
KFD32 - Refrigerator GRAM - Free user manual and instructions
Find the device manual for free KFD32 GRAM in PDF.


| Product Type | Fridge-freezer |
| Brand | Gram |
| Model | KFD32 |
| Total Gross Capacity | Approximately 300 L |
| Climate Class | SN-T (+10°C to +43°C) |
| Temperature Range Refrigerator | +2°C to +9°C |
| Temperature Range Freezer | -25°C to -16°C |
| Refrigerant | R600a (flammable, environmentally friendly) |
| Power Supply | 220-240 V, 50 Hz |
| Lighting | Halogen lamp, max 10 W, 12 V, G4 base |
| Defrosting Refrigerator | Automatic |
| Defrosting Freezer | Manual (recommended at least once a year) |
| Quick Freeze Function | Yes, 24 or 48 hours |
| Super Cooling Function | Yes, cools to approx. 1°C |
| Ventilator | Yes, for even temperature distribution |
| Door Reversible | Yes, from right to left (or vice versa) |
| Shelves | Glass shelves, bottle shelf, vegetable drawers, multi-boxes, door storage |
| Freezing Tray | Only on KF350 models |
| Alarm Codes | E1 (sensor fridge), E2 (sensor freezer), E4 (door open), E5 (high freezer temp) |
| Installation Type | Freestanding or built-in |
| Net Weight | Approximately 70 kg |
| Dimensions (HxWxD) | Approximately 1800 x 600 x 650 mm |
Frequently Asked Questions - KFD32 GRAM
User questions about KFD32 GRAM
0 question about this device. Answer the ones you know or ask your own.
Ask a new question about this device
Download the instructions for your Refrigerator in PDF format for free! Find your manual KFD32 - GRAM and take your electronic device back in hand. On this page are published all the documents necessary for the use of your device. KFD32 by GRAM.
USER MANUAL KFD32 GRAM
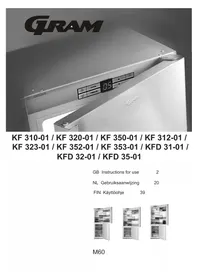
KF 310-01 / KF 320-01 / KF 350-01 / KF 312-01 / KF 323-01 / KF 352-01 / KF 353-01 / KFD 31-01 / KFD 32-01 / KFD 35-01
GB Instructions for use 2
Congratulations on your new GRAM refrigerator/freezer
Congratulations on your new refrigerator/freezer. The refrigerator/freezer was developed taking the different storage requirements of food items into consideration. Some must be stored cold - others require a little higher temperature. A few must be stored separately so as not to impart flavour and odour to other items of food. Most items of food require high air humidity in order to stay fresh.
To ensure that you get as much joy out of your refrigerator/freezer as possible, it is important that you become familiar with the its functions and know how to use the accessories. Please read the instructions for use carefully before setting up and using your refrigerator/freezer.
As these instructions apply to several refrigerator/freezer models, the equipment may vary from model to model.
Before using the refrigerator/freezer
On receipt, check to ensure that the refrigerator/freezer has not become damaged in transport. Transport damage should be reported to the local supplier before the refrigerator is put to use.
Before filling the refrigerator/freezer with items of food, the refrigerator/freezer interior should be cleaned with lukewarm water containing a mild detergent. Use a soft cloth. If the refrigerator/freezer has been stored in cold surroundings (colder than +5°C), it must be allowed to stabilise for at least 2 hours before being switched on.
Read more about setting up, building in, and installation on pages 14 and 15.
Contents
Important information
Transporting and moving the refrigerator/freezer 5
If the refrigerator is to remain unused for a time 5
Old refrigerators/freezers 5
Disposal 5
Description of the refrigerator/freezer
Using the refrigerator/freezer
Electronic control 7
Switching ON/OFF the refrigerator-freezer 8
Temperature regulation 8
Temperature display 8
Temperature inside the refrigerator-freezer 8
Quick-freezing 8
Slight temperature variations 9
Function "QUICK FREEZING" 9
Function with a ventilator 9
Display brightness adjustment 10
Alarm
Alarm codes 10
Interrupting an alarm 10
Using the refrigerating compartment and accessories
Glass shelves 11
Bottle shelf 11
Vegetable drawers 11
GB
Multi-boxes 11
Storage shelves in the door 11
Using the freezer compartment and accessories
Defrosting and cleaning
Automatic defrosting of refrigerating compartment 12
Manual defrosting of refrigerating compartment 12
Manual defrosting of freezing compartment 12
Cleaning 13
Setting up and installation
Where to place the refrigerator/freezer 14
Electrical connection 15
Starting up the refrigerator/freezer 16
You can change the doors from right-hinged to
left-hinged or vice versa yourself 17
Replacing the bulb 19
GRAM Service
Spare parts 19
Important information
The refrigerator/freezer contains the environment-friendly, non-ozone-depleting refrigerant R600a. As R600a is a flammable gas, it is important to avoid damage to the refrigeration circuit during transport and installation. If the refrigeration circuit is damaged, avoid using naked flame in the vicinity of the refrigerator/freezer and connecting power to the refrigerator/freezer. Also make sure that there is good ventilation in the room. If you are in doubt, please contact your supplier.
Transporting and moving the refrigerator/freezer
The refrigerator/freezer must always be moved in the vertical position. The cabinet must not be tilted more than approx. 40°. If the refrigerator/freezer has been tilted more than 40°, the power supply must not be connected until the appliance has stood upright for at least two hours.
If the refrigerator/freezer is to remain unused for a time
If the refrigerator/freezer is to remain unused for a time, e.g. in a summer-house, switch refrigerator and freezer off by pressing the buttons
(1), (2) and then disconnecting the power supply to the cabinet and possibly pulling the plug out of the wall socket.
Empty, defrost and clean the refrigerator/freezer. Leave the doors to the refrigerating and freezing compartments slightly ajar. This will prevent bad smells in the cabinets.
Warning
Old refrigerators and freezers are often fitted with complicated latches that can only be opened from the outside. If you have an old unit like this stored away somewhere, or if you scrap it, remember to destroy the latch to prevent children from being exposed to danger by getting locked inside the unit.
Note! Please also observe the environmental rules on disposal.

Disposal
If a refrigerator/freezer is to be disposed of, this must be done in an environmentally correct way, in accordance with current rules on disposal.
Please observe the environmental rules on disposal. There might be special requirements/conditions to be observed. Information on disposal can be obtained from:
- Gram A/S
- Your white-goods supplier
- Authorities (the local council, Ministry of the Environment, etc.)
Description of the refrigerator/freezer
The refrigerator/freezer is intended for use in a normal household. It is designed for temperature class SN-T in accordance with European standard EN 153. This means that it will run best at
a room temperature of +10°C to +43°C. The freezing compartment is a four-star freezer approved for freezing down and storing frozen items of food.

Using the refrigerator/freezer

Electronic control
The refrigerator-freezer has been equipped with electronic control. The equipment has been set up by the manufacturer for optimum temperature operation, i.e., +5°C in the refrigerator chamber and -18°C in the freezer chamber.
If the user intends to modify the manufacturer's setup, the new setting shall be stored in the electronic control memory. In case of a power supply failure, after the power supply has been restored, the control will keep the latest settings in memory.
The electronic control has been equipped with the following functions:
- ON/OFF switch function
- Display of the real temperature inside the refrigerator chamber and freezer chamber
- Setting the temperatures in the refrigerator chamber and freezer chamber
- Automatic defrosting of the refrigerator chamber
- Quick freezing
- Quick cooling
- Vent function inside the cooler chamber.
- Adjustment of the display contrast
- Acoustic and visual signalling of alarms
- Visual signalling with use of LEDs of switched on functions
- Freezer's ON/OFF switching push-buttons
- Refrigerator's ON/OFF switching pushbuttons
- Green light-emitting LED signalling that the refrigerator's chamber has been switched on
- Blue light-emitting LED signalling that the freezer's chamber has been switched on
- "COOL" pushbutton
- "FREEZE" pushbutton 7 Display showing the set temperature, time of super freezing, and alarm status codes
- Pushbutton for displaying the real temperature inside the freezers' chamber
- Pushbutton for displaying the real temperature inside the refrigerator's chamber
- Function pushbutton (for quick freezing quick cooling adjusting the ligh on the display)
- Blue light-emitting LED signalling that the quick cooling function has been switched on
- The button turning the vent on and off.
- The control light (yellow) signals the installation of the vent function.
- Blue light-emitting LED signalling that the quick freezing function has been switched on
GB
Switching ON/OFF the refrigerator-freezer
Switching ON the refrigerator: press and hold the pushbutton (2). The operation of switching on the refrigerator is signalled by the green light-emitting LED (3), and the real temperature inside the refrigerator's chamber shall be shown on the display. Switching OFF the refrigerator: press and hold the pushbutton (2).
Switching ON the freezer: press and hold the pushbutton (1). The operation of switching on the freezer is signalled by the blue light-emitting LED (4), and the real temperature inside the freezer's chamber shall be shown on the display.
Switching OFF the freezer: press and hold the pushbutton (1).
The refrigerator and freezer can be switched ON and OFF independently.
Temperature regulation
The temperature in the refrigerator's chamber can be set within the temperature range from +2°C up to +9°C. When pressing and holding the COOL pushbutton (5), the set temperature shall be shown on the display. When pressing the pushbutton ▲ (9) or pushbutton (8) it is possible to modify setting the temperature inside the refrigerator. The temperature in the freezer's chamber can be set within the range from -25°C up to -16°C. When pressing and holding the FREEZE pushbutton (6), the set temperature shall be shown on the display.
When pressing the pushbutton ▲ (9)
or pushbutton ▼ (8) it is possible to modify setting of the temperature inside the freezer.
Every pressing of the pushbutton shall activate a brief acoustic signal. In case of the power supply failure or disconnecting the power supply to the refrigerator-freezer, the control will keep in the memory the latest settings after the power supply has been restored.
Displaying of temperature
You can decide which temperature should be shown on the display – the temperature inside the refrigerator's chamber (by pressing the pushbutton (9)) or of the temperature inside the freezer's chamber (by pressing the pushbutton (8)). The above mentioned setting can be changed any time.
Temperature inside the refrigerator-freezer
The temperature settings and temperature values shown on the display are average temperatures of the refrigerator-freezer. It concerns both the refrigerator's chamber and the freezer's chamber. Do not change the temperature setting simply because it is warmer in summer. The increase of the room temperature will be detected by the sensor and the compressor will automatically run for a longer time to maintain the set temperature.
Quick freezing
Quick freezing to a low temperature is important to maintain the quality of the food of products. Quick freezing is activated by pressing and holding the function button (10) and pressing the FREEZE pushbutton (6). The blue light-emitting LED (14) switches on signalling activation of the quick freezing function.
You can choose between freezing in 24 or 48 hours:
- by holding the function button (10) and pressing once the FREEZE pushbutton (6) you switch on the 24-hours quick freezing function and "24" is shown on the display,
- by holding the function pushbutton
(10) and pressing twice the FREEZE pushbutton (6) you switch on the 48-hours quick freezing function and "48" is shown on the display,
- the next pressing of the pushbutton (6) switches off the quick freezing function and switches off the blue light-emitting LED. The quick freeze function will be automatically disabled after 24 or 48 hours.
After pressing the quick freezing function pushbutton, the indication "24" or "48" is displayed for 5 seconds. Afterwards the real temperature inside the refrigerator's chamber and freezer's chambers will be shown on the display.
It is recommended to switch on the quick freezing function (24 or 48 hours) for approximately 2 hours before loading the freezer's chamber with large quantities of the food products.
Brief temperature variations
Brief temperature variations are normal and may occur when for example the fresh food products are stored in the refrigerator-freezer or when the door is open for a longer time. These variations will not affect the food products and the temperature will quickly return to the set-point level.
The interior light switches on when the door of the refrigerator's chamber has been opened. When the door remains open, the interior light switches off after approximately 3 minutes. The display will show E4 alarm and the acoustic alarm will be activated.
Super cooling function
- the first pressing of the pushbuttons (10) + (5) switches on the blue light-emitting LED and activates quick cooling down of the refrigerator's
chamber to the temperature of approximately 1°C (the continuous operation of the compressor), after the temperature of 1°C has been reached the function automatically disables and the equipment switches into a normal cyclic operation restoring the latest temperature set for the refrigerator.
- during the super refrigerating function operation, the display shows "Sc" indication, (it is possible to monitor the freezer temperature by pressing the pushbutton ▼ (8)).
- The second pressing of the pushbuttons (10) and (5), during operation of the quick refrigerating function, disables the function and switches off the blue light-emitting LED (11).
It is recommended to switch on the quick refrigerating function “Sc” before loading the refrigerator’s chamber with a large quantity of fresh food products.
Function with a ventilator
The ventilator, after connecting the cooler to the network, is active. It is turned on and off by button (12).
Yellow LED light (13) turns on when the ventilator is turned on.
The ventilator allows maintaining the same temperature on all levels of the cooler.
After being turned on, the ventilator works in a cycle function except when the cooler door is opened.
Display brightness adjustment
By pressing and holding the pushbutton (10) and
- pressing at the same time the push-button ▲ (9), the display brightness increases.
- pressing at the same time the push-button ▼ (8), the display brightness decreases.
When adjusting the display brightness, the display shows the following indications:
1.8 - minimum brightness, 2.8 - medium brightness, 3.8 - maximum brightness (manufacturer's setting).
Alarms
Normal use of the refrigerator-freezer may cause different situations leading to interruption of various functions and unstable operation of the entire equipment as a consequence. These interruptions are shown on the display as the alarm code (an E followed by a number) and signalled by the acoustic alarm.
In case there will be several faults the alarm codes shall be displayed in turn.
Alarm codes
E1 – temperature sensor fault in the refrigerator's chamber E2 – temperature sensor fault in the freezer's chamber E4 – door is open E5 – too high temperature inside the freezer's chamber
E1, E2
One of the temperature sensors has been damaged. Call technical service. The built-in emergency program maintains the admissible temperature until the fault will be eliminated by the authorized technical service.
E4
The door of the refrigerator's chamber has been opened for more than 3 minutes.
The alarm code disappears when the door is closed.
E5
The temperature inside the freezer's chamber has been exceeding.
Interrupting an alarm
The acoustic alarm can always be interrupted by opening the door and/or pressing any push-button.
The alarm code E4 - E5 can be cancelled by pressing for 7-8 seconds at the same time the push-buttons.
The exception: in case of the alarm E1 it is possible to cancel the alarm only after replacing damaged sensors.
In such cases please contact Gram Service Center.
Using the refrigerating compartment and accessories
Glass shelves
The glass shelves can be arranged to give more or less space between them, allowing flexible refrigerator/freezer arrangement (11 and 12).


Extract the shelf by lifting up the left shelf side (13). Start by removing the top shelf when you want to clean the refrigerator or rearrange the shelves.
Bottle shelf
The bottle shelf is suitable for large and small bottles.
Vegetable drawers
The drawers at the bottom of the refrigerating compartment are very suitable for storing fruit and vegetables. The overlying shelf covers the drawer and maintains humidity, thus preventing stored food from drying out.
Multi-boxes
The multi-boxes are ideal for all items of food and can be placed in the cabinet or the door, whichever is most expedient. The tight-fitting lids prevent drying out and save much time in tedious wrapping and unwrapping. The multi-boxes are made of material that remains unaffected by mineral oils, fats, and weak acids.
Multi-boxes can also be purchased as accessories.
Storage shelves in the door
The shelves in the door can hold bottles of up to 2 litres. They can be moved and placed throughout the entire height of the door.
Using the freezer compartment and accessories
The whole of the freezer can be used for freezing down and for the long-term storage of frozen food items. In addition, the KF 350 comes equipped with a freezing tray for berries, etc.
dition, KF 350 comes equipped with a freezing tray for berries, etc.
Automatic defrosting of refrigerating compartment
Automatic defrosting of refrigerating compartment
The refrigerating compartment features automatic defrosting. In some periods, however, frost may form on the rear wall of the refrigerator. This normally happens when many fresh food items are stored in the refrigerator or in summer when the refrigerator is filled with beverages to be cooled. In situations such as these, the compressor must run for long periods of time to cool the food items. As automatic defrosting takes place while the compressor is at a standstill, the refrigerator may not defrost completely before the compressor restarts. In situations such as these, manual defrosting is required, or help must be called in to change the defrost function.
It is recommended to defrost the freezing compartment at least once a year. Stop the freezing compressor by pressing the lower button ① (1).
It is recommended to defrost the freezing compartment at least once a year. Stop the freezing compressor by pressing the lower button ① (1).
Remove all items from the freezer. To keep them as cold as possible during defrost, they can be placed in the refrigerating compartment. Place a bowl containing hot water (not boiling) in the freezer.
Pull out the drain spout and place a bowl under it to receive defrost water. When the ice has melted, clean out the freezer using water and a mild washing-up liquid. Dry the freezer with a soft cloth.

Warning
It is dangerous to use electrical apparatus, knives or sharp objects to accelerate defrost.
It is dangerous to use electrical apparatus, knives or sharp objects to accelerate defrost.
Stop the refrigeration compressor by pressing the upper button ① (2) and disconnect the power supply to the refrigerator/freezer.
Stop the refrigeration compressor by pressing the upper button ① (2) and disconnect the power supply to the refrigerator/freezer.
The cabinet is best cleaned using a weak soap solution and a soft cloth. Never use cleaning agents that scour. Clean the sealing strip around the door regularly to prolong its life. Use only clean water for cleaning the sealing strip.
The plastic parts of the cabinet cannot withstand boiling water (max. 85°C). It is important to prevent water from getting into the control panel.
Cleaning of doors in stainless steel or aluminium
Stainless steel or aluminium doors on GRAM products can, with advantage, be cleaned with a spray and a soft cloth. There are a number of different spraying agents for this purpose on the market. We recommend that you contact your usual white goods supplier for advice on the advantages and disadvantages of the individual products.

Clean the melt water drain in the refrigerating compartment using the cleaning pin supplied (15).
Remove dust and threads from the compressor compartment at the back of the refrigerator/freezer with a vacuum cleaner.
Setting up and installation
Where to place the refrigerator/freezer
For safety reasons the refrigerator/freezer must not be installed outdoors; it must be placed in a dry room. Never place the appliance close to sources of heat such as cookers or radiators, and avoid placing it in direct sunlight. The surface on which the appliance is placed must be plane. Do not use a frame or similar. The small wheels mounted at the rear of the refrigerator/freezer make it easy to place it in the required position.
The refrigerator/freezer can stand freely on the floor or be built into a kitchen element or a refrigerator element.
It is important that the refrigerator/freezer stands completely level and that there is good air circulation over, under and around it. The appliance can be adjusted by turning the four adjusting screws on the plinth. After adjustment, the feet and the two rear wheels must be in contact with the surface on which the appliance stands.
The illustrations show how to create sufficient air circulation around the cabinet. The dimensions give the actual size of openings. The circulation area must be at least 200 cm².
Building into a kitchen element
When building into a kitchen element ensure that there is sufficient ventilation around the refrigerator/freezer to dissipate heat from the compressor. The appliance can stand direct on the floor or on its plinth. (16)
Building into a refrigerator element
Building into a refrigerator element follows the same principle as described under 16. (17)
Electrical connection
The appliance is intended for connection to alternating current. The connection values for voltage (V) and frequency (Hz) are given on the nameplate in the cabinet. Power must be connected via a wall socket with switch. The wall socket should be easily accessible.
Connection to alternating current. The voltage (V) and frequency (Hz) values are indicated on the nameplate inside the cabinet. Power must be supplied through a wall socket with a switch. The wall socket should be easily accessible.
All earthing requirements stipulated by the local electricity authority must be observed. The appliance plug and wall socket should then give correct earthing. If in doubt, contact your local supplier or an authorised electrician.
The flexible cord (mains lead) fitted to this appliance has three cores for use with a 3-pin 13-amp or 3-pin 15-amp plug. If a BS 1363 (13-amp) fused plug is used, it should be fitted with a 13-amp fuse.
The flexible cord (mains lead) fitted to this appliance has three cores for use with a 3-pin 13-amp or 3-pin 15-amp plug. If a BS 1363 (13-amp) fused plug is used, it should be fitted with a 13-amp fuse.


IMPORTANT
The cores in this mains lead are coloured in accordance with the following code:
The cores in this mains lead are coloured in accordance with the following code:
These colours might not correspond with the colour markings identifying the terminals in your plug.
Connect the GREEN-AND-YELLOW core to the plug terminal marked "E" or by an earth symbol, or coloured GREEN or GREEN-AND-YELLOW. Connect the BLUE core to the plug terminal marked "N" or coloured BLACK.
Connect the BROWN core to the plug terminal marked "L" or coloured RED.
Connect the BROWN core to the plug terminal marked "L" or coloured RED.
Starting up the refrigerator/freezer
Start the refrigerator/freezer by plugging it into a wall socket. If the mains lead has been damaged, it must be replaced with a corresponding type supplied by GRAM service.
The refrigerator/freezer incorporates a “stand-by function” and in the display two horizontal lines indicate that the power supply has been connected.
Start the refrigerating compartment by pressing the upper on/off button
① (2). After approx. 5 seconds, the green light-emitting diode (3) lights to indicate that the refrigerating compartment is on. Start the freezing compartment by pressing the lower on/off button
① (1). After approx. 5 seconds, the blue light-emitting diode (4) lights to indicate that the freezing compartment is on.
The actual temperature in the refrigerating compartment is shown on the display (5). By pressing button ▼ (8) the actual temperature in the freezing compartment is displayed.
By pressing button ▲ (9) the actual temperature in the refrigerating compartment is displayed.
You can change the doors from right-hinged to left-hinged or vice versa yourself.
Illustrations 18-25 show how easy it is to change the doors from right-hinged to left-hinged - or vice versa. (Changing the door from left-hinged to right-hinged is done in the same way, but opposite).
The refrigerator/freezer must be switched off and emptied completely.
- Remove the two screws in the hinge top on the right-hand side of the cabinet. (18)
- Lift the refrigerator door slightly and take the door and upper hinge off by pulling the door towards you.
- Remove the dummy hinge from the opposite side by unscrewing the two screws. (19)
- Reverse the dummy hinge and refit it on the opposite side of the cabinet using two screws.
- Remove the lower door by unscrewing the two screws in the centre hinge. (20)
- Refit the two screws from the lefthand side on the righthand side. (21)
- Lift the lower door and the centre hinge up and take them off.
- Tilt the refrigerator to an angle of max. 45° and unscrew the bottom hinge.
This is done by removing the two screws holding the bottom hinge on the cabinet underside. (22)
- Remove the bottom dummy hinge in the opposite side in the same way as the upper dummy hinge was removed. (23)
- Reverse the dummy hinge and refit it on the opposite side of the cabinet.
- Reverse the upper righthand hinge and refit it in the lower lefthand corner of the cabinet.
- Place the cabinet in the vertical position again.
- Dismount the door handle by removing the screws. (24)
- Place the lower door in correct position on the bottom hinge.
- Reverse the centre hinge, refit it on the lower door and screw it onto the cabinet. Remember to adjust the hinges.
- Lift the top door into position on the centre hinge. Reverse the lower righthand hinge and refit it on the top part of the door in the left side of the cabinet. Push the door into position and slide the upper hinge into the upper lefthand hinge casing. Tighten the two screws. Remember to adjust the hinges.
- Remove the screws on the righthand side of the door and screw them onto the left side of the door. Use the screws from the left side to attach the handles to the righthand edge of the doors (25)


Replacing the bulb
Switch off the refrigerator/freezer by pressing the on/off buttons ① (1), (2) and unplug the mains lead from the wall socket. Screw off the screen. Replace the bulb with a new one (max. 10 W, 12 V, halogen base G4). Refit the screen, connect the power supply and restart the refrigerator/freezer by pressing the on/off buttons ① (1), (2).

GRAM Service
Spare parts
When ordering spare parts, please give the refrigerator/freezer type and number. This information is given on the nameplate inside the cabinet.


Bottle rack
Warning

Starting the refrigerator/freezer


NL


FIN


FIN


Replacing the bulb
- KF 310-01 / KF 320-01 / KF 350-01 / KF 312-01 / KF 323-01 / KF 352-01 / KF 353-01 / KFD 31-01 / KFD 32-01 / KFD
- CONGRATULATIONS ON YOUR NEW GRAM REFRIGERATOR/FREEZER
- BEFORE USING THE REFRIGERATOR/FREEZER
- CONTENTS
- GB
- IMPORTANT INFORMATION
- TRANSPORTING AND MOVING THE REFRIGERATOR/FREEZER
- IF THE REFRIGERATOR/FREEZER IS TO REMAIN UNUSED FOR A TIME
- WARNING
- DISPOSAL
- DESCRIPTION OF THE REFRIGERATOR/FREEZER
- USING THE REFRIGERATOR/FREEZER
- ELECTRONIC CONTROL
- SWITCHING ON/OFF THE REFRIGERATOR-FREEZER
- TEMPERATURE REGULATION
- DISPLAYING OF TEMPERATURE
- TEMPERATURE INSIDE THE REFRIGERATOR-FREEZER
- QUICK FREEZING
- BRIEF TEMPERATURE VARIATIONS
- SUPER COOLING FUNCTION
- FUNCTION WITH A VENTILATOR
- DISPLAY BRIGHTNESS ADJUSTMENT
- ALARMS
- ALARM CODES
- E1, E
- E
- INTERRUPTING AN ALARM
- USING THE REFRIGERATING COMPARTMENT AND ACCESSORIES
- GLASS SHELVES
- BOTTLE SHELF
- VEGETABLE DRAWERS
- MULTI-BOXES
- STORAGE SHELVES IN THE DOOR
- USING THE FREEZER COMPARTMENT AND ACCESSORIES
- AUTOMATIC DEFROSTING OF REFRIGERATING COMPARTMENT
- IT IS RECOMMENDED TO DEFROST THE FREEZING COMPARTMENT AT LEAST ONCE A YEAR. STOP THE FREEZING COMPRESSOR BY PRESSING THE LOWER BUTTON ① (1)
- IT IS DANGEROUS TO USE ELECTRICAL APPARATUS, KNIVES OR SHARP OBJECTS TO ACCELERATE DEFROST
- STOP THE REFRIGERATION COMPRESSOR BY PRESSING THE UPPER BUTTON ① (2) AND DISCONNECT THE POWER SUPPLY TO THE REFRIGERATOR/FREEZER
- CLEANING OF DOORS IN STAINLESS STEEL OR ALUMINIUM
- SETTING UP AND INSTALLATION
- WHERE TO PLACE THE REFRIGERATOR/FREEZER
- BUILDING INTO A KITCHEN ELEMENT
- BUILDING INTO A REFRIGERATOR ELEMENT
- ELECTRICAL CONNECTION
- THE FLEXIBLE CORD (MAINS LEAD) FITTED TO THIS APPLIANCE HAS THREE CORES FOR USE WITH A 3-PIN 13-AMP OR 3-PIN 15-AMP PLUG. IF A BS 1363 (13-AMP) FUSED PLUG IS USED, IT SHOULD BE FITTED WITH A 13-AMP FUSE
- IMPORTANT
- THE CORES IN THIS MAINS LEAD ARE COLOURED IN ACCORDANCE WITH THE FOLLOWING CODE
- STARTING UP THE REFRIGERATOR/FREEZER
- YOU CAN CHANGE THE DOORS FROM RIGHT-HINGED TO LEFT-HINGED OR VICE VERSA YOURSELF
- THE REFRIGERATOR/FREEZER MUST BE SWITCHED OFF AND EMPTIED COMPLETELY
- REPLACING THE BULB
- GRAM SERVICE
- SPARE PARTS
- BOTTLE RACK
- STARTING THE REFRIGERATOR/FREEZER
- NL
- FIN
Brand : GRAM
Model : KFD32
Category : Refrigerator