
BG17SS - Microwave HITACHI - Free user manual and instructions
Find the device manual for free BG17SS HITACHI in PDF.


| Product Type | Microwave with Grill and Combination functions |
| Brand | Hitachi |
| Model | BG17SS |
| Capacity | 17 liters (approximately) |
| Microwave Power Output | 700 W |
| Grill Power | 1000 W |
| Microwave Frequency | 2450 MHz |
| Power Consumption (Microwave) | 1150 W |
| Power Consumption (Grill) | 1000 W |
| Input Voltage | 230 V ~ 50 Hz |
| Outside Dimensions | 595 x 382 x 316 mm |
| Control Type | LED display, push buttons, rotary knob |
| Cooking Functions | Microwave, Grill, Combination, Defrost by Weight, Defrost by Time, Auto Menu (8 presets), Quick Start, Child Lock, Clock, Pre-set, Multi-stage cooking (up to 3 stages) |
| Auto Menu Programs | Auto Reheat, Vegetable, Fish, Meat, Pasta, Potato, Pizza, Soup |
| Child Lock | Yes (press Cancel/Stop for 3 seconds) |
| Accessories Included | Glass turntable, turntable ring, grill rack |
| Cleaning | Regular cleaning; avoid food buildup on wave guide cover; unplug before cleaning |
| Safety Features | Door interlock, child lock, auto shut-off on door open |
| Installation Type | Freestanding (requires 10 cm clearance around, 30 cm above) |
| Compliance | EEC directives 89/336/EEC and 92/31/EEC |
Frequently Asked Questions - BG17SS HITACHI
User questions about BG17SS HITACHI
0 question about this device. Answer the ones you know or ask your own.
Ask a new question about this device
Download the instructions for your Microwave in PDF format for free! Find your manual BG17SS - HITACHI and take your electronic device back in hand. On this page are published all the documents necessary for the use of your device. BG17SS by HITACHI.
USER MANUAL BG17SS HITACHI
Cooking with your microwave
Instruction booklet
GB
Safety
First aid
Treat scalding by:
1 Quickly placing the scald under cold running water for at least 10 minutes.
2 Cover with a clean dry dressing. Do not use creams, oils or lotions.

Fire
In the event of fire:
1 Keep the oven door closed.
2 Turn off the power.
3 Unplug from mains.

Important Safety Instructions
Please Read Carefully and Keep for Future Reference
Maintenance of your Microwave
It is hazardous for anyone other than a qualified technician to carry out any service or repair operation which involves the removal of a cover which gives protection against exposure to microwave energy.
- If the door is damaged, the oven must not be operated until it has been repaired by a competent person.
- If smoke is observed, switch off or unplug the appliance and keep the door closed in order to contain any flames.
- If the supply cord is damaged, it must be replaced by a service agent or similar qualified technician.
- If you have a pacemaker, please contact your doctor before using a microwave oven.
Microwave use
●This microwave is not intended for commercial use.
- It should never be used for drying clothes or other non-food purposes.
●The microwave should not be left unattended when in use.
- Only use utensils that are suitable for microwave use.
●Care should be taken so metal objects are not left in the microwave
- The temperature of accessible surfaces may be high when the appliance is operating.
- To prevent high moisture content gather inside the oven cavity, open the door immediately after the cooking function has stopped to allow steam to escape.
- Only use utensils that are suitable for microwave use. Refer to the section on the correct utensils to use in this appliance.
●Care should be taken so metal objects are not left in the microwave
These include
- Metal cooking utensils
- Metal plates or trays
- Wire twist ties
- Crockery with metal trims
- Meat thermometer
- Care should be taken when using paper, plastic, wooden or other combustible materials in the oven as they can catch fire
- Oil & fat for deep frying should not heated in the microwave
- Only use cling film designed for microwave use & take extra care when removing the film to avoid steam burns
- Only heat popcorn that has been designed for microwave use.
Cooking use
As the power of different microwave ovens can vary considerably, care must be taken when first using this appliance as it may cook faster than your old unit.
- Do not leave the appliance unattended during use.
- Only allow children to use the oven without supervision when adequate instructions have been given so that the child is able to use the oven in a safe way and understands the hazards of improper use;
•Take care when cooking food with a high sugar or fat content, such as Christmas pudding or fruitcake. The sugar or fat can overheat and in some cases catch fire.
Cleaning
The oven should be cleaned regularly and food deposits removed. Failure to maintain the oven in a clean condition can affect the life of the appliance and possibly result in a hazardous situation.
(See cleaning your microwave)
Containers
- Pressure will build up in sealed containers and can cause them to explode. Therefore do not use the following in your microwave:
Sealed containers
Capped bottles
Vacuum containers
Sealed jars
Hard-boiled egg
Eggs in their shells
Nuts
●Always pierce the skin of fruit and vegetables, such as potatoes.
Delayed boiling
Liquids heated in a microwave can boil up when removing them from the microwave. Take the following precautions :
●Always stir liquids, before & after cooking
- Allow them to stand
- Use containers that are wider at the top than the bottom
Preparing Food for babies
Extra care must be taken when preparing food or drink for babies and small children.
• Always test the food or liquid temperature before giving it to baby.
- When using a baby bottle, ensure the teat is removed before heating.
- When warming milk, ensure the bottle is shaken.
Caution

During convection and grill modes outer surface will become hot, do not touch outer casing of appliance. Care should be taken not to store any items on top of your microwave oven.
Contents
Unpacking and getting ready page 4
Introducing microwave cooking page 6
Setting the child lock page 11
Using the microwave page 12
Quick Start Cooking page 14
Auto Menu page 15
Setting the Clock page 17
Program Set In Advance page 18
Multi-stage cooking page 19
Inquiring Function page 20
Defrosting page 21
Cleaning your microwave page 23
Using aluminium foil in your microwave page 24
Questions and answers page 25
Specification page 27
Installation instructions page 28
Unpacking
This microwave oven is designed for home use. It should not be used for commercial catering.
Unpacking and getting ready
1 After unpacking your oven, check that it has not been damaged whilst in the box. Make sure there are no dents, that the door closes properly.
A dented or damaged oven could allow microwave energy to escape.
Make sure that you have taken all the packaging from inside the oven.
2 Choose a flat work surface for your microwave away from heat sources such as radiators or fires, and away from anywhere that is very cold.
You should allow a 10cm space all around the oven and 30cm above so that warm air can escape from the vents during cooking – it is not designed to be built in.

3 Plug your oven into a standard household electrical socket (240 volt, 13 amp rated).
Avoid using a socket that also has an adaptor and other equipment plugged in.
4 Put the turntable ring inside the oven and place the glass turntable on top of the ring. The turntable is shaped to sit securely on the spindle.
You must always use the turntable and ring whenever you use the microwave.

natural_image
Illustration of a microwave oven with open door and circular base, showing internal components (no text or symbols)
Accessories: (included)
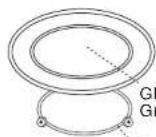
Glass turntable
Grill rack
Turntable ring
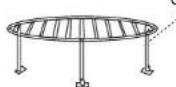
Grill Rack
LED display
Shows the clock or cooking time/setting
Defrost by weight buttons
Use this button to select the defrost by weight function
Auto Menu buttons
To quickly set cooking times for certain foods
Quick Start/Start button
Use this button once, one minute to cook instantly and to start cooking
Timer/ Power/ Weight setting
For setting time, power and weight

Clock/ Pre-set buttons
Use this button to set clock and preset
Defrost by time button
Use this button to sett defrost by time
Cancel/ Stop button
This button will stop cooking and clear cooking settings.
Microwave/ Grill/
Combination button
Use this button to select the function of microwave, grill, microwave & grill combination
Getting to know your microwave
Introducing microwave cooking
Introducing microwave cooking
Always remember the basic safeguards you would follow when using any cooking equipment or handling hot food.
This page gives some of the basic guidelines for microwave cooking. If you are unfamiliar with using a microwave, there is more information at the back of this instruction booklet.
Cooking with a microwave

Cooking with a microwave is much faster than conventional cooking and, whilst you should make sure that food is fully cooked, you should be careful not to overcook it.

Microwave energy can heat unevenly so stirring to distribute heat is very important. Always stir from the outside towards the centre.

If you are cooking a number of individual foods at the same time, such as baked potatoes or small cakes, arrange them evenly on the turntable so that they cook evenly. Never stack food in your microwave.

Turn larger foods such as meat roasts and poultry during cooking so that the top and bottom cook evenly. It is also a good idea to turn chops and chicken pieces, especially if they contain the bone.

Meat and poultry which is cooked for 15 minutes or more will brown lightly in it is own fat. Anything cooked for a shorter time can be brushed with a browning sauce to give an appetising colour.

Strips of aluminium foil can be used to cover the thinner pieces of food to stop them overcooking before the thicker parts of the food have had a chance to cook. Use the foil sparingly and wrap around the food or container carefully to stop it touching the inside of the oven which could cause sparks.
You should always have your microwave checked if it is dropped or damaged.
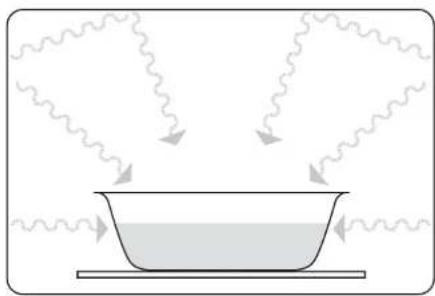
Microwave ovens cook food using microwave energy that is similar to naturally occurring radio waves. Normally, these "waves" would fade as they disappeared into the atmosphere, but in a microwave oven they are concentrated onto food causing it to heat up.
Microwave energy can not pass through metal – so it can not escape from inside your microwave oven – but it can pass through materials like glass, porcelain, plastic, and paper. These are the things used to make microwave-safe cooking equipment.
Microwave-safe cooking equipment will still get hot as the food it contains heats up.
natural_image
Simple line drawing of a bowl with wavy lines indicating flow or motion, no text or symbols present.The microwave energy focuses on the moisture in the food causing lots of tiny vibrations. The vibrations get so great that the moisture – and the food – heat up.
Checking your cooking utensils
Most heat-resistant, non-metallic cooking utensils are safe to use in your microwave. If you are not sure you can use a utensil in your microwave, follow this simple test:
1 Make sure that the grill is positioned in the upwards position to the top of the microwave (Do not use your hands to touch the grill as it may already be hot).
2 Put the utensil into the oven next to a cup of water - use a cup that you know is microwave-safe. Close the door
3 Turn the microwave oven on for 30 seconds only.
4 At the end of the time, carefully check to see if the water has warmed up. If the water has not warmed up but the utensil has, the utensil is not microwave-safe and should not be used in the oven.

Introducing microwave cooking
Safety
Never use equipment made of metal, except foil in your microwave oven.
The microwave energy can not pass through the metal so it bounces off and sparks against the inside of the oven.
Stop the microwave straight away if any equipment does cause sparks.
Remember that some crockery has a metal trim around the edge. Even this trim can cause sparks.
Safety
Never use scratched, cracked or damaged glass in a microwave. Damaged glass can explode.

Introducing microwave cooking
Remember
Always check that the food is evenly cooked and piping hot before you serve it.
More about getting the most from microwave cooking
Microwave heating categories
Your oven has been tested and labelled to meet the government's voluntary agreement on the reheating of pre-cooked food.
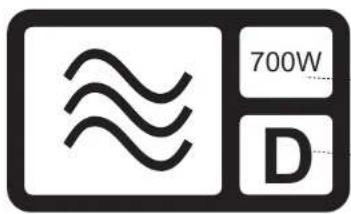
700W is the output power of the oven.
D is the heating category for your oven.
Check the cooking times for category D on the food's packaging to see how long it should be cooked for.
To Microwave: Remove outer packaging. Place film lid SEVERAL TIMES. Place on a microwaveable plate. Rear on full power. Turn halfway through nesting.
| Heating Category | Wattage (IFC 70S) | |||
| B | D | 650W | 750W | |
| Full Power | 2 | 2 | 2 | 2 |
| Turn | Turn | Turn | ||
| Full Power | 2 | 1.5 | 2 | 1.5 |
| Standing Time | 1 | 1 | 1 | 1 |
| Minutes | Minutes | |||
To Microwave from Frozen: Remove outer packaging, Pierce film lid SEVERAL TIMES. Pises on a microwaveable plate. Heat on full power. Turn halfway through heating.
| Heating Category | Wattage (IFC 705) | |||
| 8 | D | 650W | 750W | |
| Full Power | 3 | 2.5 | 3 | 2.5 |
| Turn | Turn | Turn | ||
| Full Power | 4 | 3.5 | 4 | 3.5 |
| Standing Time | 1 | 1 | 1 | 1 |
| Minutes | Minutes | |||
The heating characteristics and output power levels of microwave ovens are usually calculated using a relatively large portion of food (a 1000 gram load, IEC 705) but many packs of pre-cooked food are sold in smaller packs, often about 350 grams. The government, in partnership with food companies and microwave manufacturers, have set up a system of heating categories to help you choose the reheating time for pre-cooked food.
Steam
When you microwave food, steam is created as water in the food heats up and evaporates.
The steam formed during microwave cooking is entirely safe. It has to escape from the microwave to prevent pressure from building up inside the oven. It does this through the vents on the back of the oven and from around the door.
Condensation
As the steam cools, you may find the condensation gathers in small pools inside your microwave and on the work surface beneath the door and vents.
Always dry the oven after cooking foods with a high moisture content.

natural_image
Line drawing of a microwave oven with control panel and cloud background (no text or symbols)Your microwave is designed to let steam escape from the vents and around the door without microwave energy escaping. There is no danger of microwave energy escaping with the steam.
Introducing microwave cooking
Introducing microwave cooking
Safety
For your safety, the microwave stops if the oven door is opened during cooking. Close the door to continue the cooking cycle.

Hint
You can stop cooking at any time so that you can; check the food, turn the food over, stir it or leave the food to stand.

Checking your microwave
Check your microwave is working after unpacking and whenever you think it might not be working properly.
1 Push button to open the door.
Put the turntable ring inside the oven and place the glass turntable on top of the ring. The turntable is shaped to sit securely on the spindle.
You must always use the turntable and ring whenever you use the microwave.
Place a cup of water on the turntable. Make sure the cup is microwave-safe – it should not have any decorative metal trim.

natural_image
Illustration of a microwave oven with open door and control panel (no text or symbols)2 Close the oven door.
3 Press the "Cancel/Stop" button to clear any settings that have already been made.

Cancel/Stop
4 Press the "Quick Start/Start" button once. The oven light comes on during cooking.

Quick Start/Start
5 When cooking finishes, the water should be hot - be careful when you take the cup out of the oven. Press the "Cancel/Stop" button

Cancel/Stop
Setting the Child Lock
The child lock is a safety feature which when set will lock all of the buttons on your microwave. This prevents your microwave being used accidentally though your microwave door will still open.
1 Lock: In waiting state, press "Cancel/Stop" for 3 seconds, there will be a long beep denoting entering the children-lock state and oven will display "CCLC".

2 Lock quitting: In locked state, press "Cancel/Stop" for 3 seconds, there will be a long "beep" denoting that the lock is released.

Using the microwave
Hint:
Starting and stopping cooking
It is possible to check cooking progress at any time, by opening the door and inspecting the food. This interrupts the emission of microwave energy and the oven stops working until the door is closed again.
To resume cooking, close the door, and press the Quick Start/Start button.

Using the microwave
Basic microwave cooking and reheating
1 Press the "Cancel/Stop" button.

2 Make sure the glass turntable and the turntable ring are inside the oven.
natural_image
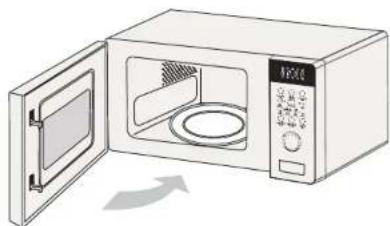
Illustration of a microwave oven with open door and side panel (no text or symbols)3 Press "Micro./ Grill/ Combi." and turn "Timer/ Power/ Weight" to select the function you want. Press "Micro./ Grill/ Combi." and turn "Timer/ Power/ Weight" to select the cooking time.


Press "Quick Start/Start" to start cooking.
Example: If you want to use 80% microwave to cook food for 20 minutes, you can operate the oven as the following steps.
| 1) Press "Micro./ Grill/ Combi.", the screen display "P100". | |
| 2) Turn "Timer/ Power/ Weight" to adjust 80% microwave power until the oven displays "P 80". | |
| 3) Press "Micro./ Grill/ Combi." to confirm, the screen displays "P 80". | |
| 4) Turn "Timer/ Power/ Weight" to adjust the cooking time until the oven displays "20:00". |
5) Press "Quick Start/Start" to start cooking or press "Cancel/Stop" to cancel the settings.
"Micro./ Grill/ Combi." Pad instructions
| Order | LED Display | Microwave Power | Grill Power |
| 1 | 100% | ||
| 2 | 80% | ||
| 3 | 50% | ||
| 4 | 30% | ||
| 5 | 10% | ||
| 6 | 0% | 100% | |
| 7 | 55% | 45% | |
| 8 | 36% | 64% |

Quick Start/Start



Microwave cooking
Hint
The quick start feature allows you to set one minute intervals of HIGH power cooking with the touch of the "Quick Start/Start" button.

Quick start cooking
This function is useful when heating small amounts of food or drink, or for adding an extra one minute when cooking time has already elapsed.
1 Put the turntable ring inside the oven and place the glass turntable on top of the ring. The turntable is shaped to sit securely on the spindle. You must always use the turntable and ring whenever you use the microwave.
Close the oven door.
natural_image
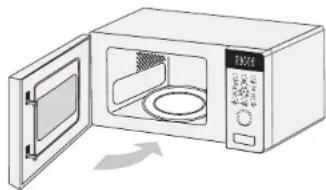
Illustration of a microwave oven with open door and digital display (no text or symbols)2 When the oven is in the waiting state, Press "Quick Start/Start" to start cooking food with full microwave power for 1 minute. Each press will increase one minute. The maximum cooking time is 95 minutes.

Quick Start/Start
Auto Menu
Example: If you want to use "Auto Menu" to cook fish of 250g.
1 Press "Auto Menu", " " and " " will light.

2 Turn "Timer/ Power/ Weight" to select the function you want.

3 Press "Auto Menu" button to confirm.

4 Turn "Timer/ Power/ Weight" to select the weight of fish. "g" will light.

5 Press "Quick Start/Start" to start. "g" will go out, " " and " AUTO COM" will flash.

Microwave cooking
The automatic menu procedure:
| Menu | Order | Weight | Display | Cooking Time | |
| A-1Auto Reheat | 1 | 200 g | ^1P_3O | 2'00" | Make sure food is thoroughly heated through. |
| 400 g | ^1V_3O | 3'10" | |||
| 600 g | ^1S_3O | 4'30" | |||
| A-2Vegetable | 2 | 200 g | ^1P_3O | 4'30" | Add a few tablespoons of water, cover with cling film for microwave use and pierce with a fork. Be cautious of steam burns when removing the cling film. |
| 300 g | ^1P_3O | 5'00" | |||
| 400 g | ^1V_3O | 6'10" | |||
| A-3Fish | 3 | 250 g | ^1P_3O | 4'50" | Make sure thicker cuts are cooked through before consuming. |
| 350 g | ^1P_3O | 5'40" | |||
| 450 g | ^1V_3O | 7'20" | |||
| A-4Meat | 4 | 250 g | ^1P_3O | 5'20" | Make sure thicker cuts are cooked through before consuming. |
| 350 g | ^1P_3O | 6'20" | |||
| 450 g | ^1V_3O | 7'40" | |||
| A-5Pasta | 5 | 50 g | ^1P_3O | 18'00" | 50g Pasta + 450g cold water.100g Pasta + 800g cold water. |
| 100 g | ^1V_3O | 22'00" | |||
| A-6Potato | 6 | 200 g | ^1P_3O | 5'00" | For best results, once the potatoes are cooked wrap them in tin foil for at least 5 minutes to cook through. |
| 400 g | ^1V_3O | 8'40" | |||
| 600 g | ^1P_3O | 10'10" | |||
| A-7Pizza | 7 | 200 g | ^1P_3O | 2'50" | This setting is designed for re-heating fresh pizza slices (not frozen pizza). |
| 400 g | ^1V_3O | 4'25" | |||
| A-8Soup | 8 | 200 ml | ^1P_3O | 2'00" | Place in a microwave safe dish, cover with cling film and pierce with a fork. |
| 400 ml | ^1V_3O | 3'10" |
Setting the clock
When the microwave oven is electrified, the oven will display "0:00", buzzer will ring once.
| 1 | Press "Clock/ Pre-Set", the hour figures will flash, and the indicator for clock " [IMAGE] "will light. |  Clock/Pre-Set Clock/Pre-Set |
| 2 | Turn "Timer/ Power/ Weight" to adjust the hour figures, the input time should be within 0--23. |  |
| 3 | Press "Clock/ Pre-Set", the minute figures will flash. |  Clock/Pre-Set Clock/Pre-Set |
| 4 | Turn "Timer/ Power/ Weight" to adjust the minute figures, the input time should be within 0--59. |  |
| 5 | Press " Clock/ Pre-Set" to finish clock setting. The indicator for clock " [IMAGE] " will go out,":" will flash, and the time will light. |  Pre-Set Pre-Set |
Clock/Pre-Set
Microwave cooking
Program set in Advance
1 Set the clock first. (Consult the instruction of clock setting.)
2 Input the cooking program. Three stage power levels can be set at most. Defrost should always be set as the first stage, if it is included in the multi-level program. Please do not press "Quick Start/Start" to start cooking at the last step.
3 Press "Clock/Pre-Set", the hour figures will flash, and the indicator " 🔒 " will light.
4 Turn "Timer/ Power/ Weight" to adjust the hour figures, the input time should be within 0-23.
5 Press "Clock/ Pre-Set", the minute figures will flash.
6 Turn "Timer/ Power/ Weight" to adjust the minute figures, the input time should be within 0--59.
7 Press "Quick Start/Start" to finish setting. The indicator for clock " 🔒 " will flash. If the door is closed, buzzer will ring twice when the time arrives, then cooking will start automatically and the indicator for clock " 🔒 " will go out.


Multi-section cooking
At most 3 sections can be input for cooking. In multi-section cooking, if one section is defrosting, then defrosting shall be placed in the first section.
Example: If you want to use "20 minutes of 100% microwave power + 5 minutes of 80% microwave power" to cook food.
| 1 | Press "Micro./ Grill/ Combi." pad, the screen display "P100". |  Micro./ Grill/Combi. Micro./ Grill/Combi. | |
| 2 | Press "Micro./ Grill/ Combi." to select 100% microwave power. |  Micro./ Grill/Combi. Micro./ Grill/Combi. | |
| 3 | Turn "Timer/ Power/ Weight" to select cooking time. |  | |
| 4 | Press "Micro./ Grill/ Combi." pad, the screen display "P100". |  Micro./ Grill/Combi. Micro./ Grill/Combi. | |
| 5 | Turn "Timer/ Power/ Weight" to select 80% microwave power. |  | |
| 6 | Press "Micro./ Grill/ Combi." pad, then turn "Timer/ Power/ Weight" to select cooking time of 80% microwave power. |  Micro./ Grill/Combi. Micro./ Grill/Combi. |  |
| 7 | Press "Quick Start/ Start" to start cooking or press "Cancel/ Stop" to cancel the setting. The unit will turn back to the clock state. |  Quick Start/Start Quick Start/Start |  Cancel/Stop Cancel/Stop |
licro./ Grill/Combi
Micro./ Grill/Combi.
Micro./ Grill/ Combi.
Micro./ Grill/Combi.
Quick Start/Start
Cancel/Stop
Microwave cooking
Inquiring Function
In microwave, grill or combination cooking state, press "Micro./ Grill/ Combi.", the current power will be displayed for 4 seconds. After 4 seconds, the oven will turn back to the former state;

Micro./ Grill/Combi.
In cooking state, press "Clock/Pre-Set" to inquire the present time and the time will flash for 4 seconds.

Clock/Pre-Set
In preset state, press "Clock/Pre-Set" to inquire the preset time and it will flash for 4 seconds.

Clock/Pre-Set
Defrosting
Defrost by weight
1 Make sure the glass turntable, turntable ring and defrost rack are inside the oven.
After putting your frozen food in the oven on the defrost rack, close the door.
Press the "Cancel/Stop" button.


natural_image
Illustration of a microwave oven with open door and side panel (no text or symbols)2 Press "Defrost By Wt." button. LED will display "dEF1", " & " and " * * " will light.

3 Turn "Timer/ Power/ Weight" to select the weight of food, "g" will light.

4 Press "Quick Start/Start" to start defrosting food. " " and " " will flash.

Defrosting

Hint
You may wish to place the frozen food onto a plate or dish before placing it onto the defrost rack. This will ensure the food load is contained
While the Oven is defrosting, open the oven door, turn the food over and separate to ensure even thawing, close the door. Press the "Cancel/Stop" button
Your oven will not stop defrosting unless the door is opened.
Defrosting
Defrost By Time
1 Make sure the glass turntable, turntable ring and defrost rack are inside the oven.
After putting your frozen food in the oven on the defrost rack, close the door.
Press the "Cancel/ Stop" button.

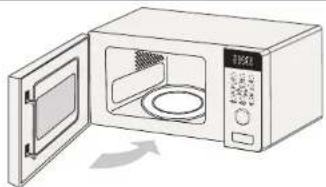
natural_image
Illustration of a microwave oven with open door and digital display (no text or symbols)2 Press "Defrost By Time" button. LED will display "dEF2", " " and " **" will light.

3 Turn "Timer/ Power/ Weight" to select the cooking time.
4 Press "Quick Start/Start" to start defrosting food. " " and " **" will flash.

Cleaning your microwave
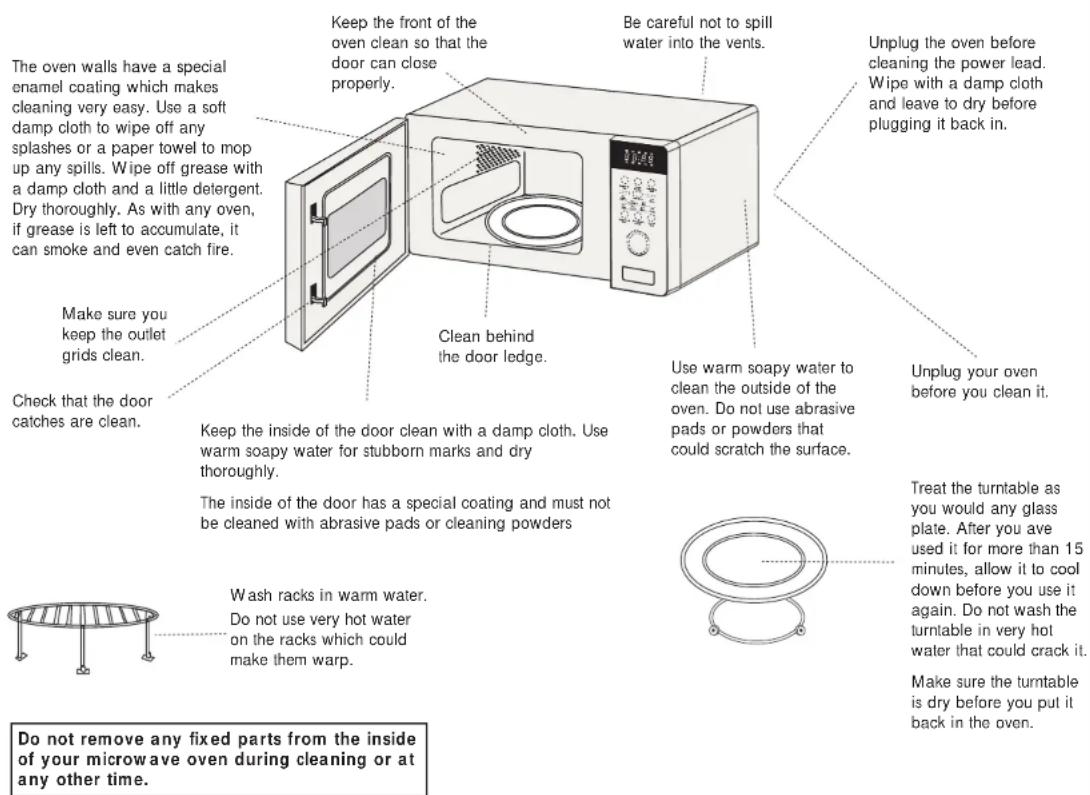
Cleaning your oven each time you use it will help to prevent stubborn marks that can be difficult to clean.
Cleaning
Caution
Pay attention to the area around the wave guide cover which if not regularly cleaned can collect food residue creating a potential fire hazard.
Warning
Ensure you unplug your microwave from the mains and wait for the oven to cool down completely before cleaning.
Using aluminium foil in your microwave
It is safe to use aluminium foil in your microwave oven as long as you follow these safety guidelines.
As with all metal, microwave energy can not pass through foil, but provided that you keep the foil away from the side of the oven it will not cause sparks and there will not be any damage to your oven.
Using foil is a good way of shielding parts of food that you do not want to cook as quickly as others – perhaps where the food is narrower and would otherwise overcook.
Place the foil over the area you want to shield, taking care that the foil will not touch the sides of the oven when the turntable rotates. Only use one piece of foil at a time so that you do not get sparks between the separate pieces.
Follow these guidelines when using foil in your microwave:
Remove foil lids from containers before using in the microwave. Some lids are made of card with a foil covering – these should be removed too.
Use a microwave-safe transparent lid if possible.
Stir food during cooking if the container has a lid or film cover.
Always use the glass turntable.
Use shallow containers with a large surface area. Do not use containers that are more than 1.25in (3.5cm) deep.
Use oven gloves when handling hot foil containers.
Do not completely cover food with foil. The microwave energy cannot pass through the foil so the food will not cook.
Do not let aluminium foil touch the inside of the oven.
Do not use more than one piece of foil in the oven at the same time.
Questions and answers

Why does not food seem to cook?

Check that:
• the cooking time has been set
- the door is closed
- the power socket is not overloaded causing a fuse to blow.

Why does the food seem undercooked or overcooked?

Check that:
• the correct cooking time has been set
- the correct power setting has been used.

How can I stop eggs from popping?

When you bake or poach eggs in the microwave, the yolk can sometimes pop as steam builds up inside it. You can stop the egg from popping by piercing the yolk with a toothpick before cooking.
Never cook eggs that are still in their shells.

Why is it so important that I allow standing time after cooking?

With microwave cooking, many foods build up enough heat inside them to continue cooking even after they have been taken out of the oven. Because microwave cooking works from the outside of food inwards, standing time lets you cook the centre of the food just right without the outside being overcooked.

Why does my oven sometimes take longer to cook than it says in the recipe?

First check that the oven was set just as the recipe said. Cooking times and heat settings are suggestions to help prevent overcooking but differences in the weight, size, shape and starting temperature of food will all affect how long it takes to cook – just as it does with a conventional oven. Use your judgement along with the recipe to check whether food has been cooked properly.

Why do I get condensation on the inside of the oven door?

Condensation is perfectly normal, especially when you are cooking food with a high moisture content such as potatoes.
Questions and answers
Does the microwave energy get through the window on the door?
A No. The door has a special metal screen with holes in that lets you see inside but stops microwave energy from getting out.
Q Steam comes out of the side of the door and vents. Can microwave energy get out too?
A No. The door and vents are carefully designed to let steam out during cooking but keep microwave energy in. The gaps are not big enough for microwave energy to escape.
Q What happens if the microwave is switched on while the oven is empty?
A The microwave will be damaged. Do not switch the microwave on when there is nothing inside the oven. It is a good idea to keep a cup of water in the oven just in case someone accidentally starts the microwave.
Why will not the oven light come on?
A Open the door. If the light does not come on, the bulb has probably blown. Call a qualified repairer – do not try to change the bulb yourself.
There are sparks inside the oven when I use the microwave. Will this cause any damage?
A Yes. Make sure that you are not using any metal utensils and that your containers do not have a metal trim. You must not use metal in your microwave, except foil, when you cook.
Q Light is showing through the vents and door. Does this mean the microwave energy can escape?
A No. It is normal for the light to be visible and is nothing to be concerned about.
Why do I get interference on my TV and radio when I use the microwave?
A Microwave ovens use radio waves similar to those received by TVs and radios. You can lessen the interference by moving your microwave further away from the TV or radio.
Specification
Input 230V\~50Hz
Output
700 Walls
Microwave frequency 2450MHz
Outside dimensions
595mm wide x 382mm high x 316mm deep
Power consumption
Microwave 1150 Watts
Grill
1000 Watts
Complies with EEC directives 89/336/EEC and 92/31/EEC.
Dimensions shown are approximate.
Because we continually strive to improve our products, we may change specifications without prior notice.
This symbol on the product or in the instructions means that your electrical equipment should be disposed at the end of life separately from your household waste. There are separate collection systems for recycling in the EU. For more information, please contact the local authority or your retailer where you purchased the product.
HITACHI
HIT BG17SS
Installation Instructions
Please read these instructions carefully before installing


natural_image
Line drawing of a microwave oven with lid and front panel (no text or symbols)Please Note
Electrical connection
The oven is fitted with a plug and must be only connected to a properly installed earthed socket. In accordance with the appropriate regulations, the socket must only be installed and the connecting cable must only be replaced by a qualified electrician.
It is recommended that the plug be accessible after installation. If this is not possible, an all-pole isolating switch must be present on the installation side with a contact gap of at least 3mm.
A. Built-in furniture
The built-in cabinet shall not have a rear wall behind the appliance.
Minimum installation height is 850mm.
Do not cover ventilation slots and air intake points.

natural_image
Line drawing of a microwave oven with lid and control panel (no text or symbols)
B. Install the Oven

-
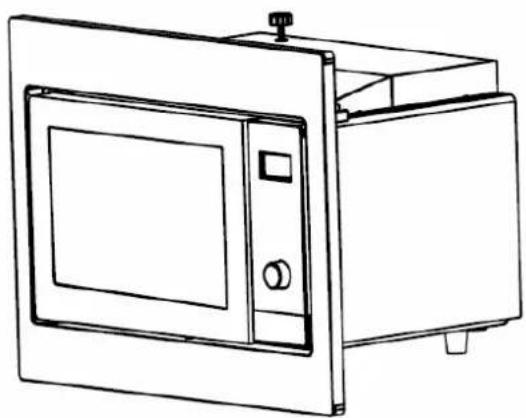
Fix SCREW A on the UPPER AIR TUNNEL of the oven, and then install the oven into the cabinet.
-
Adjust the height of SCREW A to make 1mm gap between SCREW A and the top of the cabinet.
- Do not trap or kink the power cord.
● Make sure that the oven is installed in the centre of the cabinet.

- Open the oven door. Insert SCREW C into the INSTALLATION HOLE and attach the TRIM KIT to the bracket. Then fix the TRIM-KIT PLASTIC COVER to the INSTALLATION HOLE.
- Cooking with your microwave
- Safety
- First aid
- Fire
- Important Safety Instructions
- Please Read Carefully and Keep for Future Reference
- Maintenance of your Microwave
- Microwave use
- Cooking use
- Cleaning
- Containers
- Delayed boiling
- Preparing Food for babies
- Caution
- Contents
- Unpacking
- Unpacking and getting ready
- LED display
- Defrost by weight buttons
- Auto Menu buttons
- Quick Start/Start button
- Timer/ Power/ Weight setting
- Clock/ Pre-set buttons
- Defrost by time button
- Cancel/ Stop button
- Microwave/ Grill/
- Combination button
- Introducing microwave cooking
- Cooking with a microwave
- Checking your cooking utensils
- Remember
- More about getting the most from microwave cooking
- Microwave heating categories
- Steam
- Condensation
- Hint
- Checking your microwave
- Setting the Child Lock
- Using the microwave
- Hint:
- Basic microwave cooking and reheating
- Microwave cooking
- Quick start cooking
- Auto Menu
- Setting the clock
- Program set in Advance
- Multi-section cooking
- Inquiring Function
- Defrosting
- Defrost by weight
- Defrost By Time
- Cleaning your microwave
- Warning
- Using aluminium foil in your microwave
- Questions and answers
- Why does not food seem to cook?
- Why does the food seem undercooked or overcooked?
- How can I stop eggs from popping?
- Why is it so important that I allow standing time after cooking?
- Why does my oven sometimes take longer to cook than it says in the recipe?
- Why do I get condensation on the inside of the oven door?
- Specification
- HITACHI
- HIT BG17SS
- Installation Instructions
- Please Note
- Electrical connection
- Built-in furniture
- Install the Oven
Brand : HITACHI
Model : BG17SS
Category : Microwave