
NVR-711DCDU - Home Theater NEVIR - Free user manual and instructions
Find the device manual for free NVR-711DCDU NEVIR in PDF.


| Product Type | Home Theater System |
| Brand | Nevir |
| Model | NVR-711DCDU |
| Power Supply | AC 110-240V, 50/60Hz |
| Audio Output Power | 10W x 2 + 25W (subwoofer) |
| Frequency Response | 20Hz - 20kHz (±3dB) |
| Audio Signal-to-Noise Ratio | >80dB |
| Channel Separation | >40dB |
| Distortion Rate | 0.7% |
| Video Output | 1.0Vp-p (composite), 0.7Vp-p (YUV) |
| Digital Audio Output | 0.5Vp-p (SPDIF) |
| FM Tuner Frequency Range | 87.5 - 108 MHz |
| Supported Disc Formats | DVD, CD, MP3, JPEG, Kodak Picture CD, CD+G, WMA, HDCD |
| USB Playback | Yes (MP3, JPEG, AVI, WMA) |
| Speaker System | 2.1 channel (2 satellites + subwoofer) |
| Remote Control | Included |
| Audio Input | Line-in (L/R) |
| Dimensions (approx.) | Main unit: 430 x 55 x 250 mm (width x height x depth) |
| Weight (approx.) | Main unit: 3.5 kg |
| Special Features | CD ripping to USB, FM radio, parental control, last memory |
| Safety & Maintenance | Keep away from moisture and heat; clean discs with soft cloth; use only specified power cord |
Frequently Asked Questions - NVR-711DCDU NEVIR
Step 2: Press ON/OFF to open the disc tray. Place the DVD with the label side facing up, then press ON/OFF again to close the tray.
Step 3: The DVD will start playing automatically. If not, use the remote to select Play or the corresponding title number.
Check volume: Press Volume + or Mute to ensure the system is not muted.
Check audio settings: Press Set and go to Audio Setup to verify speaker configuration and downmix mode.
Try another source: Switch to FM radio or USB to isolate the issue.
User questions about NVR-711DCDU NEVIR
0 question about this device. Answer the ones you know or ask your own.
Ask a new question about this device
Download the instructions for your Home Theater in PDF format for free! Find your manual NVR-711DCDU - NEVIR and take your electronic device back in hand. On this page are published all the documents necessary for the use of your device. NVR-711DCDU by NEVIR.
USER MANUAL NVR-711DCDU NEVIR
natural_image
Exterior view of a black electronic TV setup with speakers, a vinyl record, and a digital display (no visible text or symbols)natural_image
Pure electrical circuit lines without any symbolsnatural_image
Illustration of a child pulling an aircraft near a vehicle (no text or symbols)D. Subtítulos
B. Modo TV
D. Brillo
C. Subtítulo
D. Menú del disco
E. Control para menores
G. De origen
FIGURA 2
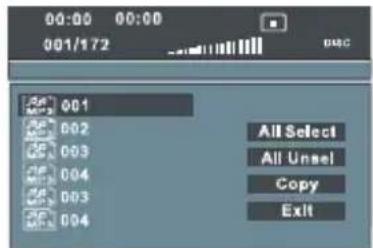
FIGURA 3
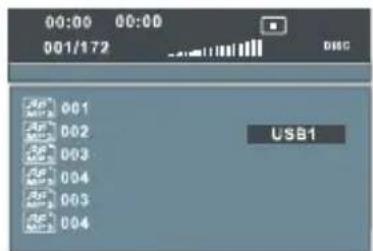
FIGURA 4
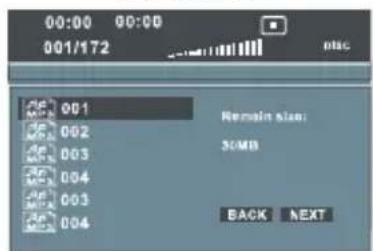
FIGURA 5
natural_image
Exterior view of a modern black electronic TV setup with speakers and a digital display (no visible text or symbols)INSTRUCTION MANUAL
PLEASE READ THIS OPERATING MANUAL COMPLETELY BEFORE OPERATING THIS UNIT AND RETAIN IT FOR FUTURE REFERENCE.
Safety Information

Danger! High Voltage! Electric Shock If Opened!

Operate with Caution! Please refer to the related operating instructions.

Label for Class II Products (Dual Insulation)
WARNING:
To avoid fire and electric shock, never attempt to put the System in the rain or in a place with high humidity. Do open the System without permission, for the parts inside may have high voltage. Ask qualified personnel to do the job.
Precautions:
To replace the power cord, use the product with the specification or recommended by the manufacturer.
To avoid electric shock, use the right power cord and insert it properly.
Laser parts are used in this System. If instructions described in this Manual are not followed in operating or adjusting the System, personnel may be exposed to radiation.
Do not open or repair the System. Such work should be done by qualified technicians.
Hazardous Operation:
Visible or invisible radiations may be sent out when the System is opened. Therefore, do not open the System so as to avoid radiation.
Safety Information and Maintenance
Please read through this Manual and understand the warning signs and indications on the parts. Keep the Manual properly for the use of the future. All parts are specially designed and manufactured so as to ensure safety.
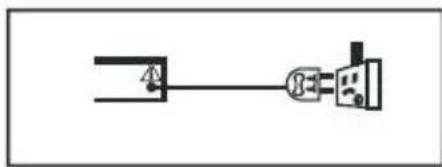
natural_image
Pure electrical circuit lines without any symbolsPower supply: Follow the descriptions on the label and use the power cord properly.
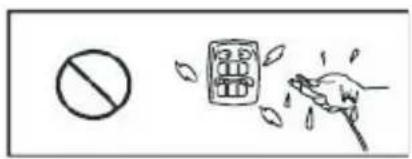
Keep all parts away from moisture.
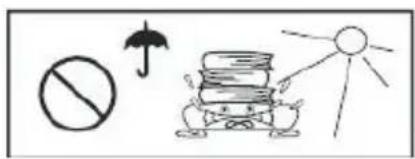
Avoid direct sunshine and high temperature.
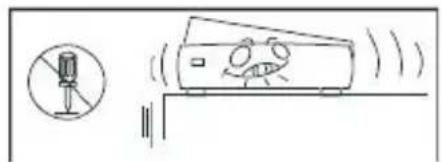
Do not open the cover. Otherwise, needles, hairpins or coins may fall into the equipment.
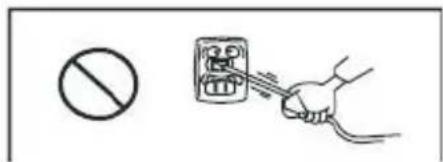
Protect the power cables. Do not allow it to be pressed by heavy objects, nor step on it. Do not stretch or bend it excessively.
natural_image
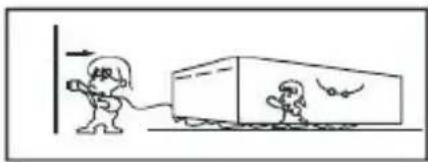
Simple line drawing of two children playing with a toy car (no text or symbols)If the System is not used for a long time, unplug the power cord from the outlet.
Disk Protection
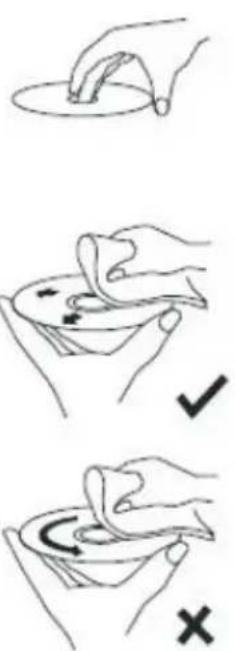
To clean a dirty disk, you should use a clean rag and clean it in a linear way and from inside to outside.
Keep the player, battery and disk away from environment with moisture, rain, dust or high temperature (which comes from heating equipment or direct rays). Keep the disk tray moved in so as to avoid dust.
Do not apply any soluble substances, such as benzene, thinner, cleaning agent and anti-static spray, to the color disk.
When the Player is suddenly moved from a cold environment to a warm environment, water can be condensed on the lens of the player, which may lead the failure of the disk. In this case, put the Player in the warm environment till the condensed water on the lens is totally evaporated.
Operating Instructions
When the System works for a long time, the panels at the top and bottom of the device can become warm.
When the device is not used, take out the disk and unplug the power cord.
If it is not used for a long time, the
System may malfunction or its performance becomes deteriorated. For that reason, the device should be operated occasionally.
Do not place foreign objects onto the disk tray.
Operating Environment
Do not put the device in an environment with:
Heat source or enclosed space (like in a car);
High temperature ( ≥40^ ) or high humidity ( ≥90% );
Dirt;
Direct sunshine.
Interference
Keep the device away from TV, radio and video recorder so as to avoid distorted image or sound.
Condensed Water
Condensed water may appear on the device in the cases below:
When it is moved from cold environment to a warm one, and vise versa;
When it is used in a space with a running air conditioner system and the cold air contacts the device;
When it is in the house with much steam or high humidity.
A device with condensed water may not work properly. In this case, you can plug the power cord and keep the machine running idle for about 2-3 hours. And the water can be evaporated after the temperature rises. If the power cord remains unplugged, water won't be condensed on the device.
Disk Protection
Do not touch the Replay button.
Do not stick tape or paper onto the disk. To clean a disk, use a wetted rag first, then a dry rag.
To avoid damage to the device, do not apply any soluble substances, such as benzene and anti-static spray with ethylene-based substance, to the disk.
Disk Sealing-up
Do not seal up the disk in a place close heat source, nor in a bathroom or close to a humidifier.
Seal up the disk in a box, the top of which shall have no heavy objects.
Structure of Disk Contents
Normally, the digitalized video disk comprises of different titles that are made up of chapters.
Audio disk is made up of tracks.
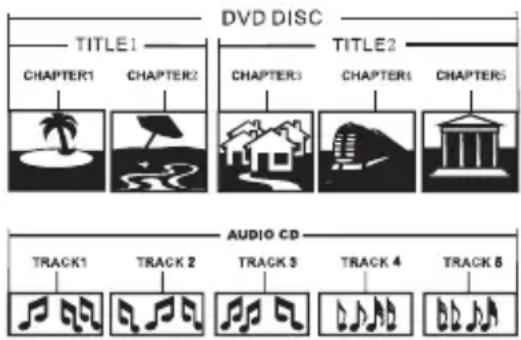
Each title, chapter and track has a number, respectively called title number, chapter number and track number. But some disks may not have such numbers.
TV screens always have a special proportion that corresponds to its size.
| TVScreenDisplayed Part | 4:3 16:9 | |||
| Common Full Screen Mailbox | Type Wide Screen | |||
4:3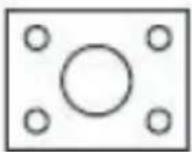 | 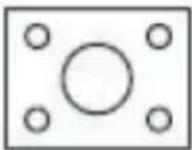 | 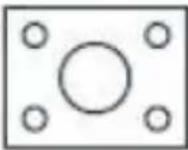 | 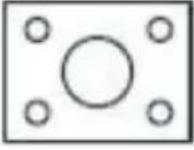 | 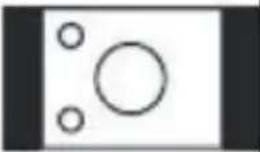 |
16:9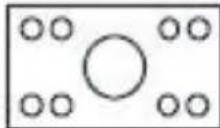 | 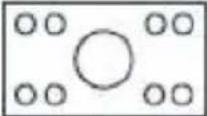 | 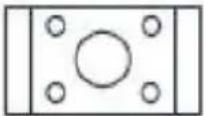 | 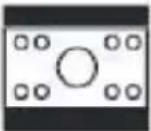 | 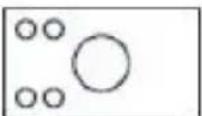 |
Accessories
- unit 1 piece
• 2.1 Speaker 1 set - Remote control 1 piece
• FM antenna 1 piece
• Audio/video cable 1 sets - User's Manual 1 piece
Basic Functions
Preparation
If you want to use watch the disk contents, turn on the TV, select the video mode and connect TV to the DVD Player.
Playing
- Press the Power button to start the device. At the time, directions will appear on the screen, and LED illuminated. If the disk is not inserted, words “no disk” will appear on the screen. If inserted with the tray, the device will play the disk automatically.
-
Press ON/OFF to withdraw the disk tray. The device can accept two types of disks. Follow the indications on the disk to insert it. Failure to follow such indication may cause damage to the disk and malfunction of the player. Do not put incompatible disks into the device.
-
Press ON/OFF to move in the disk tray, and the device will start playing automatically. Some disks might not be played automatically, and the user should manually make selections in the main interface to start the playing. You can press Enter/Play on the remote control or select the corresponding number for that purpose.
Stop Playing
- Press Stop to enter the stop mode. At the time, the “start-up” icons will appear on the TV screen. The Player can memorize the stopped place.
- Press Enter/Play, and the device will play the disk from the stopped placed or from the beginning.
- Press Stop twice to stop playing completely.
Previous/Next Track
In playing mode, you can press Previous to go back to the beginning of the chapter. Each time you press Previous, the system will jump back one chapter till it reaches the starting chapter.
In playing mode, you can press Next to play the next chapter.
Fast Forward/Reverse
- Press Fast Forward (FF) to fast play the contents of the disk. The playing speed changes each time you press this button.
- Press Enter/Play to restore the normal playing state.
- Press Fast Reverse (FR) to fast reverse the contents of the disk. The playing speed changes each time you press this button.
- Press Enter/Play to restore the normal playing state.
Pause/Stop
- In playing mode, press Pause/Stop to make the playing pause. In pause mode, the system is in mute state.
- Press Pause/Stop again, and the system will show the next interface of the contents.
- Press Enter/Play to restore the normal playing state.
Note:
- If the mark appears on the screen, it means this operation is forbidden in this device or disk.
- The device is controlled by CPU with settings, and the Screensaver mode might be activated. You can press any key to start the device.
Advanced Functions
NOTE: The functions said below are only applicable to DVD files. And different DVD player may provide different functions.
Display
Press Display, and such options for disk info as “played title”, “current title”, “played chapter”, “current chapter” and “close” to appear on the screen.
Video Mode
Press the Mode key to set the video output as CVBS, YUV or P-Scan.
Note: Press this key once, and the black screen will appear.
So, press it till the normal screen state comes back. If the image is interfered or no image appears on the screen, you can press Mode to solve the problem.
Subtitle
Press Subtitle, and all options for subtitle will appear on the screen.
The language of the subtitle shown for the first time is the default value of the device. For example, if “01/02 English” is used as the subtitle, you can press the Subtitle again to allow the screen to other languages, like 02/02 XX.
"01" refers to the current language. "02" refers to the total number of languages used in the system (subject to DVD Player's model).
Title
Press this key, and the main interface of the system will appear on the screen. The user can make options according to his preference. (This key is effective only when submenus exist)
Menu
Press this key, and the main interface of the system will appear on the screen. The user can make options according
to his preference.(This key is effective only when submenus exist)
Angle
Press this key to view the DVD contents from different angle.
GOTO
Use this key to choose chapters and time while watching DVD contents.
If you want to choose a chapter whose number has to digits, you can press “10+” to set the number.
Press Time to select the chapter in accordance with the following contents displayed on the screen:
Title 02/Chapter (enter the required digits)/32
Press Time twice to select the time when the DVD contents are played.
The information below will appear on the screen:
Press Time thrice to select the time point in the chapter. The information below will appear on the screen:
Press the key [+] to turn up the volume and [-] to turn it down.
Press Mute to set the system in the mute mote (no sound). Press Mute again to restore the normal playing state.
Repeat
Perform the operations below to repeat the chapter, DVD title and the whole DVD contents.
- Press Repeat once to repeat the
contents of the chapter.
- Press it twice to repeat the contents of the title.
- Press it thrice to repeat the whole contents of the DVD disk.
- Press it for the fourth time to cancel the repeat mode.
Note: For disks with such formats as CD, JPEG, Kodak Picture, WMA, MP3, HDCD and CD+G, you should use the main interface of the system to repeat the playing.
Zoom
Press this key to zoom in the image. In this mode, the user can also use the navigation keys to move the image.
A-B
The user can also mark one section of the DVD contents and allow the system to play it repeatedly. To that effect, choose the starting point you want to repeat and press the key A-B to set Point A when the DVD contents are being played, and press it again to set Point B as ending point. Then the part between A and B will be played repeatedly. Press the key A-B for the third place to cancel the state.
Slow
Press the key Slow to slow down the playing. Each time you press this key, the playing speed changes as follows:
$$ \blacktriangleright 1 / 2 \rightarrow \blacktriangleright 1 / 4 \rightarrow \blacktriangleright 1 / 8 \rightarrow \blacktriangleright 1 / 1 6. $$
Source
Choose signal source among DVD/FM/LINE IN.
Language
Some DVD Players supports multiple languages. Press the key Language, and the first audio selection will appear on the screen. Then you can make options. Press the key again to move to another option.
For example,
Audio 1/2: AC 3 2 CH English
Audio 2/2: AC 3 5.1 CH English
Return
In playing mode, you can press Return to enter the main menu. Press it again to return to the interface where all contents of the DVD disk are displayed. In playing S-VCD and VCD 2.0 disks, you can press the key Return to return to the Menu interface, and at the time, the main interface will appear.
PBC
With the key PBC (play back control), the system can provide advanced selection when VCD disk is being played. Press this key to enter the related interface (for some disks, the PBC interface can be reached automatically). Then press the numeric keys to make the options. Press the key again to exit the options.
Programme
With this function, the user can programme the chapters and play them in accordance with his own will. Press Programme, and the chapters list will appear on the screen, where the user can choose the desired chapter and programme it. After that, the user can move the curser to select the starting mark. At the time, the system will start “channel playing”, where the “channel mark” will appear on the screen.
Special Functions
Audio CD Playback
When a disk with CD format is inserted into the device, the System can pay its contents automatically.
- Press Previous/Next to change the track, and FF/FR to fast forward or fast reverse the contents.
- Note: A CD+G disk is equal to an Audio CD.
MP3 Playback
When a disk with MP3 format is about to be played, the system will automatically display the navigation interface while the contents are being uploaded.
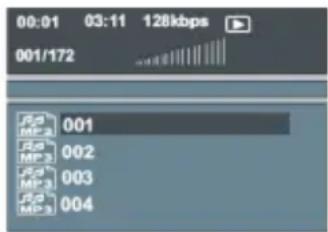
- In the navigation interface, use the key Up/Downto make options. After selection, press Enter/Play to play the file.
- In all the tracks, use the key Up/Down to make options. After selection, press Enter/Play to play the track.
- In the current interface, press the key Left to return to the previous menu, and press Previous/Next to enter the previous and next page.
Kodak Picture CD Disc Playback
When a disk with Kodak Picture format is about to be played, the system will automatically display the navigation interface while the contents are being uploaded.
- In the navigation interface, use the key Up/Down to make options. After selection, press Enter/Play to play the file.
- In all the tracks, use the key Up/Down to make options. After selection, press Enter/Play to play the track.
- Each picture of the Kodak Picture CD will be displayed as slide, whose size is automatically adjusted in accordance with the proportion of the TV.
- Press the key Main Interface to return to the main interface.
- Press Pause to allow the playing pause and the current picture will remain still.
- Press Previous/Next to view the previous and next picture.
- Press Enter/Play to return the slide mode. Note: The quality of the picture displayed is subject to the model of the device used for viewing.
JPEG Disk Playback
When a disk with JPEG format is about to be played, the system will automatically display the navigation interface while the contents are being uploaded.
- In the navigation interface, use the key Up/Down to make options. After selection, press Enter/Play to play the file in a slide manner.
- Press Previous/Next to select the previous and next picture.
- Press Pause to allow the picture-playing pause so that you can view for a longer time. Press Enter/Play to return to the normal playing state.
System Setup
Select the key Set on the remote control, and the setup interface will appear on the screen.
- The user can use the keys "Up/Down/Left/Right" to make selections. However, it would be difficult to use the cursor of the remote control to perform the operation. You can press Enter/Play to make the option, and press Left to return to the previous interface.
- Press Set to exit the setup interface.
Interface for Normal Settings
With this interface, you can set the displaying format of the TV screen, the video mode and all functions relating to DVD contents.
A.TV Display
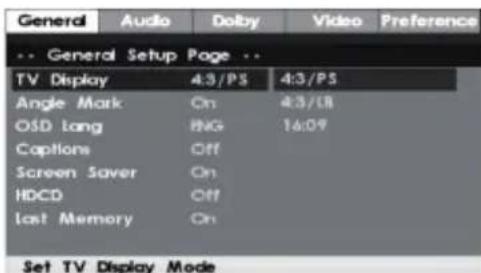
With this item, you can select the displaying format of the TV screen according to your preference. The proportion of the displayed part on the screen is subject to the nature of the disk and of the TV (refer to Page 20: Multiple Image Sizes).
In any selected displaying format, a picture recorded with 4:3 proportion will always be displayed with the same width-height proportion.
In the case of DVD disk, the displaying format might change. You can refer to the related information for details. If the contents of DVD disk are recorded with 16:9 format and the TV displays the image with proportion of 4:3, the image will be compacted when displayed.
Some DVD titles are recorded with special format. In this case, whatever displaying format the user selects, the DVD titles with the original format will be displayed on the screen.
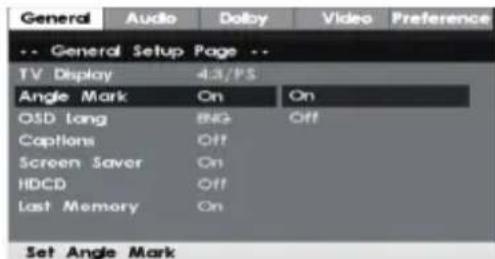
B. Angle Mark
In playing the DVD contents, the user can choose one camera angle from the options to display the contents.
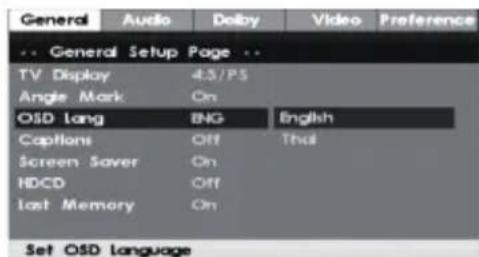
C. OSD Language
The user can set the OSD language thorough this item.
D. Captions
For those suffering from hearing, the supplementary narrations recorded can be displayed on the screen.
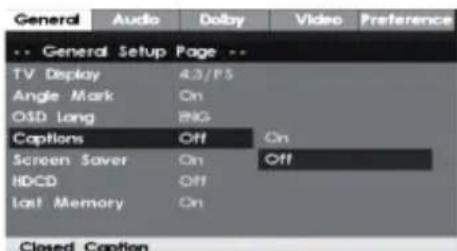
Note: This function is only effective for those disks with hidden subtitles.
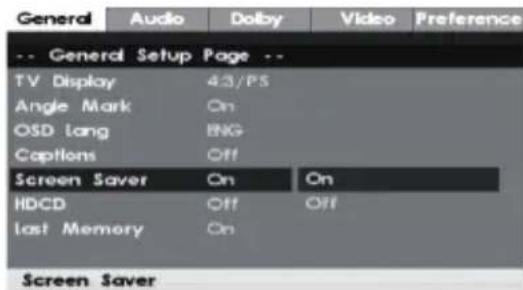
E.Screen saver
After the system enters the stop state for several minutes, the screensaver mode will be enabled and a moving image will appear on the screen.
F. HDCD
HDCD is the short form of “high density compact disk”.
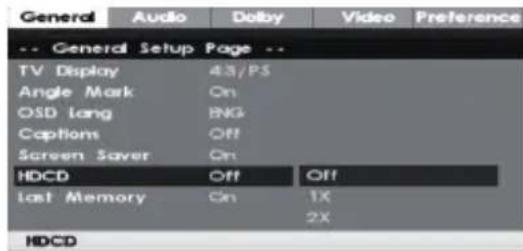
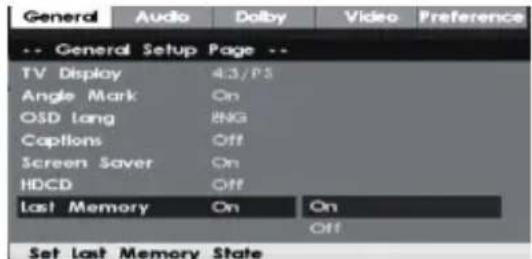
G. Last Memory
If the power fails abruptly, the DVD Player can memorize the place where the playing was stopped. When the power is restored, the system can play the disk from the stopped place.
Setting the Speaker
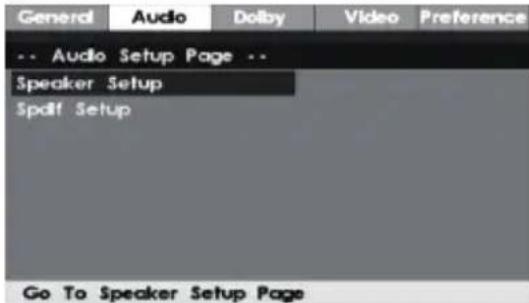
You can use this item to set Left/Right Channel or Stereo
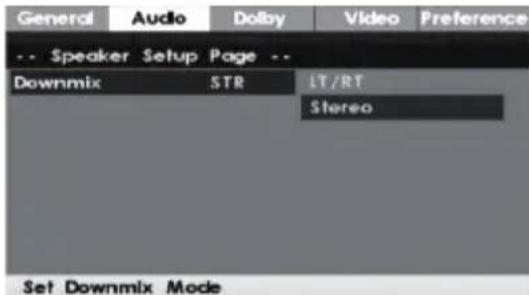
DOWNMIX Mode
1 indicates the left channel.
2 indicates the right channel.
B. SPDIF output mode
Use this item to set the SPDIF output mode. In original SPDIF mode, the user can only adjust the volume of MP3 contents, not for contents with DVD or CD format.
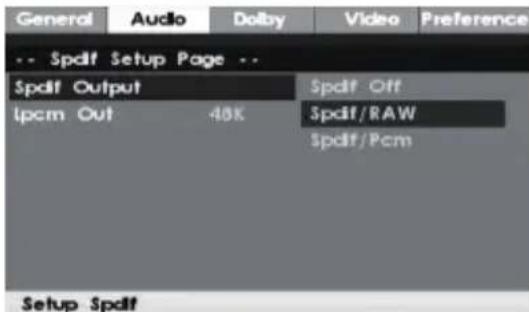
This DVD Player provides three audio output options.
Disable SPDIF: In this analog surround mode, the cables at the rear of the panel are connected to the two audio output ports to output the audio source.
Original or modified SPDIF: With this surround format, the audio source is output through the Dolby digital decoder formed on the basis of the optical mouse at the rear panel and the co-axial connector.
Interface for setting Dolby digital surround
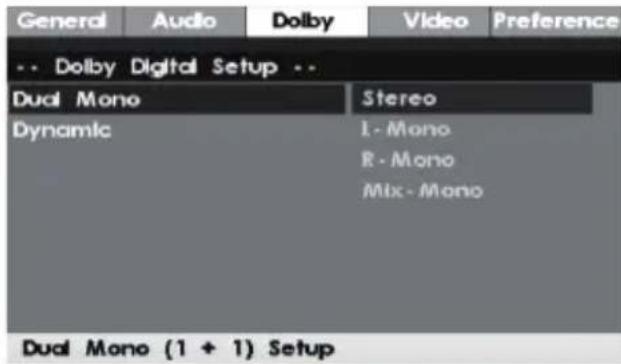
A. Dual Mono
If the user's microphone/decoder can output Dolby digital surround source, he can select stereo, left channel, right channel or mix channel.
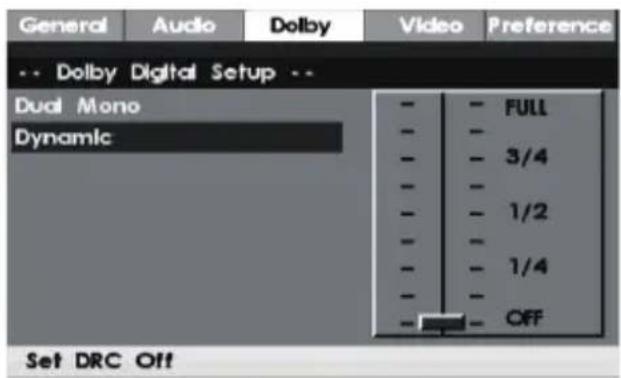
B. Dynamic
Set this item to play the audio contents in high volume at night while not disturbing others. This item can lower the volume, but keep the original sound quality. The figure below shows the range to be set from the lowest to the highest volume, with the unit dB.
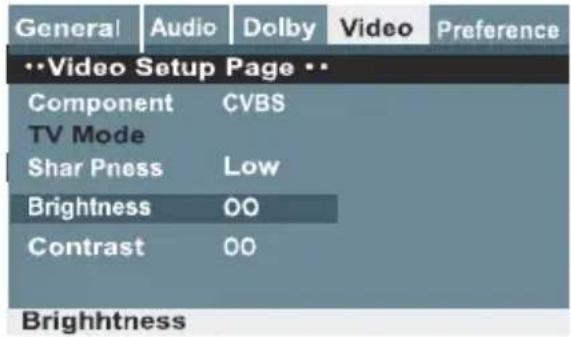
Video Setup
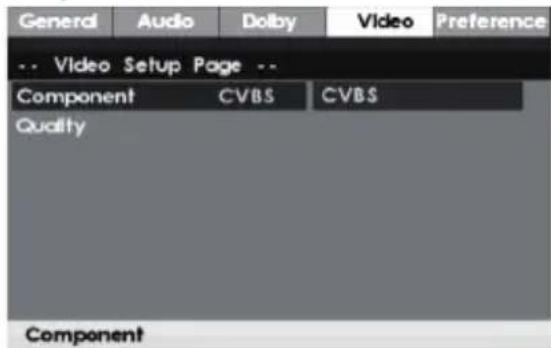
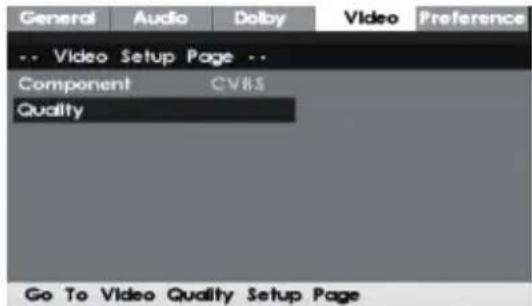
A. Component
Use this item to set the video output.
B. Quality
Use this item to set the image quality of the output video.
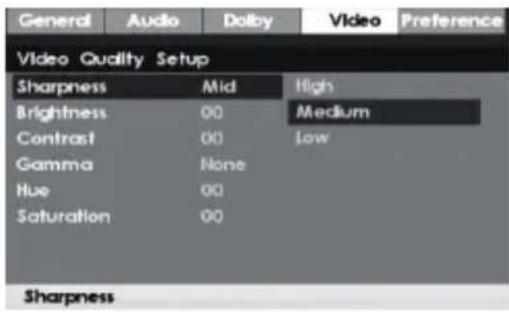
Sharpness
Brightness
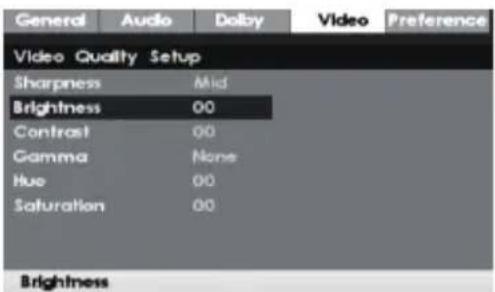
Use this item to set the brightness of the output video.
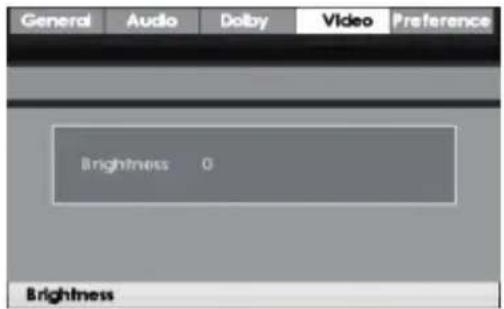
Press the key Right, and the interface below will appear: Then press Left/Right to adjust the brightness, and press Enter/Play to confirm the selection. At the same time, the screen returns to the previous interface.
Contrast
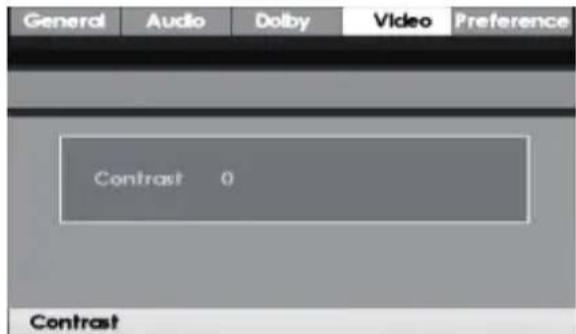
You can set the contrast through the interface of Video setting. Press the key Right to reach the interface.
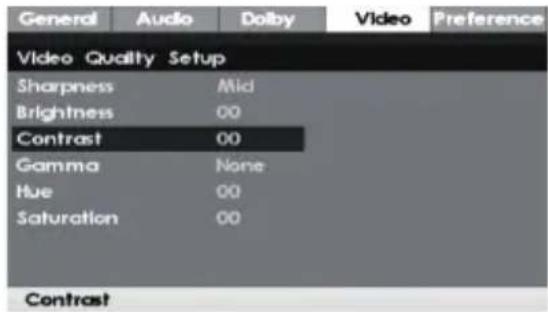
Then press Left/Right to adjust the contrast through the numbers, and press Enter/Play to confirm the selection. At the same time, the screen returns to the previous interface.
Default Setting
The item Default Setting appears only when the machine was not used. To activate the adjustment, you have to restart the machine.
A. TV Type
This DVD Player supports a variety of TV standards, such as MULTI (AUTO), NTSC and PAL.
If your TV only supports NTSC or PAL standard, the TV screen will blink with black and white spots when a wrong standard is selected. In this case, you should press Set and go to the interface of default setting, where you could find the proper standard to play the contents.
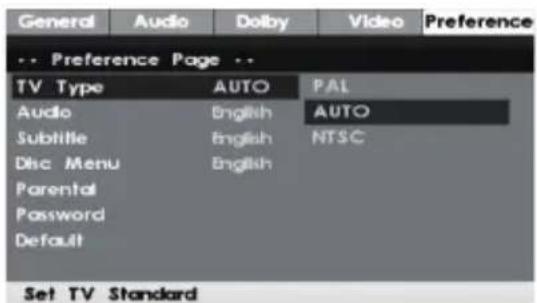
Note: To set the TV standards:
- You can choose from the two options, NTSC and PAL, from the DVD Player;
- Refer to the table below, which shows the TV standard matched by the respective disk:
| Disk Output Format | ||||
| Type | Format TV Standard | |||
| DVD | NTSC NTSC PAL NTSC | |||
| PAL ---- PAL PAL | ||||
B. Audio
You can choose the item Audio in the preference interface to set the audio output of the DVD contents.
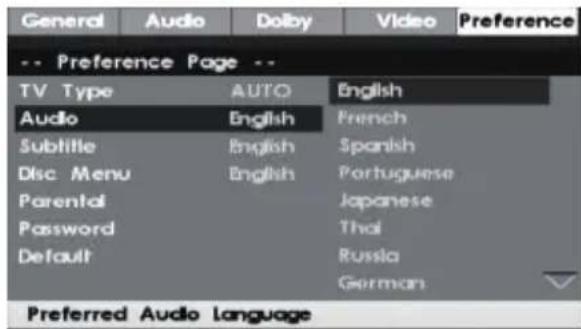
C. Subtitle
Set the preferred language as the default value of the DVD Player's subtitle. (Subject to compatibility of DVD Player)
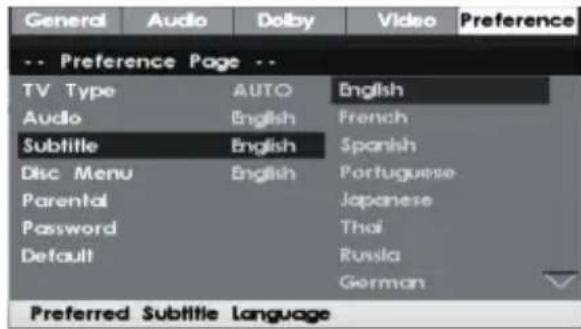
D. Disc Menu
Set the preferred language as the default value of the main interface of the DVD Player. (Subject to compatibility of DVD Player)
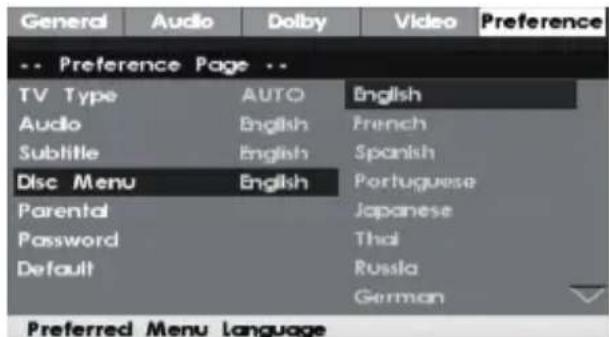
E. Parental Control
With the item Channel Supervision, you can set the examination class for DVD disk, so that family members can view the contents in accordance with their respective age group. 8 examination classes are available. Press Left/Right to make the selection, and press Enter/Play to confirm it. At the time, the system will return to the previous interface.
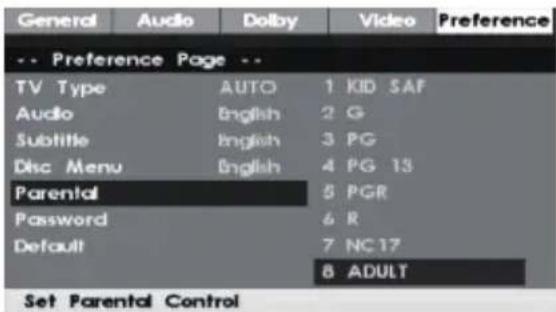
F. Change the Password
You can change the password so that your family members can watch the disk. To do that, enter the preference interface and select Then password. Press Password and enter a four-digit password.
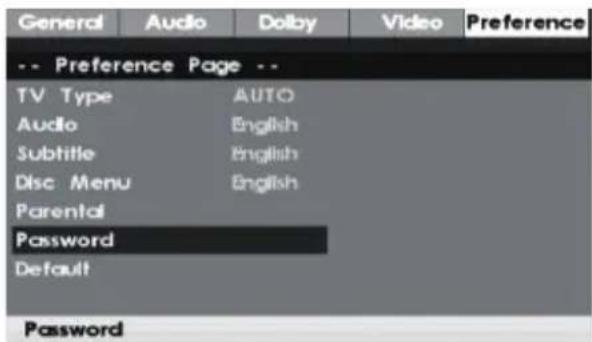
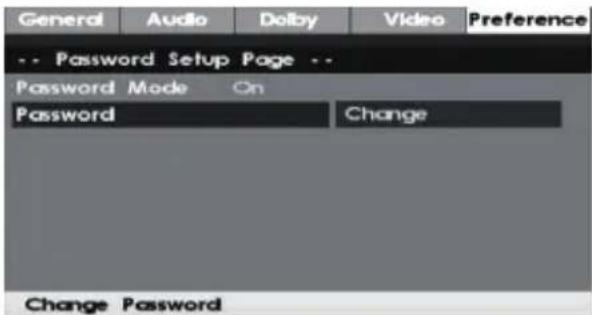
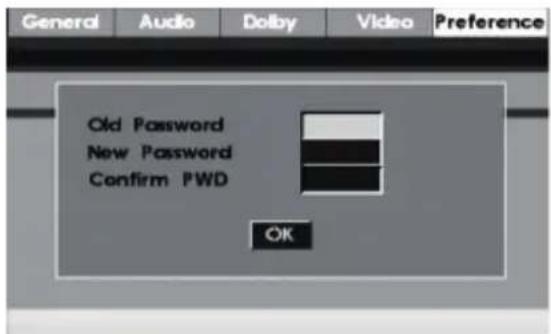
Note: To avoid oblivion, you may write down the set password. You have to enter the old password before you enter the new one (default password: 1234).
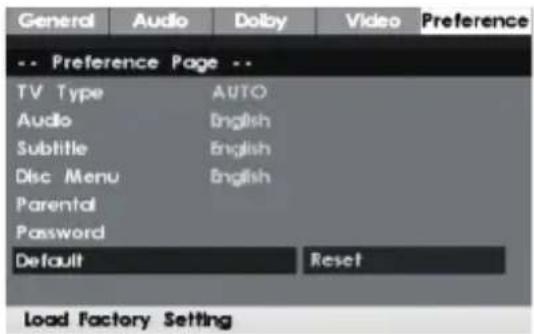
G. Default
Use the item Default, you can restore the default settings (except the password). To do that, choose the item Default in the preference interface, and press Enter/Play to restore the factory defaults.
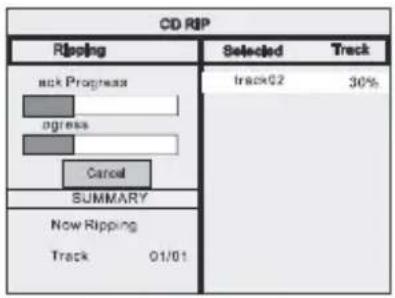
Please make sure the movable USB device has enough memory space that can accept all contents from DVD Player.
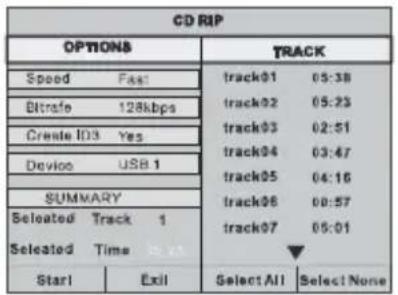
FIGURE 1
other
CD RBP | Category | Selected | Track | |---|---|---| | Back Progress | 30% | 100 | | agress | | 100 | | Cancel | | 100 | | SUMMARY | | 100 | | Now Ripping | | 100 | | Track | 01/01 | 100 |FIGURE 2
CD Taking-In
- Basic setting: This DVD Player can read the contents in CD, USB device and have enough memory.
- After the contents of CD are read, press Copy to prop up the new options (see the picture below).
Then press Up/Down/Left/Right to make selections. - After the contents of CD are taken in, press Exit to the take-in interface.
Copy Contents of MP3 and AVI
- Basic setting: This DVD Player can read contents of MMP3 and USB device, and have enough memory.
- After the contents of MP3 are read, press Stop.
Then press Up/Down to choose the file. After you press Copy, the related dialogue box will prop up. At the time, press Enter. - After the file is copied, confirmation dialogue box will prop up. Press Enter to complete the copying process.
- To copy contents of AVI format, use the same procedure as MP3.
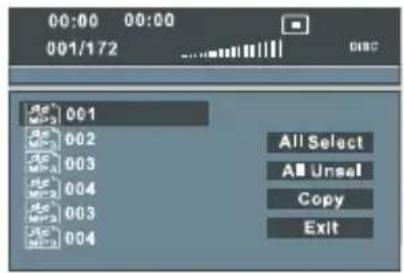
FIGURE 3
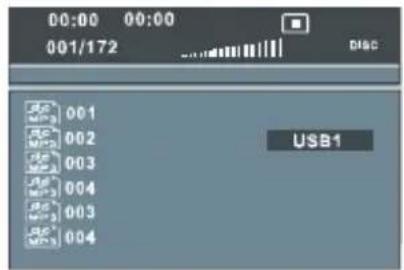
FIGURE 4
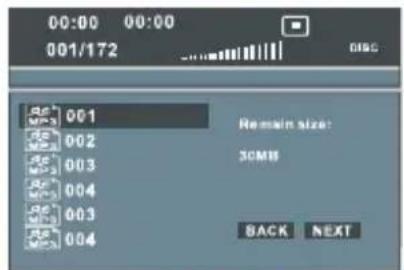
FIGURE 5
Note: It is normal to see "disk being reading" dialogue box.
Playing Radio functions
- The frequency the embedded radio receives in the system ranges from 87.50MH\~108 MHz.
- In playing mode of the DVD Player, press the key Signal Source to switch to FM mode. Then press the key Search on the remote control, and the system will search the channels and save 1-30 of them.
- You can press Previous/Next to select the channel you like, and use Fast Forward or Fast Reverse to tune manually.
Multimedia
- The System supports USB device and is compatible with files with such formats as JPEG, MP3, AVI and WMA.
- Play contents in USB device: Contents in USB device can be played only when there is no disk or card inside the player. If so, the player will play the contents automatically after properly connected.
Note:
A: If malfunction exists in memory device, the player won't play its cont
Connection Between DVD Player and Speaker
- Use the related cable to connect channel "R" at the place marked as "+" on the DVD Player to the place with the same mark "+" on the speaker; Use the related cable to connect channel "R" at the place marked as "-" on the DVD Player to the place with the same mark "-" on the speaker.
- In the same connection way as "1", make connections between the DVD Player and the speaker for channel "L".
- Before above connections, unplug the power cords for the player and speaker.
Outside Video & Audio Using
- Connect to the video and audio wite outside plauer.
Connect the outside Audio line "L" with the DVD Player "AUDIO IN--"L" jack.
Connect the outside Audio line "R" with the DVD Player "AUDIO IN--"R" jack.
- After step1, plug in and press the Remote Control function key called "SOURCE".
Function
Press the key Function, and the information below will appear on the screen:
treble:-14dB\~+14dB
bass: -14dB\~+14dB
Volume = 32dB
Note: Press the key Function, and the Player will enter the state for high-pitch adjustment. You can use the key Volume on the panel or remote control to adjust the volume for high pitch. Follow the same way to adjust the volume for the speaker, DVD Player and low pitch.
Troubleshooting
Before you contact the service center or distributor, you may refer to the table below to see if you can find out how the problem comes and if you can solve it.
| Failure Solution | |
| Not electrified ●Check whether the power is properly connected to the device. | |
| No image ●Check whether the player is properly connected to the TV;●Check whether the TV works well;●Press the key Video Mode till correct image appears;●Check whether the player is properly connected to other equipment. | |
| No sound ●Check whether the player is properly connected to the speaker. | |
| Can’t play ●Check whether the disk is properly inserted;●Clean the disk. | |
| Remote control doesn’t work ●Remove the barrier between the remote control and the device;●Align the remote control to the induction port in front of the machine panel.●Check whether the battery remote control is dead. If so, replace the battery. | |
| Interference to the image | ●Check whether the disk is dirty or scratched;●Clean the disk or replace it;●Power off the machine and restart it ten seconds later. |
| Malfunction of key | ●Rapid increase of power, interruption of power or other electric problems;●Power off the machine and restart it ten seconds later. |
System
Power supply---- AC 110-240V/50/60Hz
Channel separation---- >40dB
Distortion rate---- 0.7%
DVD
Frequency response range---- 20Hz-20KHz (+/-3dB)
Audio S/N---->80dB
Audio output (analog)---- Level output: 1.0-2.0v
Audio output (digital)---- Level output: 0.5vp-p
Video output---- Level output: 1.0vp-p
YUV output---- Level output: 0.7vp-p
Tuner
FM Frequency range---- 87.5-108MHz
Microphone
Output Power---- 10W*2+25W
Bass---- 14dB \~ +14dB
Treble 14dB~+14dB
Frequency response range---- 20Hz-20KHz (+/-3dB)
S/N—>80dB
natural_image
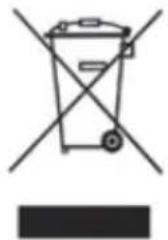
Symbol of a trash bin with crossed lines indicating no waste or restriction, and a solid black rectangle below (no text or labels)According to Waste of Electrical and Electronic Equipment (WEEE) directive, WEEE should be separately collected and treated. If at any time in future you need to dispose of this product please do not dispose it with household waste. Please send this product to WEEE collecting points where available.
In order to fulfill ruling UNE EN-60335, we indicate that if the flexible wire is damaged, it can only be substituted by a technical service recognized by NEVIR S.A., due to special tooling is required
- Subtítulos
- Modo TV
- Brillo
- Subtítulo
- Menú del disco
- Control para menores
- De origen
- Safety Information
- WARNING:
- Precautions:
- Hazardous Operation:
- Safety Information and Maintenance
- Disk Protection
- Operating Instructions
- Operating Environment
- Interference
- Condensed Water
- Disk Sealing-up
- Structure of Disk Contents
- Accessories
- Basic Functions
- Preparation
- Playing
- Stop Playing
- Previous/Next Track
- Fast Forward/Reverse
- Pause/Stop
- Note:
- Advanced Functions
- Display
- Video Mode
- Subtitle
- Title
- Menu
- Angle
- GOTO
- Repeat
- Zoom
- A-B
- Slow
- Source
- Language
- Return
- PBC
- Programme
- Special Functions
- Audio CD Playback
- MP3 Playback
- Kodak Picture CD Disc Playback
- JPEG Disk Playback
- System Setup
- Angle Mark
- OSD Language
- Captions
- E.Screen saver
- HDCD
- Last Memory
- Setting the Speaker
- SPDIF output mode
- Dual Mono
- Dynamic
- Video Setup
- Component
- Quality
- Sharpness
- Brightness
- Contrast
- Default Setting
- TV Type
- Audio
- Subtitle
- Disc Menu
- Parental Control
- Change the Password
- Default
- CD Taking-In
- Copy Contents of MP3 and AVI
- Playing Radio functions
- Multimedia
- Connection Between DVD Player and Speaker
- Outside Video & Audio Using
- Function
- Troubleshooting
- System
- DVD
- Tuner
- Microphone
Brand : NEVIR
Model : NVR-711DCDU
Category : Home Theater