
D19W12B-N6 - Screen V7 - Free user manual and instructions
Find the device manual for free D19W12B-N6 V7 in PDF.


| Product Type | 19-inch Widescreen LCD Monitor |
| Model | D19W12B-N6 |
| Brand | V7 |
| Display Size | 19" (482.6 mm) diagonal |
| Viewable Area | 410.4 (H) x 256.5 (V) mm |
| Pixel Pitch | 0.285 (H) x 0.285 (V) mm |
| Connectors | D-Sub (VGA), DVI-D (optional) |
| Audio | Audio input (optional) |
| Tilt | -5° to +15° |
| Dimensions (W x H x D) | Approx. 437.4 x 373.8 x 190.7 mm |
| Weight (Net) | Approx. 3.8 kg |
| Power Input | AC 100-240V, 50/60Hz, 1.2A |
| Power Consumption (Active) | < 45W |
| Power Consumption (Standby) | < 2W |
| Operating Temperature | 5°C to 40°C |
| Operating Humidity | 20% to 80% (non-condensing) |
| Storage Temperature | -20°C to 60°C |
| Storage Humidity | 5% to 80% (non-condensing) |
| Horizontal Frequency | 31 – 83 kHz |
| Vertical Frequency | 56 – 76 Hz |
| Maximum Resolution | 1440 x 900 @ 75Hz |
| Preset Modes | General, Movie, Picture, Game |
| OSD Languages | Multiple languages (English, Deutsch, Français, etc.) |
| Power Saving Modes | Standard, Advanced (Life-Extension) |
| Certifications | TCO'03, FCC Class B, CE |
| Cleaning Instructions | Use a soft cloth lightly moistened with mild detergent solution; avoid abrasives |
Frequently Asked Questions - D19W12B-N6 V7
User questions about D19W12B-N6 V7
0 question about this device. Answer the ones you know or ask your own.
Ask a new question about this device
Download the instructions for your Screen in PDF format for free! Find your manual D19W12B-N6 - V7 and take your electronic device back in hand. On this page are published all the documents necessary for the use of your device. D19W12B-N6 by V7.
USER MANUAL D19W12B-N6 V7
19" wide LCD Monitor User Manual

- English
Deutsch
- Français
- Italiano
Español
简体中文
日本语
- Norsk
» Русский
■ Svenska
Suomi
Dansk
■ Polski
Nederlands
» Português
한국에

PRECAUTIONS
Information for users applicable in European Union countries 1
Information for users applicable in United States of America 1
Installation 1
Power connection 1
Maintenance 1
Transporting the monitor 1
GETTING STARTED
Package contents 2
Monitor installation 2
Identifying parts and controls 3
Working with OSD Group 3
Customizing your Monitor 3
Introduction to Hotkeys 4
The operation of Function menu 4.
OSD icon list 5
Troubleshooting.6
Technical Features and Specifications 7
Interface Frequency 7
Addendum
Advanced Power Saving Mode 8....
FCC compliance 10
TcDevelopment
Congratulations!
The display you have just purchased carries the TCO'03 Displays label. This means that your display is designed, manufactured and tested according to some of the strictest quality and environmental requirements in the world. This
makers for a high performance product, designed with the user in focus that also minimizes the impact on our natural environment.
Some of the features of the TCO'03 Display requirements:
Ergonomics
- Good visual ergonomics and image quality in order to improve the working environment for the user and to reduce sight and strain problems. Important parameters are luminance, contrast, resolution, reflectance, color rendition and image stability.
Energy
- Energy-saving mode after a certain time – beneficial both for the user and the environment
- Electrical safety
Emissions
• Electromagnetic fields
- Noise emissions
Ecology
- The product must be prepared for recycling and the manufacturer must have a certified environmental management system such as EMSA or ISO14001
-
Restrictions on
-
chlorinated and brominated flame retardants and polymers
o heavy metals such as cadmium, mercury and lead.
The requirements included in this label have been developed by TCO Development in cooperation with scientists, experts, users as manufacturers all over the world. Since the end of the 1980s TCO has been involved in influencing the development of IT equipment in a more user-friendly direction. Our labeling system started with displays in 1992 and is now requested by users and IT-manufacturers all over the world.
For more information, please visit
www.tcodevelopment.com
PRECAUTIONS
Information for users applicable in European Union countries

The symbol on the product or its packaging signifies that this product has to be disposed separately from ordinary household wastes at its end of life. Please kindly be aware that this is your responsibility to dispose electronic equipment at recycling centers so as to help conserve natural resources. Each country in the European Union should have its collection centers for electrical and electronic equipment recycling. For information about your recycling drop off area, please contact your local related electrical and electronic equipment waste management authority or the retailer where you bought the product.
Information for users applicable in United States of America

LAMP(S) INSIDE THIS PRODUCT CONTAIN MERCURY AND MUST BE RECYCLED OR DISPOSED OF ACCORDING TO LOCAL, STATE OR FEDERAL LAWS. FOR MORE INFORMATION, CONTACT THE ELECTRONIC INDUSTRIES ALLIANCE AT WWW.EIAE.ORG. FOR LAMP SPECIFIC DISPOSAL INFORMATION CHECK WWW.LAMPRECYCLE.ORG.
Installation
- Do not cover or block the ventilation ports on the rear of the monitor.
- Do not install the monitor close to heat sources such as radiators or air ducts, or in a location exposed to direct sunlight, excessive dust, mechanical vibration, or shock.
- The apparatus shall only be used between 5irc tilted forward and 15irc tilted backward as normal operation position. If the tilt angle exceeds 15irc , it shall be used for wall mounting or packaging only.
Power connection
- Use the correct power cord for your local voltage.
- Use an accessible outlet close to the monitor.
- Do not allow anything to rest on the power cable.
- Only use the power adapter attached to the monitor.
5.Disconnect the power cable from the power supply if:
5.1 You will not use the monitor for an extended period.
5.2 The cable is damaged or frayed.
5.3 The monitor has been dropped or the cabinet damaged.
5.4 A distinct change in performance indicates a need for servicing.
Maintenance
- Clean the cabinet and controls with a soft cloth lightly moistened with a mild detergent solution. Do not use any abrasive materials or solvents such as alcohol or benzene.
- Do not rub, touch, or tap the surface of the screen with sharp or abrasive items such as pens or screwdrivers, as the screen may scratch.
- Do not insert objects or spill liquids into the ventilation ports on the monitor's rear, as fire, electric shock, and / or unit failure may result.
Transporting the monitor
- When carrying the display for repair or servicing, please first disassemble the monitor and pack in its original packing. To disassemble the neck and base, please press the "release button" located on the back of the neck and detach the neck/base, then remove the base from the neck by pressing the "release tabs" located under the base plate and pull the neck off the base, finally use the original carton and packing materials to wrap the display and its accessories.


Package contents
Before beginning, ensure that the carton contains the following items:




-
LCD Monitor
-
Monitor Base and Neck (the shape of base may vary according to the monitor model)
-
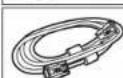
Power Cord (plug may vary according to the electrical standards for your area)
-
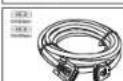
Analog Signal Cable
-
Digital Signal Cable (optional)
-
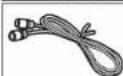
Audio Cable (optional)
-
CD-ROM (contains user manual)
-
Quick Installation Guide
Monitor installation
- Setting up the monitor
1.1 Take out the monitor, stand and monitor base from the package.
1.2 Place the monitor base on the desk and then slide the neck into the slots of base. (Make sure the direction of the neck is correct.)
1.3 Grasp the monitor with both hands and then slide the monitor into the neck. (Make sure the direction of the neck is correct)
- Connecting signal cable
2.1 Switch off your computer.
2.2 Connect the signal cable to the D-SUB or DVI port at the rear of the monitor and tighten the connector screws
2.3 Connect the other end of signal cable to the computer's VGA port or DVI port and tighten the connector screws.
2.4 Note: Ensure the display setting does not exceed 1440X900@75Hz.
- Connecting audio cable (with audio option)
3.1 Plug the audio cable into the AUDIO port at the rear of the monitor.
3.2 Plug the other end of the audio cable into the audio port of your computer or other audio source.
- Connecting power
4.1 Plug the female end of the power cord into the POWER port at the rear of the monitor.
4.2 Plug the male end of the power cord into a power outlet.
5.Switching on
5.1 Switch on your computer.
You should now be able to see the picture. If not, refer to the trouble shooting section of this guide.


Identifying parts and controls
- The LED light indicates the state of working. During operation, the LED Light is bright green. When dormant, the LED Light is orange.
- The power button ⏻ is used to identify the state of power. You can use the power button to control on & off.
- The function keys are used for adjusting all settings. When you need some adjustment, you can achieve the goals by pressing any of the function menus. Details for all the function menus are subsequently described.
Working with OSD Group
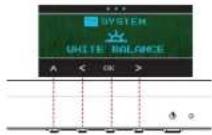
You will find that the OSD is very easy to use. You can identify the function of a button through the corresponding icon displayed on the pop-up window of OSD. Now there are 3 pictures, which show that a button represents different functions in different levels of the architecture.

First Level

Second Level
Third Level
- Press ⏻ button to start.
- Press any of the rest 4 buttons to activate the OSD menu.
- Press the corresponding function icon button on the pop-up window of the OSD.
Customizing your Monitor
The On Screen Display (OSD) system provides a full range of customizable tools to optimize your display.
Important:
Although you could perform comprehensive customization, we strongly recommend that you use the "AUTO ADJUSTMENT" function.
It can utilize the default values to thoroughly optimize the performance of the display. Activate the OSD munu.
Select the first button on the left AUTO to activate the "ATUO ADJUSTMENT" function.
Important:
In addition, we have also prepared other relatively simple methods to change the display modes. There are 4 modes, which include: GENERAL, MOVIE, PICTURE, GAME.

Hotkeys Introduction
1. Auto Adjustment
When the OSD functions are displayed, press the first button on the left AUTO, and then you can automatically optimize the image performance.
2. Volumn Control (with audio option)
When the OSD functions are displayed, press the first button on the right to enter the "Volume" menu. Then press + or to adjust the volume of sound.
Press ← or OK to end.
3. Theme Mode Menu
When the OSD functions are displayed, press the second button on the left 🎨 to shift the mode. You may press ◀ and ▶ to make adjustments between 4 modes.
Press ▲ or ←, and then you can leave automatically.
4.Main Menu
When the OSD functions are displayed, press the second button on the right ☐ to enter the main menu. And then press < or > to select the option.
Press OK to enter into the option. Press ↗ or ← to leave.
Function Keys Operation
According to the tree-like directory, you can discover the whole OSD system is like a map. This tree-like directory can help you to become aware of the whole system. During the whole process, you need to know the following actions.
-
Activate the OSD main menu: Under the energized condition, press any function key to execute the function.
-
Confirm the selection: Press the OK button.
-
Browse the previous or next option: Press < and >
-
Adjust the option value: Press + and - to adjust the value.
-
Return to the higher level menu. Press E81 or A to return to the higher level.
- Exit: Press E81 to exit OSD menu; Or if you do not press any button, it will automatically disappear after 30 seconds.

flowchart
graph TD
    A["Power"] --> B["Main Menu"]
    A --> C["Volume"]
    B --> D["Auto-Adjustment"]
    B --> E["Theme Mode Menu"]
    B --> F["Display Ratio"]
    B --> G["Color Temperature"]
    B --> H["System"]
    B --> I["Recall"]

    D --> J["General"]
    D --> K["Movie"]
    D --> L["Picture"]
    D --> M["Game"]

    E --> N["Brightness"]
    E --> O["Contrast"]
    E --> P["Input Signal Select"]
    E --> Q["OSD Menu Language"]
    E --> R["Display Ratio"]

    N --> S["Analog(D-SUB)"]
    N --> T["Digital(DVI)"]

    O --> U["Native Full Screen"]

    P --> V["Red Green"]
    P --> W["Blue Blue"]
    P --> X["Cool Cool"]
    P --> Y["Warm Warm"]

    Q --> Z["Power Saving Mode"]
    Q --> AA["White Balance"]
    Q --> AB["Horizontal Position"]
    Q --> AC["Vertical Position"]
    Q --> AD["Phase"]
    Q --> AE["Clock"]
    Q --> AF["DDC/CI"]
    Q --> AG["Demo Information"]

    R --> AH["English Deutsch"]
    R --> AI["Français Italiano"]
    R --> AJ["Espanol 一丈"]
    R --> AK["日本語 Norsk"]
    R --> AL["Pycoussi Sveneka"]
    R --> AM["Suomi Dansk"]
    R --> AN["Polski Nederlandse"]
    R --> AO["Portugues 加加"]

OSD Icon List
| Icon | Functions | Detail |
| AUTO ADJUSTMENT | * Optimize the picture performance automatically. | |
| THEME MODE | * Activate the built-in color engine to enhance the graphic effects according to the different situations of the display. contents | |
| BRIGHTNESS | * Adjust the luminance level of the screen. | |
| CONTRAST | * Adjust the contrast level of the screen. | |
| INPUT SIGNAL SELECT | * Select the input signal from Analog, or Digital Inputs (Optional). | |
| OSD MENU LANGUAGE | * Select your own preference of language of OSD menu. | |
| COLOR TEMPERATURE | * Select the setting of screen color-Cool, Warm or User.* Cool: Select the setting of screen color to be bluish white.* Warm: Select the setting of screen color to be reddish white, | |
| SYSTEM | * Adjust the mechanical specifications regarding the display.(Power Saving Mode, White Balance, Clock, Phase, Horizontal Position, Vertical Position, Information) | |
| POWER SAVING MODE | * Select between Standard and Advanced power saving modes.See addendum for details.* Standard: Fulfill EPA Energy Star power management requirement* Advanced: Activate monitor Life-Extension fuction | |
| FULLSCREEN | * Full Screen: adjust and enlarge the display screen to full screen size. |
| Icon | Functions | Detail |
| WHITE BALANCE | * Adjust the balance of the input signal. | |
| HORIZONTAL POSITION | * Shift the screen left or right | |
| VERTICAL POSITION | * Shift the screen up or down | |
| PHASE | * Adjust the monitor internal signal phase | |
| CLOCK | * Adjust the monitor internal sampling clock rate | |
| DDC/CI | * Select turn on or turn off DDC/CI function | |
| DEMO | * 2 seconds after activation of this function, some of the menus will stimulate feature-grading effects 2 times over. | |
| INFORMATION | * Show the frequency, resolution, input interface and other operating details about this display. | |
| RECALL | * Reset monitor parameters back to factory preset values. | |
| DISPLAY RATIO | * Select the display ratio from Native, and Full Screen |

Troubleshooting
| Symptom Check Items | |
| 1.No picture2.LED indicator is not lit. | 1. Check if the monitor is turned on (press the button 🎨 again).2. Check if the power cord is properly connected to the monitor and power outlet.3 .Check if there is electricity coming from the power outlet (use another device to check for power). |
| 1.No picture2.LED indicator is orange | 1 Check if your computer is turned on.2 Ensure the computer is not in power saving mode (move the mouse or press a key on the keyboard to wake up the computer).3 Check if the video signal cable is properly connected to the monitor and computer. |
| 1.Picture shows “ NO SIGNAL INPUT ” | 1 Check if your computer is turned on.2 Check if the video signal cable is properly connected to the monitor and computer. |
| 1.Picture shows “ INPUT SIGNAL OUT OF RANGE ” | 1. Ensure that the resolution and/or refresh rate is set correctly. |
| Important | Make sure your display setup is under VESA1440x900@75Hz |

Technical Features and Specifications
| Item | Description | ||
| Panel | Display Size | 19"W | 410.4(H)x256.5(V)mm |
| Pixel Pitch | 19"W | 0.285(H)x0.285(V)mm | |
| Connector | Analog | D-sub | |
| Digital | DVI-D(Optional) | ||
| Tilt | Tilt Angle | -5°~15° | |
| Dimensions (W x H x D) | Net | 19"W | About 437.4(W)x373.8(H)x190.7 (D)mm |
| Weight | Net | 19"W | About 3.8kg |
| Power | AC | AC 100~240V,50Hz/60Hz,1.2A | |
| Consumption | Active:<45W/Standby:<2W | ||
| Operating Condition | Temperature | 5°C to 40°C | |
| Humidity | 20% to 80% (No Condensation) | ||
| Altitude | Under 10,000 fts | ||
| Storage Condition | Temperature | -20°C to 60°C | |
| Humidity | 5% to 80% (No Condensation) | ||
| Altitude | Under 40,000 fts | ||
Interface Frequency
- The following frequency range is the working period. If the entered mode between below period but not match the frequency of supported timing, display optimization would not be assured. If the entered mode is out of the working period, the display will be blanking (just show "INPUT SIGNAL OUT OF RANGE") then go to power saving.
- Basically, mode judgment is regardless the sync polarity except both or more modes that are all belong to the supported timing list and could be judged by sync polarity only.
- In the meantime, real entered frequency of the supported timing is not requested exactly.
- Normalization of VGA card's deviation will be acceptable.
- Horizontal Frequency 31 \~ 83KHz
- Vertical Frequency 56 \~ 76Hz

Addendum
Advanced Power Saving Mode
1.Background
The traditional monitors have the function of electricity-saving dormancy. But the interval of dormancy is difficult to decide. If the interval is long, the purpose of saving electricity can not be achieved. While the interval is short, your computer and LCD monitor would be dormant often. When the LCD monitor becomes dormant, the back lights will be turned off immediately. The frequent turn-on and turn-off of lights will result in the lightness uneven and even shortening the life of the lights.
2. Our solution to the dilemma - Monitor Life-Extension function
In view of that, we have designed the function of Monitor Life-Extension. Once you select the option of "Advanced Power Saving Mode" in the OSD menu, and then you can not only save electricity, but extend the life of the lights.
3. Working principle of the Monitor Life-Extension function
To minimize the impact of frequent turn-on and turn-off of LCD monitor, the Life-Extension function decreases the electricity supplied to the back-light of LCD monitor gradually, instead of cut it off right away when PC enters sleeping or off mode. Please see following comparison graphics for details.
* Standard Power Saving Mode (without Monitor Life-Extension function)

line
| Time/Event | Power Level | | --------------------- | ----------- | | ON Power Saving Start | 0 | | High Power | High | | Low Power | 0 |* Advanced Power Saving Mode (with Monitor Life-Extension function)

line
| Time Segment | Power Level | |----------------------|-------------| | ON | 0 | | Sleep Start | 60% | | 7mins | 30% | | Power Saving Start | 10% |This "Slow-Start-n-Delay-Off" approach minimizes the transit of electricity and temperature caused by the turn-on and turn-off of LCD monitor. Therefore, the decay of backlights of TFT-LCD can be controlled in the certain level which is much less than it was.

4. The side effect of the Monitor Life-Extension function (why not preset Advanced Power Saving Mode as default?)
According to the request of EPA (US Environmental Protection Agency) to power management of monitors, the power consumption of the monitor must go down to below 3 watts within 3 seconds after the monitor steps in power saving mode. But the Life-Extension function decreases the electricity supplied to the backlights of LCD monitor gradually. Therefore, the Monitor Life-Extension function has conflict with the requirement of EPA in the first 7 minutes after entering sleeping mode. Even though, comparing the advantages of both conditions, we still recommend you strongly to set your monitor in Advanced Power Saving mode.
5.How to engage the Monitor Life-Extension function? You may simply use the OSD control to activate the Monitor Life-Extension function.
- Press arbitrarily 4 buttons (other than the Power Switch) to activate the OSD menu.
- Press EM button to enter function menu.
- Press < or > button to select system
- Press OK to confirm the selection.
- Press < or > button to select POWER SAVING MODE
- Press OK to confirm the selection.
- Press < or > button to select the advanced option in the POWER SAVING MODE functions.
- Press OK to confirm the selection.
- Press ∧ button to exit the higher level menu.
- Press the EXIT button to exit the OSD menu.

FCC compliance
- This device complies with Part 15 of the FCC Rules. Operation is subject to the following two conditions (1) this device may not cause harmful interference, and (2) this device must accept any interference received, including interference that may cause undesired operation.
- NOTE: This equipment has been tested and found to comply with the limits for a Class B digital device, pursuant to part 15 of the FCC Rules. These limits are designed to provide reasonable protection against harmful interference in a residential installation. This equipment generates, uses and can radiate radio frequency energy and, if not installed and used in accordance with the instructions, may cause harmful interference to radio communications. However, there is no guarantee that interference will not occur in a particular installation, if this equipment does cause harmful interference to radio or television reception, which can be determined by turning the equipment off and on, the user is encouraged to try to correct the interference by one or more of the following measures:
- Reorient or relocate the receiving antenna.
- Increase the separation between the equipment and receiver.
- Connect the equipment to an outlet on a circuit different from that to which the receiver is connected.
- Consult the dealer or an experienced radio/TV technician for help.
| WARNING: | Any unauthorized modification to this equipment could result in the revocation of the authorization to operate the equipment and void the product warranty. |


- 19" wide LCD Monitor User Manual
- - English
- PRECAUTIONS
- GETTING STARTED
- Troubleshooting.6
- Technical Features and Specifications 7
- Addendum
- TcDevelopment
- Congratulations!
- Some of the features of the TCO'03 Display requirements:
- Ergonomics
- Energy
- Emissions
- Ecology
- Information for users applicable in European Union countries
- Information for users applicable in United States of America
- Installation
- Power connection
- Maintenance
- Transporting the monitor
- Package contents
- Monitor installation
- Identifying parts and controls
- Working with OSD Group
- Customizing your Monitor
- Important:
- Hotkeys Introduction
- Auto Adjustment
- Volumn Control (with audio option)
- Theme Mode Menu
- 4.Main Menu
- Function Keys Operation
- Troubleshooting
- Technical Features and Specifications
- Interface Frequency
- Advanced Power Saving Mode
- 1.Background
- Our solution to the dilemma - Monitor Life-Extension function
- Working principle of the Monitor Life-Extension function
- The side effect of the Monitor Life-Extension function (why not preset Advanced Power Saving Mode as default?)
- 5.How to engage the Monitor Life-Extension function? You may simply use the OSD control to activate the Monitor Life-Extension function.
- FCC compliance
Brand : V7
Model : D19W12B-N6
Category : Screen