6090BV - Range hood PKM - Free user manual and instructions
Find the device manual for free 6090BV PKM in PDF.


| Product Type | Range Hood |
| Brand | PKM |
| Model | 6090BV |
| Width | 90 cm |
| Mounting Type | Wall-mounted (chimney) |
| Extraction Rate (Max) | 650 m³/h |
| Number of Speeds | 3 |
| Noise Level (Max) | 65 dB(A) |
| Lighting | 2 x 1.5W LED |
| Motor Power | 230 W |
| Power Supply | 220-240 V, 50 Hz |
| Energy Class | A |
| Filter Type | Aluminum grease filter (washable) |
| Charcoal Filter | Optional for recirculation mode |
| Ducting | 150 mm diameter |
| Controls | Push button |
| Weight | Approx. 18 kg |
| Dimensions (W x D x H) | 90 x 50 x 60-110 cm (height adjustable) |
| Maintenance | Clean grease filter monthly; replace charcoal filter every 3-6 months |
| Safety Features | Automatic shut-off (timer) on some models, overheat protection |
| Spare Parts Availability | Filters, bulbs, motor available through service |
Frequently Asked Questions - 6090BV PKM
User questions about 6090BV PKM
0 question about this device. Answer the ones you know or ask your own.
Ask a new question about this device
Download the instructions for your Range hood in PDF format for free! Find your manual 6090BV - PKM and take your electronic device back in hand. On this page are published all the documents necessary for the use of your device. 6090BV by PKM.
USER MANUAL 6090BV PKM
natural_image
Black industrial smoke hood with conical chimney and ventilation slots (no visible text or symbols)6090V
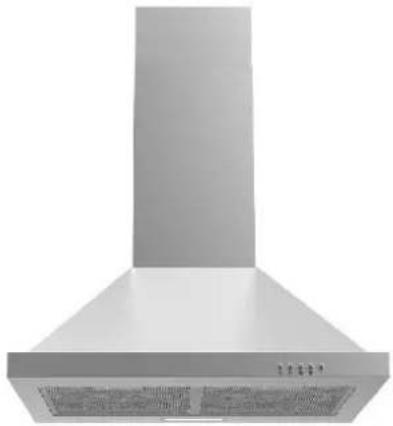
natural_image
Exterior view of a stainless steel kitchen range hood (no visible text or symbols)Deutsch
Seite
2
English
Page
42
www.pkm-online.de
natural_image
Technical line drawing of a mechanical component with threaded top and base (no text or symbols)natural_image
Simple line drawing of a 3D object resembling a chimney or duct, with no text, numbers, or symbols present.natural_image
Simple line drawing of a cabinet or shelf with an arrow indicating direction (no text or symbols)a. KAMININSTALLATION/ABLUFTBETRIEB
b. KAMININSTALLATION/UMLUFTBETRIEB
natural_image
Technical line drawing of a brick wall with a chimney and pipe connection (no text or symbols)natural_image
Diagram showing a hand using a tool to adjust or install a component, with an inset magnified view of the device's internal structure (no text or symbols present)natural_image
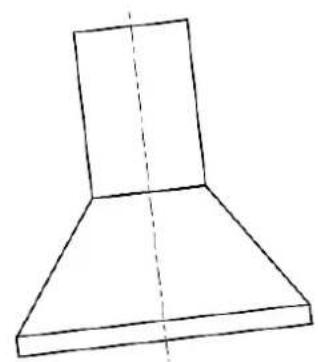
Simple line drawing of a conical chimney or fan shape with a dashed vertical line indicating symmetry (no text or symbols)RICHTIG
natural_image
Simple line drawing of a conical shape with a dashed vertical line through its top (no text or symbols)FALSCH
natural_image
Diagram of a conical device emitting arrows, no text or symbols present3.3 Aluminium-Fettfilter
natural_image
Illustration of a hand holding a tablet with a finger pointing at it, showing a download icon (no text or symbols present)Dear customer! We would like to thank you for purchasing a product from our extensive range. Please read the entire operating instructions before using the appliance for the first time. Keep these operating instructions in a safe place for future reference. If you pass the appliance on to someone else, you must also hand over these operating instructions.
Contents
Contents....42
- safety instructions.... 44
1.1 Signal words....45
1.2 Safety instructions....45
- installation 49
2.1 General installation instructions....49
2.1.1 Scope of delivery....50
2.2 Important installation instructions for exhaust air operation .... 51
2.3 Minimum distances 51
2.4 Device view....53
2.5 Installation : Non-return flap / extractor hood .... 53
2.5.1 Installing the non-return flap.... 54
2.5.2 Installing the extractor hood.... 56
2.6 Electrical connection....61
- exhaust air mode / recirculation mode 61
3.1 Exhaust air operation....61
3.2 Recirculation mode 62
3.2.1 Carbon filter 62
3.3 Aluminum grease filter....64
- Control panel and operation 65
4.1 Control panel 65
4.2 Operation....65
4.2.1 Power levels 66
- environmental protection....67
5.1 Environmental protection: Disposal....67
5.2 Environmental protection: Saving energy....67
- cleaning and care....68
6.1 Cleaning the aluminum grease filter s....69
6.2 Carbon filter 71
6.3 Replacing the LED light source 72
7. troubleshooting....72
8. technical data....75
9.disposal....76
10. warranty conditions....77
Do not dispose of this device together with your household waste. The device may only be disposed of via a collection point for reusable electrical and electronic devices. Do not remove the symbols / sticker on the device.
The illustrations contained in these operating instructions may differ in some details from the actual design of your device. However, if this is the case, please follow the instructions.
The manufacturer reserves the right to make changes that do not affect the operation of the device.
i Dispose of the packaging material in accordance with the local regulations of your place of residence.
The appliance you have purchased may have been improved in the meantime and may therefore differ from the operating instructions. Nevertheless, the functions and operating conditions are identical so that you can make full use of the operating instructions.
i We reserve the right to make technical changes and printing errors.
EC - DECLARATION OF CONFORMITY
★ The products described in these operating instructions comply with all harmonized requirements.
★ The relevant documents can be requested by the competent authorities via the product seller.
THESE OPERATING INSTRUCTIONS MUST ALWAYS BE ACCESSIBLE TO ANY PERSON OPERATING THE APPLIANCE; MAKE SURE THAT THE OPERATING INSTRUCTIONS HAVE BEEN READ AND UNDERSTOOD BEFORE OPERATING THE APPLIANCE.
BEFORE USING THE APPLIANCE FOR THE FIRST TIME, READ THE ENTIRE SAFETY INFORMATION AND SAFETY INSTRUCTIONS CAREFULLY.
The information contained therein is intended to protect your health. Failure to observe the safety instructions can lead to serious damage to your health and, in the worst case, to death.
Keep these operating instructions in a safe place so that they are always to hand when required. Follow all instructions carefully to avoid accidents or damage to the appliance.
i Be sure to check the technical environment of the appliance! Are all the cables or lines leading to your appliance in good order? Or are they outdated and no longer able to cope with the appliance's performance? A qualified specialist (electrical engineer) must therefore check both existing and new connections. All work required to connect the appliance to the power supply may only be carried out by a qualified electrician.
i The device is intended exclusively for private use.
The appliance is intended exclusively for the removal of kitchen vapors in a private household.
i The appliance is intended exclusively for operation in closed rooms.
This device may not be used for commercial purposes, when camping or on public transportation.
i Only operate the device in accordance with its intended use.
Do not allow anyone who is not familiar with the operating instructions to use the appliance.
This appliance can be used by children aged from 8 years and above and persons with reduced physical, sensory or mental capabilities or lack of experience and knowledge if they have been given supervision or instruction concerning use of the appliance in a safe way and understand the hazard involved. Children must not play with the appliance. Cleaning and user maintenance must not be carried out by children without supervision.
1.1 Signal words
⚠️ DANGER! indicates a hazardous situation which, if not averted, will result in immediate danger to life and health.
⚠ WARNING! indicates a hazardous situation which, if not avoided, may result in imminent danger to life and health.
⚠️ CAUTION! indicates a hazardous situation which, if not avoided, could result in moderate or minor injury.
NOTICE! indicates a hazardous situation which, if not avoided, may result in damage to the appliance.
1.2 Safety instructions
DANGER!
To reduce the risk of electric shock:
- Failure to observe the instructions in this operating manual endangers the life and health of the appliance operator may damage the appliance.
- Do not use the appliance if it is not working properly, is visibly damaged or has been dropped, or if the mains cable or plug is damaged.
- If the mains connection cable is damaged, it may only be replaced by the manufacturer or a customer service agent authorized by the manufacturer or a qualified specialist (electrical engineer).
- All electrical work that may be necessary to connect the appliance to the power supply must be carried out by a qualified specialist (electrical engineer). No changes or arbitrary modifications may be made to the power supply. The connection must be made in accordance with the locally applicable legal regulations.
- The current voltage and power frequency of the power supply must correspond to the values specified on the rating plate.
-
The appliance contains a gas strut. The gas strut is under pressure and must not be opened. If the gas strut is damaged, it may only be replaced by the manufacturer or a customer service authorized by the manufacturer or a qualified specialist (electrical engineer). If the gas strut does not work properly, contact customer service or the store where you purchased the appliance. ^12 Only have original spare parts fitted.
-
Never attempt to repair the appliance yourself. Repairs carried out by unqualified persons can lead to serious injury and damage. If your appliance is not working properly, contact customer service or the store where you purchased the appliance. ^13 Only have original spare parts fitted.
- Should any malfunction occur due to a technical defect, disconnect the appliance from the power supply immediately (switch off the corresponding house fuse). Contact customer service or the store where you purchased the appliance. ^14 RISK OF ELECTRIC SHOCK!
- Before switching on the appliance, make sure that no open fire is burning. Otherwise, toxic combustion gases may be drawn from the chimney or flue of the fireplace into the living area. Ensure that there is a sufficient supply of fresh air in the room where the cooker hood is in exhaust air mode and that chimney-dependent fires (e.g. coal stoves) are in operation. Always consult your responsible chimney sweep. If you use the extractor hood in recirculation mode, the simultaneous operation of a room air-dependent fireplace is harmless.
- If a flammable gas should escape from your home:
e) Open all windows for ventilation.
f) Do not pull the plug out of the socket and do not use the control panel or switches.
g) Do not touch the appliance until all gas has been removed.
h) Failure to follow these instructions may result in sparks that ignite the gas.
-
Never use the mains connection cable to disconnect the mains plug. Always pull the mains plug itself to disconnect the appliance from the power supply. DANGER OF ELECTRIC SHOCK!
-
Never touch the mains plug, the mains switch or other electrical components with wet or damp hands. RISK OF ELECTRIC SHOCK!
⚠ WARNING!
To reduce the risk of burns, electric shock, fire or personal injury:
-
If you operate the extractor hood together with other non-electrically powered appliances (gas and oil burning appliances), the negative pressure in the corresponding room must not exceed a value of 4 Pa ( 4 × 10^-5 bar).
-
Only operate the appliance with 220\~240 V AC / 50 Hz. Do not use
power strips, multiple sockets or extension cables for 220\~240 V AC / 50 Hz mains operation. All mains connection cables that show signs of damage must be replaced by a qualified electrician.
- The appliance may only be connected to a properly earthed socket.
- The appliance must be earthed. Only use an appropriate safety socket to minimize the risk of electric shock.
- The technical data of your electrical supply must correspond to the values specified on the rating plate.
- Your domestic power supply must be equipped with an automatic circuit breaker for emergency shutdown of the appliance.
- Observe the minimum distances between the extractor hood and the hob when installing the appliance.
| Glass ceramic and cast iron hotplates | min. 65.00 cm |
| Gas hobs | min. 65.00 cm |
| Coal / oil / wood firing | min. 85.00 cm |
- Never install below the minimum installation height. If the minimum distances are not observed, the grease accumulated in the filters can ignite due to the heat radiation from the hob. FIRE HAZARD!
- Before installing the appliance, the wall/ceiling ^15 of the installation room must be checked for load-bearing capacity! The appliance may only be installed in a suitable location.
- Check the route of electrical and other cables in the installation area of the appliance; this will prevent these cables from being accidentally drilled into. RISK OF ELECTRIC SHOCK!
- We recommend having the extractor hood installed by qualified specialists. Any damage caused by improper installation of the appliance is not covered by the guarantee or warranty.
- Never prepare flambéed dishes under the extractor hood. The open flames can destroy the appliance and cause a fire.
- Do not use the burners of gas stoves without a cooking utensil. The open flames can destroy the appliance and cause a fire.
- When deep-frying food, supervise the frying process at all times as the oil can catch fire. The risk of spontaneous combustion increases if frying oil is used repeatedly.
- Do not carry out any other activities with open flames. Open flames can destroy the appliance and cause a fire.
- The exhaust air hose (depending on the model) must not be made
of flammable material and must not contain any flammable materials.
- The appliance may only be operated with grease filters fitted, otherwise grease transported by the vapor will be deposited in the hood and in the exhaust air system. FIRE HAZARD! Clean or replace the filters regularly.
- Disconnect the appliance from the power supply before carrying out any cleaning or maintenance work on the appliance.
- Failure to follow the cleaning and care instructions leads to an increased risk of fire due to grease deposits.
- When unpacking, make absolutely sure that the components of the packaging (polyethylene bags, polystyrene pieces) are kept out of the reach of children. DANGER OF SUFFOCATION! RISK OF INJURY! RISK OF INJURY!
- Always supervise children when they are in the vicinity of the appliance.
- Children must not play with the appliance.
- Only allow children to use the appliance unsupervised if they have previously been instructed in the use of the appliance in such a way that they can operate the appliance safely and are fully aware of the dangers arising from improper operation.
CAUTION!
- Accessible and touchable parts of the hood can become hot when the hood is used together with a cooking appliance.
- Every user must take care not to hit their head on the corners and edges of the appliance; otherwise BRUISES AND INJURIES TO THE EYE AREA may occur!
- Install the appliance with at least two people, otherwise you may damage the appliance or cause injury to the person working on the appliance.
NOTE!
- The appliance must be transported and connected by at least two people.
- Unpack the fireplace parts with extreme care; otherwise you will damage the fireplace parts!
-
Remove all packaging material before using the appliance. The appliance may be protected with transport locks for transportation. Remove these completely. Proceed carefully when doing so. Do not use any aggressive cleaning agents to remove the remains of transport locks.
-
Be sure to remove all accessories from the packaging and the polystyrene components!
- Do not use any aggressive or corrosive cleaning agents or sharp-edged objects to clean the appliance, as these will scratch the surface. RISK OF DAMAGE!
- Constant care and maintenance ensure flawless operation and optimum performance of your appliance.
- Before connecting the appliance, check that the mains cable or the appliance itself is not damaged.
- The type plate must never be made illegible or removed! If the rating plate has been defaced or removed, all warranty claims are void!
READ THESE INSTRUCTIONS CAREFULLY AND KEEP THEM IN A SAFE PLACE.
★ No liability for personal injury or material damage will be accepted if these instructions are not followed.
2. installation
NOTE! Any damage caused by an improperly installed and/or improperly connected device is not covered by the guarantee or warranty.
We recommend having the extractor hood installed by qualified specialists. Any damage caused by improper installation of the appliance is not covered by the guarantee or warranty.
2.1 General installation instructions
Before installing the appliance, the wall/ceiling of the installation room must be checked for load-bearing capacity and load-bearing capacity.
This device may only be installed in a suitable location.
➢ Check the route of electrical and other cables in the installation area; this will prevent these cables from being accidentally drilled into.
Clean the surrounding area thoroughly before installation. This will prevent dust or building debris from being sucked in when the appliance is first used.
During installation, make sure that the cooker hood hangs horizontally to avoid grease accumulating in one corner of the hood.
2.1.1 Scope of delivery
i Make sure that all components listed below (see table) are included in the scope of delivery and are in good condition.
| Extractor hood | 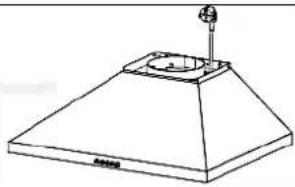 | 1x |
| Inner fireplace | 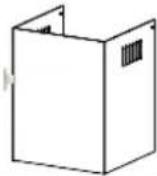 | 1x |
| Outer chimney | 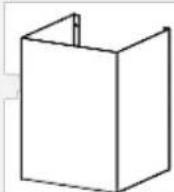 | 1x |
| air hose(only for exhaust air operation) | 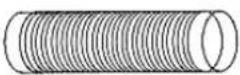 | 1x |
| Indoor chimney bracket | 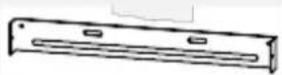 | 1x |
| Wall bracket up | 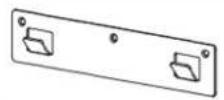 | 1x |
| Wall bracket down | 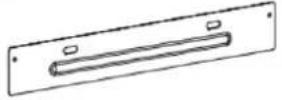 | 1x |
| Dowel | 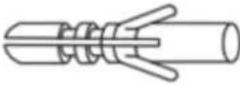 | 7x |
| Screws | 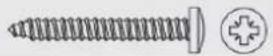 | 6x |
| Screws | 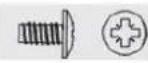 | 6x |
| Screws | 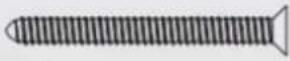  | 3x |
| Non-return cap | 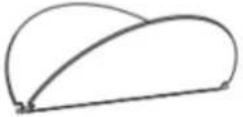 | 1x |
2.2 Important installation instructions for exhaust air operation
⚠ WARNING! The exhaust air must not be fed into a chimney that is used for exhaust gases from appliances that run on gas or other fuels.
Always observe all applicable legal and official regulations when discharging the exhaust air.
The diameter of the exhaust air hose must match the diameter of the connecting ring.
If your appliance is fitted with a charcoal filter at the factory and you want to use your appliance in exhaust air mode, you must remove the charcoal filter. A charcoal filter is only useful for recirculation mode.
The exhaust air duct should be as short and straight as possible. The diameter of the exhaust air duct must be at least 120/150 mm (see chapter TECHNICAL DATA), as otherwise increased running noise and reduced extraction performance are to be expected.
Make sure to maintain the radius when using or forming bends, otherwise the performance of the appliance will be reduced. The maximum permissible outward bend is 120^ .
Only use smooth pipes or flexible exhaust air hoses made of non-combustible material.
When laying the exhaust air duct horizontally, maintain a minimum gradient of 1 cm/m or an angle of inclination of 2^ . Otherwise condensation will run into the motor of the extractor hood.
If the exhaust air is fed into an exhaust air shaft, the end of the inlet connector must be aligned in the direction of flow.
If the exhaust air duct is routed through cool rooms (e.g. attic), a large temperature gradient can occur within the individual duct areas. In this case, condensation will form in the affected areas, which makes it essential to insulate the affected areas. In addition to insulation, equip such an exhaust air duct with a condensation barrier if necessary.
➢ Depending on the model, your extractor hood may be equipped with one (top) or two (top and rear) extractor openings. The opening that is not required is fitted with a plastic cover that can be removed by turning it anticlockwise and placed on the opening that is not required.
2.3 Minimum distances
The minimum distance between the extractor hood and an electric hob must be at least 65.00 cm.
When installing the appliance, observe the minimum distances between the extractor hood and the hob/stove.
i It is also essential to observe the individual minimum distances between hobs / ovens and extractor hoods; these are specified in the operating instructions for your hob / oven, etc.
| REQUIRED MINIMUM DISTANCE:LOWER EDGE OF HOOD BODY TO | |
| Glass ceramic and cast iron hotplates | min. 65.00 cm |
| Gas hobs | min. 65.00 cm |
| Coal / oil / wood firing | min. 85.00 cm |
- The minimum distances do not specify a mandatory overall installation height, but only a minimum value that is created by adding the height of the cooktop (floor cooktop) and the required minimum distance of the corresponding type of cooktop to the extractor hood (cooktop extractor hood), i.e. applies:
$$ \begin{array}{c c} & (\text {floor} \leftrightarrow \text {hob / stove}) \ + & (\text {hob / stove} \leftrightarrow \text {extractor hood}) \ \hline = & \text {MINIMUM INSTALLATION HEIGHT} \end{array} $$
- Adjust the overall installation height to the user's height. Please note that the extraction efficiency of the appliance may be reduced at a very large distance from the cooktop.
⚠ WARNING! Never install below the minimum installation height. If the minimum distances are not observed, the grease accumulated in the filters can ignite due to the heat radiation from the cooktop. FIRE HAZARD!
⚠️ CAUTION! Every user must take care not to bump their head on the corners and edges of the extractor hood; otherwise BRUISES AND INJURIES TO THE EYE AREA may occur!
2.4 Device view
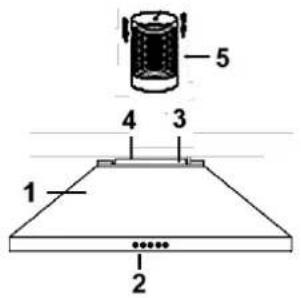
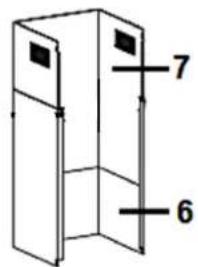
Fig. similar: Fig. serve only as an example.
| 1 | HOUSING OF THE EXTRACTOR HOOD |
| 2 | CONTROL PANEL |
| 3 | EXHAUST AIR OUTLET |
| 4 | NON-RETURN FLAP |
| 5 | EXHAUST AIR HOSE (only for exhaust air operation) |
| 6 | OUTER CHIMNEY |
| 7 | INNER FIREPLACE |
2.5 Installation : Non-return flap / extractor hood
⚠ WARNING! For safety reasons, only use fastening or installation screws in the sizes specified in these operating instructions. Failure to observe the size and installation instructions for screws or fastening devices can result in electric shock! RISK OF ELECTRIC SHOCK!
⚠ WARNING! Do not damage any electrical cables in the walls when drilling. RISK OF ELECTRIC SHOCK!
NOTE! You will need two more people to install the appliance.
NOTE! Any damage caused by an improperly installed and/or improperly connected device is not covered by the guarantee or warranty.
We recommend having the extractor hood installed by qualified specialists. Any damage caused by improper installation of the appliance is not covered by the guarantee or warranty.
| YOU CAN ROUTE THE EXHAUST AIR DUCT AS FOLLOWS(ONLY FOR EXHAUST AIR OPERATION) | |
| Vertical: The exhaust air hose is routed to an outlet cap* in the roof. | 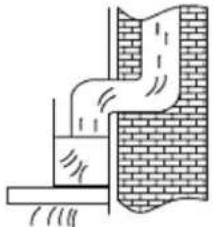 Fig. similar. Fig. similar. |
| Horizontal: The exhaust air hose is routed to an outlet opening with grille* in the house wall. | 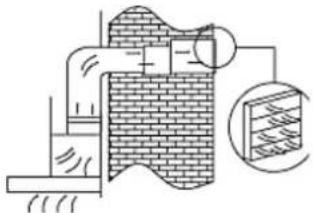 Fig. similar. Fig. similar. |
| * | Item not included in the scope of delivery. |
2.5.1 Installing the non-return flap
If the non-return flap is not installed on your appliance at the factory, you still need to install it. The following illustrations only show an example of the standard installation of a non-return flap, as the exhaust air outlet may vary depending on the model and configuration of the appliance.
The non-return damper consists of two damper parts (a / b). Both damper parts must be installed individually in the housing of the exhaust air outlet (c) (see fig. below).
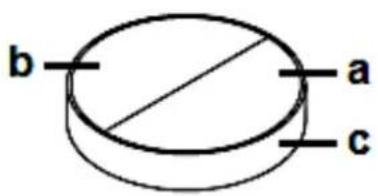
| a | NON-RETURN FLAP: flap part " a " |
| b | NON-RETURN FLAP: flap section " b " |
| c | HOUSING OF THE EXHAUST AIR OUTLET |
INSTALLATION STEPS
-
The two individual damper sections (a / b) each consist of a semicircle including an axle (d). An axle pin (e / see illustration below) is located in the middle of the axle (d) of a damper section.
-
Carefully insert the axle (d) of a damper section into the corresponding openings (f / on both sides) in the housing of the exhaust air outlet (c); the axle pin (e) must be pointing upwards (see fig. below).
-
Repeat the 2nd step for the other flap section.
-
Make sure that both parts of the non-return flap are properly installed. The flap parts must not jam or get caught.
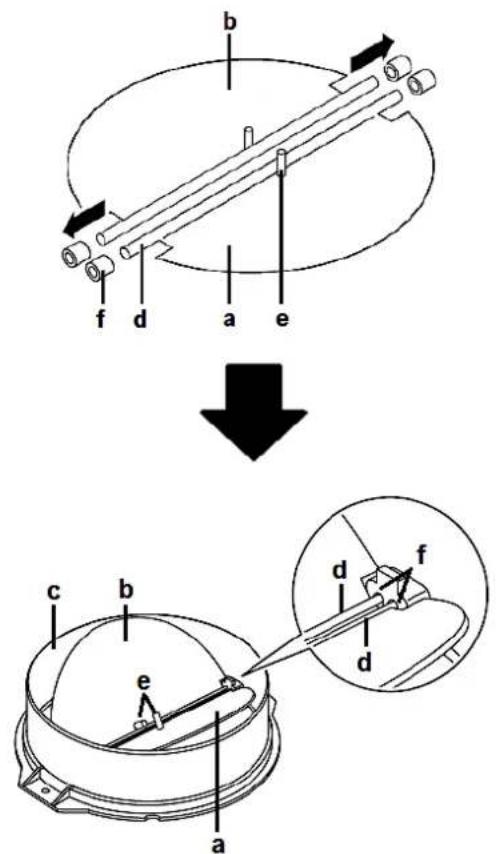
| a | NON-RETURN FLAP: flap part " a " |
| b | NON-RETURN FLAP: flap section " b " |
| c | HOUSING OF THE EXHAUST AIR OUTLET |
| d | AXLES |
| e | AXLE PINS |
| f | OPENINGS IN THE HOUSING OF THE EXHAUST AIR OUTLET (on both sides) |
2.5.2 Installing the extractor hood
The minimum distance between the extractor hood and an electric hob must be at least 65.00 cm.
INSTALLATION DRAWING
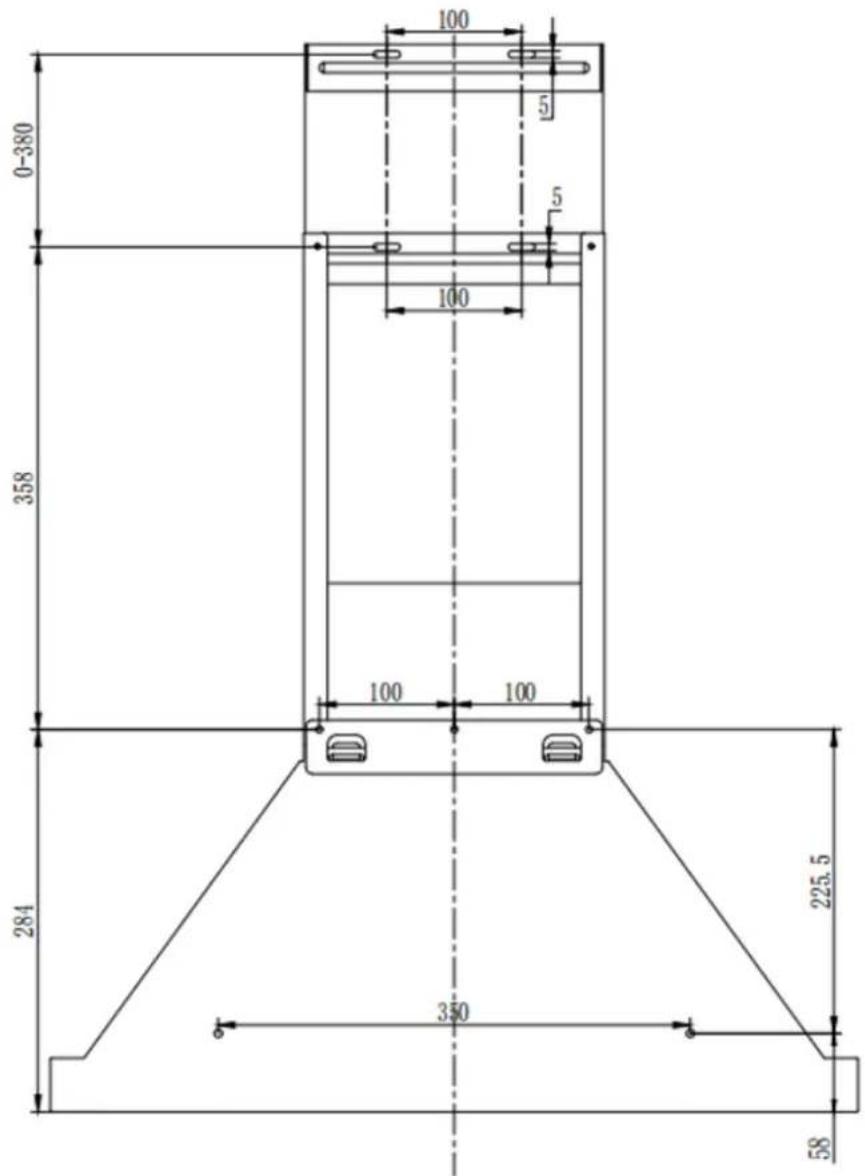
| OPTION | FIREPLACE | X |
| 1 | 400+ 0 mm | / |
| 2 | 400 + 300 mm | 410 - 650 mm |
| 3 | 400 + 390 mm | 410 - 740 mm |
| 4 | 500 + 490 mm | 510 - 940 mm |
INSTALLATION STEPS
- Determine a suitable position for the extractor hood on the wall.
- Draw a vertical line (reference line) in the middle of the area where the hood is to be fitted up to the ceiling or up to the upper limit (see illustration above).
- Mark the wall with the positions of the holes. Observe the minimum distances to the cooktop.
- Measure and mark the positions of the six required drill holes (two for attaching the internal chimney bracket and four for attaching the extractor hood housing). Make sure that the minimum distances are observed
Note that the position of the screw holes for fastening the indoor fireplace bracket is also the highest point of the entire fireplace
- Drill holes ( 10 mm drill bit) at the 6 marked points and insert the wall plugs into the holes.
- Attach the suspension device to the wall with 3 flat-head screws and tighten the screws.
Note that the position of the screw holes for fastening the indoor fireplace bracket is also the highest point of the entire fireplace
- Hang the hood on the screw heads along the horizontal line. Ensure that the hood is aligned horizontally.
- Remove the grease filters (see chapter 6.1 CLEANING THE GREASE FILTERS). Fasten the hood to the wall along the horizontal line using 2 screws. Replace the grease filters.
- EXHAUST AIR MODE: Connect the exhaust air hose to the exhaust air outlet of the extractor hood (see illustration below). Attach the exhaust air hose to the exhaust air outlet with a cable tie (see illustration below).
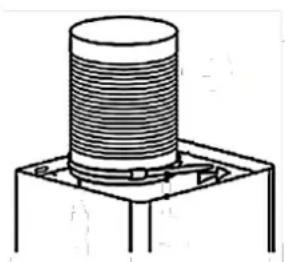
natural_image
Pure technical diagram of a mechanical component with no text or symbolsFig. similar: Fig. serves only as an example.
- Attach the outer chimney to the extractor hood with 2 screws (see illustration below).
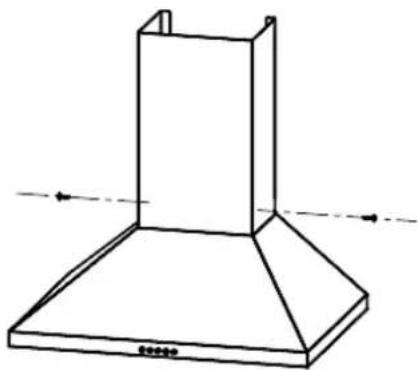
natural_image
Line drawing of a 3D object resembling a chimney or canopy with directional arrows indicating orientation (no text or symbols)Fig. similar: Fig. serves only as an example.
- Insert the inner chimney into the outer chimney (see illustration below).
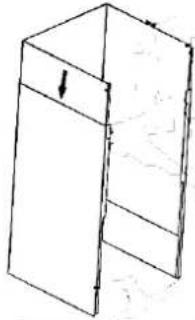
natural_image
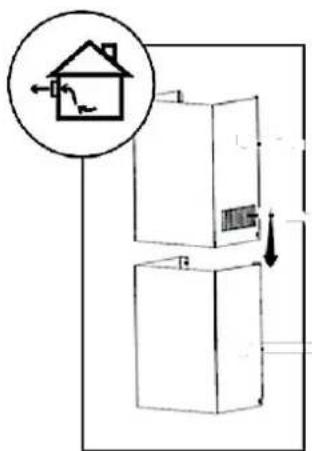
Simple line drawing of a cabinet or shelf with an arrow indicating direction (no text or symbols)c. CHIMNEY INSTALLATION / EXHAUST AIR OPERATION
The air slots ^16 of the inner chimney must point downwards and be covered by the outer chimney (see illustration below). The air slots in the inner chimney are not available on all appliance models. If your appliance model does not have air slots in the inner chimney, you can skip this point.
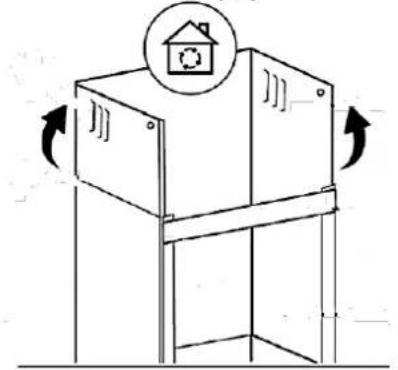
d. CHIMNEY INSTALLATION / RECIRCULATION MODE
The air slots ^17 of the inner chimney must point upwards and must not be covered by the outer chimney. The air slots in the inner chimney are not available on all appliance models. If your appliance model does not have air slots in the inner chimney, you can skip this point.
natural_image
Simple line drawing of a cabinet with arrows indicating rotation, no text or symbols present- Route the exhaust air hose (only for exhaust air operation) to the outside (see illustration below).
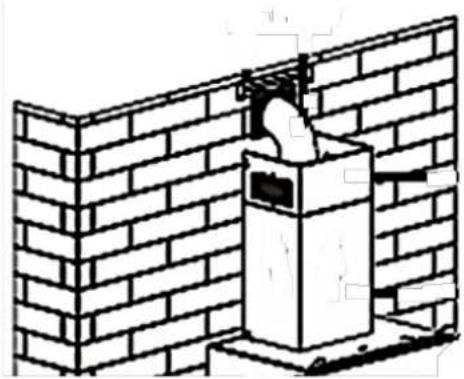
natural_image
Diagram of a brick chimney mounted on a wall, showing structural components without any text or symbols.Fig. similar: Fig. serves only as an example.
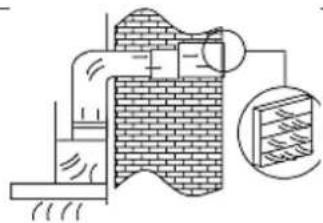
- You can route the exhaust air duct as follows (see below / ONLY for EXHAUST AIR OPERATION).
| Vertical: The exhaust air hose is routed to an outlet cap* in the roof. | 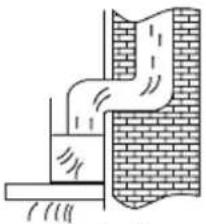 Fig. similar. Fig. similar. |
Horizontal: The exhaust air hose is routed to an outlet opening with grille* in the house wall.
natural_image
Diagram of a brick wall with an inset showing a magnified view of a grid structure (no text or symbols)Fig. similar.
*
Item not included in the scope of delivery.
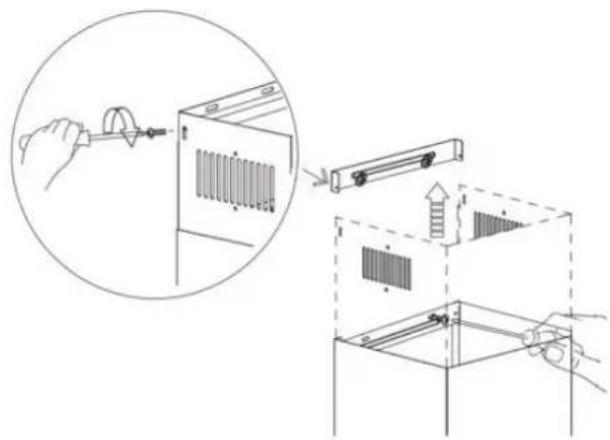
- Pull the inner flue out upwards. Align the chimney according to the attached inner chimney bracket. Fix the inner flue to the inner flue bracket with two screws (ST 4.2*9.5 mm) (see illustration below).
- Install the grease filter(s) (if not already installed) and connect the mains cable ^18 to the power supply. The installation of the grease filter is described in chapter 6.1 CLEANING THE GREASE FILTER.
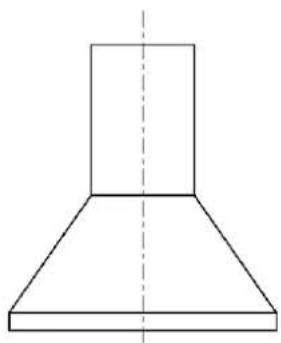
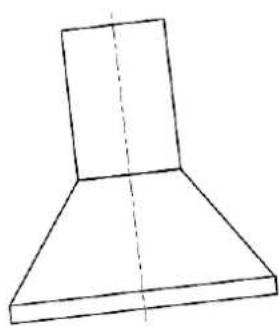
- Check that your device is mounted straight and level on the wall from the front and side perspective (see illustration below), otherwise the device will not work properly.
natural_image
Simple line drawing of a conical chimney or fan shape with a dashed vertical line indicating symmetry (no text or symbols)RIGHT
natural_image
Simple line drawing of a 3D geometric shape resembling a chimney or fan (no text or symbols)WRONG
⚠ WARNING! The appliance may only be operated with the grease filters inserted, otherwise grease transported by the vapor will be deposited in the hood. FIRE HAZARD!
2.6 Electrical connection
Before connecting the extractor hood to the mains supply, check that the voltage specified on the rating plate matches the mains voltage of your apartment/house.
Before connecting the cooker hood to the mains, check that the appliance is properly installed.
NOTE! Any damage caused by an improperly connected device is not covered by the guarantee or warranty.
3. exhaust air mode / recirculation mode
3.1 Exhaust air operation
⚠ WARNING! The exhaust air must not be fed into a chimney that is used for exhaust gases from appliances that run on gas or other fuels.
The extractor hood is usually (but modifications are possible) pre-equipped for use as an exhaust hood.
In exhaust air mode, the air drawn in is led outside through an exhaust air hose. For this, an exhaust air shaft or an exhaust air pipe leading to the outside must be available in your house/apartment.
If your appliance is fitted with a carbon filter at the factory and you want to use your appliance in exhaust air mode, you must remove the carbon filter.
For exhaust air operation, be sure to follow the instructions in chapter 2 INSTALLATION ff. and chapter 2.5.2 INSTALLING THE EXTRACTOR HOOD: step 12 "EXHAUST AIR OPERATION", STEP 14a, step 15 and step 16.
3.2 Recirculation mode
You can also use the appliance in recirculation mode.
If you do not use an exhaust air duct to the outside for the installation of the extractor hood, but operate the extractor hood in recirculation mode, the exhaust air hose is not required.
In recirculation mode, the exhaust air is fed back into the kitchen (see illustration below).
If you want to use the appliance in recirculation mode, you can install charcoal filters (see chapter 3.2.1 CHARCOAL FILTERS).
In addition to the grease filters (must always be installed), charcoal filters also neutralize odours and absorb fine dust particles etc.. As a result, charcoal filters also improve the exhaust air that is returned to the kitchen. We always recommend the use of charcoal filters in recirculation mode.
The installation of the extractor hood in recirculation mode is the same as described in chapter 2.5.2 INSTALLING THE EXTRACTOR HOOD: Step 12 "EXHAUST AIR MODE", STEP 14 a., step 15. and step 16. do not need to be observed.
i You can only use charcoal filters to eliminate cooking vapors in recirculation mode.
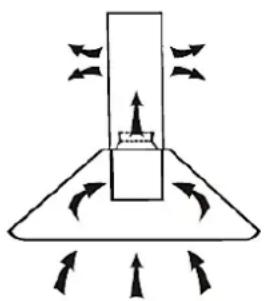
natural_image
Diagram of a mechanical or fluid system with directional arrows and a central block, no text or symbols present.Fig. similar: Fig. serves only as an example.
3.2.1 Carbon filter
⚠ WARNING! Carbon filters may only be used in recirculation mode!
i Replace the CHARCOAL FILTERS regularly; see also the CLEANING AND CARE chapter.
⚠ WARNING: Always switch off the appliance before fitting carbon filters and disconnect it from the power supply (appropriate fuse in the house fuse box).
This chapter only describes a common installation of carbon filters in a standard extractor hood. Modifications for different appliance models are possible.
The number of aluminum grease filters depends on the extractor hood model. The number of aluminum grease filters for your appliance model is specified in the "TECHNICAL DATA" section. A standard appliance model with only one grease filter is used here as an example.
7. Remove the aluminum grease filter: Press the grease filter towards the back of the appliance and pull it downwards at the same time to release it from its catch (see also chapter 6.1 CLEANING THE GREASE FILTER). Then remove the grease filter.
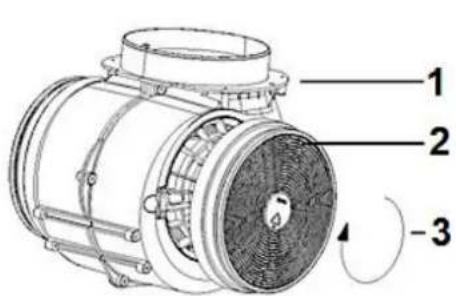
The motor of the appliance, on which the charcoal filters are installed, is located behind the grease filter.
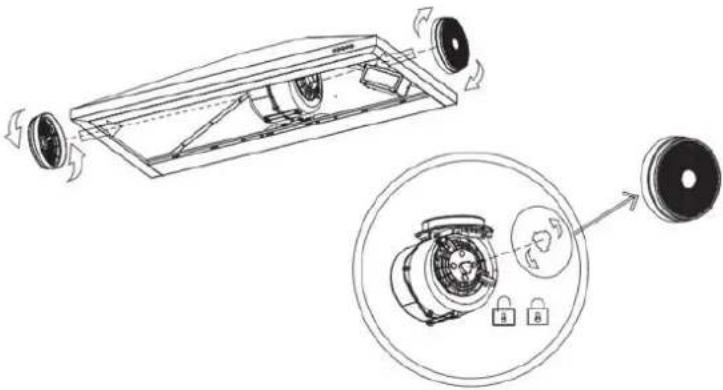
8. The CARBON FILTERS are attached to both sides of the motor.
9. Place the CARBON FILTER (2) on the motor (1) and turn it clockwise (3) until it is properly and firmly seated on the motor (see illustration below).
natural_image
Technical line drawing of a mechanical device with exploded view and close-up detail (no text or symbols)Fig. similar: Modifications are possible.
| 1 | MOTOR |
| 2 | CARBON FILTER |
| 3 | CLOCKWISE ROTATION:The CARBON FILTER is placed on the motor and turned slightly to the right until it is firmly seated on the motor. |
- Repeat the process on the other side of the motor.
-
If you want to uninstall the CHARCOAL FILTERS, carefully turn them to the left to loosen them and remove them.
-
Reinstall the grease filter: Insert the grease filter correctly into the corresponding slots on the extractor hood. Then carefully press the aluminum grease filter into its correct position.
⚠ WARNING! Attach the carbon filters securely and properly. Otherwise, the carbon filters may become loose and cause hazards.
⚠ WARNING! The appliance may only be operated with the grease filters inserted, otherwise grease transported by the vapor will be deposited in the hood. FIRE HAZARD!
NOTE! The suction power is reduced by the carbon filters.
NOTE! Change the charcoal filters at least every three to six months, depending on how the hood is used. Clean the grease filter regularly to ensure proper operation of the motor (see chapter CLEANING AND CARE).
3.3 Aluminum grease filter
i Make sure that the aluminum grease filter ^19 is always inserted correctly.
Clean the aluminum grease filter regularly (see chapter CLEANING AND CARE).
⚠ WARNING! The appliance may only be operated with the aluminum grease filter inserted, otherwise grease transported by the vapour will be deposited in the hood. FIRE HAZARD!
4.1 Control panel
⚠ WARNING! Never cover the light source with heat-insulating or other objects. FIRE HAZARD!
⚠️ CAUTION! Do not touch the lighting for 30 minutes after operating the appliance. RISK OF BURNS!
NOTE! Only use the lighting units when the appliance is in operation. Do not use the lighting units for room lighting.
NOTE! Never press two buttons on the control panel at the same time.
CONTROL PANEL
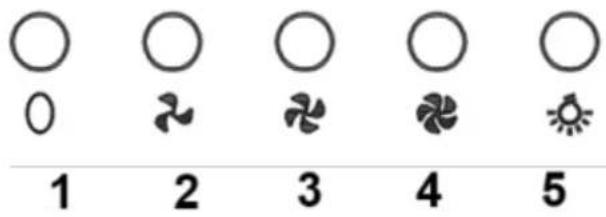
| 1 | FROM |
| 2 | LOWEST SETTING |
| 3 | MEDIUM SETTING |
| 4 | HIGHEST SETTING |
| 5 | LIGHT ON / OFF |
4.2 Operation

"OFF" BUTTON
You can switch the extractor hood off using the "OFF" BUTTON.
SWITCH OFF THE EXTRACTOR HOOD
- Press the "ON/OFF①" BUTTON to switch the extractor hood off.
- The motor stops and the appliance is switched off.

LED LIGHTING: "ON / OFF"
You can use the "LIGHTING" button to switch the LED LIGHTING of the cooker hood on or off.
SWITCH ON LED LIGHTING
- Press the "LIGHTING 🔊" button to switch on the LED lighting of the cooker hood.
- The LED lighting is now switched on.
LED - SWITCH OFF LIGHTING
- Touch the "LIGHTING 🔍" button again to switch off the LED lighting of the cooker hood,
- The LED lighting is now switched off.
⚠ WARNING! Never cover LED light source(s) with heat-insulating or other objects. FIRE HAZARD!
⚠️ CAUTION! Do not touch the LED light source(s) for 30 minutes after operating the appliance. RISK OF BURNS!
NOTE! Only use all lighting units when the appliance is in operation. Do not use the lighting units for room lighting.
4.2.1 Power levels
The extractor hood is equipped with 3 power levels (= 3 motor speeds).
You can use the "POWER" BUTTONS TO set the desired power level (motor speed) of the extractor hood.
1 - 3
SETTING THE POWER LEVELS "1 - 3 "
To set a power level (motor speed), touch the desired "POWER" BUTTON.

POWER LEVEL 1 = LOW POWER LEVEL
Power level "1" is the low power level (motor speed) of the extractor hood.
❖ This power level is suitable for slow simmering and roasting with the lid closed.
Use this power level for very low to low steam development (low concentration of cooking vapors).

Power level "2" is the medium power level (motor speed) of the extractor hood.
❖ This level is suitable for standard cooking processes.
Use this power level for ideal air circulation in the kitchen with average steam development (medium concentration of cooking vapors).

Power level "3" is the high / maximum power level (motor speed) of the extractor hood.
Use this power level if your food generates a lot of steam (high concentration of cooking vapors).
5. environmental protection
5.1 Environmental protection: Disposal
Appliances with this symbol "☒" may not be disposed of with household waste throughout the EU. Take the appliance responsibly to a recycling center to prevent possible damage to the environment or human health caused by uncontrolled waste disposal and to promote the sustainable reuse of material resources.
5.2 Environmental protection: Saving energy
Prepare food in suitable cookware (pots/pans) using lids. This also applies when reheating or keeping food warm.
Adjust the cooking pot size to the diameter of the cooking zone used or the flame of the burner (for gas appliances).
Switch the cooker hood off after cooking or use the time-delayed switch-off function (depending on model).
Only use the lighting units when the appliance is in operation. Do not use the lighting units for room lighting.
❖ Switch off the appliance light at the end of cooking.
* Always adjust the power level to the intensity of the cooking vapors generated. Only use the appliance's highest motor speed (highest / maximum power level / booster level) when there is a very high concentration of cooking vapors. A lower power level always means lower energy consumption.
- Ensure sufficient supply air so that the cooker hood works efficiently and with low operating noise.
Select a higher power level early on in the event of intense cooking vapors. Cooking vapors that have already spread throughout the kitchen may make it necessary to operate the extractor hood for longer.
As clean filters increase the efficiency of the appliance, clean the aluminum grease filter(s) regularly.
❖ Replace the charcoal filters (only use in recirculation mode) regularly. Follow the instructions of the carbon filter manufacturer.
6. cleaning and care
⚠ WARNING! Disconnect the appliance from the power supply before carrying out any maintenance or cleaning work. RISK OF ELECTRIC SHOCK
⚠ WARNING! Failure to follow the cleaning and care instructions leads to an increased RISK OF FIRE due to grease deposits.
NOTE! Before carrying out any cleaning or maintenance work, remove all rings on your fingers and all arm jewelry; otherwise you will damage the surfaces of the appliance.
NOTE! Any damage caused to your appliance by a cleaning agent will not be repaired free of charge, not even within the warranty period.
-
Treat the housing with a soft cloth and a suitable cleaning agent.
-
Never clean control panel/control elements with a cleaning agent. Instead, use a slightly damp cloth, otherwise water will penetrate the control panel and damage the electronics.
-
Never use cleaning agents containing alcohol on matt black lacquered appliances as these will cause discoloration.
- Only clean glass components ^20 with a suitable glass cleaner.
- Every time you replace the grease filter or charcoal filter or clean the filter, clean all visible lower components of your appliance with a mild, non-corrosive and grease-dissolving cleaning agent.
- Do not damage the grille when cleaning metal filters. Frequent cleaning can cause color changes to the metal surface. Such changes have no influence on the performance of the filters and are not grounds for complaint.
- Do not use abrasive cleaners or vinegar-based cleaners.
- Never use a steam cleaner. RISK OF ELECTRIC SHOCK!
SPECIAL INSTRUCTIONS FOR APPLIANCES WITH STAINLESS STEEL HOUSING ^21
Only use a suitable non-abrasive stainless steel cleaning agent to clean stainless steel surfaces.
NOTE! Never use stainless steel cleaning agents on the immediate vicinity of the control panel or on the control panel itself.
NOTE! Aggressive cleaning agents, such as scouring agents, vinegar cleaners, abrasive granules, etc. will damage the surface of the cooker hood.
6.1 Cleaning the aluminum grease filter s
⚠ WARNING! Failure to follow the cleaning instructions leads to an increased RISK OF FIRE due to grease deposits.
NOTE! Frequent cleaning can cause color changes to the metal surface. Such changes have no influence on the performance of the filters and are not grounds for complaint.
NOTE! Do not damage the grille when cleaning metal filters.
i Aluminum grease filters ^22 do not need to be replaced.
- Clean the aluminum grease filter regularly by hand or in the dishwasher (up to 65 °C).
Do not use any aggressive cleaning agents.
Do not use abrasive cleaners!
Do not use alkaline dishwasher detergents (pH greater than 7).
CLEANING INTERVAL FOR ALUMINUM GREASE FILTERS
➢ Every 2 - 3 weeks according to the frequency of use of the extractor hood.
DEINSTALLATION / INSTALLATION OF AN ALUMINUM GREASE FILTER
This section only describes a standard example of uninstalling / installing an aluminum grease filter. Modifications are possible. A standard appliance model with only one grease filter is used here as an example.
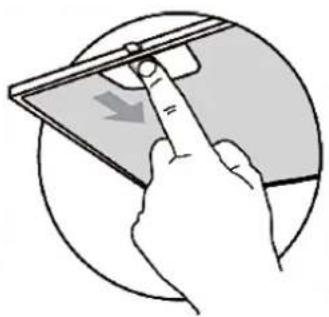
4. Press the grease filter towards the back of the appliance and pull it downwards at the same time to release it from its catch (see illustration below).
natural_image
Illustration of a hand holding a tablet with a finger pointing at it, showing a download icon (no text or symbols present)- Then remove the aluminum grease filter and clean it as described in this chapter.
- To reinstall the cleaned aluminum grease filter, insert it properly into the corresponding slots on the range hood. Carefully press the aluminum grease filter into its correct position.
WARNING! The appliance may only be operated with the aluminum grease filter inserted, otherwise grease transported by the vapour will be deposited in the hood. FIRE HAZARD!
NOTE! Any damage caused by an uninstalled or improperly installed aluminum grease filter is not covered by the warranty.
MANUAL CLEANING OF AN ALUMINUM GREASE FILTER
- Soak the aluminum grease filter in rinsing water (warm; up to 65^ C).
- Then clean the aluminum grease filter with a soft brush. Make sure that you do not damage the grid of the aluminum grease filter when cleaning.
-
Rinse the aluminum grease filter thoroughly with hot water after cleaning.
-
Repeat the process for stubborn dirt or deposits.
- Allow the aluminum grease filter to dry thoroughly before carefully reinserting it.
CLEANING AN ALUMINUM GREASE FILTER IN THE DISHWASHER
- Aluminum grease filters can also be cleaned in the dishwasher: Normal program (up to 65 °C).
Do not place the aluminum grease filter in the dishwasher together with dirty dishes. Allow the aluminum grease filter to dry thoroughly before carefully reinserting it.
NOTE! Aluminum grease filters clogged with food residue are not covered by the warranty!
6.2 Carbon filter
⚠ WARNING: Always switch off the appliance before fitting carbon filters and disconnect it from the power supply (appropriate fuse in the house fuse box).
i CARBON FILTERS for your extractor hood are available as optional accessories.
◆ Conventional carbon filters cannot be cleaned.
These filters have a limited absorption capacity and are usually used up after approx. 3 months.
❖ Replace a used filter immediately. Further information can be found on the filter packaging.
REPLACEMENT INTERVAL FOR CARBON FILTERS
At least every 3 - 6 months depending on the frequency of use of the extractor hood.
Order CARBON FILTERS at
www.pkm-online.de
➢ Type designation of the CARBON FILTERS: See chapter TECHNICAL DATA
6.3 Replacing the LED light source
⚠ WARNING! LED light sources may only be replaced by a qualified person. Never replace the bulbs yourself. If the LED lamps are damaged, contact a qualified specialist (electrical engineer) / (no warranty!).
⚠ WARNING! Disconnect the appliance from the power supply (appropriate fuse in the house fuse box) before replacing the LED lamps. RISK OF ELECTRIC SHOCK!
NOTE! Do not touch the new LED light sources with bare hands. Finger perspiration reduces the durability of the LED lamps. Use a thin cloth or thin fabric gloves.
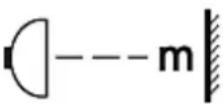 | Required minimum distance to surfaces such as pot lids, pot holders etc. to avoid parts becoming hot and fire risks. |
| --- m = 0.45 m | |
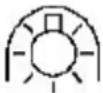 | Only self-shielding light sources may be used to avoid parts becoming unreasonably hot, fire risks and exposure to UV radiation. |
NOTE! Any damage caused by improper and incorrect replacement of the LED lamps is not covered by the warranty.
7. troubleshooting
| ERROR | |
| POSSIBLE CAUSE | MEASURES |
| DEVICE DOES NOT WORK. | |
| 2. The appliance is not connected to the socket with the mains plug.7. The mains plug is loose.7. The socket is not supplied with power.8. The corresponding fuse is switched off.9. The voltage is too low | 6. Connect the appliance properly to the socket.6. Check the mains plug.8. Check the socket in question by connecting another appliance to it.9. Check the house fuse.10. Compare the information on the rating plate with the information provided by your electricity supplier. |
| LIGHTING IS ON, BUT THE ENGINE IS NOT RUNNING. | |
| 3. Faulty energy supply. | 3. Check the power supply. |
| 4. Motor bearing defective. | 4. Replace motor. |
| THE ENGINE SMELLS SUSPICIOUS. | |
| 2. Motor defective. | 2. Replace motor. |
| TRACES OF OIL. | |
| 2. One-way valve leaking. | 3. Seal the one-way valve. |
| DEVICE VIBRATES. | |
| 2. Motor not properly installed. | 2. Fasten the motor properly. |
| 4. Hood not properly secured. | 3. Fasten the hood properly. |
| ERROR | |
| POSSIBLE CAUSE | MEASURES |
| DEVICE IS UNSTABLE. | |
| 3. Mounting bracket / plate not properly installed.4. Fastening screws not firmly tightened. | 3. Mount the mounting bracket / plate correctly4. Tighten the fixing screws firmly. |
| THE LIGHTING IS NOT WORKING. | |
| 3. The extractor hood is not switched on.4. One or all bulbs are defective. | 3. Switch on the extractor hood.4. Replace the defective bulbs. See chapter " REPLACING THE LED BULBS".PLEASE NOTE: LED lamps may only be replaced by a qualified specialist (electrician). |
| INSUFFICIENT EXTRACTION PERFORMANCE. | |
| 2. Distance between hood and hob too large. | 2. Lower the hood. |
-
Too much draught due to open doors and/or windows.
-
Close doors and / or windows.
If the appliance exhibits faults other than those described above, or if you have checked all the points on the list but the problem could not be resolved, please contact customer service.
IF THE PERFORMANCE OF THE HOOD IS INSUFFICIENT AND / OR INCREASED OPERATING NOISE CAN BE HEARD, THIS MAY BE DUE TO THE FOLLOWING CAUSES.
IN EXHAUST AIR MODE
- Insufficient size of the exhaust air duct.
▶ A blockage in the exhaust air duct.
The diameter of the exhaust air duct from the hood to the wall box inclusive should be 150/160 mm (see chapter "TECHNICAL DATA"), otherwise the performance of the motor may be impaired.
If you have fitted a fly screen to the wall box, this may impair the air flow. Remove the screen to check.
If there are fixed and very slanted slats on the cover plate of the wall conduct, this can impair the air flow. Remove the cover plate to check.
➢ Fit a cover plate with movable louvres that least restrict the air flow.
➢ Check the condition and cleanliness of the filters.
➢ Check that the air extracted by the kitchen hood is replaced so that there is no negative pressure.
IN RECIRCULATION MODE
➢ Check the condition and cleanliness of the filters.
If you use the hood in recirculation mode, check that the charcoal filters have been changed in good time (at least every 3 - 6 months).
If the appliance exhibits faults other than those described above, or if you have checked all the points on the list but the problem could not be resolved, please contact customer service.
8. technical data
| TECHNICAL DATA* | |
| Device type | Extractor hood |
| Material | Stainless steel |
| Installation width in cm | 60,00 |
| Distance to the hob (minimum) | min. 65.00 cm |
| Wall mounting | Yes |
| Push buttons | 5 |
| Recirculation mode / exhaust air mode** | Yes Yes |
| Annual energy consumption (AEChood) | 7.20 kWh/year |
| Energy efficiency class*** | A++ |
| Fluid dynamic efficiency (FDEhood) | 20,20 |
| Fluid dynamic efficiency class | C |
| Lighting efficiency (LEhood) | 36 Lux/W |
| Lighting efficiency class | A |
| Grease separation efficiency | 67,80 % |
| Grease separation efficiency class | D |
| Air flow **** | 196.60 m3/h 355.00 m3/h |
| Air flow during operation at the intensive level or high-speed level | - |
| A-weighted airborne sound emission **** | 40 dB 61 dB |
| A-weighted airborne noise emission during operation at the intensive or high-speed level | - |
| Connected load | 35,00 W |
| Lighting system | LED |
| Power consumption per lighting unit | 1*1,50 W |
| Current voltage / frequency | AC 220 - 240 V / 50 Hz |
| Grease filter / material / dishwasher-safe | 2 Aluminum Yes |
| Carbon filter CF180 | inclusive |
| Cable length | 150 cm |
| Display | no |
| Accessories supplied: Exhaust air hose | Yes |
| Accessories supplied: non-return flap | Yes |
| Accessories supplied: Mounting material | Yes |
| Accessories supplied: Operating instructions | Yes |
| Power levels | |
| Appliance dimensions H*W*D in cm | 66,00 - 103,00*60,00*50,00 |
◆ Subject to technical changes.
*
In accordance with Regulation (EU) No. 65/2014
| ** | Exhaust air mode: for connection to a ventilation chimney or exhaust air to the outside (wall duct = 150 mm ∅ / hole approx. 160 mm ∅) |
| *** | On a scale from Λ+++ (best) to D (worst). |
| **** | Measured values at minimum/maximum motor speed. |
| ***** | Equipment depends on the model. |
9. disposal
- When unpacking, make absolutely sure that the components of the packaging (polyethylene bags, polystyrene pieces) are kept out of the reach of children and animals. DANGER OF SUFFOCATION! RISK OF INJURY!
- Old appliances that are no longer used must be taken to the appropriate recycling center. Never expose to naked flames.
- Before you dispose of any old appliance, it is essential that you render it inoperable! This means always disconnect the mains plug and then cut off the power connection cable on the appliance and remove and dispose of it directly with the mains plug
- Dispose of paper and cardboard in the bins provided.
- Dispose of plastics in the containers provided for this purpose.
- If there are no suitable disposal containers in your area, take these materials to a suitable municipal collection point.
- For more information, please contact your specialist dealer or your local waste disposal facility.
All materials marked with this symbol are recyclable.
All available information on waste separation can be obtained from your local authorities.
The manufacturer guarantees the consumer for a period of 24 months, calculated from the date of purchase, for faultless material and faultless manufacture.
In addition to the rights arising from the guarantee, the consumer is entitled to the statutory warranty rights that the consumer has against the seller from whom he purchased the device. These are not restricted by the guarantee.
The warranty claim must be proven by the buyer by submitting the proof of purchase with the date of purchase and/or delivery and must be reported to the first end customer immediately after discovery and within 24 months of delivery.
The guarantee does not justify any claims for withdrawal from the purchase contract or reduction (reduction of the purchase price). Replaced parts or exchanged devices become our property.
The warranty claim does not extend to:
- fragile parts such as plastic or glass or light bulbs;
- minor deviations of the PKM PRODUCTS from the target quality, which have no influence on the utility value of the product;
- Damage due to operating and handling errors,
- Damage caused by aggressive environmental influences, chemicals, cleaning agents;
- Damage to the product caused by improper installation or transportation;
- Damage due to non-household use;
- Damage caused outside the appliance by a PKM PRODUCT - unless liability is prescribed by law.
The validity of the guarantee ends at:
- Failure to observe the installation and operating instructions;
- Repair by non-experts;
- Damage caused by the seller, installer or third parties;
- improper installation or commissioning;
- lack of or incorrect maintenance;
- devices that are not used for their intended purpose;
- Damage caused by force majeure or natural disasters, in particular but not limited to fire or explosion.
Please have the following information ready when registering your warranty claim:
- The complete address (location of the device).
- Telephone number(s) and e-mail address.
- Model designation.
- Serial number/photo of the type plate.
- Type of malfunction.
i Without this information, your warranty claim cannot be processed immediately.
SPECIAL NOTE:
Please take a photo of the rating plate before installing / setting up the appliance and save the photo for possible later use.
The type plate can be found in the following locations:
- Cooling units: in the interior or at the rear
- Dishwashers / washing machines / dryers: in the door area or at the rear.
- Hobs: on the underside.
- Ovens: in the door area.
- Stove sets have 2 rating plates, on the oven and on the hob.
- Extractor hoods: indoors, near the motor.
Warranty services do not extend the warranty period, nor do they start a new warranty period.
The geographical scope of the guarantee extends to appliances purchased and used in Germany, Austria, Belgium, Luxembourg and the Netherlands.

i All dimensions are given in millimetres.
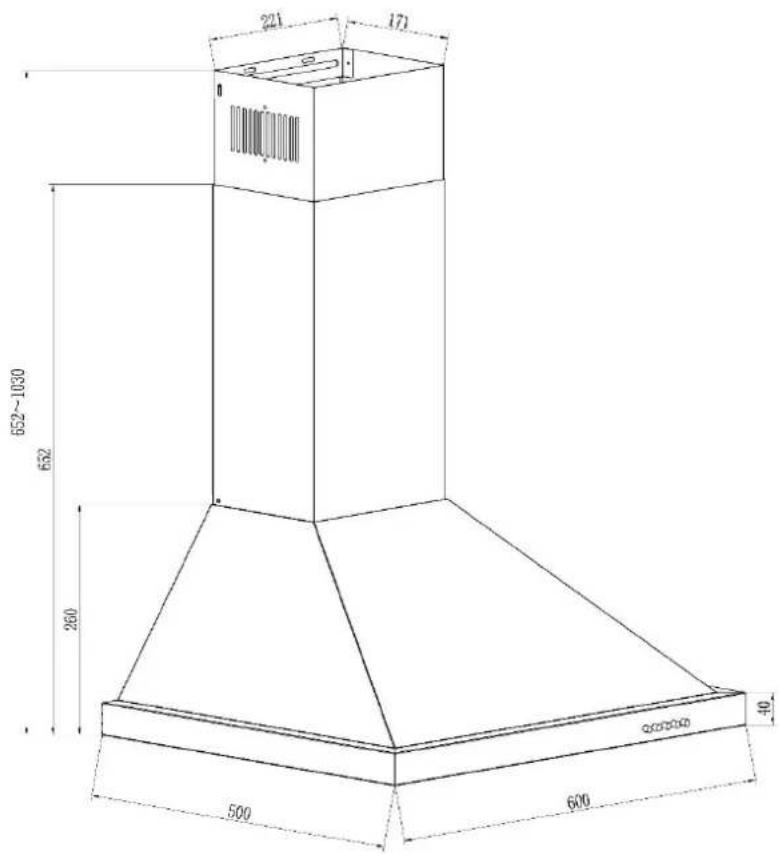
| OPTION | KAMIN | A | B | HÖHE |
| 1 | 400+ 0 | 569 | / | 569 |
| 2 | 400 + 300 | 569 | 610 - 850 | 569 - 850 |
| 3 | 400 + 390 | 569 | 610 - 940 | 569 - 940 |
| 4 | 500 + 490 | 669 | 710 - 1140 | 669 -1140 |
Please contact the shop you purchased the appliance at.
- a. KAMININSTALLATION/ABLUFTBETRIEB
- b. KAMININSTALLATION/UMLUFTBETRIEB
- Aluminium-Fettfilter
- Contents
- Contents....42
- EC - DECLARATION OF CONFORMITY
- BEFORE USING THE APPLIANCE FOR THE FIRST TIME, READ THE ENTIRE SAFETY INFORMATION AND SAFETY INSTRUCTIONS CAREFULLY.
- Signal words
- Safety instructions
- DANGER!
- To reduce the risk of electric shock:
- ⚠ WARNING!
- To reduce the risk of burns, electric shock, fire or personal injury:
- CAUTION!
- NOTE!
- READ THESE INSTRUCTIONS CAREFULLY AND KEEP THEM IN A SAFE PLACE.
- installation
- General installation instructions
- Scope of delivery
- Important installation instructions for exhaust air operation
- Minimum distances
- Device view
- Installation : Non-return flap / extractor hood
- Installing the non-return flap
- INSTALLATION STEPS
- Installing the extractor hood
- c. CHIMNEY INSTALLATION / EXHAUST AIR OPERATION
- d. CHIMNEY INSTALLATION / RECIRCULATION MODE
- Electrical connection
- exhaust air mode / recirculation mode
- Exhaust air operation
- Recirculation mode
- Carbon filter
- Aluminum grease filter
- Control panel
- Operation
- SWITCH OFF THE EXTRACTOR HOOD
- SWITCH ON LED LIGHTING
- LED - SWITCH OFF LIGHTING
- Power levels
- POWER LEVEL 1 = LOW POWER LEVEL
- environmental protection
- Environmental protection: Disposal
- Environmental protection: Saving energy
- cleaning and care
- Cleaning the aluminum grease filter s
- CLEANING INTERVAL FOR ALUMINUM GREASE FILTERS
- DEINSTALLATION / INSTALLATION OF AN ALUMINUM GREASE FILTER
- MANUAL CLEANING OF AN ALUMINUM GREASE FILTER
- CLEANING AN ALUMINUM GREASE FILTER IN THE DISHWASHER
- NOTE! Aluminum grease filters clogged with food residue are not covered by the warranty!
- Carbon filter
- REPLACEMENT INTERVAL FOR CARBON FILTERS
- Replacing the LED light source
- troubleshooting
- IF THE PERFORMANCE OF THE HOOD IS INSUFFICIENT AND / OR INCREASED OPERATING NOISE CAN BE HEARD, THIS MAY BE DUE TO THE FOLLOWING CAUSES.
- IN EXHAUST AIR MODE
- IN RECIRCULATION MODE
- technical data
- disposal
- The warranty claim does not extend to:
- The validity of the guarantee ends at:
- Please have the following information ready when registering your warranty claim:
- SPECIAL NOTE:
Brand : PKM
Model : 6090BV
Category : Range hood