LES 103UV - Measurement PCE Instruments - Free user manual and instructions
Find the device manual for free LES 103UV PCE Instruments in PDF.


| Product Type | UV Light Meter |
| Model | LES 103UV |
| Brand | PCE Instruments |
| Measurement Range | 0 to 20 mW/cm² (UVA/UVB) |
| Resolution | 0.01 mW/cm² |
| Accuracy | ±5% of reading |
| Spectral Range | 320-400 nm (UVA), 280-320 nm (UVB) |
| Display | LCD with backlight |
| Data Hold | Yes |
| Auto Power Off | Yes, after 15 minutes |
| Power Supply | 9V battery (6F22) |
| Battery Life | Approx. 100 hours |
| Dimensions | 170 x 80 x 40 mm |
| Weight | 250 g (with battery) |
| Operating Temperature | 0°C to 50°C |
| Storage Temperature | -10°C to 60°C |
| Humidity | <80% RH non-condensing |
| Accessories Included | Carrying case, battery, manual |
| Maintenance | Clean sensor with soft cloth; avoid solvents |
| Safety | Do not expose to extreme UV; use protective eyewear |
| Spare Parts | Battery, sensor cap (available from manufacturer) |
| Repairability | Battery replacement by user; other repairs by service center |
Frequently Asked Questions - LES 103UV PCE Instruments
User questions about LES 103UV PCE Instruments
0 question about this device. Answer the ones you know or ask your own.
Ask a new question about this device
Download the instructions for your Measurement in PDF format for free! Find your manual LES 103UV - PCE Instruments and take your electronic device back in hand. On this page are published all the documents necessary for the use of your device. LES 103UV by PCE Instruments.
USER MANUAL LES 103UV PCE Instruments
User manuals in various languages (français, italiano, español, português, nederlands, türk, polski, русский, 中文) can be found by using our product search on: www.pce-instruments.com
2.1 Technical specifications ....24
2.2 Delivery contents....25
2.3 Optional accessories....25
3 System description 25
3.1 Device....25
3.2 Interfaces....26
3.3 Display....27
3.4 Function keys....28
4 Getting started....28
4.1 Power supply 28
5 Operation 29
5.1 Power the device on/off....29
5.2 Measurement....30
5.3 Further functions....33
5.4 Settings....37
5.5 Info menu....42
5.6 Software....42
6 Contact....43
7 Disposal 43
natural_image
Pure electrical circuit lines without any symbols5.4.3 Menü Ton (Sound)
Please read this manual carefully and completely before you use the device for the first time. The device may only be used by qualified personnel and repaired by PCE Instruments personnel. Damage or injuries caused by non-observance of the manual are excluded from our liability and not covered by our warranty.
- The device must only be used as described in this instruction manual. If used otherwise, this can cause dangerous situations for the user and damage to the meter.
- The instrument may only be used if the environmental conditions (temperature, relative humidity, ...) are within the ranges stated in the technical specifications. Do not expose the device to extreme temperatures, direct sunlight, extreme humidity or moisture.
- Do not expose the device to shocks or strong vibrations.
• The case should only be opened by qualified PCE Instruments personnel.
- Never use the instrument when your hands are wet.
- You must not make any technical changes to the device.
- The appliance should only be cleaned with a damp cloth. Use only pH-neutral cleaner, no abrasives or solvents.
• The device must only be used with accessories from PCF Instruments or equivalent.
- Before each use, inspect the case for visible damage. If any damage is visible, do not use the device.
- Do not use the instrument in explosive atmospheres.
- The measurement range as stated in the specifications must not be exceeded under any circumstances.
- Non-observance of the safety notes can cause damage to the device and injuries to the user.
We do not assume liability for printing errors or any other mistakes in this manual.
We expressly point to our general guarantee terms which can be found in our general terms of business.
Safety symbols
Safety-related instructions the non-observance of which can cause damage to the device or personal injury carry a safety symbol.
| Symbol | Name/Descritpion | |
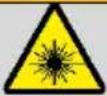 | Warning: LED beamNon-observance can cause injuries to the eyes. | |
2 Specifications
2.1 Technical specifications
| Specification | PCE-LES 103 | PCE-LES 103UV-365 | PCE-LES 103UV-385 |
| Lamp technology | 3 high power white LEDs | 3 high power UVA LEDs | 3 high power UVA LEDs |
| Light colour | cool white 6,200 K | UVA light 365 ... 370 nm | UVA light 380 ... 390 nm |
| Light power | 11730 lx @ 20 cm @ 1000 Hz, 1 %6160 lx @ 30 cm @ 1000 Hz, 1 %2650 lx @ 50 cm @ 1000 Hz, 1 % | TBA | 635 W/cm^2 @ 20 cm @ 1000 Hz, 1 %317 W/cm^2 @ 30 cm @ 1000 Hz, 1 %115 W/cm^2 @ 50 cm @ 1000 Hz, 1 % |
| Measurement range | 60 ... 300,000 FPM1 ... 5,000 Hz | ||
| Resolution | 60 ... 9999.99 FPM: 0.01 FPM10,000 ... 300,000 FPM: 0.1 FPM1 ... 5000 Hz: 0.01 Hz | ||
| Accuracy | 0.003 % of setting or ± 1 LSD | ||
| Flash duration range | 0.01 % ... 1 % of total flash durationResolution: 0.01 %0.01 ° ... 3.60 ° of 360 °Resolution: 0.01 ° | ||
| Phase shift | -360 ° ... 360 °Resolution: 1 ° | ||
| Display | 2.8" TFT LCDProgrammable auto power off | ||
| Battery | Li-ion rechargeable battery2200 mAh, 7.4 V | ||
| Charging time | approx. 2 h 30 min@ 5 V / 2 A | ||
| Operating time | approx. 4 h 30 minConditions:Flashing 100 Hz, 1 %, display brightness 70 % | ||
| Power adaptor | Input: 100 ... 240 VAC, 50/60 Hz, Output: 5 V/2 A | ||
| Environmental conditions | Charging temp.: 0 ... 45 °COperating temp.: -20 ... 60 °CStorage temp.: -20 ... 60 °C (1 month), -20 ... 45 °C (3 months)35 ... 85 % RH, non-condensing | ||
| Dimensions | 165 x 90 x 35 mm | ||
| Weight | 284 g | ||
Housing
IP52
2.2 Delivery contents
1 x PCE-LES 103 handheld stroboscope
1 x USB-C cable
1 x instruction manual
1 x carrying bag
2.3 Optional accessories
NET-USB-EU charger
3 System description
3.1 Device
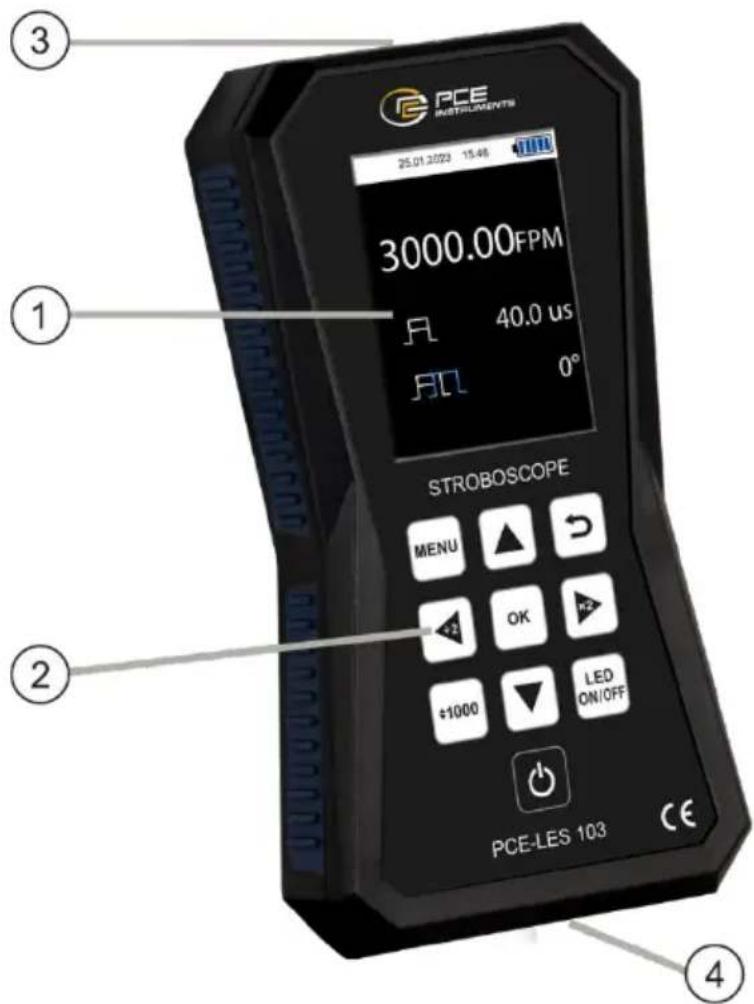
- Display
- Keypad
- LED light source
- USB charging connection (USB-C)
3.2 Interfaces
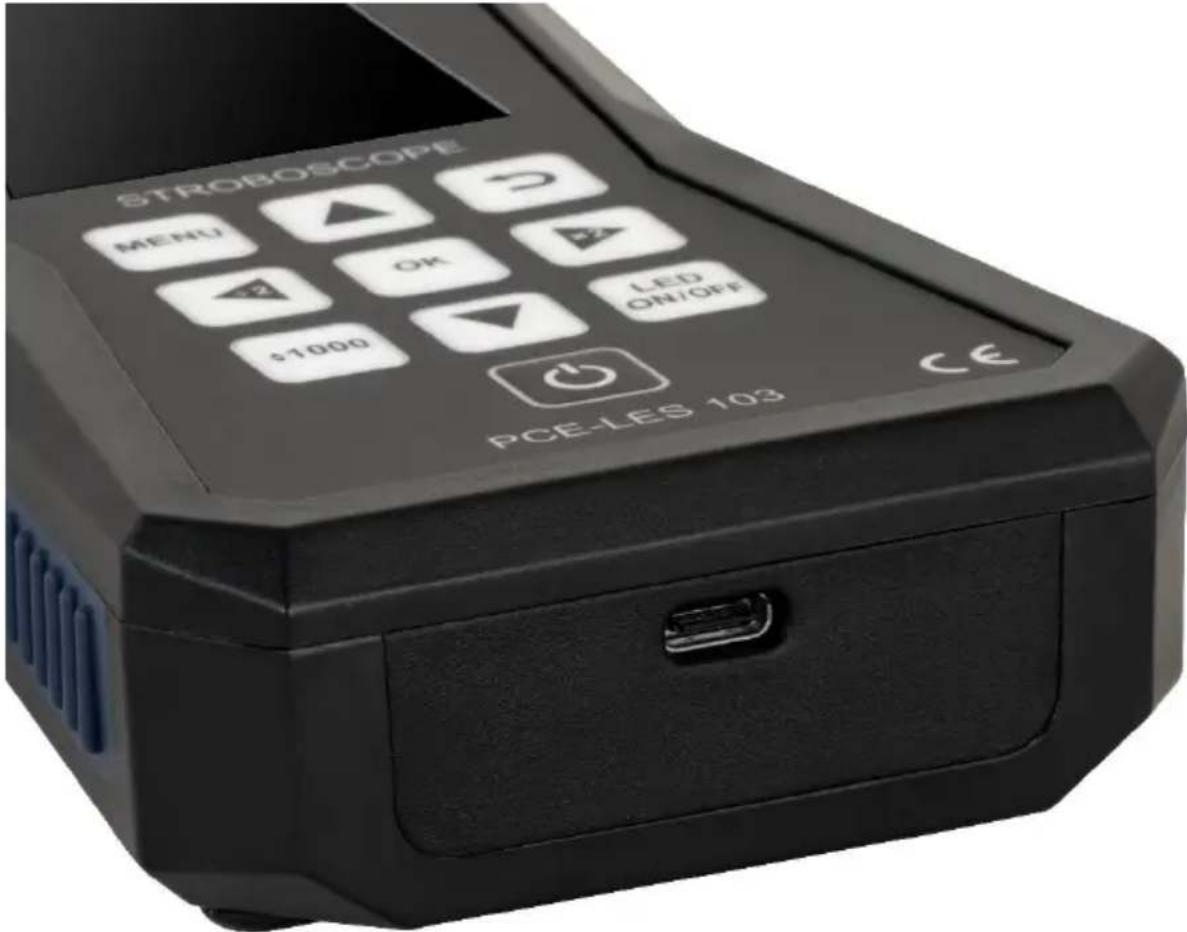
Figure 27. USB charging connection
At the bottom side of the device, there is a USB-C type connector. This connector is used to charge the internal battery of the meter and can also be used to update its firmware by means of our update software which can be downloaded here: https://www.pce-instruments.com/english/download-win_4.htm
Note: The stroboscope can also be charged or operated via a power bank
3.3 Display
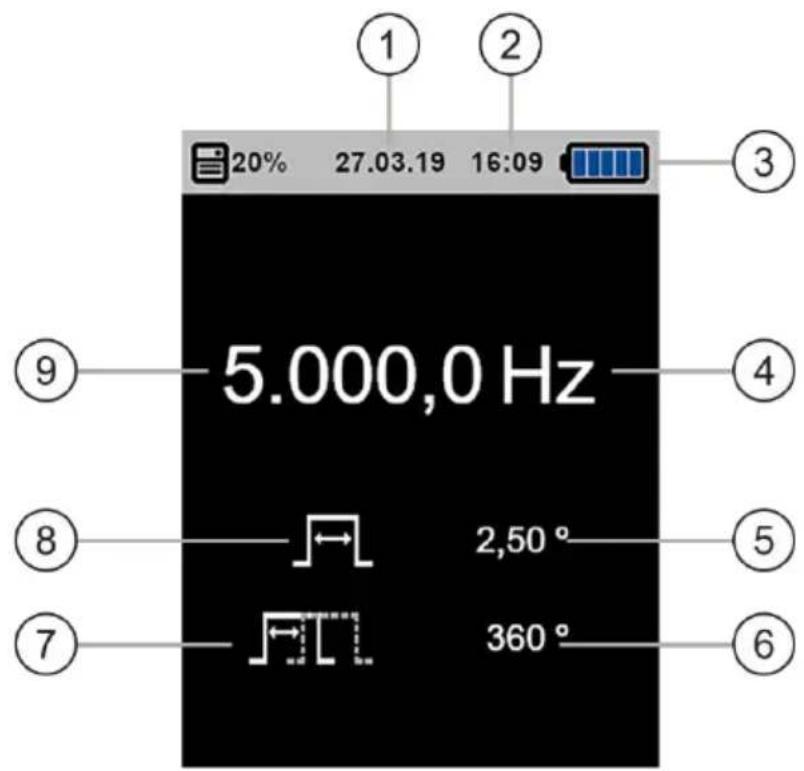
- Date
- Time
- Battery status
- Flash frequency unit
- Duty cycle value
- Phase shift value
- Phase shift icon
- Duty cycle icon
- Flash frequency value
3.4 Function keys
| KEY | NAME | FUNCTION | |
 | Power | Turn the device on/off | |
 | MENU | Switch to the menu screen | |
 | OK | Switch unit (Hz/FPM) / confirm a selection in the menu screen | |
 | Back | Back to the previous menu screen | |
 | Up | Increase a value / move up in the menu screen | |
 | Down | Decrease a value / move down in the menu screen | |
 | Left - /2 | Halve the frequency value | |
 | Right - x2 | Double the frequency value | |
 | Quick | Fine adjustment of the frequency value | |
 | LED ON/OFF | Turn the LED lamp on/off | |
4 Getting started
4.1 Power supply
The PCE-LES 103 / 103UV is a handheld device powered by a 7.4 V 2400 mAh Li-Ion battery that allows it to work without connecting it to any power supply when it is sufficiently charged.
When the battery is discharged, charge it by connecting the optionally available USB charger to the 240 V AC net and the USB plug to the USB connector of the device. The charger will provide a stable 5 V DC output to charge the battery inside the device. Alternatively, the meter can also be charged via the USB port of your computer.
The device can work connected to the power supply or with no external connection if the battery is charged. In both cases, the operation will be the same, as described in the next sections of this manual.
5 Operation
5.1 Power the device on/off
To turn on the device, press and hold the Power key for approx. 2 seconds. First, you will see the power on screen (figure 2) and after 2 seconds, the device will show the main screen (figure 3) and will be ready to use.

Figure 28. Power on screen
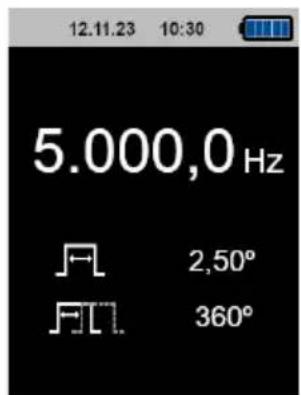
Figure 29. Measurement screen
After turning it on, the device will load the last configuration values used as well as the frequency, duty cycle and phase shift values selected the last time it was used.
To turn off the device, press and hold the Power key. A countdown will be displayed as long as the Power key is pressed. When the countdown reaches 0, the device will turn off.
5.2 Measurement
5.2.1 Change the flash unit
From the main screen of the device, press the OK key to switch the flash unit. You can select Hertz (Hz) or flashes per minute (FPM) (figure 4).
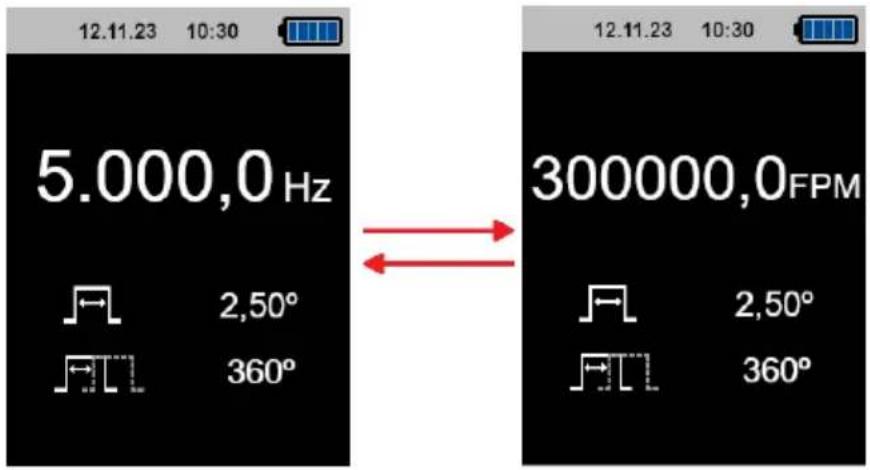
Figure 30. Changing the flash unit
Press the OK key again to switch to the previous unit.
5.2.2 Adjust the flash frequency
The frequency at which the device LEDs will flash can be adjusted by using one of the following keys:
| KEY | ACTION |
 | Multiply frequency / FPM value by 2 |
 | Divide frequency / FPM value by 2 |
 | A single keystroke increases the flash frequency / FPM by 0.01 / press and hold to increase more quickly |
 | A single keystroke decreases the flash frequency / FPM by 0.01 / press and hold to decrease more quickly |
5.2.3 Fine parameter adjustment in quick mode
You can perform a fine frequency adjustment by pressing the Quick key. When the Quick key is pressed, fine frequency adjustment mode will be activated. You will see a digit in the frequency value highlighted in orange, as shown in figure 5.
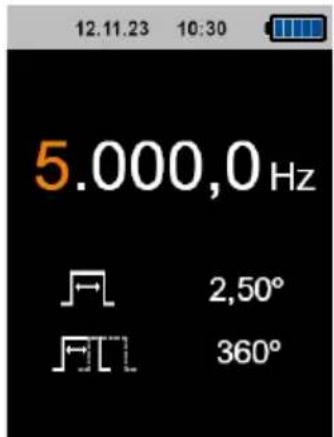
Figure 31. Quick mode
You can then press the Up / Down keys to increase / decrease that digit by 1. Press the Right or Left key to move through every digit of the value and adjust each digit. Once the desired value has been entered, press the OK key and the device will be set to the entered frequency. Once OK has been pressed, the next parameter (duty cycle) can be modified following the same procedure as with the frequency.
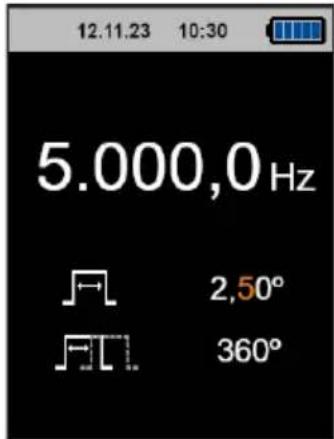
Figure 32. Quick mode - duty cycle modification
You can modify the duty cycle now by pressing the Up/Down keys to increase/decrease each digit and using the Right/Left keys to navigate to other digits. Press OK to confirm the entered value for the duty cycle or press Back to return to frequency modification mode. If you press OK, the next parameter (phase shift) can be modified in the same way as the two previous parameters.
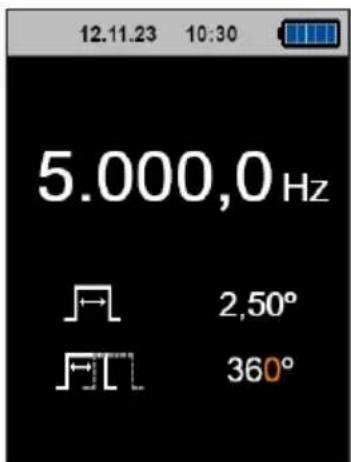
Figure 33. Quick mode - phase shift modification
Phase shift can be modified like the duty cycle and frequency. Use the Up/Down keys to increase/decrease the digit and Left/Right to navigate to other digits within the parameter. You can press OK to confirm the entered phase shift, so the device will return to the main screen or press BACK to go to duty cycle modification mode.
5.2.4 Switch the LEDs on/off
You can enable/disable the LEDs from any menu / screen just by pressing the LED ON/OFF key. When the device is in the main screen, the colour of the frequency reading will change from white (LEDs off) to orange (LEDs on) when the LED ON/OFF key is pressed.
![12.11.23 10:30 5.000,0 Hz FL 2,50° FL[ ] 360°](/content/2026/05/914728/images/22324c6e37907300cb92637148bcf05ae13037e7dd7fb9d33b565bc5062b5003.jpg)
Figure 34. Main screen - LEDs on
Attention: Avoid direct eye contact with the LED light. Do no look into the light-diodes while these are on.
5.3 Further functions
5.3.1 Menu overview
You can access the main menu screen from the main screen by pressing the MENU key. The main menu screen will show the different menus to access (figure 9).
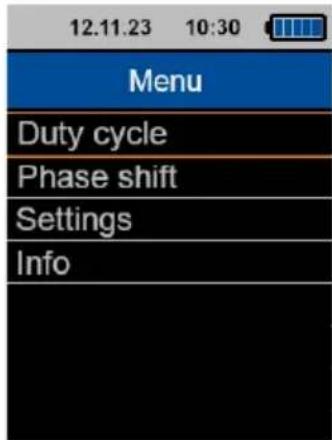
Figure 35.Main menu
- Duty cycle menu: this menu allows you to change the duty cycle related parameters.
- Phase shift menu: this menu allows you to change the phase shift related parameters.
- Settings menu: this menu allows you to change different settings regarding device operation such as power off time, language, screen brightness, units, sound, etc.
- Info menu: this menu displays information about the device version and PCE Instruments.
You can select any menu by using the Up/Down keys. The selected menu will be highlighted by an orange frame. Once the desired menu is selected, you can press OK to access it. To go back to the main screen, press the Back or the Quick key.
5.3.2 Duty cycle menu
The duty cycle menu can be accessed from the main menu screen by selecting it with the Up/Down keys and by pressing the OK key once "Duty Cycle" has been selected. To go back to the main menu, press Back. Press the Quick key to go back to the main screen.
![12.11.23 10:30 Duty Cycle Pulse 3,60° 2,0us Units [°]](/content/2026/05/914728/images/18c2973305881500158564ed04e02dad48218e56889e7c7012c65e2f68de3136.jpg)
Figure 36. Duty Cycle menu
The duty cycle menu allows you to adjust the duty cycle value as well as the duty cycle units. To adjust the duty cycle value, select "Pulse" by means of the Up/Down keys and press OK. Once OK has been pressed, the number can be modified digit by digit.
![12.11.23 10:30 Duty Cycle Pulse 3,60° 2,0us Units [°]](/content/2026/05/914728/images/8ed641a8c3a86ef9c5b6649901fa0052c566b62713e1c392caee2aaa290c1fcd.jpg)
Figure 37. Duty Cycle - modify value

To increase/decrease the highlighted digit, use the Up/Down keys and to move to the next/previous digit, use the Right/Left keys. Once the desired value has been entered, press the OK key and the flashing duty cycle will be set. A longer flash duration increases the light intensity of the flash.
To modify the duty cycle unit, select "Units", using the Up/Down keys. Once the line is highlighted, press OK and a submenu will be displayed.
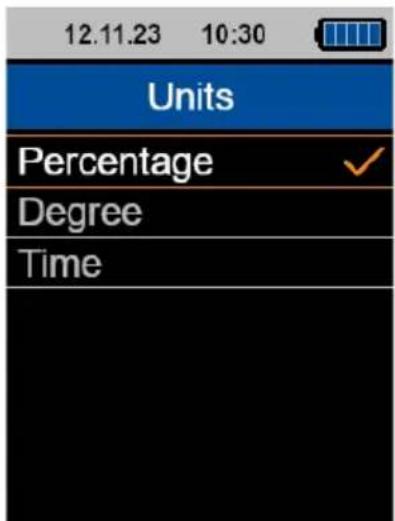
Figure 38. Duty Cycle - Units
An orange tick can be found next to the duty cycle unit the device is using at the moment. Use the Up/Down keys to select the desired unit (percentage, degree or time) and press OK to set the unit.
You can go back to the duty cycle menu by pressing the Back key. To go directly to the main screen, press the Quick key.
5.3.3 Phase shift menu
The phase shift menu can be accessed from the main menu by selecting it with Up/Down keys and by pressing the OK key once "Phase Shift" has been selected. To go back to the main menu, press the Back key. Press the Quick key to go back to the main screen.
![12.11.23 10:30 Phase Shift Degree 50° 27,8us Units [°]](/content/2026/05/914728/images/89751d52083c0f3128093386a94b5f16dd9fe871dea98aa3fda156f2cf834d69.jpg)
Figure 39. Phase Shift menu
The phase shift menu allows you to adjust the phase shift value and the phase shift unit. To adjust the phase shift value, select "Degree" using the Up/Down keys and press OK. Once the OK key has been pressed, the number can be modified digit by digit.
![12.11.23 10:30 Phase Shift Degree +050° 27,8us Units [°]](/content/2026/05/914728/images/991abf9a226f0ead568ee5563c000fc7c1f7b47cf5b05df086cd03454c9fe879.jpg)
Figure 40. Phase Shift menu - modify value
To increase/decrease the highlighted digit, use the Up/Down keys and to move to the next/previous digit, use the Right/Left keys. Once the desired value has been entered, press OK and the flashing phase shift value will be set.
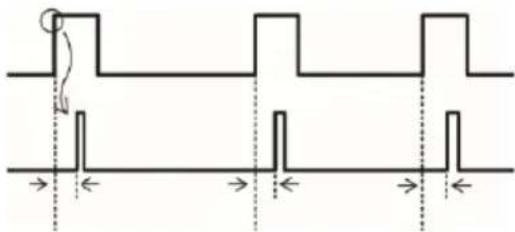
Adjusting the phase shift allows to "move" the flash in time without changing the time between the flashes.
natural_image
Pure electrical circuit lines without any symbolsFigure 41. Phase Shift explanation
To modify the phase shift unit, select "Units", using the Up/Down keys. Once the line is highlighted, press OK and a submenu will be displayed.
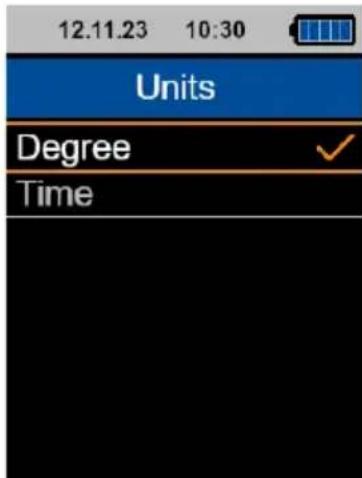
Figure 42. Phase Shift - Units
An orange tick can be found next to the phase shift unit the device is using at the moment. Use the Up/Down keys to select the desired unit (degree or time) and press OK to set the unit.
You can go back to the phase shift menu by pressing the Back key. To go directly to the main screen, press the Quick key.
5.4 Settings
The settings menu can be accessed from the main menu by selecting it with the Up/Down keys and pressing the OK key once "Settings" has been selected. To go back to the main menu, press the Back key. Press the Quick key to go back to the main screen.
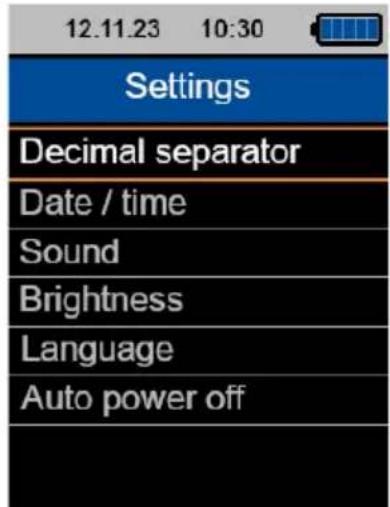
Figure 43. Settings menu
5.4.1 Decimal separator menu
The decimal separator menu can be accessed from the settings menu screen by selecting it with the Up/Down keys and pressing the OK key once "Decimal separator" has been selected. To go back to the settings menu, press the Back key. Press Quick to go back to the main screen.
![12.11.23 10:30 Decimal separator [ , ] [ . ]](/content/2026/05/914728/images/3a8c04d6b31952a30a2b4823d1e8ce4314682ef8653f820e740a985d2fe1313c.jpg)
Figure 44. Decimal separator menu
The Decimal separator menu allows you to select the decimal separator used (comma or point). An orange tick can be found next to the separator that is currently used. To change it, select the desired separator using the Up/Down keys and press OK to confirm the selected one.
5.4.2 Date and time menu
The date and time menu can be accessed from the settings menu by selecting it with Up/Down keys and pressing the OK key once "Date / Time" has been selected. To go back to the settings menu, you can press the Back key. Press Quick to go back to the main screen.
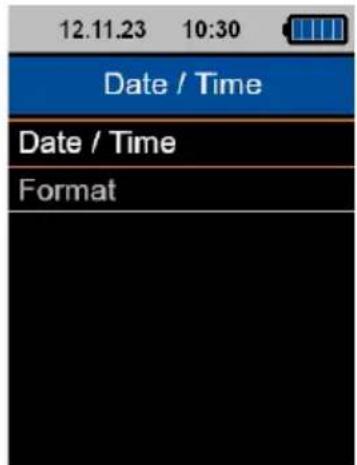
Figure 45. Date / Time menu
The date and time menu allows you to change the date and time setting of the device and to select the format the device will use to display the date in the upper area of the screen.
To change the date and time setting, select "Date / Time", using the Up/Down keys and press the OK key to access the sub-menu.
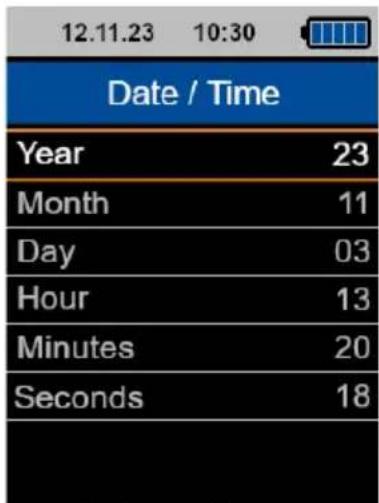
Figure 46. Date / Time submenu
In this sub-menu, you can set the year, month, day, hour, minute and seconds. To select the parameter to adjust, use Up/Down keys. Once the parameter to adjust is highlighted in orange, press the OK key and the device will enter number modification mode.
Use the Up/Down keys to adjust the digit and the Right/Left keys to move to the next/previous digit of the number. Once adjusted, press OK and the value will be saved in the device. Repeat the same procedure to adjust any other of the parameters available in the Date / Time settings menu.
To go back to the Date / Time menu, press the Back key. Press the Quick key to return to the main screen.
To change the format the device will use to display the date on the upper area of the screen, select "Format" using the Up/Down keys and press OK once it is selected to access the Format settings menu.
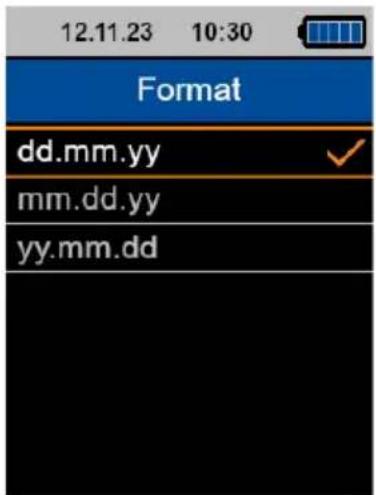
Figure 47. Date and time format
Here, you can select one of these date formats: dd.mm.yyyy / mm.dd.yyyy / yyyy.mm.dd. An orange tick can be found next to the format currently used by the device. Use the Up/Down keys to select the desired format and press OK once the desired one is highlighted in orange. This will set the date format for the device.
To go back to the Date / Time menu, press the Back key. Press the Quick key to go back to the main screen.
5.4.3 Sound menu
The sound menu can be accessed from the settings menu by selecting it with the Up/Down keys and by pressing the OK key once "Sound" has been selected. To go back to the settings menu, press the Back key. Press the Quick key to go back to the main screen.
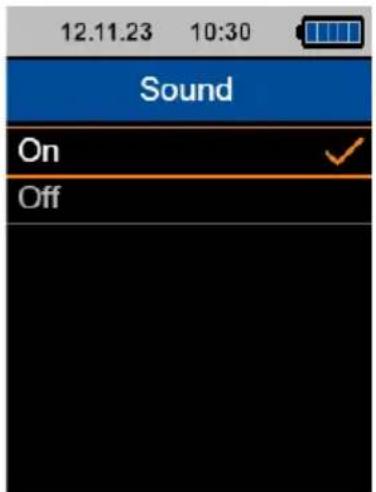
Figure 48. Sound menu
The sound menu allows you to enable/disable the beep sound when a key is pressed. An orange tick can be found next to the currently selected option. To change the sound setting, use the Up/Down key to select On or Off. Once the desired option is highlighted in orange, press OK and the device will save the setting.
5.4.4 Brightness menu
The brightness menu can be accessed from the settings menu by selecting it with Up/Down keys and by pressing the OK key once "Brightness" has been selected. To go back to the settings menu, press the Back key. Press the Quick key to go back to the main screen.
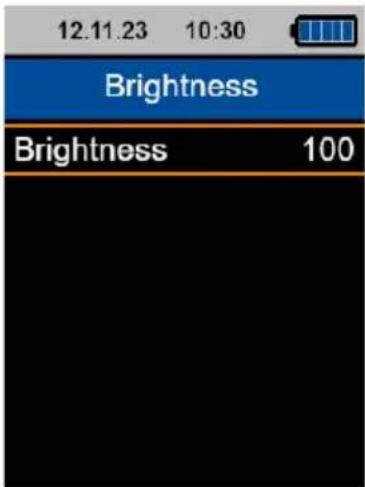
Figure 49. Brightness menu

The Brightness menu allows you to adjust the TFT brightness. Press the OK key and then use the Up/Down keys to increase / decrease the TFT brightness in steps of 10 %. Once the desired value is selected, press OK to save the value. The TFT brightness will change each time you press the Up/Down key.
5.4.5 Language menu
The language menu can be accessed from the settings menu by selecting it with Up/Down keys and pressing the OK key once "Language" has been selected. To go back to the settings menu, press the Back key. Press the Quick key to go back to the main screen.
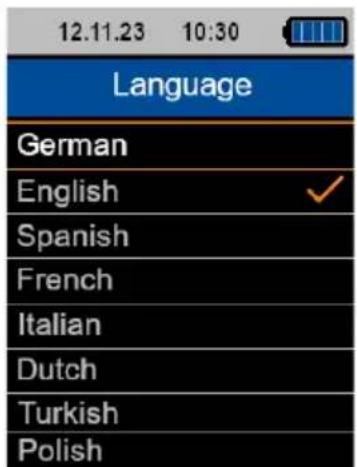
Figure 50. Language menu
An orange tick indicates what menu language is currently selected. To select the desired language, use the Up/Down keys to highlight it in orange. Once highlighted, press OK to change the device language to the selected one.
5.4.6 Auto Power Off menu
The Auto Power Off menu can be accessed from the settings menu by selecting it with the Up/Down keys and by pressing the OK key once "Auto Power Off" has been selected. To go back to the settings menu, press the Back key. Press the Quick button to go back to the main screen.

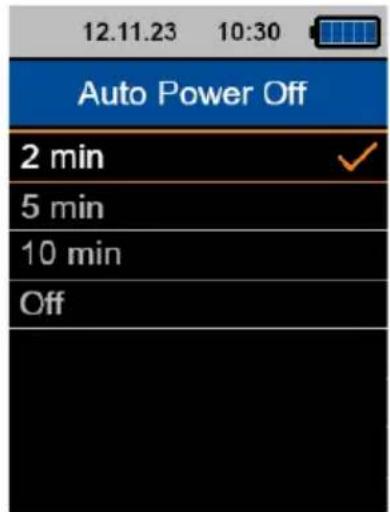
Figure 51. Auto Power Off menu
The Auto Power Off menu allows you to select a time after which the device switches off automatically. You can choose out of 2 minutes, 5 minutes, 10 minutes or disabled. You can see an orange tick next to the currently selected option. Use the Up/Down keys to select the desired option and once it is highlighted in orange, press the OK key to save your selection to the device.
5.4.7 Auto Display Off menu
The Auto Display Off menu can be accessed from the settings menu by selecting it with the Up/Down keys and pressing the OK key once “Auto Display Off” has been selected. To go back to the settings menu, press the Back key. Press the Quick key to go back to the main screen.
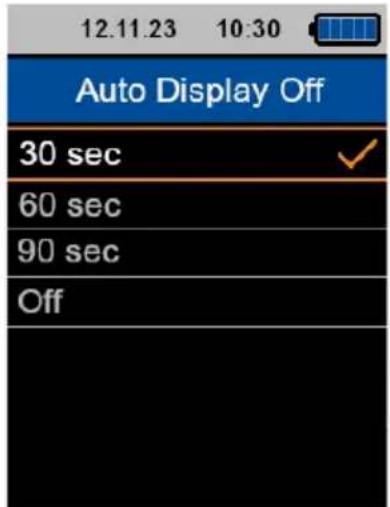
Figure 52. Auto Display Off menu
The Auto Display Off menu allows you to select a time after which the device reduces the TFT brightness to increase the operating life by reducing the power consumption. You can select 30 seconds, 60 seconds, 90 seconds or disabled. You can see an orange tick next to the currently selected option. Use the Up/Down keys to select the desired option and once it is highlighted in orange, press the OK key to confirm and save the selection.
5.5 Info menu
The Info menu can be accessed from the main menu by selecting it with the Up/Down keys and pressing the OK key once "Info" has been selected. To go back to the main menu, press the Back key. Press the Quick key to go back to the main screen.
The Info menu shows the device name, firmware version and PCE Instruments contact details.
5.6 Software
An update software is available here: https://www.pce-instruments.com/english/download-win_4.htm. This can be used to update the firmware of the device in case a new version is released. To do that, connect the device to a PC running the software via USB, then power up the device in boot/update mode. This means when the device is powered on in common operation, press both the Power and MENU keys at the same time. Then first release the Power key and then the MENU key. The device will then be working in boot mode, so the firmware can find it and update the firmware with a .hex file supplied by us.
6 Contact
If you have any questions, suggestions or technical problems, please do not hesitate to contact us. You will find the relevant contact information at the end of this user manual.
7 Disposal
For the disposal of batteries in the EU, the 2006/66/EC directive of the European Parliament applies. Due to the contained pollutants, batteries must not be disposed of as household waste. They must be given to collection points designed for that purpose.
In order to comply with the EU directive 2012/19/EU we take our devices back. We either re-use them or give them to a recycling company which disposes of the devices in line with law.
For countries outside the EU, batteries and devices should be disposed of in accordance with your local waste regulations.
If you have any questions, please contact PCE Instruments.


PCE Instruments contact information
Germany France Spain
PCE Deutschland GmbH PCE Instruments France EURL PCE Ibérica S.L.
Im Langel 26 23, rue de Strasbourg Calle Mula, 8
D-59872 Meschede 67250 Soultz-Sous-Forets 02500 Tobarra (Albacete)
Chester Rd, Old Trafford
Manchester M32 0RS
United Kingdom
Tel: +44 (0) 161 464902 0
Fax: +44 (0) 161 464902 9
info@pce-instruments.co.uk
www.pce-instruments.com/english
Italy
PCE Italia s.r.l.
Via Pesciatina 878 / B-Interno 6
55010 Loc. Gragnano Pehlivan Sok. No.6/C
Capannori (Lucca)
Italia
www.pce-instruments.com/turkish
The Netherlands
PCE Brookhuis B.V.
Institutenweg 15
7521 PH Enschede
Nederland
Telefoon: +31 (0)53 737 01 92
info@pcebenelux.nl
www.pce-instruments.com/dutch Fax: +1 (561) 320-9176
info@pce-americas.com
www.pce-instruments.com/us
United States of America
PCE Americas Inc.
1201 Jupiter Park Drive, Suite 8
Jupiter / Palm Beach
33458 FL
USA
Tel: +1 (561) 320-9162
Denmark
PCE Instruments Denmark ApS
Birk Centerpark 40
7400 Herning
Denmark
Specifications are subject to change without notice.
- Menü Ton (Sound)
- Safety symbols
- Specifications
- Delivery contents
- Optional accessories
- System description
- Device
- Interfaces
- Display
- Getting started
- Power supply
- Operation
- Power the device on/off
- Measurement
- Change the flash unit
- Adjust the flash frequency
- Fine parameter adjustment in quick mode
- Switch the LEDs on/off
- Further functions
- Menu overview
- Duty cycle menu
- Phase shift menu
- Settings
- Decimal separator menu
- Date and time menu
- Sound menu
- Brightness menu
- Language menu
- Auto Power Off menu
- Auto Display Off menu
- Info menu
- Software
- Contact
- Disposal
- PCE Instruments contact information
- Germany France Spain
- Italy
- The Netherlands
- United States of America
- Denmark
Brand : PCE Instruments
Model : LES 103UV
Category : Measurement