
BP-SE - Lens GODOX - Free user manual and instructions
Find the device manual for free BP-SE GODOX in PDF.


| Product Type | LED Projection Attachment |
| Brand | Godox |
| Model | BP-SE |
| Mount Type | Flat Head Bowens Mount |
| Compatible Lights | Godox LA150R, LA200R, LA300R, LA300Bi |
| Dimensions (Projection Attachment, excl. lens) | Approx. 220 mm x 220 mm x 180 mm |
| Weight (Projection Attachment) | 1.3 kg |
| Lens Mount | EF lens mount (optical lenses only) |
| Available Lenses (sold separately or in kits) | 65 mm, 85 mm, 150 mm optical projection lenses |
| Rotation Angle | 350 degrees |
| Gobo Holder Slot | Yes, accepts standard gobos (MLP-GS set included) |
| Iris Diaphragm Slot | Yes, compatible with optional MLP-ID |
| Shutter Blades | Yes, for beam cutting and shaping |
| Color Frame Support | Yes, includes BLP-CTF color frame |
| 1/4" Mounting Hole | Yes |
| Thermovent | Yes, for heat dissipation |
| Kit Contents (BP65/BP85/BP150) | Projection attachment, corresponding lens, gobo set (MLP-GS), gobo holder (MLP-CF), color frame (BLP-CTF), carry bag, manual |
| Optional Accessories | Adjustable iris diaphragm (MLP-ID), color effects set (SA-11C), color temperature adjustment set (SA-11T), additional lenses |
Frequently Asked Questions - BP-SE GODOX
User questions about BP-SE GODOX
0 question about this device. Answer the ones you know or ask your own.
Ask a new question about this device
Download the instructions for your Lens in PDF format for free! Find your manual BP-SE - GODOX and take your electronic device back in hand. On this page are published all the documents necessary for the use of your device. BP-SE by GODOX.
USER MANUAL BP-SE GODOX
natural_image
Technical line drawing of a mechanical component with no visible text or symbols
Official Account
祖牛微信公众号
深圳市神牛摄影器材有限公司
GODOX Photo Equipment Co., Ltd.
Add: Building 2, Yaochuan Industrial Zone, Tengwei Community, Fujai Street, Bao'an District,
Shenzhen 518103, China Tel: 186-755-29509320(8062) Fax: 86-755-25723423
E-mail: godox@godox.com
godox.com
Made in China | Y25-BPS 00-00
UK CA CE FC
BP-SE
FOR LED
LED 灯投影筒
Godox BP-SE LED Projection
Attachment for Flat Head Bowens
使用手册
Instruction Manual
前言
感谢您购买神牛产品!
投影筒装卸(以LA300R灯具为例)
natural_image
Technical line drawing of a mechanical device with labeled components (① and ②), no readable text or symbols present.不同镜头光斑均匀度
line
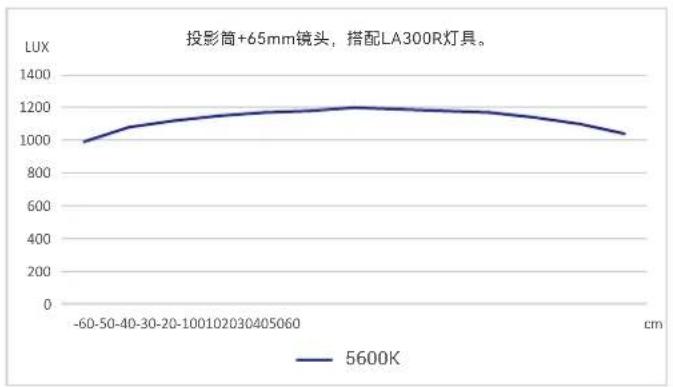
投影筒+65mm镜头,搭配LA300R灯具。 | Distance (cm) | 5600K | | --- | --- | | -60-50-40-30-20-100102030405060 | 1000 | | 0 | 1150 | | 60 | 1200 | | 120 | 1180 | | 180 | 1150 | | 240 | 1100 | | 300 | 1050 |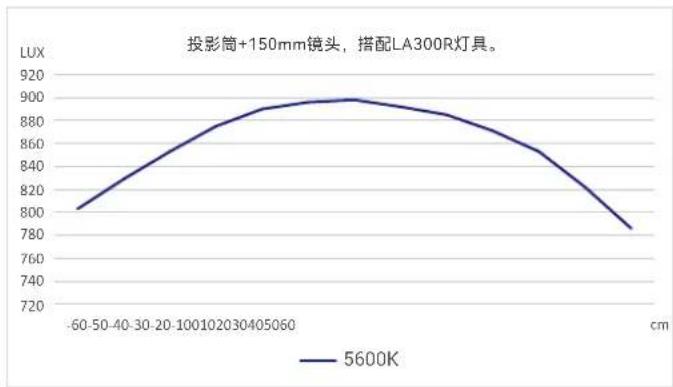
line
投影筒+150mm镜头,搭配LA300R灯具。 | Distance (cm) | 5600K | | :--- | :--- | | -60-50-40-30-20 | 800 | | -100-20-30-40-50 | 880 | | -20-30-40-50 | 900 | | -30-40-50-60 | 900 | | -40-50-60 | 880 | | -50-60 | 850 | | -60-70 | 820 | | -70-80 | 780 |Thank you for purchasing!
BP-SE For LED is designed for Godox LED lights with flat head Bowens mount with characteristics such as convenient operations, slot design and free effect settings. It offers users a range of unique lighting effects including spotlighting, chasing, beam cutting, optical zooming, beam
projection and beam shaping
Applicable Models
Godox LED lights with flat head Bowens mount such as: LA150R, LA200R, LA300R and LA300Bi
Name of Parts
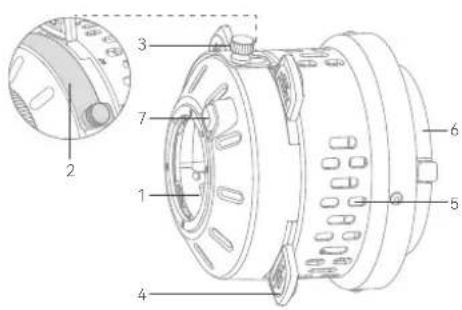
- Lens Mount
- Gobo Holder Slot/
Iris Diaphragm Slot - Screw Bolt
- Shutter Blade
- Thermovent
- Flat Head Bowens Mount
- Lens Disassembly Button
- 1/4" Mounting Hole
Note: The top dial allows for
350 degree rotation
What's Inside BP-SE For LED BP65 Kit
LED Projection
Attachment ×1

65mm Projection
Lens ×

Color Frame
BLP-CTF×1
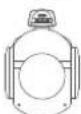
Gobo Holder
MLP-CF×1
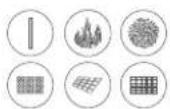
Gobo Set MLP-GS ×1

Instruction Manual ×1
09:10

Carry Bag ×1
What's Inside BP-SE For LED BP85 Kit
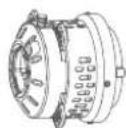
LED Projection Attachment ×1
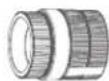
85mm Projection
Lens x1
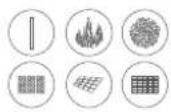
Cobo Sel MLP-GS ×1

Color Frame BLP-CTF ×1
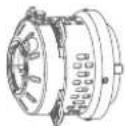
Gobo Holder
MLP-CF ×1

Instruction Manual ×1
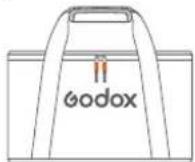
Carry Bag ×1
What's Inside BP-SE For LED BP150 Kit
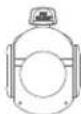
LED Projection Attachment ×1
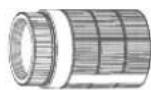
150mm Projection Lens ×1
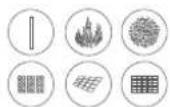
Gobo Sel MLP-GS ×1

Color Frame BLP-CTF×1
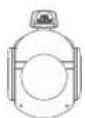
Gobo Holder
MLP-CF ×1

Instruction Manual ×1
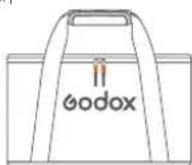
Carry Bag ×1
Note: This product utilizes an EF lens mount for optical lenses. Do not use a camera lens mount as a substitute, as the generated high temperature may damage the camera lens.
Optional Accessories
Optical Projection Lens 65mm, Optical Projection Lens 85mm, Optical Projection Lens 150mm, Adjustable Iris Diaphragm MI P-ID, Color Effects Set SA-11C, Color Temperature Adjustment Set SA-11T.
Installation of Gobo Holders
Loosen the screw bolt on the projection attachment counterclockwise(only loosen, do not remove them), slide open the gobo holder cap, and put the gobo into the gobo holder then insert into slot.
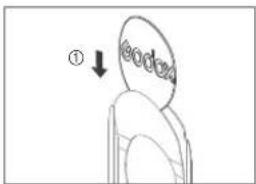
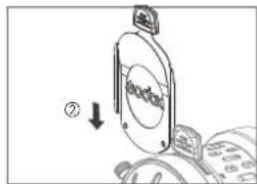
Note: The optional Iris Diaphragm can also be installed in the same way, but they cannot be installed at the same time.
Lens Installation and Disassembly
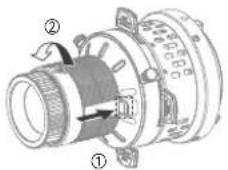
- Insert the lens into the lens mount on the projection attachment, then rotate it clockwise until the lens disassembly button automatically locks up with a "ting".
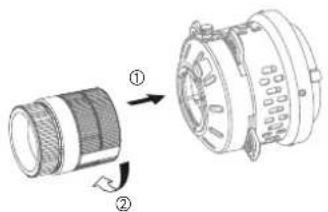
- To remove the lens, press and hold the lens disassembly button on the projection attachment and rotate the lens ianticlockwise to remove it.
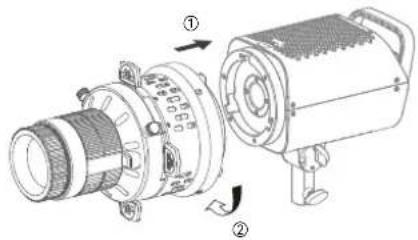
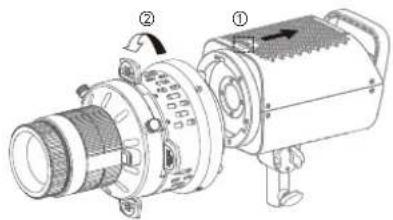
Projection Attachment Installation and Disassembly (take LA300R as an example)
- Insert the projection attachment mount into the LA300R mount, then rotate the projection attachment clockwise until the mount locking pusher of LA300R bayonet automatically locks up
natural_image
Technical diagram of an electric motor showing internal components and housing (no text or labels)- To remove the projection attachment, press and hold the mount locking pusher of LA500R, and then rotate the projection attachment anticlockwise to remove it.
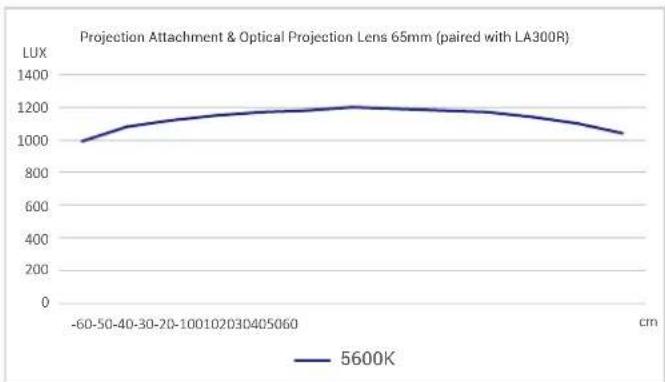
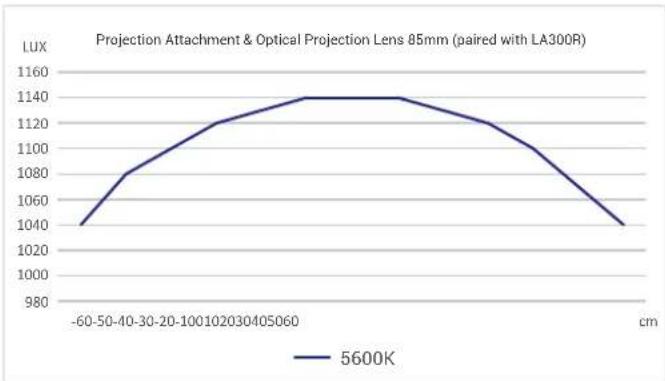
Beam Uniformity of Different Lens
line
| Position (cm) | Value | | ------------- | ----- | | -60-50-40-30-20 | 1000 | | 20-100 | 1100 | | 30-40 | 1150 | | 40-50 | 1200 | | 50-60 | 1250 | | 60-70 | 1200 | | 70-80 | 1150 | | 80-90 | 1100 | | 90-100 | 1050 |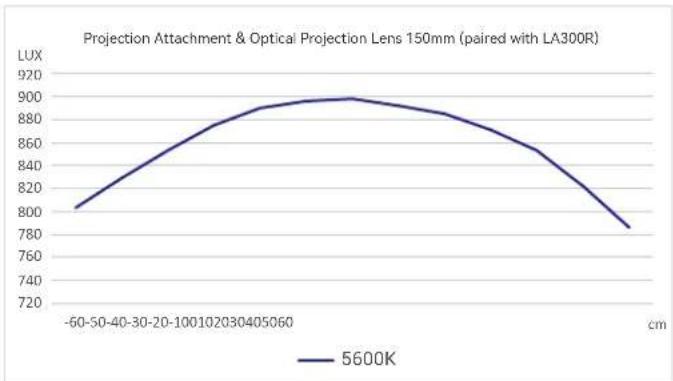
line
| Distance (cm) | LUX | | ------------- | ---- | | -60-50-40 | 800 | | -40-30-20 | 840 | | -20-100 | 870 | | 0-20 | 890 | | 20-40 | 900 | | 40-60 | 890 | | 60-80 | 870 | | 80-100 | 840 | | 100-120 | 810 | | 120-140 | 780 |Please note that the above data is not absolute, but rather an average value. All data was obtained during testing of the LED light LA300R at 100% brightness
line
| Distance (cm) | Lux | | ------------- | ---- | | -60-50-40 | 1040 | | -30-20 | 1080 | | -100 | 1120 | | 20 | 1140 | | 30 | 1140 | | 40 | 1120 | | 50 | 1100 | | 60 | 1040 |Photometric Data
Combine the Projection Attachment with Different Lenses (paired with LA300R)
| CCT | Test Condition | Unit | 1m | 2m | 3m | 5m |
| 2800K | LA300R Bare Light | lux | ≈9630 | ≈9460 | ≈1100 | ≈408 |
| fc | ≈894 | ≈228 | ≈102 | ≈38 | ||
| With 65mm Lens | lux | ≈10300 | ≈2180 | ≈907 | ≈318 | |
| fc | ≈960 | ≈202 | ≈84 | ≈30 | ||
| With 85mm Lens | lux | ≈17500 | ≈3650 | ≈1510 | ≈535 | |
| fc | ≈1660 | ≈339 | ≈140 | ≈50 | ||
| With 150mm Lens | lux | ≈55900 | ≈9660 | ≈3890 | ≈1320 | |
| fc | ≈5200 | ≈898 | ≈361 | ≈122 | ||
| 3200K | LA300R Bare Light | lux | ≈9830 | ≈2530 | ≈1120 | ≈419 |
| fc | ≈913 | ≈235 | ≈104 | ≈39 | ||
| With 65mm Lens | lux | ≈10700 | ≈2260 | ≈929 | ≈331 | |
| fc | ≈990 | ≈209 | ≈86 | ≈31 | ||
| With 85mm Lens | lux | ≈18400 | ≈3760 | ≈1550 | ≈548 | |
| fc | ≈1710 | ≈349 | ≈144 | ≈51 | ||
| With 150mm Lens | lux | ≈57700 | ≈9960 | ≈3980 | ≈1360 | |
| fc | ≈5360 | ≈925 | ≈370 | ≈126 | ||
| 4300K | LA300R Bare Light | lux | ≈9630 | ≈2490 | ≈1100 | ≈408 |
| fc | ≈895 | ≈231 | ≈102 | ≈38 | ||
| With 65mm Lens | lux | ≈10500 | ≈2210 | ≈918 | ≈327 | |
| fc | ≈978 | ≈205 | ≈85 | ≈30 | ||
| With 85mm Lens | lux | ≈18700 | ≈3710 | ≈1530 | ≈539 | |
| fc | ≈1690 | ≈344 | ≈142 | ≈50 | ||
| With 150mm Lens | lux | ≈57200 | ≈9880 | ≈3950 | ≈1340 | |
| fc | ≈5310 | ≈918 | ≈367 | ≈125 | ||
| 5600K | LA300R Bare Light | lux | ≈9130 | ≈2330 | ≈1030 | ≈385 |
| fc | ≈849 | ≈217 | ≈96 | ≈36 | ||
| With 65mm Lens | lux | ≈9950 | ≈2100 | ≈868 | ≈309 | |
| fc | ≈924 | ≈195 | ≈81 | ≈29 | ||
| With 85mm Lens | lux | ≈17200 | ≈3510 | ≈1450 | ≈512 | |
| fc | ≈1600 | ≈327 | ≈135 | ≈48 | ||
| With 150mm Lens | lux | ≈54500 | ≈9380 | ≈3760 | ≈1270 | |
| fc | ≈5060 | ≈872 | ≈349 | ≈118 | ||
| 6500K | LA300R Bare Light | lux | ≈8390 | ≈2150 | ≈948 | ≈356 |
| fc | ≈779 | ≈199 | ≈88 | ≈33 | ||
| With 65mm Lens | lux | ≈9190 | ≈1940 | ≈801 | ≈286 | |
| fc | ≈854 | ≈180 | ≈74 | ≈27 | ||
| With 85mm Lens | lux | ≈15900 | ≈3230 | ≈1330 | ≈473 | |
| fc | ≈1480 | ≈300 | ≈124 | ≈44 | ||
| With 150mm Lens | lux | ≈50300 | ≈8670 | ≈3470 | ≈1180 | |
| fc | ≈4670 | ≈805 | ≈322 | ≈110 |
he above tests were all conducted with the light at 700% brightness and the projection lens set to spotlight mode.
Technical Data
| Projection tube (excluding lens) | Projection lens 65mm | Projection lens 85mm | Projection lens 150mm | |
| Size= | 220mm×220mm×1.8mm | 80mm×80mm×83mm | 80mm×80mm×89mm | 80mm×80mm×129mm |
| Net weight= | 1.3kg | 0.5kg | 0.5kg | 0.7kg |
Specifications and data may subject to changes without notice.
产品保修
Dear customers, as this warranty card is an important certificate to apply for our maintenance service, please fill in the following form in coordination with the seller and safe-keep it. Thank you!
| Product Information | Model | Product Code Number |
| Customer Information | Name | Contact Number |
| Address | ||
| Senior Information | Name | |
| Contact Number | ||
| Address | ||
| Date of Sale | ||
| Note | ||
Note: This firm shall be sealed by the seller.
Applicable Products
The document applies to the products listed on the Product Maintenance Information (see below for further information). Other products or accessories (e.g. promotional items, giveaways and additional accessories attached, etc.) are not included in this warranty scope.
Warranty Period
The warranty period of products and accessories is implemented according to the relevant Product Maintenance Information. The warranty period is calculated from the day (purchase date) when the product is bought for the first time, And the purchase date is considered as the date registered on the warranty card when buying the product.
How to Get the Maintenance Service
If maintenance service is needed, you can directly contact the product distributor or authorized service institutions. You can also contact the Godox after-sale service call and we will offer your service. When applying for maintenance service, you should provide valid warranty card. If you cannot provide valid warranty card, we may offer you maintenance service once confirmed that the product or accessory is involved in the maintenance scope, but that shall not be considered as our obligation:
Inapplicable Cases
The guarantee and service offered by this document are not applicable in the following cases: ① The product or accessory has expired its warranty period; ② Breakage or damage caused by inappropriate usage, maintenance or preservation, such as improper packing, improper usage, improper plugging in/out external equipment, falling off or squeezing by external force, contacting or exposing to the improper temperature, solvent, acid, base, flooding and damp environments, etc; ③ Breakage or damage caused by non-authorized institution or staff in the process of installation, maintenance, alternation, addition and detachment; ④ The original identifying information of product or accessory is modified, alternated, or removed; ⑤ No valid warranty card; ⑥ Breakage or damage caused by using
illegally authorized, nonstandard or non-public released software; ⑦ Breakage or damage caused by force majeure or accident; ⑧ Breakage or damage that could not be attributed to the product itself. Once met these situations above, you should seek solutions from the related responsible parties and Godox assumes no responsibility. The damage caused by parts, accessories and software that beyond the warranty period or scope is not included in our maintenance scope. The normal discoloration, abrasion and consumption are not the breakage within the maintenance scope.
Maintenance and Service Support Information
The warranty period and service types of products are implemented according to the following Product Maintenance Information:
| Product Type | Name | Maintenance Period(month) | Warranty Service Type |
| Parts | Circuit board | 12 | Customer sends the product to designated site |
| Battery | 3 | Customer sends the product to designated site | |
| Electrical parts e.g.battery charger, etc. | 12 | Customer sends the product to designated site | |
| Other Items | Power cord, sync cable, lamp body, lamp cover, looking device, package, etc. | No | Without warranty |
Godox After-sale Service Call -86 765 29609320(8062)
- 深圳市神牛摄影器材有限公司
- 前言
- 投影筒装卸(以LA300R灯具为例)
- Applicable Models
- Optional Accessories
- Installation of Gobo Holders
- Lens Installation and Disassembly
- Projection Attachment Installation and Disassembly (take LA300R as an example)
- 产品保修
- Applicable Products
- Warranty Period
- How to Get the Maintenance Service
- Inapplicable Cases
- Maintenance and Service Support Information
Brand : GODOX
Model : BP-SE
Category : Lens