
GG401 - Grill BLAUPUNKT - Free user manual and instructions
Find the device manual for free GG401 BLAUPUNKT in PDF.

| Brand | Blaupunkt |
| Model | GG401 |
| Product Type | Gas Grill |
| Fuel Type | LPG (Butane/Propane) |
| Gas Pressure | 37 mbar |
| Total Heat Output | 11.7 kW |
| Gas Consumption | 851 g/h |
| Main Burner Injector Size | 0.7 mm |
| Side Burner Injector Size | 0.66 mm |
| Ignition System | Piezo ignition |
| Number of Burners | Main burner(s) and side burner |
| Construction Material | Stainless steel |
| Grill Surface (Cooking Grate) | Ceramic enamel coated |
| Max Gas Cylinder Dimensions | Height 59 cm, Diameter 34 cm |
| Regulator Type | Quick-connect, 37 mbar |
| Gas Line Length | Approx. 60 cm (max 150 cm) |
| Usage Environment | Outdoor only, well-ventilated |
| Safety Features | Gas cylinder compartment, leak test required, automatic shut-off |
| Cleaning Method | Burn off residues, brush grates, rinse with water, oil coating |
| Storage | Store in dry place, disconnect gas cylinder when not in use |
| Warranty | Contact service for support |
Frequently Asked Questions - GG401 BLAUPUNKT
User questions about GG401 BLAUPUNKT
0 question about this device. Answer the ones you know or ask your own.
Ask a new question about this device
Download the instructions for your Grill in PDF format for free! Find your manual GG401 - BLAUPUNKT and take your electronic device back in hand. On this page are published all the documents necessary for the use of your device. GG401 by BLAUPUNKT.
USER MANUAL GG401 BLAUPUNKT
natural_image
Exterior view of a modern stainless steel BBQ grill with control knobs and wheels (no visible text or symbols)Enjoy it.
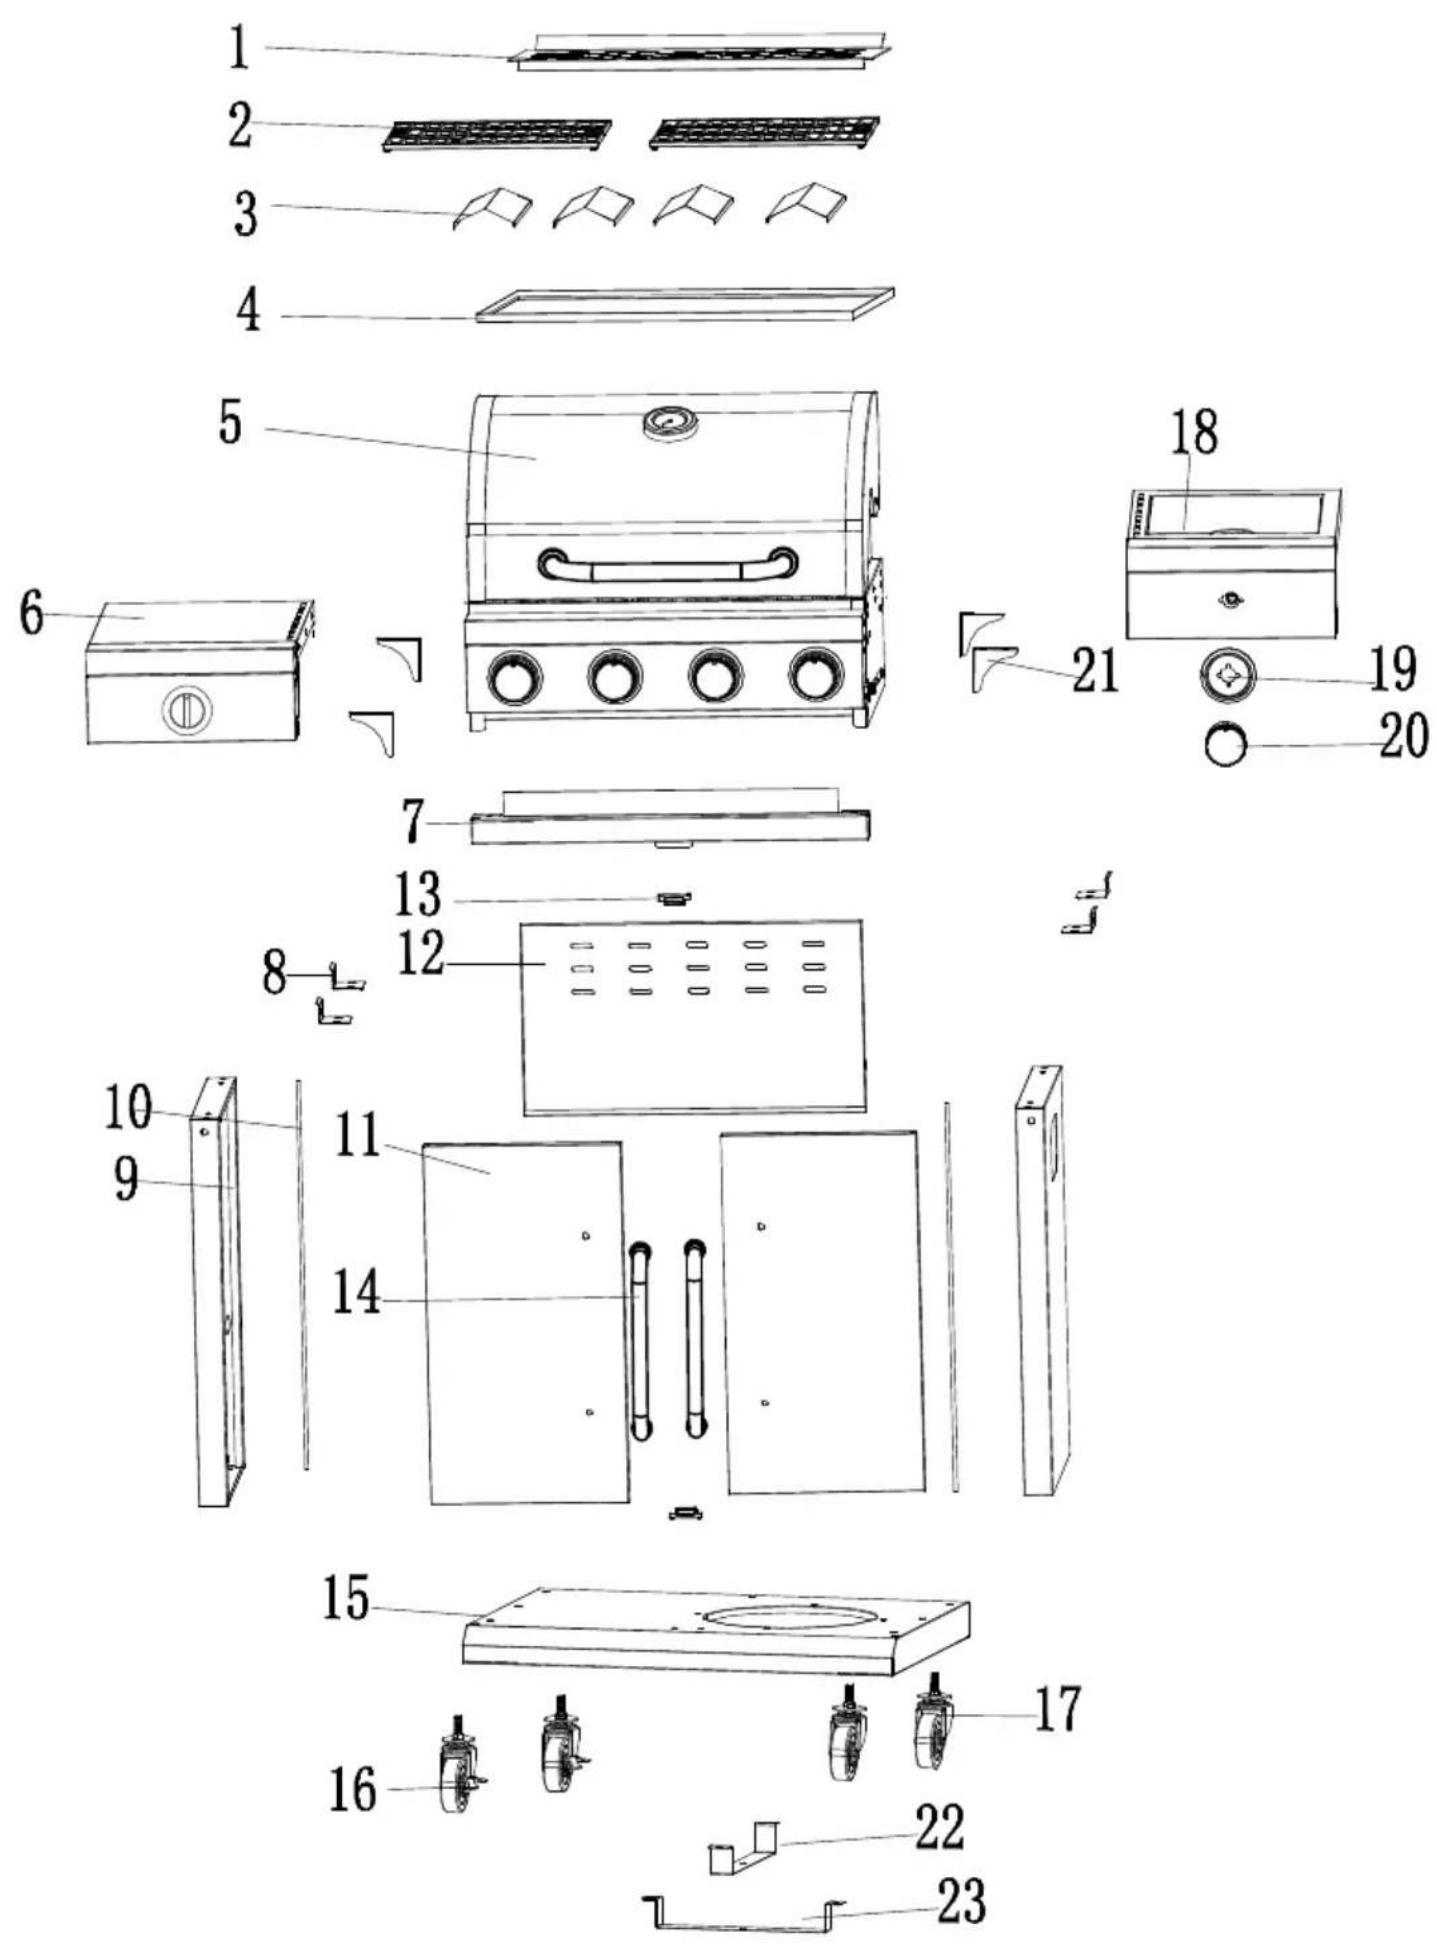
| PART | QTY | |
| 1. | X 1 | |
| 2. |  | X2 |
| 3. |  | X 4 |
| 4. |  | X 1 |
| 5. |  | X 1 |
| 6. | 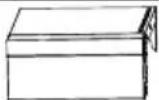 | X 1 |
| 7. |  | X 1 |
| 8. | X | |
| 9. |  | |
| 10 |  | X 2 |
| 11. | 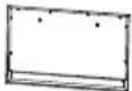 | X 2 |
| 12. |  | X1 |
| 13. | 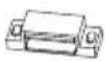 | X 2 |
| 14. | 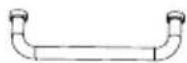 | X 2 |
| 15 | 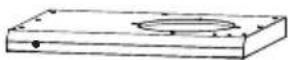 | X 1 |
| 16. |  | X 2 |
| 17. |  | X 2 |
| 18. | 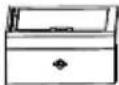 | X 1 |
| 19. |  | X 1 |
| PART | QTY |
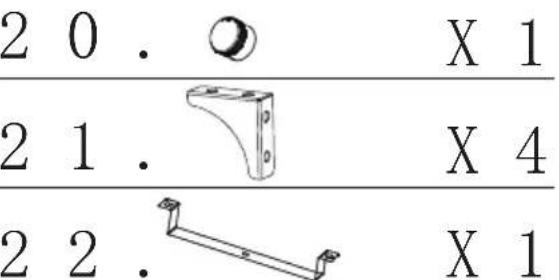
| 2 0 . | X 1 |
| 2 1 . | X 4 |
| 2 2 . | X 1 |
| 2 3 . | [X52H] X 1 |
| A. | X 5 8 | |
| B. | X 4 | |
| C. | X 2 | |
| D. | X 2 |
| A. | X 5 8 | |
| B. | X 4 | |
| C. | X 2 | |
| D. | X 2 |
| A. | X 5 8 | |
| B. | X 4 | |
| C. | X 2 | |
| D. | X 2 |
| A. | X 5 8 | |
| B. | X 4 | |
| C. | X 2 | |
| D. | X 2 |
| A. | X 5 8 | |
| B. | X 4 | |
| C. | X 2 | |
| D. | X 2 |
| 2 | 2. | X1 |
| 2 | 2. | X1 |
| 2 | 2. | X1 |
| 2 | 2. | X1 |
| 2 | 2. | X1 |
| H | g | mA | kA | |
| 1.0 | 0.5 | 0.2 | 0.3 | 0.4 |
| H | g | mA | kA | |
| 1.0 | 0.5 | 0.2 | 0.3 | 0.4 |
| H | g | mA | kA | |
| 1.0 | 0.5 | 0.2 | 0.3 | 0.4 |
| H | g | mA | kA | |
| 1.0 | 0.5 | 0.2 | 0.3 | 0.4 |
| H | g | mA | kA | |
| 1.0 | 0.5 | 0.2 | 0.3 | 0.4 |
| 2 | 2. | X1 |
| 2 | 2. | X1 |
| 2 | 2. | X1 |
| 2 | 2. | X1 |
| 2 | 2. | X1 |
| 2 | 2. | X1 |
| 2 | 2. | X1 |
| PART | QTY |
| 2 0 . | X 1 |
| 2 1 . | X 4 |
| 2 2 . | X 1 |
| PART | QTY |
| 2 0 . | X 1 |
| 2 1 . | X 4 |
| 2 2 . | X 1 |
| PART | QTY |
| 2 0 . | X 1 |
| 2 1 . | X 4 |
| 2 2 . | X 1 |
| PART | QTY |
| 2 0 . | X 1 |
| 2 1 . | X 4 |
| 2 2 . | X 1 |
PART QTY 2 0 . X 1 2 1 . X 4 2 2 . X 1
| PART | QTY |
| 2 0 . | X 1 |
| 2 1 . | X 4 |
| 2 2 . | X 1 |
PART QTY 2 0 . X 1 2 1 . X 4 2 2 . X 1
| PART | QTY |
| 2 0 . | X 1 |
| 2 1 . | X 4 |
| 2 2 . | X 1 |
PART QTY 2 0 . X 1 2 1 . X 4 2 2 . X 1
| 2 | 0. | ○ | X | 1 |
- X1
| 2 | 0. | ○ | X | 1 |
- X1
| 2 | 0. | ○ | X | 1 |
- X1
| 20. | ○ | X1 |
- X1
| 2 | 0. | ○ | X | 1 |
- X1
| 2 | 0 | 2 | Y | 1 |
- X1
| 2 | 0. | ○ | X | 1 |
- X1
| 2 | 0. | ○ | X | 1 |
- X1
| 2 | 0. | ○ | X | 1 |
- X1
| 2 | 0. | ○ | X | 1 |
20 X 1
| 2 | 0. | ○ | X | 1 |
- X1
| 2 | 0. | ○ | X | 1 |
- X1
- X1
| 2 | 0. | ○ | X | 1 |
- X1
| 2 | 0. | ○ | X | 1 |
2 0 0 V 1
| 2 | 0. | ○ | X | 1 |
- X1
| 2 | 0. | ○ | X | 1 |
- X1
| 2 | 0. | ○ | X | 1 |
- X1
| 2 | 0. | ○ | X | 1 |
- X1
 |
- X1
| 20. | X1 |
| 21. | X4 |
| 22. | X1 |
- X1
| 20. | X1 |
| 21. | X4 |
| 22. | X1 |
- X1
| 20. | X1 |
| 21. | X4 |
| 22. | X1 |
- X1
| 20. | X1 |
| 21. | X4 |
| 22. | X1 |
- X1
- X4
- X1
| 20. | X1 |
| 21. | X4 |
| 22. | X1 |
- X1
- X4
- X1
| 20. | X1 |
| 21. | X4 |
| 22. | X1 |
- X1
- X4
- X1
| 2 0 . | X 1 |
| 2 1 . | 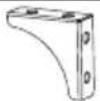 X 4 X 4 |
| 2 2 . | X 1 |
- X1
- X4
- X1
| 20. | X1 |
| 21. | X4 |
| 22. | X1 |
- X1
- X4
- X1
| 20. | X1 |
| 21. | X4 |
| 22. | X1 |
| 23. | X1 |
- X1
- X4
- X1
| 20. | X1 |
| 21. | X4 |
| 22. | X1 |
- X1
- X4
- X1
| 20. | X1 |
| 21. | X4 |
| 22. | X1 |
- X1
- X4
- X1
| 20. | X1 |
| 21. | X4 |
| 22. | X1 |
- X1
- X4
- X1
| 20. | X1 |
| 21. | X4 |
| 22. | X1 |
- X1
- X4
- X1
| 20. | X1 |
| 21. | X4 |
| 22. | X1 |
- X1
- X4
- X1
| 20. | X1 |
| 21. | X4 |
| 22. | X1 |
| 20. | X1 |
| 21. | X4 |
| 22. | X1 |
- X1
- X4
- X1
| 20. | X1 |
| 21. | X4 |
| 22. | X1 |
- 1
- 1
| 20. | X1 |
| 21. | X4 |
| 22. | X1 |
- 1
- 1
| 20. | X1 |
| 21. | X4 |
| 22. | X1 |
2 1 0 2 2 .
| 20. | X1 |
| 21. | X4 |
| 22. | X1 |
- 1
- 1
| 20. | X1 |
| 21. | X4 |
| 22. | X1 |
- 1
- 1
- 1
- 1
| 20. | X1 |
| 21. | X4 |
| 22. | X1 |
- 1
- 1
- 1
- 1
| 20. | X1 |
| 21. | X4 |
| 22. | X1 |
- 1
- 1
| 20. | X1 |
| 21. | X4 |
| 22. | X1 |
- 1
- 1
| 20. | X1 |
| 21. | X4 |
| 22. | X1 |
- 1
- 1
| 20. | X1 |
| 21. | X4 |
| 22. | X1 |
| 20. | X1 |
| 21. | X4 |
| 22. | X1 |
- 1
- 1
| 20. | X1 |
| 21. | X4 |
| 22. | X1 |
- X1
- X4
- X1
| 20. | X1 |
| 21. | X4 |
| 22. | X1 |
2 1 0 2 2 .
| 20. | X1 |
| 21. | X4 |
| 22. | X1 |
2 1 0 2 2 .
| 20. | X1 |
| 21. | X4 |
| 22. | X1 |
natural_image
Technical line drawing of a mechanical device with labeled components (A, 9), no readable text or symbols beyond labels3
A X 6
4
A X 5
5
A X 8
6
B X 4
C X 2
natural_image
Technical line drawing of a mechanical device with wheels and a labeled component (A), no text or symbols present.7
AX2
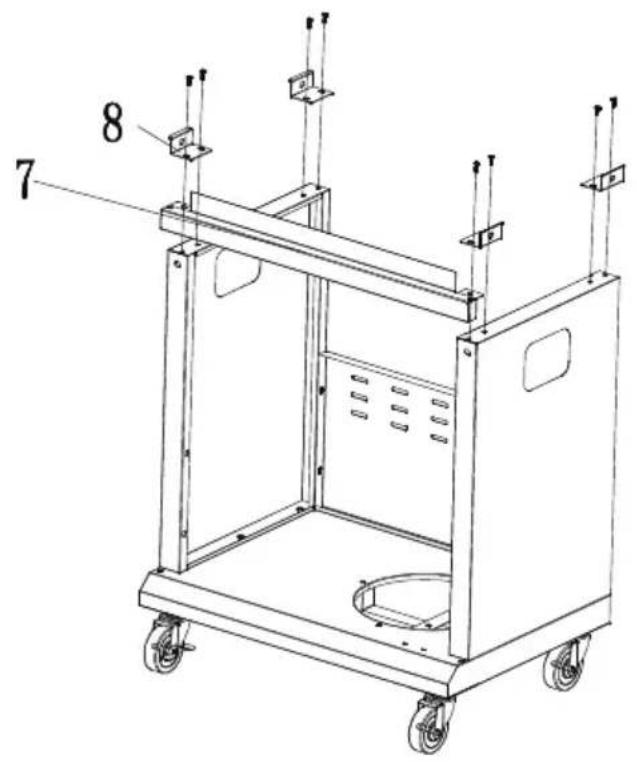
8
A X 4
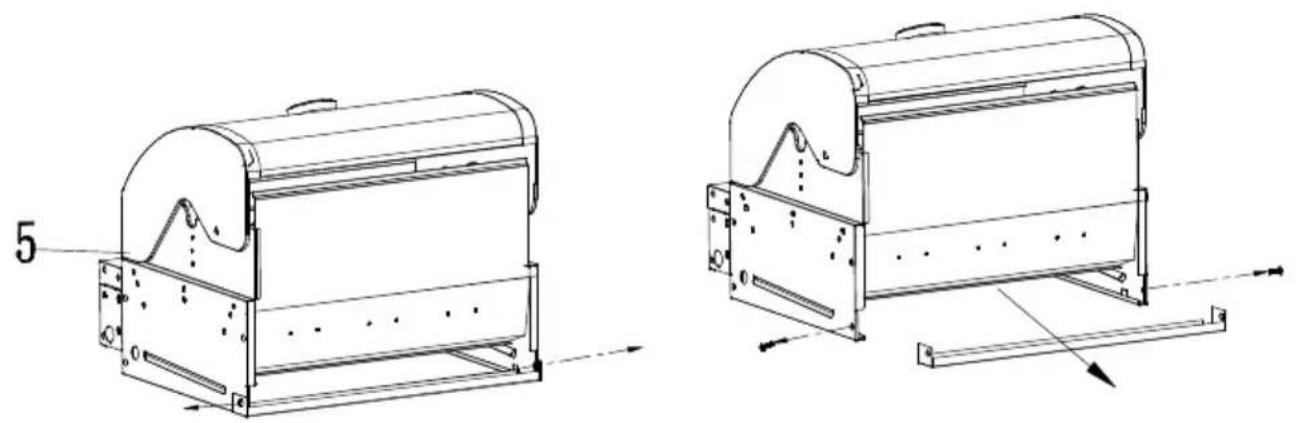
natural_image
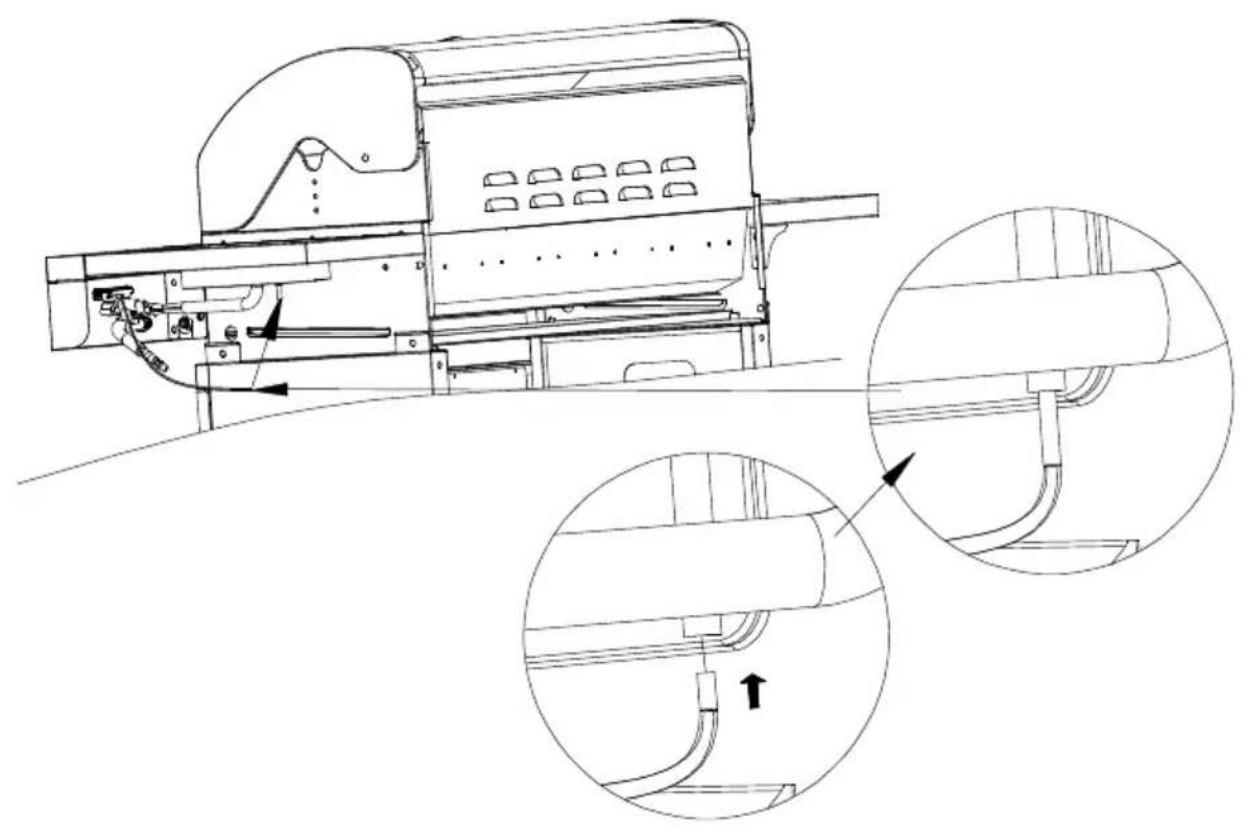
Technical line drawings of two industrial cylindrical enclosures with internal components and mounting brackets (no text or symbols)Please remove this shipping metal protective part before assembly!
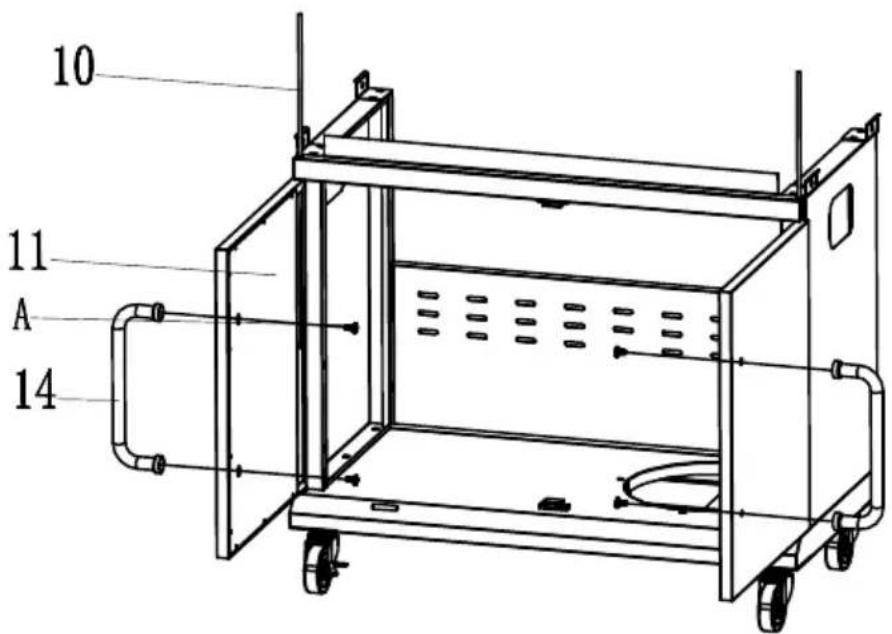
9
10
A X 4
11
A X 4
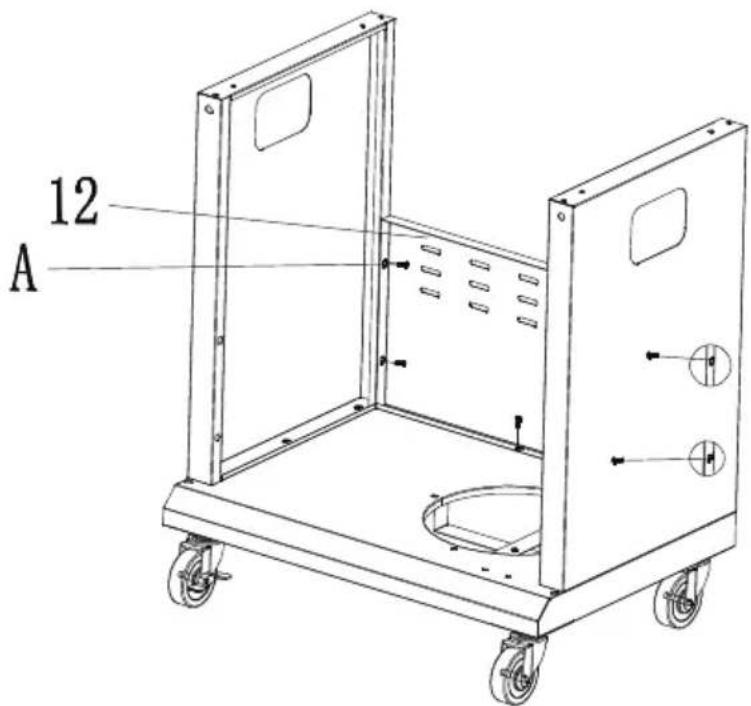
12
A X 6
natural_image
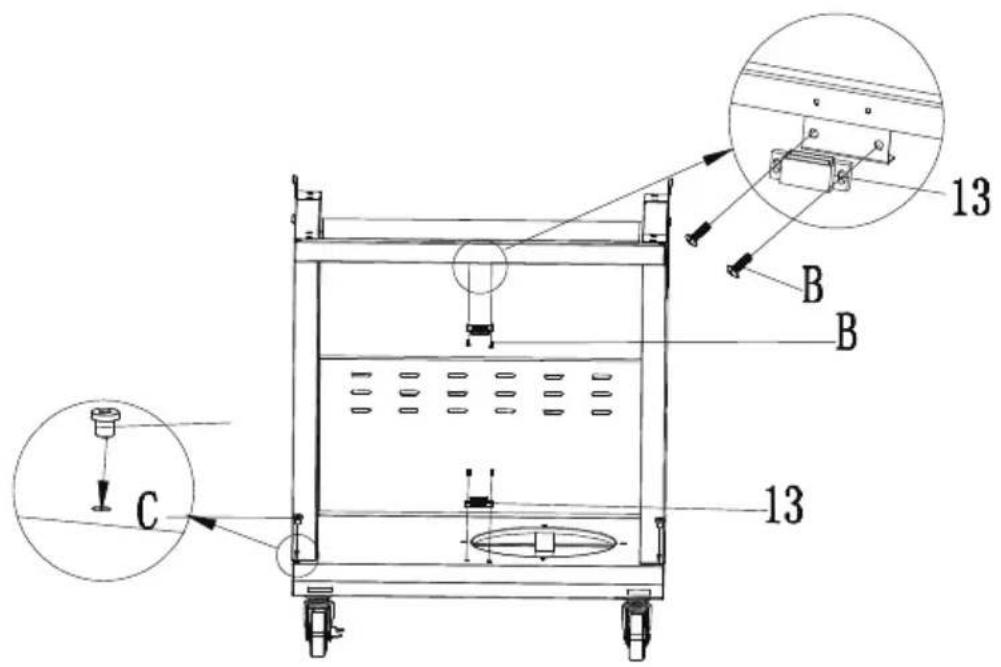
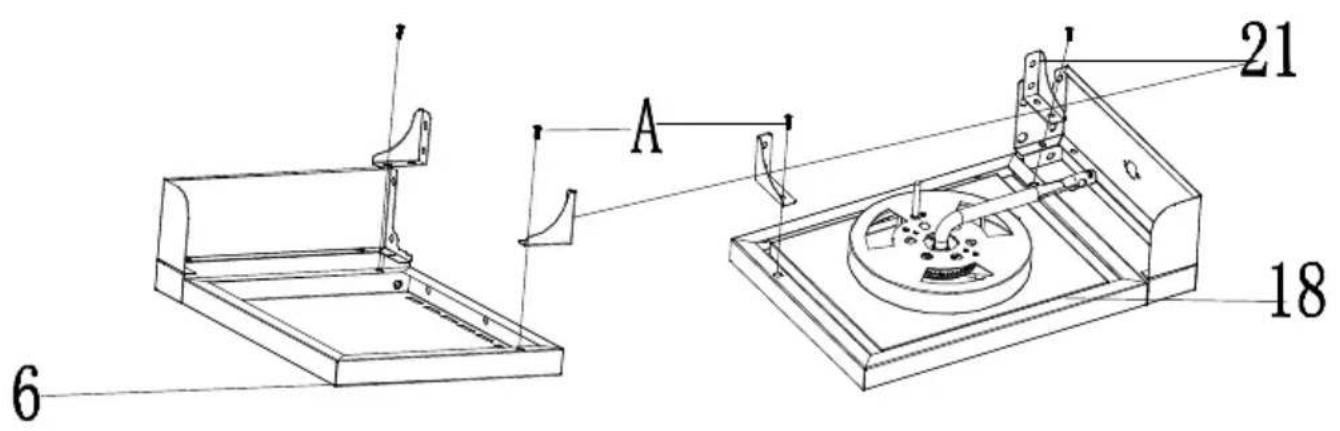
Technical line drawing of a mechanical assembly with two views (top and side), no visible text or symbols13
A X 1 4

14
D X 2
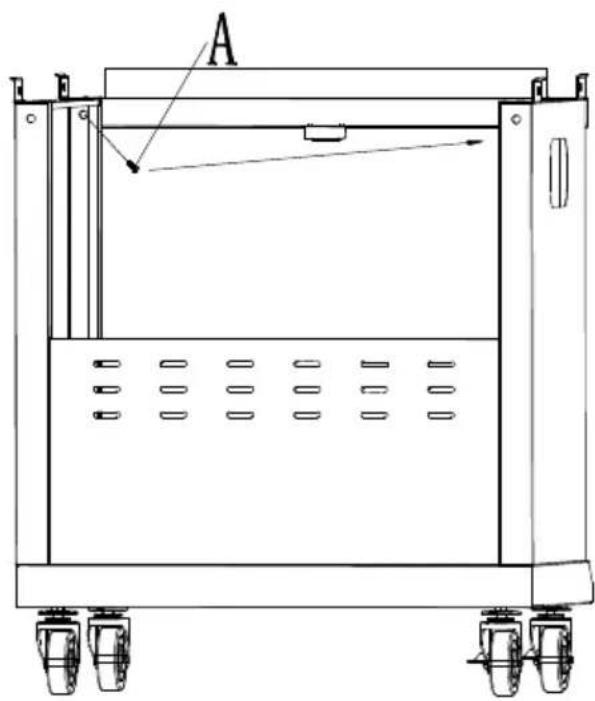
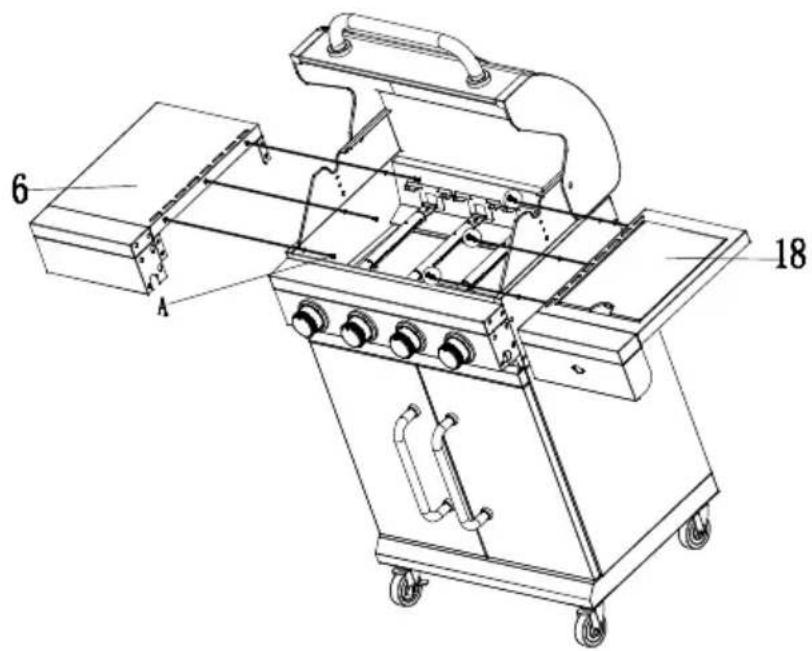
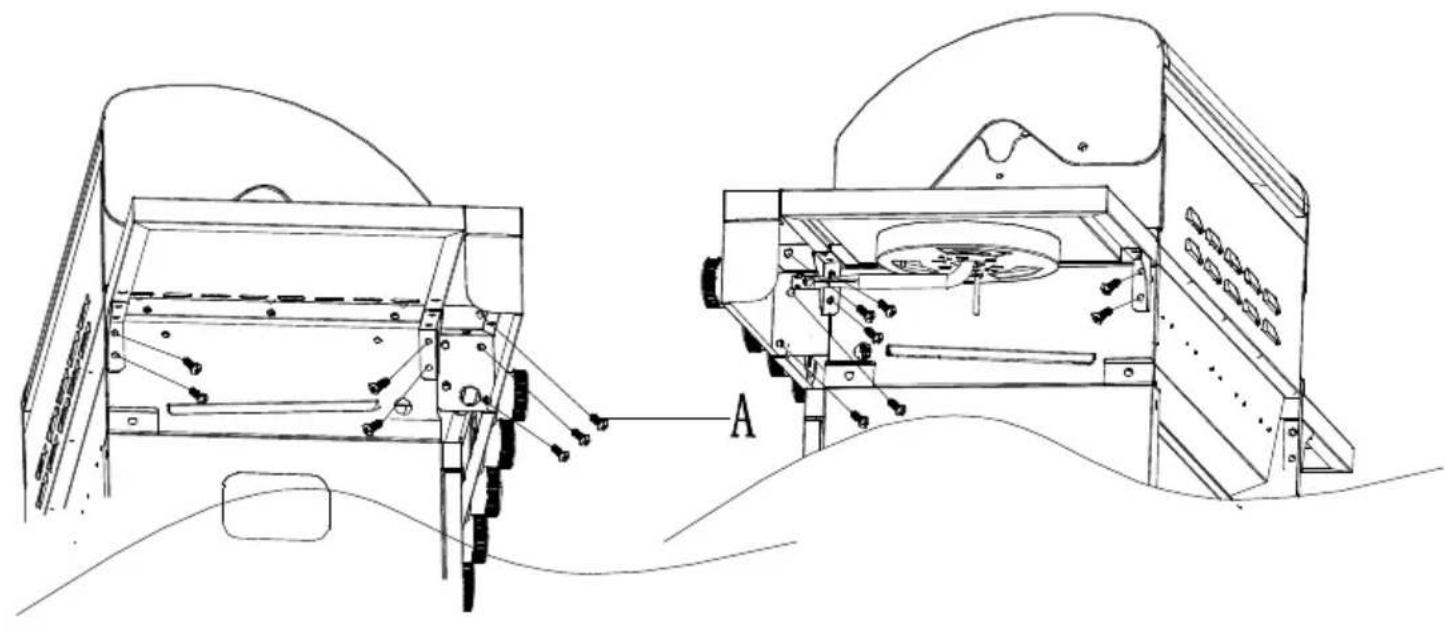
natural_image
Technical line drawing of a mechanical device with internal components and two magnified views showing internal structure (no text or symbols)15
16
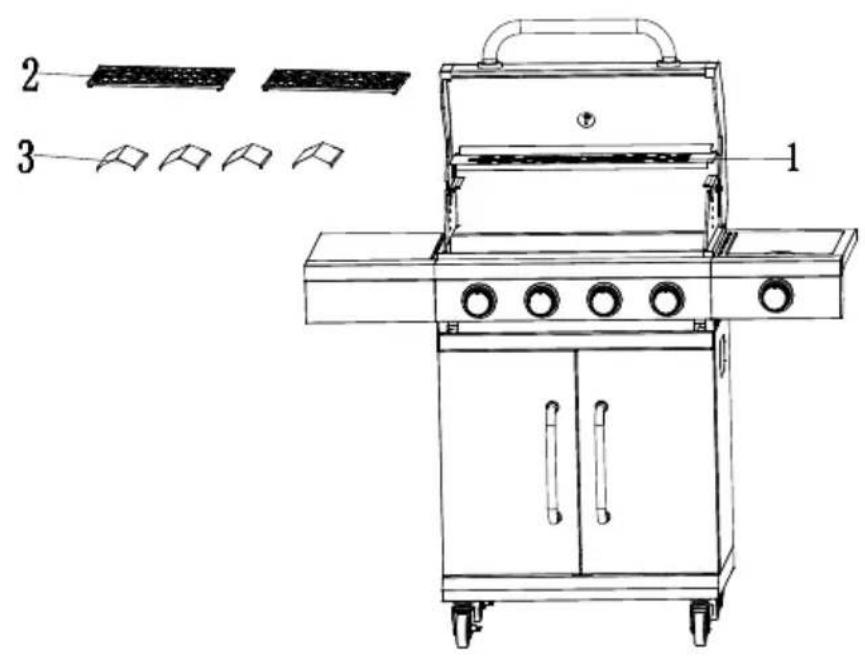
natural_image
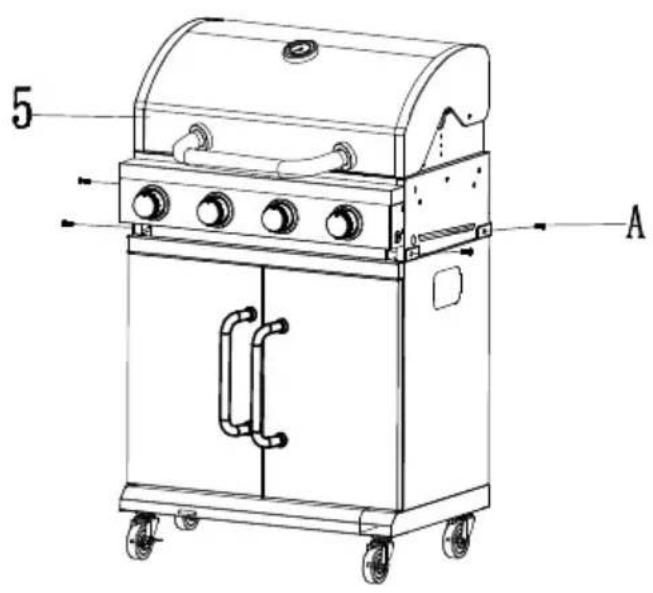
Line drawing of a portable electric grill with wheels and control panel (no text or symbols)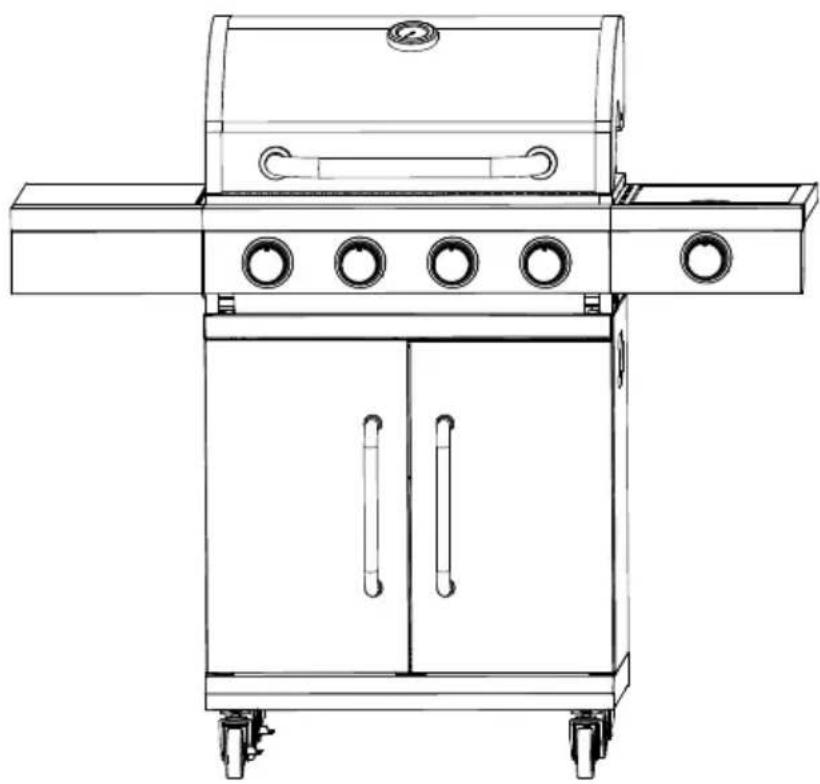
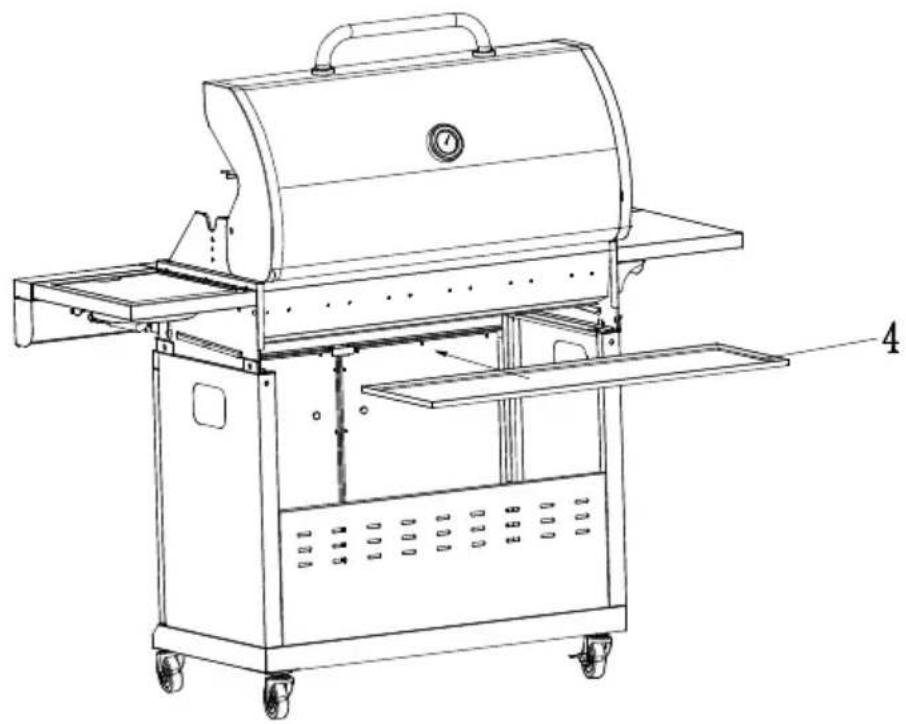
natural_image
Line drawing of a four-tiered outdoor grill with wheels and doors (no text or symbols)SAFETY INSTRUCTIONS
- Failure to observe the warnings and cautions could result in serious injury or death, fire or explosion and damage to property. Read all safety precautions in this manual. Keep the manual for future reference.
-
Do not make any modifications to the appliance or structural changes. Use only recommended gas cylinders connected via a regulator complying with national standards or norms (EN 16129:2013-11) with a nominal outlet pressure of category I3B/P(37). Only a liquefied gas line complying with national regulations and standards (EN 16436-1:2014+A3:2020-10) should be used. It should be approximately 60 cm long, not exceeding 150 cm. Replace the LPG tube periodically according to the national regulations in force (usually every two years).
-
Never use an unstabilised gas supply (without a regulator).
-
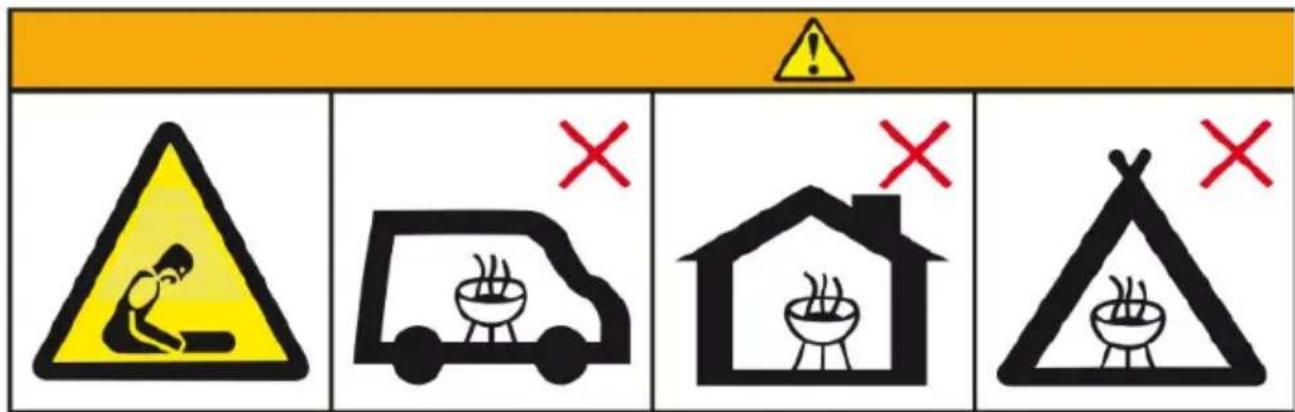
Do not use indoors! The grill is intended for outdoor use only. If the grill is used indoors, such as buildings, tents, caravans, campers, boats, there is a danger to life. Accumulating toxic fumes can cause carbon monoxide poisoning or death.
-
Use the barbecue only outdoors in well-ventilated areas. Do not use the barbecue under a canopy or under
combustible structures. Do not use the barbecue in buildings, covered walkways, garages or other enclosed or partially enclosed areas.
-
Do not use the grill near flammable materials. Do not use the barbecue near dry grass or in areas where barbecuing is prohibited. Take care to keep a distance from wood, wooden planks, wooden decking or porches and verandas.
-
Place the barbecue on a stable and even heat-resistant surface. Do not place the grill near walkways or where it may impede movement.
-
Before lighting the grill, make sure it is correctly unfolded and all parts are fitted.
-
Use extreme caution when using the grill. The barbecue heats up when grilling, its parts become very hot. Never leave a lit grill unattended.
-
CAUTION: Children and pets should not be in the immediate vicinity of the grill. Do not leave children or pets unattended.
-
Do not use the grill in windy weather.
-
Protective gloves and tongs are recommended for handling the grill.
-
Avoid wearing loose-sleeved clothing when lighting and operating the grill. Pay attention to loose garments that may fall towards the burners and ignite.
-
The grill heats up. Do not touch a lit grill, do not move the grill when it is lit or immediately after the grill is finished. Wait until it has cooled down.
-
Do not touch the black side parts of the handle covered, they get hot when the grill is in operation.
-
When the grill is stored, it should not be exposed to
adverse weather conditions such as rain, full sun, significant humidity, etc.
-
Turn off the gas supply from the cylinder when the appliance is not in use.
-
Do not use an open flame (e.g. a match) to check for leaks in the installation and connections.
-
The grill has been thoroughly checked for leaks at the factory. However, it is recommended that a thorough leak check is carried out before use. Transport, handling, assembly can cause fittings to come loose.
-
Always cook/grill with care. Be prepared in case of dangerous incidents or fire. Locate the location of the first aid kit and fire extinguisher. Familiarise yourself with the instructions for use of the fire extinguisher.
-
Do not heat or grill food in sealed containers. Pressure build-up in the container can lead to an explosion leading to injury or damage to equipment.

Your products is designed a manufactured with high quality materials and components, which can be recycled and reused.
GAS CYLINDER - SPECIAL SAFETY CONDITIONS
-
Take special care when handling and moving gas cylinders.
-
Do not store gas cylinders in a lying position
-
Do not use overfilled cylinders. Higher gas pressures may cause excessive gas release or uncontrolled venting of gas through the valve.
-
Store the cylinder outside in a well-ventilated area. Do not store the cylinder in areas subject to flooding and weather conditions such as strong sunlight, rain). Place the cylinder in a location which is easily accessible so that the valve can be closed at any time.
-
Maximum dimensions of the gas cylinder to use the cylinder compartment: height 59 cm, diameter 34 cm.
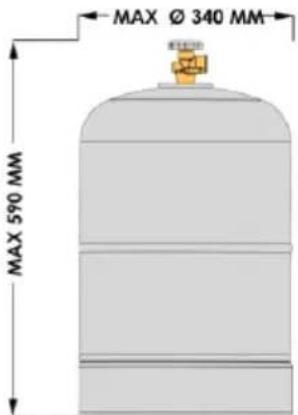
- Metal or composite cylinders filled with propane-butane or propane gas can be used for the gas barbecue. The included regulator (regulator) has a working pressure of 37 mbar. Quick-connect regulators with a working pressure of 37 mbar can also be used.
ASSEMBLING THE UNIT
Assemble the grill according to the diagram shown in the pictures in part one of the instructions. Check that all components were in the box according to the list of components. Ensure that the correct parts were used to assemble the individual components according to the indication in the instructions, such as the size of the screws or the correct metal parts.
CONNECTING AND REPLACING THE GAS CYLINDER
Ensure that the cylinder and the grill are away from all sources of ignition, such as open flames, sparks, burning cigarettes.
Check the condition of the LPG hose for signs of damage, cracks, abrasions, cuts. If there is any damage, do not connect it to the gas cylinder.
Ensure that the cylinder's main valve is turned off. Remove the protective cap from the threads of the main valve (it is recommended to leave it for later use, to plug the seat after unscrewing the hose).
Verify the condition of the gasket at the regulator fixing nut, that it is in place and not damaged. Fit and screw (left-hand thread) the regulator fixing nut to the main thread of the valve. When the unit is to be used, unscrew the cylinder main valve. Check all connections for leaks before starting the unit. NOTE: Ensure that the gas line is not twisted.
To unscrew the regulator, first turn off the cylinder main valve. Then unscrew the nut connecting the regulator to the valve. Place the protective cap on the main valve. NOTE: Never unscrew the regulator when the main valve is not turned off.
To check the tightness of the connections:
-
Prepare a solution of soap or other detergent with water or prepare a specialised preparation.
-
Turn all burner knobs to the OFF position.
-
Open the main gas cylinder valve to its maximum.
-
Spread the solution over each gas line joint. If there is a leak, there will be bubbles and foaming in the solution. In this case, turn off the main gas valve. Correct the fixings and tighten, check again. If the leak is in the grill, contact service. If the leak is observed in the gas line, replace it. Do not operate the
appliance with a leaking line.
Ensure that the appliance has been assembled in accordance with the instructions and that a leak test of the connections has been carried out.
NOTE: When lighting the grill, the grill lid should be raised.
Ensure that the control knobs are set to the OFF position. Open the main valve at the gas cylinder.
Hold the knob down for 3-5 seconds so that the gas starts to flow and fill the burner. Then turn one control knob to the "HI" position marked at the same time with the lightning bolt symbol. The burner should be lit by the sparking of the piezo igniter. Hold the knob down for a further 2-3 seconds - the flame should stabilise.
To light additional burners, turn the burner control knob closest to the burner already burning to the "HI" position by pressing it. Light the burners one by one.
The additional side burner can be lit in the same way.
In the event that the burners do not want to light, turn the control knobs to the OFF position, wait at least 5 minutes, then try again.
In the event that the spark igniter does not work, the burners can be lit using a lighter or long matches.
To do this, remove the grate and the diffusers, turn the knob to the "HI" position, then set the igniter approximately 5 mm of the burner holes. Once the burners are lit, place the diffusers and grates in position. Use protective gloves.
Turn off the main cylinder valve, then turn the burner control knobs to the OFF position.
HANDLING AND GRILLING TECHNIQUES
Before using the grill for the first time, it must be fired up. This is done by starting the grill, firing all the burners and setting them to the "HI" position. You should fire the grill for 20 minutes with the lid closed. After this time, switch off the burners and open the lid. Wait until the appliance has cooled down. Firing should be done before first use and to get rid of odours and dirt.
Preheating the grill. Before grilling food, the grill should reach the target temperature. Move the burners to the correct position and cover the grill with the lid. This usually takes about 10 minutes. Before grilling, it is advisable to clean the grates with a brush and grease/spray them with vegetable oil. This will make the food less likely to stick to the surface of the grates.
Grilling temperature:
"HI" - the grates will heat up to 320-340 °C. The highest setting is used to heat the grill quickly or to fry steaks briefly before cooking them further at a lower temperature.
"LO" - The grates at this setting should heat up to about 150 °C. This temperature is advisable for preparing large cuts of meat or delicate fish and for smoking.
Intermediate settings will achieve temperatures in the "HI" and "LO" range. A higher temperature of around 290 °C is advisable for preparing chops and steaks, a temperature between 200 and 230 °C is recommended for vegetables, poultry, burgers and roasting.
NOTE: The actual temperature inside the grill may vary. It depends on external factors such as ambient temperature and wind strength.
Direct grilling and indirect grilling.
Direct grilling involves cooking food on the grill directly over the flame. Direct grilling is the most common method for preparing steaks, fish, burgers and vegetables.
Indirect grilling involves placing the food on grates that are not positioned directly over the burning burners. The food will be cooked by convective air movement. It is best to place the food on the middle grate and use the outermost burners. To add flavour to the food, you can place a roasting tin under the food, placing it on the diffusers. Fill the roasting tin with marinade, juice or wine and top up during cooking.
Grilling time and temperature depend on the method of grilling and the food being prepared. It is advisable to familiarise yourself with the cooking methods and use tried and tested recipes.
CLEANING, MAINTENANCE AND STORAGE
When you have finished grilling, it is advisable to prepare the grill for the next use by burning off the residue. Set all burners to the "HI" position, close the lid and allow the unit to burn for 5-10 minutes until no more smoke comes out.
When the grill has cooled down, clean the grates with a brush and then coat with cooking oil. The grates can be washed in water with dishwashing liquid, then rinsed thoroughly. Do not use aggressive detergents. The grates are coated with ceramic enamel to reduce the susceptibility to sticking.
Cleaning or using sharp tools may damage the enamel. The appearance of damage to the enamel surface, chipping, rust underneath, does not affect the use and function of the grates. Rust should be removed with a brush, then the surfaces should be preserved with vegetable oil. Clean diffusers (aromatisers) of deposits with a brush.
Metal parts may discolour when exposed to high temperatures. This does not affect the functional features of the unit.
Inspect the burners regularly (at least once a year). Check them for cracks and signs of wear. The indicated symptoms may be indicative of contaminated or damaged venturi tubes in the burners:
- the grill does not reach the correct temperature;
- The grill does not heat evenly;
- the flame is uneven, crackling sounds from the burners;
- escaping gas is noticeable.
The burners should be cleaned by an experienced person or a service centre specialising in the repair and maintenance of gas grills.
Store the grill in a place that is not exposed to atmospheric conditions such as rain, increased humidity, direct sunlight. When not in use for long periods of time, disconnect the gas cylinder from the grill.
SPECIFICATIONS
| Country of destination | Category | Gas and pressure | Output heat [kW] | Gas output [g/h] | Main burner injector size [mm] | Side burner injector size [mm] |
| PL | I3B/P(37) | Butane (G30)/Propane (G31) and mixtures of these gases, 37 mbar | 11,7 | 851 g/h | 0,7 | 0,66 |
WSKAZÓWKI DOTYCZĄCE BEZPIECZEŃSTWA
02-801 Warsaw, Poland
phone: +48 22 688 08 00
e-mail: info@everpol.pl
www.blaupunkt.com
In case of questions or problems
please contact our service.
Tel. 00 48 22 688 08 33
E-mail: sda@blaupunkt.pl
All rights reserved. All brand names are registered trademarks of their respective owners. Specifications are subject to change without prior notice.
Enjoy it.
Brand : BLAUPUNKT
Model : GG401
Category : Grill