
HS Freeze 4 - Flash ROLLEI - Free user manual and instructions
Find the device manual for free HS Freeze 4 ROLLEI in PDF.


| Product Type | Pro Studio Flash Unit with Rechargeable Battery |
| Brand / Model | Rollei HS Freeze 4 |
| Dimensions | 28.5 x 11.5 x 12.5 cm |
| Weight (with battery) | 2.350 kg |
| Weight (without battery) | 1.770 kg |
| Power Supply | Rechargeable Lithium-Ion Battery (14.8 V / 4 Ah) |
| Flash Power | 400 WS |
| Guide Number | 66 (ISO 100) |
| Flash Duration (Normal) | 1/800s – 1/8000s |
| Flash Duration (Freeze) | 1/800s – 1/19000s |
| Modeling Light | 15W LED |
| Recycle Time | Approx. 1.7 seconds |
| Sync Modes | Normal, High Speed Sync (HSS), Freeze |
| Operating Modes | TTL, Manual (M), Easy Cap, Delay |
| Wireless Control | TTL-C, TTL-N, TTL-S, TTL-F, U7 (Optional Triggers) |
| Channels | 00 – 15 |
| Groups | A, B, C, D, E, F, G, H, I, J |
| Radio Range | Up to 300 m |
| Infrared Sensor | Integrated (IR Slave Function) |
| Connections | Sync (3.5 mm), USB (Firmware Updates) |
| Display | Multifunctional LCD (7.2 cm / 2.8") |
| Battery Capacity Indicator | 4 LED Lights |
| Included Accessories | Case, Battery, Battery Charger, Reflector, Magnetic Color Gel |
| Safety Features | Overheat Protection (OH Display) |
| Easy Cap Mode | Background removal with multiple flashes (requires image processing software) |
Frequently Asked Questions - HS Freeze 4 ROLLEI
User questions about HS Freeze 4 ROLLEI
0 question about this device. Answer the ones you know or ask your own.
Ask a new question about this device
Download the instructions for your Flash in PDF format for free! Find your manual HS Freeze 4 - ROLLEI and take your electronic device back in hand. On this page are published all the documents necessary for the use of your device. HS Freeze 4 by ROLLEI.
USER MANUAL HS Freeze 4 ROLLEI
Pro Studio Flash unit with rechargeable battery

Instructions in English
Rollei
HS Freeze 4
Inhalt
20 Sync Modi: Normal NOR | HSS SH | Freeze FRE


natural_image
Black RoRlei brand electronic device with green indicator lights and a small control knob (no readable text or symbols beyond branding)2. Hinweise:
natural_image
Woman with long blonde hair wearing a patterned t-shirt, posing against a plain gray background (no text or symbols visible)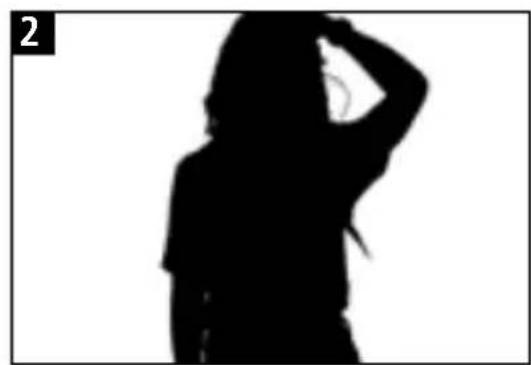
natural_image
Silhouette of a person in motion, hand near head (no text or symbols)Verzögerungsmodus
Thanks for purchasing this Rollei HS Freeze 4. Please read all the information in this user guide carefully. Keep the manual in a safe place and pass it over to other users if necessary.

Please do not put the flash in an environment where flammable liquid is likely to come into contact with this product.

Please do not put the flash in an environment where strong electromagnetic fields or dust is likely to come into contact with this product.

Please do not put the flash in places with high humidity or rapidly changing temperatures, to avoid condensation forming on the unit.

Please do not touch the flash tube or the modeling lamp with bare hands.

Please do not charge the battery with any other power stupply than the one which is included.

Please do not use the flash while the battery is connected to the charger.

Please plug in the charger to the socket only after you have connected it with the battery.

Please do not insert any metal parts into any lighting equipment.

Please dry your hands before handling the equipment, as touching your equipment with wet hands is dangerous to both the equipment and to yourself.
Safety Notes

Please do not attempt repairs to your flash equipment personally. If a problem occurs, contact the store where you have bought it or the Rollei Service Center.

Make sure that you have firmly tightened the handle on the umbrella bracket to attach the flash on a light stand before using the device.

Please do not fire the strobe at a very close distance to objects, people or animals as the strobe release intense heat can cause damage and serious injury.
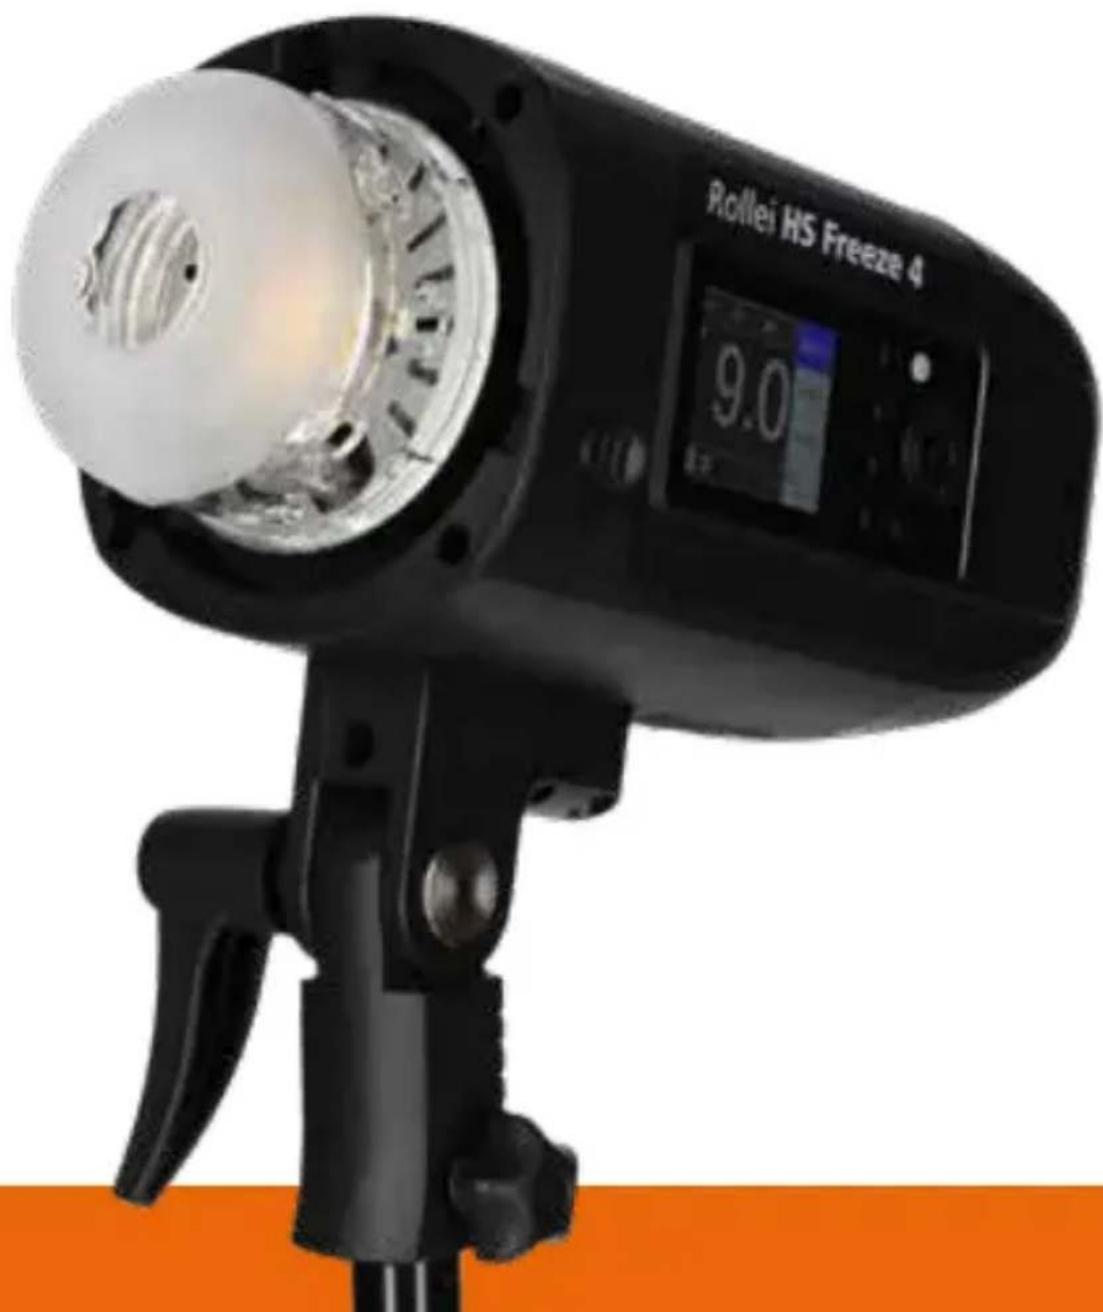
Overview

ENGLISH
Overview
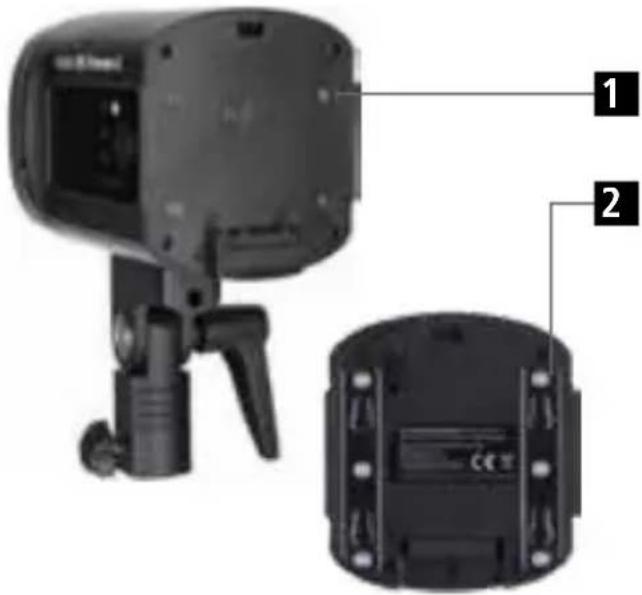
1 Glass protector
2 Accessory release button
3 Ligth stand locker
4 Battery release button
5 Battery LED indicator
6 Umbrella socket
7 Tilt Locking handle
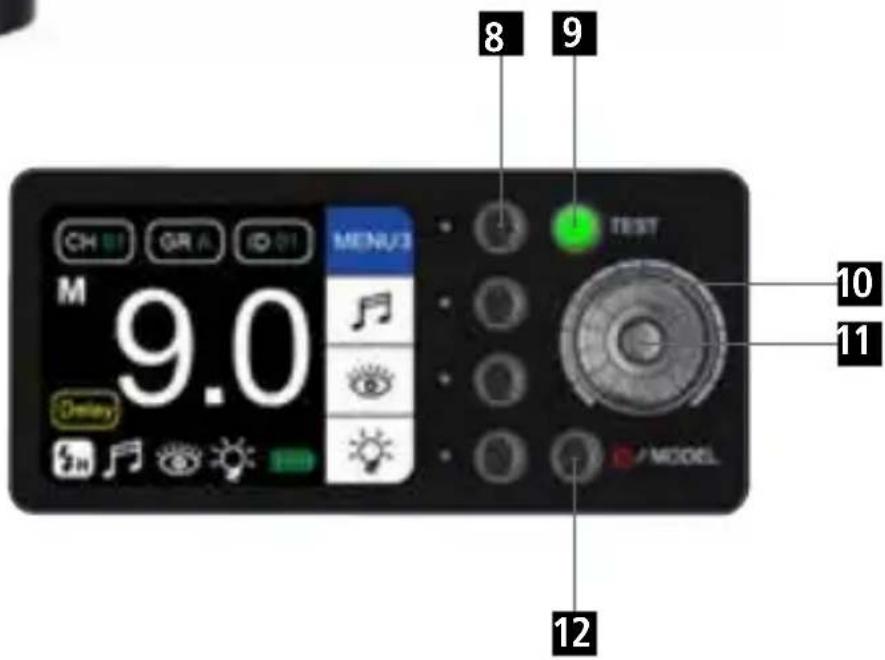
8 Function button
9 Test flash button
10 Power output button
11 Ok button
12 Power switch / modeling lamp
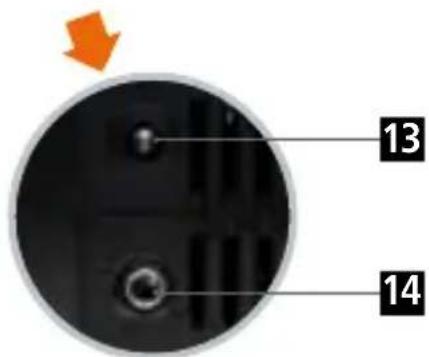
13 Infra red sensor
14 Sync socket

15 Group A/B/C/D/E/F/G/H/J
16 Channel (00 - 15)
17 M / TTL
18 Power output (TTL: ±3.0 | M: 1.0 – 9.0 | HSS: 4.0 – 9.0 | Freeze 1.0 – 9.0)
19 Delay Mode
20 Sync Modes: Normal NOR | HSS 🎨 | Freeze FRE
21 Beep
22 Infrared Slave Mode
23 Canon RT radio "ID" numbers (only display under Canon RT radio mode)
24 Battery status
25 Modeling lamp
Press the first function button from the top repeatedly to change the different menus.
| MENU1 | MODE | SYNC | t _TTL-C |
MODE
Press the second function button from the top to switch between M (manual) and TTL mode.
SYNC
Press the third function button from the top to switch between the different sync modes.
NOR Normal flash mode
High speed sync mode (enables the shutter speed of up to 1/8000s)
FRE Freeze sync mode (max. of 1/190000, sync with shutter speed, not available under TTL mode)
010 TTL-C
Wireless Remote Control
TTL-C: Canon* remote control (the flash can then be controlled with the Canon* trigger, optional accessory)
TTL-N: Nikon* remote control (the flash can then be controlled with the Nikon* trigger, optional accessory)
TTL-S: Sony* remote control (the flash can then be controlled with the Sony* trigger, optional accessory)
TTL-F: Fuji* remote control (the flash can then be controlled with the Fuji* trigger, optional accessory)
U7: Universal trigger, for non-TTL and non-HSS compatible camera models (the flash can then be controlled with the U7 trigger, optional accessory)
OFF: The wireless remote control function is deactivated.
*Canon, Nikon, Sony und Fuji are registered trademarks, Canon, Nikon, Sony or Fuji products are trademarks or registered trademarks of Canon, Nikon, Sony or Fuji Corporations.
| MENU2 | CH | GR | ID |
CH Press the second function button from the top and turn the power output button to adjust the channel number. This can be set from 00 to 15.
GR Press the third function button from the top and turn the power output button to adjust the group. Here you can choose between A/B/C/D/E/F/G/H/I/J.
ID Press the fourth function button from the top to set the Canon* ID number between 00 and 99. The flash and Canon speedlites can be synchronized if the channel and the ID numbers are the same
| MENU3 |
Press the second function button from the top to activate the beep. Here you can turn the function on and off. If this is turned on, the flash will make indication sounds and the icon is shown on the display.
Infrared Slave Mode: Press the third function button from the top side to activate or deactivate the slave mode function. If this function is activated, the icon will be shown on the display. The flash is then able to release a flash strobe as soon as another flash is fired. For this function the infra red sensor should not be hidden.
Modeling lamp: Press the fourth function button from the top to activate the modeling lamp. Press it once for the proportional mode [PRO] and the modeling lamp's intensity will match the power setting on the flash unit. Press the button again to enter the independent mode [1.0 \~9.0] in which you can set the power of the modeling lamp individually from 1.0 to 9.0 by turning the power output wheel. To deactivate the modeling lamp press the Power on/off button.
| MENU4 | All 1Easy | Cap No. 1 |
| EasyCap | Easy Cap: Activate (Dark icon)Deactivate (Light icon) | All 1 No. 1 |
| All 1 | Total groups of flashes under Easy Cap mode. This can be set from All1 to All6. |
| No. 1 | Number of flash heads under Easy Cap mode.This can be set from No1 to No6. |
Further information can be found in the chapter „Easy Cap Mode.
| MENU5 | Delay 00.00 |
| Z | Press the second function button from the top to activate the Flash Master mode, when the icon turns red, the trigger will only fire the flash, without sending any settings to the unit. Settings should be controlled directly on the flash panel. |
| 00.00 | Set the delay time from 00.00 to 30.00 seconds. |
Further information can be found in the chapter "Delay Mode".
*Canon, Nikon, Sony und Fuji are registered trademarks, Canon, Nikon, Sony or Fuji products are trademarks or registered trademarks of Canon, Nikon, Sony or Fuji Corporations.
Operation
Battery
1 Locking Guides
2 Battery Connectors
3 battery Installation
Install the battery by putting the bottom of the battery locking guides alongside the battery connectors. Then press the battery release button and slide downwards to lock the battery in place.
4 battery release
Press the battery release button and slide the battery upwards.
5harging the battery
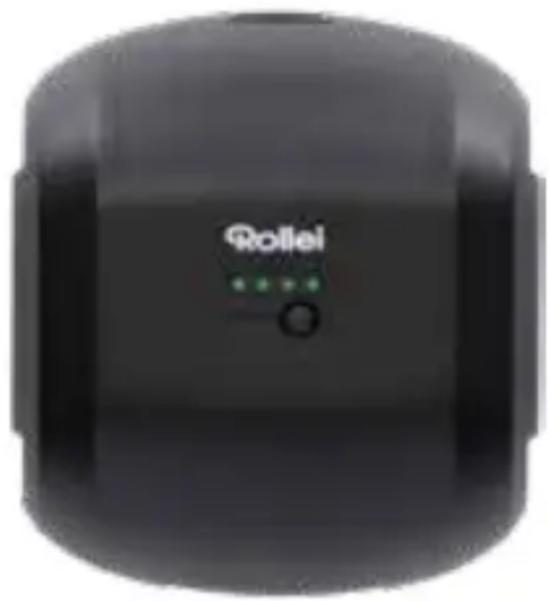
Use the battery charger to charge the battery. The charging time is about 3 hours. The charging status will be indicated by the light on the charger. It is red while charging and will change to green when the battery is fully charged.


Battery Maintenance
Please only use the original battery charger for charging the battery.
1. Battery capacity check
Press the battery check button on the backside of the battery to check the current battery capacity.
4 lights: 100–75%
3 lights: 75–50%
2 lights: 50–25%
1 light: 25–5%
0 lights: less than 5%
natural_image
Black RoRlei brand electronic device with green indicator lights and a small control knob (no readable text or symbols beyond branding)2. Notes:
- Turn of the flash before taking out the battery.
- The battery will achieve optimal performance only after two or three complete charge and discharge cycles.
- If the flash is used outdoors, the usage time might be shorter than normal.
- The normal working temperature of the battery is between +15°C and +25°C. Please note that the environmental temperature might effect the battery run time. If the temperature is lower than 0°C, the battery will be limited even with full power
- If the flash indicates that the battery power is low, please change the battery and recharge it. If you keep working, the battery might be damaged.
- If the flash will not be used for a long time, please fully charge the battery before storing it in a cool and dry place. Please note that the battery needs to be recharged at least every 3 months.
- After long term or heavy use please let the battery cool down for about 10 minutes before storing.
Power on / off
- Switch on: Press and hold the power button for about 2 seconds until the LCD screen will lights up and loads the menu system.
- Switch off: Press and hold the power button for about 2 seconds until the LCD screen turns totally black.
TTL Mode
- Enter Menu 1 and press the second function button repeatedly until the display shows TTL on the LCD.
- Press the third function button to change the sync mode. Choose between normal mode or high speed mode.
- Enter Menu 2 to set the channel and the group of the flash.
- Choose the wireless remote control mode according to the trigger that you are using.
- The exposure value can be adjusted from -3.0 up to +3.0 directly on the flash by rotating the power output wheel. The value can be adjusted by 1 f-stop increment by pushing the power output wheel once and then turning it around (clockwise to increase the value and counter clockwise to decrease the value). The value can also be adjusted by 1/10 f-stop by just turning the power output wheel without pressing.
Note: If you use a trigger the value of the flash will not be overwritten by the value set on the trigger. For example if your flash shows an EV of +1.0 and your trigger shows a value of +2.0, then the picture will have a real exposure value of +3.0. If the flash shows an EV of +3.0 then you are able to even get a higher exposure value by setting the trigger to also +3.0 and then the maximum exposure value of +6.0 will be reached. The same goes for the negative exposure values.
M (manual) Mode
- Enter Menu 1 and press the second function button repeatedly until the display shows M on the LCD.
- Press the third function button to change the sync mode. Choose between normal mode, high speed mode and freeze mode.
- Enter Menu 2 to set the channel and the group of the flash.
- Choose the wireless remote control mode according to the trigger that you are using.
- In manual mode the power can be set from 1.0 \~ 9.0. The minimum power output is 1.0 and the maximum one is 9.0. For a small adjustment in increments of 0.1 f stop just rotate the power output wheel and the value will be adjusted accordingly. For large adjustments press the power output wheel once and then rotate it and the value will be changed by 1 f stop.
High Speed Sync
If high speed sync is activated the icon will be shown on the display.
In this sync mode you can set the shutter speed up to 1/8000s, to synchronize the speed with the flash. The power output in this sync mode can only be set between 4.0 up to 9.0.
Freeze Mode
If the freeze mode is activated the icon FWll be shown on the display.
In this mode the maximum shutter speed is limited to the normal flash sync time (normally 1/250s), but the flash can be fired with speeds of up to 1/19000s.
The power output in this sync mode can be set between 1.0 up to 9.0.
Easy Cap Mode
The Easy Cap Mode can be used to easily cut out the main subject from the background with the help of an image processing software (available separately).
A minimum of two flash units are required for this operation.
- Activate the Easy Cap mode on your flash.
- Set the number of groups that are needed. Therefore press the corresponding function button and rotate the dial to change the value. The maximum setting of the groups is limited to 6 (All6), but within each group the quantity of flashes is unlimited.
- Then set the sequence of the groups. Therefore press the corresponding function button and change the value by rotating the wheel Here you set the sequence of when the flash will be released. After the setting the groups will flash according to this sequence.
Example (working with 4 flashes)
- There are 2 groups related with Easy Cap mode, therefore the group setting is set to "All2".
- There are two flashes which will be the main flashes and they are set to „No1” (group 1). Then they will be triggered with the first frame (see figure 1 – correctly exposed picture).
- The two background flashes are set to „No2“ (group 2. and they will not be triggered in the first frame but in the second one (see figure 2 – no exposure on main subject, only the background).
- With the help of image processing software, the main subject can now be quickly cut out from the background.

natural_image
Woman with long blonde hair wearing a patterned t-shirt, posing against a plain gray background (no text or symbols visible)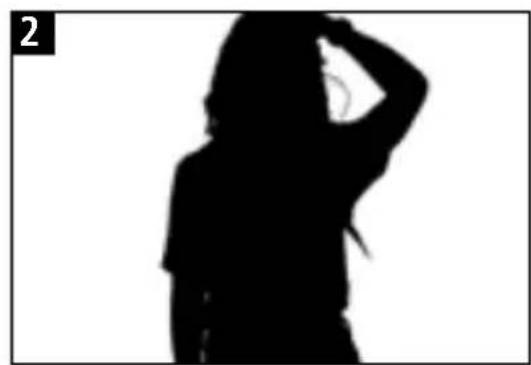
natural_image
Silhouette of a person in motion, hand near head (no text or symbols)Delay Mode
In this mode you can set a delay time. The flash will fire after this time is over. This is used, for example, if you want to take a picture with some ambient light, but you don't want to set the flash on the front nor the rear curtain. This might also be used if you want to have motion in your picture but one single part of the image in the middle of that motion should be sharp. Then you can set your camera's shutter time and calculate the correct delay time that you can enter in the flash menu. Therefore enter the delay mode and set the time between 00.00 and a maximum of 30.00 seconds.
General Notes
- FrFreeze Mode can only be used in manual (M. mode and it is focused on providing the shortest possible flash duration at a given power setting.
- If the wireless remote control function is activated (TTL-C / TTL-N / TTL-S / TTL-F), the flash can only be controlled by the corresponding transmitter that is available as an optional accessory.
- If the wireless remote control function U7 is activated, the flash can only be controlled by the transmitter U7 which is available as an optional accessory. Please note that this transmitter does not support High Speed Sync or TTL Mode.
- If the systems overheats, it will automatically go into an overheat protection mode. The display will show „OH“ which indicates that the overheat protection mode is activated. In this event the system will stop responding while it recovers. As soon as the temperature is back to an acceptable level, the flash will start working again.
- If you start the continuous shooting mode in your camera, the flash power output range is only available from 1.0 to 3.0. Please note that the flash itself does not have a continuous shooting mode and there will be no corresponding icon on the flash display.
| Flash Power 400 WS | |
| Flash Power Range 9 stops (in 0.1F or 1.0F increments) | |
| Guide Number 66 (with ISO 100) | |
| Modeling Light 15 W LED | |
| Recycle Time Approx. 1.7 seconds | |
| Flash Duration Normal: 1/800s – 1/8000s | Freeze: 1/800s – 1/19000s | |
| Lighting Time Up to 500 (if battery is fully charged) | |
| Operation modes TTL, M (manual), Easy Cap, Delay | |
| Flash modes Normal | High Speed Sync | Freeze | |
| Channels | Groups 0 – 15 | A, B, C, D, E, F, G, H, I, J | |
| Radio Range Up to 300 meters (built-in radio receiver) | |
| Infrared Sensor Integrated (IR slave function) | |
| Connections Sync (3,5 mm) | USB (for firmware updates) | |
| Display Multifunctional LCD (7.2 cm / 2.8") | |
| Power Supply Exchangeable and rechargeable lithium ion Battery(14.8 V / 4 Ah) | |
| Dimension | 28.5x 11.5 x 12.5 cm |
| Weight | 2.350 kg / 1.770 kg (with/without battery) |
| Scope of Delivery | Rollei HS Freeze 4, case, battery, battery charger, reflector,magnetic colour gel |
Subject to technical changes.

Dispose of packaging: For disposal, separate packaging into different types. Cardboard and board must be disposed of as paper and foil must be recycled.

Disposal of Waste Electrical and Electronic Equipment and/or Battery by users in private households in the European Union.
This symbol on the product or on the packaging indicates that this cannot be disposed of as a household waste. You must dispose of your waste equipment and/or battery by handling it over to the applicable take-back scheme for the recycling of electrical and electronic equipment and/or battery. For more information about recycling of this equipment and/or battery, please contact your city office, the shop where you purchased the equipment or your household waste disposal service. The recycling of materials will help to conserve natural resources and ensure that it is recycled in a manner that protects human health and environment.
Battery Warning
- Never dismantle, crush, or pierce the battery, or allow the battery to short-circuit. Do not expose battery being placed in high temperature environment, if battery leaks or bulges, stop continue to use.
- Always charge using the charger. Risk of explosion if battery is replaced by an incorrect type.
- Keep the battery out of reach of children.
- Batteries may explode if exposed to naked fire. Never dispose of batteries in a fire.
- Disposed of used batteries observing local regulations.
- Before disposing the device, please remove the battery.
The Manufacturer hereby declares that the CE marking was applied to the Rollei HS Freeze 4 in accordance with the basic requirements and other relevant provisions of the following CE Directives:
2011/65/EC RoHs Directive 2014/30/EU EMC Directive 2006/95/EEC LVD Directive 2009/125/EG EuP Directive 2002/96/EG WEEE Directive 2014/53/EU RED Directive

The EC Declaration of Conformity can be requested from the address specified on the Warranty card.
Rollei
www.rollei.com/social
- Rollei
- HS Freeze 4
- Inhalt
- Hinweise:
- Verzögerungsmodus
- Safety Notes
- Overview
- Operation
- Battery
- battery Installation
- battery release
- 5harging the battery
- Battery Maintenance
- Battery capacity check
- Notes:
- Power on / off
- TTL Mode
- M (manual) Mode
- High Speed Sync
- Freeze Mode
- Easy Cap Mode
- Example (working with 4 flashes)
- Delay Mode
- General Notes
- Disposal of Waste Electrical and Electronic Equipment and/or Battery by users in private households in the European Union.
- Battery Warning
Brand : ROLLEI
Model : HS Freeze 4
Category : Flash