TC 34N - Thermometer PCE Instruments - Free user manual and instructions
Find the device manual for free TC 34N PCE Instruments in PDF.


| Product Type | Digital Thermometer |
| Model | TC 34N |
| Brand | PCE Instruments |
| Measurement Range | -50°C to +300°C (-58°F to +572°F) |
| Accuracy | ±0.5°C (-10°C to +150°C); ±1°C otherwise |
| Resolution | 0.1°C / 0.1°F |
| Display | LCD, 3½ digits |
| Probe | Type K thermocouple (included) |
| Functions | Temperature measurement, hold, min/max, auto-off |
| Power Supply | 1 x 9V battery (6F22) |
| Battery Life | Approx. 200 hours continuous use |
| Dimensions | 170 x 70 x 30 mm |
| Weight | 200 g (including battery) |
| Operating Temperature | 0°C to +50°C |
| Storage Temperature | -20°C to +60°C |
| Humidity | <80% RH non-condensing |
| Safety | CE certified, EN 61326-1 |
| Maintenance | Clean with damp cloth; do not submerge in water |
| Spare Parts | Type K thermocouple probes, 9V battery |
| Warranty | 2 years |
| Manual Languages | English, German, French, Spanish, Italian |
Frequently Asked Questions - TC 34N PCE Instruments
User questions about TC 34N PCE Instruments
0 question about this device. Answer the ones you know or ask your own.
Ask a new question about this device
Download the instructions for your Thermometer in PDF format for free! Find your manual TC 34N - PCE Instruments and take your electronic device back in hand. On this page are published all the documents necessary for the use of your device. TC 34N by PCE Instruments.
USER MANUAL TC 34N PCE Instruments
User Manual
PCE-TC 34N Infrared Thermometer
User manuals in various languages (français, italiano, español, português, nederlands, türk, polski, русский, 中文) can be found by using our product search on: www.pce-instruments.com
Last change: 22 August 2023
v1.0
Contents
1 Safety notes....1
2 Specifications.... 2
3 Delivery scope....2
4 Device description .... 3
4.1 Display description 4
5 Switching the meter on and off 4
5.1 Thermal image 4
5.2 Picture-in-picture function....4
5.3 Take a picture 5
5.4 Lowest / highest measured value and time.... 5
6 Menu....5
6.1 Picture in-picture adjustment....5
6.2 View images....6
6.3 Change colour palette....7
6.4 Set emissivity 7
7 More settings....9
8 Charging the battery 9
9 Troubleshooting....10
10 Contact....10
11 Disposal....10
1 Safety notes
Please read this manual carefully and completely before you use the device for the first time. The device may only be used by qualified personnel and repaired by PCE Instruments personnel. Damage or injuries caused by non-observance of the manual are excluded from our liability and not covered by our warranty.
- The device must only be used as described in this instruction manual. If used otherwise, this can cause dangerous situations for the user and damage to the meter.
- The instrument may only be used if the environmental conditions (temperature, relative humidity, ...) are within the ranges stated in the technical specifications. Do not expose the device to extreme temperatures, direct sunlight, extreme humidity or moisture.
- Do not expose the device to shocks or strong vibrations.
• The case should only be opened by qualified PCE Instruments personnel.
- Never use the instrument when your hands are wet.
- You must not make any technical changes to the device.
- The appliance should only be cleaned with a damp cloth. Use only pH-neutral cleaner, no abrasives or solvents.
• The device must only be used with accessories from PCE Instruments or equivalent.
- Before each use, inspect the case for visible damage. If any damage is visible, do not use the device.
- Do not use the instrument in explosive atmospheres.
- The measurement range as stated in the specifications must not be exceeded under any circumstances.
- Non-observance of the safety notes can cause damage to the device and injuries to the user.
We do not assume liability for printing errors or any other mistakes in this manual.
We expressly point to our general guarantee terms which can be found in our general terms of business.
2 Specifications
| Measurement range | -20 ... 300 °C / -4 ... 572 °F |
| Resolution | 0.1 °C / 0.1 °F |
| Measurement accuracy | ±2 % of rdg. or ±2 °C / ±3.6 °FThe higher value applies. |
| Infrared and real image resolution | 320 x 240 pixels |
| Picture in picture | 5 levels |
| Field of view (FOV) | 35° x 26° |
| Depth of field of view | >0.15 m |
| Emissivity range | 0.01 ... 1.00 ε |
| Frame rate | 9 Hz |
| Wavelength | 8 ... 14 μm |
| Focus | fixed |
| Colour palette | rainbow, iron, cold colours, white-black(+inverted) |
| Display | 3.5" TFT colour display |
| Memory | 3 GB for approx. 20,000 images |
| Image format | JPG |
| Interface | USB-C for charging and data transfer |
| Automatic power off | off / 5 minutes / 20 minutes |
| Power supply (battery) | 3.7 V, 2600 mAh, type 18650 |
| Power supply (mains adaptor) | primary: 100 ... 240 VAC, 50 / 60 Hzsecondary: 5 VDC, 2 A |
| Operating time with battery | min. 2 hours |
| Menu languages | English, German Chinese, Italian |
| Storage conditions | -20 ... 60 °C / -4 ... 140 °F, <85 % RH,non-condensing |
| Environmental conditions | 0 ... 45 °C / 32 ... 113 °F, <85 % RH,non-condensing |
| Tripod mount | 1/4" |
| Dimensions | 221 x 96 x 88 mm / 8.7 x 3.7 x 3.4" |
| Weight | 372 g / 13 oz |
*Before measuring, the meter must be acclimatised in order to maintain accuracy.
3 Delivery scope
1 x infrared thermometer PCE-TC 34N
1 x USB-C cable
1 x USB charging plug
1 x carrying case
1 x user manual
4 Device description
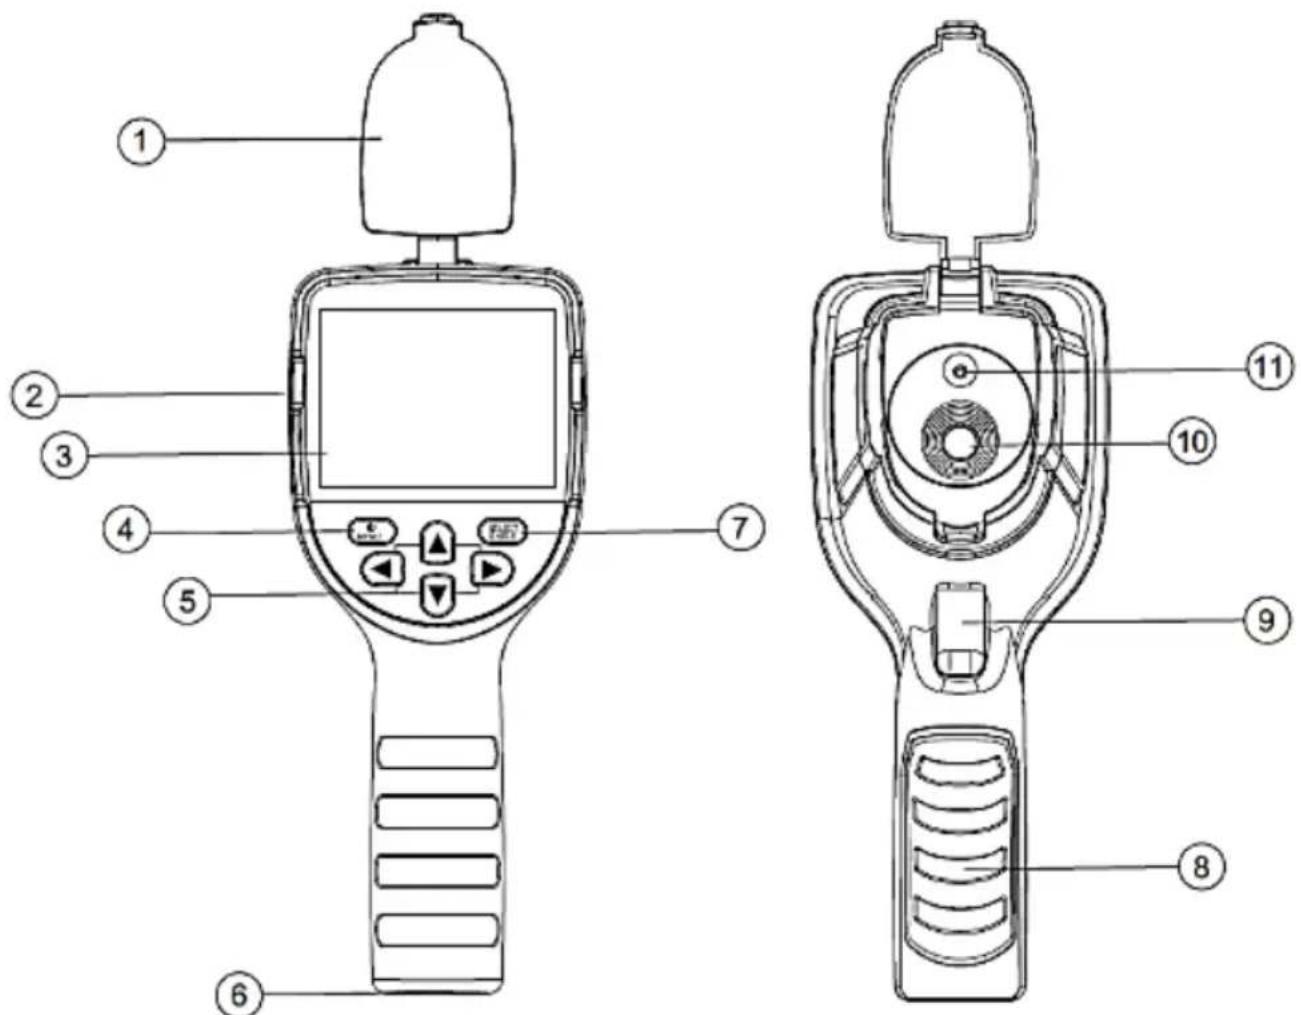
| No. | Description |
| 1 | Protective cap |
| 2 | USB-C interface for charging and transferring the recorded measurement data |
| 3 | Display |
| 4 | On/off switch, menu key |
| 5 | Navigation keys (arrow keys) |
| 6 | Tripod connection |
| 7 | "Enter" key to select or confirm the entry |
| 8 | Battery compartment cover |
| 9 | Trigger button to take images |
| 10 | Infrared camera |
| 11 | Real camera |
4.1 Display description
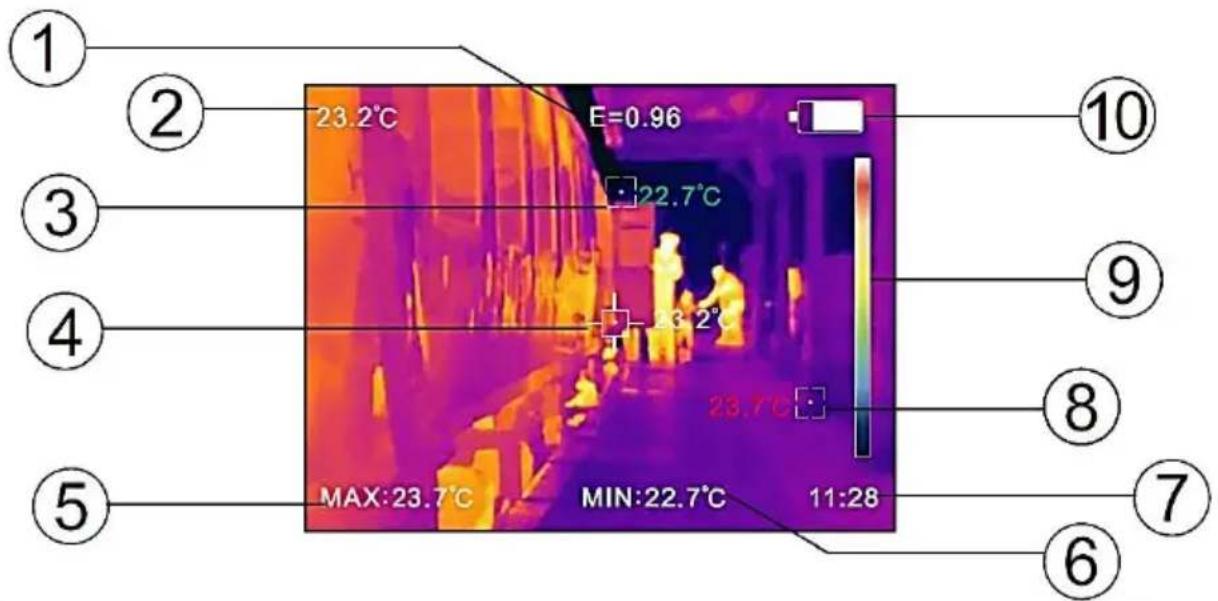
| No. | Description |
| 1 | Set emissivity |
| 2 | Display of the temperature in the centre of the thermal image |
| 3 | Lowest temperature on the thermal image |
| 4 | Temperature in the centre of the thermal image |
| 5 | Highest temperature on the thermal image |
| 6 | Lowest temperature on the thermal image |
| 7 | Current time |
| 8 | Highest temperature on the thermal image |
| 9 | Colour scale |
| 10 | Battery status display |
5 Switching the meter on and off
To switch the meter on and off, press and hold the key for about three seconds. After switching on, the measurement starts immediately.
Note: After the meter has been switched on, the protective cap must be opened. Close the protective cap as soon as you switch off the meter. Before the measurement, the meter must have acclimatised.
5.1 Thermal image
The colours shown in the thermal image are not specific to a temperature. They are relative to the coldest and hottest temperature measured. The coldest and hottest spot are indicated by a red and a green dot on the display. The position for the temperature measurement in the centre of the thermal image cannot be changed.
5.2 Picture-in-picture function
To use the picture-in-picture function, use the ▼ and ▶ keys during the measurement. 5 levels are available.
5.3 Take a picture
To take a picture, use the trigger key. You will then be asked if you want to save the image. Select "Yes" or "No" with the navigation keys and confirm your entry with the "SELECT KEY."
5.3.1 Transferring images to a computer
To transfer the saved images to a computer, connect the measuring device to a computer via the USB-C interface and switch it on. The meter is recognised as a mass data storage device. After the meter has been recognised by the computer, the images can be transferred directly without any software.
5.4 Lowest / highest measured value and time
To additionally display the lowest and highest measured value and the time, press the key during the measurement. The highest and lowest readings are shown with the time at the bottom of the display. Press the key again to hide this view.
6 Menu
To make settings, press the key. Use the navigation keys to select functions and change parameters. Use the key to open menu items and save settings.
6.1 Picture in-picture adjustment
If the real image and the thermal image are not on top of each other, this can be changed via the item "Image registration" in the menu. The image can now be moved with the navigation keys.
Confirm the entry with the key.
When a setting is made, it is automatically closed after six seconds.
Note: Set the picture-in-picture function in advance so that you can see both pictures equally well.
6.2 View images
To view the saved images, go to the icon in the menu. From there, the individual images can be accessed.
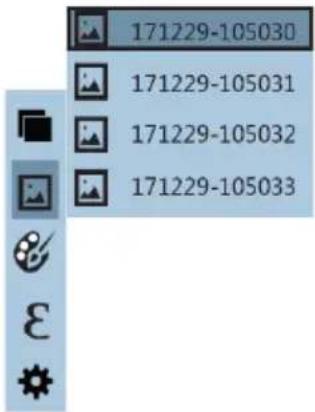
If an image is opened, you can use the and keys to jump to the next and previous image. Press the key to return to the menu. Press the key to resume the measurement.
The currently opened image can be deleted with the - image. Before deleting, you will be asked whether you really want to delete the image. Select "Yes" or "No" with the navigation keys and confirm your entry with the SELECT key.
6.3 Change colour palette
To change the colour palette, enter the menu and click on the icon. From there, any colour palette can be selected.
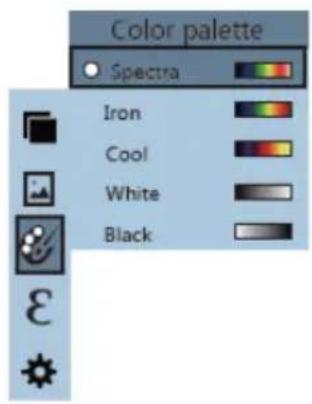
There are five different palettes to choose from:
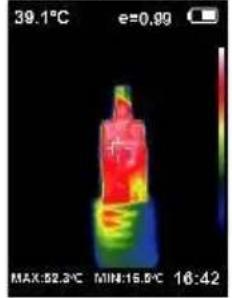
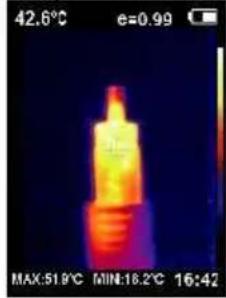
natural_image
Thermal imaging of a lit incandescent lamp showing heat distribution (no text or symbols on the lamp itself)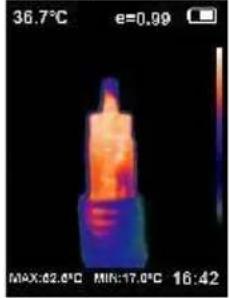
natural_image
Thermal imaging of a cylindrical object with heat distribution visualization (no text or symbols on the object itself)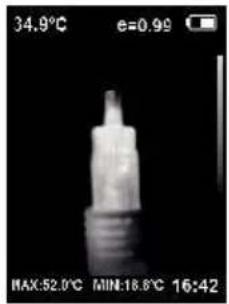
natural_image
Close-up of a lit fuse tip against a dark background, no visible text or symbols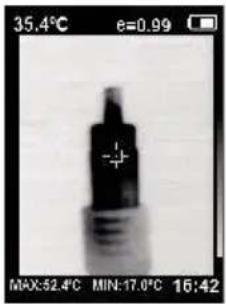
natural_image
Close-up of a black pen tip with a cross mark, shown in a photo editing interface (no readable text or symbols on the object itself)6.4 Set emissivity
To set the emissivity, enter the menu and click on the ε icon. From there, different emissivities can be set. For faster setting, four fixed emissivities are pre-set. If necessary, a specific value can also be set.
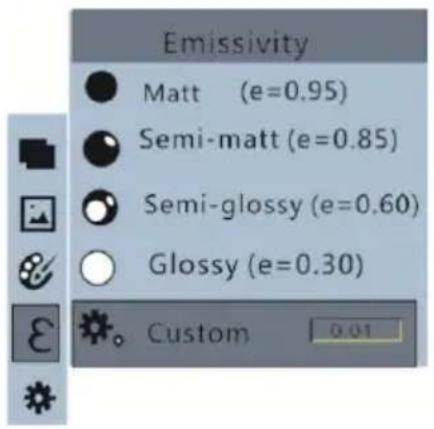
6.4.1 Example emissivities chart
The emissivity describes the energy emission behaviour of materials. Most (90 % of typical applications) organic materials and painted or oxidised surfaces have an emissivity of 0.95 (default setting in the meter).
If you measure shiny or polished metallic surfaces, this will result in a loss of accuracy. If possible, cover the surface to be measured with temperature-resistant black tape or a thin layer of black paint. Wait a little while until the tape or paint layer has reached the same temperature as the material underneath. Now measure the temperature on the tape or painted surface.
| Material | Heat emissivity | Material | Heat emissivity |
| Asphalt | 0.90 ... 0.98 | Fabric (black) | 0.98 |
| Concrete | 0.94 | Human skin | 0.98 |
| Cement | 0.96 | Leather | 0.75 ... 0.80 |
| Sand | 0.90 | Charcoal (powder) | 0.96 |
| Soil | 0.92 ... 0.96 | Lacquer | 0.80 ... 0.95 |
| Water | 0.92 ... 0.96 | Lacquer (matt) | 0.97 |
| Ice cream | 0.96 ... 0.98 | Rubber (black) | 0.94 |
| Snow | 0.83 | Plastics | 0.85 ... 0.95 |
| Glass | 0.90 ... 0.95 | Wood | 0.90 |
| Ceramics | 0.90 ... 0.94 | Paper | 0.70 ... 0.94 |
| Marble | 0.94 | Chromium oxides | 0.81 |
| Plaster | 0.80 ... 0.90 | Copper oxides | 0.78 |
| Mortar | 0.89 ... 0.91 | Iron oxides | 0.78 ... 0.82 |
Note: This chart is for guidance only.
7 More settings
Under the item Settings in the menu
| Menu item | Setting option |
Automatic power off | Setting of the automatic power off. Here you can select when the meter switches itself off.A time between 5 and 20 minutes is possible.If required, this function can also be switched off. |
Intensity (illuminance of the display) | Adjustment of the illuminance of the display in three steps |
Language | The menu language can be set here.You can choose between English, Chinese, Italian and German. |
Unit | The temperature unit can be set here. You can choose between °C and °F. |
Time format | The time format can be set here.12 hours / 24 hours are possible |
Time setting | The date and time can be set here. |
Spot | Here, the measurement of the temperature in the middle of the thermal image can be switched on and off. |
| Version | The version number of the meter can be read out here. |
8 Charging the battery
As soon as the battery indicator shows a flat battery, it must be charged so that the meter can continue to be used.
To charge the battery, connect the meter to a USB charging station via the USB-C interface. As soon as the meter is connected, this is indicated by the battery status display. A 5 V DC, 2 A power supply is recommended here. After charging, the battery lasts approx. 3 hours.
As soon as the display shows that the battery is fully charged, charging must be stopped.
Note: The battery must not be continuously connected to the charging station. This could damage the battery. If the meter will not be used for a longer period of time, the battery should be charged in between. At the latest after three months of inactivity, the battery should be charged for approx. 2 hours.
9 Troubleshooting
| Error | Cause | Solution |
| The meter cannot be switched on. | The battery is not inserted. | Insert a rechargeable battery. Use an 18650 type battery. |
| The battery is discharged. | Charge the battery. For more information, see 8 Charging the battery . | |
| The meter switches off automatically. | The battery is discharged. | Charge the battery. For more information, see 8 Charging the battery . |
| An automatic power off has been set | Disable automatic power off. | |
| No image | The protective cap is not opened. | Open the protective cap. |
10 Contact
If you have any questions, suggestions or technical problems, please do not hesitate to contact us. You will find the relevant contact information at the end of this user manual.
11 Disposal
For the disposal of batteries in the EU, the 2006/66/EC directive of the European Parliament applies. Due to the contained pollutants, batteries must not be disposed of as household waste. They must be given to collection points designed for that purpose.
In order to comply with the EU directive 2012/19/EU we take our devices back. We either re-use them or give them to a recycling company which disposes of the devices in line with law.
For countries outside the EU, batteries and devices should be disposed of in accordance with your local waste regulations.
If you have any questions, please contact PCE Instruments.




PCE Instruments contact information
Germany France Spain
PCE Deutschland GmbH PCE Instruments France EURL PCE Ibérica S.L.
Im Langel 26 23, rue de Strasbourg Calle Mula, 8
D-59872 Meschede 67250 Soultz-Sous-Forets 02500 Tobarra (Albacete)
Chester Rd, Old Trafford
Manchester M32 0RS
United Kingdom
Tel: +44 (0) 161 464902 0
Fax: +44 (0) 161 464902 9
info@pce-instruments.co.uk
www.pce-instruments.com/english
Italy
PCE Italia s.r.l.
Via Pesciatina 878 / B-Interno 6
55010 Loc. Gragnano Pehlivan Sok. No.6/C
Capannori (Lucca)
Italia
www.pce-instruments.com/turkish
The Netherlands
PCE Brookhuis B.V.
Institutenweg 15
7521 PH Enschede
Nederland
Telefoon: +31 (0)53 737 01 92
info@pcebenelux.nl
www.pce-instruments.com/dutch Fax: +1 (561) 320-9176
info@pce-americas.com
www.pce-instruments.com/us
United States of America
PCE Americas Inc.
1201 Jupiter Park Drive, Suite 8
Jupiter / Palm Beach
33458 FL
USA
Tel: +1 (561) 320-9162
Denmark
PCE Instruments Denmark ApS
Birk Centerpark 40
7400 Herning
Denmark
- User Manual
- Contents
- Safety notes
- Delivery scope
- Device description
- Display description
- Switching the meter on and off
- Thermal image
- Picture-in-picture function
- Take a picture
- Transferring images to a computer
- Lowest / highest measured value and time
- Menu
- Picture in-picture adjustment
- View images
- Change colour palette
- Set emissivity
- Example emissivities chart
- More settings
- Charging the battery
- Troubleshooting
- Contact
- Disposal
- PCE Instruments contact information
- Germany France Spain
- Italy
- The Netherlands
- United States of America
- Denmark
Brand : PCE Instruments
Model : TC 34N
Category : Thermometer