ACM-210B - Coffee maker Aroma - Free user manual and instructions
Find the device manual for free ACM-210B Aroma in PDF.


| Product Type | Drip Coffee Maker |
| Brand | Aroma |
| Model | ACM-210B |
| Capacity | 12 cups (60 oz / 1.8 L) |
| Power | 1000 W |
| Voltage | 120 V |
| Frequency | 60 Hz |
| Dimensions (W x D x H) | 10.2 x 7.5 x 12.6 in (26 x 19 x 32 cm) |
| Weight | 2.5 kg (5.5 lbs) |
| Water Tank Capacity | 1.5 L |
| Filter Type | Paper basket filter (#4 cone) or permanent filter (sold separately) |
| Carafe Material | Glass |
| Keep Warm Function | Yes, automatic |
| Auto Shut-Off | Yes, after 2 hours |
| Anti-Drip Function | Yes |
| Brew Strength Selection | No |
| Programmable Timer | No |
| Cleaning Indicator | No |
| Descaling | Recommended every 3 months with vinegar or descaling solution |
| Warranty | 1 year limited |
Frequently Asked Questions - ACM-210B Aroma
User questions about ACM-210B Aroma
0 question about this device. Answer the ones you know or ask your own.
Ask a new question about this device
Download the instructions for your Coffee maker in PDF format for free! Find your manual ACM-210B - Aroma and take your electronic device back in hand. On this page are published all the documents necessary for the use of your device. ACM-210B by Aroma.
USER MANUAL ACM-210B Aroma
natural_image
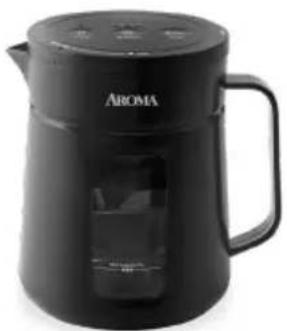
Black Aroma coffee maker with open lid and side handle (no visible text or symbols on body)instruction manual
ACM-210/210B
Cold Brew Coffee Maker

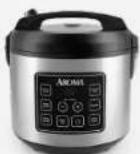
Digital Rice & Grain Multicookers
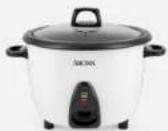
Rice & Grain
Cookers
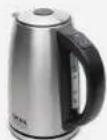
Electric Kettles
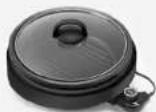
Indoor Grills
...and More!
AROMA®
To Enhance and Enrich Lives.
Here at Aroma we strive to make a difference—to design and distribute products that enhance and enrich people's lives.
Aroma offers an array of exceptional products to make cooking simple and satisfying. Discover other countertop appliances and cookware from our current product lineup to complement your kitchen.
REGISTER YOUR PRODUCT

Registration is quick and easy.
Be notified of:
- new product releases
- new test kitchen recipes
• sales and promotions
...and more!
SCAN TO REGISTER
AromaCo.com/registration

/AromaHousewares
IMPORTANT SAFEGUARDS
When using electrical appliances basic safety precautions should always be followed, including the following:
- Important: Read all instructions carefully before using the appliance.
- To protect against fire, electric shock and injury to persons, do not immerse appliance, USB cable or plug in water or any other liquid. See instructions for cleaning.
- This appliance should not be used by or near children or individuals with certain disabilities.
- Unplug from outlet when not in use, before putting on or taking off parts, before serving and before cleaning.
- Do not operate appliance with a damaged cord or plug, or after appliance malfunctions or has been damaged in any manner. Contact Aroma ^® customer service for examination, repair or electrical/mechanical adjustment.
- The use of accessory attachments not recommended by Aroma® Housewares may result in fire, electrical shock or injury.
- Do not use outdoors.
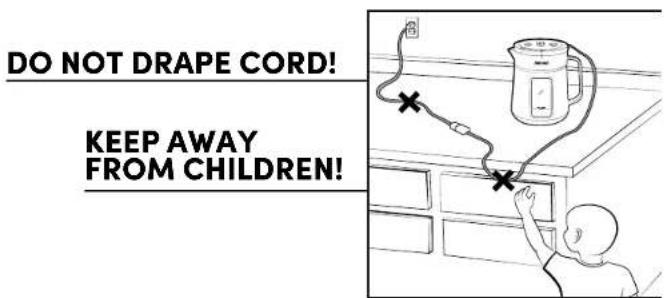
- Do not let USB cable hang over the edge of a table or counter or touch hot surfaces.
-
Do not place appliance on or near a gas or electric burner or in a heated oven.
-
To disconnect, turn unit OFF, then remove plug from wall outlet. Always unplug from plug gripping area. Never pull on the power cord.
- Do not use appliance for other than its intended use.
- Do not attempt to disassemble the appliance in any way.
- Use only on a level and dry surface.
- Do not clean container with harsh cleansers, steel wool pads or other abrasive materials.
- To disconnect, first power off the unit, then remove the plug from the wall outlet.
- Do not operate the appliance while empty.
- WARNING: Do not use a cracked container or a container having a loose or weakened handle.
- WARNING: Do not place in microwave oven.
- Fill the Brewing Vessel of this appliance with water only. Do not fill with other liquids or foods.
- Use only with a 120V AC power outlet.
Published By:
Aroma Housewares Co. | 6469 Flanders Drive, San Diego, CA 92121, U.S.A.
1-800-276-6286 | www.AromaCo.com
©2024 Aroma Housewares Company | All rights reserved.
SAVE THESE INSTRUCTIONS

IMPORTANT SAFEGUARDS
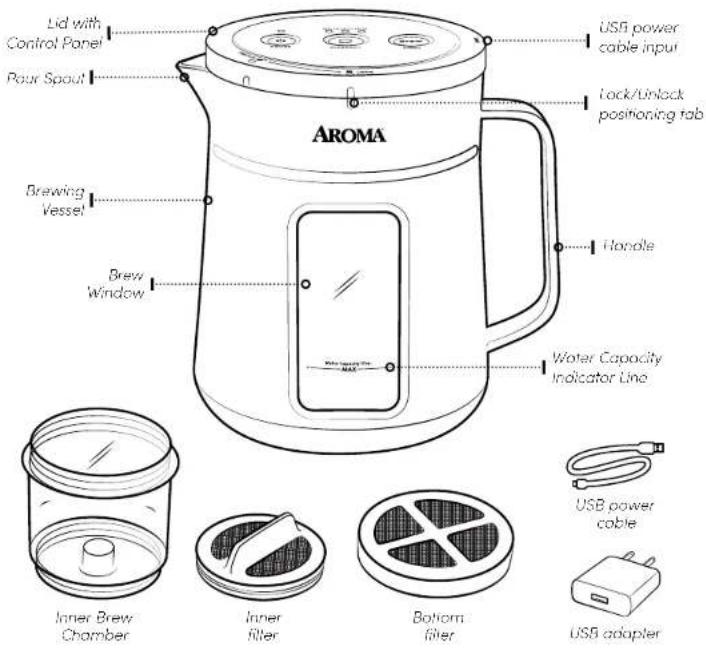
Parts Identification
Short Cord Instructions
- A short power-supply cord is provided to reduce the risks resulting from becoming entangled in or tripping over a longer cord.
- Longer extension cords are available and may be used if care is exercised in their use.
- If a longer extension cord is used:
a.) The marked electrical rating of the extension cord should be at least as great as the electrical rating of the appliance.
b.) The longer cord should be arranged so that it will not drape over the counter top or tabletop where it can be pulled by children or tripped over unintentionally.
USB Cord Safety Tips
- Never pull or yank on USB power cable.
- To insert the USB adapter, grasp it firmly and guide it into outlet.
- To disconnect, grasp USB adapter and remove it from outlet. Do not pull on the cable.
- Before each use, inspect the USB cable for cuts and/or abrasion marks. If any are found, this indicates that the USB cable should be replaced.
- Never wrap the USB cable tightly around the appliance, as this could place undue stress on the USB cable.
THIS APPLIANCE IS FOR HOUSEHOLD USE ONLY.
Controls/Functions
(1) Power Button
Powers the unit on/off, or cancels a brewing cycle in progress.
(1) Strength Selection Button
Selects brew strength – press until the blue indicator light is illuminated below the desired brew strength option. Mild, Medium, or Bold.
Brew / Start Button
Press to begin the brewing cycle.
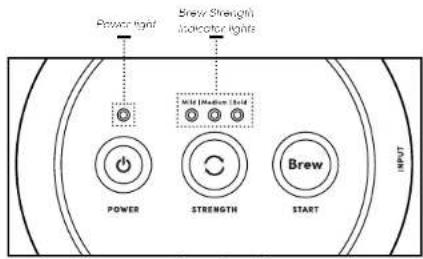
Lid Control Panel
BEFORE FIRST USE
- Read all instructions and important safeguards.
- Remove all packaging materials and make sure that the product has been received in good condition.
- Tear up all plastic bags and dispose of them properly as they can pose a risk to children.
- Wash Brewing Vessel, Inner Filter, Inner Brew Chamber, and Bottom Filter with warm, soapy water. Rinse well and dry thoroughly.
- Wipe exterior and interior surfaces of the Lid/Control Panel with a soft, moist cloth to remove dust particles collected during packing and handling.
- Dry all parts thoroughly.
- Place coffee maker on a solid, dry and level surface.
TO CLEAN
- Clean coffee maker after each use.
- Disconnect the USB adapter from the wall outlet and the USB cable from the Lid/Control Panel before cleaning.
- Remove the Lid/Control Panel and Inner Brew Chamber from the Brewing Vessel, then remove the Lid/Control Panel from the Inner Brew Chamber by rotating counterclockwise.
- Remove the Bottom Filter from the Inner Brew Chamber by rotating counterclockwise. Discard the coffee powder.
- Thoroughly wash and dry the Brewing Vessel, Inner Brew Chamber, Bottom Filter and Inner Filter.
- Lightly wipe the Lid/Control Panel with a soft damp cloth. Dry well with soft dry cloth.
- Be sure all parts are clean and dry before storing. Store appliance upright in its box or in a clean, dry place. Never store it while it is hot or wet. Never wrap cord tightly around the appliance.

Caution:
Do not use abrasive cleaners or scouring pads of any kind on the coffee maker. This will cause damage to the finish and may create a risk of electrical shock.
Never attempt to disassemble the coffee maker.
Never immerse the coffee maker, USB power cable or USB adopter in water.
Always take care not to allow electrical components to come into contact with water. Important: All parts must be hard washed. Do not put any parts of this appliance in the dishwasher.
Room temperature water is recommended for best results. Do not use hot or boiling water for brewing.
Note:
- Any other servicing should be performed by Aroma ^® Housewares.
- The coffee maker should be cleaned on a regular basis to prolong the life of the machine and to guarantee optimal brewing results.
- If the filter mesh is clogged with coffee powder, remove it with a soft brush. Rubbing too hard can scratch or damage the filter mesh.
PREPARING TO BREW
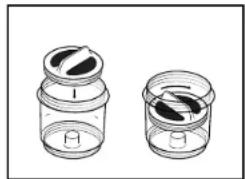
- Install the Inner Filter into the Inner Brew Chamber; lock into place by turning clock-wise (see Figure A).
- Add 45 grams of medium grounds or tea into the Inner Brew Chamber (see Figure B).
- Install the Bottom Filter onto the Inner Brew Chamber by turning clockwise until tight (see Figure B). The coffee grounds will be located inside the Inner Brew Chamber between the Bottom Filter and the Inner Filter.
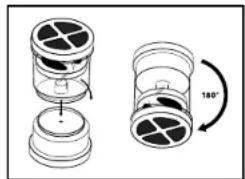
- Secure the Inner Brew Chamber onto the Lid/Control Panel, turn until tight, and flip over for loading into the Brewing Vessel (see Figure C).
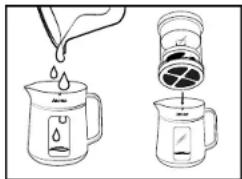
- Add 17 oz. water to Brewing Vessel (see Figure D). Do not exceed MAX capacity line.
- Carefully lower the Inner Brew Chamber inside the Brewing Vessel (see Figure D). Align the Unlock tab on the Lid/Control Panel with the tab on the Brewing Vessel. Twist Lid to Lock position to secure.
- Attach smaller end of USB cord to the Lid/Control Panel where it reads Input. Attach larger USB cord end into the USB adapter, and insert the adapter into a 120V AC wall outlet.
- The coffee maker is now ready for brewing.
Figure A
natural_image
Two identical containers with lids, one partially filled with a lid and the other with a lid (no text or symbols visible)Figure B
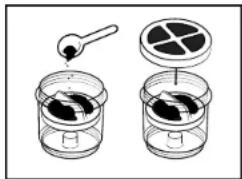
Figure C
natural_image
Diagram of two cylindrical mechanical components with internal blades and a 180° rotation indicator (no text or symbols)Figure D
Note:
Ensure that the "Input" on the Lid/Control Panel is facing the handle side for proper alignment.
The coffee maker can also be powered via USB using a laptop, power bank, or USB wall outlet.
The performance of your coffee maker when powered via USB may vary depending on the power output of the USB source.
COLD BREWING COFFEE COL
- Place the coffee maker on a sturdy, level and dry surface.
- Press the (∅)/Power button to turn on coffee maker.
- Press the ①/Strength Selection button to select brew strength. Continue to press the Strength Selection button until the blue indicator light is illuminated below the desired brew strength option: Mild, Medium or Bold intensity level.
- Once the brew strength has been selected, press the Brew/Start button to start the brewing cycle.
- When the coffee maker has completed the brew cycle, the red and blue indicator lights will both turn off. The coffee maker will then pump the water out of the Inner Brew Chamber, lasting approximately 15 seconds. The coffee maker will then beep three times, indicating that the coffee maker is off and the cold brew coffee is ready to enjoy.
- Press and hold the (∅)/Power button in the event you want to stop the coffee maker in the middle of the brewing cycle. It will take approximately one minute for the coffee maker to turn off. There will be three beeps and the unit will then turn off.
- Pour cold brew coffee from the Brewing Vessel into a glass over ice. A 1:1 ratio of coffee to ice is recommended for optimal flavor.
- When finished, safely unplug the power cord.

Caution:
Do not attempt to fill the Inner Brew Champer over the MAX water capacity, or 17oz.
Note:
In Mild mode, the coffee maker will brew for approximately 5 minutes. In Medium mode, the coffee maker will brew for approximately 10 minutes. In Bold mode, the coffee maker will brew for approximately 15 minutes.
We strongly advise users to refrain from using expired, long-exposed, or oxidized coffee grounds when brewing coffee. Using fresh and properly stored coffee grounds is crucial for achieving optimal flavor and aroma in your coffee. Additionally, using such coffee grounds may result in coffee foam overflowing at the spout of the coffee machine, leading to mess and inconvenience.
- Add loose tea leaves into the Inner Brew Chamber by following "Preparing to Brew" on page 7.
- Place the coffee maker on a sturdy, level, and dry surface.
- Press the (⊕)/Power button to turn on coffee maker.
- Press the (O)/Strength Selection until the blue indicator light is illuminated below Bold.
- Press the Brew/Start button to start the brewing cycle.
- When the coffee maker has completed the brew cycle, the red and blue indicator lights will both turn off. The coffee maker will then pump the water out of the Inner Brew Chamber, lasting approximately 15 seconds. The coffee maker will then beep three times, indicating that the coffee maker is off, and the cold brew tea is ready to enjoy. You can run the cycle again if you want a stronger tea.
- Press and hold the (∅)/Power button in the event you want to stop the coffee maker in the middle of the brewing cycle. It will take approximately one minute for the coffee maker to turn off. There will be three beeps, and the unit will then turn off.
- Pour cold brew tea from the Brewing Vessel into a glass over ice.
- When finished, safely unplug the power cord.
LIMITED WARRANTY
Aroma Housewares Company warrants its products against defects in material and workmanship for one year from the provable date of purchase in the United States.
Within this warranty period, Aroma Housewares Company will repair or replace, at its discretion, defective parts at no charge. Proof of the date of purchase, such as the original dated sales receipt, will be required with any request for warranty repair or replacement. All liability is limited to the amount of the purchase price.
This warranty does not apply if the warranty period expired; the product has been modified by any unauthorized service center or personnel; the defect was subject to abuse, improper use not conforming to product manual instructions, or environmental conditions more severe than those specified in the manual and specification, neglect of the owner or improper installation; the defect was subject to Force Majeure such as flood, fire, lightning, earthquake, other natural calamities, war. The warranty excludes accessories and replacement parts. This warranty is void if the product is used for other than single-family household use or subjected to any voltage and waveform other than as specified on the rating label (e.g., 120V - 60Hz).
Aroma's sole obligation under the warranty shall be to replace the defective product with a working one or a similar model of equivalent value, if the same model is not available, in the occurrence of any failure or defect covered under the warranty during the warranty period. Refurbished items or items not purchased through an authorized retailer are not eligible for warranty claims. Transportation charges on parts, or products in whole, submitted for repair or replacement, under this warranty, must be borne by the purchaser.
This warranty gives you specific legal rights, which may vary from state to state, and does not cover areas outside the United States.
SERVICE & SUPPORT
In the event of a warranty claim, or if service is required for this product, please contact Aroma® customer service toll-free at:
1-800-276-6286 | CustomerService@AromaCo.com M-F, 8:30am-4:30pm, Pacific Time
www.AromaCo.com
Aroma Housewares Company 6469 Flanders Drive, San Diego, CA 92121, U.S.A.
natural_image
Black Aroma coffee maker with open lid and glass handle (no visible text or symbols)To Enhance and Enrich Lives.

natural_image
Line drawings of various fork shapes arranged in two rows (no text or symbols)- instruction manual
- AROMA®
- REGISTER YOUR PRODUCT
- IMPORTANT SAFEGUARDS
- SAVE THESE INSTRUCTIONS
- Parts Identification
- Short Cord Instructions
- USB Cord Safety Tips
- THIS APPLIANCE IS FOR HOUSEHOLD USE ONLY.
- Controls/Functions
- BEFORE FIRST USE
- TO CLEAN
- Caution:
- Note:
- PREPARING TO BREW
- COLD BREWING COFFEE COL
- LIMITED WARRANTY
- SERVICE & SUPPORT
Brand : Aroma
Model : ACM-210B
Category : Coffee maker