GS 1531 - Freezer Nabo - Free user manual and instructions
Find the device manual for free GS 1531 Nabo in PDF.


| Product Type | Freezer (upright) |
| Brand | Nabo |
| Model | GS 1531 |
| Climate Class | SN, N, ST, T |
| Ambient Temperature Range | +10°C to +43°C |
| Thermostat Settings | Min (less cool), Mid (normal), Max (coolest) |
| Interior Features | Drawers, flip mask, two-star compartment, adjustable feet |
| Door Reversible | Yes (with tools: Phillips screwdriver, flat-blade screwdriver, hexagonal spanner) |
| Defrosting | Manual (power off, natural or hot water, use plastic/wooden ice shovel) |
| Cleaning | Interior: baking soda solution; exterior: damp cloth; avoid abrasives |
| Installation Clearances | 10 cm sides, 10 cm rear, 30 cm top |
| Leveling | Two adjustable feet at front |
| Energy Saving | Keep door closed, allow air circulation, avoid overfilling |
| Noise Level | Normal operation noises (refrigerant flow, compressor) |
| Safety Features | Child safety: door lock key kept away; flammable refrigerant R600a? (cyclopentane foam) |
| Spare Parts Availability | Thermostats, sensors, PCBs, light sources, handles, hinges, trays, baskets: at least 7 years; door gaskets: at least 10 years |
| Power Supply | Mains; must be earthed; no extension cords |
| Weight | Not specified |
| Dimensions (approx.) | Not specified; door opening requires at least 902 mm x 1052 mm |
| Warranty/Support | Contact Nabo hotline: 0900 15 00 52 (45 Cent/min), www.nabo.at |
Frequently Asked Questions - GS 1531 Nabo
User questions about GS 1531 Nabo
0 question about this device. Answer the ones you know or ask your own.
Ask a new question about this device
Download the instructions for your Freezer in PDF format for free! Find your manual GS 1531 - Nabo and take your electronic device back in hand. On this page are published all the documents necessary for the use of your device. GS 1531 by Nabo.
USER MANUAL GS 1531 Nabo
natural_image
Front and back view diagram of a double-door refrigerator with horizontal shelves (no text or labels)Entsorgungshinweise
natural_image
Illustration of a colorful wall-mounted device with a blue screen and a small object on top (no text or symbols visible)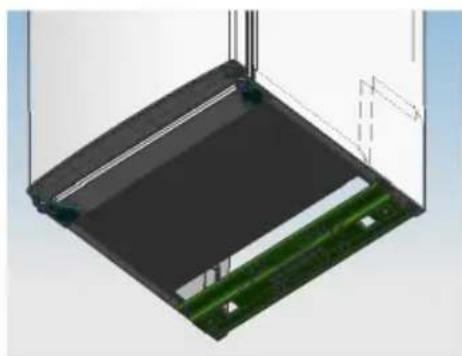
natural_image
3D diagram of a layered electronic component with green circuit board and black substrate (no text or symbols)natural_image
Simple line drawing of a door frame with a curved handle and corner markers (no text or symbols)www.nabo.at | office@baytronic.at
CE
Tabelle 1 Klimaklassen
4.1 Switching On Your Unit 10
4.2 Noise Inside the Unit! 10
4.3 Tips for Keeping Food in the Unit.... 10
- CLEANING 11
5.1 Defrosng.... 11
5.2 Cleaning the Interior and the Exterior of the Unit 11
5.3 Cleaning Tips 12
- MAINTENANCE 12
6.1 Care When Handling / Moving Your Unit.... 12
6.2 Servicing 12
6.3 Switching Of for Long Periods of Time 12
- Trouble shoong 12
7.1 Warm ps: 13
- TIPS FOR ENERGY SAVING 13
- DISPOSAL....14
1. SAFETY WARNINGS
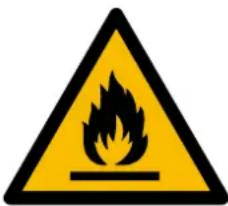
Warning: risk of re / ammable materials
THIS appliance is intended to be used in household and similar applicaons such as sta kitchen areas in shops, oces and other working environments; farm houses and by clients in hotels, motels and other residential type environments; bed and breakfast type environments; catering and similar non-retail applicaons.
THIS appliance is not intended for use by persons (including children) with reduced physical, sensory or mental capabilities, or lack of experience and knowledge, unless they have been given supervision or instrucon concerning use of the appliance by a person responsible for their safety.)
Children should be supervised to ensure that they do not play with the appliance.
IF the supply cord is damaged, it must be replaced by the manufacturer, its service agent or similarly qualified persons in order to avoid a hazard.
DO not store explosive substances such as aerosol cans with a ammable propellant in this appliance.
THE appliance has to be unplugged aer use and before carrying out user maintenance on the appliance.
WARNING: Keep venlaon openings, in the appliance enclosure or in the built-in structure, clear of obstrucon.
WARNING: Do not use mechanical devices or other means to accelerate the defrosing process, other than those recommended by the manufacturer.
WARNING: Do not damage the refrigerant circuit.
WARNING: Do not use electrical appliances inside the food storage compartments of the appliance, unless they are of the type recommended by the manufacturer.
WARNING: Please abandon the refrigerator according to local regulators for it use ammable blowing gas and refrigerant.
WARNING: When poisoning the appliance, ensure the supply cord is not trapped or damaged.
WARNING: Do not locate mulple portable socket-outlets or portable power supplies at the rear of the appliance.
DO not use extension cords or ungrounded (two prong) adapters.
DANGER: Risk of child entrapment. Before you throw away your old refrigerator or freezer:
-Take o the doors.
-Leave the shelves in place so that children may not easily climb inside.
THE refrigerator must be disconnected from the source of electrical supply before aempng the installaon of accessory.
REFRIGERANT and cyclopentane foaming material used for the appliance are
flammable. Therefore, when the appliance is scrapped, it shall be kept away from any fire source and be recovered by a special recovering company with corresponding qualification other than be disposed by combustion, so as to prevent damage to the environment or any other harm.
FOR EN standard: This appliance can be used by children aged from 8 years and above and persons with reduce physical sensory or mental capabilities or lack of experience and knowledge if they have been given supervision or instruction concerning use of the appliance in a safe way and understand the hazards involved. Children shall not play with the appliance. Cleaning and user maintenance shall not be made by children without supervision. Children aged from 3 to 8 years are allowed to load and unload refrigerating appliances.
The necessity that, for doors or lids fitted with locks and keys, the keys be kept out of the reach of children and not in the vicinity of the re- frigerating appliance, in order to prevent children from being locked inside.
TO avoid contamination of food, please respect the following instructions:
- Opening the door for long periods can cause a significant increase of the temperature in the compartments of the appliance.
- Clean regularly surfaces that can come in contact with food and accessible drainage systems.
- Clean water tanks if they have not been used for 48 h; flush the water system connected to a water supply if water has not been drawn for 5 days. (note 1)
- Store raw meat and fish in suitable containers in the refrigerator, so that it is not in contact with or drip onto other food.
- Two-star frozen-food compartments are suitable for storing pre-frozen food, storing or making ice-cream and making ice cubes. (note 2)
- One *, two , three-star -and four-star * * * * compartments are not suitable for the freezing of fresh food. (note 3)
- If the refrigerating appliance is left empty for long periods, switch off, defrost, clean, dry, and leave the door open to prevent mould developing within the appliance.
- For appliances without a 4-star compartment: this refrigerating appliance is not suitable for freezing foodstuffs. (note 4)
Note 1,2,3,4: Please confirm whether it is applicable according to your product compartment type.
FOR a freestanding appliance: this refrigerating appliance is not intended to be used as a built-in appliance.
2. INSTALLTION
2.1 Locaon
When selecng a posion for your unit you should make sure the oor is at and rm, and the room is well venlated. Avoid locang your unit near a heat source, e.g. cooker, boiler or radiator. Also avoid direct sunlight as it may increase the electrical consumpon. Extreme cold ambient temperatures may also cause the unit not to perform properly. This unit is not designed for use in a garage or outdoor installaon. Do not drape the unit with any covering.
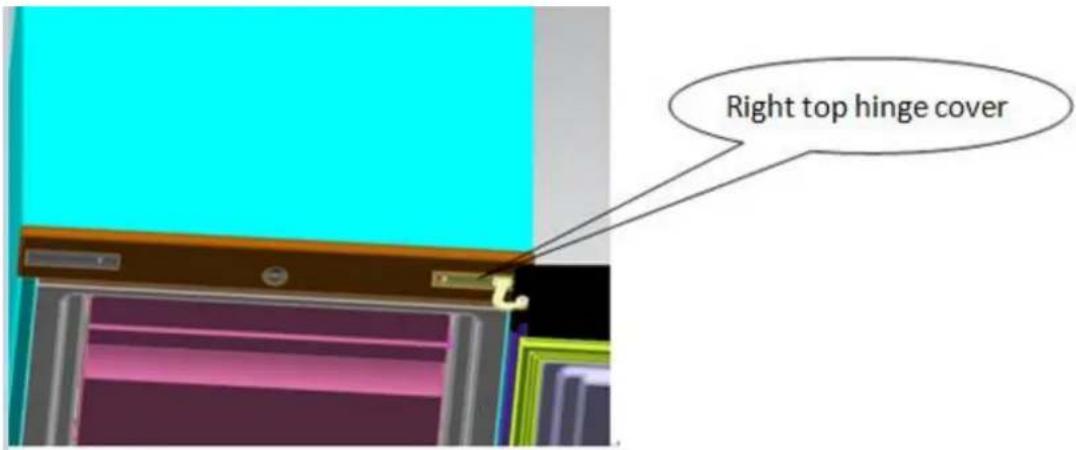
When installing the unit, ensure that 10 cm of free space is le at both sides, 10 cm at the rear and 30 cm at the top of the unit. This will allow cold air to circulate around the unit and improve the eciency of the cooling process. Right top hinge cover
2.2 Reversing the Door Swing
Tools Required: Phillips style screwdriver / Flat-blade screwdriver / Hexagonal spanner/Hexagonal socket wrench
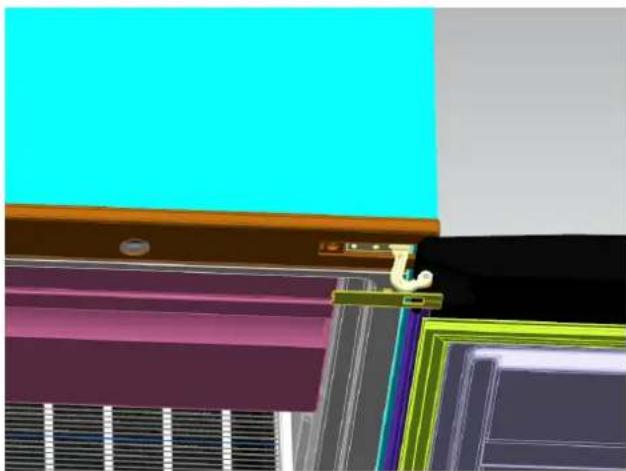
1) Remove the right top hinge cover.
natural_image
3D rendering of a wall-mounted air conditioner unit with colored panels and a blue top (no text or symbols visible)2) Remove the screws xed the top-hinge with cross-slot screwdriver.
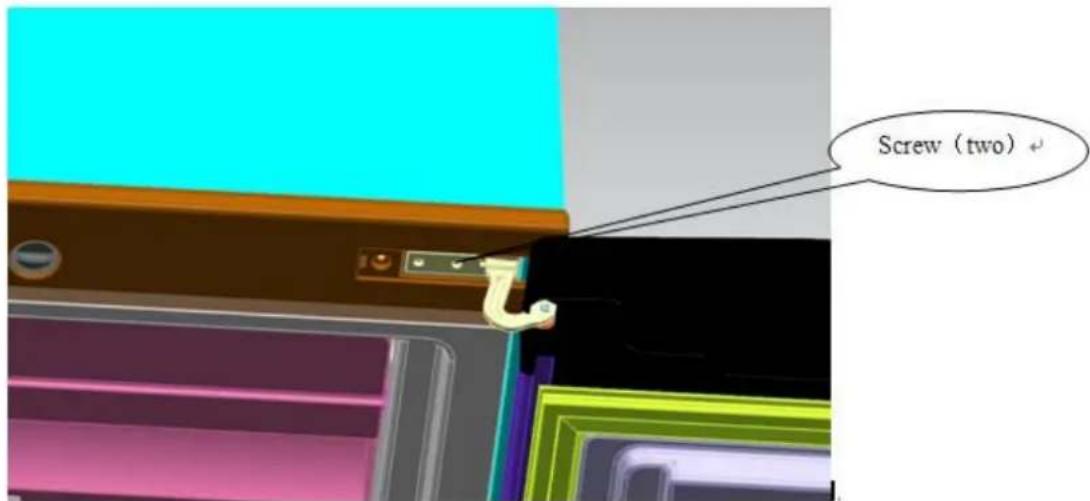
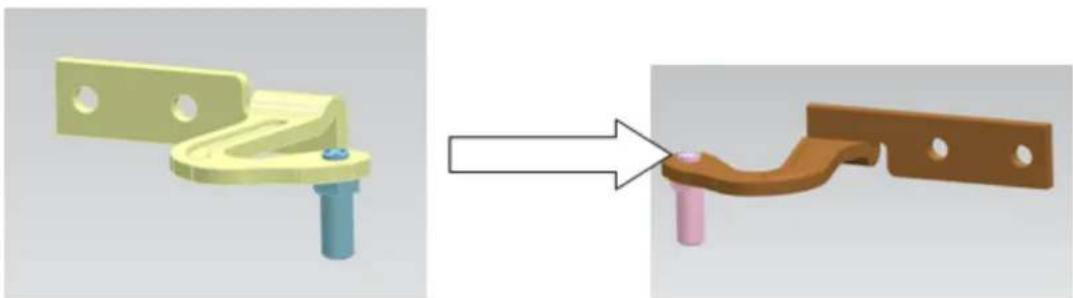
3) Replace the top-hinge and the top-door limit block and the door bearing bush to the other side.
A. Remove the nut with sleeve .Take o the washer then remove the axes to the other side and xed.
natural_image
3D mechanical component before and after modification, showing a yellow bracket with blue end caps and a brown bracket with pink end caps (no text or symbols)B. Remove the door limit block
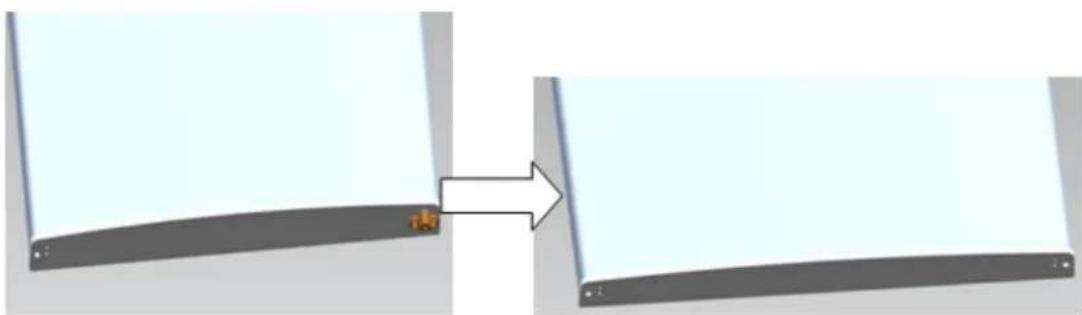
natural_image
Diagram showing a device transitioning from a flat panel to a curved panel, with no visible text or symbols.C. Please taking out another door limit block, with screw mounting to the door
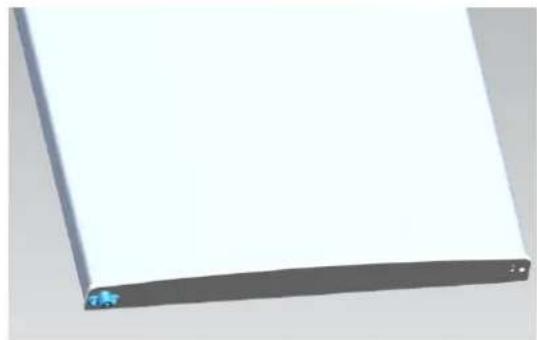
natural_image
Simple 3D rendering of a flat panel with a small blue icon at the bottom left corner (no text or symbols)4) Disassemble the screws xed the bottom-hinge with hexagonal socket wrench.
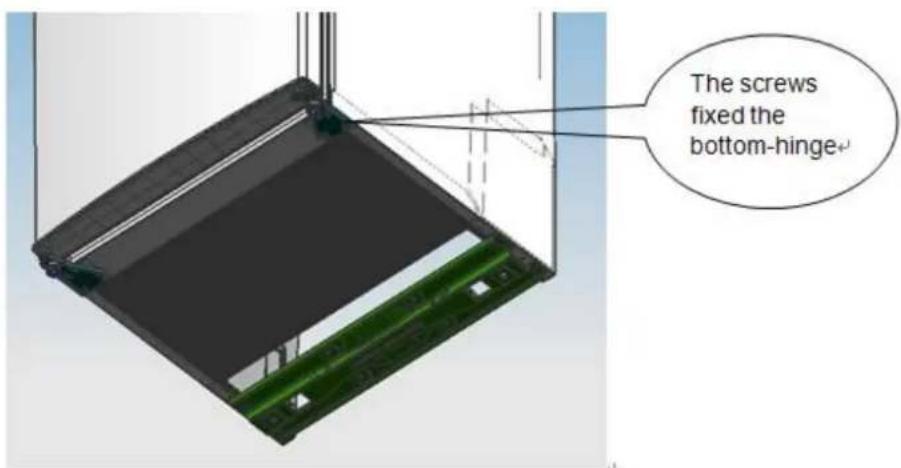
Note: the refrigerator-freezer incline angle less 45^ .
5) Replace the bottom hinge to the other side then x it with screws.
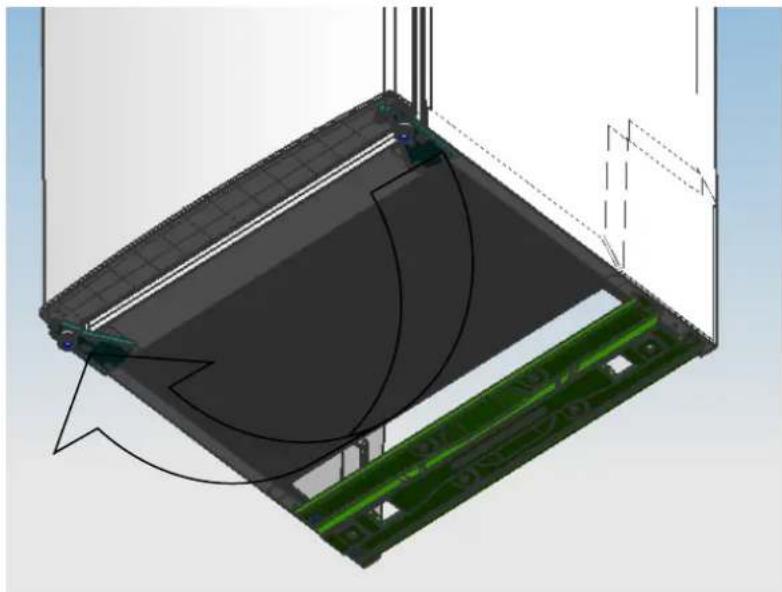
natural_image
3D CAD rendering of a modular electronic device with green circuit board and grid panel (no text or symbols visible)6) Set the door right posion, x the mid-hinge.
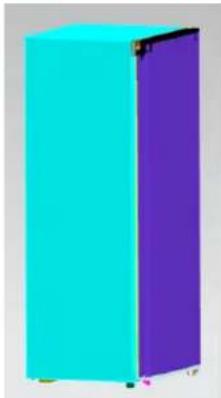
natural_image
3D illustration of a two-color refrigerator with cyan and purple sections (no text or symbols)7) Replace the top-hinge.
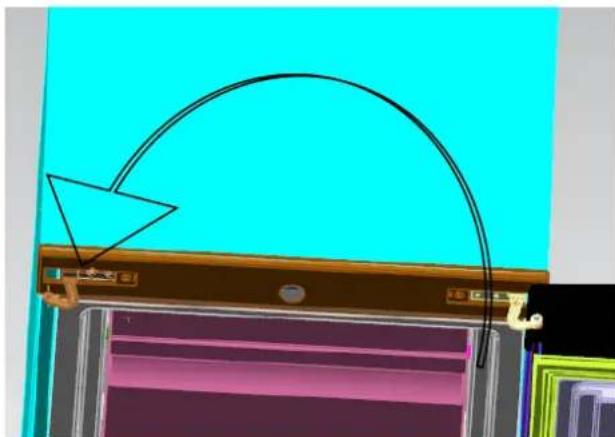
natural_image
Illustration of a device with a curved arrow and control panel, set against a cyan background (no text or symbols)8) Set the top door right posion, x the top-hinge and the cover.
natural_image
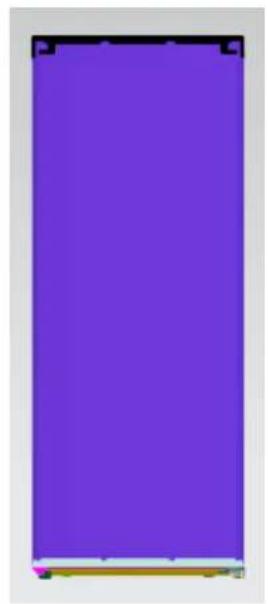
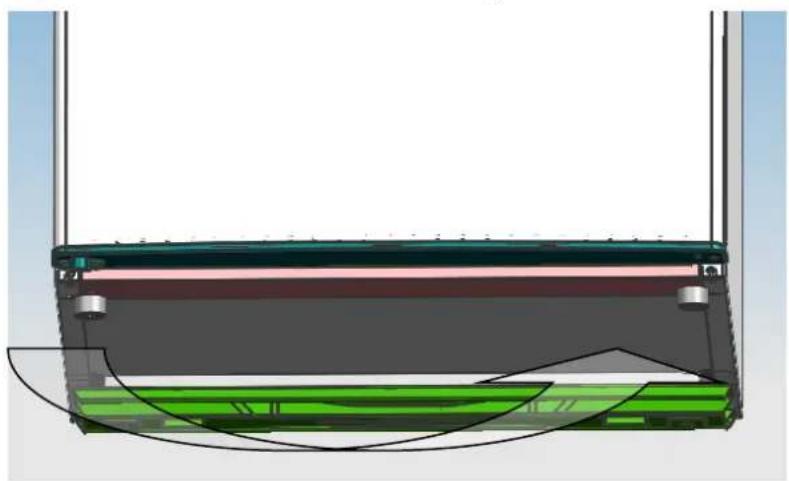
Solid purple rectangle with a thin horizontal line at the bottom (no text or symbols)9) Replace the leveler to the other side and adjust it to make sure the cabinet level.
natural_image
Diagram of a mechanical or electronic component with layered structure and curved arrows indicating motion or force (no text or symbols)2.3 Door Handle Install Illuminaon (oponal)
Note: Figures in the user manual are only for reference. The actual product may differ slightly. The refrigerator must be disconnected from the source of electrical supply before aempng the installaon of accessory.
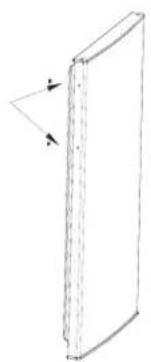
Step 1: take out two plug pins from the door (Side of door open)
natural_image
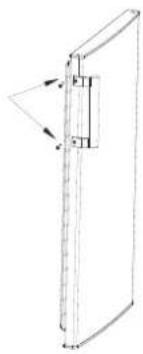
Simple line drawing of a rectangular panel with arrows indicating direction (no text or symbols)Step 2: Install the door handle to the door and fasten it with screws
natural_image
Pure technical line drawing of a vertical structural component without any text, numbers, or symbols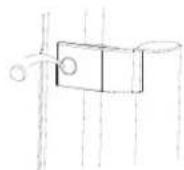
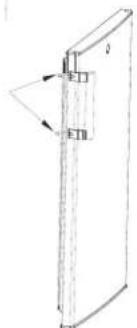
Step 3: Cover screw caps of the handle into screw holes
natural_image
Simple line drawing of a vertical panel with arrows indicating direction (no text or symbols)2.4 Door Space Requirements
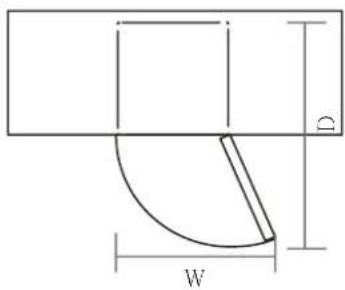
The unit's door must be able to open fully as shown.
$$ W \times D \geqslant 9 0 2 \times 1 0 5 2 m m $$
2.5 Levelling the Unit
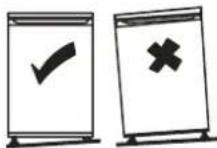
To do this adjust the two levelling feet at the front of the unit. If the unit is not level, the door and magnec seal alignments will not be covered properly.
Make sure that the foot touches the ground before use.
Look down from the top, clockwise and counterclockwise loosening, ghtening.
2.6 Cleaning Before Use
Wipe the inside of the unit with a weak soluon of bicarbonate soda. Then rinse with warm water using a 'Wrung-out' sponge or cloth. Wash the shelves and salad bin in warm soapy water and dry completely before replacing in the unit. Clean the exterior of the unit with a damp cloth. If you require more informaon refer to the Cleaning secon.
2.7 Before Using Your Unit
Do not damage the power cord under any condion so as to ensure safety use, do not use when the power cord is damaged or the plug is worn.
Do not put ammable, explosive, volale and highly corrosive items in the refrigerator to prevent damages to the product or re accidents.
Do not place ammable items near the refrigerator to avoid res.
This product is household refrigerators and shall be only suitable for the storage of foods.
According to naonal standards, household refrigerators shall not be used for other purposes, such as storage of blood, drugs or biological products.
Do not place items such as bottled or sealed container of uid such as bottled beers and beverages in the freezer to prevent bursts and other losses.
Before placing any food in your unit, turn it on and wait for 24 hours, to make sure it is working properly and to allow it me to fall to the correct temperature. Your unit should not be overlled.

Before Plugging in
You must check that you have a socket which is compatible with the plug supplied with the unit.
Before Turning On!
Do not turn on unl two hours aer moving the unit.
2.8 Interior Accessories
Various plasc storage drawers are included with your appliance - dierent models have dierent combinaons.

In order to make the most of the volume of frozen-food storage compartment, the user can remove one or more drawers, out of the appliance, according to your daily use.
3. PRODUCT OVERVIEW
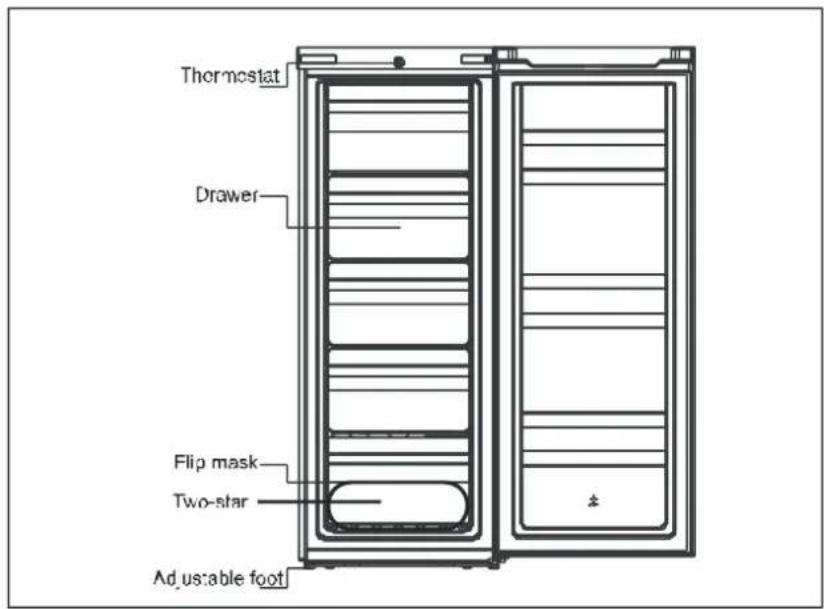
Drawers, food boxes, shelves, etc. placed according to the posion in the picture above are the most energy ecient.
All images in this instrucon manual are for indicaon only; please refer to your individual unit for details.
Two-star frozen-food compartments are suitable for storing pre-frozen food, storing or making ice-cream and making ice cubes, not suitable for the freezing of fresh food.
4. OPERATION
4.1 Switching On Your Unit
◆The temperature selector knob is located on the middle of the upper beam.
Seing "Min": Less Cool Temperature
Seing "Mid": Normal Operaon(adequate for most situaons)
Seng "Max": Coolest Temperature
During high ambient temperatures e.g. on hot summer days. It may be necessary to set the thermostat to the Coolest seng(posion "Max").This may cause the compressor running connuously in order to maintain a low temperature in the cabinet.
◆ For the rst time you install your refrigerator, set the thermostat knob at "Mid".
Give your refrigerator me to cool down completely before adding food. It is the best to wait 24 hours before adding food. The thermostat knob controls the temperature.
4.2 Noise Inside the Unit!
You may noce that your unit makes some unusual noises. Most of these are perfectly normal, but you should be aware of them!
These noises are caused by the circulaon of the refrigerant liquid in the cooling system. It has become more pronounced since the introducon of CFC free gases. This is not a fault and will not affect the performance of your unit. This is the compressor motor working, as it pumps the refrigerant around the system.
4.3 Tips for Keeping Food in the Unit
◆ Keep raw meats/shes in a container which is large enough to collect juices and cover it properly. Place the container on the lowest drawer.
Leave space around your food, to allow air to circulate inside the unit. Ensure all parts of the unit are kept cool.
◆ To prevent transfer of favours and drying out, pack or cover the food separately.
◆ Always let pre-cooked food cool down before you put in the unit. This will help to maintain the internal temperature of the unit.
◆ To prevent cold air escaping from the unit, try to limit the number of mes you open the door. We recommend that you only open the door when you need to put food in or take food out.
5. CLEANING
5.1 Defrosng
◆ Power o the refrigerator.
◆ Remove the food from the refrigerator and place it properly to prevent food from melng.
◆ Clear the drain pipe (to use so materials to prevent damage to the liner), Prepare the water containers for defrosng. (pay aenon to clean the compressor compartment water draining tray, avoiding overow to the ground).
You can use the natural temperature for the natural defrost, you can also use the ice shovel to eliminate the frost (to use plasc or wooden ice shovel, for avoiding damage to the liner or pipe)
You can also use the appropriate amount of hot water to speed up the defrost, with a dry towel to dry the water aer defrosng.
◆ Aer defrosng, put back the foods in cabinet, and power on the refrigerator.
5.2 Cleaning the Interior and the Exterior of the Unit
◆ Dusts behind the refrigerator and on the ground shall be mely cleaned to improve the cooling eect and energy saving.
◆ Check the door gasket regularly to make sure there are no debris. Clean the door gasket with a so cloth dampened with soapy water or diluted detergent.
◆ The interior of the refrigerator should be cleaned regularly to avoid odor.
◆ Please turn o the power before cleaning interior, remove all foods, drinks ,shelves, drawers, etc.
Use a so cloth or sponge to clean the inside of the refrigerator, with two tablespoons of baking soda and a quart of warm water. Then rinse with water and wipe clean. Aer cleaning, open the door and let it dry naturally before turning on the power.
For areas that are difficult to clean in the refrigerator (such as narrow sandwiches, gaps or corners), it is recommended to wipe them regularly with a so rag, so brush, etc. and when necessary, combined with some auxiliary tools (such as thin sticks) to ensure no contaminants or bacterials accumulaon in these areas.
Do not use soap, detergent, scrub powder, spray cleaner, etc., as these may cause odors in the interior of the refrigerator or contaminated food.
◆ Clean the bottle frame, shelves and drawers with a so cloth dampened with soapy water or
diluted detergent. Dry with a so cloth or dry naturally.
◆ Wipe the outer surface of the refrigerator with a so cloth dampened with soapy water, detergent, etc., and then wipe dry.
Do not use hard brushes, clean steel balls, wire brushes, abrasives(such as toothpastes), organic solvents (such as alcohol, acetone, banana oil, etc.), boiling water, acid or alkaline items, which may damage the fridge surface and interior. Boiling water and organic solvents such as benzene may deform or damage plasc parts.
Do not rinse directly with water or other liquids during cleaning to avoid short circuits or aect electrical insulaon aer immersion.
5.3 Cleaning Tips
Condensaon may appear on the outside of the unit. This may be due to a change in room temperature. Wipe of any moisture residue. If the problem connues, please contact a qualified technician for assistance.
6. MAINTENANCE
6.1 Care When Handling / Moving Your Unit
Hold the unit around its sides or base when moving it. Under no circumstances should it be lied by holding the edges of the top surface.
6.2 Servicing
The unit should be serviced by an authorized engineer and only genuine spare parts should be used. Under no circumstances should you aempt to repair the unit yourself. Repairs carried out by inexperienced persons may cause injury or serious malfuncon. Contact a qualitatively technician.
6.3 Switching Of for Long Periods of Time
When the unit is not in use for a long period of me, disconnect it from the mains supply, empty all food and clean the appliance, leaving the door ajar to prevent unpleasant smells.
7. Trouble shoong
The following simple issues can be handled by the user. Please call the aer-sale service department if the issues are not seled.
| Inoperaon | Whether the freezer is plugged and connected to power;Low voltage;Failure power or tripping circuit |
| Odor | Odorous foods should closely wrapped;Whether foods are roen;Whether the interior shall be cleaned. |
| Long-term operaon of compressor | It is normal that refrigerator operates for longer me in summer when the ambient temperature is higher;Do not put too much food in the freezer at one me;Do not put foods unl they are cooled;Frequent opening of refrigerator door. |
| Illuminang light does notshine | Whether the refrigerator is connected to power,whether the illuminang light is damaged. |
| The refrigerator door can not be properly closed. | The freezer door is stuck by food packages;Too much food;Tilt refrigerator. |
| Loud noises | Whether the food is leveled, whether the refrigerator is balanced;Whether the refrigerator parts are properly placed. |
7.1 Warm ps:
◆The refrigerator enclosure may emit heat during operaon specially in summer, this is caused by the radiaon of the condenser, and it is a normal phenomenon.
◆ Condensaon: condensaon phenomenon will be detected on the exterior surface and door seals of the freezer when the ambient humidity is large, this is a normal phenomenon, and the condensaon can be wiped away with a dry towel.
◆Buzz: Buzz will be generated by running compressor specially when starting up or shutting down.
8. TIPS FOR ENERGY SAVING
Warning for energy
1) Refrigerang appliances might not operate consistently (possibility of defrosng of contents or temperature becoming too warm in the frozen food compartment) when sited for an extended period of time below the cold end of the range of temperatures for which the refrigerang appliance is designed.
2) The fact that effervescent drinks should not be stored in food freezer compartments or cabinets or in low-temperature compartments or cabinets, and that some products such as water ices should not be consumed too cold;
3) The need to not exceed the storage me(s) recommended by the food manufacturers for any kind of food and particularly for commercially quick-frozen food in food-freezer and frozen-food storage compartments or cabinets;
4) The precautions necessary to prevent an undue rise in the temperature of the frozen food while defrosing the refrigerant appliance, such as wrapping the frozen food in several layers of newspaper.
5) The fact that a rise in temperature of the frozen food during manual defrosng, maintenance or cleaning could shorten the storage life.
9. DISPOSAL
Old units sll have some residual value. An environmentally friendly method of disposal will ensure that valuable raw materials can be recovered and used again. The refrigerant used in your unit and insulaon materials require special disposal procedures. Ensure that none of the pipes on the back of the unit are damaged prior to disposal. Up to date informaon concerning opons of disposing of your old unit and packaging from the new one can be obtained from your local council oce.
When disposing of an old unit break of any old locks or latches and remove the door as a
safeguard.
| Correct Disposal of this product | |
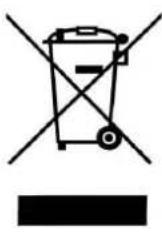 | Correct Disposal of this productThis marking indicates that this product should not be disposed with other household wastes throughout the EU. To prevent possible harm to the environment or human health from uncontrolled waste disposal, recycle it responsibly to promote the sustainable reuse of material resources. To return your used device, please use the return and collecon systems or contact the retailer where the product was purchased. They can take this product for environmental safe recycling. |
For more informaon, please contact the local authority or your retailer where you purchased the product.
Table 1 Climate classes
| Class | Symbol | Ambient temperature range °C |
| Extended temperate | SN | +10 to +32 |
| Temperate | N | +16 to +32 |
| Subtropical | ST | +16 to +38 |
| Tropical | T | +16 to +43 |
Extended temperate: 'this refrigerang appliance is intended to be used at ambient temperatures ranging from 10 °C to 32 °C';
temperate: 'this refrigerang appliance is intended to be used at ambient temperatures ranging from 16 °C to 32 °C';
Subtropical: 'this refrigerang appliance is intended to be used at ambient temperatures ranging from 16 °C to 38 °C';
Tropical: 'this refrigerang appliance is intended to be used at ambient temperatures ranging from 16 °C to 43 °C';
The ordered parts in the following table can be acquired from channel XXX:
| Ordered Part | Provided by | Minimum Time Required for Provision |
| thermostats | Professional maintenance personnel | At least 7 years aer the last model is launched on the market |
| temperature sensors | Professional maintenance personnel | At least 7 years aer the last model is launched on the market |
| printed circuit boards | Professional maintenance personnel | At least 7 years aer the last model is launched on the market |
| light sources | Professional maintenance personnel | At least 7 years aer the last model is launched on the market |
| door handles | Professional repairers and nal users | At least 7 years aer the last model is launched on the market |
| door hinges | Professional repairers and nal users | At least 7 years aer the last model is launched on the market |
| trays | Professional repairers and nal users | At least 7 years aer the last model is launched on the market |
| baskets | Professional repairers and nal users | At least 7 years aer the last model is launched on the market |
| door gaskets | Professional repairers and nal users | At least 10 years aer the last model is launched on the market |
Vertrieb durch:
Hotline: 0900 15 00 52 (45 Cent/Min) www.nabo.at
- Entsorgungshinweise
- SAFETY WARNINGS
- Warning: risk of re / ammable materials
- INSTALLTION
- Locaon
- Reversing the Door Swing
- Door Handle Install Illuminaon (oponal)
- Door Space Requirements
- Levelling the Unit
- Cleaning Before Use
- Before Using Your Unit
- Before Plugging in
- Before Turning On!
- Interior Accessories
- PRODUCT OVERVIEW
- OPERATION
- Switching On Your Unit
- Noise Inside the Unit!
- Tips for Keeping Food in the Unit
- CLEANING
- Defrosng
- Cleaning the Interior and the Exterior of the Unit
- Cleaning Tips
- MAINTENANCE
- Care When Handling / Moving Your Unit
- Servicing
- Switching Of for Long Periods of Time
- Trouble shoong
- Warm ps:
- TIPS FOR ENERGY SAVING
- Warning for energy
- DISPOSAL
Brand : Nabo
Model : GS 1531
Category : Freezer