Phonitor 3 - Headphone amplifier SPL - Free user manual and instructions
Find the device manual for free Phonitor 3 SPL in PDF.


| Product Type | Headphone Amplifier |
| Brand | SPL |
| Model | Phonitor 3 |
| Dimensions (W x H x D) | 278 x 66 x 300 mm |
| Weight | 2.8 kg |
| Power Supply | 230 V AC / 115 V AC (switchable), 50/60 Hz |
| Power Consumption | 30 W |
| Inputs | 2x XLR balanced, 2x RCA unbalanced |
| Outputs | 2x 6.35 mm stereo headphone jacks |
| Gain | Adjustable -10 dB to +18 dB |
| Frequency Response | 10 Hz – 100 kHz (±0.5 dB) |
| Total Harmonic Distortion (THD) | < 0.001% |
| Signal-to-Noise Ratio | > 120 dB |
| Crossfeed Modes | Studio, HiFi, Monitor, Off |
| Construction | Solid steel chassis with aluminum front panel |
| Accessories Included | Power cord |
| Intended Use | Home studio, Hi-Fi, professional monitoring |
| Cleaning Instructions | Wipe with a dry, soft cloth; do not use solvents |
| Safety Precautions | Do not expose to moisture; do not open the device; risk of electric shock |
| Spare Parts & Repairability | Contact SPL or authorized service center for repairs |
| General Information | Made in Germany; 2-year warranty |
Frequently Asked Questions - Phonitor 3 SPL
User questions about Phonitor 3 SPL
0 question about this device. Answer the ones you know or ask your own.
Ask a new question about this device
Download the instructions for your Headphone amplifier in PDF format for free! Find your manual Phonitor 3 - SPL and take your electronic device back in hand. On this page are published all the documents necessary for the use of your device. Phonitor 3 by SPL.
USER MANUAL Phonitor 3 SPL
Headphone amplifier and monitoring controller with 120V technology
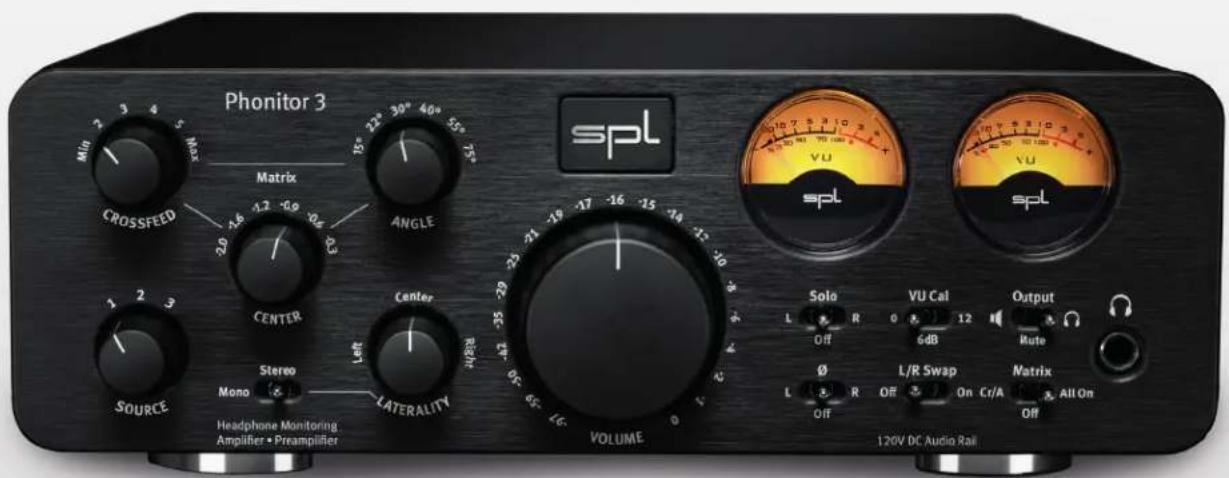
Manual
More information: www.spl.audio

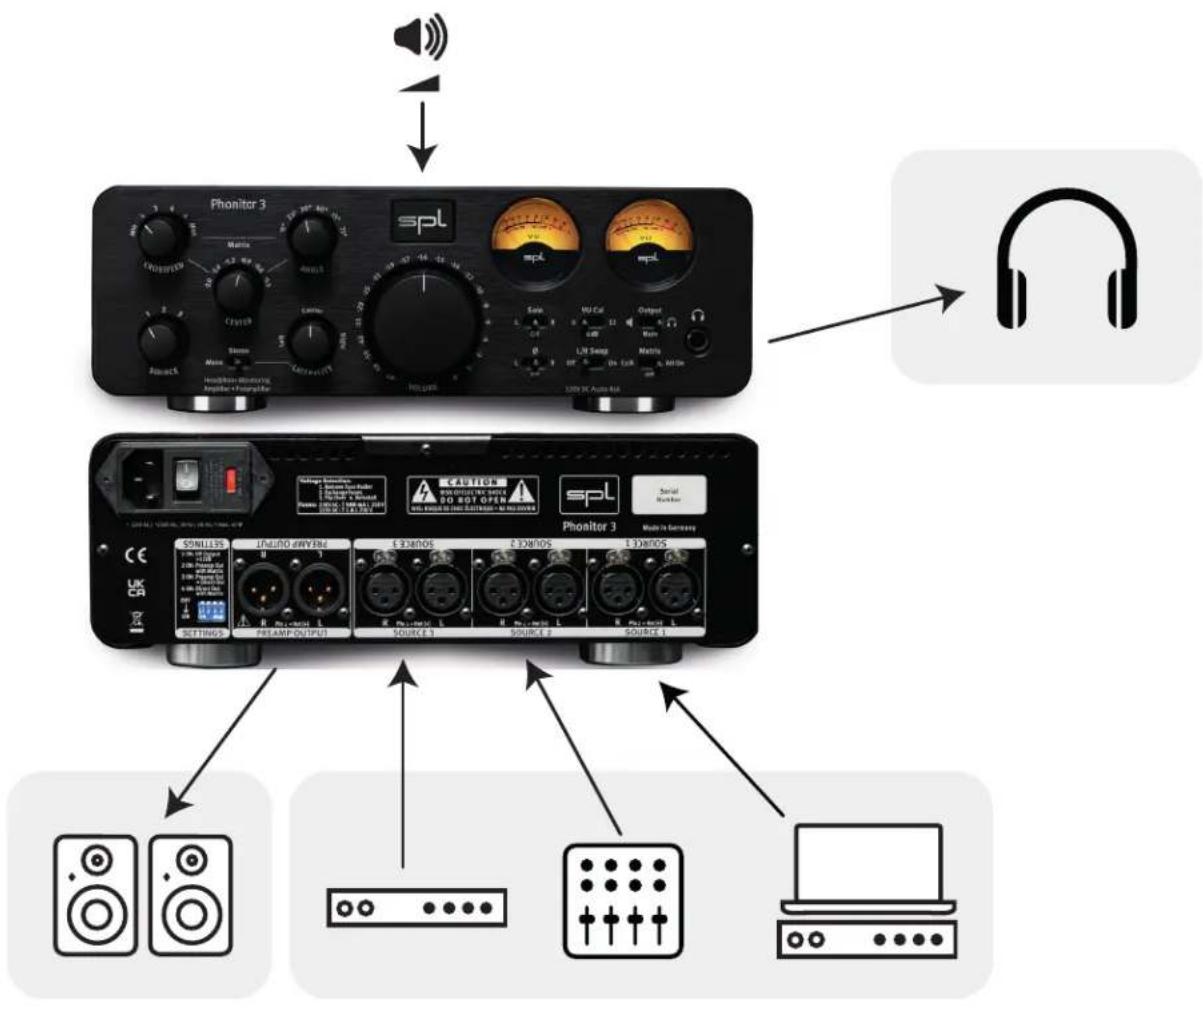
Getting started
Read the safety instructions starting on page 11.
Make sure that the mains voltage of the Phonitor 3 corresponds to the voltage of your region and that the fuse has the correct value for the selected voltage (see specifications on page 8.)
The power switch on the back of the Phonitor 3 must be in the off position.
Connect the supplied power cord to the power connector of the Phonitor 3 and to a power outlet.
Be sure to connect the device to a main socket outlet with a protective grounding connection! If the supplied power cord does not match your mains socket outlet, please contact your dealer.
The devices that are to be connected to the Phonitor 3 must be be switched off.
Connect the outputs of your analog sources to the analog inputs of the Phonitor 3. Please use appropriate audio cables (XLR).
Audio cables not included in the scope of delivery.
Connect audio cables between the Phonitor 3 and following amplifiers or active monitors (XLR).
Audio cables not included in the scope of delivery.
Connect headphones to the headphone outputs of the Phonitor 3.
Warning: Never connect a mono jack to the stereo headphone jack and make sure that the plug is fully inserted, otherwise a short circuit might damage the amplifiers.
Power on
Switch on the power switch on the rear panel of the Phonitor 3 (On = 1).
The VU meters light up.
Power off
Switch off the power switch on the rear panel of the Phonitor 3 (Off = 0).
The VU meters no longer light up.
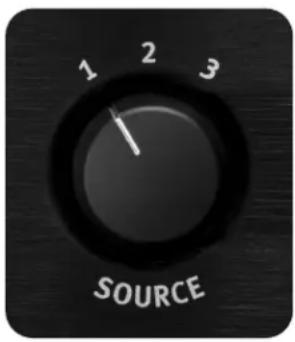
Source selection
Use the Source switch to select an analog input source.
Phonitor Matrix settings
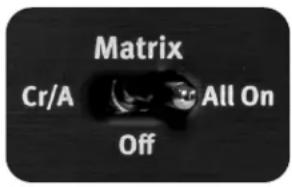
With the Matrix switch you can activate the Phonitor Matrix – with the Center function (All) or without (Cr/A). In the Off position, the Phonitor Matrix is deactivated.
The Phonitor Matrix creates a speaker-like listening experience on headphones, by mixing the left and right signals, each delayed (interaural time difference) and attenuated (interaural level difference), to the corresponding opposite side.
Crossfeed
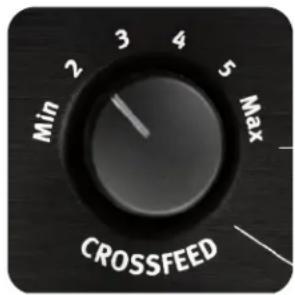
With the Crossfeed switch you can adjust the interaural level difference. The level difference is comparable to the influence of different room sizes and their reflection and absorption characteristics. The interaural level difference is frequency-corrected because the sound is reflected and absorbed by the head in a non-linear fashion.
Angle
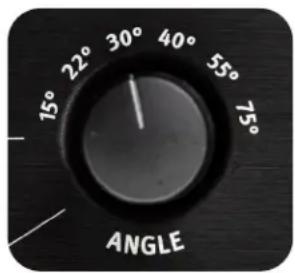
With the Angle switch you adjust the interaural time difference which is related to the placement of the speakers. The interaural time difference is frequency-corrected because the sound is reflected and absorbed by the head in a non-linear fashion.

Center
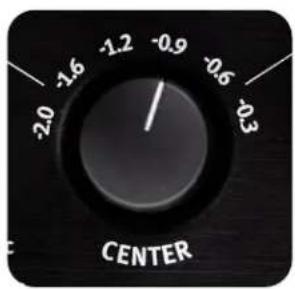
When activated (Matrix switch = All) you control the intensity of the center signal with the Center switch. If the stereo width is narrowed through changes in Crossfeed and Angle (so as to correspond to your actual loudspeaker setup), the phantom center may likely sound too intense while mixing on headphones. You normally would counteract by lowering the center signals in the mix. However, listening to that mix on loudspeakers the phantom center appears to quiet.
Attenuating the center allows the center signal to be adjusted back to the appropriate ratio of volume in relation to the stereo signal when mixing on headphones, so that the phantom center gains the correct volume in relation to the stereo signal during speaker playback.
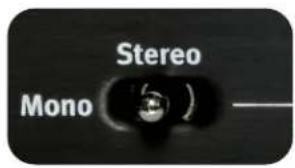
Mono/Stereo
By using the Stereo switch you can switch the audio signal to Stereo, Stereo with Laterality control and Mono. In Mono mode, both stereo channels are summed.
The mono signal maintains at the same level as the two channels of the stereo signal are each attenuated by 6 dB before summing.
Solo
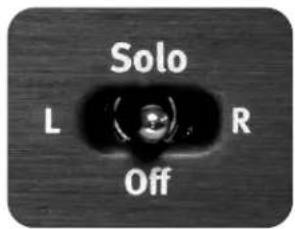
With the Solo switch you can monitor the left or right channel of the stereo signal individually. In Off position you hear the stereo signal. Set the Solo switch in position L to hear only the left channel and in position R to hear only the right channel.
With Solo activated you hear the selected channel only on the respective side – this is called "Solo-in-Place". However, if you like to hear the selected channel on both sides set the stereo switch to mono. This allows you to immediately detect, for example, whether the mid and high frequencies are similar.
Phase ∅
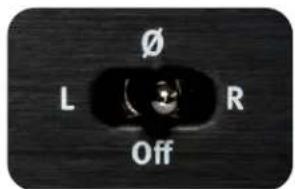
With the phase inversion switch the phase the of the left or right channel can be inverted (180°).
TIP: By using the mono/stereo and L/R phase inversion switch in combination, it is also possible to only monitor the center or side signal (M/S). When the switch is set to "Mono" and phase inversion is active for L (or R), only the side signal is played back. If the phase inversion is switched off, the mono signal corresponding to the "M" signal is played back.
Laterality
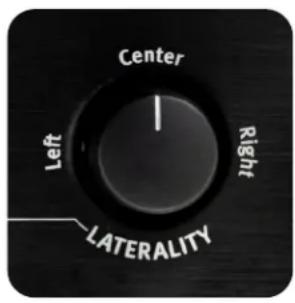
Laterality refers to the deviation of sound perception to either side of the ears. With the Laterality control you can compensate perceived volume differences between channels that may be due to a hearing impairment. This control differs from conventional balance controls. If one channel is attenuated, the other one is increased at the same time. This means that, e.g. when hard left, the level of the left channel increases by 2.25 dB while the right channel is attenuated by 2.25 dB. This control has a narrower range than conventional balance controls. Its resolution is very fine, which means it can be peciseley adjusted.
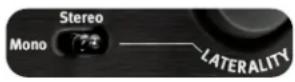
Set the Stereo switch to Laterality to control the laterality.
L/R Swap
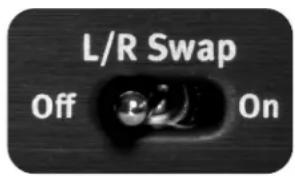
This function inverts the stereo image. Left becomes right and right becomes left.
This is especially important and extremely time-saving, when you are monitoring samples in video dubbing that should match a scene with direction of movement. If the direction is not correct, you usually have to load the sample into the DAW to switch channels. before you can judge whether the sample matches the image. With the L/R Swap function, this is no longer necessary. You can now adjust the direction of movement on the Phonitor 3 while pre-listening the sample library.
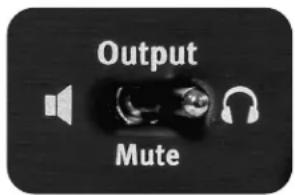
Output selection
The Output switch allows you to route the selected source signal to the desired output – headphones or speakers (XLR audio outputs on the rear panel).
In the center position (Mute), no signal reaches the outputs.
The VU meters light up red.
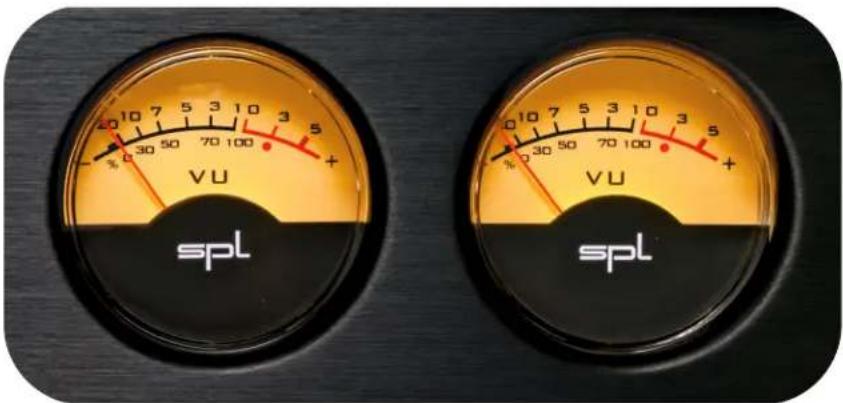
VU Meters
The VU meters display the input levels for the selected source. The meter indicates levels from -20 dB to +5 dB.
0 dB corresponds to +4 dBu.
The ballistics of the VU meters guarantee an optimal visual perception. The time calibration of the VU meters complies with the requirements of the BBC.
The rise time up to 0 dB is about 300 ms.
VU Cal
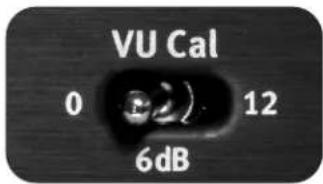
With the VU Cal switch you can lower the sensitivity of the VU meters by 6 dB or 12 dB. This way the display range can be adapted to higher input levels.
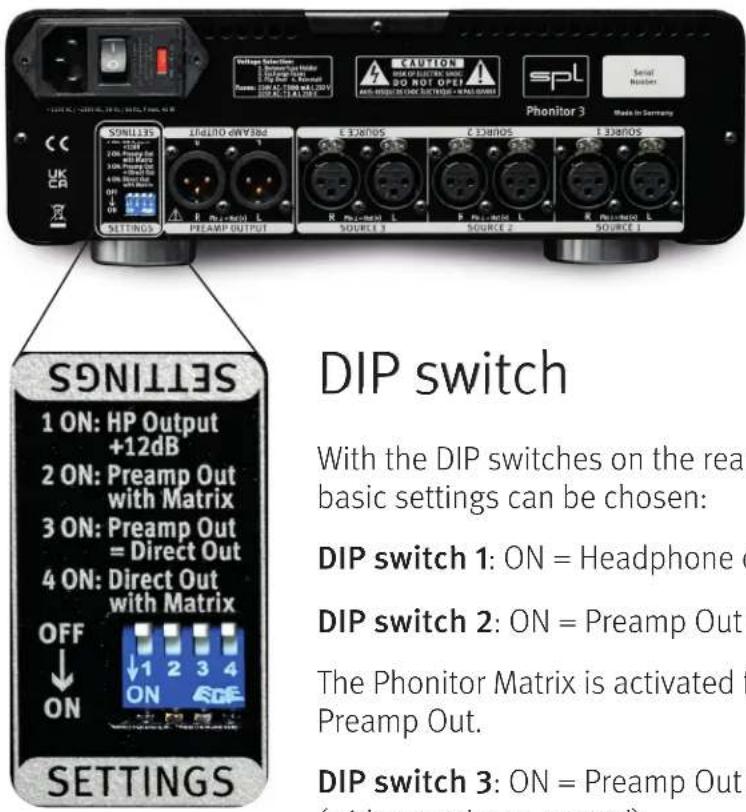
DIP switch
With the DIP switches on the rear of the device, the following basic settings can be chosen:
DIP switch 1: ON = Headphone output is increased by +12 dB.
DIP switch 2: ON = Preamp Out with Phonitor Matrix
The Phonitor Matrix is activated for the XLR outputs Preamp Out.
DIP switch 3: ON = Preamp Out becomes Direct Out (without volume control)
The selected input signal is fed to the XLR output without changing the volume or other parameters (except phase inversion).
DIP switch 4: ON = Direct Out with Phonitor Matrix
The Phonitor Matrix is activated for the Direct Out XLR outputs.
Specifications
Analog inputs & outputs; XLR (balanced)
| Maximum input & output gain 32.5 dBu |
| Input impedance (XLR) 22 kΩ |
| Output impedance (XLR) 75 kΩ |
| Common mode rejection (1 kHz) -82 dB |
| Frequency range 10 Hz – 100 kHz |
| THD + N (0 dBu, 1 kHz) 0.0009 % |
| Noise (A-weighted) -102 dBu |
| Crosstalk (1 kHz) -95 dB |
| Dynamic range 134.5 dB |
Standard Headphones Output, 6.35 mm (1/4") TRS Jack
| Wiring Tip = Left, Ring = Right, Sleeve = GND |
| Source impedance 0.18 Ω |
| Damping factor (40 Ω) 180 |
| Frequency range 10 Hz – 100 kHz |
| Crosstalk (1 kHz) -91 dB |
| THD + N (1 kHz, 0 dBu) 0.0003 % |
| Noise (A-weighted) -102 dBu |
| Output power (1 kHz, 1% THD, 250 Ω) 2 x 5 W |
| Output power (1 kHz, 1% THD, 32 Ω) 2 x 1 W |
| Dynamic range 134.5 dB |
Internal Linear Power Supply with Shielded Toroidal Transformer
Operating voltage for analog audio +/- 60 V
Operating voltage for relays and LEDs + 12 V
Mains Power Supply
Mains voltage (selectable, see fuse chamber) 230 V AC / 50; 115 V AC / 60 Hz
Fuse for 230 V T 0.5 A
Fuse for 115 V T 1 A
Power consumption max. 40 VA
Dimensions & Weight
W x H x D (width x height incl. feet x depth) 278 x 100 x 300 mm
11 x 4 x 11.78 inch
Unit weight 3.9 kg
9.15 lbs
Shipping weight (incl. packaging) 5.5 kg
11.9 lbs
Reference: 0 dBu = 0.775V. All specifications are subject to change without notice.
Phonitor 3 - Manual
flowchart
graph TD
    A["Speaker Input"] --> B["Phonitor 3"]
    B --> C["Speaker Headset"]
    C --> D["Audio Headset"]
    D --> E["Speaker Headset"]
    E --> F["Speaker Headset"]
    F --> G["Speaker Headset"]
    G --> H["Speaker Headset"]
    H --> I["Speaker Headset"]
    I --> J["Speaker Headset"]
    J --> K["Speaker Headset"]
    K --> L["Speaker Headset"]
    L --> M["Speaker Headset"]
    M --> N["Speaker Headset"]
    N --> O["Speaker Headset"]
    O --> P["Speaker Headset"]
    P --> Q["Speaker Headset"]
    Q --> R["Speaker Headset"]
    R --> S["Speaker Headset"]
    S --> T["Speaker Headset"]
    T --> U["Speaker Headset"]
    U --> V["Speaker Headset"]
    V --> W["Speaker Headset"]
    W --> X["Speaker Headset"]
    X --> Y["Speaker Headset"]
    Y --> Z["Speaker Headset"]
    Z --> AA["Speaker Headset"]
    AA --> AB["Speaker Headset"]
    AB --> AC["Speaker Headset"]
    AC --> AD["Speaker Headset"]
    AD --> AE["Speaker Headset"]
    AE --> AF["Speaker Headset"]
    AF --> AG["Speaker Headset"]
    AG --> AH["Speaker Headset"]
    AH --> AI["Speaker Headset"]
    AI --> AJ["Speaker Headset"]
    AJ --> AK["Speaker Headset"]
    AK --> AL["Speaker Headset"]
    AL --> AM["Speaker Headset"]
    AM --> AN["Speaker Headset"]
    AN --> AO["Speaker Headset"]
    AO --> AP["Speaker Headset"]
    AP --> AQ["Speaker Headset"]
    AQ --> AR["Speaker Headset"]
    AR --> AS["Speaker Headset"]
    AS --> AT["Speaker Headset"]
    AT --> AU["Speaker Headset"]
    AU --> AV["Speaker Headset"]
    AV --> AW["Speaker Headset"]
    AW --> AX["Speaker Headset"]
    AX --> AY["Speaker Headset"]
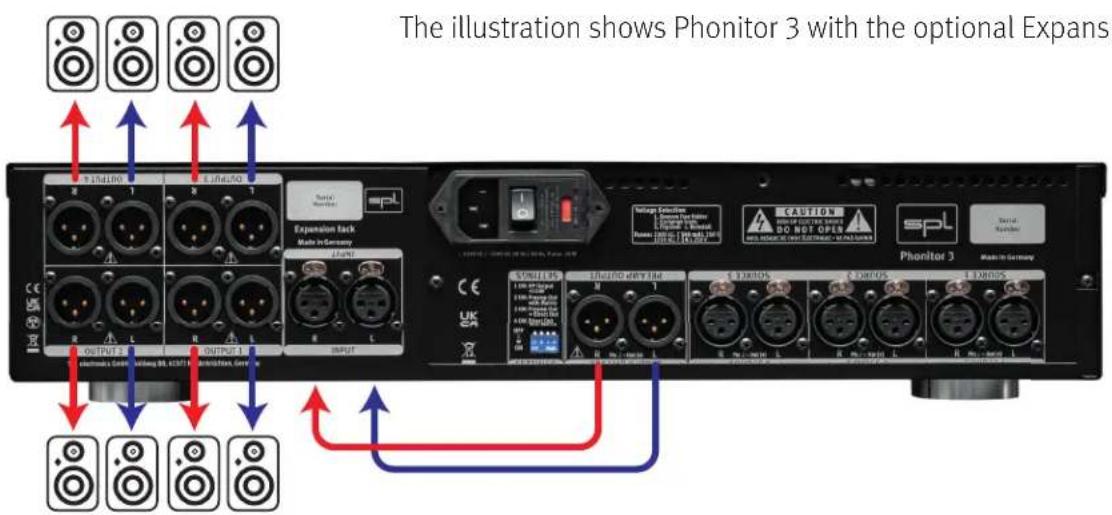
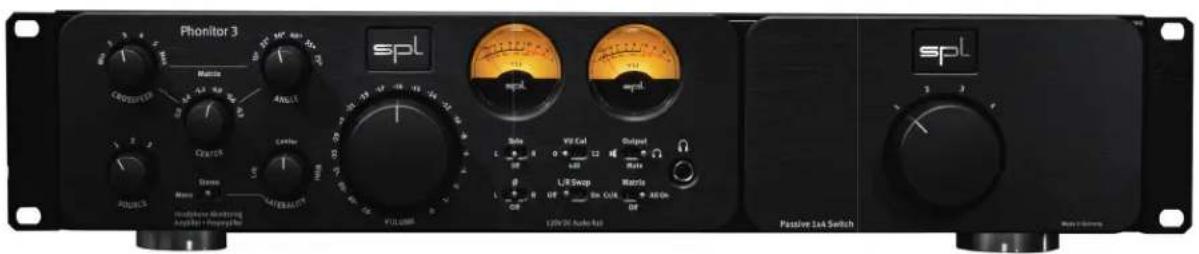
The illustration shows Phonitor 3 with the optional Expansion Rack.
Security Advices
Before starting up the device:
- Read thoroughly and follow the security advices.
- Read thoroughly and follow the Quickstart.
- Observe all warning instructions on the device.
- Please keep the user manual as well as the security advices in a safe place for future reference.

Warning
Always follow the security advices listed below to avoid serious injuries or even deadly accidents due to electric shocks, short circuit, fire or other dangers. The following are examples of such risks and do not represent an exhaustive list:
Power supply/Power cord
Do not place the power cord near heat sources such as heaters or radiators and do not excessively bend or otherwise damage the cord, do not place heavy objects on it, or place it in a position where anyone could walk on, trip over, or roll anything over it.
Only use the voltage indicated on the device.
Only use the supplied power cord/plug.
If you intend to use the device in an area other than in the one you purchased it, the included power cord may not be compatible. In this case please contact your dealer.
Be sure to connect the device to an appropriate mains socket outlet with a protective grounding connection. Improper grounding can cause electrical shock.
When removing the electric plug from the device or an mains socket outlet, always pull on the plug itself and not the cord. Pulling the cord may damage it.
Unplug the device from the mains socket outlet when the device is not used for a while.
Replacing fuses and voltage selection
The replacement of fuses and the switching of mains voltages must only be performed by qualified technicians. Fuses must only be replaced with fuses of the same type and specifications.
Do not open
This device contains no user-serviceable parts. Do not open the device or attempt to disassemble the internal parts or modify them in any way. If it should appear to be malfunctioning, turn off the power immediately, unplug the power cord from the mains socket outlet and have it inspected by a qualified professional.
Water warning
Do not expose the device to rain, or use it near water or in damp or wet conditions, or place anything on it (such as vases, bottles or glasses) containing liquids which might spill into any openings. If any liquid such as water seeps into the device, turn off the power immediately and unplug the power cord from the mains socket outlet. Then have the device inspected by a qualified professional.
Never insert or remove an electric plug with wet hands.
Fire warning
Do not put burning items, such as candles, on the unit. A burning item may fall over and cause a fire.
Lightning
Before thunderstorms or other severe weather, disconnect the device from the mains socket outlet; do not do this during a storm in order to avoid life threatening lightning strikes. Similarly, disconnect all the power connections of other devices, antenna and phone/network cables which may be interconnected so that no damage results from such secondary connections.
If you notice any abnormality
When one of the following problems occur, immediately turn off the power switch and disconnect the electric plug from the mains socket outlet. Then have the device inspected by a qualified professional.
- The power cord or plug gets frayed or damaged.
- The device emits unusual smells or smoke.
- An object has fallen into the unit.
- There is a sudden loss of sound during the use of the the device.
Location
Do not place the device in an unstable position where it might accidentally fall over.
Do not block the vents. This device has ventilation holes to prevent the internal temperature from rising too high. In particular, do not place the device on its side or upside down. Inadequate ventilation can result in overheating, possibly causing damage to the device or even fire.
Do not place the device in a location where it may come into contact with corrosive gases or salty air. This may result in malfunction.
Before moving the device, remove all connected cables. When setting up the device, make sure that the mains socket outlet you are using is easily accessible. If some trouble or malfunction occurs, immediately turn off the power switch and disconnect the plug from the mains socket outlet. Even when the power switch is turned off, electricity is still flowing to the product at a minimum rate. When you are not using the device for a long time, make sure to unplug the power cord from the wall mains socket outlet.

Connections
Before connecting the device to other devices, power down all devices. Before power on or off the devices, set all volume levels to minimum.
Only use appropriate cables to connect the device with other devices. Make sure that the cables you use are intact and comply with the electrical specifications of the connection. Other connections can lead to health risks and damage the equipment.
Handling
Operate the controls and switches only as described in the manual. Incorrect adjustments outside safe parameters can lead to damage. Never use excessive force on the switches or controls.
Do not insert your fingers or hands in any gaps or openings of the device.
Avoid inserting or dropping foreign objects (paper, plastic, metal, etc.) into any gaps or openings of the device. If this happens, power down immediately and unplug the power cord from the mains socket outlet. Then have the device inspected by a qualified professional.
Do not expose the device to excessive dust or vibrations or extreme cold or heat (such as direct sunlight, near a heater or in a car during the day) to prevent the possibility of causing damage to the housing, the internal components or unstable operation.
If the ambient temperature of the device suddenly changes, condensation can occur (if for example the device is relocated or is affected by a heater or air conditioning).
Using the device while condensation is present may result in malfunction. Do not power on the device for a few hours until the condensation is gone. Only then it is safe to power on.
Cleaning
Disconnect the device from your mains socket outlet before cleaning.
Do not use any solvents, as these can damage the chassis finish. Use a dry cloth, if necessary, with an acid-free cleaning oil.
Disclaimer
The company names and product names in this manual are the trademarks or registered trademarks of their respective companies.
SPL and the SPL Logo are registered trademarks of SPL electronics GmbH.
SPL cannot be held responsible for damage caused by improper use or modification of the device or data that is lost or destroyed.
Notes on Environmental Protection
At the end of its operating life, this product must not be disposed with regular household waste but must be returned to a collection point for the recycling of electrical and electronic equipment.
The wheelie bin symbol on the product, user manual and packaging indicates that.
For proper treatment, recovery and recycling of old products, please take them to applicable collection points in accordance with your national legislation and the Directives 2012/19/EU.
The materials can be reused in accordance with their markings. Through reuse, recycling of raw materials, or other forms of recycling of old products, you are making an important contribution to the protection of our environment.
Your local administrative office can advise you of the responsible waste disposal point.
This directive only applies to countries inside the EU. If you wish to discard devices outside the EU, please contact your local authorities or dealer and ask for the correct method of disposal.
WEEE-Reg-No.: 973 349 88
This manual includes a description of the product but no guarantee as for specific characteristics or successful results. Unless stated otherwise, everything herein corresponds to the technical status at the time of delivery of the product by SPL electronics GmbH. The design and circuitry are under continuous development and improve-ment. Technical specifications are subject to change.
CE Declaration of CE Conformity
The construction of this unit is in compliance with the standards and regulations of the European Community.
Phonitor 3
Bedienungsanleitung
Quellenwahl
Solo
Phase ∅
Laterality
L/R Swap
Ausgangswahl
- Getting started
- Power on
- Power off
- Source selection
- Phonitor Matrix settings
- Crossfeed
- Angle
- Center
- Mono/Stereo
- Solo
- Phase ∅
- Laterality
- L/R Swap
- Output selection
- VU Meters
- VU Cal
- DIP switch
- Specifications
- Internal Linear Power Supply with Shielded Toroidal Transformer
- Mains Power Supply
- Dimensions & Weight
- Security Advices
- Before starting up the device:
- Warning
- Power supply/Power cord
- Replacing fuses and voltage selection
- Do not open
- Water warning
- Fire warning
- Lightning
- If you notice any abnormality
- Location
- Connections
- Handling
- Cleaning
- Disclaimer
- Notes on Environmental Protection
- CE Declaration of CE Conformity
- Phonitor 3
- Quellenwahl
- Ausgangswahl
Brand : SPL
Model : Phonitor 3
Category : Headphone amplifier