
Video 90 FB - Tripod Sachtler - Free user manual and instructions
Find the device manual for free Video 90 FB Sachtler in PDF.


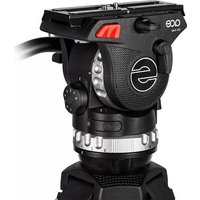
| Product Type | Fluid Head |
| Brand | Sachtler |
| Model | Video 90 FB |
| Weight | 16.0 kg (35.3 lbs) |
| Maximum Payload | 115 kg (254 lbs) |
| Counterbalance Steps | 24 |
| Balance Plate Travel | 180 mm (7.1 in) |
| Drag Grades | 7 horizontal, 7 vertical, plus 0 setting |
| Tilt Range | +60° / -45° |
| Panning Range | Continuous 360° |
| Operating Temperature | -40°C to +60°C (-40°F to +140°F) |
| Camera Mount | V-formed wedge plate (international standard) |
| Tripod Mount | Flat base, 150 mm diameter |
| Pan Bars | Two front sections, 28.5 mm diameter, 400 mm length |
| Dimensions (H x W x D) | 270 x 246 x 96.5 mm |
| Spirit Bubble | Yes, for leveling |
| Brakes | Horizontal and vertical, vibration-free |
| Tilt Safety Lock | Yes, with red knob |
| Wedge Plate Lock | Safety pin and locking lever |
| Warranty | Standard warranty; extended upon registration at sachtler.com |
| Maintenance | Regular cleaning; do not open housing; service by authorized personnel |
| Transport Setting | Drag to max, brakes open, counterbalance to max |
Frequently Asked Questions - Video 90 FB Sachtler
User questions about Video 90 FB Sachtler
0 question about this device. Answer the ones you know or ask your own.
Ask a new question about this device
Download the instructions for your Tripod in PDF format for free! Find your manual Video 90 FB - Sachtler and take your electronic device back in hand. On this page are published all the documents necessary for the use of your device. Video 90 FB by Sachtler.
USER MANUAL Video 90 FB Sachtler

sachtler
We want you to receive Sachtler products that are always state of the art.
Therefore we reserve the right to make changes based on technical advances.
1 Safety instructions ....1
2 Operating elements....1
3 Operation ....2
3.1 Levelling of the fluid head.....2
3.2 Removing the cam e ra and/or wedge plate ....2
3.3 Fitting the camera and/or wedge plate .....2
3.4 Adjusting the camera's coun ter bal ance ....3
3.5 Setting of the Drag......4
3.6 Brakes ....4
3.7 Connection to tele prompt er....4
3.8 Transport setting of drag, counterbalance and brakes ....5
4 Technical spec ifi ca tions....6
4.1 General data 6
4.2 Dimensions ......6
5 Warranty....7
Inhaltsverzeichnis
1 Safety instructions
-> Before using the Video 90 fluid head make sure that all 4 fixing screws of the tripod's flat base are secured tight ly.
-> When releasing the vertical brake make sure that the camera is secured against any sud den movement.
-> Do not operate the fluid head upside down with out the nec es sary securing devic es, i.e. ropes etc.
-> Before transport reset fluid drag to "0".
2 Operating ele ments

3 Operation
3.1 Levelling of the fluid head
The Video 90 has a bubble to facilitate levelling.(Only possible through extension of the tripod's legs.
3.2 Removing the cam e ra and/or wedge plate
Lock the head with the tilt safety lock.
The blocking and clicking into position of the tilt safety lock is achieved by pulling out the red knob and turning it 90°. Green marking on the red knob becomes invisible.
Push the safe ty pin of the wedge plate lock to the front and swing it into hor i zon tal posi tion. Pull the wedge plate locking lever out. The camera and/or wedge plate is now released and can be removed by pulling it back wards.
Whenever removed from the head, the camera should be held by two per sons, as the weight can approach 90kg / 198lb.
3.3 Fitting the cam e ra and/or wedge plate
-> Apply hor i zon tal brake.
-> Engage all 8 switch es of the coun ter bal ance.
All levers should be in an upright position, metal pins are not visible.
-> Release vertical brake and tilt safety lock. The loosening and clicking into position of the tilt safe ty lock is achieved by pulling out the red knob and turning it 90°. Green marking on the red knob becomes visible.
-> The springs of the counterbalance engage automatically by tilting the camera through the hor i zon tal position.
-> Release fine adjustment of counterbalance (rotate anticlock wise until it reaches the end stop).
-> Lock the head with the tilt safe ty lock. Make sure that
the assem bly lock clicks into posi tion and that the head is locked vertical ly (so that it can not be moved any more by pan arms).
-> Open lock of wedge plate as described in 3.2. Move cam e ra and/or wedge plate from the back of the wedge plate along the guides until it reach es the end stop.
-> Push the lock ing lever in until it touch es the head and secure lock ing of the wedge plate by lift ing safe ty pin.
3.4 Adjusting the camera's coun ter bal ance
-> Hold the camera by securing the pan arm.
-> Apply horizontal brake and release vertical brake and tilt safe ty lock (rock ing the pan arms up and down will facil i tate this).
-> Select 0 on the vertical drag adjustment ring.
-> Loosen clamp of camera sliding balance plate.
-> By turning the spin dle for wards and back wards move the camera until you have reached a position where the camera is balanced horizontally. Rear-heavy cameras are moved to the front by turning the spin dle clock wise, front-heavy cameras are moved to the back by turning the spin dle anti-clock wise. You will find it easier when holding the camera in a horizontal position.
-> Secure sliding balance plate with clamping lever (spindle drive is self-locking, clamping serves to eliminate play).
-> Caution: If you can't manage to centre the camera, you should move the wedge plate to a different position on the tripod mounting adaptor.
-> Hold the pan arm with your hand and release the counter balance spring one after another, starting with the three levers at the front of the head.
-> After each spring is released, check if the camera will remain in a tilt ed position, with out moving upwards or down wards sig nif i cant ly
-> Engaging the two rear left levers will apply half or quarter springs which will help to select opti mum coun ter - balance.
-> If there is still a small imbalance, rotate the counterbalance fine adjust ment clock wise to com pen sate.
-> Now choose the drag capacity for the tilt ed move ments by using the con trol ring.
-> Please note: A lower counterbalance setting becomes immediately effective in any tilt position. An increase of the counterbalance setting will only be effective in the horizontal position (Springs must click in audibly).
3.5 Setting of the Drag
The Video 90 is equipped with seven drag levels hor i zon - tally and vertically and a zero setting. By turning the vertical set ting and the hor i zon tal set ting one selects the desired level of the fluid drag.
Turn the set ting ring to "0" in order to switch off the drag complete ly.
If you set the setting rings on the same index number (e.g. “3”) the degree of the horizontal and vertical drag is identical and thus enables precise diagonal panning movements with out jerks and vibra tions.
Make sure that you always turn the setting to the next indexed position. Engage the retainer pins by slowly panning or tilting the camera.
ATTENTION: Panning or tilting the camera with settings between the indexed positions can damage the retainer pins and/or disks.
3.6 Brakes
The hor i zon tal brake applies the lock for the pan and the ver ti cal brake for the tilt move ment. Both brakes are vibra-tion less and can be used dur ing shoot ing.
3.7 Connection to tele prompt er
The Video 90 has two tapped holes at the front to attach tele prompt ers.
3.8 Transport setting of drag, counterbalance and brakes
To ensure smooth operation of the setting rings for the drag over the long life time period of the fluid head, you should turn both setting rings from position "0" to maximum position, before and after the use of the fluid head.
Setting during transportation:
open both brakes - horizontal and vertical.
Counterbalance and drag should be set to maximum position.
4. Technical spec ifi ca tions
4.1 General data
| Counterbalance: | 24 steps |
| Balance plate: | 180 mm / 7.1" |
| Grades of drag: | 7 horizontally, vertically and 0 |
| Tilt range: | +60°/- 45° |
| Panning range: | con tin u ous |
| Temperature range: | - 40°C (-40°F) to +60°C (+140°F) |
| Weight: | 16.0 kg / 35.3 lbs |
| Max. load: | 115 kg / 254 lbs |
| Camera fitting: | V-formed wedge plate accord ing to inter na tion al stan dard |
| Tripod fitting: | flat base for OB tripods and pedestals |
| Pan bars: | two front sections, diam e ter 28.5 mm/1.1", length 400 mm / 15.7" |
4.2 Dimensions

5 Warranty
War ran ty expires if:
-> The fluid head was operated improperly or not in accordance with the specified technical data or
-> the head housing was opened by unauthorised personnel.
We reserve the right to make chang es based on tech ni cal advanc es.
Please register at www.sachtler.com for an extended warranty period.
sachtler
- INHALTSVERZEICHNIS
- 1 SAFETY INSTRUCTIONS
- 2 OPERATING ELE MENTS
- 3 OPERATION
- 3.1 LEVELLING OF THE FLUID HEAD
- 3.2 REMOVING THE CAM E RA AND/OR WEDGE PLATE
- 3.3 FITTING THE CAM E RA AND/OR WEDGE PLATE
- 3.4 ADJUSTING THE CAMERA'S COUN TER BAL ANCE
- 3.5 SETTING OF THE DRAG
- 3.6 BRAKES
- 3.7 CONNECTION TO TELE PROMPT ER
- 3.8 TRANSPORT SETTING OF DRAG, COUNTERBALANCE AND BRAKES
- TECHNICAL SPEC IFI CA TIONS
- 4.1 GENERAL DATA
- 4.2 DIMENSIONS
- 5 WARRANTY
Brand : Sachtler
Model : Video 90 FB
Category : Tripod