
Hot Pod CF 14 - Tripod Sachtler - Free user manual and instructions
Find the device manual for free Hot Pod CF 14 Sachtler in PDF.


| Product Type | Tripod with pneumatic center column |
| Model | Hot Pod CF 14 |
| Brand | Sachtler |
| Weight | 5.8 kg / 12.8 lb |
| Maximum Load | 25 kg / 55 lb |
| Transport Length | 85 cm / 33.5 in |
| Height Range | 79 - 174 cm / 31.1 - 68.5 in |
| Head Fitting | 100 mm bowl |
| Spreader | Off-ground spreader, integrated |
| Leg Locks | Central locking for simultaneous leg release |
| Rubber Feet | Integrated rubber feet |
| Pneumatic Spring | Maintenance-free, adjustable force (100 N or 140 N options) |
| Compatible Fluid Heads | Video 15, Video 18 (for CF 14) |
| Accessories | Hot Pod CF Dolly (code 7066) |
| Carrying Strap | Included |
| Cleaning | Use mild detergent; regularly clean legs and tulip rim |
| Safety | Do not disassemble pneumatic spring; lock column when changing head |
| Warranty | Extended warranty available via registration at sachtler.com |
Frequently Asked Questions - Hot Pod CF 14 Sachtler
User questions about Hot Pod CF 14 Sachtler
0 question about this device. Answer the ones you know or ask your own.
Ask a new question about this device
Download the instructions for your Tripod in PDF format for free! Find your manual Hot Pod CF 14 - Sachtler and take your electronic device back in hand. On this page are published all the documents necessary for the use of your device. Hot Pod CF 14 by Sachtler.
USER MANUAL Hot Pod CF 14 Sachtler
natural_image
Black tripod-mounted device with bipod and stand, no visible text or symbols
natural_image
Abstract geometric logo with a stylized 'S' inside a circle and a registered trademark symbol (no text or numbers present)sachtler
© by sachtl er®. All rights reserved/Alle Rechte
We want to receive Sachtler products that are always state of the art.
Therefore we reserve this right to make changes based on technical advances.
1 Symbols used in the manual....2
2 Safety instructions....3
3 Operating elements....4
4 Hot Pod CF - the fast 100 mm tripod....5
5 Operation of the Hot Pod CF 6
5.1 Setting up ....6
5.2 Dismantling 8
5.3 Mounting of the fluid head 9
5.4 Dismounting the fluid head 10
5.5 Change of the pneumatic spring 11
5.6 Cleaning the Hot Pod CF 12
6 Technical data ....13
7 Accessories ....13
7.1 Fluid heads ......13
7.2 Pneumatic springs....14
7.3 Hot Pod CF Dolly 14
8 Warranty....14
Inhaltsverzeichnis
1 Symbols used in the manual

Danger
Indicates an immediate danger to the life and health of persons.
Non-observance of these instructions will have serious harmful consequences to health and possible fatal injuries.

Warning
Indicates a possible danger to the life and health of persons.
Non-observance of these instructions may have serious harmful consequences to health and possible fatal injuries.

Caution
Indicates a possibly dangerous situation.
Non-observance of these instructions can lead to slight injury or material damage.

Note
Indicates a possibly harmful situation.
Non-observance can damage the machine or the environment.

Important
Indicates user tips and other particularly useful information.


Shows you what to do.
Informs you about the result of your actions.
The bullets indicate listings.
2 Safety instructions
Risk of injury when using a pneumatic spring
Danger
The Hot Pod CF is equipped with a special pneumatic spring in the center column.
-> Under no circumstances should you undo the pneumatic spring. It has an extremely high internal pressure.
-> Prior to disposal the pneumatic spring must not be under pressure.
Caution
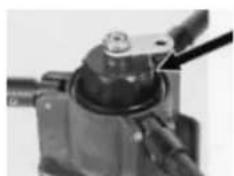
The center column will raise automatically when the column lock is loose and the transport lock is disengaged.
-> Do not bend over the center column when loosing the locks.
Risk of accident

Warning
-> Observe the local safety regulations governing the prevention of accidents.
-> Operate the Hot Pod CF under the supervision of trained personnel only.
-> Keep the Hot Pod CF away from children.
Danger of tipping over
Caution
-> The Hot Pod CF must be placed vertically. Inclined ground has to be compensated with adjusting the length of the tripod legs.
-> Place the Hot Pod CF only on ground that is able to support the load.
-> Take additional safety actions against horizontal force (e.g. wind) to prevent tipping over.
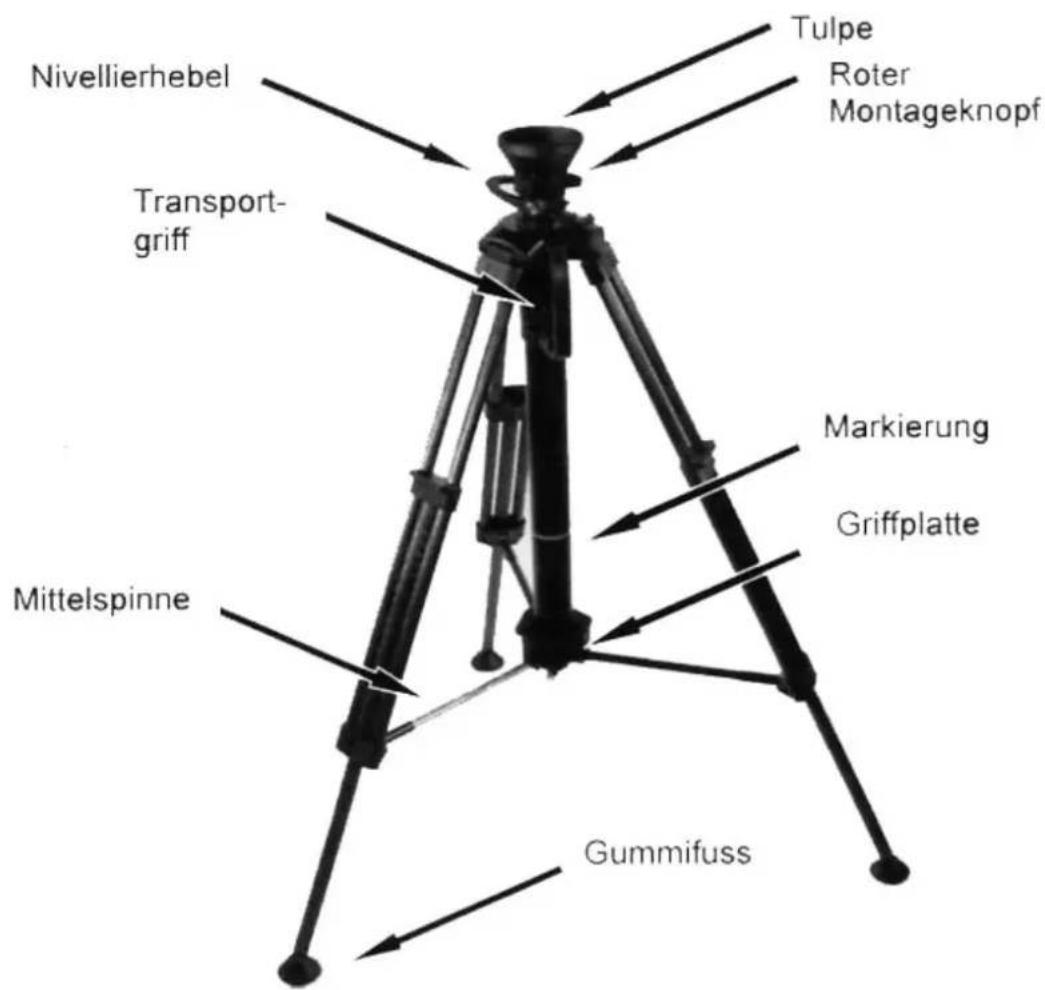
3 Operating elements
natural_image
Close-up of a mechanical component with a black arrow pointing to a specific part (no visible text or symbols)Transport Lock
Column Lock (Lock) to lock the center column
natural_image
Close-up of a mechanical component with a central knob and attached wires (no visible text or symbols)Column Hood at bottom covering the pneumatic spring
4 Hot Pod CF - the fast 100 mm tripod
The 100 mm tripod Hot Pod CF is the perfect addition to the Sachtler fluid heads DV8/100, DV 12, Video 15/DV 15 and Video 18.
The Hot Pod CF's central locking releases all three legs simultaneously with one movement making the Hot Pod CF ready to use in no time. The pneumatic center column easily lifts loads of up to 15 kg/25 kg to lens heights of over 2 m. The elevation force of the pneumatic center column is maintenance free. You can choose different pneumatic springs according to your specific needs.
The change of the fluid head is done with a few deft movements, you don't even need any tools.
A change of location? You can easily carry the Hot Pod CF using its handle (strategically positioned at the tripod's center of gravity), or simply using the supplied carrying strap.
5 Operation of the Hot Pod CF
5.1 Setting up

natural_image
Close-up of a tripod-mounted device with a labeled component (1) and no visible text or symbols on the object itself.-> While holding Hot Pod CF at it's transport handle 1, transfer grip to two adjacent tripod legs at a position slightly above the centerplate.
-> Spread out the tripod legs.

The position of the centerplate 3 is now between the marker 2 and the bottom end of the center column.
-> While holding the transport handle with one hand, loosen the central locking of the legs by pulling up the center plate 3 to the marker 2 at the center column.

natural_image
Close-up of a mechanical assembly with a cylindrical component and two rods, labeled with number 4 (no text or symbols on the main subject)The tripod legs will drop to full length.
-> Push down the center plate 4 completely.
The tripod legs are locked.

-> Loosen the column lock 5.

natural_image
Close-up of a mechanical component with a numbered arrow pointing to a feature (no visible text or symbols)-> Push down the head to relieve the hook 6 of the transport lock.
-> Disengage the hook 6 of the transport lock.

If the Hot Pod CF is supplied with the pneumatic spring, the center column will raise automatically.

Caution
Risk of injury
The center column will raise automatically when the column lock is loose and the transport lock is disengaged.
-> Do not bend over the center column when loosing the locks.
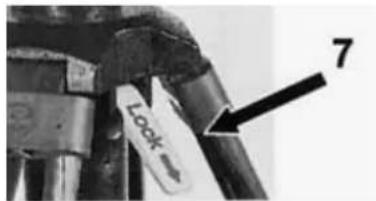
-> Adjust the height to the desired shooting position and lock the center column 7.

Note
-> Always lock the center column for shooting.

natural_image
Mechanical device with labeled component '8' (no readable text or symbols beyond label)
-> Mount the camera.
-> Level the fluid head by pushing down the levelling-lever 8.
The fluid head comes free and you can level it by watching the water level or touch bubble of the fluid head.
-> The Hot Pod CF is ready to use now.
5.2 Dismantling
-> For dismantling the Hot Pod CF proceed in reverse order than for setting up.
-> Engage the transport lock first and then lock the center column.
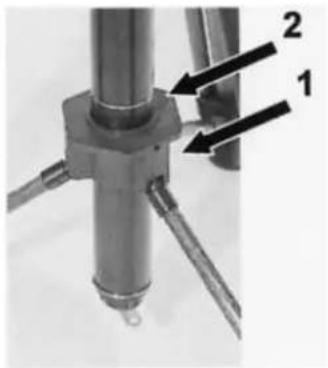

Loosen the central locking of the legs by pulling up the center plate 1 to the marker 2 at the center column.
If tripod legs are extended, at this time the tripod legs are unlocked and will move freely.
- > Holding the Hot Pod CF by its transport handle and keeping the center plate 1 at the position of the marker 2 at the center column -collapse the tripod legs completely by pushing downward. With practice this can be done in one or two smooth motions.
natural_image
Close-up of a mechanical assembly with two labeled parts (1 and 2), no visible text or symbols beyond labels.
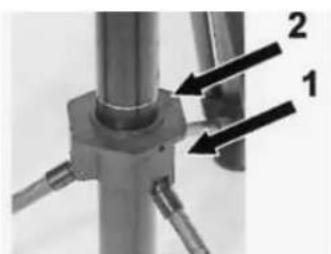
Pull up the center plate 1 to its final upward position and close tripod legs against the center column.

The tripod legs are locked for transport.
5.3 Mounting the fluid head

Important
Note concerning the change of the fluid head
-> Compress the center column completely.
-> Always lock the center column when changing the fluid head.
-> Lock the horizontal brake at the fluid head.

natural_image
Close-up of a black industrial device with a labeled component (1) and no visible text or symbols on the device itself.-> Insert the fluid head vertically into the thread.
-> Push down and hold the leveling-lever 1 to a horizontal position.

Turn the fluid head clockwise a few revolutions while holding the leveling-lever 1 in a horizontal position.

If you lift the fluid head it will be held by the thread.

natural_image
Close-up of a mechanical component with a labeled arrow and circular feature (no readable text or symbols)-> Push down the leveling-lever 1 completely.
- Additionally push and hold down the red mounting button 2 while turning the fluid head clockwise.

Important
Note for mounting the fluid head
-> Check the correct position of the fluid head.
-> Tilt the fluid head a little bit back and forth.
-> Turn the fluid head simultaneously in little steps.
If the position is correct you will feel the red mounting button snap slightly.


-> Turn the fluid head and stop turning just before the fluid head is tight.
Releasing the red mounting button 2 and the leveling-lever 1, the leveling-lever will rotate to a horizontal position.

-> Level the fluid head by pushing down the leveling-lever 1.
The fluid head comes free and you can level it by watching the water level or touch bubble of the fluid head.
5.4 Dismounting the fluid head
Important
Note concerning the change of the fluid head
natural_image
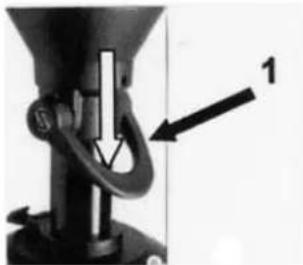
Close-up of a mechanical device with a curved handle and labeled component (no readable text or symbols)-> Always lock the center column when changing the fluid head.
-> Lock the horizontal brake at the fluid head.
-> Push down and hold the levelling-lever 1.

natural_image
Close-up of a mechanical component with a labeled arrow pointing to a feature (no readable text or symbols)-> Simultaneously press and hold the red mounting button 2.
-→ Loosen the fluid head by tilting it slightly back and forth.
-> Unscrew the fluid head by turning it counterclockwise.
You can lift it a little, but the head is still held by the thread.


After a few revolutions the fluid head comes free.
-> Now you can release the leveling-lever 1 and the red mounting button 2.
- > Unscrew the fluid head completely by turning it anti-clockwise.
5.5 Change of the pneumatic spring

Danger
Danger of injury when using a pneumatic spring
-> Under no circumstances you should undo the pneumatic spring. Pneumatic springs have an extremely high internal pressure.
- Prior to disposal the pneumatic spring must not be under pressure.
natural_image
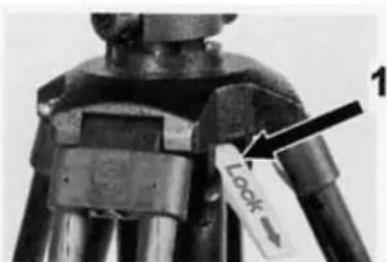
Close-up of a camera setup with tripod and stand, no visible text or symbols-> Loosen the column lock 1.
-> Extend the column completely.
-> Lock the column lock 1 again.

natural_image
Close-up of a mechanical component with a labeled part (2), showing no visible text or symbols.-> Turn the Hot Pod CF upside down.
-> Unscrew and remove the column hood 2.
-> Change the pneumatic spring 3.
-> Fasten the column hood 2 again completely.

After several turns it will require more strength to turn the column hood.

Note for change of pneumatic spring
-> Insert the thick end of the pneumatic spring first.
For mounting the pneumatic spring, it must be equipped with the hoods 4 on both sides. If you ordered the pneumatic spring without the hoods, please transfer the hoods from the old pneumatic spring to the new one.
5.6 Cleaning the Hot Pod CF

Recommendations for cleaning
-> Use a mild detergent only.
Note
natural_image
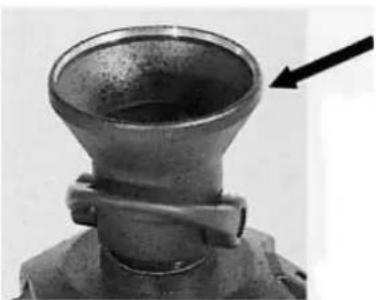
Close-up of a metallic funnel-shaped object with a black arrow pointing to it, no visible text or symbols.You maintain the full functionality of your Hot Pod CF when you remove dust and grease from the legs and the glossy lathed rim of the tulip 1 on a regular basis.
6 Technical data
Hot Pod CF 10 Hot Pod CF 14
Code-Number 5385/10 5385/14
Weight 5,8 kg/12.8 lb
Maximum load 15 kg/33 lb 25 kg/55 lb
Transport length 85 cm/33.5"
Height min/max 79 - 174 cm/31.1 - 68.5"
Head fitting 100 mm
Off-ground spreader integrated
Rubber feet at the legs integrated
7 Accessories
7.1 Fluid heads
The Hot Pod CF supports the following fluid heads:
Hot Pod CF 10
DV 8/100
DV 12
Hot Pod CF 14
- Video 15
- Video 18
7.2 Pneumatic springs
The Hot Pod CF can be equipped with different types of pneumatic springs.
Type of pneumatic Code-Number spring
Pneumatic spring,
ready to mount, 100 N sst13b0201
with hoods 140 N sst13b0301
Pneumatic spring,
single, 100 N sst13e0202
without hoods 140 N sst13e0302
7.3 Hot Pod CF Dolly
As an accessory you can order the Sachtler Hot Pod CF Dolly, Code-Number 7066.
8 Warranty
The warranty expires, if the Hot Pod CF was operated improperly or not in line with the specified technical data (please refer to our General Terms of Sale and Delivery).
Please register at www.sachtler.com for an extended warranty period.
natural_image
Close-up of a mechanical hopper or filter component with a black arrow pointing to a handle (no visible text or symbols)Transportsicherung

natural_image
Close-up of a mechanical component with a lever and shaft (no visible text or symbols)natural_image
Close-up of a tripod-mounted device with a labeled component (1) and a circular emblem on the base (no readable text or symbols)natural_image
Close-up of a mechanical assembly with a black cylindrical component and two metal rods, labeled with number 4 (no text or symbols on the main subject)
natural_image
Close-up of a mechanical component with a numbered arrow pointing to a feature (no text or symbols visible)
natural_image
Mechanical device with a curved handle and labeled part '8' (no text or symbols beyond the number)

natural_image
Close-up of a mechanical joint with two black arrows pointing to features, no visible text or symbolsnatural_image
Close-up of a black industrial sensor or motor with a labeled component (1) and no visible text or symbols on the device itself.natural_image
Close-up of a mechanical component with a labeled arrow pointing to a feature (no readable text or symbols)natural_image
Close-up of a mechanical clamp or hook assembly with a vertical line and arrow indicator (no text or symbols)natural_image
Close-up of a mechanical component with a labeled arrow and number 2, showing no readable text or symbols.natural_image
Close-up of a mechanical component with a labeled part (2), showing no visible text or symbols.natural_image
Close-up of a mechanical component with a conical top and a black arrow pointing to a feature (no text or symbols visible)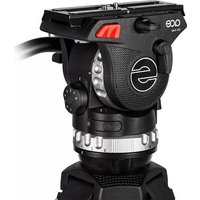
- Inhaltsverzeichnis
- Symbols used in the manual
- Safety instructions
- Risk of injury when using a pneumatic spring
- Risk of accident
- Danger of tipping over
- Operating elements
- Hot Pod CF - the fast 100 mm tripod
- Operation of the Hot Pod CF
- Setting up
- Risk of injury
- Note
- Dismantling
- Mounting the fluid head
- Note concerning the change of the fluid head
- Note for mounting the fluid head
- Dismounting the fluid head
- Change of the pneumatic spring
- Danger of injury when using a pneumatic spring
- Note for change of pneumatic spring
- Cleaning the Hot Pod CF
- Recommendations for cleaning
- Technical data
- Accessories
- Fluid heads
- Hot Pod CF 10
- Hot Pod CF 14
- Pneumatic springs
- Type of pneumatic Code-Number spring
- Hot Pod CF Dolly
- Warranty
Brand : Sachtler
Model : Hot Pod CF 14
Category : Tripod