
Super Pro Magnum Feeder - Video camera Moultrie - Free user manual and instructions
Find the device manual for free Super Pro Magnum Feeder Moultrie in PDF.


| Product Type | Programmable Deer Feeder Kit |
| Brand | Moultrie |
| Model | Super Pro Magnum Feeder |
| Compatible Drum | Any standard drum or barrel (Moultrie barrel optional) |
| Mounting | Bottom-mount with three bolts and wing nuts |
| Power Source | One or two 6V alkaline (e.g., Energizer) or Moultrie rechargeable batteries |
| Timer | Digital programmable timer; up to 10 feed times per day |
| Feed Duration | 1–60 seconds per feed time |
| Motor Speed | Adjustable (settings selectable via menu) |
| Day Scheduling | Individual days can be enabled/disabled |
| Test Mode | Yes, with selectable duration and motor speed |
| Display | LCD screen with menu navigation (UP/DOWN/LEFT/RIGHT, PROGRAM, BACK, TEST) |
| Legs Included | Yes, three leg sections with square brackets |
| Hardware Included | 3 combination drive screws (1/4-20×4"), 3 flat washers, 3 push nuts, 3 wing nuts |
| Belly Band Ring | Included for Moultrie barrel; secures feeder to drum |
| External Power Port | Yes, for optional Moultrie Power Panel (MFA-15029 or MFA-12602) |
| Warranty | Lifetime warranty |
| Safety | Requires eye protection during installation; FCC compliant |
| Replacement Parts | Available at www.moultriefeeders.com |
| Operating Temperature | Not specified; typical outdoor use |
Frequently Asked Questions - Super Pro Magnum Feeder Moultrie
User questions about Super Pro Magnum Feeder Moultrie
0 question about this device. Answer the ones you know or ask your own.
Ask a new question about this device
Download the instructions for your Video camera in PDF format for free! Find your manual Super Pro Magnum Feeder - Moultrie and take your electronic device back in hand. On this page are published all the documents necessary for the use of your device. Super Pro Magnum Feeder by Moultrie.
USER MANUAL Super Pro Magnum Feeder Moultrie
Instructions for Super Pro Magnum Feeder
Thank you for your purchase of the Super Pro Magnum Feeder. Please read this sheet before operating the unit. If you should have any questions about this product or any other Moultrie product, please contact us using the information on the back of this sheet.
HARDWARE INCLUDED:
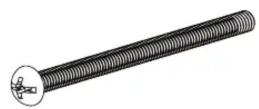
Combination Drive Screw
Qty. 3
(1/4"-20 x 4")
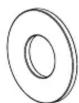
Flat Washer
Qty. 3
(14'')
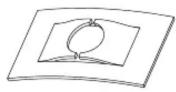
Push Nut
Qty. 3
(1/4^ )
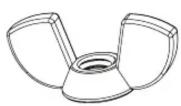
Wing Nut
Qty. 3
(14'')
A DRILLING YOUR DRUM OR BARREL
NOTE: If you purchased a Moultrie barrel, go to Step B
Super Pro Magnum Kit will mount to the bottom of any drum or barrel
1 Turn drum over, measure and mark the center of the bottom.
2 Mark where holes of kit are on the bottom of the drum. Drill three 5/16" Feeder Leg Holes.
3 Using a Hole Saw, drill a 2.25" hole in the center of the bottom of your drum.
natural_image
3D technical illustration of a mechanical component with two black arms and a central circular feature (no text or symbols)B MOUNTING THE FEEDER
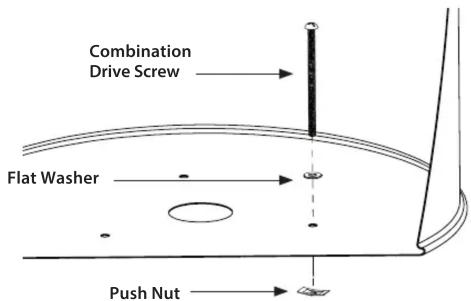
1 From the inside of the drum, put flat washers on the 1/4-20 x 4" Combination Drive Screws then slide through the holes in the bottom of the barrel and screw the push nuts onto the bolts on the outside of the barrel.
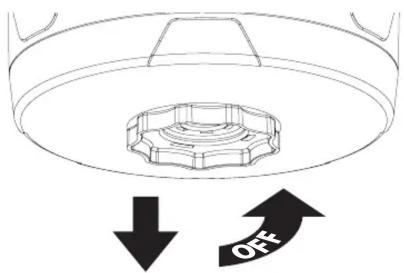
2 Turn grooved handle counterclockwise one click. This will release the battery cover from the feeder kit. Battery cover can be pulled off straight downward and set aside.
NOTE: Grooved handle should stay assembled with battery cover. DO NOT FORCE THE GROOVED HANDLE COUNTERCLOCKWISE AN ADDITIONAL CLICK. This will disassemble the grooved handle from the battery cover and can cause wear on the parts that retain this assembly.
natural_image
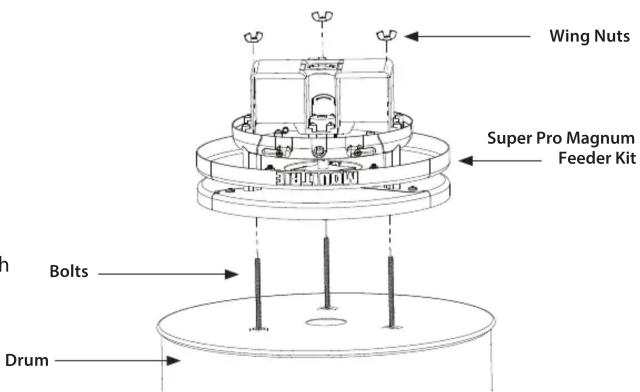
Diagram of a circular mechanical component with two directional arrows indicating 'OFF' (no text or symbols present)3 Slide feeder over three Bolts that are sticking firmly through the bottom of the drum. Attach Feeder Kit to the Drum using the three provided Wing Nuts.
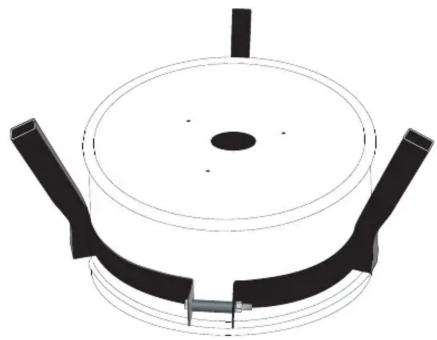
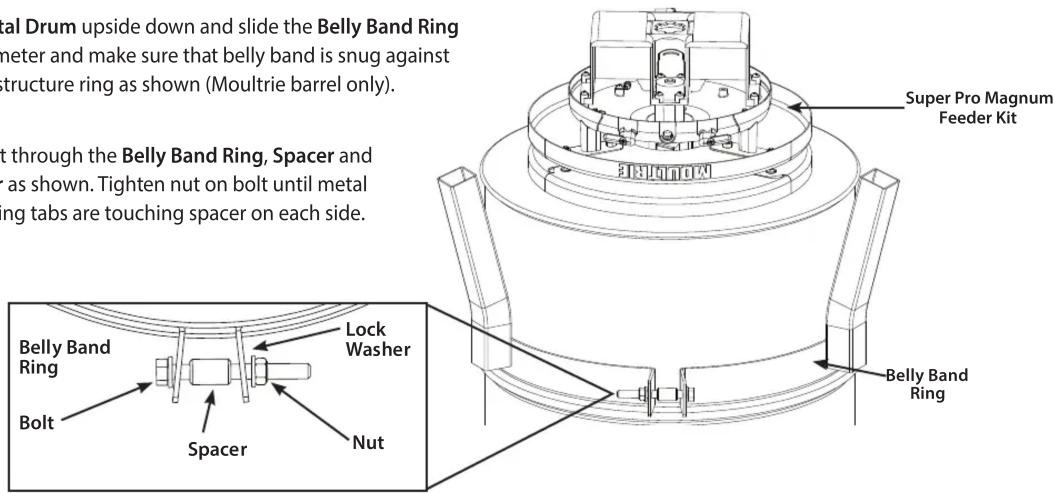
4 Turn the Metal Drum upside down and slide the Belly Band Ring around perimeter and make sure that belly band is snug against the bottom structure ring as shown (Moultrie barrel only).
5 Slide the bolt through the Belly Band Ring, Spacer and Lock Washer as shown. Tighten nut on bolt until metal Belly Band Ring tabs are touching spacer on each side.
NOTE: DO NOT LOAD FEEDER until it is standing up and in place (see Section D).
C INSTALLING BATTERY
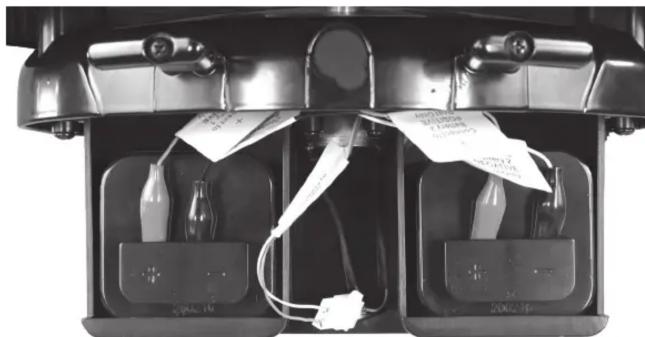
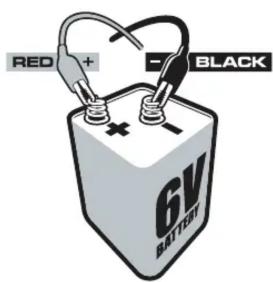
Install one or two 6-volt alkaline (ex. Energizer™) or Moultrie rechargeable batteries by attaching the Red Alligator Clip to the positive terminal (+) and the Black Alligator Clip to the negative (-) terminal.
natural_image
Interior view of a device showing battery pack, circuit board, and wiring (no visible text or symbols)NOTE: Be sure that the Red and Black alligator clips labeled with a "1" are both attached to the appropriate terminals on the first battery, and that the Red and Black alligator clips labeled with a "2" are both attached to the appropriate terminals on the second battery (if used).
CAUTION: WEAR EYE PROTECTION
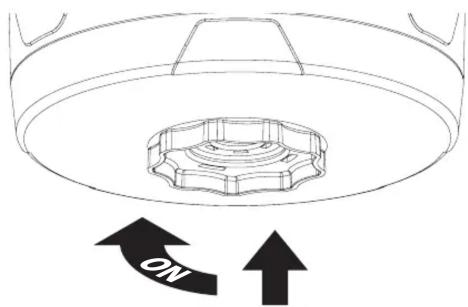
2 Make sure grooved handle is in the counterclockwise position, then slide the battery cover back onto the assembly. Make sure the design features line up with the features on the feeder kit. Once fully in place, rotate the grooved handle one click in the clockwise direction to secure all pieces in place.
NOTE: Make sure grooved handle is rotated counter-clockwise before trying to install battery housing or else it will not lock into place.
natural_image
Diagram of a circular device with a central hub and two directional arrows labeled 'ON' (no text or symbols beyond the arrow)D STAND UP FEEDER AND INSTALL LID
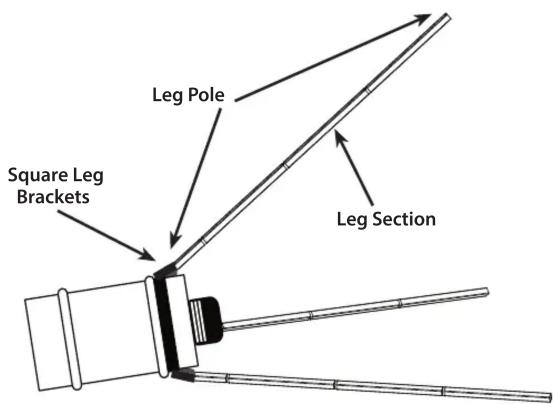
1 Assemble leg poles with the desired amount of leg sections. Tap legs into place during assembly.
2 With two legs against the ground, rotate feeder upward until vertical and supported by all three legs.
3 Add feed, then install lid and tighten bolt securely.


E
CONFIGURING AND TESTING FEEDER
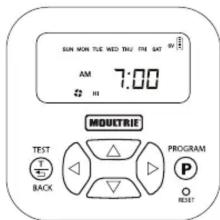
1 SET CURRENT TIME: Press the PROGRAM button and SET CURRENT TIME will appear. Press UP or DOWN to set the hour, then press RIGHT to go to the minutes. Press UP or DOWN to set the minutes. Press the BACK button to return to the Main Menu, or press PROGRAM to proceed through the settings.
NOTE: The timer is capable up to 10 feed times, each 1-60 seconds each, and each can operate on any day of the week where each day can be toggled ON/OFF.
2 SET CURRENT DAY: Press the PROGRAM button until the Set Current Day screen appears. Press LEFT or RIGHT to select the current day. Press BACK to return to the Main Menu, or press PROGRAM to proceed through the settings.
3 SET EST. FEED REMAINING: Press the PROGRAM button until the Est. Feed Remaining screen appears. Press UP or DOWN to select the amount of feed you have in the feeder. Press BACK to return to the Main Menu, or press PROGRAM to proceed through the settings.
4 SET FEED TIME: Press the PROGRAM button until the desired Feed Timer appears at the top of the screen. Press the DOWN button until the feed time is flashing. Press PROGRAM to enter edit mode. Press UP or DOWN to set the hour. Press the RIGHT button to go over to the minutes. Press UP or DOWN to set the minutes. Press PROGRAM or BACK to return to the Feed Timer. The factory settings include two feeder times 7am and 6pm, each for 6 seconds.
5 SET DAYS OF THE WEEK: After setting the feed time, press UP so the days of the week start flashing. Press PROGRAM to enter edit mode. By default all days should be enabled. Press LEFT or RIGHT to highlight the desired day. Press DOWN to disable the selected day. Press UP to re-enable the selected day. Once all desired days are selected, press PROGRAM or BACK to return to the Feed Timer.
6 SET RUN DURATION: Press DOWN and LEFT until the RUN DURATION seconds are flashing. Press PROGRAM to enter edit mode. Press UP or DOWN to set desired feed duration. Press PROGRAM or BACK to return to the Feed Timer.
7 SET MOTOR SPEED: Press UP or DOWN until the motor speed setting is flashing at the bottom of the screen. Press PROGRAM to enter edit mode. Press RIGHT or LEFT to select the desired motor setting. Press PROGRAM or BACK to return to the Feed Timer.
When the Feed Timer is blinking at the top of the screen, press PROGRAM or RIGHT to advance to the next feed timer. Repeat for all required feed times.
8 TEST FEEDER: Press the BACK button to reach the Main Menu. Press the TEST button to enter the Test Mode. The Test duration will appear (this will be the same as the duration as Feed Timer 1). Press UP or DOWN to set the Test Duration. Press PROGRAM. Press RIGHT or LEFT to select desired motor speed. Press PROGRAM to perform test. After a 5 second countdown, the test will commence.

Full Battery

Empty Battery
Helpful Tips:
- For extended battery life, the Moultrie 6V Feeder/Micro Camer Power Panel (MFA-15029) or Feeder PowerPanel (MFA-12602) can be added using the External Power Port.
- Replacement parts can be purchased from Moultrie's website www.moultriefeeders.com.
- Your Moultrie Super Pro Magnum Feeder Kit has a Lifetime Warranty. Please visit www.moultriefeeders.com/support for more information.
FCC COMPLIANCE
This device complies with part 15 of the FCC Rules. Operation is subject to the following two conditions: (1) This device may not cause harmful interference, and (2) this device must accept any interference received, including interference that may cause undesired operation.
Changes or modifications not expressly approved by PRADCO Outdoor Brands could void the user's authority to operate this device.
NOTE: This equipment has been tested and found to comply with the limits for a Class B digital device, pursuant to part 15 of the FCC Rules. These limits are designed to provide reasonable protection against harmful interference in a residential installation. This equipment generates, uses and can radiate radio frequency energy and, if not installed and used in accordance with the instructions, may cause harmful interference to radio communications. However, there is no guarantee that interference will not occur in a particular installation. If this equipment does cause harmful interference to radio or television reception, which can be determined by turning the equipment off and on, the user is encouraged to try to correct the interference by one or more of the following measures:
– Reorient or relocate the receiving antenna.
— Increase the separation between the equipment and receiver.
- Connect the equipment into an outlet on a circuit different from that to which the receiver is connected.
— Consult the dealer or an experienced radio/TV technician for help.
MOULTRIE®
Our Service Department will gladly answer any questions you have.
www.moultriefeeders.com/support
Brand : Moultrie
Model : Super Pro Magnum Feeder
Category : Video camera