
SmartSynx TO68D5-2SPTV - Deep fryer PowerXL - Free user manual and instructions
Find the device manual for free SmartSynx TO68D5-2SPTV PowerXL in PDF.


| Product Type | Dual-Zone Digital Air Fryer Oven |
| Model Numbers | TO68D5-0SP, TO68D5-0SPTV, TO68D5-2SPTV |
| Power Supply | 120V ~60 Hz |
| Rated Power | 1750 W |
| Exterior Dimensions (HxWxD) | 17.72 x 15.94 x 13.86 inches (450 x 405 x 352 mm) |
| Interior Dimensions (HxWxD) | 14.17 x 13.18 x 7.87 inches (360 x 335 x 200 mm) |
| Temperature Range | 85°F – 450°F (30°C – 232°C) |
| Cooking Functions | Air Fry, Roast, Broil, Bake, Pizza, Grill, Toast, Reheat, Keep Warm, Dehydrate, Rotisserie, Slow Cook |
| Dual-Zone Cooking | Yes, with included Divider for independent temperature and time settings |
| SmartSynx Feature | Synchronizes cooking end times for two zones |
| Accessories Included | Drip Tray, Divider, Baking Pan (3), Large Oven Rack, Crisper Tray (2), Large Baking Pan, Grill Plate, Large Crisper Tray, Rotisserie Set, Rotisserie Fetch Tool |
| Control Panel | Two control knobs, digital display, Cancel, Start/Pause, Fan, Synx, Mute, Light, Shake Indicator buttons |
| Safety Features | Automatic shut-off, cool-down fan, overheat protection, short power cord |
| Cleaning & Maintenance | Accessories are dishwasher-safe; hand wash recommended. Wipe exterior with damp cloth. Do not immerse the appliance. |
| Material | Stainless steel exterior, non-stick coated accessories |
| Weight | Approx. 20 lbs (9 kg) |
| Country of Origin | China |
Frequently Asked Questions - SmartSynx TO68D5-2SPTV PowerXL
User questions about SmartSynx TO68D5-2SPTV PowerXL
0 question about this device. Answer the ones you know or ask your own.
Ask a new question about this device
Download the instructions for your Deep fryer in PDF format for free! Find your manual SmartSynx TO68D5-2SPTV - PowerXL and take your electronic device back in hand. On this page are published all the documents necessary for the use of your device. SmartSynx TO68D5-2SPTV by PowerXL.
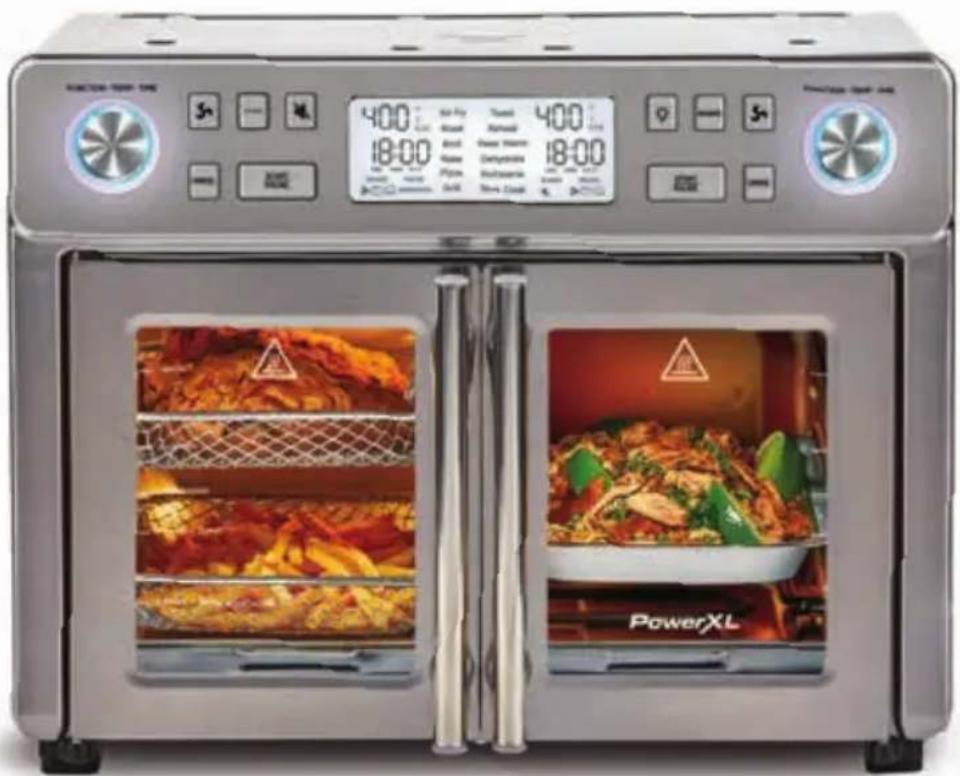
USER MANUAL SmartSynx TO68D5-2SPTV PowerXL
SmartSynx™ Duplex Oven/ Horno dúplex
OWNER'S MANUAL MANUAL DE USO Y CUIDADO
natural_image
Modern kitchen electric oven with digital display and two side dishes showing fried chicken wings (no visible text or symbols)PowerXL™
MODELS/MODELOS: TO68D5-0SP, TO68D5-0SPTV, TO68D5-2SPTV
Table of Contents
| IMPORTANT SAFEGUARDS | 3 | ||
| Quick Start Guide | |||
| Parts & Accessories | 10 | ||
| Using the Control Panel 16 | |||
| Cooking Functions | 18 | ||
| Instructions for Use | 20 | ||
| Cooking Charts | 23 | ||
| Care & Cleaning | |||
| Troubleshooting | 26 | ||
Appliance Specifications
| Model Numbers | T068D5-0SP, T068D5-0SPTV, T068D5-2SPTV |
| Supply Power | 120V ~60 Hz |
| Rated Power | 1750W |
| Exterior Dimensions | 17.72 x 15.94 x 13.86 inches (450 x 405 x 352 mm) |
| Internal Dimensions | 14.17 x 13.18 x 7.87 inches (360 x 335 x 200 mm) |
| Temperature Range | 85° F–450° F |

WARNING
PREVENT INJURIES!
CAREFULLY READ ALL INSTRUCTIONS BEFORE USE!
When using electrical appliances, basic safety precautions should be followed, including the following:
- READ ALL INSTRUCTIONS.
- Do not touch hot surfaces. Use handles or knobs.
- To protect against electrical shock, do not immerse the cord, plug, or the main body of the appliance or expose the electrical components to water or other liquid.
- Close supervision is necessary when any appliance is used by or near children.
- Unplug the appliance from the electrical outlet when not in use and before cleaning. Allow to cool before handling, putting on or taking off parts, cleaning, or storing.
- Do not operate any appliance if it has a damaged cord or plug, if it is not working properly, or if it has been damaged or dropped. Return the appliance to an authorized service facility for examination, repair, or adjustment.
- The use of accessory attachments not recommended for use in this manual may cause injuries.
- Do not use outdoors.
- Do not let the power cord hang over the edge of a table or counter or touch hot surfaces.
- Do not place on or near a hot gas or electric burner or in a heated oven.
- Extreme caution must be used when moving an appliance containing hot oil or other hot liquids, removing accessories, or disposing of hot grease.

- Always make sure the plug is attached to the appliance first. Then, plug the cord into a wall outlet. To disconnect, turn any control to "off" and then remove the plug from the outlet.
- Do not use this appliance for anything other than its intended use.
- A short power-supply cord is used to reduce the risk resulting from the cord being grabbed by children or becoming entangled in or tripping over a longer cord.
- Extension cords are available and may be used if care is exercised in their use.
- The marked electrical rating of the extension cord should be at least as great as the electrical rating of the appliance.
- WARNING: Spilled food can cause serious burns. Keep the appliance and the power cord away from children. Never drape the cord over the edge of the counter and never use an outlet below the counter.
- The power cord should be arranged so that it will not drape over the countertop or tabletop where it can be pulled on by children or tripped over unintentionally.
-
A fire may occur if this appliance is covered by or touching flammable material, including curtains, draperies, walls, and the like, when in operation. Do not store anything on top of the appliance when in operation.
-
Do not clean with metal scouring pads. Pieces can break off the pad and touch electrical parts, creating risks of electric shock.
- Extreme caution should be exercised when using containers constructed from materials other than metal or glass.
- Do not store any materials other than accessories included in this manual in this appliance when not in use.
- Do not place your appliance on a cooktop, even if the cooktop is cool, because you could accidentally turn the cooktop on, causing a fire, damaging the appliance, your cooktop, and your home.
- This appliance is intended for countertop use only.
- Do not place or use this appliance near water.
- When cooking, do not place the appliance against a wall or within 6 inches of other appliances. Do not place anything on top of the appliance. Always operate the appliance on a horizontal surface that is level, stable, and noncombustible.
- Before using your appliance on any countertop surface or other fragile surface, such as a glass tabletop, check with your countertop manufacturer or installer for recommendations about using appliances on your surfaces. Some manufacturers and installers may recommend protecting your surface by placing a hot pad or trivet under the appliance for heat protection. Your manufacturer or installer may recommend that hot pans, pots, or electrical appliances should not be used directly on top of the countertop. If you are unsure, place a trivet or hot pad under the appliance before using it.
- Plug the power cord into a 120V outlet with no other appliances on the same outlet. Plugging other appliances into the outlet will cause the circuit to overload.
- Never tug the plug forcefully from the wall outlet.
- Do not plug in the power cord or operate the appliance controls with wet hands.
- Never plug the appliance into an electrical outlet below the surface where the appliance is placed.
- Never operate the appliance unattended.
- Should the appliance emit black smoke, unplug immediately and wait for the smoking to stop before handling the appliance. Allow the appliance to cool and wipe excess oil and grease from the appliance.
- Avoid touching moving parts.
- When in operation, hot air and steam are released through the air vents. Keep your hands and face at a safe distance from the air vents. Do not cover the air vents while the appliance is operating. Doing so will prevent even cooking and may overheat or damage the appliance.
- While cooking, the internal temperature of the appliance reaches several hundred degrees Fahrenheit. To avoid personal injury, never place your hands inside the appliance unless it is thoroughly cooled.
- The appliance's outer surfaces and accessories may become hot during use. Wear oven mitts when handling the appliance during and after use, and to protect against hot steam and air released when opening the appliance.
- Do not overfill the appliance.
- Do not place any of the following materials in the appliance: paper, cardboard, plastic.
- Oversized foods or metal utensils must not be inserted in the appliance because they may create a fire or risk of electric shock. Do not cover the Drip Tray or any part of the appliance with metal foil. This will cause the appliance to overheat.
- Never pour oil into the appliance or accessories. Fire and personal injury could result. This appliance is not intended for deep-frying foods.
- Do not expose the appliance to corrosive chemicals or vapors.
- This appliance is for home use only. If the appliance is used improperly or for professional or semi-professional purposes or if it is not used according to the instructions in the user manual, the guarantee becomes invalid and Empower Brands, LLC will not be held liable for damages.
- Never connect this appliance to an external timer switch or separate remote-control system.
- Never operate the appliance with the doors open. Do not leave the doors open for an extended period.
- Always ensure that nothing is protruding out of the appliance before closing the doors.
- Always close the doors gently; never slam the doors closed. Always use the handle when opening and closing the doors.
- The appliance must be operated with the Drip Tray in place, and the Drip Tray must be cleaned if it becomes more than half full.
- Never put accessories directly on the top of the lower heating elements.
- This appliance is not intended for use by persons (including children) with reduced physical, sensory or mental capabilities, or lack of experience and knowledge, unless they have been given supervision or instructions concerning use of the appliance by a person responsible for their safety.
- Children should be supervised to ensure that they do not play with the appliance.
- The appliance is not intended to be operated by means of an external timer or separate remote-control system.
Extension Cord
-
A short power supply cord is provided to reduce the risk resulting from becoming entangled in or tripping over a longer cord.
-
Extension cords are available and may be used if care is exercised in their use.
-
If an extension cord is used:
a. The marked electrical rating of the extension cord should be at least as great as the electrical rating of the appliance;
b. If the appliance is of the grounded type, the extension cord should be a grounding-type 3-wire cord.
c. The cord should be arranged so that it will not drape over the countertop or tabletop where it can be pulled on by children or tripped over unintentionally.
Electric Power
This appliance should be operated on a dedicated electrical outlet. If the electrical outlet is overloaded with other appliances, your new appliance may not operate properly.
Automatic Shut-Off
The appliance has a built-in shut-off device that will automatically shut off the appliance when the cooking time has completed. You can manually switch off the appliance by pressing the Cancel Button. The fan will continue running for 30 seconds to cool down the appliance.
Electromagnetic Fields
This appliance complies with all standards regarding electromagnetic fields. If handled properly and according to the instructions in the user manual, the appliance is safe to use based on scientific evidence available today.
SAVE THESE INSTRUCTIONS - FOR HOUSEHOLD USE ONLY
Note: If the power cord is damaged, it must be replaced by qualified personnel or an authorized service center.
QUICK START GUIDE
Single-Zone Cooking

natural_image
Person opening a stainless steel oven with metal grilles, no visible text or symbolsStep 1
Insert the Drip Tray inside the appliance (below the heating elements). Do not insert the Divider.

natural_image
Person placing a food item into a microwave oven with a tray of stuffed meat inside (no visible text or symbols)Step 2
Select accessories appropriate for your recipe. Add food to the accessories. Insert your chosen accessory inside the appliance.

Step 3
Turn either Control Knob to select the cooking function. Press and turn the Control Knob to adjust the cooking time and temperature.

Step 4
Press the Start/Pause Button to begin the cooking cycle.
natural_image
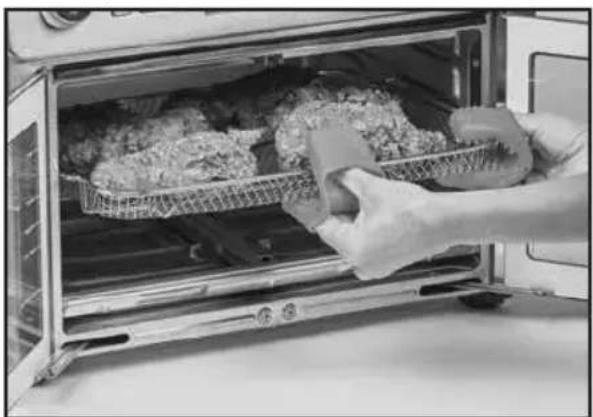
Person holding a food tray inside an open oven with stuffed meat on the stove (no visible text or symbols)Step 5
When the cooking time has completed, cooking will stop and the fan will continue to run for 30 seconds to cool down the appliance. The accessories will be hot; use oven mitts to remove your food.
QUICK START GUIDE
Dual-Zone Cooking

natural_image
Interior view of a stainless steel oven with open doors and metal grilles, no visible text or symbolsStep 1
Insert the Drip Tray inside the appliance (below the heating elements). Insert the Divider.

natural_image
Interior view of a microwave oven with open doors showing food being placed into a tray (no text or symbols visible)Step 2
Select accessories appropriate for your recipe. Add food to the accessories. Insert your chosen accessories inside the appliance.

Step 3
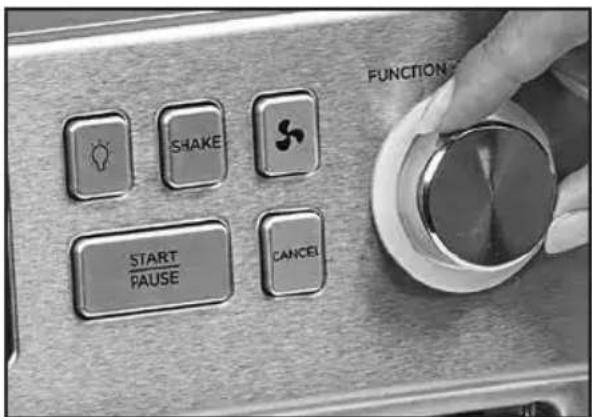
Turn the left Control Knob to select the left cooking zone's cooking function. Press and turn the Control Knob to adjust the cooking time and temperature.
Step 4
Turn the right Control Knob to select the right cooking zone's cooking function. Press and turn the Control Knob to adjust the function's cooking time and temperature.

Step 5
Press the Start/Pause Button above a cooking zone to begin the cooking cycle in that cooking zone.

natural_image
Interior view of a microwave oven with two trays filled with fish and food, being handled by a hand (no text or symbols visible)Step 6
When the cooking time has completed, cooking will stop and the fan will continue to run for 30 seconds to cool down the appliance. The accessories will be hot; use oven mitts to remove your food.
Parts & Accessories
natural_image
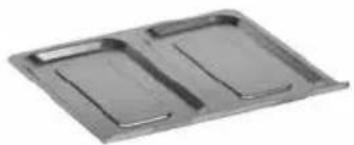
Exterior view of a modern office building (no signage)Drip Tray Divider

natural_image
Metallic plastic tray component with ribbed structure (no text or symbols visible)
natural_image
Metal tray with horizontal ridges, no visible text or symbolsBaking Pan*

natural_image
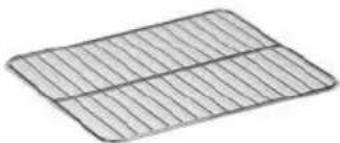
Simple line drawing of a rectangular grid pattern with no text or symbolsLarge Oven Rack*
natural_image
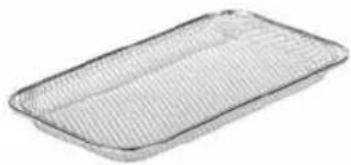
Simple wire mesh tray with no text or symbolsCrisper Tray
natural_image
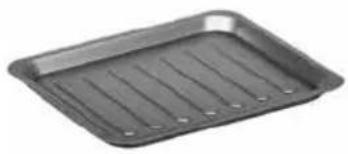
Black rectangular baking tray with horizontal ridges (no text or symbols visible)Large Baking Pan*

natural_image
Black plastic object with ribbed surface, no visible text or symbols
natural_image
Plain rectangular object with a textured surface, no visible text or symbolsLarge Crisper Tray*

Rotisserie SetGrill Plate*
Rotisserie Fetch Tool

chemical
Simple line drawing of a molecule with two connected chains| Accessory T068D5-0SP T068D5-0SPTV T068D5-2SPTV | ||
| Drip Tray 111 | ||
| Divider 111 | ||
| Baking Pan 2 2 3 | ||
| Large Oven Rack 112 | ||
| Crisper Tray 2 2 2 | ||
| Large Baking Pan | 112 | |
| Grill Plate | 012 | |
| Large Crisper Tray | 012 | |
| Rotisserie Set | 111 | |
| Rotisserie Fetch Tool | 111 | |
* Some accessories may be sold separately.
Parts & Accessories
Using the Drip Tray
- Slide the Drip Tray into the bottom of the inside of the appliance (below the heating elements; see Fig. A).
- Never operate the appliance without the Drip Tray in place.
- If the Drip Tray becomes more than half full, pause the cooking process and clean the Drip Tray before continuing.
- To remove, use oven mitts to pull the Drip Tray straight out of the appliance.
Using the Divider
- To insert the Divider into the appliance, slide the Divider onto the rail inside the appliance (see Figs. B). Ensure that the indentation in the Divider is facing upward. Push the Divider all the way into the appliance.
- The Divider must be inserted into the appliance to use the dual-zone cooking mode. Remove the Divider to use the appliance's single-zone cooking mode.
- To remove, use oven mitts to pull the Divider straight out of the appliance.

natural_image
Person using a tool to clean or install a stainless steel oven (no visible text or symbols)Fig. A

natural_image
Interior view of a microwave oven with open door and tray, showing interior shelves and a hand adjusting the tray (no text or symbols visible)Fig. B
Parts & Accessories
Using the Crisper Tray, Oven Rack, Baking Pan, and Grill Plate
- The Divider must be in place when using the smaller Crisper Tray, Baking Pan, and Grill Plate accessories.
- The Divider must not be in place when using the larger Oven Rack and Baking Pan accessories.
- Select a shelf for your chosen accessory and cooking mode. You can use the markings on the appliance's doors to help you select the ideal shelf position.
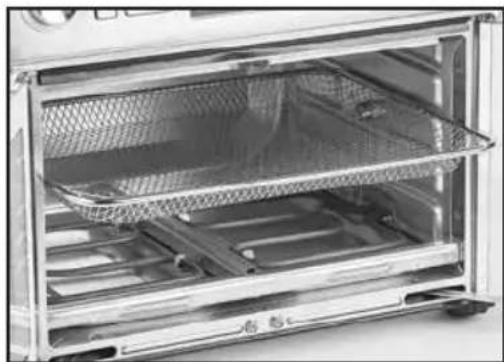
- Slide your chosen accessory into a shelf inside the appliance (see Figs. C-D).
- To remove, use oven mitts to pull the accessory straight out of the appliance.
- When cooking food that drips, the Baking Pan can be placed below the Crisper Tray or Oven Rack to prevent food from dripping onto the lower heating elements.

natural_image
Interior view of a modern microwave oven with open doors and grilles (no visible text or symbols)Fig. C

natural_image
Interior view of a stainless steel oven with mesh grating and side-mounted dish (no visible text or symbols)Fig. D
Parts & Accessories
| Accessory Recommendations for Each Function | |||||
| Function Name | Crisper Tray Oven | Rack Baking Pan | Grill Plate Rotisserie Set | ||
| Air Fry √√ | |||||
| Roast √ | |||||
| Broil √ | |||||
| Bake √√ | |||||
| Pizza √ | |||||
| Grill √ | |||||
| Toast | √ | ||||
| Reheat | √ | √ | √ | ||
| Keep Warm | √ | √ | √ | ||
| Dehydrate | √ | √ | |||
| Rotisserie | √ | ||||
| Slow Cook | √ | ||||
Parts & Accessories
Using the Rotisserie Set
- If the Divider is inside the appliance, remove the Divider. Do not use the Divider when using the Rotisserie Set.
- Carefully slide the Rotisserie Shaft through the center of the food lengthwise.
- Slide the Forks onto each side of the Spit and secure them in place by tightening the two Set Screws. To support the food on the Rotisserie Spit better, insert the Rotisserie Forks into the food at different angles (see Fig. E).
- Hold the assembled Rotisserie Spit at a slight angle with the left side higher than the right side and insert the right side of the Spit into the Rotisserie connection inside the appliance (see Fig. F).
- With the right side securely in place, lower the left side of the Spit into the Rotisserie connection on the left side of the appliance (see Fig. G).

natural_image
Mechanical component with a rectangular block and metal bracket, no visible text or symbolsFig. E Fig. F

natural_image
Close-up of a hand using a tool to adjust or install a mechanical component, no visible text or symbolsParts & Accessories
Removing the Rotisserie Spit
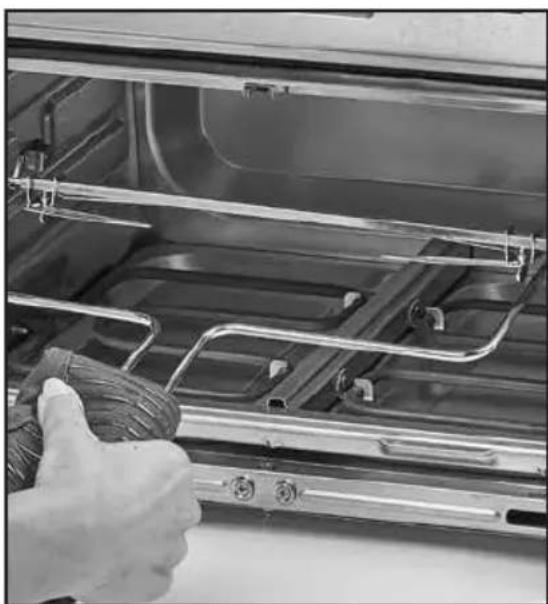
- Use the Rotisserie Fetch Tool to hook the bottom of the left and right sides of the Rotisserie Spit (see Fig. H).
- Pull the Rotisserie Spit away from the left rotisserie connection point and then lift the Spit upward to remove and disconnect the Spit from both connection points.
- Carefully pull the Rotisserie Spit out of the appliance.

natural_image
Close-up of a hand using a tool to adjust or install a mechanical component, no visible text or symbolsFig. G
natural_image
Close-up of a hand adjusting metal pipes inside an oven (no visible text or symbols)Fig. H
Using the Control Panel

flowchart
graph TD
    A["FUNCTION - TEMP - THIS"] --> B["A"]
    B --> C["B"]
    C --> D["C"]
    D --> E["D"]
    E --> F["E"]
    F --> G["F"]
    G --> H["F"]
    H --> I["I"]
    I --> J["G"]
    J --> K["H"]
    K --> L["D"]
    L --> M["F"]
    M --> N["A"]
    style A fill:#fff,stroke:#000
    style B fill:#fff,stroke:#000
    style C fill:#fff,stroke:#000
    style D fill:#fff,stroke:#000
    style E fill:#fff,stroke:#000
    style F fill:#fff,stroke:#000
    style G fill:#fff,stroke:#000
    style H fill:#fff,stroke:#000
    style I fill:#fff,stroke:#000
    style J fill:#fff,stroke:#000
    style K fill:#fff,stroke:#000
    style L fill:#fff,stroke:#000
    style M fill:#fff,stroke:#000
    style N fill:#fff,stroke:#000
A. Control Knobs: Press once and turn to adjust the cooking temperature. Press again and turn to adjust the cooking time. See the "General Operating Instructions" section for detailed instructions.
B. Cancel Buttons: Press to cancel an active cooking process.
C. Start/Pause Buttons: Press to start or pause the cooking process.
D. Fan Buttons: Press to set the appliance's fan setting to High, Low, or Off.
E. Synx Button: Press to use the appliance's SmartSynx feature. See the "Using the Synx Button" section for detailed instructions.
F. Mute Button: Press to mute the sounds produced when operating the appliance, such as when pressing buttons and when the cooking cycle is complete. When the appliance is muted, press to unmute the appliance.
G. Light Button: Press to turn the light inside the appliance on or off.
H. Shake Indicator Button: Press to use the appliance's shake indicator feature. See the "Using the Shake Indicator" for detailed instructions.
I. Display
Using the Control Panel
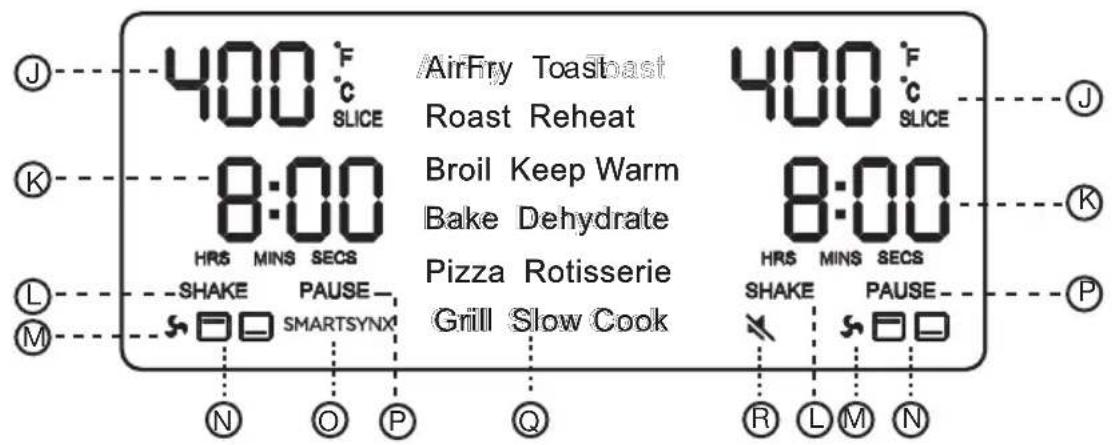
J. Temperature Displays
K. Cooking Time Displays
L. Shake Indicator Displays
M. Fan Displays
N. Heating Element Displays
- SmartSynx Display
P. Pause Display
Q. Cooking Function Display
R. Mute Display
NOTE: When the Divider is removed from the appliance and the appliance is operating in single-zone cooking mode, the displays relating to the appliance's dual-zone operation on the right side of the Control Panel are hidden.
Cooking Functions
| Cooking Function Information | |||||
| Function Name | Default Cooking Temperature (Temperature Range) | Default Cooking Time (Time Range) | Default Fan Speed | Active Heating Elements | Preheating Included in Cooking Time |
| Air Fry 400° F | (180° F-450° F) | 20 minutes (1-60 minutes) | High Upper No | ||
| Roast 350° F | (180° F-450° F) | 35 minutes (1 minute-4 hours) | Low Upper & Lower Yes | ||
| Broil 450° F | (400° F-450° F) | 10 minutes (1-20 minutes) | High Upper Yes | ||
| Bake 350° F | (180° F-450° F) | 25 minutes (1 minute-4 hours) | Low Upper & Lower Yes | ||
| Pizza 400° F | (180° F-450° F) | 18 minutes (1-60 minutes) | Off Upper & Lower Yes | ||
| Grill 450° F | (250° F-450° F) | 15 minutes (1-45 minutes) | Off Upper & Lower Yes | ||
Cooking Functions
| Cooking Function Information | |||||
| Function Name | Default Cooking Temperature (Temperature Range) | Default Cooking Time (Time Range) | Default Fan Speed | Active Heating Elements | Preheating Included in Cooking Time |
| Toast (Light-Dark) | 4 slices | (1-6 slices)* | Off Upper & Lower | No | |
| Reheat 280°F | (180°F-450°F) | 20 minutes (1 minute-2 hours) | Low Upper & Lower | No | |
| Keep Warm 160°F | (160°F-250°F) | 1 hour (1 minute-4 hours) | Off Upper & Lower | No | |
| Dehydrate 120°F | (85°F-175°F) | 6 hours (30 minutes-72 hours) | Low Upper No | ||
| Rotisserie 375°F | (180°F-450°F) | 40 minutes (1 minute-4 hours) | High Upper Yes | ||
| Slow Cook 225°F | (225°F-275°F) | 4 hours (30 minutes-10 hours) | Low Upper & Lower | No | |
NOTE: When using the Toast function, the temperature setting is replaced by a Darkness setting. Use this setting to adjust the desired darkness of your toast. The time setting is replaced by a number of slices setting. Use this setting to adjust the number of slices of bread you are toasting.
* When cooking in dual-zone cooking mode, the default slice setting for the Toast function is 2 slices, and the slice range is 1–2 slices.
Before First Use
- Unpack all parts from the box and remove any clear or blue protective film on the components. Check all packaging material thoroughly for accessories.
- Remove and save all literature.
- Wash all removable accessories (see the "Care & Cleaning" section).
- Select a location to place the appliance. The location should allow enough space for air flow (at least 6 inches of free space on the top, back, and sides of the appliance). The surface on which the appliance is placed should be horizontal, stable, and heat resistant.
General Operating Instructions
Dual-Zone Cooking
- Insert the Drip Tray inside the appliance (see the "Using the Drip Tray" section). Insert the Divider (see the "Using the Divider" section).
- Select accessories appropriate for your recipe. Add food to the accessories. Insert your chosen accessory inside the appliance (see the "Using the Crisper Tray, Oven Rack, and Baking Pan" section).
- Turn the left Control Knob to select the left cooking zone's cooking function. A bracket will mark the left side of the selected function on the Control Panel. Press the Control Knob to confirm the setting. Turn to adjust the temperature and press to confirm. Turn to adjust the time and press to confirm.
- Turn the right Control Knob to select the right cooking zone's cooking function. A bracket will mark the right side of the selected function on the Control Panel. Press the Control Knob to confirm the setting. Turn to adjust the temperature and press to confirm. Turn to adjust the time and press to confirm.
- Optional: Set the Shake Indicator and SmartSynx feature (see the "Using the Shake Indicator" and "Using the Synx Buttons" sections).
- Press the Start/Pause Button above a cooking zone to begin the cooking cycle in that cooking zone.
- When the cooking time has completed, cooking will stop and the fan will continue to run for 30 seconds to cool down the appliance.
Single-Zone Cooking
- Insert the Drip Tray inside the appliance (see the "Using the Drip Tray" section). Do not insert the Divider.
- Select accessories appropriate for your recipe. Add food to the accessories. Insert your chosen accessory inside the appliance (see the "Using the Crisper Tray, Oven Rack, and Baking Pan" and "Using the Rotisserie Set" sections).
- Use the left or right Control Knob to select a cooking function. A bracket will mark the selected function on the Control Panel. Press the Control Knob to confirm the setting. Turn to adjust the temperature and press to confirm. Turn to adjust the time and press to confirm.
- Optional: Set the Shake Indicator (see the "Using the Shake Indicator" section).
- Press the Start/Pause Button to begin the cooking cycle.
- When the cooking time has completed, cooking will stop and the fan will continue to run for 30 seconds to cool down the appliance.
NOTE: You can press the Start/Pause Button at any time during the cooking process to pause the cooking process. When you press the Start/Pause Button again, the programmed cooking cycle will resume.
Using the Shake Indicator
The Shake Indicator lets you know when the cooking time has reached its halfway point, which is an ideal time to shake certain foods (see the "Shaking Food" section). The Shake Indicator is only available when using the Air Fry function.
- Set the cooking function, temperature, and time for one cooking zone. If you want to use the Shake Indicator with the food in the first cooking zone, press the Shake Indicator Button. The Shake Indicator Display on the Control Panel will illuminate.
- When using the dual-zone cooking mode: Set the cooking function, temperature, and time for the second cooking zone. If you want to use the Shake Indicator with the food in the second cooking zone, press the Shake Indicator Button.
- Press the Start/Pause Button to begin the cooking cycle. If the Shake Indicator has been set for a cooking zone, the appliance will beep five times and the Shake Indicator Display on the Control Panel will blink when the cooking zone's timer is halfway through the total cooking time. You can open the doors and shake food as needed.
- Close the doors. Press the Start/Pause Button to resume the cooking cycle.
Instructions for Use
Shaking Food
To ensure even cooking while air frying, you can shake food during the cooking process. Using the Shake Indicator can help remind you to shake food halfway through the cooking process.
- Press the Start/Pause Button to pause the cooking process.
- Use oven mitts to remove the accessories and food. Place the accessories and food on a heat-resistant surface.
- Shake the ingredients in the accessories.
- Return the accessories to the appliance. Close the doors. Press the Start/Pause Button to resume the cooking process.
CAUTION: The accessories will be hot. Always use oven mitts to handle hot accessories.
Using the Synx Button
When cooking food with different cooking times in dual-zone cooking mode, the SmartSynx feature lets you finish cooking food in the two cooking zones simultaneously. The SmartSynx feature is only available when using the Air Fry, Roast, Broil, Bake, Pizza, or Grill functions.
- Add food to the cooking zone with the longer cooking time. Do not add food to the cooking zone with the shorter cooking time yet.
- Set the cooking function, temperature, and time for each cooking zone. Before pressing the Start/Pause Button to begin the cooking cycle, press the Synx Button. The SmartSynx Display on the Control Panel will illuminate.
- Press the Start/Pause Button. The cooking process will begin in the cooking zone with the longer cooking time. The Control Panel will display "HOLD" over the cooking zone with the shorter cooking time.
- When the cooking timers of both cooking zones synchronize, the appliance will beep six times. Open the doors and add food to the second cooking zone (if food had not already been added for the Air Fry function).
- Close the doors. Both cooking zones' timers will count down simultaneously.
Cooking Charts
| General Cooking Guidelines | ||||||
| Food Size T | Temperature | Cooking | Time | Preheat | Shake/Flip | Spray with Oil |
| Frozen Foods | ||||||
| French fries 400°F 18 | minutes √ | |||||
| Sweet potato fries 400°F 22 minutes √ | ||||||
| Chicken nuggets 400°F 14 minutes √ | ||||||
| Chicken | ||||||
| Breaded cutlets | 6 oz | 400°F | 10 minutes | √ | √ | √ |
| Wings | 400°F 25 minutes | √ | √ | |||
| Chicken breast | 6 oz | 400°F | 8 minutes | √ | ||
| Beef | ||||||
| Burgers | 6 oz | 400°F | 10 minutes | √ | √ | |
| Hot dogs | 8 pieces | 375°F | 5 minutes | √ | √ | |
| NY strip steaks | 8 oz | 400°F | 12 minutes | √ | √ | |
| Meatballs, 1 inch | 1.5 lb | 375°F | 10 minutes | √ | √ | |
| Pork | ||||||
| Pork chops | 400°F 12 minutes | √ | √ | |||
| Sausages | 350°F | 15 minutes | √ | √ | ||
| Fish | ||||||
| Salmon filet | 6 oz | 390°F | 12 minutes | √ | ||
| Shrimp (16-20 size) | 12 oz | 390°F | 10 minutes | √ | √ | |
Cooking Charts
| General Cooking Guidelines | ||||||
| Food Size T | Temperature | ure Cooking | Time | Preheat | $shake/Flip | Spray with Oil |
| Vegetables | ||||||
| Asparagus 1 lb 380° F | 8 minutes | √√ | ||||
| Broccoli 8 oz 380° F | 8 minutes | √ | ||||
| Corn on the cob | 2 pieces | 380° F 8 minutes | √ | |||
| Prepared Food | ||||||
| Hard-boiled eggs, shell on | 250° F 18 minutes | |||||
| Cake | 320° F | 20 minutes | ||||
| Grilled cheese sandwich | 1 piece 375° F | 6 minutes | √√ | |||
Cleaning the Appliance
Recommendation: Clean the appliance after each use.
- Unplug the appliance and let cool for at least 30 minutes before cleaning.
- Wipe the outside of the appliance with a warm, moist cloth and a mild detergent.
- Gently scrub both sides of the doors with a warm, moist cloth and soapy water.
- Clean the appliance interior with only mild, nonabrasive soaps or detergents applied with a sponge or soft cloth. Do not scrub the heating elements.
- Rinse the inside of the appliance with a clean, moist cloth.
Cleaning the Accessories
Recommendation: Clean any accessories that were used during the cooking process after each use.
- Let the accessories cool for at least 30 minutes before cleaning.
- To remove food stuck on accessories easily, soak the accessories in warm, soapy water before cleaning.
- The accessories are dishwasher safe, but hand-washing with warm water, a mild detergent, and a sponge or soft cloth is recommended.
Storage
- Unplug the appliance and let cool for at least 30 minutes before storing.
- Clean the appliance (see the "Cleaning the Appliance" section). Ensure all the components are dry before storing.
- Store in a clean, dry place.
Maintenance
Any other maintenance must be performed by an authorized service technician. Contact an authorized service center.
Troubleshooting
| Troubleshooting | ||
| Problem Possible Cause Solution | ||
| The appliance does not work. | The appliance is not plugged in or the appliance is plugged into an outlet that is shared with other devices. | Plug the power cord into a dedicated electrical outlet. |
| Food has not cooked completely. | The accessories are overloaded. Use smaller batches to help ensure even cooking. | |
| The cooking temperature is set too low. | Raise the cooking temperature and continue cooking. | |
| Food is not cooked evenly. | Some foods need to be shaken during the cooking process. | See the “Shaking Foods” section. |
| Foods of different sizes are being cooked together. | Cook similarly sized foods together. | |
| Smoke is coming from the appliance. | Too much oil is being used. Use less oil when cooking food in this appliance. | |
| Accessories have excess residue from previous cooking. | Clean the appliance and its accessories after each use. | |
| Food is dripping on the bottom heating elements. | Place the Baking Pan at a level below the food (do not place the Baking Pan or any other accessory directly on the heating elements). | |
Error Codes
If any of the error codes in the chart below appear on the Control Panel, contact an authorized service center.
| Error Code Meaning Solution | ||
| Er1 Sensor open circuit fault. | Contact authorized service center. | |
| Er2 Sensor short circuit fault. | Contact authorized service center. | |
| Er3 DC fan open fault. | Contact authorized service center. | |
| Er4 DC fan short fault. | Contact authorized service center. | |
Tabla De Contenido
natural_image
Person opening a microwave oven with open door and tray, no visible text or symbolsPaso 1
natural_image
Person placing a tray of food items into an open oven (no visible text or symbols)Paso 2
natural_image
Person holding a plastic grater inside an open oven with food being handled (no visible text or symbols)Paso 5
natural_image
Interior view of a stainless steel oven with open doors and metal grilles, no visible text or symbolsPaso 1
natural_image
Interior view of a microwave oven with open doors showing food being placed into a tray (no visible text or labels)Paso 2
natural_image
Interior view of a microwave oven with two trays filled with fish and food, being handled by a hand (no text or symbols visible)Paso 6
natural_image
Exterior view of a dark rectangular plastic tray with two side compartments (no text or symbols)natural_image
Metallic plastic housing component with ribbed internal structure (no text or symbols visible)
natural_image
Exterior view of a rectangular baking tray with horizontal ridges (no text or symbols)Bandeja para hornear*
natural_image
Simple line drawing of a rectangular grid pattern with vertical lines (no text or symbols)Parrilla del horno grande*

natural_image
Simple wire mesh rectangular tray with no text or symbolsBandeja para freír

natural_image
Black rectangular baking tray with horizontal ridges (no text or symbols)Bandeja para hornear grande*

natural_image
Black plastic object with ribbed side and flat top (no text or symbols visible)a la parrilla*

natural_image
Plain rectangular cushion or cushion with textured surface, no visible text or symbolschemical
Simple line drawing of a zigzag molecule with two branchesnatural_image
Person using a tool to clean or install a stainless steel oven (no visible text or symbols)Fig. A

natural_image
Interior view of an oven with open door and tray, showing metal grating and a hand adjusting the interior (no text or symbols visible)Fig. B
natural_image
Interior view of a stainless steel oven with two compartments filled with food containers (no visible text or symbols)Fig. C
natural_image
Interior view of a modern stainless steel toaster oven with mesh tray and side grilles (no visible text or symbols)Fig. D
Piezas y Accesorios
natural_image
Close-up of a metallic object with textured surface and metal bracket, possibly a mechanical or industrial component (no visible text or symbols)Fig. E Fig. F

natural_image
Close-up of a hand using a tool to adjust or install a mechanical component, no visible text or symbolsPiezas y Accesorios
natural_image
Close-up of a hand using a tool to adjust or install a mechanical component (no visible text or symbols)Fig. G

natural_image
Close-up of a hand using a tool to adjust or install a metal tray inside an oven (no visible text or symbols)Fig. H
Empower Brands, LLC, Middleton, WI 53562. 04/2024
Made in China.
Fabricado en China.
T22-9003640-B
30703 E/S
- SmartSynx™ Duplex Oven/ Horno dúplex
- PowerXL™
- WARNING
- PREVENT INJURIES!
- CAREFULLY READ ALL INSTRUCTIONS BEFORE USE!
- Extension Cord
- Electric Power
- Automatic Shut-Off
- Electromagnetic Fields
- SAVE THESE INSTRUCTIONS - FOR HOUSEHOLD USE ONLY
- QUICK START GUIDE
- Single-Zone Cooking
- Step 1
- Step 2
- Step 3
- Step 4
- Step 5
- Dual-Zone Cooking
- Step 6
- Parts & Accessories
- Using the Drip Tray
- Using the Divider
- Using the Crisper Tray, Oven Rack, Baking Pan, and Grill Plate
- Using the Rotisserie Set
- Removing the Rotisserie Spit
- Using the Control Panel
- Cooking Functions
- Before First Use
- General Operating Instructions
- Using the Shake Indicator
- Instructions for Use
- Shaking Food
- Using the Synx Button
- Cooking Charts
- Cleaning the Appliance
- Cleaning the Accessories
- Storage
- Maintenance
- Troubleshooting
- Error Codes
- Tabla De Contenido
- Paso 1
- Paso 2
- Paso 5
- Paso 6
- Piezas y Accesorios
Brand : PowerXL
Model : SmartSynx TO68D5-2SPTV
Category : Deep fryer