
LSR 10HQ - Compressor Holzmann - Free user manual and instructions
Find the device manual for free LSR 10HQ Holzmann in PDF.


| Product Type | Retractable Air Hose Reel |
| Brand | Holzmann |
| Model | LSR 10HQ |
| Extendable Hose Length | 10 m |
| Supply Hose Length | 1 m |
| Hose Material | Rubber |
| Hose Inside Diameter | 9.5 mm |
| Hose Outside Diameter | 14 mm |
| Working Temperature Range | -20°C to +60°C |
| Maximum Operating Pressure | 20 bar |
| Connection Type | 2 x 1/4" Quick Couplings |
| Mounting Type | Wall, ceiling, or column (4 screws 10x60mm) |
| Adjustable Spring Force | Yes, by rotating reel clockwise or counterclockwise |
| Adjustable Hose Stop | Yes, via stop ring and cap screws |
| Guide Arm Adjustment | 90° steps, 6-sided nut |
| Safety Features | Read manual, use PPE, disconnect air supply before service |
| Maintenance | Clean guide rollers, check fittings, low maintenance |
| Spare Parts Availability | Original Holzmann spare parts via dealer or service center |
Frequently Asked Questions - LSR 10HQ Holzmann
User questions about LSR 10HQ Holzmann
0 question about this device. Answer the ones you know or ask your own.
Ask a new question about this device
Download the instructions for your Compressor in PDF format for free! Find your manual LSR 10HQ - Holzmann and take your electronic device back in hand. On this page are published all the documents necessary for the use of your device. LSR 10HQ by Holzmann.
USER MANUAL LSR 10HQ Holzmann
Read the operation manual carefully before first use!
CE
Technical data subject to changes, errors excepted!
1 INHALT / INDEX
2 SI CHERHEI TSZEI CHEN / SAFETY SIGNS 4
3 VORWORT 5
4 TECHNIK 6
4.1 Bedienelemente....7
4.2 Technische Daten .... 7
5 SICHERHEIT 8
13.1 Intended use.... 17
13.1.1 Working conditions.... 17
13.2 Prohibited use.... 17
13.3 Security Instructions 17
13.4 Residual risk factors 18
14 ASSEMBLY 18
14.1 Installation Supporting base.... 18
14.1.1 Walls, columns, floor and ceiling mounting.... 18
15 OPERATION 19
15.1 Rolling out/ pulling the hose 19
15.2 Rolling in / collect the hose 19
15.3 Settings 19
15.3.1 Adjust tube length.... 19
15.3.2 Change position of the guide arm 19
15.3.3 Adjusting the spring force.... 19
15.3.4 Spring force reduce: 20
15.3.5 Increase spring force 20
16 MAINTENANCE 20
17 TROUBLESHOOTING 21
18 ERSATZTEILE / SPARE PARTS 22
ATTENTION! Ignoring the safety signs and warnings applied on the machine as well as ignoring the security and operating instructions can cause serious injuries and even lead to death.

DE
READ THE MANUAL! Read the user and maintenance manual carefully and get familiar with the controls n order to use the machine correctly and to avoid injuries and machine defects.

DE
PROTECTIVE CLOTHING! The operator is obligated to wear proper ear protection, safety goggles and safety shoes



CE-KONFORM - Dieses Produkt entspricht den EG-Richtlinien. EC-CONFORM - This product complies with the EC-directives.
3 VORWORT
This manual contains Information and important instructions for the installation and correct use of the retractable air hose reel LSR 10HQ / 15HQ.
This manual is part of the machine and shall not be stored separately from the machine. Save it for later reference and if you let other persons use the machine, add this instruction manual to the machine.
Please read and obey the security instructions!

Before first use read this manual carefully. It eases the correct use of the machine and prevents misunderstanding and damages of machine and the user's health.
Due to constant advancements in product design construction pictures and content may diverse slightly. However, if you discover any errors, inform us please.
Technical specifications are subject to changes!
Please check the product contents immediately after receipt for any eventual transport damage or missing parts.
Claims from transport damage or missing parts must be placed immediately after initial machine receipt and unpacking before putting the machine into operation.
Please understand that later claims cannot be accepted anymore.
Copyright
© 2013
This document is protected by international copyright law. Any unauthorized duplication, translation or use of pictures, illustrations or text of this manual will be pursued by law – court of jurisdiction is A-4020 Linz, Austria!
CUSTOMER SERVICE CONTACT
| 1 | Stopp-Ring |
| 2 | Tube guide rollers |
| 3 | Hose stop unit |
| 4 | Hose reel |
| 5 | Mounting bracket |
| 6 | Plug connector 1/4" |
| 7 | Supply hose |
| 8 | Coupling 1/4" |
| 9 | Guide arm |
12.1 Specifications
| Extendable hose length 10 m 15 m | ||
| Supply hose 1 m 1 m | ||
| Tubing Rubber Rubber | ||
| Hose inside diameter 9,5 mm 9,5 mm | ||
| Hose outside diameter 14 mm 14 mm | ||
| Working temperature | -20°C bis + 60°C | -20°C bis + 60°C |
| max. operating pressure | 20 bar | 20 bar |
| Coupling type connections | 2 x 1/4" Schnellkupplung | 2 x 1/4" Schnellkupplung |
Subject to technical changes!
13 SAFETY
13.1 Intended use
The machine only in technically perfect condition in accordance with, safety and danger, use it! Interference, which could affect safety, must be rectified immediately!
It is generally prohibited to modify safety equipment of the machine or to make ineffective!
For a different or additional use and resulting damage or injury takes HOLZMANN MASCHINEN no responsibility or warranty.
13.1.1 Working conditions
The machine is designed for the work under the following conditions:
The machine is not intended for outdoor use.
The machine is not intended for use in potentially hazardous conditions.
13.2 Prohibited use
The operation of the machine under conditions outside of the limits, given in these instructions is not permitted.
The operation of the machine without the safety devices provided is inadmissible
The removal or turning off the protection devices is prohibited
It is not permitted processing of materials with dimensions outside the limits specified in this manual.
It is not permitted the use of tools that are not for use with LSR 10HQ / 15HQ are suitable.
The operation of the machine on a way or for any purpose that does not comply with the instructions of this manual to 100%, is prohibited.
Do not leave the machine unattended, especially when children are not around. DO NOT LEAVE the workplace!
13.3 Security Instructions
Missing or non-readable security stickers have to be replaced immediately!
To avoid malfunction, damage and physical injury MUST be observed:

Use personal safety equipment: ear-muffs, safety goggles, dust mask when working on dusty jobs.
The machine does not require extensive maintenance.
Repairing shall be performed by trained professionals only.
Accesories: Use only accessories recommended by HOLZMANN-Maschinen and its sales partners.
13.4 Residual risk factors
Even if the machine is used as required it is still impossible to eliminate certain residual risk factors totally. The following hazards may arise in connection with the machine's construction and design:
Hearing, unless arrangements have been made by the user for hearing protection.
These risks can be minimized if all safety rules are applied, the machine is properly maintained and serviced the machine as intended and is serviced by a trained service professional.
Despite all the safety devices and remains her good common sense and your appropriate technical qualification / training on the operation of a machine such as the LSR 10HQ / 15HQ of the most important safety factor!
14 ASSEMBLY
14.1 Installation Supporting base
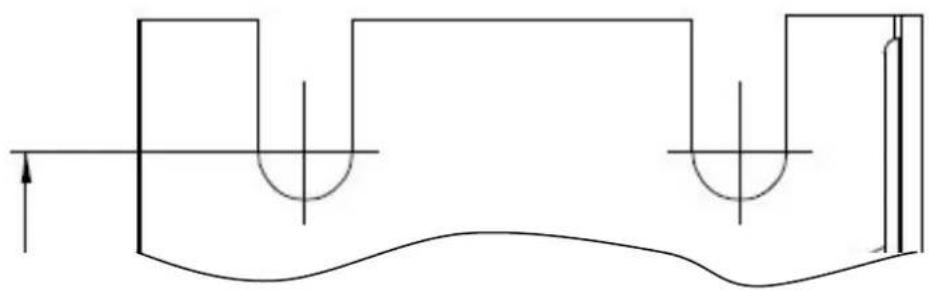
When drilling the holes to the proper spacing. The schematic diagram (on page 10) shows the distances.
14.1.1 Walls, columns, floor and ceiling mounting
The base mount with 4 screws must be securely 10x60mm (better longer) are attached to stable wall or ceiling.
The use of anchor bolts with appropriate washers or attachment to a component is strongly recommended.
NOTE:
Dimensions for drilling distances (on page 10).
natural_image
Pure technical line drawing of a mechanical component or structural section without any text, numbers, or symbols15 OPERATION

If the hose can be rolled out in full length, not huge move on, as this may tear the hose and the hose-end residual dangerous swirl around
15.1 Rolling out/ pulling the hose
- Remove hose to the desired length and can withdraw slowly clicks into place. If the hose reel does not lock the same again again go out and leave to withdraw slowly. Repeat the process locked in the desired position until the hose reel.

If the hose is released during the roll up the hose end to uncontrolled fast take-up reel. Themselves and other people can thereby be injured or property damaged. Why not let the hose when rolling. Always lead to the end of the hose controlled take-up reel.
15.2 Rolling in / collect the hose
■ Further off hose is released to lock. Then slowly move the hose to the take-up reel.
15.3 Settings
15.3.1 Adjust tube length
The solid fixed length of hose with hose coupling can be set indefinitely.
- Loosen the two cap screws on the hose-stop ring (1) carefully. Pull the tube out of the guide and slide the hose-stop ring to the desired length.
- Screw the two cylinder screws again
15.3.2 Change position of the guide arm
The position of the guide arm (9) is adjustable in 90° steps. Allows you to set parallel or angled to the wall, floor or ceiling, the tube guide
- By removing the 6 sided nut on the mounting and align the guide arm in the desired position.
- the guide arm in position by tightening the 6 sided nut.
15.3.3 Adjusting the spring force
By adjusting the spring force of the return velocity of the tube can be adjusted individually. It increases or reduces the effort to curl the hose off or on.

The air supply necessarily interrupt when adjustment, maintenance, and repair work. Disconnect hose from the air supply!
ATTENTION: Always hold the hose reel in this setting and do not let go!
■ Remove the hose-stop ring (1) as described in 15.3.1
- Pull the hose end out through the hose guide
15.3.4 Spring force reduce:
- By turning the hose reel counterclockwise (seen on hose supply side), the spring force is relieved.
15.3.5 Increase spring force
- By turning the hose reel to clockwise (seen on hose inlet side), the spring force is increased.
After adjust the spring tension pull the hose end through the hose roller guide and fix the stop ring. Only now you can let go of the hose reel again!
16 MAINTENANCE
The hose reel is low maintenance and contains little parts that need maintenance in-a subject the operator.

The air supply necessarily interrupt when adjustment, maintenance, and repair work. Disconnect hose from the air supply!
The elimination of defects does your dealer
Keep the tube clean and free of dirt to ensure a smooth operation of the plant.
Clean the surface of the guide rollers of accumulated debris.
Regularly check the air fittings for looseness, leaks, cracks or damage.
Occasionally check the mounting hardware for looseness or damage.
17 TROUBLESHOOTING

The air supply necessarily interrupt when adjustment, maintenance, and repair work. Disconnect hose from the air supply!
| Trouble Possible cause Solution | ||
| It winds not completely back | Coiled tubing unevenlyAt low spring tensionTo severe replacement hoseAdjustable hose stop ringHose rolled up too fast | Roll up hose evenlyreplace springUse appropriate replacement hoseAdjust hose stop ring in the correct positionRoll up hose evenly slowly |
| Locking will not work | Hose reel mounted incorrectlyHose released too quicklydamaged arresting | See Chapter 6 AssemblyLead to lock tube slowlyreplace locking unit |
| Leaking hose | damaged hoseLoose hose clampWorn rotating body seal | replace hoseFix or replace hose clampReplace rotating body seal |
18 ERSATZTEILE / SPARE PARTS
With original Holzmann spare parts you use parts that are attuned to each other shorten the installation time and elongate your machines lifespan.
IMPORTANT
The installation of other than original spare parts voids the warranty!
So you always have to use original spare parts
By the order of spare parts use the service formular that you can find at the end of this manual. Make always a note of the type, spare part number and a definition of the machine. That there are no mistakes, we recommend to make a copy of the spare part list where you can mark with a pen the spare parts which you order.
You find the order address in the preface of this operation manual.
| No. | Description Qty | No. | Description Qty | ||
| 1 | Circlip 1 21 Docking rivets 4x8 2 | ||||
| 2 | Elbow connection 1 22 M5x10 Cross recess pan head screw 1 | head | screw 1 | ||
| 3 | Oil Bearing 1 23 Flat gasket 1 | ||||
| 4 | M5 Lock nut 3 24 M12 Lock nut | 1 | |||
| 5 | M5x10 Cross recess pan head screw 1 25 M5 Lock nut 4 | Lock nut | |||
| 6 | Right reel 1 26 Guide Jacket 6 1 | Guide Jacket 6 | |||
| 7 | Left Reel 1 27 M8 Lock nut 3 | Lock nut | |||
| 8 | M8 Sunk screw 3 28 Guide Jacket 8 1 | Guide Jacket 8 | |||
| 9 | Spring 1 29 M5x10 Cross recess pan head screw 4 | Cross recess pan head screw 4 | |||
| 10 | Double thread screw | 3 | 30 | Guide roller shaft | 2 |
| 11 | Patchet plate | 1 | 31 | Guide roller | 2 |
| 12 | M5 Lock nut 3 32 Clamping ball cushion | 1 | |||
| 13 | M5x10 Cross recess pan head screw | 1 | 33 | Right half Calamping ball | 1 |
| 14 | Center shaft | 1 | 34 | Left half Clamping ball | 1 |
| 15 | Docking rivets 3x5 | 1 | 35 | M14 Self tapping screw slot | 2 |
| 16 | M5 Lock nut | 36 Arm | |||
| 17 | Ratchet | 37 M12 Flat gasket | |||
| 18 | Tension spring | 38 | M12 Lock nut | 1 | |
| 19 | Ratchet seat | 39 M8x20 Cross recess pan head screw 3 | |||
| 20 | Mounting bracket | ||||
19 KONFORMI TÄTSERKLÄRUNG / CERTIFICATE OF CONFORMITY
Hereby we declare that the above mentioned machines meet the essential safety and health requirements of the above stated EC directives. Any manipulation or change of the machine not being explicitly authorized by us in advance renders this document null and void.
Haslach, 11.06.2013
(applicable from 11.06.2013)
Please consult our troubleshooting section for initial problem solving. Feel free to contact your HOLZMANN reseller or us for Customer Support!
Warranty claims based on your sales contract with your HOLZMANN retailer, including your statutory rights, shall not be affected by this guarantee declaration. HOLZMANN-MASCHINEN grants guarantee according to following conditions:
A) The guarantee covers the correction of deficiencies to the tool/machine, at no charge, if it can be verified adequately that the deficiencies were caused by a material or manufacturing fault.
B) The guarantee period lasts 12 months, and is reduced to 6 months for tools in commercial use. The guarantee period begins from the time the new tool is purchased from the first end user. The starting date is the date on the original delivery receipt, or the sales receipt in the case of pickup by the customer.
C) Please lodge your guarantee claims to your HOLZMANN reseller you acquired the claimed tool from with following information:
Original Sales receipt and/or delivery receipt
Service form (see next page) filed, with a sufficient deficiency report
for spare part claims: a copy of the respective exploded drawing with the required spare parts being marked clear and unmistakable.
D) The Guarantee handling procedure and place of fulfillment is determined according to HOLZMANNs sole discretion in accordance with the HOLZMANN retail partner. If there is no additional Service contract made including on-site service, the place of fulfillment is principally the HOLZMANN Service Center in Haslach, Austria.
Transport charges for sendings to and from our Service Center are not covered in this guarantee.
E) The Guarantee does not cover:
- Wear and tear parts like belts, provided tools etc., except to initial damage which has to be claimed immediately after receipt and initial check of the machine.
- Defects in the tool caused by non-compliance with the operating instructions, improper assembly, insufficient power supply, improper use, abnormal environmental conditions, inappropriate operating conditions, overload or insufficient servicing or maintenance.
- Damages being the causal effect of performed manipulations, changes, additions made to the machine.
- Defects caused by using accessories, components or spare parts other than original HOLZMANN spare parts.
- Slight deviations from the specified quality or slight appearance changes that do not affect functionality or value of the tool.
- Defects resulting from a commercial use of tools that - based on their construction and power output - are not designed and built to be used within the frame of industrial/commercial continuous load.
F) Claims other than the right to correction of faults in the tool named in these guarantee conditions are not covered by our guarantee.
G) This guarantee is voluntary. Therefore Services provided under guarantee do not lengthen or renew the guarantee period for the tool or the replaced part.
SERVICE
After Guarantee and warranty expiration specialist repair shops can perform maintenance and repair jobs. But we are still at your service as well with spare parts and/or machine service. Place your spare part / repair service cost inquiry by filing the SERVICE form on the following page and send it:
via Mail to service@holzmann-maschinen.at
or via Fax to: +437248611166
PRODUCT EXPERIENCE FORM
We observe the quality of our delivered products in the frame of a Quality Management policy.
Your opinion is essential for further product development and product choice. Please let us know about your:
- Impressions and suggestions for improvement.
- experiences that may be useful for other users and for product design
- Experiences with malfunctions that occur in specific operation modes
We would like to ask you to note down your experiences and observations and send them to us via FAX, E-Mail or by post:
Erworben von / purchased from:
E-Mail/ e-mail:
/ service inquiry / spare part inquiry / guarantee claim
Please describe amongst others in the problem: What has cause the problem/defect, what was the last activity before you noticed the problem/defect? For electrical problems: Have you had checked you electric supply and the machine already by a certified electrician?
3. Bitte beachten
/ Additional information
INCOMPLETELY FILLED SERVICE FORMS CANNOT BE PROCESSED! FOR GUARANTEE CLAIMS PLEASE ADD A COPY OF YOUR ORIGINAL SALES / DELIVERY RECEIPT OTHERWISE IT CANNOT BE ACCEPTED. FOR SPARE PART ORDERS PLEASE ADD TO THIS SERVICE FORM A COPY OF THE RESPECTIVE EXPLODED DRAWING WITH THE REQUIRED SPARE PARTS BEING MARKED CLEARLY AND UNMISTAKABLE. THIS HELPS US TO IDENTIFY THE REQUIRED SPARE PARTS FASTLY AND ACCEL- ERATES THE HANDLING OF YOUR INQUIRY.
- INHALT / INDEX
- SI CHERHEI TSZEI CHEN / SAFETY SIGNS 4
- VORWORT 5
- TECHNIK 6
- SICHERHEIT 8
- ASSEMBLY 18
- OPERATION 19
- MAINTENANCE 20
- TROUBLESHOOTING 21
- ERSATZTEILE / SPARE PARTS 22
- VORWORT
- CUSTOMER SERVICE CONTACT
- Specifications
- SAFETY
- Intended use
- Working conditions
- Prohibited use
- Security Instructions
- Residual risk factors
- ASSEMBLY
- Installation Supporting base
- Walls, columns, floor and ceiling mounting
- NOTE:
- OPERATION
- Rolling out/ pulling the hose
- Rolling in / collect the hose
- Settings
- Adjust tube length
- Change position of the guide arm
- Adjusting the spring force
- Spring force reduce:
- Increase spring force
- MAINTENANCE
- The elimination of defects does your dealer
- TROUBLESHOOTING
- ERSATZTEILE / SPARE PARTS
- IMPORTANT
- KONFORMI TÄTSERKLÄRUNG / CERTIFICATE OF CONFORMITY
- (applicable from 11.06.2013)
- SERVICE
- PRODUCT EXPERIENCE FORM
- Bitte beachten
- / Additional information
Brand : Holzmann
Model : LSR 10HQ
Category : Compressor