
WSS1 - Speaker Stand SANUS - Free user manual and instructions
Find the device manual for free WSS1 SANUS in PDF.


| Product Type | Speaker Stand |
| Brand | Sanus |
| Model | WSS1 |
| Compatible Speakers | Sonos PLAY:1 and PLAY:3 |
| Maximum Weight Capacity | 5.8 lb (2.6 kg) |
| Height | Approximately 26.5 in (67.3 cm) |
| Base Diameter | Approximately 11 in (28 cm) |
| Top Plate Diameter | Approximately 5 in (12.7 cm) |
| Material | Steel |
| Finish | Black |
| Color | Black |
| Included Hardware | Rubber isolation pads, carpet spikes, spike nuts, PLAY:1 bracket, PLAY:3 horizontal bracket, PLAY:3 vertical bracket, bracket screw, speaker screw, felt pad |
| Cable Management | Internal routing for power and Ethernet cords |
| Assembly Required | Yes: simple assembly with Phillips screwdriver |
| Safety Features | Weight limit warning, carpet spikes for stability on carpets |
| Number of Stands per Package | 1 (sold individually) |
| Warranty | 5 years (contact customer service for details) |
| Country of Origin | China |
| Customer Service Phone (US) | 1-800-359-5520 |
| Customer Service Phone (UK) | 0800-056-2853 |
| Manual Languages | English, Spanish |
Frequently Asked Questions - WSS1 SANUS
User questions about WSS1 SANUS
0 question about this device. Answer the ones you know or ask your own.
Ask a new question about this device
Download the instructions for your Speaker Stand in PDF format for free! Find your manual WSS1 - SANUS and take your electronic device back in hand. On this page are published all the documents necessary for the use of your device. WSS1 by SANUS.
USER MANUAL WSS1 SANUS
natural_image
Three identical line drawings of a stand with cylindrical and rectangular components, no text or symbols present.WSS1 / WSS2
SPEAKER STAND INSTRUCTION MANUAL
We'll Make It Stress-Free
If you have any questions along the way, just give us a call. 1-800-359-5520. We're ready to help!
IMPORTANT SAFETY INSTRUCTIONS – SAVE THESE INSTRUCTIONS – PLEASE READ ENTIRE MANUAL PRIOR TO USE
Before getting started, let's make sure this product is perfect for you!
1 Do you own a Sonos® PLAY:1™ or PLAY:3™ speaker? The speaker stands are designed to support only PLAY:1 and PLAY:3 speakers. Weight Limit: 5.8 lb (2.6 kg)
2 Do you have the tool that is needed?

3 Ready to begin? Check your speaker owner's manual to see if there are any special requirements for mounting your speaker.
Please read through these instructions completely to be sure you're comfortable with this easy install process.
Do not use this product for any purpose not explicitly specified by manufacturer.
Manufacturer is not responsible for damage or injury caused by incorrect assembly or use.
If you do not understand these instructions or have doubts about the safety of the installation, assembly or use of this product, contact Customer Service at 1-800-359-5520 (UK: 0800-056-2853).
Dimensions
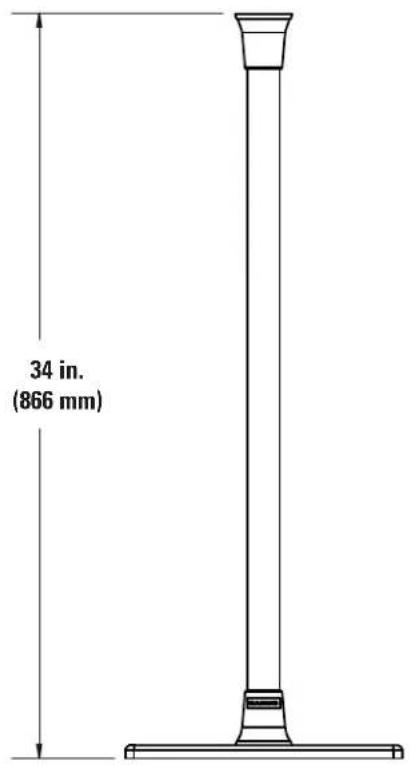
Front View

Top View
Parts and Hardware
⚠ WARNING: This product contains small items that could be a choking hazard if swallowed.
Before starting assembly, verify all parts are included and undamaged. If any parts are missing or damaged, do not return the damaged item to your dealer; contact Customer Service. Never use damaged parts!

NOTE: Not all hardware included will be used.

NOTE: Quantities shown are for one speaker stand.


Hardware for STEP 4Parts / Hardw
Rubber Isolation Pads
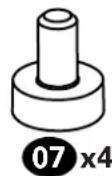
Optional Carpet Spikes

08 x4
Spike Nuts

Parts and Hardware for STEP 5
Sonos® PLAY:1™ Bracket

natural_image
Simple line drawing of a door with a handle and base plate, no text or symbols presentSonos® PLAY:3™ Horizontal Bracket

natural_image
Simple line drawing of a 3D object resembling a folded corner or bracket with a small symbol on the base (no text or labels)Sonos® PLAY:3™ Vertical Bracket
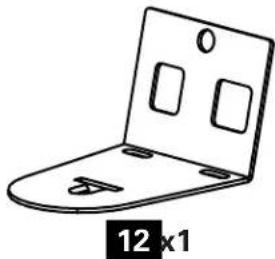
natural_image
Technical line drawing of a metal bracket with mounting holes and a 12x1 scaling label (no text or symbols beyond the label)Bracket Screw

1/4-20 × 5/8 in.
13 x1
2.7 in. Felt Pad
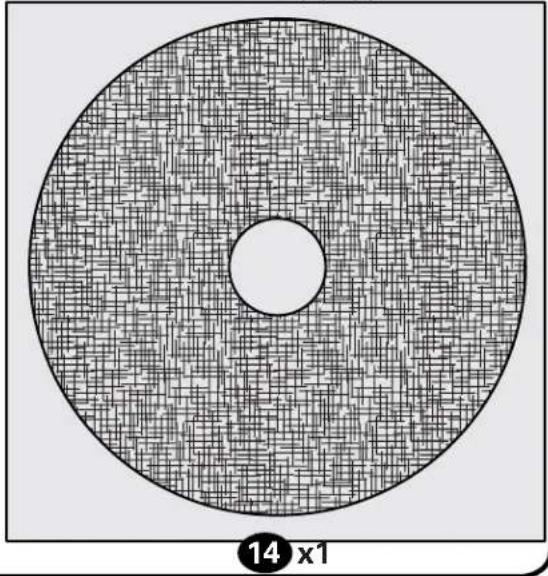
natural_image
Circular diagram with a central hole and grid pattern, labeled '14 x1' at bottom (no text or symbols within the diagram itself)Hardware for STEP 6
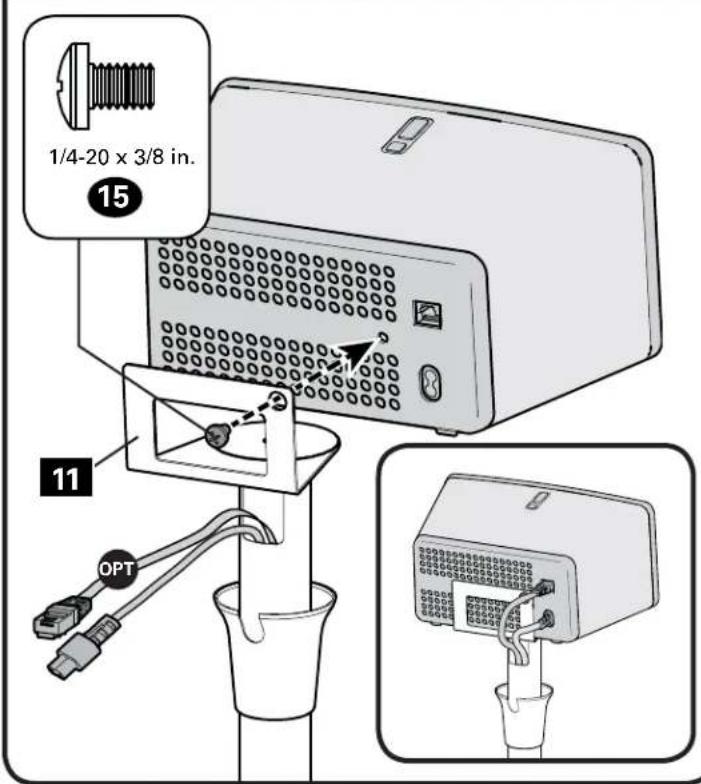
Speaker Screw
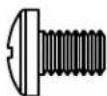
1/4-20 × 3/8 in.
15x1
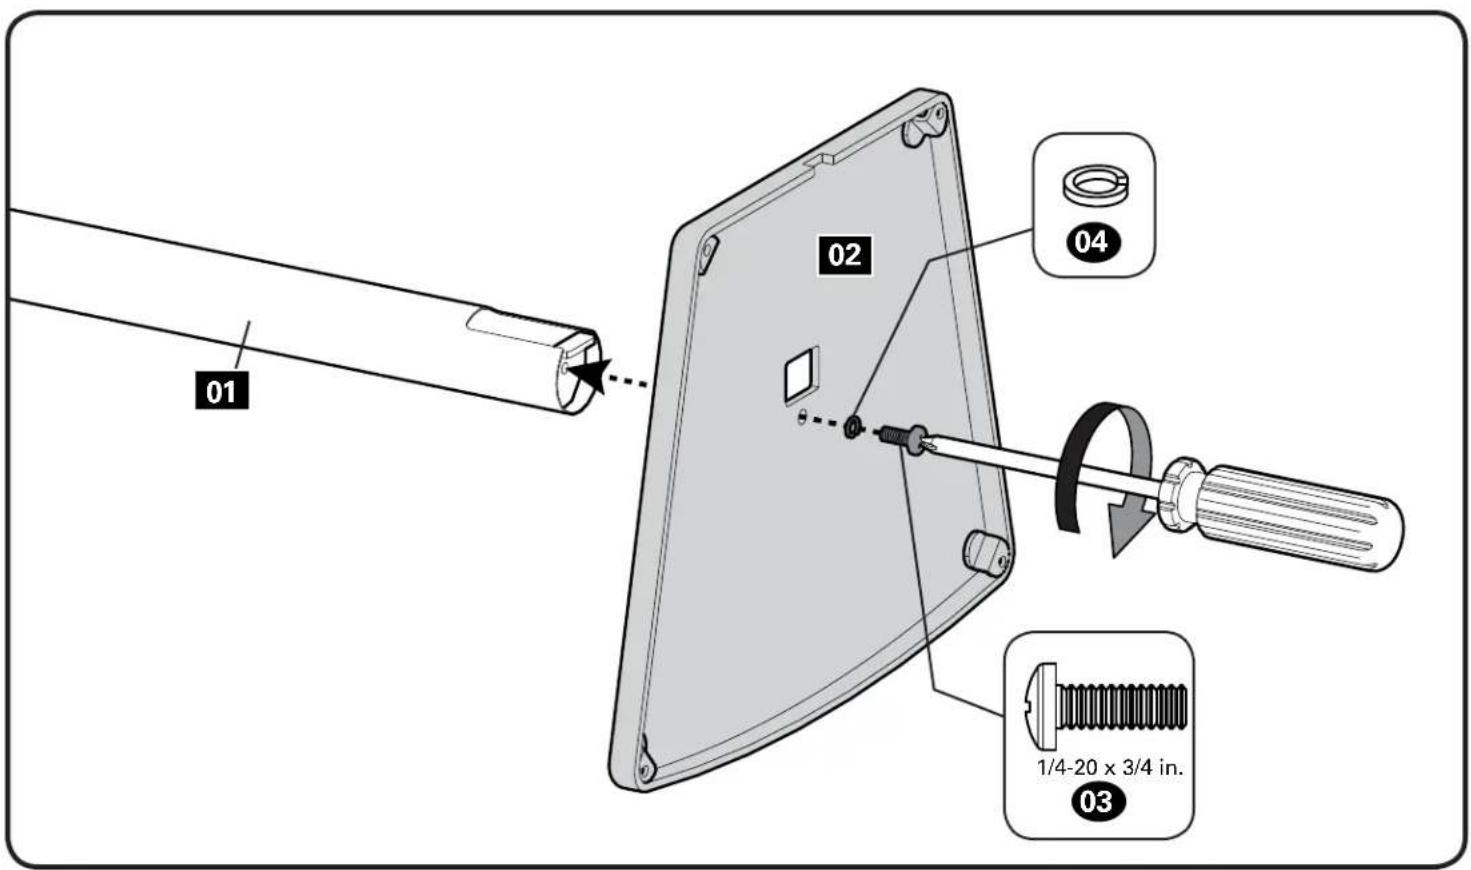
STEP 1 Install Base onto Tube
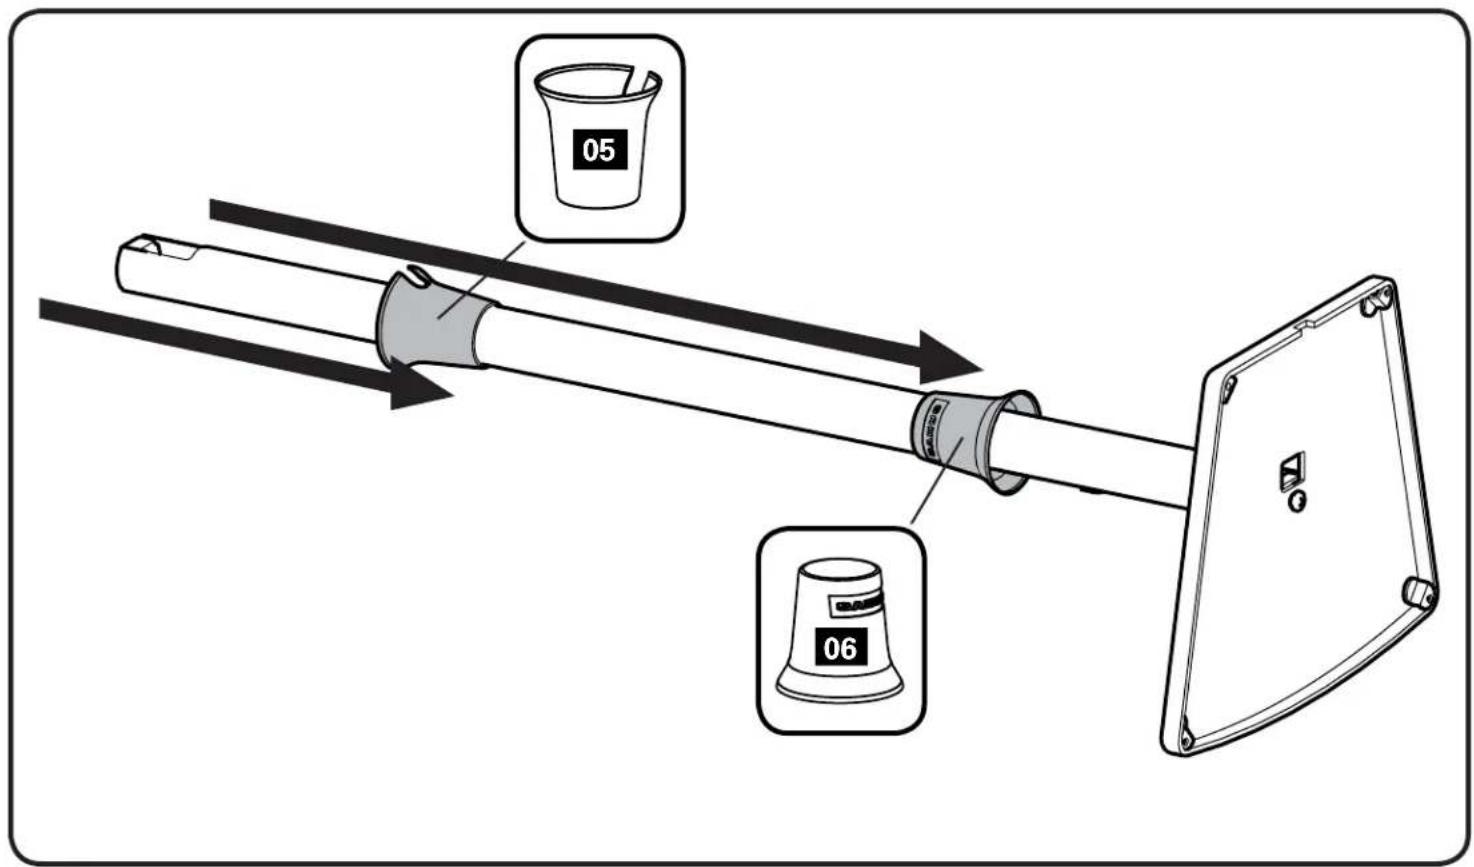
STEP 2 Slide Collars onto Tube
STEP 3 Route Speaker Power Cord

natural_image
Simple line drawing of a mechanical component inside a circle (no text or symbols)
natural_image
Simple line drawing of a connector or cable inside a circle (no text or symbols)
natural_image
Prohibition sign of a plug without a wire, enclosed in a circle (no text or symbols)
NOTE: Ethernet cord, if required (see speaker manual), should always be installed after the appropriate power cord. (See page 10)

STEP 4 Install Rubber Isolation Pads or Carpet Spikes
Rubber Isolation Pads
Twist rubber isolation pads 07 into the base 02.

Optional Carpet Spikes
▲ WARNING: The ends of the carpet spikes 08 are sharp and may scratch flooring, damage wiring, or be hazardous to small children.

Install Ethernet Cord

If ethernet cord is required:
- Set assembled stand upright and feed one end of ethernet cord into the top opening.
- Work the cord through the tube and pull the end through the bottom opening.

NOTE: Ethernet cord should always be installed after the appropriate power cord.

natural_image
Diagram of a mechanical device with a lever and cable attachment (no text or symbols)STEP 5 Attach Speaker Bracket
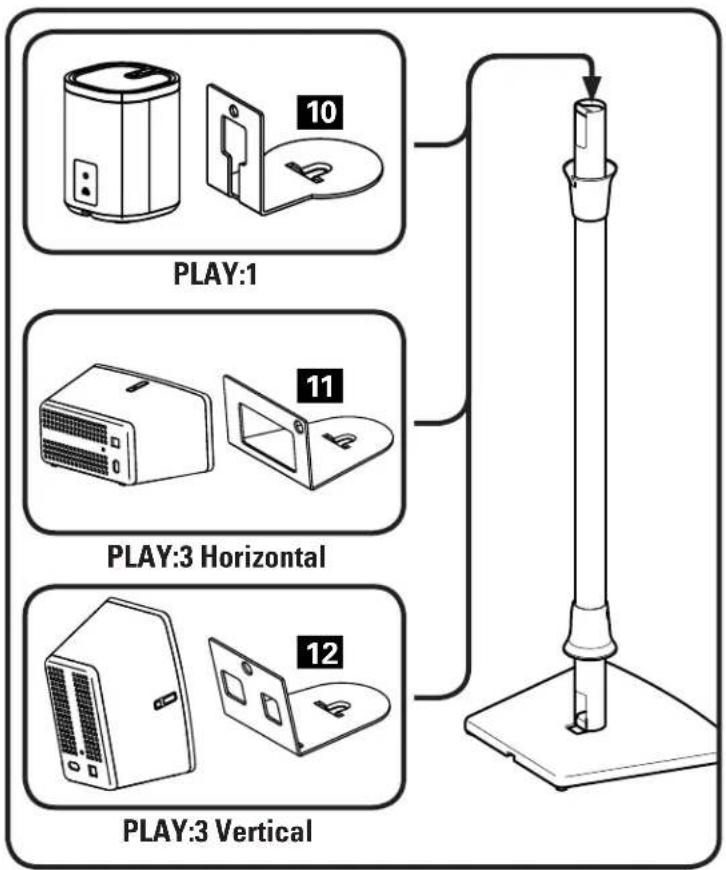
flowchart
graph TD
    A["PLAY:1"] --> B["PLAY:3 Horizontal"]
    B --> C["PLAY:3 Vertical"]


STEP 6 Attach Speaker - PLAY:1


STEP 6 Attach Speaker - PLAY:3
Horizontal Vertical

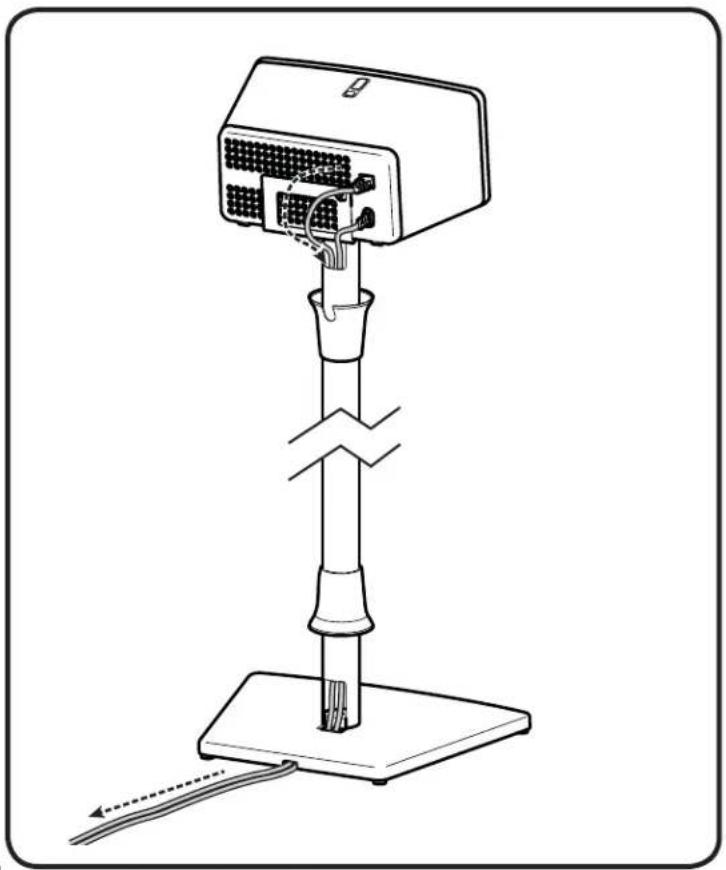
STEP 7 Pull Wires STEP 8 Position
natural_image
Line drawing of a device with a vertical support structure and cable, no text or symbols presentCollars

natural_image
Illustration of a vertical stand-mounted electronic device with control panel and indicator lights (no text or symbols)All Done!

natural_image
Line drawing of a standard office stand with a rectangular top and base (no text or symbols)ESPAÑOL
Thank you for choosing Sanus! Please take a moment to let us know how we did:

Call us: 1-800-359-5520
UK: 0800 056 2853

Email us: info@sanus.com Leave review: sanus.com
Milestone AV Technologies and its affiliated corporations and subsidiaries (collectively, "Milestone"), intend to make this manual accurate and complete. However, Milestone makes no claim that the information contained herein covers all details, conditions, or variations. Nor does it provide for every possible contingency in connection with the installation or use of this product. The information contained in this document is subject to change without notice or obligation of any kind. Milestone makes no representation of warranty, expressed or implied, regarding the information contained herein. Milestone assumes no responsibility for accuracy, completeness or sufficiency of the information contained in this document.
©2014 Milestone AV Technologies. All rights reserved. Sanus is a division of Milestone.
All other brand names or marks are used for identification purposes and are trademarks of their respective owners.
SANUS • 6436 City West Parkway • Eden Prairie, MN 55344 USA 6901-002391 00
- WSS1 / WSS2
- SPEAKER STAND INSTRUCTION MANUAL
- We'll Make It Stress-Free
- IMPORTANT SAFETY INSTRUCTIONS – SAVE THESE INSTRUCTIONS – PLEASE READ ENTIRE MANUAL PRIOR TO USE
- Dimensions
- Parts and Hardware
- STEP 1 Install Base onto Tube
- STEP 2 Slide Collars onto Tube
- STEP 3 Route Speaker Power Cord
- STEP 4 Install Rubber Isolation Pads or Carpet Spikes
- Rubber Isolation Pads
- Optional Carpet Spikes
- Install Ethernet Cord
- STEP 6 Attach Speaker - PLAY:3
- All Done!
- ESPAÑOL
Brand : SANUS
Model : WSS1
Category : Speaker Stand