
DS-X2U3-Glanz - Car Mount Fantec - Free user manual and instructions
Find the device manual for free DS-X2U3-Glanz Fantec in PDF.


| Product Type | SATA USB 3.0 Docking Station with Clone Function |
| Brand | Fantec |
| Model | DS-X2U3-Glanz |
| Dimensions (W/D/H) | 126.5 x 114.5 x 83 mm |
| Material | Plastic, high gloss surface |
| Power Supply | AC Adapter, 12V |
| External Interface | Superspeed USB 3.0 (backward compatible to USB 2.0 & 1.1) |
| Internal Interface | SATA 6 Gbps |
| Supported Drives | SATA I/II/III HDD or SSD, 2.5" or 3.5" |
| Cloning Function | OneTouch sector-by-sector cloning without PC |
| Operating Systems | Windows 10, Mac OS X 10.6+, Linux |
| LED Indicators | Power, HDD A, HDD B, and four cloning progress LEDs |
| Package Contents | Docking station, USB 3.0 cable, power adapter, user manual |
| Care and Cleaning | Wipe with a dry, soft cloth. Do not use liquids. |
| Safety | Use only the supplied power adapter. Keep away from liquids. Ensure proper ventilation. |
| Spare Parts / Repairability | Contact Fantec service at service@fantec.de for support. |
Frequently Asked Questions - DS-X2U3-Glanz Fantec
User questions about DS-X2U3-Glanz Fantec
0 question about this device. Answer the ones you know or ask your own.
Ask a new question about this device
Download the instructions for your Car Mount in PDF format for free! Find your manual DS-X2U3-Glanz - Fantec and take your electronic device back in hand. On this page are published all the documents necessary for the use of your device. DS-X2U3-Glanz by Fantec.
USER MANUAL DS-X2U3-Glanz Fantec
Docking & Clone Station
INHALT:
1) EINLEITUNG....3
2) SPEZIFIKATIONEN....3
3) LIEFERUMFANG....4
4) EIGENSCHAFTEN....4
5) HDD DOCKINGSTATION....4
6) FESTPLATTE EINSETZEN UND ENTNEHMEN....6
7) GERÄT ZUM KLONEN VERWENDEN....7
8) GERÄT ALS DOCKINGSTATION VERWENDEN....9
9) FESTPLATTEN INITIALISIEREN UND FORMATIEREN....10
10) KONTAKT & TECHNISCHER SUPPORT....15
1) EINLEITUNG
natural_image
Front view of a portable electronic device with two internal components and a numbered indicator (no text or symbols)Rückansicht
MBR oder GPT Modus
MAC OS X ab 10.6
10) KONTAKT & TECHNISCHER SUPPORT
The FANTEC DS-X2U3-Glanz USB 3.0 DOCKINGSTATION is a practical storage device with integrated cloning function:
* Up to two SATA SSDs or hard drives can be connected to your PC easily, quickly and without tools via USB3.0.
* SSDs and hard drives can be cloned 1:1.
The functional docking design allows quick access and easy replacement of your hard drives. With its built-in one-touch cloning function, it conveniently creates 100% identical copies of your drive, regardless of content (OS, data, etc.). When connected to a computer, the device turns into a USB 3.0 storage device and can provide up to 2 independent storage drives simultaneously. Whether for data access or cloning, the DS-X2U3-Glanz from FANTEC offers the perfect solution.
2) SPECIFICATIONS
| Device Support: SATA I/II/III Hard Drives or SSD | |
| Device Size: 2.5” or 3.5” | |
| Internal Interface: SATA 6 Gbps | |
| External Interface: | Superspeed USB 3.0 (Downwards compatible to USB 2.0 & 1.1) |
| Power Supply: AC Adapter, 12V | |
| Material | Plastic,surface high gloss |
| Dimensions (W/D/H): 126,5mm x 114,5mm x 83mm | |
| OS Support | Windows10 (R), Mac OS X 10.6und höher, Linux |
3) PACKAGE CONTENTS
• FANTEC DS-X2U3-Glanz
- USB 3.0 Cable
- Power Adapter
- User Manual
4) FEATURES
- Standalone storage Clone & USB 3.0 Docking station
• OneTouch Sector-by-Sector cloning
• LED lights for connection status and cloning progress - Functional Docking design for quick and easy exchange and access
- For USB 3.0 speed, the system must support USB 3.0 specifications
natural_image
Front view of a portable electronic device with two internal components and a numbered indicator (no text or symbols)Rear View
5 Power switch
6 Power adapter interface
7 USB 3.0 interface (do not connect if cloning)
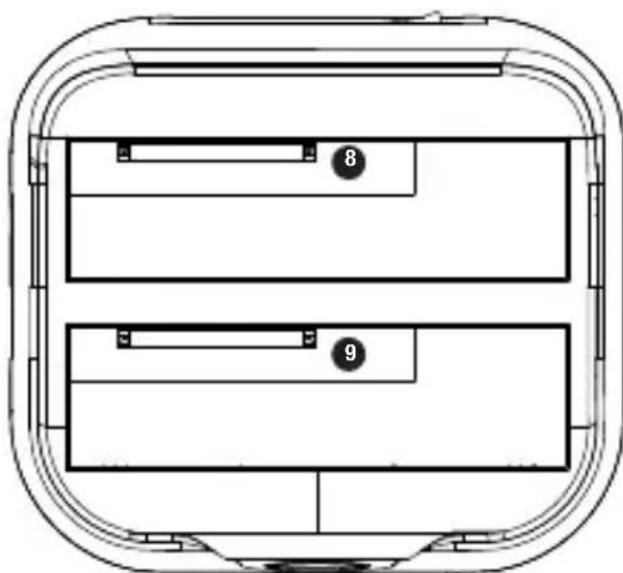
Top View
8 Slot for „HDD B“ (clone: destination)
9 Slot for „HDD A“ (clone: source)
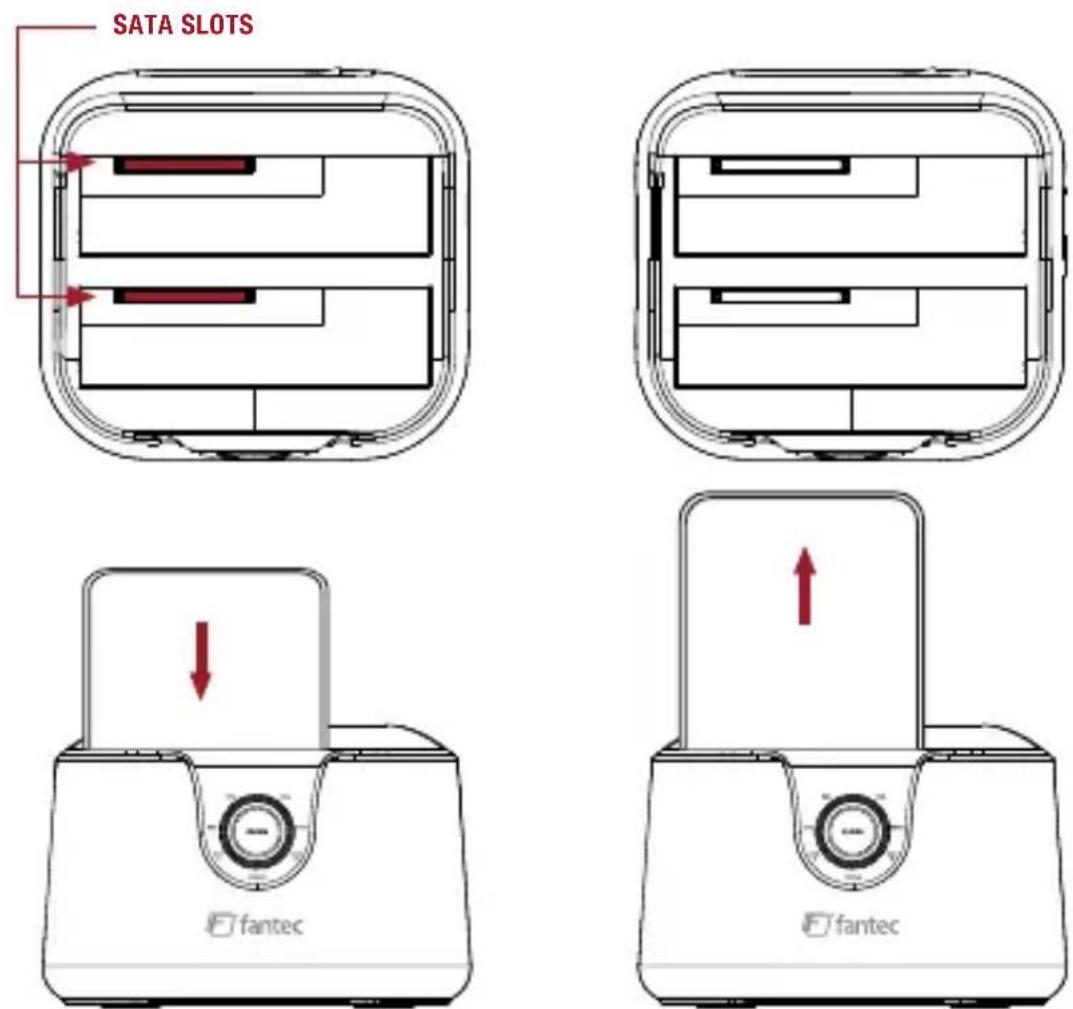
6) HARD DRIVE INSTALLATION AND REMOVAL
- Locate the position of the SATA connector in the slot.
- Align the 2.5" or 3.5" HDD/SSD drive with the connector of the slot and press the drive. connector of the slot and gently push the drive into the SATA gently into the SATA connector.
- To remove, carefully pull the drive out of the case.
7) USING THE DEVICE FOR CLONING
IMPORTANT NOTE:
When cloning, make sure that the source drive is inserted in the front HDD A slot and the destination drive is inserted in the rear HDD B slot. The destination drive must have an actual capacity greater than or equal to the byte of the source drive.
- Connect the power supply to the docking station and to a power outlet.
- Make sure the USB port is not connected.
- Insert your source drive into the front slot „HDD A“ and the target drive in the rear slot „HDD B“.
- Switch on the device with the main switch on the back [the POWER LED and the two status LEDs „HDD A“ + „HDD B“ light up].
- Press and hold the clone button for 5 seconds to complete the process to start.
- The top four colored LEDs move back and forth. After this the first 25% have been cloned, the first LED remains permanent switched on and the rest of them continue to wander back and forth. At 50% the next LED stays on permanently. If all LEDs stay on permanently, the cloning process is complete.
LED Status in Cloning mode
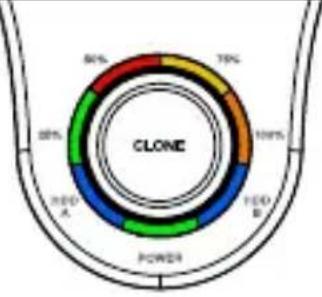 | LED Status | |||
| 25% 50% | 75% 100% | |||
| HDD A(front) | POWER | HDD B(back) | ||
| 2 drives installed,Cloning started | The four upper colored LEDs flash cyclicallyfrom left to right and back. | |||
| Cloning procedure | LEDs light up alternately back and forth. Statusis signaled by permanent glow: 25%, 50%,75% and ready.Power, HDD A and HDD B alsolight up permanently. | |||
| Cloning finished All | LEDs are permanently on | |||
About cloning
- All data on the Destination drive will be lost once the cloning procedure starts.
- The capacity of the Destination drive must be equal or bigger than the capacity of the Source drive. If the capacity is bigger, the capacity remaining after cloning, can be formulated to a new partition.
8) USING THE DEVICE AS A DOCKING STATION
- Turn on your computer.
- Connect the power adapter to wall outlet and to the docking station.
- Connect the USB 3.0 cable to the docking station and the other end to a USB 3.0/2.0 port on your computer.
- Turn on the power switch on the back (Power LED lights up together with the HDD LEDs of the respective inserted HDD).
- If the drive inserted is a brand new drive, you will have to initialize partition and format the drive for the first time. If the drive inserted is an older drive with data, you should see an acknowledgement from the computer that the drive is ready for use.
LED Status in Docking mode
| LED Status | |||
| POWER HDD A (front) HDD B (back) | |||
| HDD A (front) installed | Green | Blue when active / Flashing blue at access | |
| HDD B (back) installed | Green | Blue when active / Flashing blue at access | |
| HDD A + B installed | Green | Blue when active / Flashing blue at access | Blue when active / Flashing blue at access |
9) HDD INITIALIZING AND FORMATTING
MS Windows (32/64 bit)
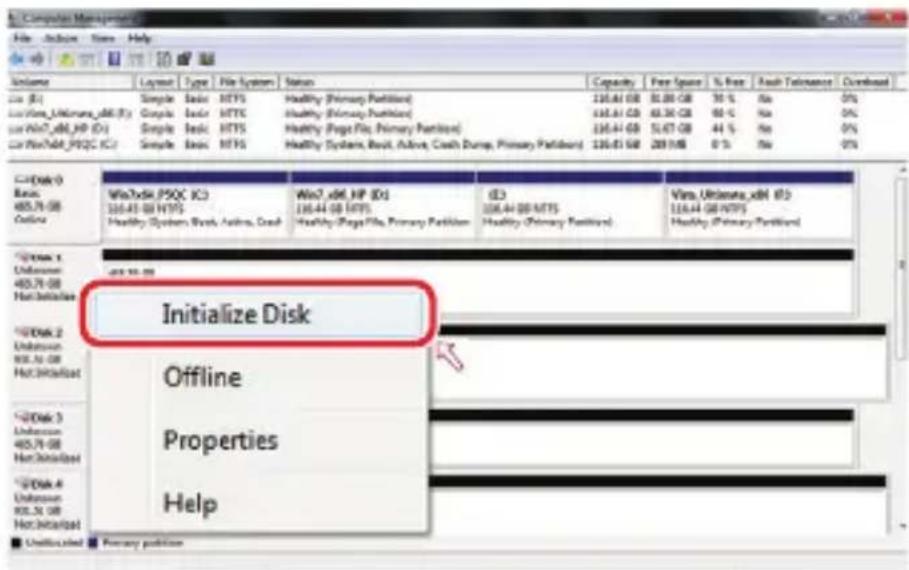
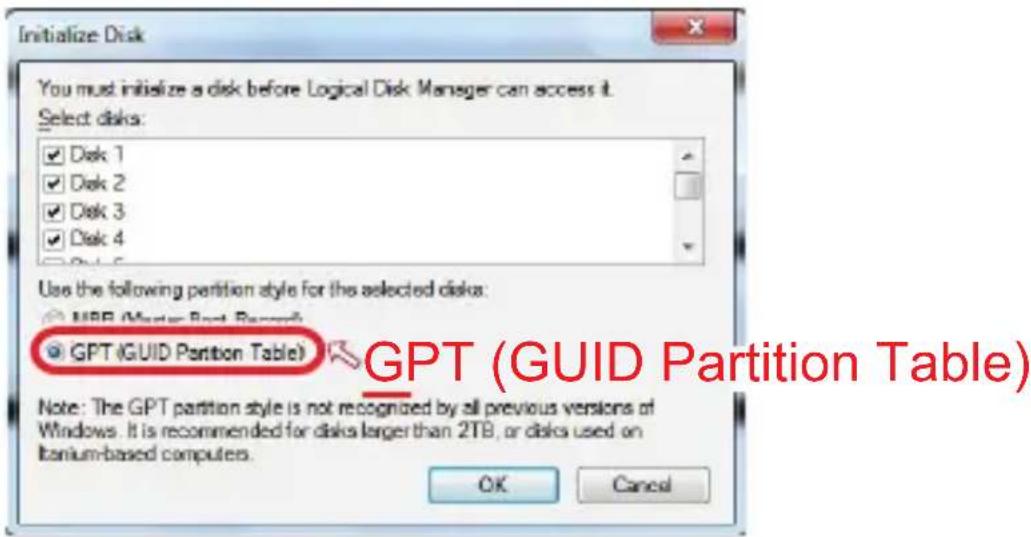
If the HDD is uninitialized, you may have to initialize it by doing steps as followed: At first click “Start” at your PC and key in “diskmgmt.msc”. After that please press “OK” key.
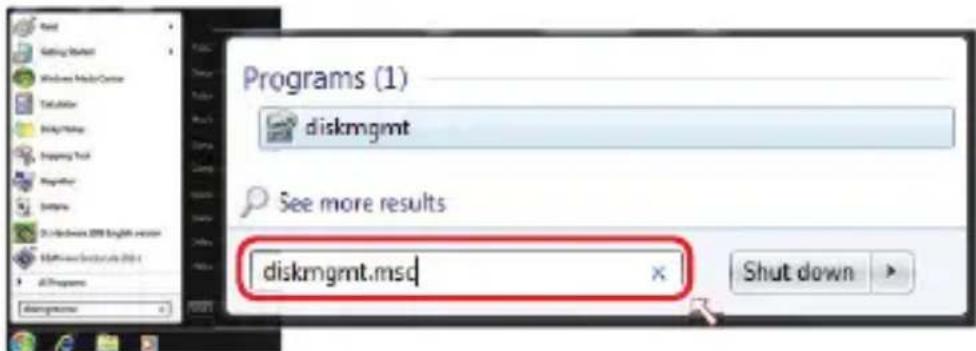
1. Start disk initialization.
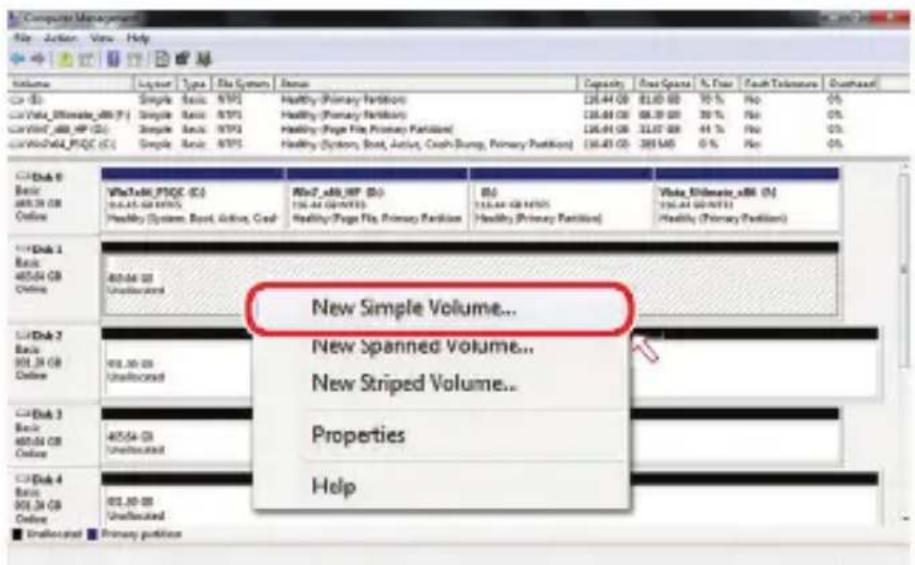
2. Create new partition and format disk.
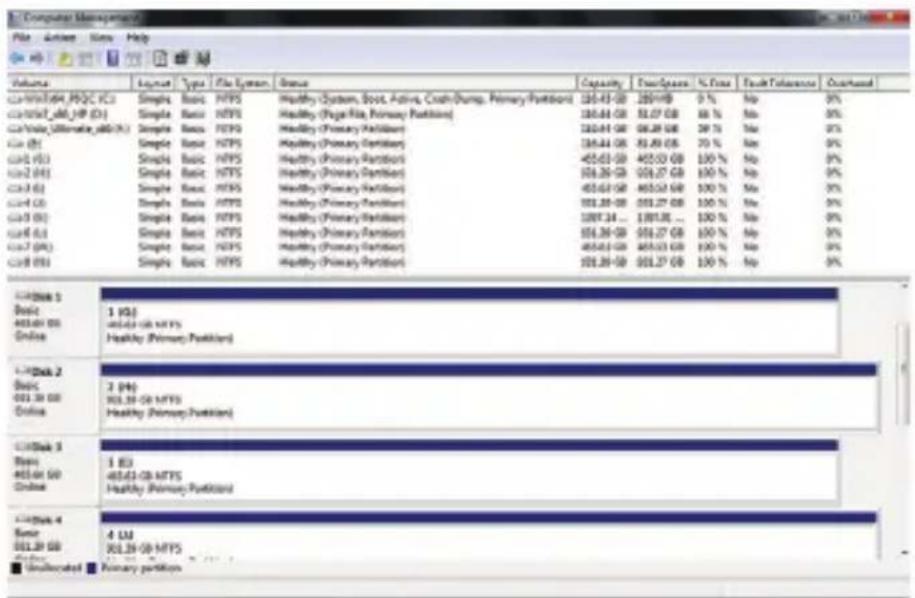
3. HDD format completed.
Start disk initialization.
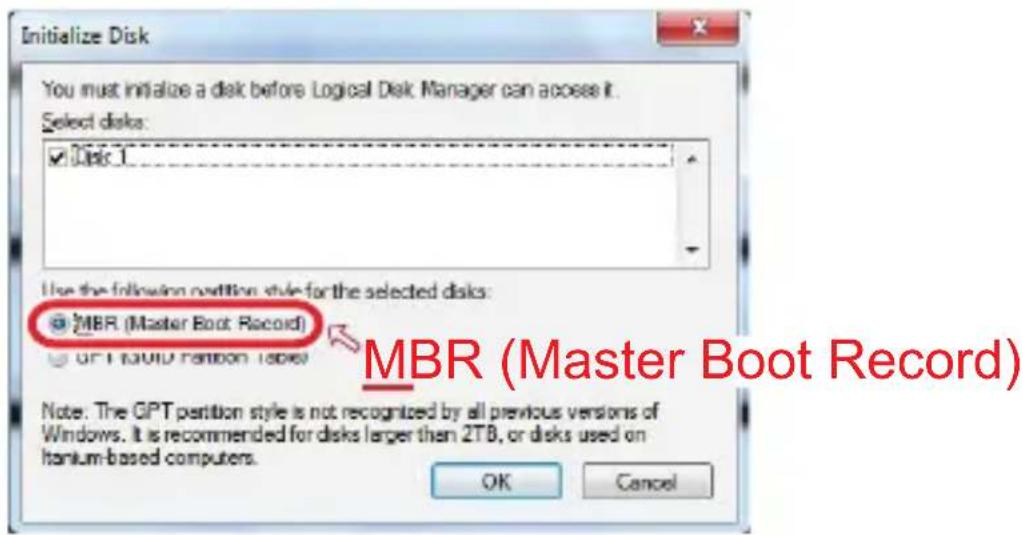
NOTE: Please enable GPT (Windows10) if the total capacity is more than 2TB and enable MBR if the total capacity is less than 2TB.
Activate MBR if total volume is less than 2TB
Activate GPT if total volume is more than 2TB
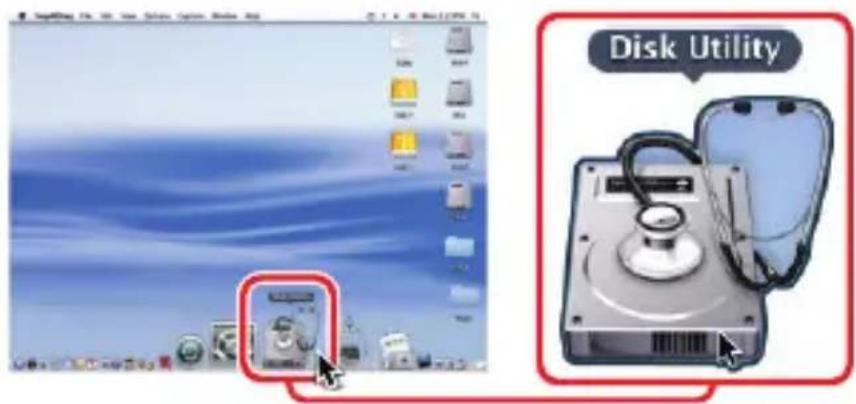
MAC OS X 10.6 or later
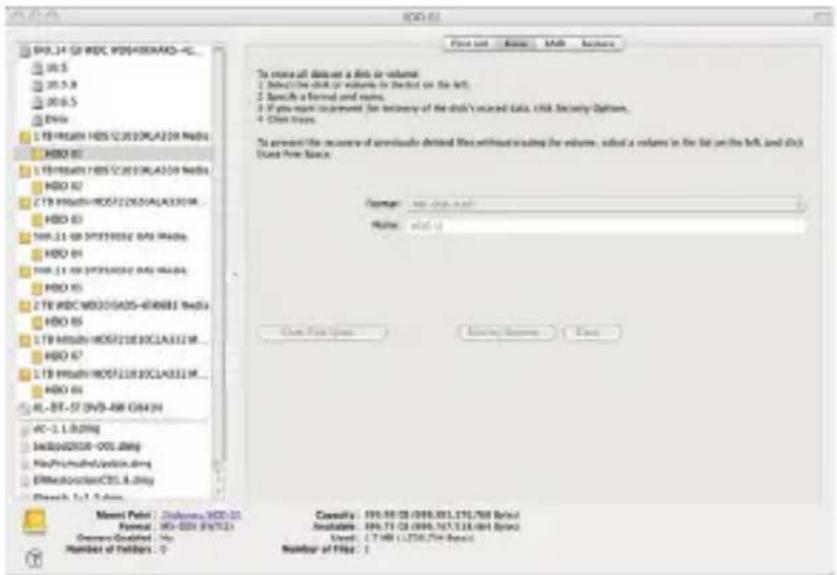
1. Click on Programs > Utility > Disk Utility icon.
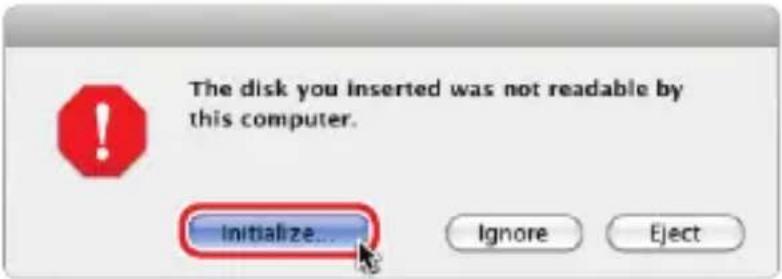
2. HDD initialize...
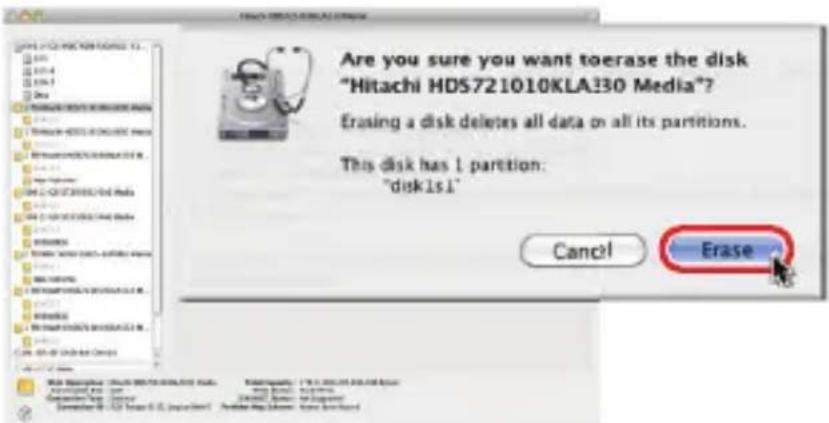
3. Click Erase
![Hertz HD57218104LA30 Media File Edit View Tools Paste MAC Tools To insert the disk on a disk or volume. Select the disk or volume in the list on the left. Specify a format and name. 4. To view it, we prevent the recovery of the disk contained data, Chat Security Options. 4. Click Desc. To prevent the measure of amortizable deleted files without creating the volumes, set a volume on the list on the left, and call to order Free Space. Format: MS-Data mask Name: HOD 01 Browse Browse Sources: Security Options: S-Brown Chips Description: Hertz HD57218104LA30 Media Connection Type: ICD Connection Type: EXAM Connection ID: ICD Topo ID (S, Logpi) [0] Total Capener: 1 TB (0.006.204.496.034 Bytes) Write Status: RecallOffs SMART Status: Not Supported Partition Map Scheme: Major Book Access](/content/2026/05/899991/images/807b0cd557c33528a3cc8c6071f50d11e1053de1ab3eb398a49676abd9b913d4.jpg)
4. Click Erase
5. HDD format in process
6. Format completed
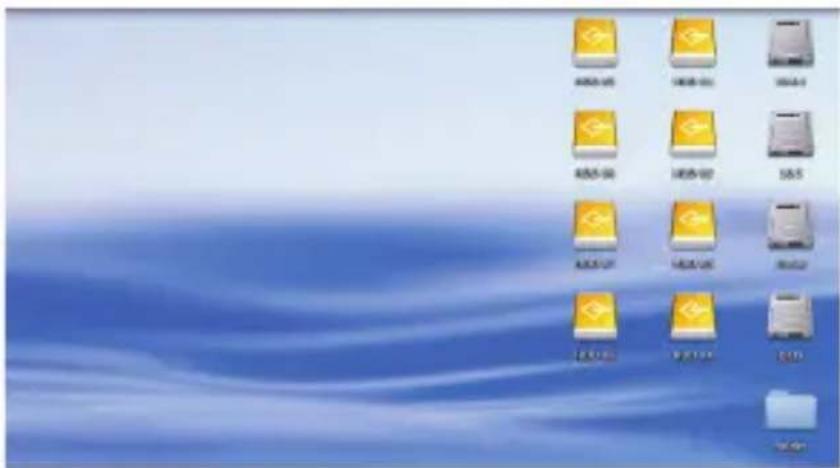
10) CONTACT & TECHNICAL SUPPORT
Dear customer,
thank you for choosing our product. Our products are developed and produced with the greatest diligence in order to provide the highest level of quality.
- Please read the manuale.
- If there is a problem, please contact our service department via E-Mail:
service@fantec.de
Address for warranty return shipments:
Declaration of conformity:
- Docking & Clone Station
- INHALT:
- 1) EINLEITUNG
- Rückansicht
- MBR oder GPT Modus
- MAC OS X ab 10.6
- 10) KONTAKT & TECHNISCHER SUPPORT
- 3) PACKAGE CONTENTS
- 4) FEATURES
- Rear View
- Top View
- 6) HARD DRIVE INSTALLATION AND REMOVAL
- 7) USING THE DEVICE FOR CLONING
- IMPORTANT NOTE:
- LED Status in Cloning mode
- About cloning
- 8) USING THE DEVICE AS A DOCKING STATION
- LED Status in Docking mode
- 9) HDD INITIALIZING AND FORMATTING
- MS Windows (32/64 bit)
- Start disk initialization.
- Create new partition and format disk.
- HDD format completed.
- Start disk initialization.
- Activate MBR if total volume is less than 2TB
- Activate GPT if total volume is more than 2TB
- MAC OS X 10.6 or later
- Click on Programs > Utility > Disk Utility icon.
- HDD initialize...
- Click Erase
- Click Erase
- HDD format in process
- Format completed
- 10) CONTACT & TECHNICAL SUPPORT
Brand : Fantec
Model : DS-X2U3-Glanz
Category : Car Mount