
EHE246-020 - Oven Exquisit - Free user manual and instructions
Find the device manual for free EHE246-020 Exquisit in PDF.


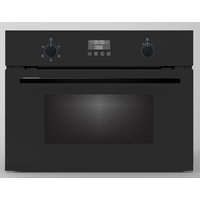
| Product Type | Built-in Oven Set with Glass Ceramic Hob |
| Model | EHE246-020 |
| Brand | Exquisit |
| Dimensions (Unpacked) | 595 x 595 x 530 mm (HxWxD) |
| Weight (Unpacked) | 30 kg |
| Voltage / Frequency | 380-415 V / 50 Hz |
| Total Connected Load | 8350 W |
| Oven Connected Load | 2350 W |
| Oven Light Power | 25 W |
| Oven Temperature Range | 50 °C to 250 °C |
| Heating Modes | Top and Bottom Heat, Bottom Heat Only, Top Heat Only, Oven Light |
| Hob Cooking Zones | 4 Radiant Zones with Energy Regulators |
| Hob Power Levels | 6 Levels (L1 to L6) |
| Door Type | Hinged, Removable for Cleaning |
| Oven Light Lamp | G9, 25W, T300 °C |
| Cleaning | Manual cleaning; removable door and protective glass |
| Safety Features | Residual Heat Indicator (hob), Overheat Protection, Child Safety Warnings |
| Included Accessories | Grill Rack, Baking Tray, Glass Ceramic Hob, Installation Kit |
| Warranty | 24 months (private use); 12 months (commercial) |
| EAN (Oven) | 4016572415490 |
| EAN (Hob) | 4016572402995 |
Frequently Asked Questions - EHE246-020 Exquisit
User questions about EHE246-020 Exquisit
0 question about this device. Answer the ones you know or ask your own.
Ask a new question about this device
Download the instructions for your Oven in PDF format for free! Find your manual EHE246-020 - Exquisit and take your electronic device back in hand. On this page are published all the documents necessary for the use of your device. EHE246-020 by Exquisit.
USER MANUAL EHE246-020 Exquisit
Built-in oven set with glass ceramic hob
EHE246-020 black
Gebrauchsanweisung
Instruction Manual
Getting to know your appliance Scope of supply
1x oven
1x grill rack
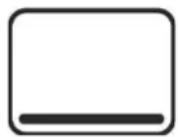
1x baking tray
1x glass ceramic hob
1x instruction manual
1x installation instructions
Installation accessories:
4x retaining clips
4x seals
4x screws ST4.2x26mm (oven)
4x screws ST4.2x32mm (hob)
2x bridges (not to be used for the recommended connection)

| QUANTITY | DESCRIPTION | FIGURE | |
| 1x | Grill rack | 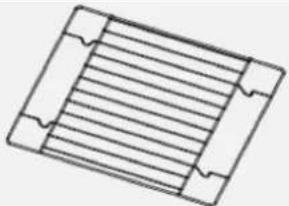 | |
| 1x | Baking tray |  | |
POSITION DESCRIPTION
| 1 | Oven temperature regulator |
| 2 | Function selector |
| 3 | Hob temp. |
| 4 | Hob temp. |
| 5 | Hob temp. |
| 6 | Hob temp. |
| 7 | Hob temperature signal light |
| 8 | Oven temperature signal light |
| 9 | Oven door handle |
| 10 | Hotplate frame |
Control panel

Figure 1 Control panel
1) Energy regulator hob (front left)
2) Energy regulator hob (rear left)
3) Oven function selector
4) Oven temperature regulator
5) Energy regulator hob (rear right)
6) Energy regulator hob (front right)
Inhaltsverzeichnis
13 For your safety....23
13.1 Intended use 23
13.2 Safety and responsibility 24
13.3 Safety and warnings.... 24
13.4 Unpacking the appliances 25
14 Before using for the first time....25
15 Operation 26
15.1 Operating the oven.... 26
15.2 Operating the glass ceramic hob.... 27
16 Cleaning and maintenance of the oven....28
16.1 Hanging and unhanging the appliance door.... 29
16.2 Cleaning the protective glass 29
17 Cleaning and maintenance of the glass ceramic hob 29
18 Tips and practical advice 30
18.1 Saving energy 30
18.2 Selecting the right type of heating 31
19 Error messages and faults 32
20 Replace illuminant 33
21 After Sales Service 34
22 Warranty terms 35
23 Technical data.... 36
24 Disposal 37
natural_image
Hand holding a tool interacting with circular objects (no text or symbols visible)Glaskeramikkochfeld reinigen

WARNUNG

WARNUNG
VERLETZUNGSGEFAHR!
For safe and proper use of the appliance, read the instruction manual and other documentation accompanying the product and keep in a safe place for future reference. All safety instructions in this instruction manual are marked with a warning symbol. They draw your attention to potential hazards. Be sure to read and observe this information.
Symbols used

DANGER
Indicates a hazardous situation which, if not avoided, will lead to very serious injuries or even death!

WARNING
Indicates a hazardous situation which, if not avoided, can lead to very serious injuries or even death!

CAUTION
Indicates a hazardous situation which, if not avoided, can lead to minor or moderate injuries!
ATTENTION
Indicates a situation which, if not avoided, will lead to material damage.

ELECTRIC SHOCK HAZARD!

RISK OF SCALDING!

FIRE HAZARD!

➢ Information and instructions to be observed.
- Indicates a list
→ Indicates inspection steps in sequence - Indicates work steps in sequence
√ Describes the response of the appliance to the work step
13.1 Intended use
The appliance is intended for private/household use. It is suitable for the cooking and baking of food. Every other form of use is not considered an intended use. If the appliance is used commercially, for other purposes or in any way other than as described in this instruction manual, please note that the manufacturer assumes no liability for any damage resulting from such use.
The intended use also implies compliance with the operating and maintenance conditions prescribed by the manufacturer. For safety reasons, modifications or alterations to the appliance are not permitted.
13.2 Safety and responsibility

DANGER

ELECTRIC SHOCK!
- Never touch an electrical appliance if your hands or feet are wet or if you are barefoot.
- A damaged power supply cable must be replaced by the supplier without delay.
- If cable or plug are damaged, do not use the appliance any longer.
- If the hob can no longer be switched off due to defect, switch off the household fuse immediately.
- Contact After Sales Service.
Safety of vulnerable persons: Children and persons with limited aptitude!

DANGER
- This appliance can be used by children aged 8 years and above, as well as by persons with reduced physical, sensomotoric or mental abilities or lack of experience and/or knowledge:
- if they are supervised or instructed on the safe use of the appliance.
- if they understand the associated hazards.
- Children must not be allowed to play with the appliance. Keep children away from the appliance!
- Children must not be allowed to clean the appliance.
- Risk of injury from individual cleaning operations.
13.3 Safety and warnings

WARNING

FIRE HAZARD!
- Never store anything on the hob surface.
- Never store highly flammable substances above or below the appliance.
- If the appliance is switched on unintentionally, the parts may deform or ignite.
- Do not place aluminium foil or plastic on the hob.
- Keep everything that could melt away from the hob, e.g. plastics, foils, in particular sugar and very sugary foods.
- Keep electrical appliances away from the hob.
• Take particular care when roasting: - Oil and fat can catch fire.
Procedure in case of fire
Never try to extinguish burning oil or fat with water.

WARNING

RISK OF BURNS!
- Oven interior; heating element, baking tray and grill rack get very hot. Keep children away!
- Use oven cloths or suitable gloves to insert or remove the grill rack or baking tray or to turn the food.
- Before removing the pots, set the temperature regulator/energy controller to "0".
13.4 Unpacking the appliances

WARNING
RISK OF INJURY!
Have a damaged hob or oven door repaired or replaced immediately by After Sales Service.

WARNING
RISK OF INJURY!
Have defective appliances repaired only by an authorised and qualified electrician.
Transport instructions
Inspect the appliance for transport damage.
The packaging materials must be undamaged.
- On no account should a damaged appliance be installed or put into operation.
- In case of damage, contact After Sales Service or the supplier.
Removing transport protection
Unpacking the appliances
- Carefully unpack the oven and glass ceramic hob.
- Check the oven and glass ceramic hob for damage.
The appliance is secured for transport.
- Remove all adhesive tapes, polystyrene inserts and plastic film.
- Carefully remove residues of adhesive with white spirits.
14 Before using for the first time
Clean the oven thoroughly before the first use.
- For good visibility in the oven; turn the function selector to lighting; temperature remains at 0^ C.
- Remove the accessories, wash with lukewarm water and dry.
-
Heat the oven at maximum temperature for 45 minutes in order to
-
burn out possible production residues.
- burn in the protective film inside the oven.
- Let the oven cool down; wipe the oven interior with a damp cloth to remove all residues.
ATTENTION
RISK OF DAMAGE!
Do not any harsh or abrasive cleaning agents use; the surface will be damaged.
15 Operation
Operating modes and baking/roasting tables
Oven temperature regulator
The oven energy controller allows temperature settings in the range from 50^ C to 250^ C.
Independent oven lighting
By turning the function selector to this position, the oven interior is illuminated.
Use this function, for example, when cleaning the oven interior.
Heating from above and below
If the function selector is turned to this position, heating takes place in the conventional way.
Heating from below
In this position, heating takes place only with heating from below. The heat comes from the lower heating element.
This type of heating is suitable to bake food more intensely from the bottom. For example, for baking moist baked goods with fruit or for subsequent baking.
Heating from above
In this position, heating takes place only with heating from above. The heat comes from the upper heating element.
This type of heating is suitable for baking a casserole (gratinating) or fruit cake, for example.
15.1 Operating the oven
Switching on
Set the temperature control to the desired oven temperature between 50 - 250 °C.



ATTENTION
RISK OF DAMAGE!
Do not use force to turn the oven energy controller beyond the end position.
- The operation indicator lights up until the selected temperature is reached in the oven.
• Control lamp lights up yellow. - During baking, the operation indicator switches on and off at times (thermostat function of the oven).
- Use residual heat. Switch off the oven about 5 minutes earlier and bake the food for 5 minutes.
Switch off
Turn back the Oven function selector and temperature regulator to "0".
15.2 Operating the glass ceramic hob
The hob has cooking zones of different diameters and powers. The area that is heated is clearly marked on the hob. For the best heating performance, place the cookware exactly on the indicated cooking zone.

WARNING

ELECTRIC SHOCK!
The glass ceramic hob cannot be switched off.
- Switch off the household fuse immediately.
- Do not carry out repairs on the appliance yourself.
- Contact After Sales Service.
Suitable cookware
- The hob surface and pot base must be clean and dry.
- Use pots and pans with a flawless, smooth base.
• For heat-resistant cookware, follow the manufacturer's instructions - Do not use pots made of plastic or whose inside is coated with aluminium.
ATTENTION
APPLIANCE DAMAGE!
The glass ceramic hob can be damaged by pots with rough bottoms. Use only undamaged cookware.
Power levels (L levels) of the energy controllers
| L LEVEL | ENERGY CONTROLLER |
| 1 | Heating |
| 2 | Cooking vegetables |
| 3 | Making soup |
| 4 | Slow browning |
| 5 | Roasting meat/fish |
| 6 | Fast cooking/roasting |
Switching on the hob
Turn the energy controller to the desired energy level.
The heating zones are regulated via the energy controls on the control panel. Regulation possible from keeping warm (about 7 % of heating capacity) to maximum temperature. Next to the energy controller or cycle switch there is a hob diagram showing the position of the relevant hob. A light indicator shows as soon as the hob exceeds a temperature of 50^ C (residual heat indicator). The display only goes out as soon as the temperature falls below this value again.
Switching off the hob
- Turn the energy controller to "0".
Clean the hob after each use.
- Wipe off the glas ceramic hob with a damp cloth and a little detergent.
- Wipe the hob dry with a clean cloth.
- Remove any splashes of food or grease immediately.
- For further cleaning instructions, see chapter 'Cleaning and maintenance'.

WARNING

BURNS DUE TO THE HOT SURFACES OF THE GLASS
CERAMIC HOB!
The cooking zones and the surrounding area get very hot.
- Never touch hot surfaces.
- When you have finished cooking, switch off the appliance.
- Do not leave the heating elements switched on when the pots or pans are empty or not on the hob.
- Keep vulnerable persons, children under 8 years and pets away from the hob.
16 Cleaning and maintenance of the oven
Before cleaning and maintenance work, always read the ▶Safety instructions read and observe the safety instructions.

DANGER
RISK OF ELECTRIC SHOCK!
- Switch off the appliance and allow to cool down before all cleaning or service work.
- Do not use a steam cleaner. Moisture could get into electrical components.
- The appliance must be dry before it is used again.

CAUTION
DANGER OF ENTRAPMENT!
- During cleaning and maintenance work, work carefully to protect hands and fingers from being pinched. Keep hands and fingers away from moving parts of the door and snap hinges.
ATTENTION
APPLIANCE DAMAGE!
Aggressively abrasive cleaning agents can scratch surfaces and damage glass surfaces.
- Do not use corrosive cleaning agents or abrasive cleaning sponges.

WARNING
Risk of injury!
Incorrect or improperly performed repairs will result in the loss of the warranty claim.
- Repairs should only be carried out by qualified specialists.
Clean the outside of the appliance
- For the following cleaning operations, switch off the appliance and let it cool down.
- Wipe the outside of the appliance with a damp cloth and wipe dry with a dry cloth. In case of heavy soiling, use commercially available cleaning agents. Follow the manufacturer's instructions.
- Wipe the oven door with a soft cloth and warm soapy water.
Clean the interior
Clean the oven after each use. Grease accumulation and food residues could cause a fire (fire procedure).

Remove stubborn soiling using special oven cleaners.
16.1 Hanging and unhanging the appliance door
CAUTION RISK OF INJURY!
Appliance door is heavy.
- Carefully unhinge and rehinge the appliance door.
- Wear sturdy shoes.
The appliance door can be unhinged to facilitate cleaning of the interior.
- Open the appliance door, push the two hinged brackets upwards.
- Press the door slightly, lift it up and pull it out to the front.
- Place the appliance door on a cloth with the outside facing downwards to avoid scratches.
- Insert the appliance door in reverse order.
- When inserting, make sure that the recess of the hinge fits correctly with the hook of the hinge bracket.
- Press both hinged brackets down again so that the hinges are not damaged when the appliance door is closed.
16.2 Cleaning the protective glass
If the glass pane is damaged, have it replaced immediately ( topAfter Sales Service).
The protective glass embedded in the appliance door can be removed for cleaning.
- Screw on both plastic parts at the upper lateral corners on the inside of the appliance door.
- Carefully remove the protective glass, clean and dry it.
- Insert the protective glass in the reverse order.
- Secure the protective glass again with the two plastic parts.
17 Cleaning and maintenance of the glass ceramic hob
Before cleaning and maintenance work, always read and observe the ▶ Safety instructions.

DANGER
RISK OF ELECTRIC SHOCK!
- Switch off the appliance and allow to cool down before all cleaning or service work.
- Do not use a steam cleaner. Moisture could get into electrical components.
- The appliance must be dry before it is used again.

WARNING
RISK OF INJURY!
Incorrect or improperly performed repairs will result in the loss of the warranty claim.
• Repairs should only be carried out by qualified specialists.
ATTENTION
APPLIANCE DAMAGE!
Aggressively abrasive cleaning agents can scratch surfaces and damage glass surfaces. Do not use corrosive cleaning agents or abrasive cleaning sponges.

natural_image
Hand using a tool to cut circular patterns on a surface (no text or symbols visible)Cleaning the glass ceramic hob

WARNING
RISK OF BURNS FROM HOT SURFACES
- Do not touch hot surfaces.
- Wipe up spilled food, food residues and splashed fat immediately.
For the following cleaning operations, switch off the appliance and let it cool down.
- Wipe the cooking zone of the appliance with a damp cloth and wipe dry with a dry cloth. In case of heavy soiling, use commercially available cleaning agents for glass ceramic hob. Follow the manufacturer's instructions.
- Remove sugar residues with hot water.

CAUTION
RISK OF CUTTING INJURIES!
- Do not use pointed or sharp objects (e.g. razor blades) for cleaning.
- Remove aluminium foil and melted plastic/plastic material with a razor blade scraper.
18 Tips and practical advice
18.1 Saving energy
- Baking tins with black surface conduct the heat better and shorten the baking time.
- Use the residual heat and leave the dish to reheat for another 5 minutes after switching it off.
- The diameter of the cooking pot should be the same size or only slightly larger than the cooking zone.
- For the best heating performance, place the cookware exactly on the designated cooking zone.
- When buying pots, note that frequently the diameter at the top of the pot is indicated. However, this is generally larger than the bottom of the pot.
- Pressure cookers are particularly time- and energy-saving. The short preparation time preserves vitamins.
- Always make sure there is a sufficient amount of liquid in the pressure cooker, as the hob and the cooker can be damaged by overheating.
- If possible, always close pots with the matching lid. Select the size of the cooking pot according to the amount of food.
- Use the residual heat and leave the dish to reheat for another 5 minutes after switching it off.
18.2 Selecting the right type of heating
This appliance may differ from the product used previously, so below are some tips and advice on preparation times and temperatures.
- Baking tins with light or shiny surfaces are not recommended for baking with heating from above& below as the bottom of the food may not bake well.
- When preparing a dish for the first time, set the temperature slightly lower.
- Use heat-resistant crockery, follow the instructions of the crockery manufacturer.
- Slide the baking tray or grill rack into the respective rack level according to the recommendations in the tables.
The data in the tables are to be understood as guidelines and can be changed depending on the recipe, quantity and desired quality.
| ➢ Enter changed times for later use in the table. |
Heating from above/below
| Type of baked food | Slide-in level | Temperature [°C] | Preparation time [min.] |
| Bundt cake | 2 | 170-180 | 55-80 |
| Sand cake | 2 | 160-180 | 65-80 |
| Flan case | 2-3 | 170-180 | 20-30 |
| Sponge cake | 2 | 170-180 | 30-40 |
| Bundt cake (yeast dough) | 2 | 160-180 | 40-60 |
| Bread (e.g. multigrain bread) | 2 | 210-220 | 50-60 |
| Fruit cake: | |||
| - Shortcrust pastry | 3 | 170-180 | 35-60 |
| - Yeast dough | 30-50 | ||
| Crumble cake | 3 | 160-170 | 30-40 |
| Sponge roll | 2 | 180-200 | 10-15 |
| Pizza (on thin dough) | 3 | 220-240 | 10-15 |
| Pizza (on thick dough) | 2 | 190-210 | 30-50 |
| Cut-out cookies | 3 | 160-170 | 10-30 |
| Puff pastry | 3 | 180-190 | 18-25 |
| Meringue | 3 | 90-110 | 35-45 |
Frying meat
- Only cook meat weighing more than 1 kg in the oven. For smaller portions, use hob for frying.
- Use fireproof dishes with heat-resistant handles for frying.
- When roasting on a grill rack, it is advisable to slide a tray with a little water into the bottom shelf (fat pan).
- After half the set time, turn the roast at least once and baste it occasionally with the resulting sauce or with hot, salted water. Do not use cold water.
| The information in the table always refers to 1 kg. About 15-25 minutes more for each additional kg. |
| Type of meat | Slide-in level | Temperature [°C] | Preparation time [min] |
| Heating from above/below | Heating from above/below | per cm | |
| Beef | |||
| Roast beef:slightly bloody "saignant" inside | 3 | 250 | 12-15 |
| Preheated oven:half cooked through/medium | 3 | 250 | 15-25 |
| Preheated oven:well-doneWell done | 3 | 210-230 | 25-30 |
| Roast beef | 2 | 200-220 | 120-140 |
| Pork | |||
| Joint | 2 | 200-210 | 90-140 |
| Ham | 2 | 200-210 | 60-90 |
| Pork fillet | 3 | 210-230 | 25-30 |
| Veal | 2 | 200-210 | 90-120 |
| Lamb | 2 | 200-220 | 100-120 |
| Game | 2 | 200-220 | 100-120 |
| Poultry | |||
| Chicken | 2 | 210-220 | 40-55 |
| Goose | - | 190-200 | 150-180 |
| Fish | 2 | 210-220 | 40-55 |
19 Error messages and faults
| error message | Possible cause | Troubleshooting |
| Temperature sensor does not work. | Contact After Sales Service. | |
| The oven does not heat. | Unit incorrectly connected. | Contact After Sales Service. |
| Differing supply voltage | Check supply voltage, contact After Sales Service if necessary. | |
| Fuse blown. | Contact a qualified electrician. | |
| Oven light does not come on. | Lamp is defective. | Replace illuminant |
| Fan runs constantly. | It is normal up to 1 hour after operation. | For longer durations, contact After Sales Service. |

DANGER

RISK OF ELECTRIC SHOCK!
- Before replacing the bulb, switch off the fuse at the fuse box and allow the unit to cool down.
If the oven light no longer works, the oven light itself can be replaced. For suitable lamps or (chargeable) repair service, contact After Sales Service.
Lamp data for oven light (suitable for temperatures up to 300 °C):
| Voltage | 230 V | Power | 25W |
| Heat resistance | T300 | Fitting | G9 (plug-in lamp) |
Proceed as follows:
- Switch off the appliance and allow to cool down.
- Disconnect the switch on the safety box.
- Open the appliance door, unscrew the protective cover of the oven light and remove the defective bulb.
- Insert the new lamp carefully without touching it with your fingers. Use an eyeglass cloth to h
- Screw the protective cover back on.
- Switch on the fuse and check whether the lighting works.
→ If the lighting does not work, please contact After Sales Service, see chapter After Sales Service.


WARNING
RISK OF INJURY!
Incorrect or improperly performed repairs will result in the loss of the warranty claim. - Repairs should only be carried out by qualified specialists.
If a malfunction cannot be remedied with the help of the instructions given (▶Troubleshooting), contact the customer service:
EGS GmbH
Dieselstrasse 1
D-33397 Rietberg
Service telephone for Germany: +49 2944 9716 791
Service telephone for Austria: 0820 200 170 (chargeable, depending on the network provider)

A visit by an After Sales Service technician is not free of charge even during the warranty period in the event of incorrect operation or one of the faults described in the Instruction Manual above
We require the following information for processing:
- Address and telephone number
• Description of the fault
• Details according to type plate (version, batch, model, EAN, serial number)
Note: The type plate is located on the inside of the oven door.
22 Warranty terms
As the buyer of an Exquisit appliance, you are entitled to the statutory warranties arising from the purchase contract with your dealer. In addition, we grant you a warranty on the following terms:
Warranty period
The warranty period is 24 months from the date of purchase (proof of purchase must be presented). During the first 6 months, After Sales Service will fix defects in the appliance free of charge. on condition that the appliance is accessible for repairs without any great effort. During the following 18 months, the buyer is obliged to prove that the defect already existed at the time of delivery.
In the case of commercial use (e.g. in hotels, canteens) or joint use by several households, the warranty period is 12 months from the date of purchase (proof of purchase must be presented). During the first 6 months, After Sales Service will fix defects in the appliance free of charge. on condition that the appliance is accessible for repairs without any great effort. During the following 6 months, the buyer is obliged to prove that the defect already existed at the time of delivery.
The claim under warranty does not prolong the warranty period for either the appliance or for newly installed parts.
Scope of the defect remedy
Within the periods indicated, we will remedy all defects in the appliance that are demonstrably attributable to poor workmanship or material flaws. Replaced parts become our property.
The warranty does not cover:
Normal wear and tear, intentional or negligent damage, damage caused by non-compliance with the operating instructions, improper set-up or installation or by connection to incorrect mains voltage, damage due to chemical or electrothermal effects or due to other abnormal environmental conditions, glass, paint or enamel damage and possible colour differences as well as defective bulbs.
Defects in the appliance resulting from transport damage are also not covered. We will also not provide any services if - without our special, written approval - work has been carried out on the Exquisit appliance by unauthorised persons or if parts of foreign origin have been used. This limitation shall not apply to faultless work carried out by a qualified person using our original parts to adapt the appliance to the technical safety regulations of another EU member state.
Scope
Our warranty applies to appliances purchased and in operation in the Federal Republic of Germany or Austria.
In the case of complaints about defective appliances, the sender's and recipient's addresses must be in the Federal Republic of Germany or Austria.
For appliances purchased and operated in other European countries, the warranty conditions of the seller apply.
For repairs outside the warranty period:
- If an appliance is repaired, the repair invoices are payable immediately without deduction.
- If an appliance is inspected or a started repair is not completed, flat-rate travelling expenses and labour costs will be invoiced.
- Advice from our After Sales Service centre is free of charge (see chapter "After Sales Service").
| BRAND | EXQUISIT | |
| Model | EHE246-020 | |
| Product group | Built-in cooker set | |
| Voltage / frequency | V/Hz | 380-415 / 50 |
| Total connected load | W | 8350 |
| Stove connected load | W | 2350 |
| Baking light power | W | 25 |
| Hob dimensions, unpacked | HxWxD | 595 X 595 X 530 |
| Weight unpacked | kg | 30 |
| EAN No. of oven | 4016572415490 | |
| EAN No. of hob | 4016572402995 |
* Subject to technical modifications.
All appliance-specific data on the energy label have been determined by the appliance manufacturer using standardised European measuring methods under laboratory conditions. These are documented in EN 50304. The actual energy consumption of the appliance in the household depends on the installation location and user behaviour, and can therefore in some cases be higher than the values determined by the appliance manufacturer under standardised conditions.
CE mark
At the time of its placement on the market, this appliance conforms to the requirements laid down in the Council directives on the approximation of the laws of the Member States relating to electromagnetic compatibility, Directive 2014/30/EU, and relating to the making available on the market of electrical operating equipment designed for use within certain voltage limits, Directive 2014/35/EU.
This appliance bears the CE mark and has a declaration of conformity that can be examined by the responsible market supervisory authorities.
24 Disposal
Disposal of packaging materials

Sort packaging materials before disposal. Paper and cardboard with the waste paper and plastic film in the recycled materials bin.
Disposing of old appliances (EN)

Old appliances must not be disposed of with household waste
The symbol of the crossed-out wheeled bin on the product or its packaging means that the appliance must not be disposed of with household waste but requires separate disposal. You can return the old appliance free of charge to a suitable municipal collection point for old electrical and electronic equipment, e.g. a recycling centre.
You can obtain the addresses from your city administration or local government.
Alternatively, you can return old electrical appliances with an edge length of up to 25 cm free of charge to retailers with a sales area for electrical and electronic equipment of at least 400 m ^2 or food retailers with a total sales area of at least 800 m ^2 who offer electrical and electronic equipment at least several times a year.
Larger old appliances can be returned free of charge to an appropriate retailer when purchasing a new appliance of the same type that performs essentially the same functions as the new appliance. Please contact your dealer regarding the modalities of returning an old appliance when delivering the new appliance.
Please remove - if possible - all (rechargeable) batteries as well as all lamps that can be removed without destroying them before disposing of the product.
Please note that you are responsible for deleting personal data from the appliance to be disposed of.
Children can often not recognise the hazards associated with household appliances. Ensure the necessary supervision and do not let children play with the appliance.
exquisit
GGV HANDELSGES. MBH & CO. KG
AUGUST-THYSSEN-STR. 8
41564 KAARST
GERMANY
EHE246-2-1_BDA_DE-EN_E1-0-2023-09.DOCX


- Built-in oven set with glass ceramic hob
- EHE246-020 black
- Getting to know your appliance Scope of supply
- Installation accessories:
- Inhaltsverzeichnis
- For your safety....23
- Before using for the first time....25
- Operation 26
- Cleaning and maintenance of the oven....28
- Cleaning and maintenance of the glass ceramic hob 29
- Tips and practical advice 30
- Error messages and faults 32
- Replace illuminant 33
- After Sales Service 34
- Warranty terms 35
- Technical data.... 36
- Disposal 37
- Glaskeramikkochfeld reinigen
- WARNUNG
- VERLETZUNGSGEFAHR!
- Symbols used
- DANGER
- WARNING
- CAUTION
- ATTENTION
- ELECTRIC SHOCK HAZARD!
- RISK OF SCALDING!
- FIRE HAZARD!
- Intended use
- Safety and responsibility
- ELECTRIC SHOCK!
- Safety of vulnerable persons: Children and persons with limited aptitude!
- Safety and warnings
- Procedure in case of fire
- Never try to extinguish burning oil or fat with water.
- RISK OF BURNS!
- Unpacking the appliances
- RISK OF INJURY!
- Before using for the first time
- RISK OF DAMAGE!
- Operation
- Operating modes and baking/roasting tables
- Oven temperature regulator
- Independent oven lighting
- Heating from above and below
- Heating from below
- Heating from above
- Operating the oven
- Switching on
- Switch off
- Operating the glass ceramic hob
- Suitable cookware
- APPLIANCE DAMAGE!
- Switching on the hob
- Switching off the hob
- Clean the hob after each use.
- BURNS DUE TO THE HOT SURFACES OF THE GLASS
- CERAMIC HOB!
- Cleaning and maintenance of the oven
- RISK OF ELECTRIC SHOCK!
- DANGER OF ENTRAPMENT!
- Clean the outside of the appliance
- Clean the interior
- Hanging and unhanging the appliance door
- CAUTION RISK OF INJURY!
- Cleaning the protective glass
- Cleaning and maintenance of the glass ceramic hob
- Cleaning the glass ceramic hob
- RISK OF BURNS FROM HOT SURFACES
- RISK OF CUTTING INJURIES!
- Tips and practical advice
- Saving energy
- Selecting the right type of heating
- Frying meat
- Proceed as follows:
- We require the following information for processing:
- Warranty terms
- Warranty period
- Scope of the defect remedy
- The warranty does not cover:
- Scope
- For repairs outside the warranty period:
- CE mark
- Disposal
- Disposal of packaging materials
- Disposing of old appliances (EN)
- exquisit
Brand : Exquisit
Model : EHE246-020
Category : Oven