
650812 - Office Equip - Free user manual and instructions
Find the device manual for free 650812 Equip in PDF.


| Product Type | Electric Sit-Stand Desk Frame with Desktop |
| Brand | Equip |
| Model | 650812 (Black) |
| Weight Capacity | 70 kg (154 lbs) |
| Power Input | 100-240V AC |
| Operation Temperature | -5°C to +40°C |
| Desktop Material | Wood (particle board) |
| Frame Material | Steel |
| Height Adjustment | Electric with up/down buttons |
| Controller | Digital, wired |
| Included Components | Desktop, Crossbar, Connecting Plates (3), Side Brackets (2), Lifting Columns (2), Sync Rod, Feet (2), AC Adapter, Power Cord, Controller, Wooden Dowel Pins (4), Screws (various sizes), Cable Clips (3), Allen Wrenches (5mm, 4mm) |
| Assembly Required | Yes, with tools (drill, Phillips screwdriver, bubble level not included) |
| Cable Management | Included cable clips for tidy wiring |
| Leveling Feet | Adjustable foot pads for uneven floors |
| Safety Features | Overload protection, electrical safety (do not operate in moist environment) |
| Usage Environment | Indoor only |
| Compliance | EU WEEE directive for disposal |
Frequently Asked Questions - 650812 Equip
User questions about 650812 Equip
0 question about this device. Answer the ones you know or ask your own.
Ask a new question about this device
Download the instructions for your Office in PDF format for free! Find your manual 650812 - Equip and take your electronic device back in hand. On this page are published all the documents necessary for the use of your device. 650812 by Equip.
USER MANUAL 650812 Equip
ERGO Electric Sit-Stand Desk Frame with Desktop, Grey/Black

natural_image
Line drawing of a simple wooden table with two legs and a side support (no text or symbols)Digital Data Communications GmbH
Im Defdahl 10F
44141 Dortmund, Germany
Tel: +49 231 9075 222
650811(Grey)
650812(Black)
■ Checklist and Installation
Please check all of the components shown in the component checklist. If any of the components are missing or damaged, contact your point of purchase for a replacement.

natural_image
Simple 3D rectangular block diagram with no text or symbolsA (x2)
Desktop

natural_image
Pure mechanical bracket diagram without any text, numbers, or symbolsB (x1)
Crossbar

C (x3)
Connecting Plate

Side Bracket


natural_image
Pure diagonal line with two black square markers at endpoints (no text or symbols)G (x1)
Sync Rod
natural_image
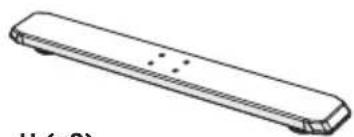
Simple line drawing of a rectangular object with rounded ends and a dotted line on the side (no text or symbols)H (x2)
Foot

I (x1)
AC Adapter

J (x4)
Wooden Dowel Pins

K (x1)
Power Cord
L (x1)
Controller
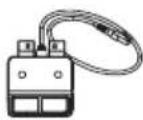
The picture of the controller is for your reference only. Actual product may vary.

S-A (x4)
M6×12
Hex Head Screw

S-B (x4)
M6x8
Hex Head Screw

S-C (x8)
M6×30
Hex Head Screw

S-D (x23)
ST4.2×13
Phillips Head Screw
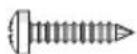
S-E (x10)
ST4.8×16
Phillips Head Screw

S-F (x3)
Cable Clip

S-G (x1)
5mm
Allen Wrench

S-H (x1)
4mm
Allen Wrench
What important specifications should know before installation?

Weight Capacity
70kg (154lbs)

Power Input
(100\~240V)

Operation Temperature
(-5^ +40^)
What tools are needed to assemble the desk frame?

Bubble Level

Allen Wrench
(Included)

Drill

Phillips Screwdriver
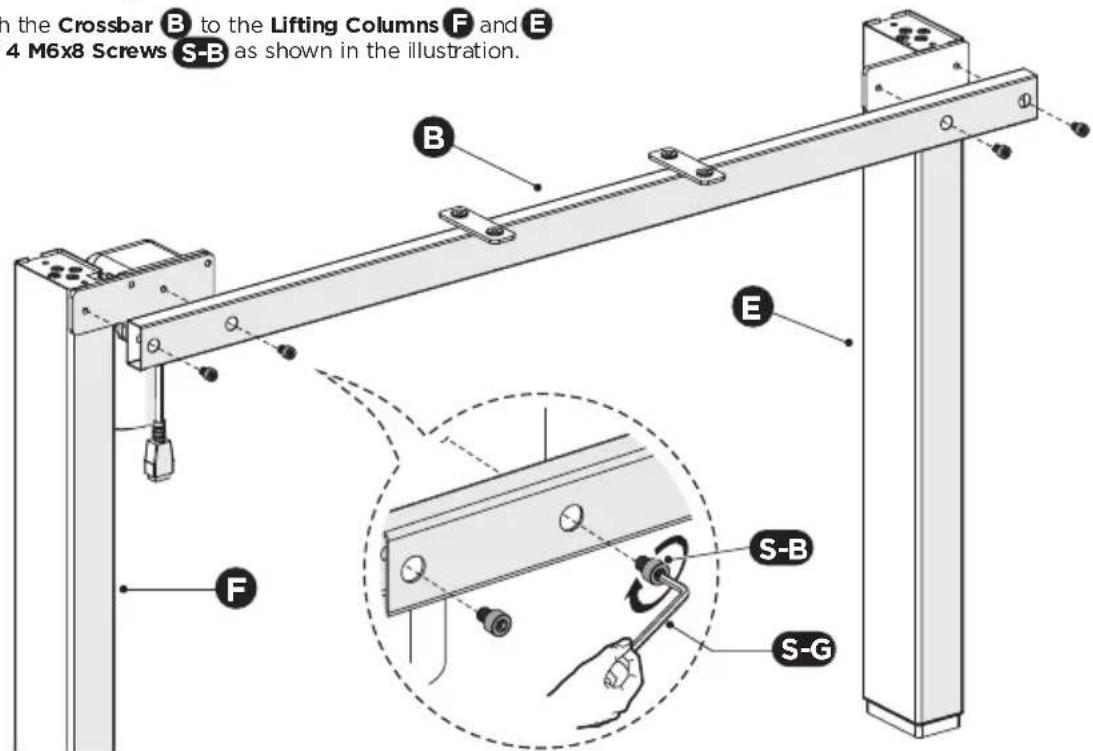
1. Attaching the Crossbar
- Attach the Crossbar B to the Lifting Columns F and E using 4 M6x8 Screws S-B as shown in the illustration.
2. Attaching the Side Brackets
- Attach each Side Bracket D to the Lifting Column using 2 M6x12 Screws S-A.
- Repeat the same process to attach the other side bracket.

3. Attaching the Feet
- Turn over the desk frame with the help of another person.
- Place the Lifting Column E /F upside down on the floor.
- Attaching the Foot H to the Lifting Column using 4 M6x30 Screws S-C.
- Repeat the same process to attach the other foot.

CAUTION: At least two people are required when turning over the desk, or serious bodily injuries might occur.

4. Assembling the Desktop
- Carefully place the dissassembled Desktop A upside down on the floor as shown.
- Assemble the desktop with 4 Wooden Dowel Pins and 3 Connecting Plates using 18 ST4.2x13 Screw S-D
Note: Please make sure the desktop keep facing down while installation.


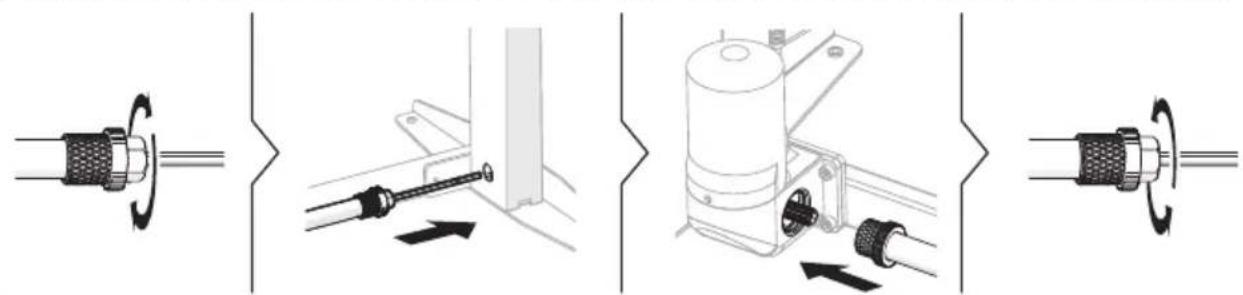
5. Attaching the Sync Rod
- Place the assembled desk frame to the backside of the desktop.
- Align the screw holes on the desktop with mounting holes found on the crossbar and side brackets.

natural_image
Technical line drawing of a mechanical assembly with a downward arrow indicating motion or force (no text or symbols present)- Turn the knob as shown in the illustration to loosen and adjust the Sync RodG.
- Insert both ends of Sync Rod into holes found on the desk frame as shown in the illustration.
- Re-tighten the knob.

6. Attaching the Desk Frame to the Desktop
- Attaching the assembled desk frame to the desktop through the mounting holes found on the Side Brackets and Crossbar as shown in the illustration using 8 ST4.8x16 Screws S-E .

7. Attaching the AC Adapter
- Attach the AC Adapter ① to the desktop using 2 ST4.8x16 Screws S-E.
- Attach the Controller L to the desktop with 2 ST4.2x13 Screws S-D
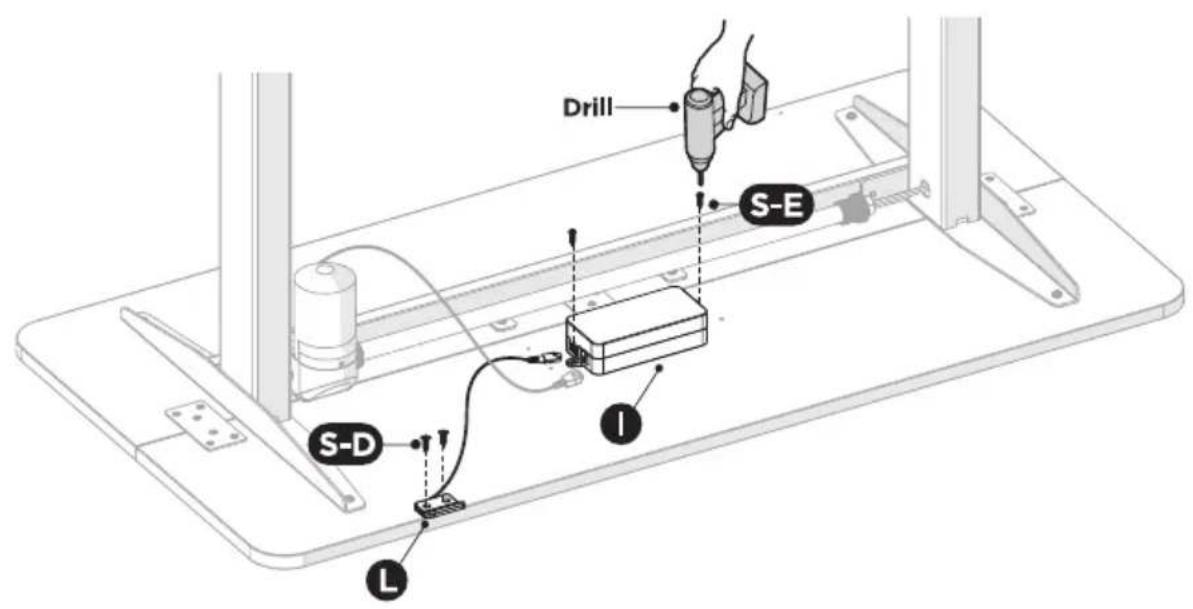
8. Inserting Cords into the AC Adapter
- Insert Motor Cord F into the port marked M1 on the side of the AC Adapter I.
- Insert the Controller L into the port marked HS.
- Insert the Power Cord K into the port marked AC.
Note:
- Don't connect the plug to the socket before the desk is fully assembled.

9. Cable Management
- Run the cables through the Cable Clips S-F on j attach the cable clips to the desktop with 3 ST4.2x13 Screws to ensure clean and neat surface.

10. Adjusting the Desk
- Turn over the desk with the help of another person.
- There are two adjustable foot pads under each foot. If the floor isn't even, simply turn the pad to adjust the level to make the desk stable.
Tip: Use a bubble level (not included) to check if the desktop is even.
- Connect the desk to power. Long press the up and down buttons to adjust the height.

CAUTION: At least two people are required when turning over the desk, otherwise serious bodily injuries might occur.

■ Instructions of Safety and Warnings:
- Any failure to comply with the safety and installation instructions in this manual may cause serious bodily injury.
- Overlooking any part of the instructions, wings and additional information marked with the "Note" and "⚠️" may result in serious damage to the system or its components.
- Children should never be allowed to operate or touch the product without direct supervision of an adult. Users should prevent children from being near or around the desk during operation.
- Disabilities and/or lack of experience and knowledge should be prevented from using the product unless under supervision or assisted during use and operation.
- Never sit on or exceed the rated weight of the desk.

Electrical Safety Instructions:
The product is powered by electricity. In order to avoid burns, fire and electric shock, please read the instructions carefully.

Don't clean the product with water while the power is still connected.

Never operate the system if it's in moist environment or its electrical components have contact with liquids.

Don't disassemble or replace components while the power is still connected.

Don't operate the system if the control box makes noise or odor. Alterations of the given power unit and control box aren't allowed.

Never operate the system with a damaged cord or plug. Please contact your point of purchase to replace the damaged parts.

Other Safety Instructions:
- Remove any obstacles from the area around the desk during assembly and subsequent use.
- Organize all cords and wires to prevent any possible tripping or accidents from occurring.
- Never attempt to modify or change the desk frame or components that operate the desk.
- Don't add anything to the adjustable junctions of the desk frame.
- The desk is rated for Indoor Use Only.

Disposal: The product with this mark indicates that this product shouldn't be disposed with other household wastes throughout the EU. To prevent possible harm to the environment or human health from uncontrolled waste disposal, recycle it responsibly to promote the sustainable reuse of material resources. To return your used device, please use the local recycle service or contact your point of purchase to withdrawn the product.


- ERGO Electric Sit-Stand Desk Frame with Desktop, Grey/Black
- ■ Checklist and Installation
- Attaching the Crossbar
- Attaching the Side Brackets
- Attaching the Feet
- Assembling the Desktop
- Attaching the Sync Rod
- Attaching the Desk Frame to the Desktop
- Attaching the AC Adapter
- Inserting Cords into the AC Adapter
- Note:
- Cable Management
- Adjusting the Desk
- ■ Instructions of Safety and Warnings:
- Electrical Safety Instructions:
- Other Safety Instructions:
Brand : Equip
Model : 650812
Category : Office