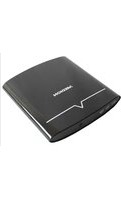
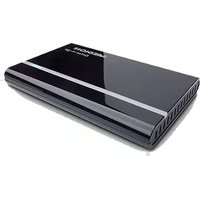
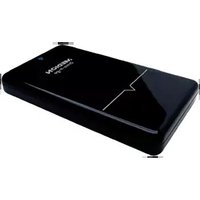
S92012 (MD 97710) - External hard drive MEDION - Free user manual and instructions
Find the device manual for free S92012 (MD 97710) MEDION in PDF.


| Product Type | External DVD/CD Rewriter |
| Brand | Medion |
| Model | S92012 (MD 97710) |
| Interface | USB 2.0 (Y-cable, up to 2 ports) |
| Power Supply | Bus-powered via USB Y-cable |
| Supported Discs | CD-R, CD-RW, DVD±R, DVD±RW |
| Operating System | Windows Vista / XP / 7 |
| Operating Temperature | 5°C to 45°C (41°F to 113°F) |
| Storage Temperature | -20°C to 55°C (-40°F to 131°F) |
| Operating Humidity | 8% to 80% (non-condensing) |
| Storage Humidity | 8% to 85% (non-condensing) |
| Laser Class | Class I (when housing closed) |
| Disc Loading | Tray type with manual eject button |
| Emergency Eject | Yes, via pinhole on front |
| Installation | Plug and Play under Windows |
| Included Software | Burning software on CD |
| Cleaning | Damp cloth only; no solvents or cleaning discs |
| Safety | Keep away from magnetic sources, avoid shocks, do not open casing |
| Service | No user-serviceable parts; contact Medion support |
Frequently Asked Questions - S92012 (MD 97710) MEDION
User questions about S92012 (MD 97710) MEDION
0 question about this device. Answer the ones you know or ask your own.
Ask a new question about this device
Download the instructions for your External hard drive in PDF format for free! Find your manual S92012 (MD 97710) - MEDION and take your electronic device back in hand. On this page are published all the documents necessary for the use of your device. S92012 (MD 97710) by MEDION.
USER MANUAL S92012 (MD 97710) MEDION
Safety and Maintenance 3
Data Security 3
Safety Instructions.... 3
Operational Safety 3
Electromagnetic Compatibility 4
Set-up Location 5
Disposal 6
Cleaning......6
Laser operation....7
Service Information for Experts....7
What's Included 8
System Requirements....8
Getting Started 9
What May Be Copied? 9
Product Overview....9
Front View....9
Rear View 9
Making the cable connections 10
The Optical Drive As A Boot Drive 10
Loading a Disc:....11
Playing Back and Retrieving Data from Discs 12
How to remove a Disc: 12
Emergency Removal Of A Trapped Disc 12
Installation of Software....13
Install Your Burning Software in This Way 13
Software Uninstallation 14
1
UK/ N. IRELAND HELPLINE 0871 3761020
REP. IRELAND HELPLINE 1-800-992508
(calls are charged at 7p per min from a standard landline, calls from mobiles could be higher)
Customer Service 15
First Aid in the case of Malfunctions 15
Diagnosing the Cause 15
Technical Support 16
Do you require additional Support? 16
Copying this manual....16
Copyright © 2009
All rights reserved.
This manual is protected by Copyright.
The Copyright is owned by Medion * .
Trademarks:
MS-DOS ® and Windows ® are registered trademarks of Microsoft ® .
Pentium ® is a registered trademark of Intel ® .
Other trademarks are the property of their respective owners.
We reserve the right to make technical changes.
2
UK/ N. IRELAND HELPLINE 0871 3761020
REP. IRELAND HELPLINE 1-800-992508
(calls are charged at 7p per min from a standard landline, calls from mobiles could be higher)
Safety and Maintenance
Data Security

Every time you update your computer's data make back-up copies on an external storage medium, i.e. CDR disc. We cannot assume a liability for data loss or associated subsequent damage.
Safety Instructions
Please read this chapter carefully and observe all listed notes. This will ensure reliable operation and long life expectancy of your product.
Keep these instructions with your product at all times. The proper set up, use and care can help extend the life of your product. In the event that you transfer ownership of this product, please provide these instructions to the new owner.
Operational Safety
- Do not allow children to play unattended with electrical equipment. Children are incapable of judging potential risks properly.
- Drives are very susceptible to faults. Never drop the drive or subject it to bumps or vibrations, because they could result in damage to it. We do not accept any guarantee for damage of this type.
- Also follow the instructions for use of the PC or laptop to which you connect the device.
- Do not insert any objects into the inside of the device through the slits or openings and never open the casing. This could lead to an electrical short circuit, an electric shock or even cause a fire which could endanger your health and damage your computer equipment.
- The voltages and interfaces used in the devices comply with the low protective voltages in accordance with EN 60950. Connections to other equipment must only be made with equivalent interfaces with low protection voltages in accordance with EN 60950.
Please contact our Service Center if you have technical problems with the drive or:
• ... Your drive has come into contact with liquid.
• ... The drive is not functioning correctly.
- Please contact our authorised Service Partners exclusively in the case of a necessary repair.
Electromagnetic Compatibility
- The Guidelines of electromagnetic compatibility (EMV) must be observed when connecting the drive.
- Keep the device at least 1 metre (approximately three feet) away from sources of high frequency and magnetic interference (mobile phones, televisions, infra-red devices, loud-speakers etc.) in order to avoid malfunction and data loss.
Set-up Location
- This product is NOT designed for use in industrial environments.
- Operate the drive exclusively in a horizontal position.
- Delay operation after transport until the device has adjusted to the ambient temperature. In situations of large temperature or humidity differences condensation may build up moisture, which might cause an electrical short circuit.
- In the first hours of operation, new devices may emit a typical, unavoidable but completely harmless smell, which will decline increasingly in the course of time. We recommend that you ventilate the room regularly, in order to counteract the formation of the smell. During the development of this product, we have made sure that the applicable limits are clearly decreased.
- Keep your product away from moisture, dust, heat and direct sunlight. Failure to observe these instructions can lead to malfunctions or damage to your equipment.
- To prevent damage to your device from a fall, place and operate it on a stable, balanced and vibration-free surface.
Ambient Temperature
The optical drive can be operated at an ambient temperature of between 5° C and 45° C (+41° and +113°F) and at a relative humidity of between 8% and 80% (with no condensation).
When powered off, the product can be stored at temperatures between -20° C and 55° C ( -40° and +131° F) and at a relative humidity of between 8% and 85% (with no condensation).
Disposal
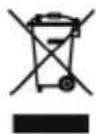
Device
At the end of its life, the appliance must not be disposed of in household rubbish. Enquire about the options for environmentally-friendly disposal.
Packaging

To avoid damage during transport, the device is stored in protective packaging. The packaging is produced mostly from materials which can be disposed of in an environmentally friendly manner and therefore can be professionally recycled.
Cleaning
It is usually not necessary to clean the drive. Always detach all connection cables before cleaning the drive.
- Caution! This appliance does not include any parts that need servicing or cleaning.
- Do not use any solvents, corrosive or gaseous cleaning products.
- If necessary, clean the surface of the drive with a damp cloth.
- Do not use CD-ROM cleaning discs or similar products that clean the lens of the laser to clean your CD-/DVD-drive.
Laser operation
ATTENTION
The drive has Laser Class I, provided that the device is operated in an enclosed housing. Please leave maintenance to an expert. Please do not remove the cover of the drive, because invisible laser irradiation will be discharged if the cover has been opened. Do not look at the beam, not even with optical instruments.
Service Information for Experts
This Chapter is intended for technically qualified experts. Please take the notes in the ‘Safety and Maintenance’ Chapter and the following safety information into account:

LASER
In this product laser devices of Laser Class 1 to Laser Class 3b may be used. Where the housing remains closed, the device meets the requirements of Laser class 1.
By opening up the housing you will gain access to laser devices of up to Laser Class 3b.
When removing and/or opening up these laser devices, the following must be observed:
- The drive contains no user-serviceable parts.
- Repairs to the drive must be performed only by the manufacturer.
- Do not look into the laser beam, even with specialist optical instruments.
- Do not allow yourself to be exposed to the laser beam.
- Avoid exposure of the eyes or skin to direct or stray radiation.
What's Included
Please check to ensure that your product is complete and inform us within 14 days of purchase if anything is missing. The following should be included with the optical drive:
- DVD-/CD-ReWriter
- USB-Y cable
- Instruction manual
- Software-Disc
- Warratny card
System Requirements
- Operating system Windows
® Vista/XP/7 - Connection Max. 2 x USB 2.0
Getting Started
What May Be Copied?
Unless you own the Copyright or the permission of the owner of the Copyright, unapproved copying of Discs violates national or international laws and can result in serious punishment. Please ask your solicitor for advice.

Product Overview
Front View
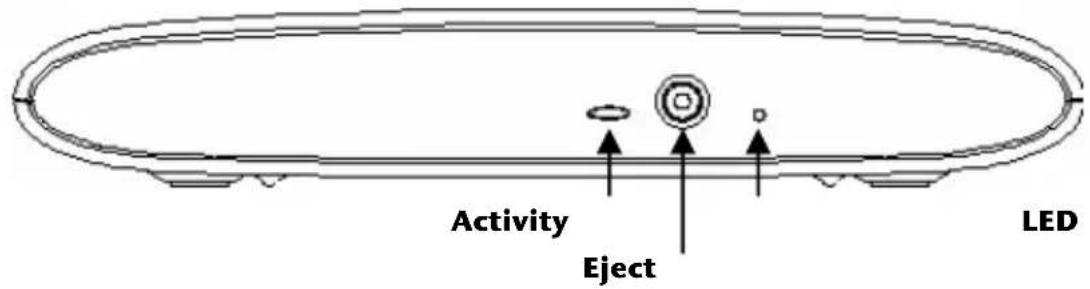
Rear View
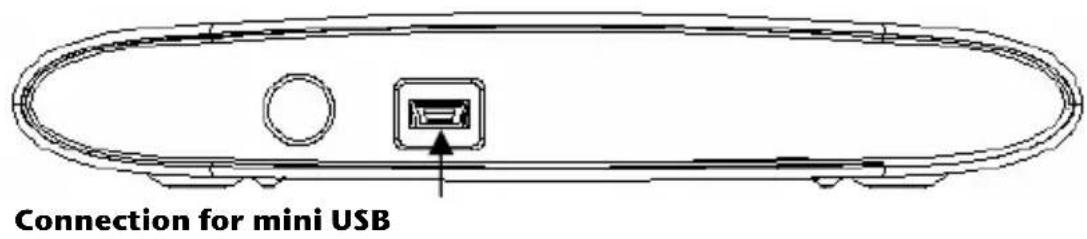
Making the cable connections
Connect the external programmer by means of USB.
- Switch on the computer and wait until the operating system has booted completely.
- Connect the mini-USB connector of the Y cable to the connection of your external programmer.
- Connect the other end of the Y cable to the labelling on your computer. Use the second USB connector and connect it to an additional USB connection for additional electricity supply.
- The programmer will be recognized and linked automatically under Windows" XP/Vista.
The Optical Drive As A Boot Drive
Optical drives can be used for booting the operating system.
Settings in the BIOS of the PC/laptop are necessary to do this. Also read the relevant operating instructions of your PC/laptop.
Loading a Disc:
This optical drive uses a support to retain a disc.
Care must be taken that the disc is pressed precisely on the support and engages there when inserting a disc.
Attention
Do not use scratched or dirty discs, discs with pieces broken off or discs of poor quality. Do not stick protective foil or other stickers to the discs. Because of the high speeds in the drive the discs might break and damage your data as well as your drive.
Examine the discs before you insert them. If damage or dirt is visible, you should not use them. Damage caused by faulty media is excluded from warranty and repairs costs will be charged.
-
Press the eject button on the front of the optical drive to open the tray.
-
Place the disc into the drive with the label (or side 1) upwards and press it down carefully. The disc must engage on the support audibly.
-
Press the eject button again to close the tray.

natural_image
Hand holding a CD or DVD disc with a downward arrow indicating compression (no text or symbols present)Note
Many Discs start automatically when they are inserted. This will depend on the operating system and relevant settings.
Playing Back and Retrieving Data from Discs
Your optical drive is able to playback and to retrieve Audio CDs, DVD Movies and Data discs.
After loading the disc your operating system will open a selection window with different options for playback.
If your operating system doesn't open the selection window
you still have the possibility of access via the

Explorer or

Computer.
You will also need to open a program to play DVDs, if appropriate, according the DVD audio CD and the software installed.
How to remove a Disc:
- Press the eject button at the front of the optical drive to open the tray.
- Remove the disc and store it in the disc cover in a safe place.
Attention
Do not try to remove the CD from the drive while the computer is accessing the disc. This could lead to crashes.
Emergency Removal Of A Trapped Disc
If the tray does not open automatically anymore, it can be opened manually. Re-start the computer, if the tray still does not open, please proceed as follows:
- Exit Windows * and switch the computer off.
- Gently position a long pointed object (e.g. opened up paperclip) into the emergency opening until you feel some resistance. Now press gently and the tray should open.
- Remove the disc.
12
UK/ N. IRELAND HELPLINE 0871 3761020
REP. IRELAND HELPLINE 1-800-992508
(calls are charged at 7p per min from a standard landline, calls from mobiles could be higher)
Installation of Software
Attention
You may find that during the installation procedure important files may be changed or even cancelled. To avoid further problems in using older files after an installation, make sure you safeguard your hard disk. See page 3 for further information regarding data backup.
Install Your Burning Software in This Way
The installation menu will be started automatically when you insert the CD.
Note
If the automatic start does not work, it is likely that the so-called Autorun function has been deactivated. Read the respective chapter in Windows Help on how to activate this function.
Manual installation without the autorun function:
- Click on START and select the item RUN.
- Now enter the drive letter of the CD ROM, followed by a colon and the program name, into the OPEN field. Enter Setup under XP and Setupx under Vista®.
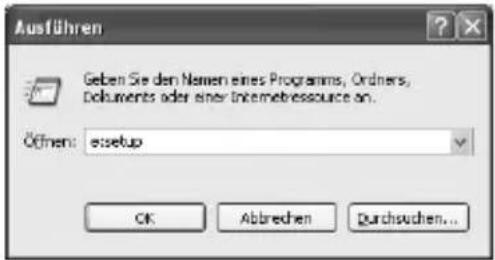
The drive letter of your optical drive will depend on the configuration of your system. Please enter the name relevant to your system under all circumstances.
- Confirm your entry with a click on OK.
- Follow the instruction given by the program.
Software Uninstallation
In order to remove installed software from your PC, follow the next steps:
- Open the Control Panel and make a double click on the Programs entry.
- Select the respective program, start the uninstallation and follow the instructions on the screen.
Customer Service
First Aid in the case of Malfunctions
Diagnosing the Cause
Sometimes malfunctions can have simple causes, but can also be very complex and require extensive technical analysis. We would like to provide a few guiding steps for you to solve any problems.
Basic Information
- Regular execution of the Windows programs “Defragmentation” and “Scandisk” can remove sources of errors and increase system performance.
Checking the connections and the cables
Visibly check all cables and connections. Should all lights be off, check whether all equipment is supplied with power.
- Switch off the PC and check all cable connections. Check the connections to peripherals. Do not exchange cables, even though they may look similar. The polarity in those cables may be different. When it is confirmed that the computer has power and all connections are correct, turn the computer on again.
Technical Support
This product has been tested in our test laboratories in detail and extensively with a large number of different computers.
However, it is usual, that device drivers are updated from time to time. This is because possible compatibility problems occur with other components (programs, equipment) which have not yet been tested. Device driver updates and the latest information on your product are available at the following Internet web address:
www.medion.com
Do you require additional Support?
If the suggestions in the above section have not solved your problem, please contact the service hotline and we will attempt to help you solve the problem. Before you contact the Technology Centre, however, please have the following information available:
• How is your computer configured?
• What additional peripherals do you use?
• What messages, if any, appear on your screen?
- What software were you using when the error occurred?
- What steps have you already undertaken to solve the problem?
- If you have been given a customer number previously, please quote this.
Copying this manual
This document contains legally protected information. All rights reserved. Copying in mechanical, electronic and any other form without the written approval of the manufacturer is prohibited.
- Safety and Maintenance 3
- What's Included 8
- System Requirements....8
- Getting Started 9
- Customer Service 15
- 2
- Safety and Maintenance
- Data Security
- Safety Instructions
- Operational Safety
- Please contact our Service Center if you have technical problems with the drive or:
- Electromagnetic Compatibility
- Set-up Location
- Ambient Temperature
- Disposal
- Cleaning
- Laser operation
- ATTENTION
- Service Information for Experts
- LASER
- What's Included
- System Requirements
- Getting Started
- What May Be Copied?
- Product Overview
- Making the cable connections
- The Optical Drive As A Boot Drive
- Loading a Disc:
- Note
- Playing Back and Retrieving Data from Discs
- Computer.
- How to remove a Disc:
- Emergency Removal Of A Trapped Disc
- Installation of Software
- Install Your Burning Software in This Way
- Software Uninstallation
- Customer Service
- First Aid in the case of Malfunctions
- Diagnosing the Cause
- Basic Information
- Checking the connections and the cables
- Technical Support
- Do you require additional Support?
- Copying this manual
Brand : MEDION
Model : S92012 (MD 97710)
Category : External hard drive