
MX-XP103 - Blender PANASONIC - Free user manual and instructions
Find the device manual for free MX-XP103 PANASONIC in PDF.


| Product Type | Blender |
| Model | MX-XP103 |
| Brand | Panasonic |
| Dimensions (approx.) | 20 x 15 x 30 cm |
| Weight (approx.) | 1.5 kg |
| Power Consumption | 400 W |
| Jar Capacity | 1.5 L |
| Jar Material | Plastic (BPA-free) |
| Blade Material | Stainless steel |
| Number of Speeds | 2 (Low and High) |
| Pulse Function | Yes |
| Ice Crushing | Yes |
| Dishwasher Safe Parts | Jar and lid are dishwasher safe |
| Non-Slip Feet | Yes |
| Safety Lock Lid | Yes |
| Overload Protection | Yes (auto shut-off) |
| Power Cord Length | 1.2 m |
| Voltage | 220-240 V, 50/60 Hz |
| Color | White/Grey |
| Cleaning | Wipe motor base with damp cloth; jar and lid are removable for washing |
| Repair Index (if applicable) | Repairable with common tools; spare parts available via Panasonic service |
Frequently Asked Questions - MX-XP103 PANASONIC
User questions about MX-XP103 PANASONIC
0 question about this device. Answer the ones you know or ask your own.
Ask a new question about this device
Download the instructions for your Blender in PDF format for free! Find your manual MX-XP103 - PANASONIC and take your electronic device back in hand. On this page are published all the documents necessary for the use of your device. MX-XP103 by PANASONIC.
USER MANUAL MX-XP103 PANASONIC
Panasonic Taiwan Co., Ltd.
https://www.panasonic.com
© Panasonic Taiwan Co., Ltd. 2022

Date of issue: June 2022
Printed in China
VZ50V327
MX0622W0
Panasonic®
Operating Instructions Hướng Dẫn Sử Dụng
natural_image
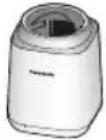
Illustration of a Panasonic blender with three open containers and a lid (no text or symbols)Thank you for purchasing this Panasonic product.
- Please read this operating instructions carefully in order to use the product correctly and safely.
- Before using this product please give your special attention to "Safety Precautions" and "Important Information" (P. EN3-EN6).
- Please keep this Operating Instructions for future use.
- Panasonic will not accept any liability if the appliance is subject to improper use, or failure to comply with these instructions.
Contents Page
Safety Precautions......EN3
Important Information......EN6
Parts Names and Instructions......EN7
Before Use......EN8
How to Use......EN9
Cleaning and Care......EN12
Troubleshooting......EN14
Overloading Protection......EN15
Replacement Parts......EN16
Specifications......EN16
EN2
Safety Precautions
Please make sure to follow these instructions.
In order to prevent accidents or injuries to the user, other people, and damage to property, please follow the instructions below.
■ The following signals indicate the degree of harm and damage when the product is misused.

WARNING: Indicates potential hazard that could result in serious injury or death.

CAUTION: Indicates potential hazard that could result in minor injury or property damage.
■ The symbols are classified and explained as follows.

This symbol indicates prohibition.

This symbol indicates requirement that must be followed.

WARNING
To prevent electric shock, fire caused by short circuit, smoke, scald or injury.

- Do not disassemble, repair or modify this appliance.
→ Contact Service Centre for inspection or repair.
- Do not damage the power cord or power plug.
The following actions are strictly prohibited: Modifying, touching on or placing near heating elements or hot surfaces, bending, twisting, pulling, hanging / pulling over sharp edges, putting heavy objects on top, bundling the power cord or carrying the appliance by the power cord.
- Do not use the appliance if the power cord or power plug is damaged or the power plug is loosely connected to the outlet.
→ If the power cord is damaged, it must be replaced by the manufacturer, its service centre or similarly qualified person in order to avoid a hazard.
→ Insert the power plug firmly.
EN3
Safety Precautions
Please make sure to follow these instructions.

WARNING

- Do not plug or unplug the power plug with wet hands.
- Do not immerse the motor housing, power cord and power plug in water, or splash them with water and/or any liquid.
- Do not allow infants and children to play with the packaging material.
- Do not put any objects such as spoon, chopsticks other than cooking ingredients, and prohibited ingredients such as frozen vegetables and fruits etc. into tumbler.
- Do not assemble only the tumbler base to the motor housing.
→ Ensure to set the tumbler unit on motor housing correctly.

● This appliance is not intended for use by persons (including children) with reduced physical, sensory or mental capabilities, or lack of experience and knowledge, unless they have been given supervision or instruction concerning use of the appliance by a person responsible for their safety.
Children should be supervised to ensure that they do not play with the appliance.
- Keep the appliance and its power cord out of reach of children.
● Discontinue using the appliance immediately and unplug in the unlikely event that this appliance stops working properly. e.g. for abnormal occurrences or breaking down
- The power plug or the power cord become abnormally hot.
• The appliance power fails. - The motor housing is deformed, has visible damage or is abnormally hot.
- There is crack on the tumbler or other parts.
• There is an unpleasant odour. - There is abnormal turning noise while in use.
- There is another abnormality or failure.
→ Contact Service Centre for inspection or repair.
● Dust off the power plug regularly.
→ Unplug the power plug, and wipe with a dry cloth.
EN4

WARNING

- Be careful if hot liquid is poured into tumbler, as it can be ejected out of the appliance due to a sudden steaming.
● Make sure the voltage indicated on the label of the appliance is the same as your local supply.
Also avoid plugging other devices into the same outlet to prevent electrical overheating. However, if you are connecting a number of power plugs, make sure the total wattage does not exceed the rated wattage of the outlet.

CAUTION
To prevent electric leakage, electric shock, fire caused by short circuit, scald, injury or property damage.

- Do not use the appliance on the following places.
- On uneven surfaces, on carpets or tablecloths etc.
- Place where it may be splashed with water or near a heat source.
- Near any open water sources such as bathtubs, sinks, or other containers.
- Near a wall or furniture.
→ Place the appliance on a firm, dry, clean, flat worktop.
- Do not place any objects onto the appliance or insert any objects in the bottom or the gaps of appliance.
- Do not push switch pin with any implement such as thin stick, etc.
- Do not carry the appliance by holding the power cord or tumbler.
- Do not replace any parts of the appliance with non-genuine spare parts.
- Do not blend or place over 40 °C ingredients into the tumbler.
- Do not remove the tumbler from the motor housing when the motor is still rotating.
→ Make sure the blade stops rotating before removing the tumbler from the motor housing.
EN5
Safety Precautions
Please make sure to follow these instructions.

CAUTION

- Do not blend more than the working capacity marked on the tumbler. (P. EN7)
- Do not stretch the gasket to avoid deforming.

● Make sure to hold the power plug when unplugging it. Never pull on the power cord.
- Beware not to trip over or get caught in the power cord while in use.
- In order to avoid a hazard due to inadvertent resetting of the thermal cut-out, this appliance must not be supplied through an external switching device, such as a timer, or connected to a circuit that is regularly switched on and off by the utility.
● Always disconnect the appliance from the supply if it is left unattended and before assembling, disassembling, moving or cleaning.
- Care shall be taken when handling the blade, emptying tumbler and during cleaning.
- Ensure to operate and rest the appliance as stated on specification table. (P. EN16 "Specifications")
- Ensure to clean the appliance especially surfaces in contact with food after use. (P. EN12 - EN13 "Cleaning and Care")
● This product is intended for household use only.
Important Information
- Do not use the appliance outdoors.
- Do not drop the appliance to avoid damaging it.
- Do not wrap the power cord around the motor housing.
- Do not operate with an empty tumbler.
- Do not store liquid in the tumbler for a long time.
EN6
Parts Names and Instructions
![Lid without opening cap Lid gasket in the reverse side. Drinking spout Opening cap gasket Lid with opening cap Tumbler unit Tumbler (2 pcs) When adding ingredients, it should face upward. Working capacity (approximately 400 mL) Blade Tumbler base [Bottom view] Upper connector [Top view] Lower connector Switch pin When it is pushed, the lower connector rotates. [Operation marks] Turn tumbler to "ON" direction, the blade rotates. ON←OFF ▲ Align ▽ on the tumbler base with this mark(P. EN11) Motor housing Power cord Power plug* * The shape of the plug may vary from illustration.](/content/2026/05/894588/images/29e277f95504746c9156e398223d9d5e1607568130470f28a1bb559a33451708.jpg)
EN7
Parts Names and Instructions
Tumbler unit preparation
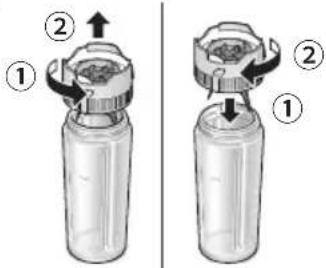
Before use, remove tumbler and its base, wash each part except motor housing and power plug, then assemble them securely. (P. EN12 - EN13 "Cleaning and Care")
Disassembly
Twist the tumbler base anticlockwise to remove it.
Assembly
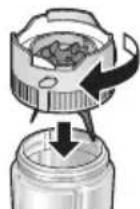
Twist the tumbler base clockwise to assemble it securely.
Note
- Make sure the tumbler base gasket is not damaged. If it is damaged, replace it. (P. EN16)
- Make sure the tumbler base gasket is attached to tumbler base properly.
Before Use
Prohibited Ingredients
Blending prohibited ingredients may cause tumbler damage, liquid leakage, or motor housing malfunction etc.
■Hard ingredients
•Commercial ice cubes
•Dry soybean
•Turmeric
- Frozen ingredients
(e.g. vegetable and fruits)
- Hard seed
(e.g. peach, persimmon, plum)
•Dry kelp
•Crystal sugar
•Brown sugar (solid)
•Grains
•Dry food
(e.g. dried fish, dried shrimp)
■Paste ingredients
•For nursing care, baby food etc.
■Sticky, low moisture content ingredients
• Boiled potatoes
•Yam
- Boiled vegetable *1
•Dried fruits (e.g. raisins) *1
•Dried seeds
(e.g. chia seed, basil seed) *2
■Ingredients with rich fibers or muscles
- Meat, fish
■Pressure inducing ingredients
•Hot ingredients (more than 40 °C) *3
•Carbonated water
■Ingredient contains oil
•e.g. peanut, walnut *1
*1 Can be used with liquid. Cut it into 1 cm or more small size cubes.
*2 Can be used after soaked in water. (P. EN9)
*3 Can be used after cooling down to room temperature.
EN8
How to Use
Ingredients Preparation
Cut soft ingredients into 2-3 cm cubes. Remove the thick skin, core or seed from fruits and vegetables.
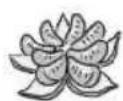
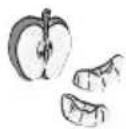
Cut hard ingredients into 1 cm cube. Peel off the skin if desired.
- If pieces are too large, they may not be mixed well.
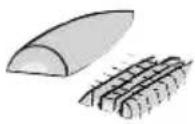
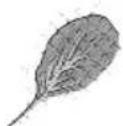
Wash leafy vegetables well then cut into 2-3 cm pieces or strips.
- Remove thick stem end like kale.
Water-absorbing seed should be soaked in water before use. (e.g. dry chia seeds etc.)
- Refer to the specific method of each seed.
[Example]
Using 12 teaspoon (about 1 g) dry chia seed soaked with water.
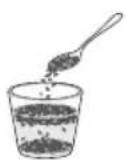
| Water quantity for soaking 10 | g or more (approximately 10 times) |
| Time for soaking (approximately) | 12 hours at least (keep in refrigerator) |
| Liquid quantity for blending 100 mL or more |
(Maximum amount of dry chia seed : 4 g)
Note
- The weight of nuts, cacao nibs, and powder etc. should be less than 10% of liquid weight. Dried fruits such as wolfberry should be less than 5%. Too much amount may make the unsatisfactory texture.
- When blending ice cubes, use approximately 2.5 cm (15 g) ice cubes made with a household fridge. (Too large ice cubes may cause malfunction or tumbler broken.)
How to Use
Ingredients order into tumbler
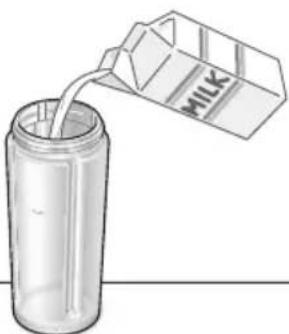
Pour liquid first, followed by hard ingredients and then others.
(Otherwise, the hard ingredients may get stuck on the blade to stop operation.)
Place the ingredients in the order of ①-⑦.
7
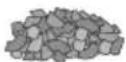
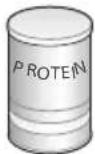
Ingredients with small particles or easily scattering, and powder(e.g. cacao nibs, soaked seed or protein powder)
⑥
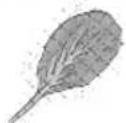
Leafy vegetables
5
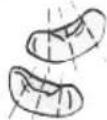
Soft ingredients with high moisture content
4
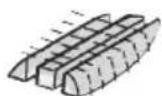
Ingredients with low moisture content or hard ingredients (e.g. carrot)
③
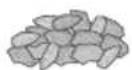
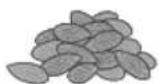
Dried fruits (e.g. wolfberry) Nuts (e.g. almond)
②
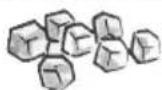
Ice cubes
1
natural_image
Illustration of a milk carton being poured into a clear glass bottle (no text or symbols)Liquid (e.g. water, milk)
After placing the ingredient, assemble the tumbler base securely.
EN10
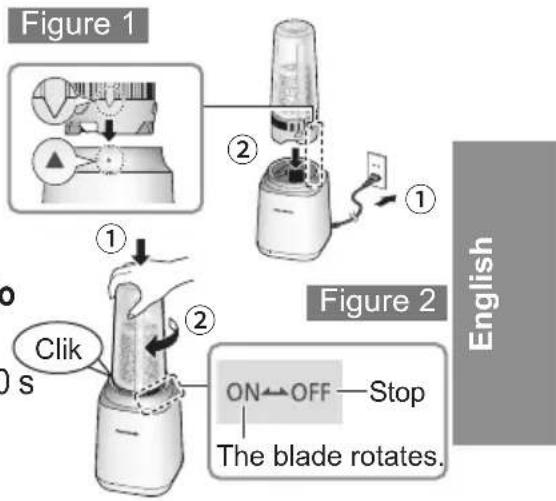
1 Ensure to assemble the tumbler unit properly.
2 Insert the power plug.
Align the ▲ on the motor housing with the ▽ on the tumbler base. (see Figure 1)
3 Hold and twist the tumbler to "ON" direction to start blending.(see Figure 2)
Blending time (approximately): 1 min -1 min 30
- Hold the tumbler firmly during use.
4 Twist tumbler to "OFF" direction to stop blending.
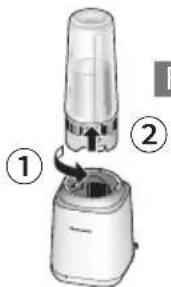
5 After the blade stops rotating, remove the tumbler unit from motor housing. (see Figure 3)
6 Turn the tumbler upside down and remove the tumbler base.
7 Pour out the mixture or attach the lid. Pull out the power plug after use.
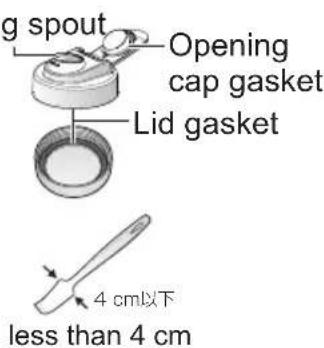
- Make sure the lid gasket and opening cap gasket are properly positioned when using lid.
- When using lid (with opening cap), do not turn it up-side-down or tilt it, otherwise the ingredients may spill out from the drinking spout.
- Do not use the lid with opening cap to blend sticky or low moisture content ingredients, as they are hardly to pour through the drinking spout.
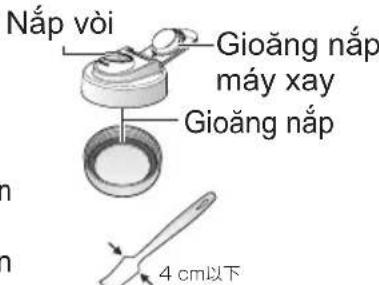
- Do not use a metal spoon or spatula when taking out the mixture. Using narrow rubber spatula with curved head which less than 4 cm width is recommended. (Commercial sales)
Recipes
Put the ingredients in the order from top to bottom.
Walnut Apple Smoothie
Blending time (approximately): 1 minute
| Milk 80 mL | |
| Walnut | approximately 4 pieces (8 g) |
| Apple | approximately _5s of a medium (100 g) |
| Honey | _22 teaspoon |
| Cinnamon powder | Appropriate amount |
Hot drink: Pour it into a heat-resistant container after blending, and then heat it in a microwave before drinking.
Kiwi fruit and celery smoothie
Blending time (approximately): 1 minute
| Cold water 80 mL | |
| Kiwi fruit 45 | g |
| Banana 60 | g |
| Celery 30 | g |
EN11
Cleaning and Care
●After prewash, unplug the appliance before cleaning.
●Make sure to clean the appliance after every use.
- Do not use benzine, thinner, bleach, alcohol, nylon face of sponge, metal brushes or polish powder etc.
●Some discoloration of plastic parts may occur upon usage but it does not affect usage.
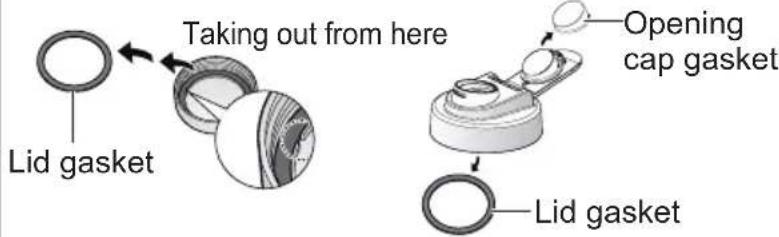
●Use a thin and round top stick which fit into the cutout part on the tumbler base or lid to pick up and put back its gasket. (e.g. chopstick)
Prewash
Before cleaning, add 400 mL water and blend for about 1 minute.
Soak in warm water with diluted kitchen detergent first, then clean it with a soft sponge. Rinse and dry them well.
- For cleaning tumbler, the sponge with long and thin handle is recommended. Clean the edge of tumbler thoroughly.
- Remove the lid gasket before cleaning. (Dry it well, and put it back along the inboard edge of the lid.)
natural_image
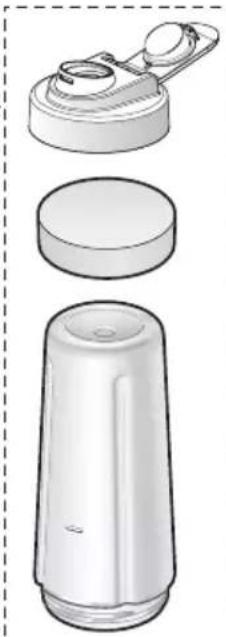
Illustration of three types of thermosmear devices: a cylindrical cap, a lid, and a cylindrical container (no text or symbols)Clean the tumbler base especially the blade and its surrounding with a brush under running water. (Brush is not provided.)
- Do not clean the blade with bare hand.
- Do not use hot water above 40^ C .
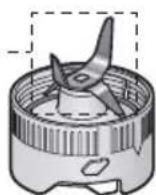
Wipe with a damped cloth.
Storing
- Dry the tumbler base thoroughly, then assemble the tumbler.
●Dry the lid thoroughly, then keep it separately.
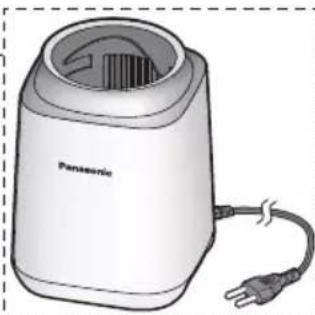
natural_image
Illustration of a Panasonic electric heater with a power cord (no text or symbols on the device itself)EN12
When the tumbler base gasket needs to be cleaned
Remove the tumbler base gasket from its base before cleaning.
Soak in warm water with diluted kitchen detergent. Wash it with a soft sponge, rinse and dry them well. Attach it along the inboard edge of the tumbler base.
Detaching A
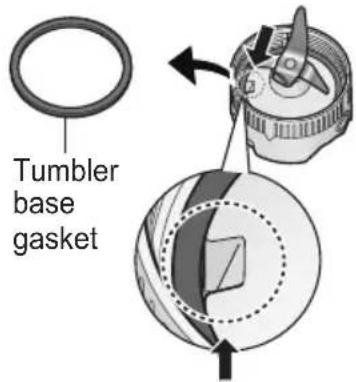
Taking out from here
- Press the gasket firmly to prevent the gap between the gasket and the groove occurring or the gasket bulge out.
Press down to the bottom until there is no gap.
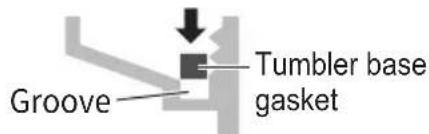
[Cross section]
Using dishwasher and dish dryer
Safe √ / Unsafe ✗
| Lid | Lid gasket (Black) Opening cap gasket(Gray) | Tumbler | Tumbler base | Tumbler base gasket (Gray) | Motor housing |
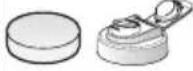 | 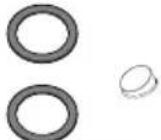 | 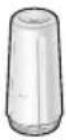 |  |  |  |
| √ | × | √ | × | × | × |
●Make sure to read the operating instructions of the dishwasher and dish dryer before use. Make sure to use a detergent intended for use with a dishwasher.
- Keep distance these items from the heating element, and set temperature to low if using a model with heat control.
EN13
Troubleshooting
Check following points before calling or arranging for repair.
| Problem Cat | and Action |
| Even though the tumbler is twisted to "ON" direction, the appliance does not start blending. | ●The tumbler unit is not attached with the motor housing properly.→When attaching it, make sure the marks on tumbler base and motor housing have been aligned, then twist it firmly until you hear a "click" sound.●The tumbler base is not attached tightly.→Assemble it tightly.●The power plug is disconnected.→Insert the power plug into outlet firmly.●Ingredients are stuck around the blade.→Remove all ingredients and then replace them. |
| The blade is idling. | ●The liquid amount is not enough.→Add more liquid.●Too much ice cubes.(e.g. juice with a lot of ice)→1 Twist the tumbler back to "OFF" direction, remove tumbler after rotation stops completely.2 Shake the tumbler gently.·If it happens again, reduce the ingredients. |
| The appliance stops during blending. | ●The overloading protection device is activated.●Prohibited ingredients are added.●Too much ingredients are used.●Ingredients are too large.●Ingredients are too hard. (e.g. shaved ice)●There is abnormal noise or vibration is too large.→Refer to "Overloading Protection" for inspection.(P. EN15)If prohibited ingredients are used, remove them. |
| There is abnormal noise or vibration. | ●Too much ingredients.→Twist tumbler to "OFF" direction and reduce ingredient amount.●The tumbler unit is not assembled firmly.→Assemble it firmly. (P. EN8) |
EN14
Problem Ca
The mxiture is leaking.
and Action
●The tumbler unit is not assembled firmly.
→Assemble it firmly. (P. EN8)
●The lid gasket or tumbler base gasket is not attached firmly.
→ Attach it properly.
●Foreign matters are adhered around the lid gasket or tumbler base gasket.
→ Remove the foreign matters.
●The tumbler base gasket is damaged.
→Replace it.
●Lubrication oil might be traced around the upper connector (P. EN7) but it will not affect the performance. Wipe them off with kitchen paper.
●"Peep" sound may be heard during operation, but it is not abnormal.
Overloading Protection
In case of overload and overheating, the protection device is triggered to stop operation and it is not abnormal. After rotation stops, follow the below steps:
- Do not operate the appliance repeatedly without any countermeasure.
1 Unplug the appliance and rest for 10 minutes in order to release the overloading protection.
2 Twist tumbler back to "OFF" direction, remove it from motor housing. And reduce the ingredients in tumbler to less than half.
- Remove the prohibited ingredients if used.
- When the blade is stuck with ice cubes, remove them from the tumbler. For the caught ones around the blade, remove them by flushing water.
●For ingredient etc. with high viscosity or low moisture, reduce the ingredients and add more liquid.
3 Reset the tumbler, start blending again.
(If appliance still does not operate, contact Panasonic Service Centre for inspection or repair.)
Replacement Parts
Replacement parts are available at the Service Centre.
● Consumable parts
| Part Name | Tumbler base gasket |
| Lid gasket | |
| Opening cap gasket |
- Optional parts
| Part Name | 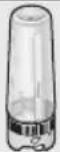 | Tumbler unit·Tumbler·Tumbler base(attached with tumbler base gasket) |
 | Lid (attached with lid gasket, opening cap gasket) | |
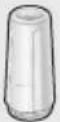 | Tumbler |
Specifications
| Power supply 220 V 50 | -60 Hz ~ | |
| Power consumption 310 W | ||
| Rated time | continuous operation(Repeat the cycle of 3 min ON and then 1 min OFF) | |
| Working capacity(approximately) | 400 mL | |
| Length of power cord(approximately) | 1.0 m | |
| Dimensions(approximately) | W 1 | 2.0 cm |
| D 12 | 2.0 cm | |
| H 32 | 2.2 cm | |
| Weight (approximately) 1.1 k g | ||
EN16
Lắp ráp
natural_image
Illustration of a milk can pouring liquid into a clear glass bottle (no text or symbols)natural_image
Diagram of a blender with a handle and base, showing the blade being inserted (no text or symbols present)Hình 3
natural_image
White cylindrical object with a flat top and side profile, resembling a plastic or paper container (no text or symbols visible)VIỆT NAM
natural_image
Technical illustration of a mechanical component with no visible text or symbols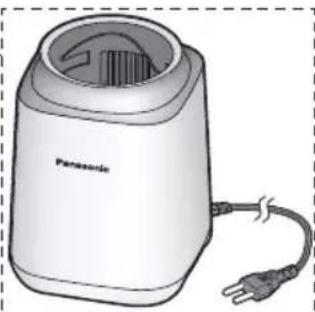
natural_image
Illustration of a Panasonic electric heater with a power cord (no text or symbols on the device itself)VN12
Bảo quản
- Panasonic®
- Operating Instructions Hướng Dẫn Sử Dụng
- Contents Page
- Safety Precautions
- WARNING
- CAUTION
- To prevent electric leakage, electric shock, fire caused by short circuit, scald, injury or property damage.
- Important Information
- Parts Names and Instructions
- Tumbler unit preparation
- Disassembly
- Assembly
- Note
- Before Use
- Prohibited Ingredients
- ■Hard ingredients
- ■Paste ingredients
- ■Sticky, low moisture content ingredients
- ■Ingredients with rich fibers or muscles
- ■Pressure inducing ingredients
- ■Ingredient contains oil
- How to Use
- Ingredients Preparation
- Ingredients order into tumbler
- Pour liquid first, followed by hard ingredients and then others.
- Recipes
- Cleaning and Care
- Prewash
- Storing
- When the tumbler base gasket needs to be cleaned
- Detaching A
- Using dishwasher and dish dryer
- Safe √ / Unsafe ✗
- Troubleshooting
- Problem Ca
- and Action
- Overloading Protection
- Replacement Parts
- Specifications
- Lắp ráp
- Bảo quản
Brand : PANASONIC
Model : MX-XP103
Category : Blender