DV2100 - Uncategorized MARANTZ - Free user manual and instructions
Find the device manual for free DV2100 MARANTZ in PDF.


| Product Type | DVD Player |
| Brand | Marantz |
| Model | DV2100 |
| Dimensions (W x D x H) | 420 x 309 x 76 mm |
| Weight | 4.2 kg |
| Power Consumption | 17 W |
| Power Requirements | AC 230 V, 50 Hz |
| Disc Compatibility | DVD VIDEO, Video CD, CD, CD-R/RW (music only), DVD±R/RW (video only) |
| Audio Output Formats | Dolby Digital, DTS, MPEG, Linear PCM |
| Built-in Audio Decoder | Dolby Digital, DTS |
| Surround Sound Output | 5.1 Channel (Front L/R, Center, Surround L/R, Subwoofer) |
| Video Outputs | Composite (RCA), S-Video, SCART (AV EUROCONNECTOR with RGB) |
| Digital Audio Outputs | Optical (TOSLINK), Coaxial (RCA) |
| Analog Audio Outputs | 2-channel (RCA) and 5.1-channel (RCA) |
| TV System Switch | NTSC, PAL, AUTO (supports conversion for Video CD) |
| Parental Lock | Yes (8 levels, password protected) |
| Multi-Angle Playback | Yes (supports discs with multiple camera angles) |
| Multi-Language Support | Yes (audio, subtitles, menus - up to 8 audio languages, 32 subtitle languages) |
| Setup Navigator | Yes (on-screen guided setup for audio, video, language) |
| Remote Control | Included (with AA R6P batteries) |
| Accessories Included | Audio/Video cable, Audio cable, Euro SCART cable, Remote control cable, Power cable, Operating manual |
| Region Code | Refer to rear panel; supports region 2 (UK/Europe) typically |
| Safety & Certifications | CE marked, complies with EMC and Low Voltage directives |
Frequently Asked Questions - DV2100 MARANTZ
User questions about DV2100 MARANTZ
0 question about this device. Answer the ones you know or ask your own.
Ask a new question about this device
Download the instructions for your Uncategorized in PDF format for free! Find your manual DV2100 - MARANTZ and take your electronic device back in hand. On this page are published all the documents necessary for the use of your device. DV2100 by MARANTZ.
USER MANUAL DV2100 MARANTZ
This section must be read carefully before any connection is made to the mains supply.
WARNINGS
Do not expose the equipment to rain or moisture.
Do not remove the cover from the equipment.
Do not insert anything into the equipment through the ventilation holes.
Do not handle the mains lead with wet hands.
Make a space of about 0.1 meter around the unit.
CE marking

This product is in conformity with the EMC directive and low-voltage directive.
EQUIPMENT MAINS WORKING SETTING
Your Marantz product complies with the household power and safety requirements in your area.
IMPORTANT: (FOR UK version only)
This apparatus is fitted with an approved moulded 13 Amp plug. To change a fuse in this type of plug proceed as follows:
- Remove fuse cover and fuse.
- Fix new fuse which should be a BS1362 5A, A.S.T.A. or BSI approved type.
- Refit the fuse cover.
If the fitted plug is not suitable for your socket outlets, it should be cut off and an appropriate plug fitted in its place. If the mains plug contains a fuse, this should have a value of 5A. If a plug without a fuse is used, the fuse at the distribution board should not be greater than 5A.
NOTE : The severed plug must be destroyed to avoid a possible shock hazard should it be inserted into a 13A socket elsewhere.
HOW TO CONNECT A PLUG
The wires in the mains lead are coloured in accordance with the following code:
BLUE—"NEUTRAL" ("N")
BROWN—"LIVE" ("L")
- The BLUE wire must be connected to the terminal which is marked with the letter "N" or coloured BLACK.
- The BROWN wire must be connected to the terminal which is marked with the letter "L" or coloured RED.
- Do not connect either wires to the earth terminal in the plug which is marked by the letter "E" or by the safety earth symbol ± or coloured green or green-and-yellow.
Before replacing the plug cover, make certain that the cord grip is clamped over the sheath of the lead — not simply over the two wires.
PRECAUTIONS
The following precautions should be taken when operating the equipment.
GENERAL PRECAUTIONS
When installing the equipment ensure that:
– the ventilation holes are not covered.
– air is allowed to circulate freely around the equipment.
- it is placed on a vibration-free surface.
- it will not be exposed to excessive heat, cold, moisture or dust.
- it will not be exposed to direct sunlight.
– it will not be exposed to electrostatic discharges.
In addition, never place heavy objects on the equipment.
If a foreign object or water does enter the equipment, contact your nearest dealer or service center.
Do not pull out the plug by pulling on the mains lead; grasp the plug.
It is advisable when leaving the house, or during a thunderstorm, to disconnect the equipment from the mains supply.
CONGRATULATIONS ON YOUR PURCHASE OF THIS FINE MARANTZ PRODUCT.
MARANTZ is on the leading edge of DVD research for consumer products and this unit incorporates the latest technological developments.
We are sure you will be fully satisfied with the DVD player. Thank you for your support.
Please read through these operating instructions so you will know how to operate your model properly. After you have finished reading the instructions, put them away in a safe place for future reference.
• This player is not suitable for commercial use.
This product incorporates copyright protection technology that is protected by method claims of certain U. S. patents and other intellectual property rights owned by Macrovision Corporation and other rights owners. Use of this copyright protection technology must be Authorized by Macrovision Corporation, and is intended for home and other limited viewing uses only unless otherwise authorized by Macrovision corporation. Reverse engineering or disassembly is prohibited.
Features of This Player
Compatible with DVD, Video CD and CD formats
DVD, Video CD and CD discs that display the logos shown below can be played back on MARANTZ DVD players. For more information on discs compatible with this player, refer to the table below.
| Types of playable discs and their marks | Diameter/Playable sides | Playback time | |
DVD VIDEO | DVD VIDEO12 cm (5in.)/single-sided12 cm (5in.)/double-sided | 1 layer2 layer1 layer2 layer | Digital audioDigital video(MPEG 2)133 min.242 min.266 min.484 min. |
| DVD VIDEO8 cm (3 in.)/single-sided8 cm (3 in.)/double-sided | 1 layer2 layer1 layer2 layer | Digital audioDigital video(MPEG 2)41 min.75 min.82 min.150 min. | |
VIDEO CD | VIDEO CD12 cm (5 in.)/single-sided | Digital audioDigital video(MPEG 1)Max. 74 minutes | |
| VIDEO CD single8 cm (3 in.)/single-sided | Digital audioDigital video(MPEG 1)Max. 20 minutes | ||
CD   | CD12 cm (5 in.)/single-sided | Digital audioMax. 74 minutes | |
| CD single8 cm (3 in.)/single-sided | Digital audioMax. 20 minutes | ||
The disc format logos shown above are found on disc labels or on disc jackets.
- To prevent malfunction, do not use an 8 cm (3 in.) adaptor (for CDs).
• Discs other than the ones indicated above cannot be played on this unit. - DVDs that have incompatible region numbers, DVD-Audio, DVD-ROM, and CD-ROM cannot be played on this unit. The region number of the player can be found on the rear panel.
*1 Playing recordable CDs
- Note that this unit cannot record onto recordable discs.
- This unit can play music-use CD-R and CD-RW discs. However, depending on the condition of the player and the disc, you may find that not all discs will play successfully. (For example, if the disc is scratched or dirty, or if the player's pickup lens is dirty.)
Compatible with a wide range of DVD digital audio output formats


DVDs are recorded in one of four types of digital audio formats (as of October 1998). The digital audio output jacks of this player output Dolby Digital*, DTS**, MPEG, and linear PCM digital bitstreams.
This player has a function that converts Dolby Digital and MPEG audio formats into the linear PCM format. This allows playback of DVDs recorded in Dolby Digital and MPEG without the need for a decoder.
Equipped with six channel discrete audio output and an internal Dolby Digital and DTS decoder
Enjoy the cinematic surround sound produced by Dolby Digital and DTS audio soundtracks without the need for an external decoder. This player features six channel discrete audio output jacks so you can connect this player directly to an amplifier or receiver with 6 channel discrete input, and utilize the player's built-in Dolby Digital and DTS decoding capabilities.
Multiple video output formats that can be selected to best suit your TV or monitor
This player features one composite, one S-video jacks, and one AV CONNECTOR terminals. RGB signal output is possible from the AV CONNECTOR terminal.
(●)TruSurround
TruSurround and Virtual Dolby Digital
TruSurround*** uses technology that simulates multichannel surround sound using only two speakers. Virtual Dolby Digital works in conjunction with Dolby Digital audio sources to create a realistic surround sound. Virtual Dolby Digital is selected automatically when Dolby Digital sources are loaded.
Frame advance playback in foward and reverse direction
This player incorporates technology that enables frame advance playback of DVDs. In the forward direction, the playback speed can be adjusted four steps. In the reverse direction, the playback speed can be adjusted two steps.
Easy setup and adjustment using on-screen menus
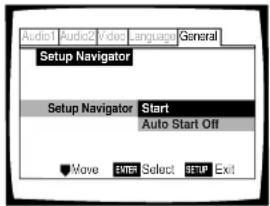
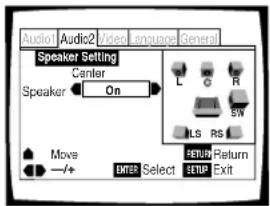
Press SETUP on the remote control to open the Setup screen and you'll find setting up and adjusting the system easy to do with on-screen menus conveniently organized and arranged. Additionally, on-screen information (①) ^4 appears to clarify the functions and explain the options available. Below are just a few examples.
Set up the on-screen speaker system to match your home audio system in the Audio 2 menu for ideal presentation of multichannel audio (page 28).
Answer a few questions and have all the necessary audio, video, and on-screen language adjustments set automatically by the player using the Setup Navigator (page 15).
* Manufactured under license from Dolby Laboratories. "Dolby" and the double-D symbol are trademarks of Dolby Laboratories. Confidential unpublished works, © 1992-1997 Dolby Laboratories. All rights reserved.
** "DTS" and "DTS Digital Surround" are trademarks of Digital Theater Systems, Inc. Manufactured under license from Digital Theater Systems, Inc.
*** TruSurround and the (●) symbol are trademarks of SRS Labs, Inc. in the United States and selected foreign countries. TruSurround technology is incorporated under license from SRS Labs, Inc.
Wide range of DVD viewing options
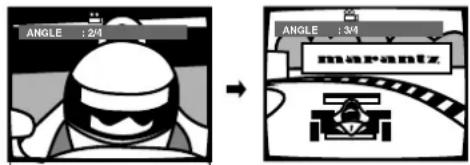
Multi-Angle (page 31)☆
You can view scenes from different camera angles when watching movies or other media with multiple angle playback available.
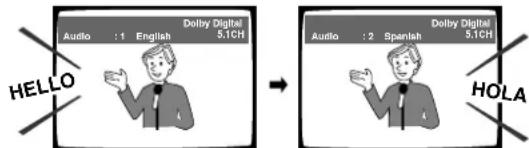
Multiple Languages (page 34)☆
You can select the language on when watching movies or other media that have multiple language and/or audio soundtracks recorded on them.
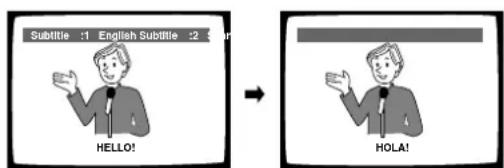
Multi-Language Subtitles (page 35)☆
You can select a subtitle language or turn subtitles off when watching movies or other media with subtitles available.
☆This mark indicates this may not be possible with certain discs.
Differences in Disc Composition
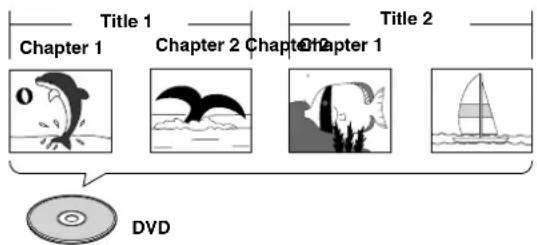
DVD
DVDs are divided into units referred to as titles, and titles are divided into chapters. A DVD which contains a movie may have only one title with many or no chapter divisions. Karaoke DVDs may have many titles, assigning a title to each song on the disc. Menu screens do not belong to any title.
DVD player functions generally apply to titles on a disc or chapters within a selected title. The player functions available may also vary from title to title, depending on the disc. When discs have a unique title division, it should be noted that search and program functions may be affected.
Video CD/CD
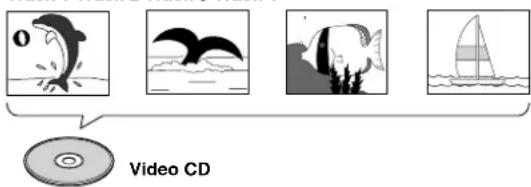
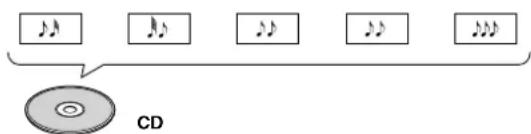
Video CDs and CDs are divided into units referred to as tracks (Video CD tracks may also be referred to as scenes). One song generally corresponds to one track. Some tracks are further divided into units referred to as indexes. Video CDs with PBC (Playback Control) also contain menus recorded on the disc which enable easy access to the contents of the disc.
When played back on a DVD player, both Video CDs and CDs are considered to be a single title, regardless of the number of tracks.
Track 1 Track 2 Track 3 Track 4
Track 2 Track 4 Track 3 Track 1 Track 5
How to Proceed in This Manual
DVD is an incredible format that presents the highest quality digital audio and video available today. The amount of information that can be recorded onto a DVD disc is remarkable, allowing it to offer numerous functions and features available with no other format.
Because using the DVD player and DVDs may be confusing at first, following the order below should help you get through the important stages of getting set up so you can start using your player as soon as possible.
Get familiar with the player.
Refer to the section "Before Using" on page 6 to confirm that all the accessories were included with the player. If you are new to DVD, it might be beneficial for you to go through the "Names and Functions" section starting on page 7 to get familiar with the parts and buttons on the main unit and remote control as they will be referred to throughout this manual.
There is also a list of terms that can be found on page 56 if you are having trouble understanding some of the terminology associated with DVD.
Make the necessary connections.
No entertainment system seems to be set up exactly the same way. The "Making Connections" section starting on page 10 shows how video and audio connections may be made to suit your home entertainment system.
Set up the necessary player menus.
Before you can begin to enjoy the benefits of the DVD format, it is first necessary to set up the player to output the video and audio information that corresponds to your system. The section "Setting Up the Player" starting on page 15 explains how to use the Setup Navigator, a function that automatically sets up the player corresponding to the answers given in a multiple-choice on-screen procedure. The Setup screen menus, described in the section starting on page 23, are also used in a number of other functions. Learning the procedure for operating these menus will make using this player much easier and more enjoyable.
Play a disc.
When all the connections and setups have been made, you are ready to play a DVD, Video CD, or CD with the player. The section "Getting Started Using Your DVD Player" starting on page 19 outlines the basic player operations.
Enjoy the many features available.
Once you are comfortable using the basic player functions, you are ready to take advantage of the various options DVD and this player have to offer. The section "Advanced Functions" starting on page 37 describes how to use the features available on many DVDs.
Table of contents
Before Using ....6
Checking Accessories 6
Preparing the Remote Control 6
Names and Functions ....7
Front Panel 7
Rear Panel 8
Display Window....8
Remote Control....9
Making Connections ....10
Connecting Your DVD Player 10
Audio Connections 12
Video Connections 13
A/V EUROCONNECTOR Connection ....14
System Control Connections 14
Setting Up the Player ....15
Using the Setup Navigator 15
Getting Started Using Your DVD Player ...19
Playing DVDs, Video CDs and CDs .....19
Chapter (Track) Skip Forward/Skip Back .....21
Forward and Reverse Scanning....21
Resuming playback from where you stopped .....22
Stopping Playback and Switching Power Off.....22
Adjusting Audio and Video Settings .....23
Using the Setup Screen Menus....23
Changing to the Setup Screen "Expert" Menu Mode....24
Setting the Digital Audio Output To Be Compatible with Your AV Component ....25
Getting Surround Sound from Stereo Speakers ...26
Adjusting the Dynamic Range of the Audio Soundtrack 27
Setting Analog Audio Connections to an AV Amplifier or Receiver 27
Setting Your Speaker System for Multichannel Audio Playback....28
Setting the TV Screen Size 29
Setting the Video Output Format for AV CONNECTOR Connections ....30
Switching the S-Video Output ....30
Selecting the type of paused image to display....30
Setting the position of the on-screen display .....30
Viewing from a Desired Camera Angle (Multi-Angle) 31
Setting the Language Options ....32
Setting the on-screen display (OSD) language ...32
Setting Language and Subtitle Preferences in the Setup Screen Menus ....32
Changing the Audio Language (Multi-Language Function) 34
Selecting a Subtitle Language (Multi-Language Subtitles) 35
Advanced Functions ......37
Setting the Parental Lock Level....37
Turning the Screen Saver On and Off ....39
Changing the Background Color of the Screen ...39
Still Frame/Slow Play/Frame Advance Playback ..40
Searching for a Title, Chapter, Track, or Location on a Disc....41
Repeat Play 42
Random Play 43
Playback in a Desired Order (Program Play) .....44
Continuing Playback from a Specified Location (Last Memory)....47
Memorizing Settings for Often Viewed DVDs (Condition Memory) 48
Viewing Disc Information 49
Resetting the Player to System Settings ....50
Additional Information ....51
Disc Care....51
For Proper and Long Use of This Unit ....52
Language Code List....53
Troubleshooting 54
Terms 56
Specifications 57
Before Using
Checking Accessories
Please confirm that the following were received with the player.
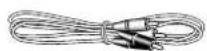
Audio / Video cord ....1
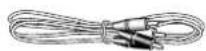
Audio Cord 2
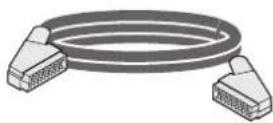
Euro SCART cable ....1
Remote Control cord ....1

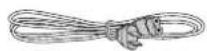
Power cord ....1
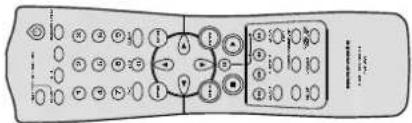
Remote control unit .... 1
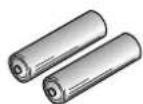
AA/R6P batteries 2
Operating instructions (this manual) ..... 1
Preparing the Remote Control
Inserting batteries into the remote control
1 While pushing the tab on the battery compartment cover toward the center of the remote, pull out in the direction indicated by the arrow.
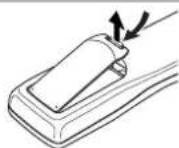
2 Insert batteries.
Make sure to match the plus (+) and minus (−) polarity guides on the batteries with the marks inside the battery compartment.
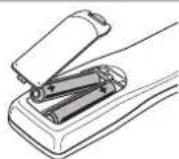
3 Close the cover.
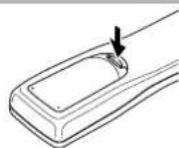
Notes
- Do not mix old and new batteries.
- When replacing batteries, use all new batteries.
- When not using the remote control for a long period of time (over 1 month), remove the batteries to avoid possible damage from battery corrosion. If battery leakage occurs, wipe the battery liquid from the battery component, then insert new batteries.
- When disposing of used batteries, please comply with governmental regulations or environmental public instruction's rules that apply in your country or area.
Remote control operation
When operating the remote control, point it at the remote sensor located on the player's front panel. The remote control can be used up to 17 feet (5 m) from the player and within a 30° angle on each side of the sensor.
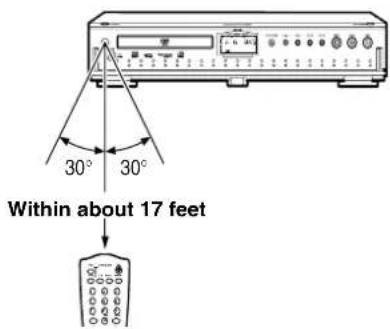
Notes
- Exposing the remote sensor to direct sunlight or strong light may cause faulty operation.
- When using this DVD player independently, set a REMOTE CONTROL switch on the rear panel to "INTERNAL". (Page 14)
Names and Functions
Front Panel
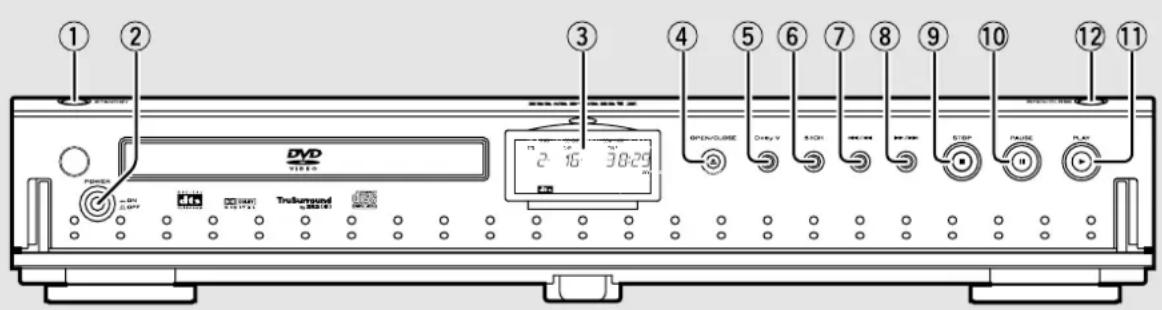
①STANDBY button/standby indicator (Page 22)
②Power switch (Page 15, 19, 22, 23, 50)
③DISPLAY (Page 8)
④(Tray) Open/close button (Page 19, 22)
⑤Dolby V (irtual) button (Page 26)
⑥5.1 CH (mode) button (Page 12, 27)
⑦REVERSE button (Page 21, 40)
⑧FORWARD button (Page 21, 40)
⑨STOP button (Page 22, 50)
⑩PAUSE/STEP button (Page 40)
⑪PLAY button (Page 19, 21, 40)
⑫(Door) open/close button (Page 19)
Rear Panel
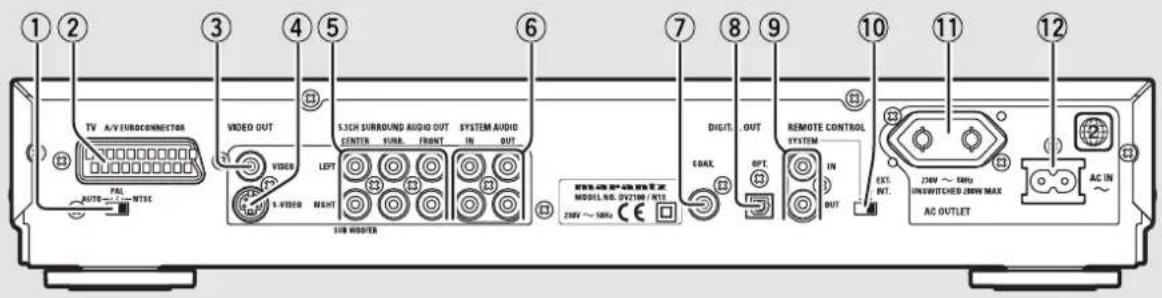
①TV SYSYEM switch (Page 13)
②A/V EUROCONNECTOR Jacks (Page 14)
③Video out jacks (Page 10, 11, 13)
④S Video out jack (Page 11, 13)
⑤5.1CH SURROUND AUDIO OUT jacks (Page 11)
⑥SYSYEM AUDIO IN/OUT jacks (Page 10, 12)
⑦BITSTREAM/PCM Coaxial digital audio out jack (Page 12)
⑧BITSTREAM/PCM Optical digital audio out jack (Page 12)
⑨REMOTE Control in/out jacks (Page 14)
⑩REMOTE CONTROL SYSTEM/ EXTERNAL/INTERNAL switch (Page 14)
⑪AC outlet jack
⑫AC IN power cord connection terminal (Page 10, 11)
Display Window
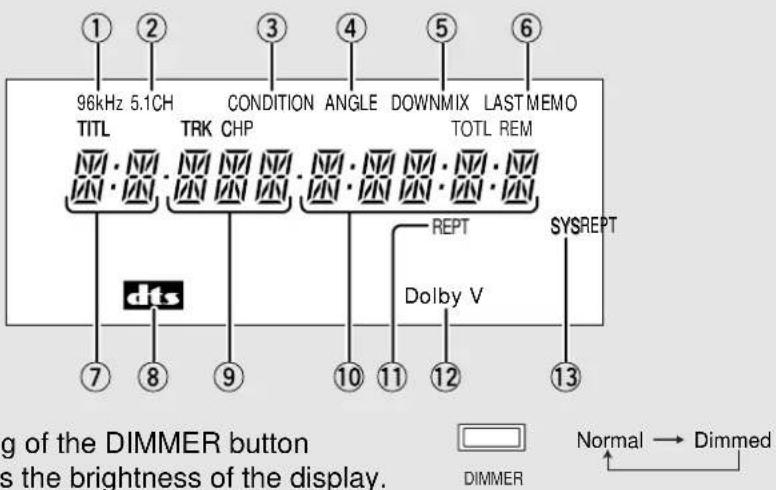
①96 kHz indicator
②5.1CH indicator
③Condition MEMO indicator
④Camera Angle indicator
⑤DOWN MIX indicator
⑥LAST MEMO indicator
⑦TITLE number indicator
⑧DTS indicator
⑨CHAPTER/TRACK number indicator
⑩TOTAL/TRACK indicator
⑪CHAPTER/TITLE/TRACK Repeat indicator
⑫Dolby V(irtual) indicator
⑬SYS BUS indicator
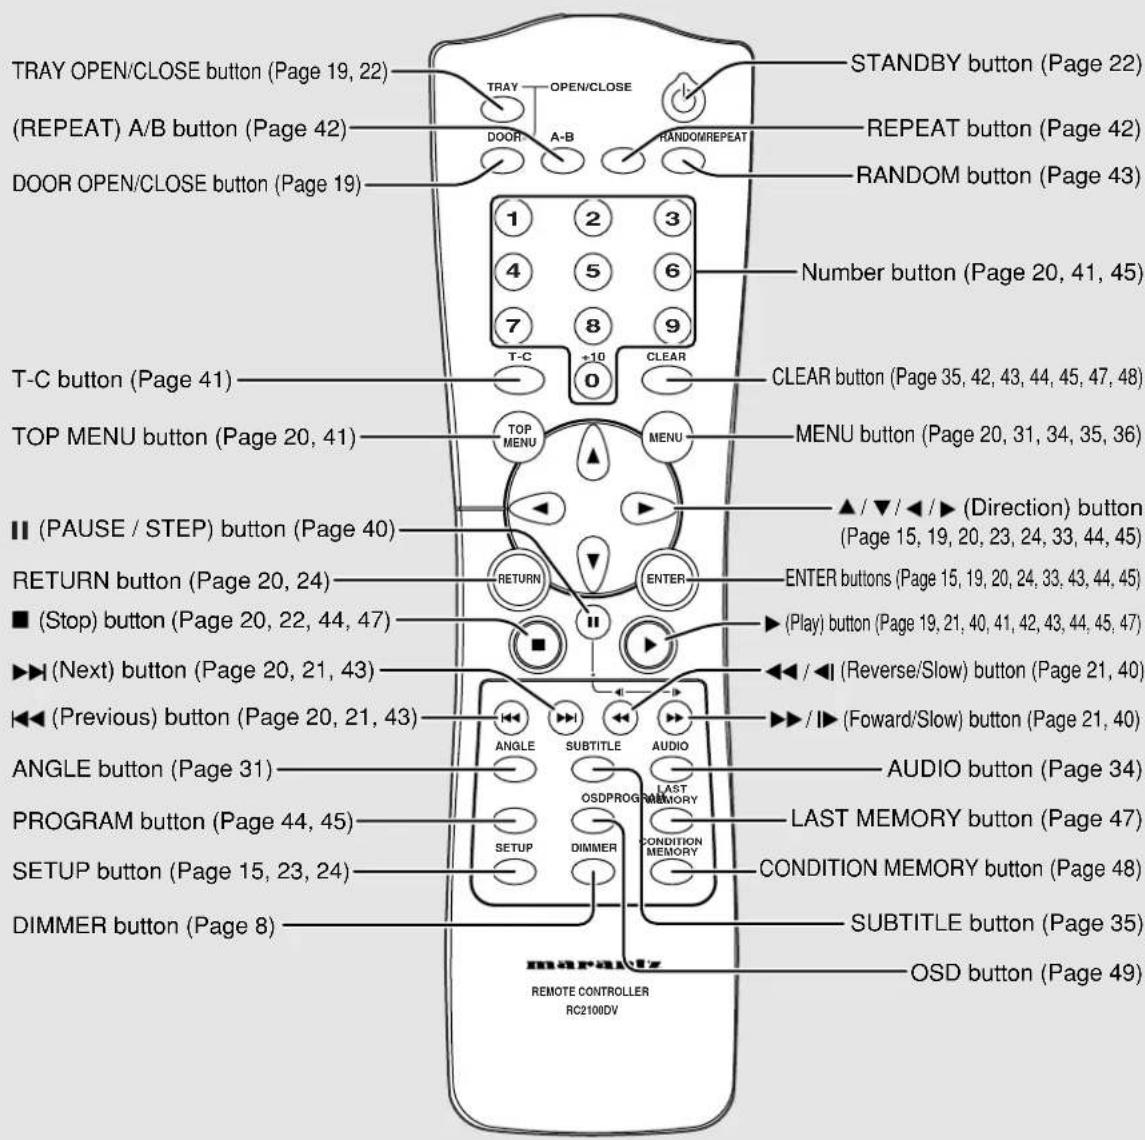
Remote Control
Making Connections
Connecting Your DVD Player
Unlike any other audiovisual media format, DVD offers a wide array of audio and video output options which allows playback to be enjoyed in any number of system configurations from a standard TV with stereo audio input to a home theater system with a TV or monitor and full surround sound capabilities.
Connection Guide
The illustration on this page shows the basic setup using the audio and video cords included with this player. Use this illustration as a guide to setting up your home system.
An explanation of each type of audio and video connection available can be found on pages 12 to 14. To determine the best audio and video connection setup for your system, refer to the manuals supplied with the components you are making connections to.
In addition to making physical connections to your TV or monitor, it is also necessary to assign the TV screen size. You can use the [Setup Navigator] in the Setup screen General menu to set whether you are using a wide screen or standard size TV or monitor (page 16). Additionally, you can use the
[TV Screen] setting in the Setup screen Video menu (page 29).
Notes
- When making connections to this unit or when changing connections, check that the unit is off by pressing Power Switch and unplug the power cord from the power outlet.
- The analog video output on this player uses copy protect circuitry to prevent the video playback on DVDs from being copied. If you connect the player to a TV via a VCR, or record and play back the contents of a disc with a VCR, the playback picture may not be normal.
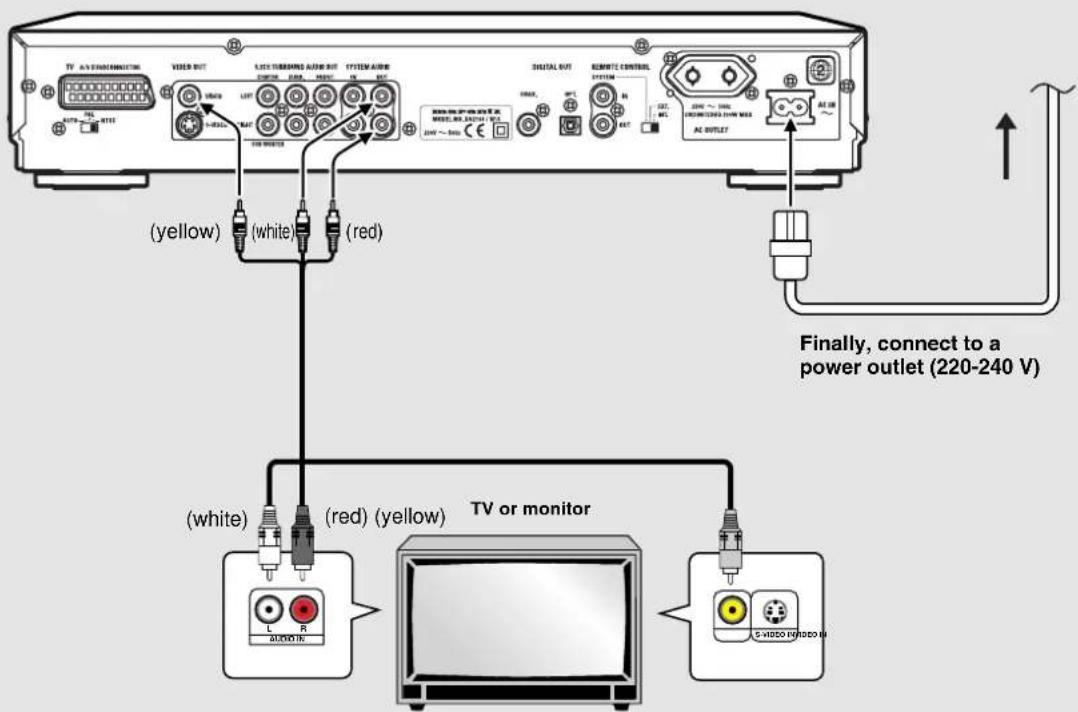
Make audio connections from the AUDIO OUT jacks on the player to the AUDIO IN jacks on the TV or monitor using the stereo audio cord included with the player. Be sure to match the color of the plugs with the color of the jacks (red and white).
Make video connections from the VIDEO OUT jacks on the player to the VIDEO IN jack on the TV or monitor using the video cord included with the player.
Home Theater Component Connections
The connections on this page demonstrate the versatility of this player to conform to any number of home entertainment systems.
Please note that the illustration shown on this page is meant as an example. Please refer to the manuals supplied with the components to which you are making connections to determine the best possible setup for your home system.
An explanation of each type of audio and video connection available can be found on pages 12-14.
5.1 CH SURROUND AUDIO OUT
5.1 channel audio refers to the current industry surround sound standard requiring two front speakers, a center speaker, two surround (rear) speakers and a sub woofer.
Although in actuality there are 6 channels, because the sub woofer channel, or LFE channel, makes up a mere fraction of the total audio soundtrack, it has been designated as the 0.1 of the 5.1 system.
By utilizing the player's internal multichannel audio decoder, the audio of Dolby Digital and DTS DVDs can be output from the 5.1 channel discrete outputs to an AV amplifier or receiver with 5.1 channel input capability.
![S-video connection produces a high quality video image. If you have a TV or monitor that features an S-video input, make video connections from one of the S-VIDEO OUT jacks on the player to the S-VIDEO IN jack on the TV or monitor using an S-video cord (not included) (page 13). TV or monitor S-video cord (Not included) Make connections from the 5.1 CH SURROUND AUDIO OUT on the player to an AV receiver or AV amplifier with 6 channel discrete input, often referred to as "5.1 channel ready" or "Dolby Digital ready". This allows you to use the high quality Dolby Digital and DTS decoding capabilities of the player. When making this kind of connection, be sure to select [5.1 Channel] in the Setup Navigator [Analog Jacks] screen (page 17). S-VIDEO OUT VIDEO LEFT RIGHT S-VIDEO S-VIDEO SURROUND AUDIO OUT CENTER VOLT FRONT IN OUT DIGITAL OUT CRACK RTC IN OUT REMOTE CONTROL SYSTEM EXT. INT. UNINTENDED 20W MAX AC OUTLET 1 A/V cords 2 stereo audio cords (Included) AV amplifier or AV receiver Finally, connect to a power outlet. (220–240V) • See your audio system's owner's manual for detail. Front Speaker (L) Front Speaker (R) Center Speaker Rear Speaker (L) Rear Speaker (R) Sub woofer](/content/2026/05/891817/images/b76223c8fce9eb9704b09d13124f545f62f8d9c0d708b8cfb445b5cb98fdc3b4.jpg)
Audio Connections
This player features two digital (optical and coaxial) and also analog 2 channel and 5.1 channel audio output connection possibilities.
Digital Audio Connections:
You can enjoy the digital audio recorded on DVD discs from both optical digital and coaxial digital output jacks.
When making digital audio connections, do not make connections from both the coaxial and optical digital outputs to the same component.
When a DVD recorded in Dolby Digital, DTS, or MPEG is loaded, noise will be output if you have made connections via the digital audio jacks to a receiver or amplifier that cannot decode a Dolby Digital, DTS, or MPEG digital bitstream. In this case, be sure to set up the Setup Navigator audio settings to best reflect the type of system you are using (page 18). Additionally, the digital audio settings can be adjusted manually in the Setup screen Audio 1 menu (page 25-26).
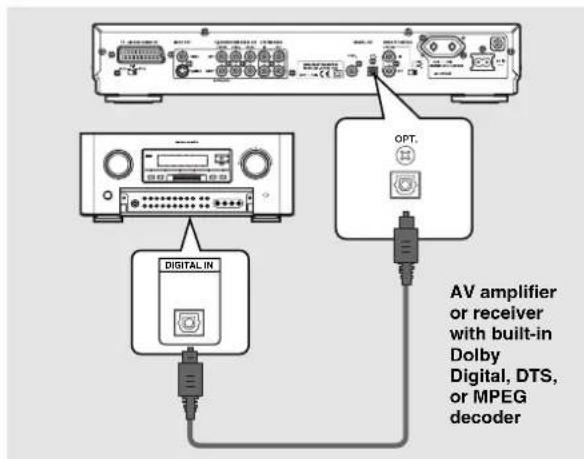
DIGITAL OUT (Optical)
The digital signal is transmitted as light pulses through a fiber-optic cable.
- Use to connect to an AV amplifier or receiver with built-in Dolby Digital, DTS, or MPEG decoder.
- Use a fiber-optic cable (not supplied) to connect the DIGITAL OUT OPT (digital optical output) on the player to the digital optical input on an AV amplifier or receiver.
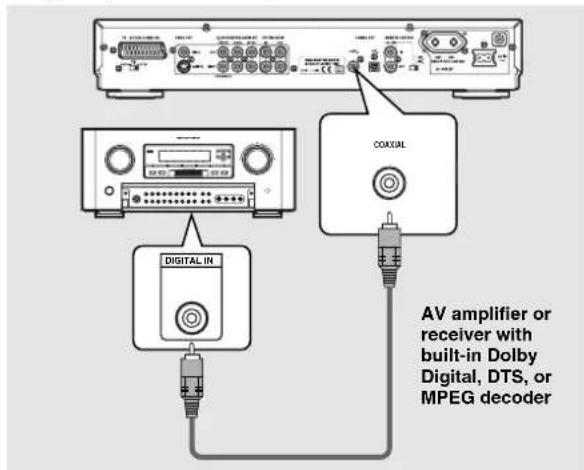
DIGITAL OUT (Coaxial)
The digital signal is transmitted electronically through a coaxial cable.
- Use to connect to an AV amplifier or receiver with built-in Dolby Digital, DTS, or MPEG decoder.
- Use a coaxial cable (not supplied) to connect the DIGITAL OUT (coaxial digital output) on the player to the coaxial digital input on an AV amplifier or receiver.
Analog Audio Connection:
After making physical connections to either the 2 CH AUDIO OUT or 5.1 CH SURROUND AUDIO OUT analog jacks, be sure to identify which output you are going to be using in the [Analog Jacks] screen of the Setup Navigator (page 17). You can also manually set the output in the [Audio Out] setting of the Setup screen Audio 2 menu (page 27).
Notes
- When [5.1 Channel] is selected, the front right (R) and left (L) audio channels are output from the SYSTEM AUDIO OUT jacks.
- The [Audio Out] setting creates an audio output default for the player. If connections are made to both SYSTEM AUDIO OUT (2 CH) and 5.1 CH SURROUND AUDIO OUT (5.1 CH) analog jacks to make different audio connections for multichannel and stereo audio sources, it is possible to switch between 2 channel and 5.1 channel audio output by pressing 5.1 CH (MODE) on the front panel. However, this button does not work when the on screen menu operation is being performed.
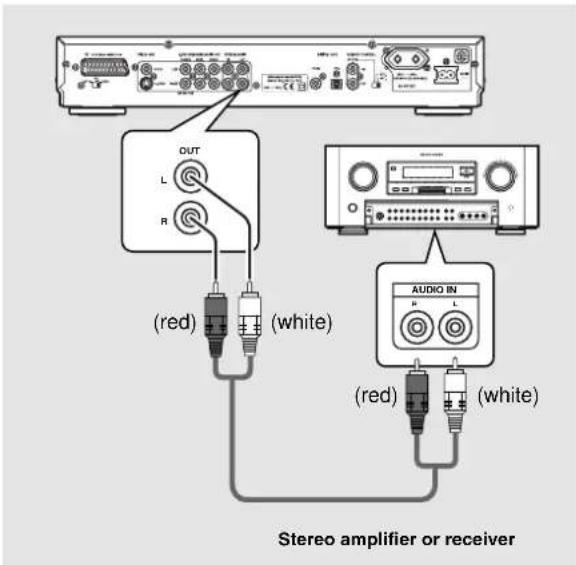
2 CH AUDIO OUT
- Make analog audio connections to a stereo amplifier or receiver.
- Analog audio connections can also be made to a TV or monitor with stereo input jacks.
- Use the supplied audio cord to connect the SYSTEM AUDIO OUT on the player to the audio input on the stereo amplifier or receiver.
- When making analog audio connections, be sure to match the color of the plugs with the color of the jacks (red and white).
- When making this kind of connection, be sure to select [2 Channel] in the Setup Navigator [Analog Jacks] screen (page 17).
5.1 CH SURROUND AUDIO OUT
- prease refer to previous page.
Video Connections
This player features S-video, composite, and component video output possibilities.
Check the manual supplied with your TV or monitor to determine the best possible connection for your system. In addition to making physical connections to your TV or monitor, it is also necessary to assign the TV screen size. You can use the [Setup Navigator] in the Setup screen General to set whether you are using a wide screen or standard size TV or monitor (page 16). Additionally, you can use the [TV Screen] setting in the Setup screen Video menu (page 29).
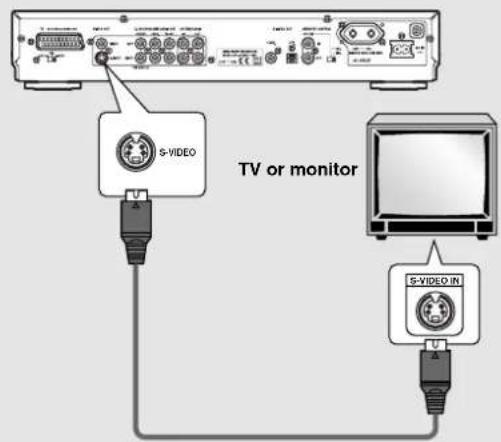
S-VIDEO OUT
- Make S-video connections to a TV or monitor with S-video input to produce a high quality video image.
- Use an S-video cable (not supplied) to connect the output on the player to S-video input on the TV or monitor.
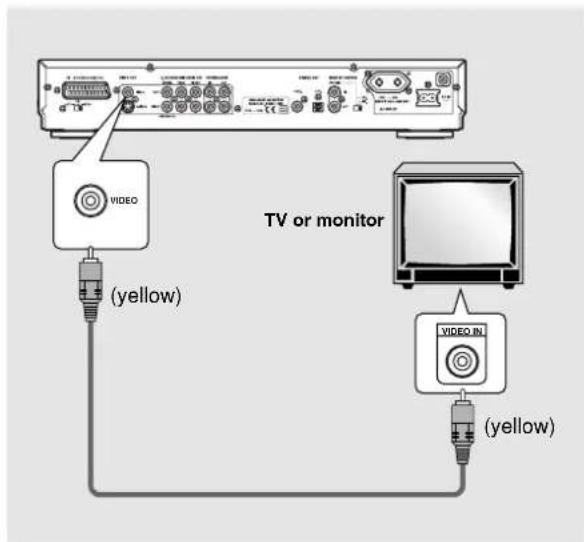
VIDEO OUT
- Make composite video connections to a standard TV or monitor with a video input jack.
- Use the supplied video cable to connect the VIDEO OUT jacks on the player to the video input on the TV or monitor.
- Be sure to match the color of the plug with the color of the jack (yellow).
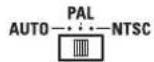
TV SYSTEM switch
Video output changes as follows according to the playback disc's recorded format.
NTSC → PAL, PAL → NTSC conversion is possible on Video CDs. PAL → NTSC conversion is not possible on DVDs. When the TV SYSTEM switch is set to the AUTO position, the disc's format will be output as is. When a CD or disc is not loaded, the previous video output format will be selected.
| Disc Output format | ||||
| Type | Format | Position of TV SYSTEM switch | ||
| NTSC PAL AUTO | ||||
| DVD | NTSC | NTSC MOD. PAL NTSC | ||
| PAL | —— | PAL PAL | ||
| Video CD | NTSC | NTSC MOD. PAL NTSC | ||
| PAL | NTSC PAL PAL | |||
| CD, No disc | NTSC PAL NTSC or PAL | |||
About MOD. (Modulation) PAL
- SHRINK
Most models of the newly developed countdown PAL TV system detect 50 Hz (PAL)/60 Hz (NTSC) and automatically switch vertical amplitude, resulting in a display without vertical shrinkage.
- If your PAL TV does not have a V-Hold control, you may not be able to view NTSC disc because the picture may roll. If the TV has a V-Hold control, adjust it until the picture stops rolling. On some TVs, the picture may shrink vertically, leaving black bands at the top and bottom of the screen. This is not a malfunction; it is caused by the NTSC → PAL conversion.
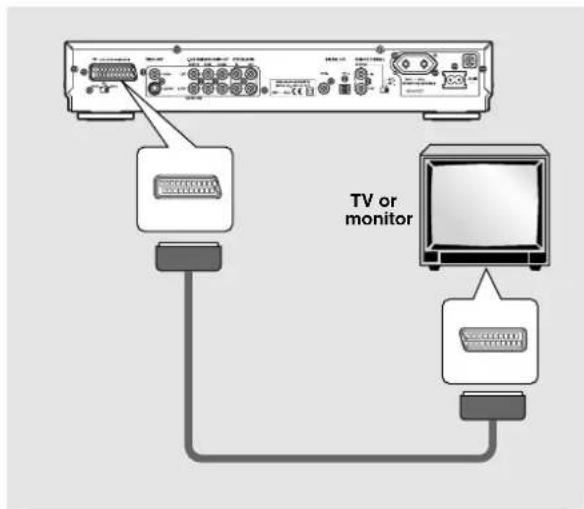
AV EUROCONNECTOR Connection
Using a 21-pin SCART cable (in cluded), connect the A/V EUROCONNECTOR jack on the player to a TV or monitor to achieve audio and video with a single connection.
- In addition to making physical connections to your TV or monitor, it is also necessary to set the video output format to composite video, S-video, or RGB in the Setup screen Video menu (page 30).
System Control Connections
CONNECTIONS
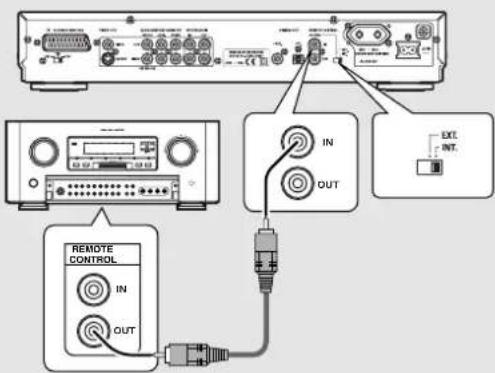
By connecting this DVD player to another Marantz audio component using a supplied Remote control cord, you can remotely operate the components as a single system.
- When connecting to component with a remote sensor (such as the SR-14, SR-18, SR-19, SR2100, PS2100), be sure to connect the "REMOTE CONTROL IN" jack of this DVD player to the "REMOTE CONTROL OUT" jack of the component with the remote sensor.
- When connecting to component which is not equipped with a remote sensor, be sure to connect the component to the "REMOTE CONTROL OUT" jack of this DVD player.
Remote switch
- INTERNAL MODE
①When using this DVD player independently, set this switch to "INTERNAL".
- EXTERNAL MODE
①When using this DVD player in a system with a Marantz tuner or timer equipped with a remote sensor, set the switch to "EXTERNAL.
②Synchronized power on and off
Connect with the remote control output jack of a component (such as the SR-14, SR-18, SR-19) which is compatible with Marantz remote control system. The remote control allows to switch the power of this DVD player to "POWER ON and Standby mode".
Note
be sure to leave power switch on the Front panel in the power mode.
- SYSTEM MODE
For details, refer to the User Guide of the PS2100 or SR2100.
When connecting this DVD player with any other New Slim Line Receiver (PS2100 or SR2100) using the remote control cable, set this switch to "SYSTEM." This makes it possible to do the following.
①Control this DVD player by the remote control of the New Slim Line Receiver (PS2100 or SR2100).
Note:
Use this combination of components with the power switch turned on. If the "SYSTEM BUS ERROR" message is displayed when this combination of components is used, re-check the remote control switch setting and connecting cables.
②Control the whole system using this DVD player's standby ON/OFF function.
③Control this DVD player's PLAY and STOP modes from the New Slim Line Receiver.
For further details, refer to the User Guide of the PS2100 or SR2100.
④Switch the New Slim Line Receiver's input selector to DVD by pressing this DVD player's play key.
⑤Automatically switch this DVD player's output (5.1 channels or 2 channels) to match the New Slim Line Receiver's surround mode. (PS2100 only)
⑥Switch this DVD player's output to 2-channel playback when the headphones facility of the New Slim Line Receiver (PS2100 or SR2100) is used.
Setting Up the Player
Using the Setup Navigator
The Setup Navigator has been designed to simplify the process of getting the DVD player ready to perform. Designed as a series of on-screen multiple-choice questions, the Setup Navigator automatically sets the audio, video, and language settings according to how the questions are answered. Once this procedure is complete, it will be possible to begin using the DVD player to enjoy DVDs.
The procedure on this page describes the operations necessary to function within the Setup Navigator screens. A detailed description of the contents of each question that appears on the screen can be found on the following pages.
When setting up for the first time
Some DVDs start playing automatically when loaded in the player. Because the Setup Navigator cannot be used if a disc is playing, it is recommended to set up the player using the Setup Navigator before loading a DVD for the first time. If a DVD has been loaded, be sure to press STOP■ before proceeding.
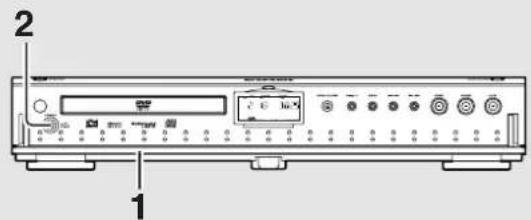
1 Open the Door Panel by hand.
2 Press Power switch on the front panel.
- Press the POWER switch on the Front panel to turn the power on, and press it again to turn the power off.
Note
When it is required to remote control the power mode of this DVD player, be sure to leave this switch in the power on mode.
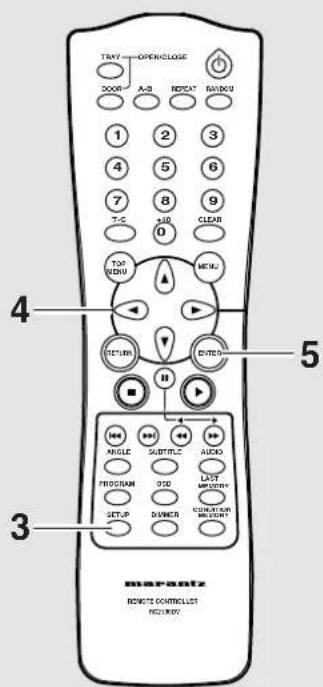
3 Press SETUP.
When SETUP is pressed for the first time, the following screen appears. Though the Setup Navigator may be used more than once, this screen only appears the first time SETUP is pressed.
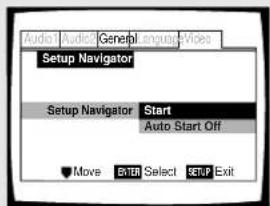
4 Use the cursor buttons ( ▲/∞) to make a selection.
- If you are going to use the Setup Navigator, it is not necessary to change the setting on the first screen. Please proceed to the next step.
- If you do not want to set up the player using the Setup Navigator, use the cursor button ( ) to select [Auto Start Off] at this time.
The Setup Navigator function may still be used at a later time in manual Setup screen menu operation (page 23).
5 Press ENTER.
The selection is entered and the next Setup Navigator screen appears.
Use steps 4 and 5 as a basis for entering selections on the all of the Setup Navigator screens described on the following pages.
To change the answer to a prior question
Use the cursor button (◀) to return to previous screens. Please note, however, that you cannot go forward using the cursor button (▶), so it will be necessary to answer all the questions that occur after the screen that was returned to.
To exit the Setup Navigator
Press SETUP while on any of the screens to exit the Setup Navigator. Please note that if the Setup Navigator is exited before all the questions are answered, no settings are changed.
To return to the Setup screen
Press RETURN. The Setup Navigator is exited and the Setup screen General menu screen appears. Please note that no settings are changed if RETURN is pressed before the Setup Navigator is finished.
Setting the OSD Language (On-Screen Display Language)
The [OSD Language] screen establishes the OSD language, or on-screen display language, which refers to the language that is used by the player in menus and on-screen messages. Additionally, the language that is established at this setting will also be used for the default audio and subtitle language.
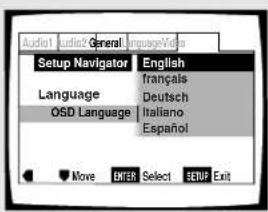
Settings: English*
français
Deutsch
Italiano
Español
* Factory setting
Note
In addition to setting the OSD language, the audio and subtitle language are also set at this time. If you wish to change the audio or subtitle language to a different language, make changes in the Setup screen Language menu [Audio Language] and [Subtitle Language] as needed (page 32, 35).
Setting the TV screen size
The [TV Type] screen establishes the size, or more appropriately the width to height ration of your television or monitor. The width-to-height ratio of conventional TVs is 4:3, while the width-to-height ratio of wide screen and high-definition TVs is 16:9. This width-to-height ratio is called the aspect ratio.
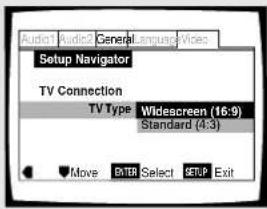
Settings: Widescreen (16:9)*
Standard (4:3)
* Factory setting
Note
- There are two screen formats that can be used to display wide-screen format DVDs: letter box and pan & scan. When [Standard (4:3)] is selected in the Setup Navigator, the letter box screen format is automatically selected. To switch the preference to the pan & scan format, make changes in the Setup screen Video menu [TV Screen] setting (page 29).
- When [Standard (4:3)] is selected in the Setup Navigator, Linear PCM digital audio playback is output is automatically downsampled to 48 kHz (when the original signal is 96 kHz). In order to hear audio at the sampling rate of 96 kHz, set the Setup screen Video menu [TV Screen] setting to either [16:9 (Wide)] or [4:3 (Pan & Scan)] (page 29). Additionally, make sure that your system is set up to output the 96 kHz bitstream using either the Setup Navigator or the Setup screen Audio 1 menu [96kHz PCM Out] setting (pages 18, 25).
Setting analog audio connections to an AV amplifier or receiver
The [Analog Jacks] screen establishes whether analog connections have been made to an AV amplifier or receiver, and if connections are made, whether the connections made are for 2 channel stereo or for 5.1 channel surround sound.
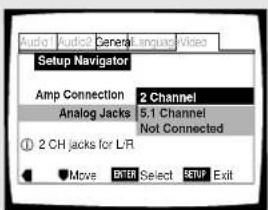
Settings: 2 Channel\*
Select if you have made 2 channel connections to an amplifier or receiver.
5.1 Channel
Select if you have made 5.1 channel connections to an AV amplifier or receiver with the appropriate inputs. When this setting is selected, several screens will follow to determine the configuration of your speaker system. These screens are described in the section 'To coordinate your speaker system for 5.1 channel output' on this page.
Not Connected
Select if you have not made connections to an amplifier or receiver or if you have made stereo connections to a TV or monitor.
* Factory setting
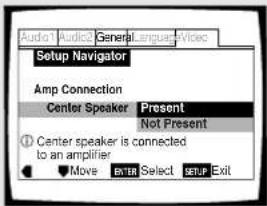
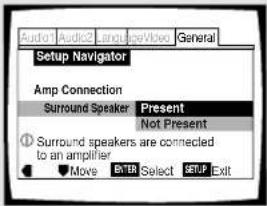
To coordinate your speaker system for 5.1 channel output
When [5.1 Channel] is selected in the [Analog Jacks] screen, the following screens appear to determine the configuration of your speaker system. In all of the following screens, select [Present] if the speaker in question is present in your system, and [Not Present] if it is not.
[Center Speaker]
[Surround Speakers]
[Sub-woofer]
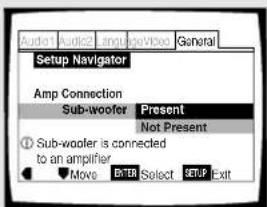
Settings: Present*
Not Present
* Factory setting
Note
If [Not Present] is selected for both [Center Speaker] and [Surround Speaker], [Sub-woofer] is automatically set to [Not Present] and the [Sub-woofer] screen is not displayed.
Setting digital audio connections to an AV amplifier or decoder
The [Digital Jack] screen establishes whether digital connections have been made to an AV amplifier, receiver, or external decoder. As there are numerous options available, please refer to the instructions supplied with the component the player is connected to determine what digital audio formats can be decoded. If you have made no digital connections, select [Not Connected].
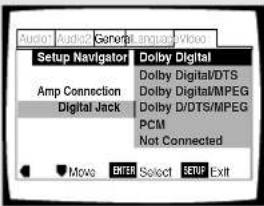
Settings: Dolby Digital*
Dolby Digital/DTS
Dolby Digital/MPEG
Dolby D/DTS/MPEG
PCM
Not Connected
* Factory setting
Setting compatibility with 96 kHz output
The [96 kHz PCM Audio] screen establishes whether or not the AV component the player is connected to is capable of processing an audio signal with a sampling rate of 96 kHz. This screen only appears if connections have been made to an external AV component as determined in previous screens.
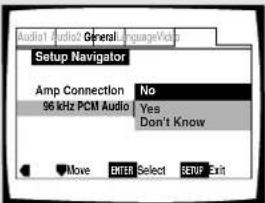
Settings: No*
Select if the connected AV component cannot process an audio signal with a sampling rate of 96 kHz.
Yes
Select if the connected AV component can process an audio signal with a sampling rate of 96 kHz.
Don't Know
Select if you are uncertain whether the connected AV component can process an audio signal with a sampling rate of 96 kHz.
* Factory setting
Note
When a DVD is played back in the letter box format, 96 kHz Linear PCM digital audio playback is automatically downsampled to 48 kHz. In order to hear audio at the sampling rate of 96 kHz, set the Setup screen Video menu [TV Screen] setting to either
[16:9(Wide)] or [4:3 (Pan & Scan)] (page 29)
Confirming the settings
The [Exit Setup Navigator] is the final screen in the Setup Navigator.
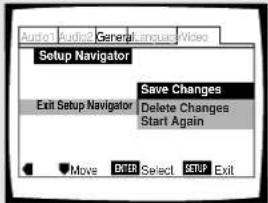
Settings: Save Changes*
Select to have the player make all of the necessary audio, video and language settings automatically.
Delete Changes
Select to exit the Setup Navigator without changing any of the system settings.
Start Again
Select to return to the [OSD Language] screen of the Setup Navigator and do the settings again.
* Factory setting
To exit the Setup screen
When you have completed setting up the player using the Setup Navigator or if you exit the Setup Navigator, the Setup screen General menu appears. Press SETUP to close the Setup screen.
To change other player settings in the Setup screen menus
The procedure for changing the settings in the Setup screen menus is described on page 23.
Getting Started Using Your DVD Player
Playing DVDs, Video CDs and CDs – DVD/Video CD/CD
Before you can start to enjoy the digital audio and video on DVDs, be sure that you have either performed the Setup Navigator procedure described in the previous section or made the necessary settings in the Setup screen menus as outlined in the next section to set up the player to correspond to your home system. Having made these settings, you are now ready to start using the player to enjoy DVDs, Video CDs, and CDs.
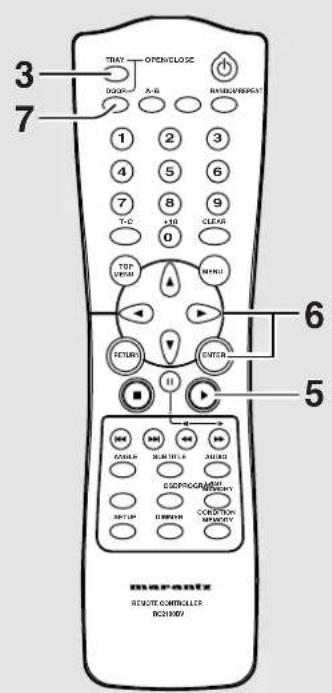
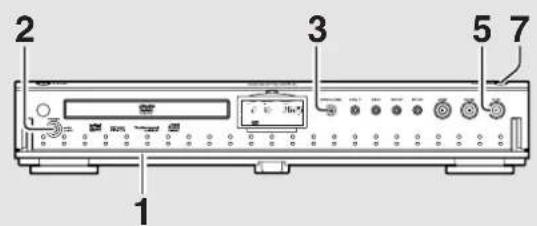
1 Open the Door Panel by hand.
Note
When power switch on the front panel is set in the power on mode, the door panel is opened by pressing the door OPEN/CLOSE button (7).
2 Press POWER switch on the front panel to turn on the player.
3 Press Tray OPEN/CLOSE.
The disc tray comes out.
Note
When Power switch on the front panel is set in the power on mode, door panel is opened and the disc tray comes out by pressing the tray OPEN/CLOSE button.
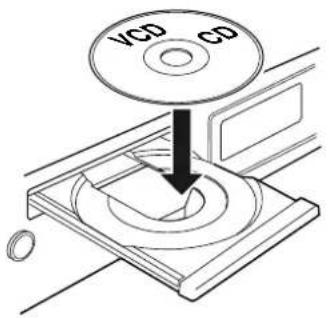
4 Load a disc.
Load a disc with the label side facing up, using the disc tray guide to align the disc.
5 Press PLAY ▶.
- The disc tray closes, and playback begins.
- Depending on the disc, a menu may be displayed. If a menu is displayed, proceed to step 6.
6 Select the item you want to view.
- When a DVD is loaded:
Select the item with the cursor buttons (◄/►/▲/∞) or the number buttons then press ENTER.
- When a Video CD is loaded:
Use the number buttons to select the item.
Notes
- Noise is output if you make digital audio connections to a receiver or amplifier that does not have a built-in decoder. Check that the digital audio output format selected in the Audio 1 menu corresponds to the audio components you have made connections to (page 25-26).
- The TV screen size is factory set to present the wide screen format (16:9 aspect ratio). If you have a standard TV screen (4:3 aspect ratio), this setting can be changed to match your TV screen size in the Video menu (page 29).
When an operation is prohibited
There are times when you are using the player and attempt to perform an operation, but for some reason it cannot be performed. When this occurs, one of the two following icons appears on the screen.

The operation is prohibited by the player.

The operation is prohibited by the programming on the disc.
When a menu screen is displayed
Menu screens are displayed for DVDs that have menu screens or Video CDs that include Playback Control (PBC). DVDs often contain extra information that can be accessed in the DVD menu and sometimes makes navigating DVD menu screens as enjoyable as watching the feature presentation.
Example: When a DVD that has menu screens is loaded
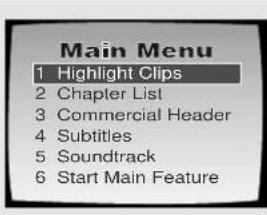
Example: When a Video CD that has Playback Control is loaded
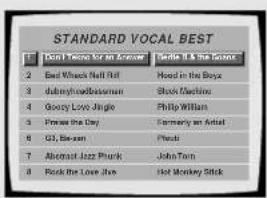
To open or return to the DVD or Video CD menu screen
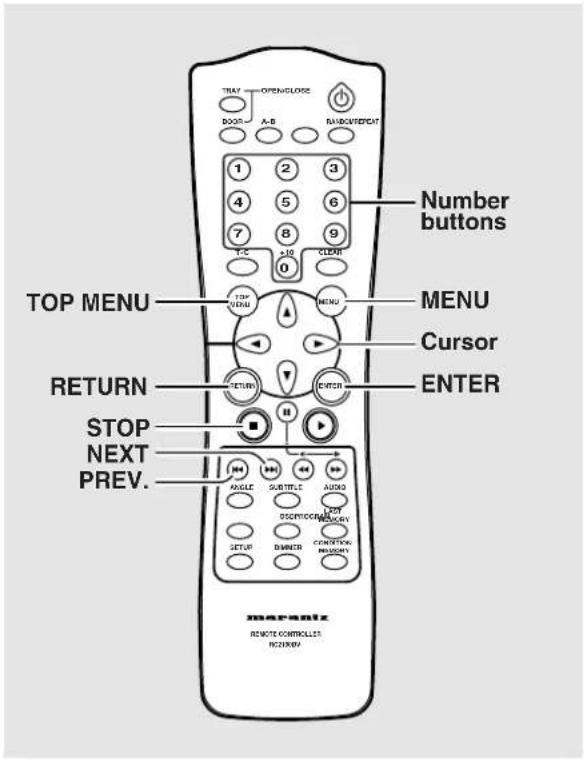
Although this differs depending on the disc, pressing MENU, TOP MENU, or RETURN during DVD playback or RETURN during Video CD playback displays the menu screen. Refer to the DVD or Video CD disc jacket and accompanying documentation for more information.
To navigate a menu screen
- Although individual DVD titles may differ, when a menu screen is displayed, use the cursor buttons (◄/►/▲/∞) and ENTER on the remote control. The cursor buttons are used to move around the options on the screen and ENTER is used for selection.
- Occasionally, the number buttons may also be used to make selections. If this is possible, using number buttons serves to directly select an option on a menu screen. Only number buttons are used to make selections on Video CD menu screens.
- When the Video CD has more than one menu, pages can be advanced to or returned to with PREV ◀◀◀ or NEXT ▶▶▶.
To play Video CDs without displaying menu screens
Video CDs with Playback Control (PBC) display a menu screen when play is started. It is possible, however, to play back Video CDs without displaying menu screens.
When a Video CD with PBC is loaded, press STOP ■, and then the number button of the track you want to play.
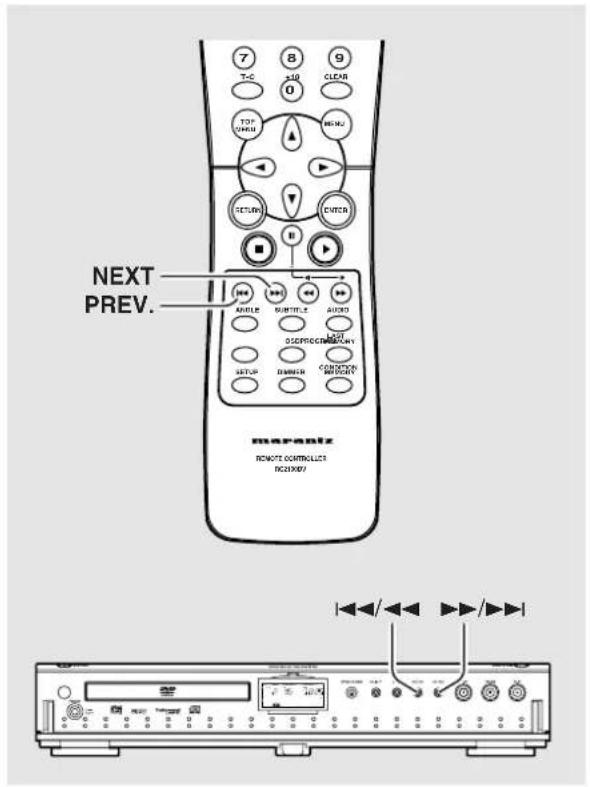
Chapter (Track) Skip Forward/ Skip Back – DVD/Video CD/CD
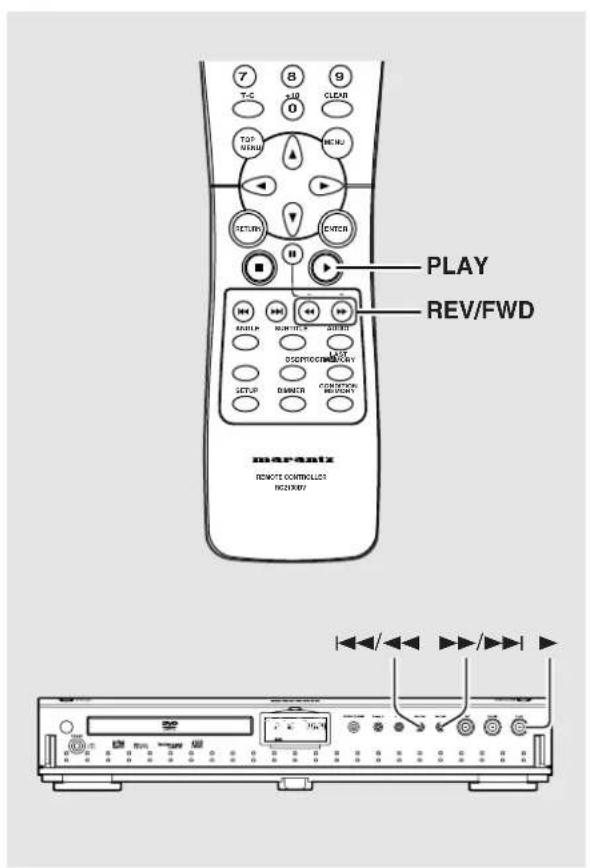
Forward and Reverse Scanning – DVD/Video CD/CD
Advancing to the next chapter (track)
Press NEXT ▶▶▶ (▶▶/▶▶▶ on the front panel).
- Press to skip forward to the next chapter (track).
- You can advance more than one chapter (track) forward by pressing and holding NEXT ▶▶ and releasing when the desired chapter (track) number appears in the display.
Skipping back to the previous chapter (track)
Press PREV ◀◀◀ (◀◀◀/◀◀ on the front panel).
- Press once to skip back to the start of the chapter (track) currently playing.
- Press twice to skip back to the start of the previous chapter (track).
- You can skip back to previous chapters (tracks) by pressing and holding PREV ◀◀ and releasing when the desired chapter (track) number appears in the display.
Fast forward scanning
Press and hold FWD ▶▶ (▶▶/▶▶ on the front panel) during playback.
- Release FWD ▶▶ when you reach the desired location. Normal playback resumes.
- When the "Scan" indicator on the screen changes from flashing to lit, fast forward scanning will continue even if the button is released. When the desired location has been reached, press PLAY ▶.
Fast reverse scanning
Press and hold REV ◀◀ (◀◀/◀◀ on the front panel) during playback.
- Release REV ◀◀ when you reach the desired location. Normal playback resumes.
- When the "Scan" indicator on the screen changes from flashing to lit, fast reverse scanning will continue even if the button is released. When the desired location has been reached, press PLAY ▶.
Resuming playback from where you stopped – DVD/Video CD
Use the resume feature to restart playback from the point that the disc was stopped last time.
Press STOP ■ once.
The display shows "RESUME" and the stop position is memorized.
- The resume position remains memorized as long as the disc is in the player — even if you switch the power off.
- Pressing STOP ■ twice causes the disc to return to the beginning when PLAY ▶ is pressed again. The display shows the disc type (DVDs or Video CDs)
Press PLAY ▶.
Playback starts from the resume position.
Notes
- The actual restart position may be slightly before or after the resume position.
- If you want to remove the disc, but still want to resume playback from the last stopped position, use the LAST MEMORY feature instead (page 47).
Stopping Playback and Switching Power Off
- DVD/Video CD/CD
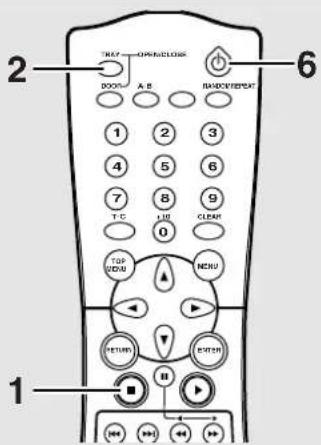
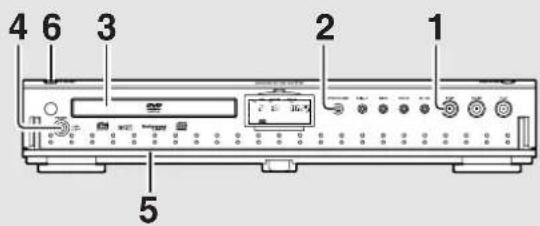
1 Press STOP ■.
Playback stops.
2 Press Tray OPEN/CLOSE.
The door is opened and the disc tray comes out.
3 Remove the disc.
Be sure to press the Tray OPEN/CLOSE button to closs the disc tray after you remove the disc.
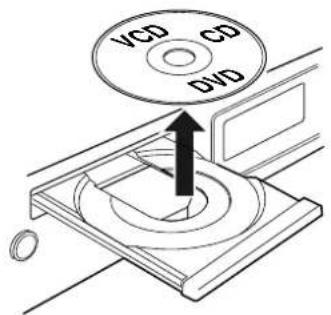
Note
Press standby switch (6) to set the player in standby mode so that the disc tray goes back in, the door panel is closed and standby indicator lights.
4 Press Power button on the front panel.
The player turns off.
5 Close the door panel by hand.
Adjusting Audio and Video Settings
Using the Setup Screen Menus
The procedure on this page describes how to operate the menus on the Setup screen. These menus are used to set and adjust a number of system settings. The various functions that can be adjusted are covered throughout this manual. The procedure on this page provides a basic outline for using the Setup screen menus.
When setting up for the first time
It is recommended to set up player using the Setup Navigator (page 15). If you selected [Auto Start Off] when the Setup Navigator appeared, you may still set up the player using the Setup Navigator in the General menu screen.
If you choose not to use the Setup Navigator, be sure to make the necessary settings in the Setup screen
Audio 1, Audio 2, Video, and Language menus as described on the following pages.
Some DVDs start playing automatically when loaded in the player. If a DVD has been loaded, be sure to press STOP ■ before proceeding.
Note
If the Setup screen is opened during playback of a DVD being viewed in the letter box format, the screen may switch to the wide screen format. This is not a malfunction, and the screen will return to normal when the Setup screen is closed.
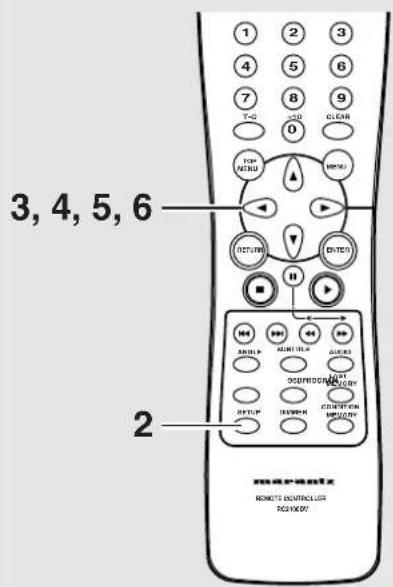
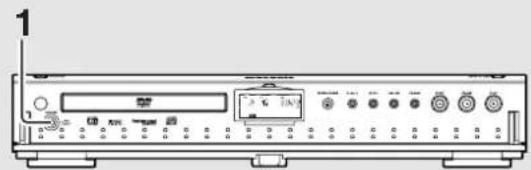
1 Press Power on the front panel.
2 Press SETUP.
The Setup screen appears.
(Example)
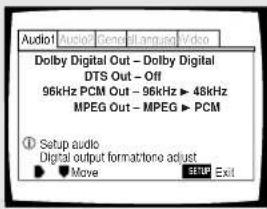
3 Use the cursor buttons (◀/▶) to select the menu you want.
As each menu is selected with the cursor, the settings appear below the menu heading.
4 Use the cursor buttons ( ) to enter the menu.
The top item within the menu becomes highlighted.
(Example)
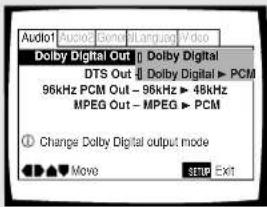
5 Use the cursor buttons ( / ) to select the setting you want to change.
The options available for each setting appear to the right when the setting is selected. The current setting appears with the setting indicator lit.
6 Use the cursor buttons (▶) to enter the setting options.
(Example)
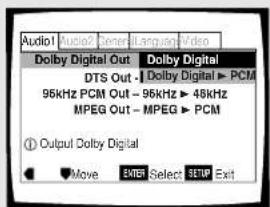
- Not all menu options can be changed while a disc is playing. In these cases, the options appear grayed out on the screen and cannot be adjusted. To change these settings, press STOP ■ first before pressing SETUP.
- Operating the menu after pressing STOP ■ may cancel the resume function.
- Some menu options are not immediately effective if set while a disc is playing. To make these settings effective, stop playback and then start again, or change the settings while the disc is stopped.
continued
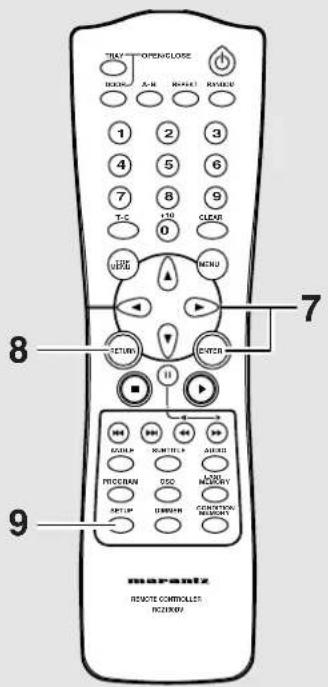
7 Use the cursor buttons (▲/∞) to select a new setting and press ENTER to set the new setting in memory. Press RETURN or the cursor button (◀) to exit the options without making any changes.
8 Press RETURN or the cursor button (◀) to go back to the main menu bar to select another menu.
9 Press SETUP to close the Setup screen.
The Setup screen closes.
Note
The next time you press SETUP, you'll see the menu screen that you exited from last time.
How to interpret the setting indicator colors in the Setup screen menus
When setting up the system, or when making adjustments, it is convenient to know what settings are applicable to the different disc formats. When the settings appear for each menu option, the currently selected setting appears with the setting indicator highlighted in one of three colors: blue, green or yellow. These colors correspond to what formats the menu option effects as shown in the table below.
| Color of indicator Disc | format(s) |
| Blue DVD only | |
| Yellow | DVD / Video CD |
| Green | All compatible formats |
Note
If a setting applicable only to DVDs is changed while a Video CD or CD is loaded, a blue DVD icon appears in the upper right hand corner of the screen to indicate that the setting is not applicable to the currently loaded disc. The setting will be effective the next time a DVD is loaded.
IMPORTANT
Changing to the Setup Screen "Expert" Menu Mode
The Setup screen menus are divided into two levels, [Basic] and [Expert], to make this unit more convenient to operate for different levels of users. The [Basic] menu mode contains functions that may be considered necessary for the basic operations of this player and helpful on-screen information identified by the ⓘ mark. The [Expert] menu mode adds to the [Basic] menu mode additional functions of the player that can be adjusted to further personalize performance of the player.
In this manual, functions that are contained in the [Expert] menu mode are identified by the [Expert] Make changes to the [Setup Menu Mode] setting in the Setup screen General menu.
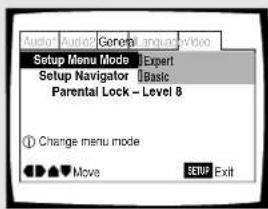
Settings: Expert Basic*
* Factory setting
Note
On-screen information only appears in the [Basic] menu mode.
Setting the Digital Audio Output To Be Compatible with Your AV Component – DVD
This player is capable of digital audio output for Dolby Digital, DTS, MPEG, and signals with a sampling rate of 96 kHz. Make settings in the Setup screen Audio 1 menu to reflect the capabilities of the components that you have made digital connections to.
Notes
- If you have already completed the Setup Navigator screen operations, the settings on this page have already been set by the player.
- If you have made only stereo line connections (analog) using the supplied audio cord, it is not necessary to make any changes in this menu.
Dolby Digital Out
This player is capable of outputting the Dolby Digital surround sound audio signal. When the player is connected to an AV component that has a built-in Dolby Digital decoder, select [Dolby Digital]. This player can also convert the Dolby Digital signal to a digital Linear PCM signal, the same digital signal output from a CD. Select [Dolby Digital ▶ PCM] when you have made connections to an amplifier or receiver with a Dolby Pro Logic decoder or a Digital Analog Converter (DAC).
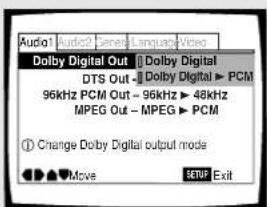
Settings: Dolby Digital*
Dolby Digital ▶ PCM
* Factory setting
Note
There is no digital signal output when [Dolby Digital ▶ PCM] is selected during 5.1 channel output or when the "Dolby V" indicator is lit.
DTS Out
This player is capable of outputting DTS digital audio for DVDs recorded in DTS. When this player is connected to an AV component that has a built-in DTS decoder, select [DTS]. If your system is not equipped to decode DTS, select [Off]. Refer to the operating instructions supplied with your audio components if you are unsure about compatibility with DTS.
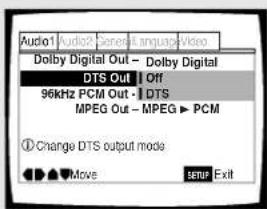
Settings: Off* DTS
* Factory setting
Note
If you have made digital audio connections to component(s) not equipped to decode the DTS digital bitstream, be sure to select [Off]. If a DTS signal is output without decoding, the output is digital noise that could potentially cause damage to your speakers.
96 kHz PCM Out
This player is capable of outputting digital signals with a sampling frequency of 96 kHz. If you have made connections to a component capable of processing this signal rate, select [96 kHz] for the signal to be output as is. As some components are incapable of processing digital signal input with sampling rates of 96 kHz, selecting [96 kHz ▶ 48 kHz] compresses the signal to a standard signal with a sampling rate of 48 kHz.
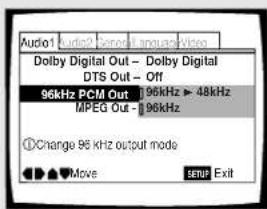
Settings: 96 kHz ▶ 48 kHz* 96 kHz
* Factory setting
Notes
- On DVDs that contain copy protection, the 96 kHz signal may only be output from the analog audio jacks. When this type of disc is encountered, even if [96 kHz] is selected, the player automatically outputs the digital audio signal at a compressed rate of 48 kHz.
- When a DVD is played back in the letter box format, Linear PCM digital audio playback is output is automatically downsampled to 48 kHz (when the original signal is 96 kHz). In order to hear audio at the sampling rate of 96 kHz, set the Setup screen Video menu [TV Screen] setting to either [16:9 (Wide)] or [4:3 (Pan & Scan)] (page 29).
- Changes to the [96 kHz PCM Out] setting cannot be made when a disc is playing.
MPEG Out
This player is capable of outputting the MPEG digital bitstream. When the player is connected to an AV component that has a built-in MPEG decoder, select the [MPEG] setting. Otherwise, select [MPEG▶PCM] to convert the digital signal to the PCM signal, the digital signal output from a CD.
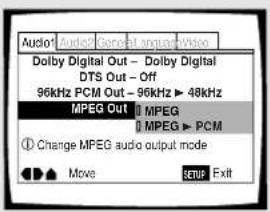
Settings: MPEG
MPEG ▶ PCM*
* Factory setting
Digital Out ExpDVD/Video CD/CD
Depending on your preferences and the type of connections made, you may opt not to have the digital audio signal output at all. When this setting is set to [Off] there is no signal output from the digital audio output jacks.
Make changes to the [Digital Out] setting in the Setup screen Audio 1 menu in the [Expert] menu mode (page 24).
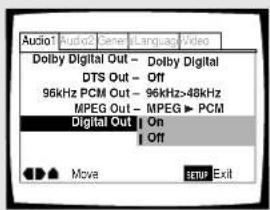
Settings: On (Digital bitstream is output)* Off (Digital bitstream is not output)
* Factory setting
Getting Surround Sound from Stereo Speakers. – DVD/Video CD
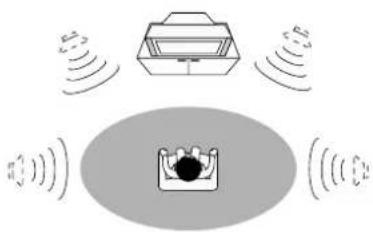
Depending on the audio source, this player is capable of switching between Virtual Dolby Digital (multichannel audio sources) and TruSurround (stereo audio sources) to produce a surround sound effect from stereo speakers.
This function works only when connections are made to the SYSTEM AUDIO OUT (2 CH) jacks and AV EUROCONNECTOR jacks.
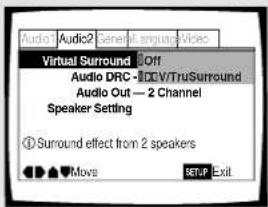
Settings: Off*
V/TruSurround
*Factory setting
Notes
- There is no effect when the audio source is either DTS or 96 kHz LPCM or during CD playback.
- When the "Dolby V" indicator is lit during playback, and [Dolby Digital ▶ PCM] is selected in the [Dolby Digital Out] setting in the Setup screen Audio 1 menu, there is no audio output from the digital output jacks.
- The Virtual Surround mode can also be turned on and off by pressing Dolby V on the front panel. However, this button does not work when the on screen menu operation is being performed.
TruSurround and Virtual Dolby Digital
TruSurround uses technology that simulates multichannel surround sound using only two speakers. Virtual Dolby Digital works in conjunction with Dolby Digital audio sources to create a realistic surround sound. Virtual Dolby Digital is selected automatically when Dolby Digital sources are loaded.
natural_image
Diagram showing sound waves interacting with a speaker and a device (no text or symbols)(●)TruSurround™
Adjusting the Dynamic Range of the Audio Soundtrack - DVD
Audio DRC stands for Audio Dynamic Range Compression. When Audio DRC is on, soft sounds such as dialog can be heard more clearly without making loud sounds even louder. Select from three levels of compression depending on how much effect you want. When Audio DRC is set to [Off], there is no effect on the audio source. Make changes to the [Audio DRC] setting in the Setup screen Audio 2 menu.
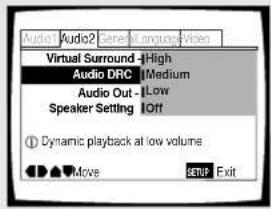
Settings: High
(maximum compression of audio source)
Medium
(moderate compression of audio source)
Low
(very little compression of audio source)
Off*
* Factory setting
Note
Audio DRC is only effective with Dolby Digital audio sources.
Setting Analog Audio Connections to an AV Amplifier or Receiver
This player is capable of both 2 channel stereo and 5.1 multichannel surround sound audio output. Use this setting to select which analog outputs are connected to an AV component.
Make adjustments in the [Audio Out] setting in the Setup screen Audio 2 menu.
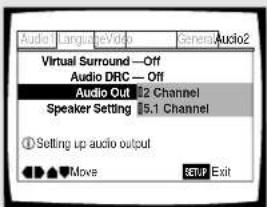
Settings: 2 Channel*
5.1 Channel
*Factory setting
Notes
- This setting can also be changed by using 5.1 CH (MODE) on the front panel. However, this button does not work when the on screen menu operation is being performed.
- When [5.1 Channel] is selected, the front right (R) and left (L) audio channels are also output from the SYSTEM AUDIO OUT jacks.
- If the center or surround components are not recorded on the disc, there will be no output from the CENTER or SURROUND output jacks. This is not a malfunction. Speaker channels can be verified in the program format indicators in the display.
- When [5.1 Channel] is selected at this setting and [Dolby Digital ▶ PCM] is selected in the [Dolby Digital Out] setting in the Setup screen Audio 1 menu, there is no audio output from the digital output jacks.
Setting Your Speaker System for Multichannel Audio Playback
This player contains a built-in decoder for Dolby Digital and DTS audio sources as well as 5.1 channel discrete audio output. Ideally, a 5.1 channel system contains 6 speakers: 2 front speakers, 2 surround speakers, a center speaker, and a sub woofer. However, as this is not always the case, accurately setting the [Speaker Setting] setting to reflect your speaker setup allows the player's built-in decoder to reroute signals to compensate for absent speakers. Make adjustments in the [Speaker Setting] setting in the Setup screen Audio 2 menu.
Notes
- If you have already completed the Setup Navigator screen operations, the settings on this page have already been set by the player.
- If you have not made connections to the 5.1 CH SURROUND AUDIO OUT jacks on the rear panel of the player, it is not necessary to make any changes to this setting.
1 Use the cursor buttons ( ◀/▶) to select the speaker.
Every time the cursor button is pressed, the selected speaker changes in the following order.
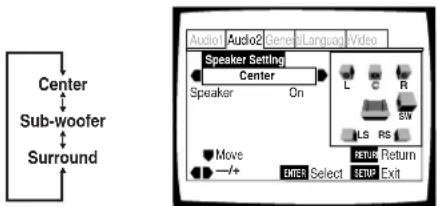
2 Use the cursor button ( ) to move the cursor down to the speaker bar and use the cursor buttons (◀/▶) to select [On] or [Off] corresponding to whether the selected speaker is present in your system or not, respectively.
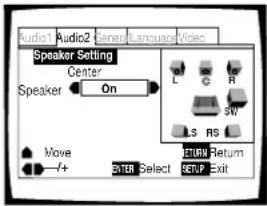
Notes
- To help identify the speakers being selected, the initials of the speakers in the speaker system representation on the right side of the screen will appear in blue.
- When [On] is selected for a speaker or pair of speakers, the icons for those speakers turn yellow in the speaker system representation on the right side of the screen.
- If [Off] is selected for both [Center Speaker] and [Surround Speaker], [Sub-woofer] is automatically set to [Off].
- When the sub woofer is [On], the low range components of the center and surround signals will be mixed in the LFE signal and output from the SUB WOOFER jack.
- When the sub woofer is [Off], the low range components of the center and surround signals will be mixed in the L and R signals and output from the front speakers.
About source audio output
When the source input mode has been switched between the [5.1 Channel] and [2 Channel] mode settings using the [Audio Out] setting in the Setup screen Audio 2 menu or by pressing 5.1 CH (MODE) on the front panel, audio output for each source will be as shown on the following table.
| AUDIO CONTENTS | OUTPUT MODE | SYSTEM AUDIO OUT (2 CH) | (5.1 CH SURROUND AUDIO OUT) | DIGITAL OUTPUT (S/PDIF) | |||||
| L, R | Front L,R | Center | Surround L,R | Sub Woofer | Dolby Digital>PCM | Dolby digital | |||
| DVD | Dolby Digital | 5.1 CH^3 | Front Lch, Rch | Center | Surround Lch, Rch | LFE | MUTE | Dolby Digital | |
| 2 CH | 2 ch DOWNMIX Lch, Rch | MUTE | Lch, Rch ^-1 | ||||||
| Dolby Digital Karaoke | 5.1 CH^3 | 2 ch DOWNMIX Lch, Rch | MUTE | MUTE | Dolby Digital | ||||
| 2 CH | Lch, Rch | ||||||||
| LPCM | 5.1 CH^3 / 2 CH | Lch, Rch | MUTE | Lch, Rch | |||||
| MPEG | 5.1 CH^3 / 2 CH | Lch, Rch | MUTE | Lch, Rch | MPEG | ||||
| DTS | 5.1 CH^3 | Front Lch, Rch | Center | Surround Lch, Rch | LFE | DTS^*2 | |||
| 2 CH | 2 ch DOWNMIX Lch, Rch | MUTE | |||||||
| CD | 5.1 CH^*3 / 2 CH | Lch, Rch | MUTE | Lch, Rch | |||||
| VIDEO CD | 5.1 CH^*3 / 2 CH | Lch, Rch | MUTE | Lch, Rch | |||||
*1: When the "DOLBY V" indicator is lit, PCM output is muted.
*2: When the Setup screen Audio 1 menu [DTS Out] setting is set to [Off], DTS digital output is muted.
*3: When the 5.1 CH mode is selected, "5.1 CH" indicator is lit.
Setting the TV Screen Size - DVD
The width-to-height ratio of conventional TVs is 4:3, while the width-to-height ratio of wide screen and high-definition TVs is 16:9. This width-to-height ratio is called the aspect ratio. When viewing software recorded in different aspect ratios, the image's height to width ratio can be switched to match the TV or monitor being used.
Make changes to the TV screen size in the [TV Screen] setting in the Setup screen Video menu. Please note that changes to the [TV Screen] setting cannot be made when a disc is playing. Stop playback of the disc before attempting to make any changes.
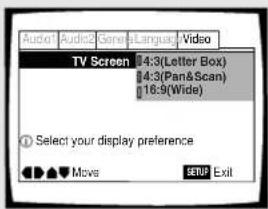
Settings: 4:3 (Letter Box)
4:3 (Pan & Scan)
16:9 (Wide)*
* Factory setting
Notes
- If [Standard (4:3)] is selected in the Setup Navigator screen, [4:3 (Letter Box)] is selected on this screen. If you prefer the pan&scan format, change the settings on this screen.
- Whether the aspect can be switched or not depends on the disc. Please refer to the information written on the disc jacket, etc.
- Some discs may not include the screen format selected in the [TV Screen] setting. When this occurs, the standard TV screen format available on the disc is automatically selected.
- When a DVD is played back in the letter box format, Linear PCM digital audio playback is output is automatically downsampled to 48 kHz (when the original signal is 96 kHz). In order to hear audio at the sampling rate of 96 kHz, select either [16:9 (Wide)] or [4:3 (Pan & Scan)].
Differences in screen sizes and DVD formats
The number of screen size formats currently available can be somewhat confusing. If set incorrectly, the video presentation may not appear as it should. The following diagrams and descriptions are intended to help you set your TV screen size in a way that will allow you to fully enjoy the digital video of DVD.
The settings in the [TV Screen] setting are perhaps most applicable when the DVD you are watching is programmed in the wide screen format. If you have a standard TV, select either [4:3 (Letter Box)] or [4:3 (Pan & Scan)] based on your personal preference. If you have a wide screen TV, select [16:9 (Wide)].
| When viewing a wide screen TV or monitor | |
| DVD screen size format | Setting and Appearance |
| Wide screen format DVDPlease note that there are some wide screen letter box formats that place black bars at the top and bottom of the screen. This is not a malfunction. | 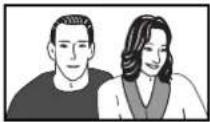 “Wide” setting “Wide” setting |
| Standard screen format DVDWhen viewing a standard screen format DVD on a wide screen TV, black bars may be automatically placed at the side of the screen to adjust to the DVD format. | 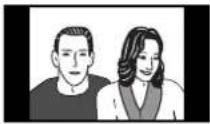 “Wide” setting “Wide” setting |
| Standard screen format DVD (unnatural stretched effect)If you are viewing a standard screen format DVD on a wide screen TV, the picture may appear ‘stretched’ on the screen. To remedy this condition, change your wide screen TV to display a standard (4:3) screen. Refer to the instructions supplied with your wide screen TV or monitor for more information. | 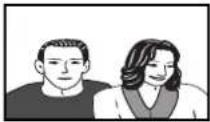 “Wide” setting “Wide” setting |
| When viewing a standard size TV or monitor | |
| DVD screen size format Setting and Appearance | |
| Wide screen format DVDThe Letter box presentationplaces black bars at the topand bottom portions of thescreen to provide the full widescreen presentation of a movieon a standard TV (4:3 aspectratio). | 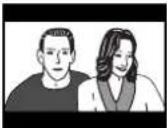 “Letter Box” setting “Letter Box” setting |
| Wide screen format DVDThe Pan & Scan presentationcrops both sides of the widescreen presentation to use thefull standard TV screen. | 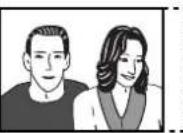 “Pan & Scan” setting “Pan & Scan” setting |
| Standard screen format DVDIf you have a standard TV, thestandard screen format will bepresented regardless of thesetting. | 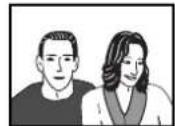 Any setting Any setting |
| Wide screen format DVD(unnatural squeezed effect)If you are viewing a wide screenformat DVD on a standard TV andthe [TV Screen] setting is set to[16:9 (Wide)], the picture mayappear ‘squeezed’ on the screen.To remedy this condition, selecteither [4:3 (Letter Box)] or [4:3(Pan & Scan)]. | 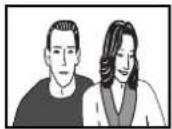 “Wide” setting “Wide” setting |
Setting the Video Output Format for AV CONNECTOR Connections
When connections are made to the A/V EUROCONNECTOR on the player via a SCART cable, it is possible to select the video format that is compatible with your TV or monitor. Select [Video] to have a composite video signal output, [S-Video] to have an S-video signal output, and [RGB] to have an RGB signal output. For more information on which format is most appropriate, refer to the instructions supplied with your TV or monitor. Make changes to the [Video Out] setting in the Setup screen Video menu.
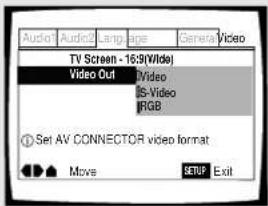
Settings: Video* S-Video RGB
* Factory setting
Switching the S-Video Output Expert
You can Switch the kind of S-Video signal output from the S-Video outputs. If you connected your TV with an S-Video cord, in rare cases the TV picture may appear stretched. In this case switch the output from [S2] to [S1].
Make changes in the [S-Video Out] in the Setup screen Video menu in the [Expert] menu mode (page 24).
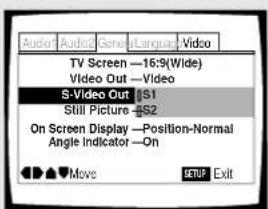
Settings: S1 S2*
* Factory setting
Selecting the type of paused image to display Expert
This function lets you view a clear still-image when DVD playback is paused.
Make changes in the [Still Picture] setting in the Setup screen Video menu in the [Expert] menu mode (page 24).
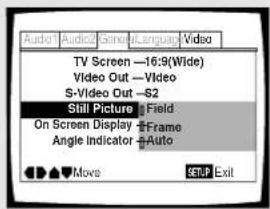
Settings: Field
(Picture shake will be eliminated during a paused picture.)
Frame
(Select to obtain higher picture quality.)
Auto\*
(Selects field or frame automatically according to the disc.)
* Factory setting
Setting the position of the on-screen display Expert
When watching conventional software on a wide screen TV, the operation display is at the very top of the screen, and may be difficult to see. Changing the position of the display lets you see operation indicators clearly even on a wide screen TV.
Alternatively, you can choose to turn them off completely with the [Off] setting.
Make changes in the [On Screen Display] in the Setup screen Video menu in the [Expert] menu mode (page 24).
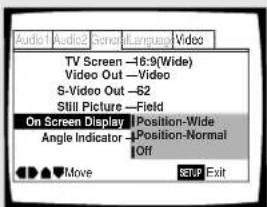
Settings: Position-Wide
Position-Normal* Off
* Factory setting
Note
This setting is only effective with DVDs that contain a 4:3 aspect ratio video presentation.
Viewing from a Desired Camera Angle (Multi-Angle)
- DVD
You can select a camera angle when viewing DVDs with the multi-angle option.
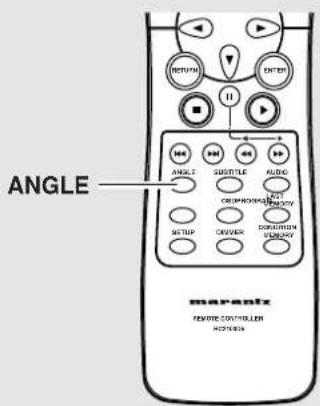
Press ANGLE during playback.
The camera angle changes each time you press the button.
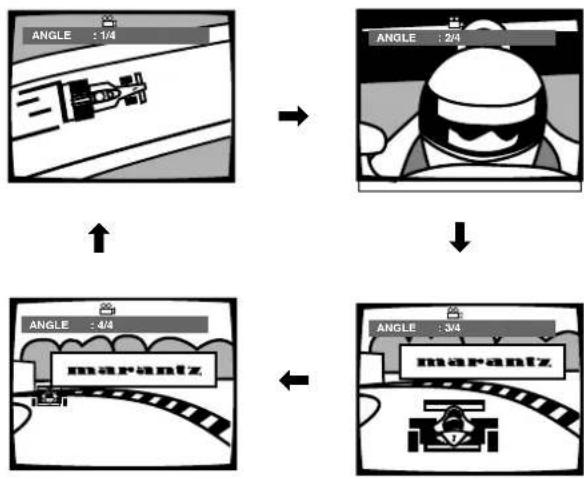
flowchart
graph TD
    A["Start: ANGLE : 1/4"] --> B["Step 1: Racing Game"]
    B --> C["Step 2: Racing Game"]
    C --> D["Step 3: Racing Game"]
    D --> E["Step 4: Racing Game"]
Notes
- You can use the Multi-Angle function only with discs featuring recordings of images shot from different camera angles.
- During Multi-Angle playback, the "ANGLE" indicator in the display lights.
- For some discs, selection can be made using the DVD menu. In this case, press MENU to display the DVD menu screen and then make your selection.
To check whether or not a disc is recorded with angles:
The jacket of discs that are recorded with angles will be marked with
When locations on discs that are recorded with angles are played back, the "ANGLE" indicator can be displayed.
To cancel the angle mark, set [Angle Indicator] to [Off] in the Setup screen Video menu described in the section below.
Turning the angle indicator on and off Expert
When a picture recorded in different angles is played back
is displayed on the screen. This setting lets you see clearly whether the playback picture is recorded in multiple angles or not.
Turn the angle indicator on or off in the [Angle Indicator] setting in the Setup screen Video menu in the [Expert] menu mode (page 24).
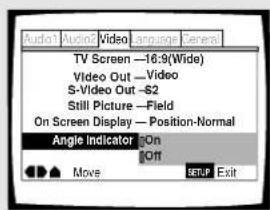
Settings: On* (displayed)
Off (Not Displayed)
* Factory setting
Note
Even when the [Angle Indicator] setting is set to [Off], the "ANGLE" indicator in the display panel of the player lights during multi-angle playback. Therefore, it is possible to know when the multi-angle function can be used without having to display the icon on the screen.
Setting the Language Options
DVDs have the capacity to contain a great deal of audio information, which includes the ability to hold up to 8 different language tracks and subtitle information in as many as 32 different languages. This section outlines the variety of audio language and subtitle options available with this player. Please note that if you have completed the Setup Navigator, the audio and subtitle language options have automatically been set in accordance with the OSD language (the language that appears on the screen).
Notes
- DVDs differ in content and do not all contain multiple language or subtitle information. Therefore making settings in this section may have no effect on some DVDs.
- If you have already completed the Setup Navigator screen operations, the settings on this page have already been set by the player.
Setting the on-screen display (OSD) language
This setting is used to establish the language that operation indicators and on-screen messages and operations display. Change this setting in the Setup screen Language menu [OSD Language] setting.
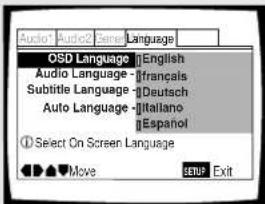
Settings: English*
français
German
Italiano
Español
* Factory setting
Note
- The languages that can be selected may be different from those shown above.
- The [OSD Language] setting is factory set to [English]. If you want English to be displayed, it is not necessary to adjust this setting.
Setting Language and Subtitle Preferences in the Setup Screen Menus
The Setup screen Language menu contains a number of settings related to the audio and subtitle language preferences.
Please note that changes to the settings in the Language menu in this section cannot be made when a disc is playing. Stop playback of the disc before attempting to make any changes.
Selecting an audio language preference
The audio language that you normally listen to can be selected from the various audio languages on a DVD. Even when the audio language is changed during playback by pressing AUDIO, the language selected at this setting will be selected as the default when the DVD is changed. Make changes to the [Audio Language] setting in the Setup screen Language menu.
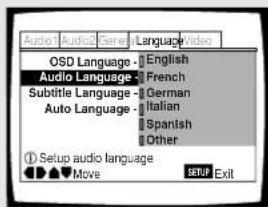
Settings: English*
French
German
Italiano
Spanish
Other
(For details on how to select other languages, see 'When "Other" is selected' on page 33.)
*Factory setting
When "Other" is selected
When you want to select one of the 136 languages as the main audio language, follow the steps below when the following screen appears.
A language code list can be found on page 53.
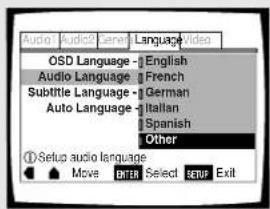
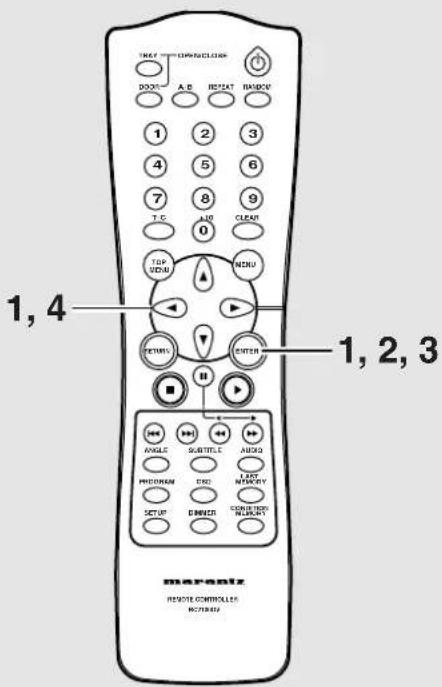
1 Use the cursor buttons to select "Other" and press ENTER.
The language selection screen appears.
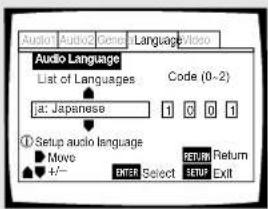
2 Use the cursor buttons (◀/▶) to select either "List of Languages" or "Code".
3 If you select "List of Languages", use the cursor buttons ( / ) to select the language.
For languages which are only shown as a code, please refer to "Language Code List" on page 53.
List of Languages
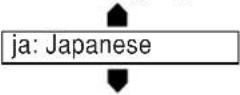
If you select "Code", use the cursor buttons (▲/∞) to input the numbers of the input code.
Use the cursor buttons (◀/▶) to change the position of the cursor. You can also use the number buttons to enter the code.
Code (0\~2)
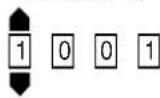
Note
To select number 0, press +10/0 rapidly.
4 Press ENTER to set the new language.
To exit the screen without making any changes, press RETURN.
Changing the Audio Language (Multi-Language Function) - DVD
Dolby Digital, PCM, and other audio data can be recorded on DVDs in a number of languages or audio tracks, letting you choose the desired language or audio.
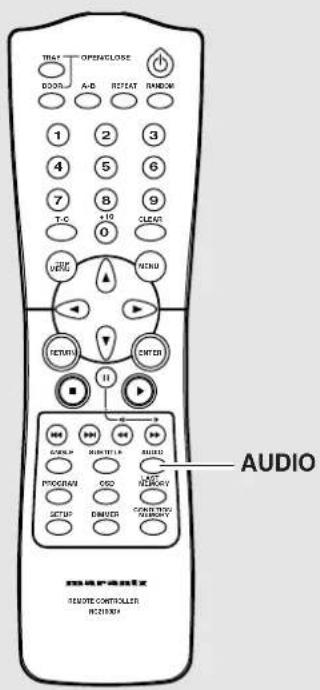
Press AUDIO repeatedly to select the desired language.
Pressing AUDIO once displays the currently selected language. Subsequent presses rotates through the audio languages available on the DVD.
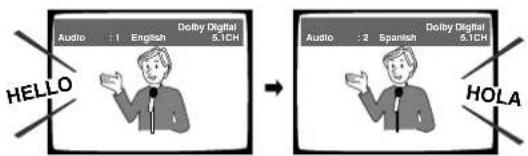
Notes
- You cannot switch languages if there is only one language recorded on the disc.
- Switching the audio language may not be possible with some titles. In this case, the 🔒 mark is displayed.
- For some titles, selection can be made using the DVD menu. In these cases, press MENU to display the DVD menu screen and then make your selection.
- Depending on the disc, when the audio track is changed by pressing AUDIO, the screen may briefly turn black. This is not a malfunction.
Changing Audio Type – Video CD/CD
For enjoyment of karaoke or similar format Video CDs and CDs, it is possible to select stereo audio, or either right or left channel mono depending on the requirements of the source.
Press AUDIO repeatedly during playback to switch the audio type.
Audio output changes from [1/L] (Left channel) to [2/R] (Right channel) to [Stereo].
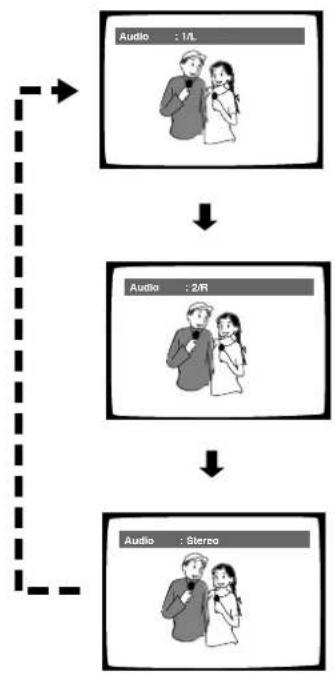
flowchart
graph TD
    A["Audio : 1/L"] --> B["Audio : 2R"]
    B --> C["Audio : Stereo"]
    D["User: 1/L"] --> E["User: 2R"]
    E --> F["User: Stereo"]
Note
With karaoke and other discs, set the appropriate audio type for singing and accompaniment after referring to information on the disc jacket or accompanying material.
Selecting a Subtitle Language (Multi-Language Subtitles)
- DVD
You can select a desired subtitle language with DVDs that have subtitle data in multiple languages recorded on them.
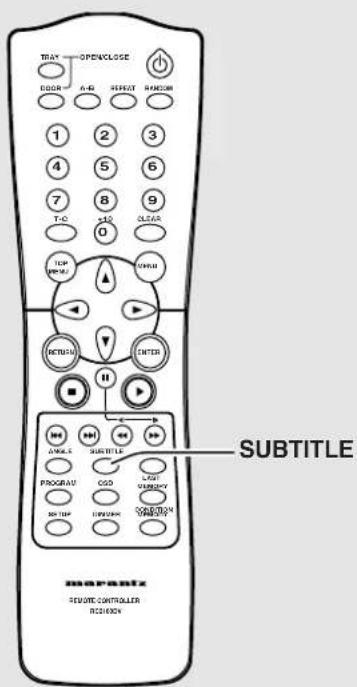
Press SUBTITLE repeatedly during playback.
Pressing SUBTITLE once displays the currently selected subtitle language. Subsequent presses rotates through the subtitle languages available on the DVD.
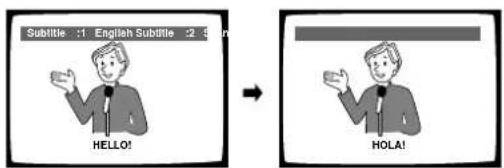
Notes
- The subtitle language cannot be switched if the subtitle language is not recorded, or if only one language is recorded.
- Switching the subtitle language may not be possible with some discs. In this case, the S mark will be displayed.
- To clear subtitles during playback, press SUBTITLE and then press CLEAR, or press SUBTITLE until [Off] appears.
- For some discs, subtitle language selection can be made using the menu on the DVD. In this case, press MENU to display the DVD menu screen and then make your selection.
Selecting a subtitle language preference
The subtitle language that you will normally display can be selected from the subtitles programmed on a disc. Even when the subtitle language is changed during playback by pressing SUBTITLE, the language selected at this setting will be selected when the disc is changed.
Make changes to the [Subtitle Language] setting in the Setup screen Language menu.
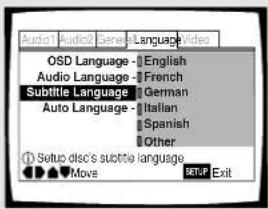
Settings: English*
French
German
Italiano
Spanish
Other
(For details on how to select other languages, see 'When "Other" is selected' on page 33.)
*Factory setting
Setting Auto Language to control subtitle and audio language based on program content
When the Auto Language function is used, foreign movies are shown with the original audio soundtrack and subtitles in the language selected in the [Subtitle Language] menu option. Domestic films are shown with the original audio soundtrack and no subtitles. (This setting may not be effective with all DVD discs.) Make changes to the [Auto Language] setting in the Setup screen Language menu.
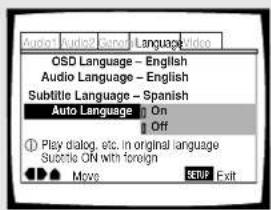
Settings: On* Off
* Factory setting
Note
The Auto Language function operates only when this function is set to [On], and the language set for the [Audio Language] and [Subtitle Language] settings is the same.
Selecting a DVD menu language preference Expert
In addition to containing different audio languages, DVD may also contain menu screens in different languages as well. Setting a DVD language preference, sets the selected language as a default when DVDs with menu information in that language are encountered. Selecting [w/ Subtitle Language] automatically assigns the language selected in the [Subtitle Language] setting. Make changes to the [DVD Language] setting in the Setup screen Language menu in the [Expert] menu mode (page 24).
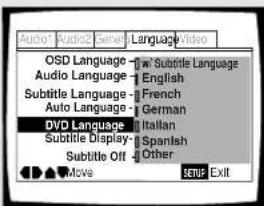
Settings: w/ Subtitle Language*
English
French
German
Italiano
Spanish
Other
(For details on how to select other languages, see 'When "Other" is selected' on page 33.)
* Factory setting
Notes
- The menu settings may look different from the one shown above.
- If this function is not effective, the languages that can be selected may also be selected in the DVD menu. Press MENU to open the DVD menu and make your selection accordingly.
Selecting subtitles, assist subtitles or no subtitles Expert
Use this function to turn the subtitles on or off. Additionally, some DVDs provide assist subtitles that provide additional explanations of scenes in addition to the standard subtitles for viewers who are hard of hearing. Select [Assist Subtitle] to display these subtitles on DVDs where this function is offered.
Make changes to the [Subtitle Display] setting in the Setup screen Language menu in the [Expert] menu mode (page 24).
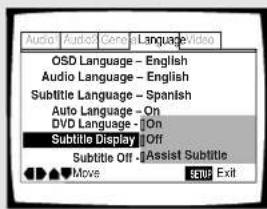
Settings: On*
Off
Assist Subtitle
* Factory setting
Notes
- If there is no subtitle information recorded on the DVD, no subtitles are displayed even if this function is set to [On].
- This setting serves as a default as whether or not to display subtitles. Even if this option is set to [Off], subtitles can be displayed by pressing SUBTITLE. Similarly, if this option is set to [On], the subtitles can be turned off by pressing SUBTITLE and then CLEAR.
Forcing subtitles to be displayed
Expert
This setting allows you to force subtitles to be displayed with DVDs that do not automatically display them on the screen.
Select [With Audio] to display the subtitles in the same language as the currently selected audio language. Select [Selected Subtitle] to display the subtitles in the language set in the [Subtitle Language] setting.
Make changes to the [Subtitles Off] setting in the Setup screen Language menu in the [Expert] menu mode (page 24).
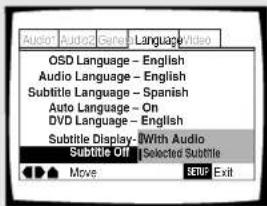
Settings: With Audio
Selected Subtitle*
* Factory setting
Advanced Functions
This player is compatible with DVD, Video CD, and CD disc formats. Users already familiar with Video CD or CD will already be familiar with some of the functions the player is capable of performing. With DVD, an even greater number of possibilities and functions are available.
Note
DVDs differ in content and do not all contain the same information. Therefore some functions in this section may not work or have no effect on some DVDs.
Setting the Parental Lock Level - DVD
This player lets you set the Parental Lock if the DVD has a parental lock level recorded on it. With Parental Lock capable discs, you can block access to material you feel is inappropriate for your children. Refer to the DVD disc jacket and the accompanying documentation to see if a particular disc contains a parental lock level.
Make changes to the [Parental Lock] setting in the Setup screen General menu. Please note that changes to the Parental Lock level can only be made when the player is stopped.
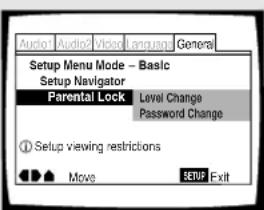
Settings: Level Change
(For information, refer to "Setting the Parental Lock level" on the following page.)
Password Change
(For information, refer to "Changing the password" on the following page.)
When a DVD with a set Parental Lock level is loaded
Playback cannot be started until the code number has been correctly input by using the cursor buttons (◄/►/▲/∞) or the number buttons, and ENTER has been pressed.
Entering the password
When you select either [Level Change] or [Password
Change], it is necessary to enter the password (4-digit code number). Use the following steps at any time you are asked to enter or confirm your password.
1 Use the cursor buttons ( ▲/∞) or the number buttons to select a number between 0 and 9.
You can also use the number buttons to enter the numbers directly. When entering your password for the first time, or changing it, you will be asked to reenter your password. When using the number buttons to confirm the password, the numbers appear as asterisks, and the cursor advances automatically to the next position.
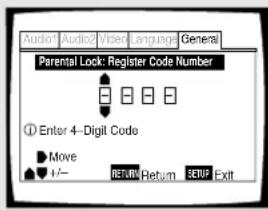
Note
To select number 0, press +10/0 rapidly.
2 Use the cursor buttons ( ◀/▶) to move the cursor to a different position in the password.
When all four numbers of the password have been entered, ENTER appears on the screen.
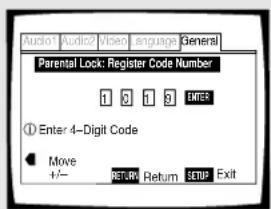
3 Press ENTER to set the new password.
The password is entered.
Note
Be sure not to forget your password. If you should forget it, reset the system, and enter a new password. To reset the system, see 'Resetting the Player to System Settings' (page 50). Please note that this procedure resets the system, and clears all saved settings, not just the password.
Setting the Parental Lock level
Change the Parental Lock level to a higher or lower level according to the settings printed on the DVD disc jacket or accompanying documentation. If you use the Condition Memory function to save the settings for a particular disc, the Parental Lock level is saved as well. Because it is saved in memory, Parental Lock levels can be set for individual discs according to their content rather than a set level for all DVDs.
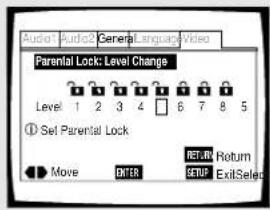
1 Select [Level Change] in the [Parental Lock] setting.
The screen changes to the password input screen. If you have not yet set a password, you will be asked to do so at this time. To enter the password, refer to "Entering the password" on the previous page.
2 Use the cursor buttons (◀/▶) to adjust the Parental Lock level.
The lock icons appear [unlocked] up to the selected level to indicate that access is available.
3 Press ENTER to set the new level.
The new Parental Lock level is set and the screen returns to the General menu screen. To go back to the General menu screen without making any changes, press RETURN.
Notes
The parental lock level is equivalent to the following USA movie ratings.
LEVEL 7: NC-17 LEVEL 3: PG
LEVEL 6: R LEVEL 1: G
LEVEL 4: PG 13
The parental lock levels for "CANADA" are included for future use. Check the appropriate parental lock level when you buy a DVD video disc equipped with the parental lock feature in the future.
Changing the password
Change your password whenever you feel it is necessary. However, if you forget your existing password, you cannot enter this screen to change it.
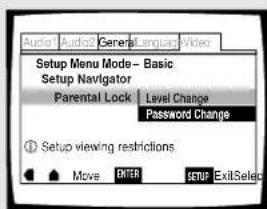
1 Select [Password Change] in the [Parental Lock] setting.
The screen changes to the password input screen. To enter the password, refer to 'Entering the password' on the previous page.
If you have not yet set a password, you cannot select this setting. Establish a password by selecting [Level Change] first.
2 Use the cursor buttons ( ◀/▶/▲/∞) or the number buttons to enter the new password.
3 When the new password has been entered, press ENTER.
The new password is set and the screen returns to the General menu screen. To go back to the General menu screen without making any changes, press RETURN.
Turning the Screen Saver On and Off Expert
As a protective function against residual images on the TV screen or monitor, a phenomenon referred to as "screen burn", the screen saver appears when the same screen has been displayed for a length of time. By default, the screen saver is turned on. However, the screen saver function can be turned on and off at your discretion.
Make changes to the [Screen Saver] setting in the Setup screen General menu in the [Expert] menu mode (page 24).
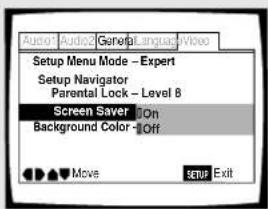
Settings: On* Off
*Factory setting
Changing the Background Color of the Screen Expert
You can select a blue or black background to appear when the player is in the stop mode.
Make changes to the [Background Color] setting in the Setup screen General menu in the [Expert] menu mode (page 24).
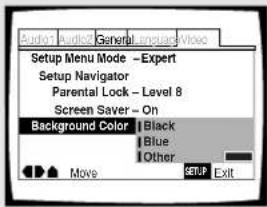
Settings: Black Blue* Other
*Factory setting
When "Other" is selected
This player gives you the option of creating your own background color by adjusting the red, green and blue levels.
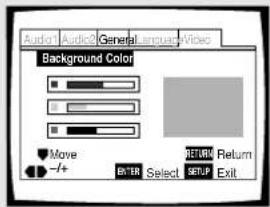
1 Use the cursor buttons ( ▲/∞) to select a color bar.
The selected color bar becomes highlighted.
2 Use the cursor buttons ( ◀/▶) to adjust the level of the color.
As the color bar is adjusted, the square on the right side of the screen indicates how the current mix of the three colors appears.
3 Repeat steps 1 and 2 until you have achieved a color that you like.
4 Press ENTER to set the color as the background color.
Still Frame/Slow Play/Frame Advance Playback – DVD/Video CD
The video images on DVD and Video CD can be viewed as a still frame, played back at slow speeds and even advanced frame by frame.
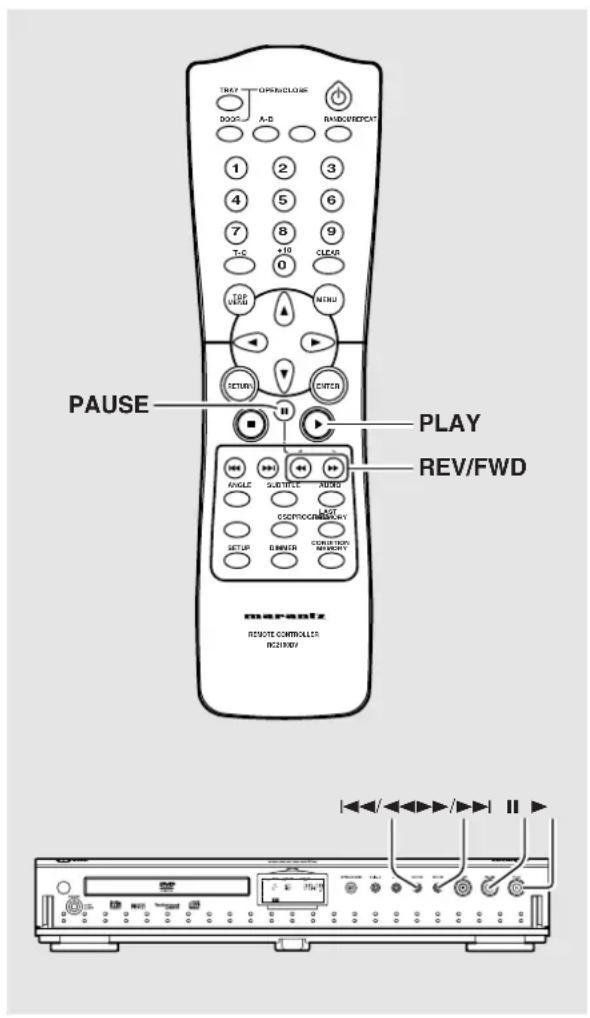
Viewing a still frame
Press PAUSE II.
When viewing a DVD, if the paused picture shakes, select the [Field] setting in the Setup screen Video menu [Still Picture] setting as described in the section on page 30.
To return to normal playback
When viewing a still frame playback, pressing PLAY ▶ restores normal playback operation.
Viewing slow playback
Press FWD ▶▶ for longer than one second during Pause.
- Slow playback is engaged.
- During slow playback, the speed of playback can be adjusted from 1/2 normal playback speed to 1/16 normal playback speed in four steps using REV ◀◀ and FWD ▶▶
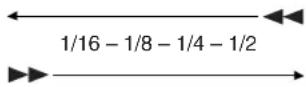
Press REV ◀◀ for longer than one second during Pause.
- Slow playback in the reverse direction is engaged.
- In the reverse direction, the playback speed can be set to high or low.
To return to normal playback
When viewing still frames or slow playback, pressing PLAY ▶ restores normal playback operation.
Frame by frame advance playback: Viewing one frame at a time
1 Press PAUSE II.
2 Press FWD ▶▶ or REV ◀◀ rapidly.
FWD ▶▶: The picture advances one frame each time the button is pressed.
REV ◀: The picture backs up a DVD a few frames each time the button is pressed.
To return to normal playback
When viewing frame by frame playback, pressing PLAY ▶ restores normal playback operation.
Notes
- There is no sound when viewing still frames or slow playback, or when advancing one frame at a time.
- Still frame, slow play, or frame advance playback may not be possible with certain titles. In this case, the 🔒 mark is displayed.
- Depending on the disc, there may be some shaking of the video image during slow reverse playback.
Searching for a Title, Chapter, Track, or Location on a Disc
- DVD/Video CD/CD
This player offers different ways of accessing the information on a DVD, Video CD, or CD. Using T-C, you can search for titles or chapters on a DVD, tracks on a Video CD or CD, and even select the point in time to start playback.
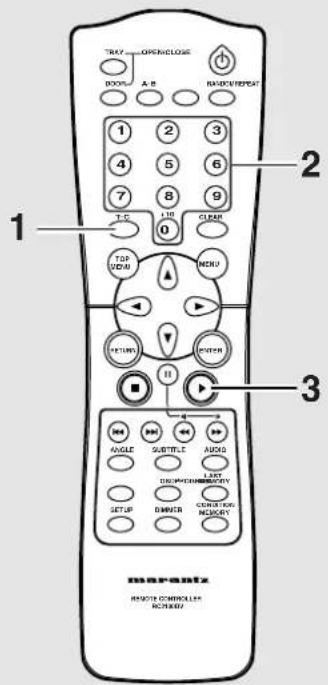
1 Press T/C repeatedly to select the type of search.
The type of search changes which each press as follows.

2 Press the number button(s) of the desired title, chapter or track or of the specific time where you would like to begin playback.
• To select number 3, press 3.
• To select number 10, press 1 and +10/0 rapidly.
• To select number 87, press 8 and 7.
When performing a time search:
• To select 21 minutes, 43 seconds, press 2, 1, 4, and 3.
• To select 1 hour, 14 minutes, press 7, 4, +10/0 and +10/0.
Note
• To select number 0, press +10/0 rapidly.
3 Press PLAY
Playback of the selected title, chapter or track starts. When a time search is performed, playback begins at the appointed time.
Notes
- For some discs, selection can be made using the top menu on the DVD. In this case, press TOP MENU to display the menu screen and then make your selection.
- With some DVDs, the search operation may not be possible and may stop shortly after being performed. In this case, the mark is displayed.
• Time search is not possible with CDs. - When performing DVD time search, playback may start from a slightly different time than that specified.
- Time search is not possible during when the disc is stopped.
- Search using time search is not possible during PBC playback of Video CDs.
To perform a direct title or chapter/track search using the number buttons
- Press the number buttons while the disc is stopped to select a title number.
- Press the number buttons while the disc is playing to select a chapter or track.
Notes (for direct search)
• To select number 3, press 3.
- To select number 10, press +10/0 for longer than 1 sec and then press +10/0 rapidly.
- To select number 13, press +10/0 for longer than 1 sec and then press 3 rapidly.
Memo
- To select number 10, press +10/0 for longer than 1 sec.
• To select number 0, press +10/0 rapidly.
Repeat Play – DVD/Video CD/CD
You can repeat an entire title, chapter or track, or just a part.
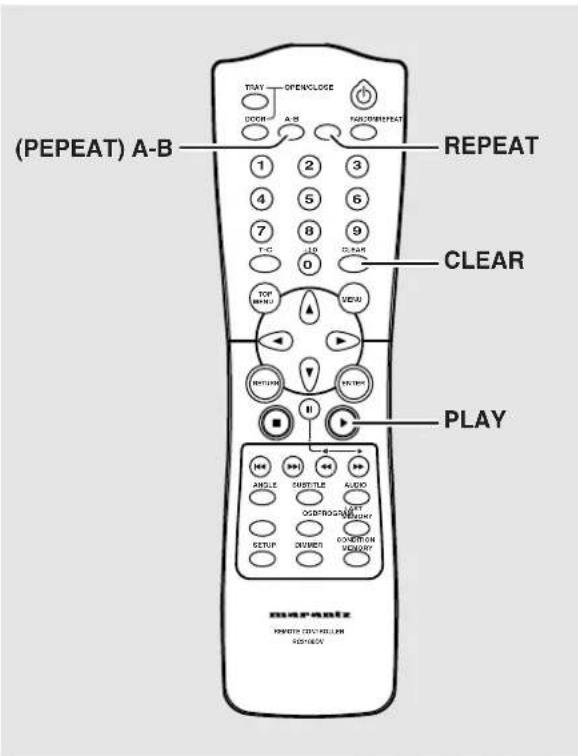
Repeat play of a chapter/track
Press REPEAT once during playback of the chapter or track you want to repeat.
Repeat play of a title
Press REPEAT twice during playback of the title you want to repeat.
- With DVDs, the title continues playing until the end, and then playback starts once more from the beginning of that title.
- With CDs and Video CDs, a disc is considered a single title, so the entire disc is repeated.
To repeat a program
Press REPEAT once during program playback to repeat the program.
To cancel repeat play
Press CLEAR. Playback continues, but the repeat function is canceled.
Repeat play of a specified section
Press (REPEAT) A–B at the beginning and end of the section you want to repeat.
- When (REPEAT) A–B is pressed a second time, the disc returns to the location where (REPEAT) A–B was pressed first and plays the selected section repeatedly.
- You can only perform A-B repeat within the same title, chapter, or track.
To cancel A–B repeat play
Press CLEAR. Playback continues, but the repeat function is canceled.
Return to a specified location on a disc
1 Press (REPEAT) A-B at the desired location.
2 When you want to return to the specified location, press PLAY ▶.
To clear the specified location
Press CLEAR to cancel repeat play or to clear the specified location that was set using (REPEAT) A-B.
Notes
- With some DVD discs, there may be times when repeat playback is not possible. In these cases, the 📄 mark will appear on the screen.
- With Video CDs, repeat play is not possible when the menu is displayed (PBC playback). To perform repeat play, start playback without displaying a menu by pressing the track number to be repeated when the disc is stopped, and then press REPEAT.
- If you switch camera angle during repeat play, repeat play is cancelled.
Random Play – DVD/Video CD/CD
Play titles, chapters, or tracks on a disc in random order.
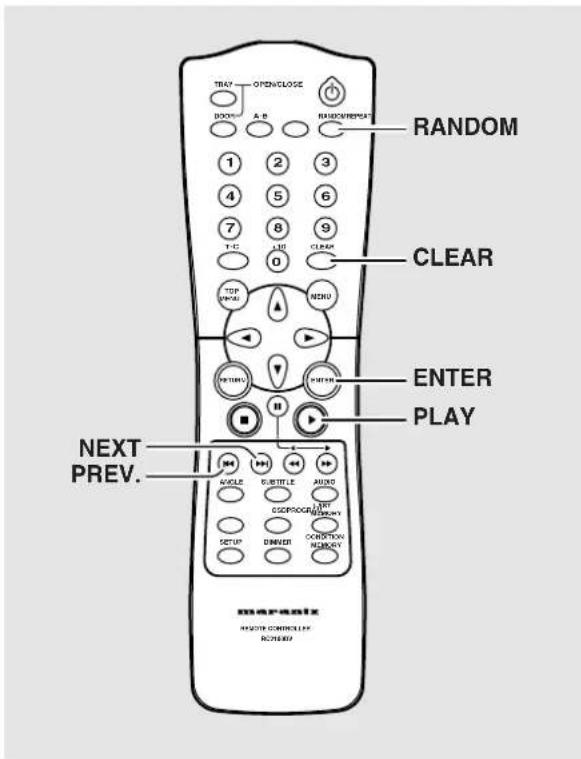
Random playback of chapters within one title - DVD
Press RANDOM once, then press ENTER or PLAY ▶.
"Random Chapter" appears on the screen, and chapters within the title will be played back in random order.
Random playback of titles - DVD
Press RANDOM twice, then press ENTER or PLAY ▶.
"Random Title" appears on the screen, and titles will be played back in random order.
Random playback of tracks -Video CD/CD
Press RANDOM.
"Random" appears on the screen, and random playback begins.
To change titles, chapters, or tracks during random play
- Press NEXT ▶▶ and the next randomly selected track starts playing.
- Press PREV ◀◀◀ and playback of the current track starts again from the beginning.
To stop random play
Press CLEAR. This returns you to normal playback of chapters/tracks in order from the chapter/track currently playing.
Notes
- With Video CDs, random play is not possible during playback when the menu is displayed (PBC playback). To perform random play, start playback without displaying a menu by pressing a track number button while in the stop mode, and then press RANDOM.
- Random play of programmed chapters/tracks is not possible.
- In the case of DVDs, random playback may not be possible with some discs.
- Repeat playback of random playback is not possible. In these cases, the 🔔 mark will appear on the screen.
Playback in a Desired Order (Program Play) – DVD/Video CD/CD
The titles and chapters within a title on a DVD and similarly the tracks on a Video CD or CD can be arranged to play in the order you want.
Programming DVDs
A program with a maximum of 24 steps can be memorized.
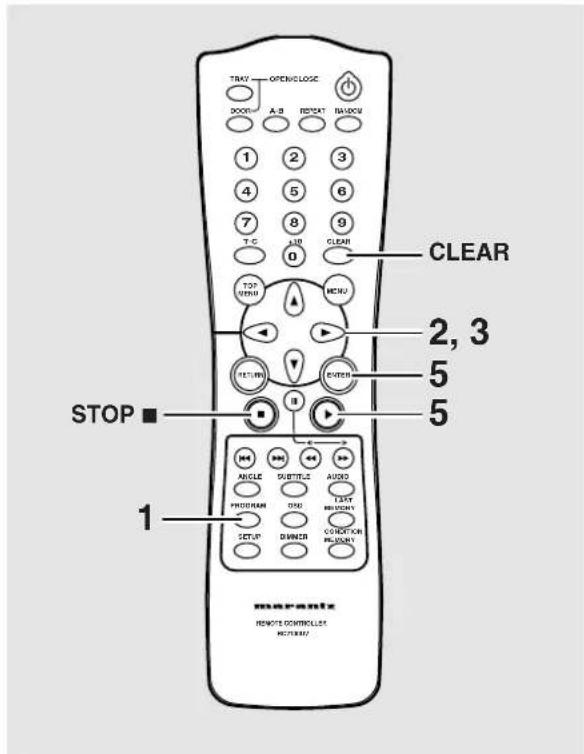
1 Press PROGRAM.
The Program screen appears.
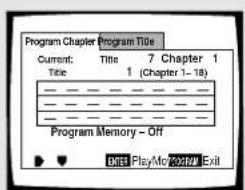
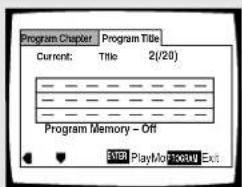
2 Use the cursor buttons (◀/▶) to select either Chapter or Title program.
3 Once the program type is selected. Use the cursor button ( ) to enter the program window.
When [Program Chapter] is selected, you must also select what title the chapters to be programmed are in. Use the cursor button (▲) to highlight "Title" and then use the number buttons to enter the title number to be used.
4 In the program window, use the number buttons to enter the numbers of the titles or chapters in the order you want to program them in.
• To program DVD titles/chapters 9, 7, and 18 in order, press 9, 7, +10/0 for longer than 1 sec and 8.
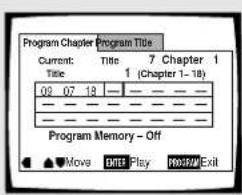
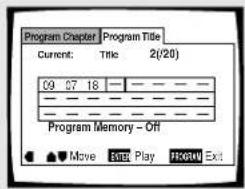
5 Press ENTER or PLAY ▶
- Playback starts in the set order.
- Press PROGRAM to return to the previous display. The program will not begin until PLAY ▶ is pressed.
To program a pause in a program
Press PAUSE II instead of a number button.
“” appears on the screen and the pause can be programmed.
A pause cannot be programmed as the first or last position in a program, and two or more pauses cannot be programmed in succession.
To delete a number:
Use the cursor buttons (▲/∞/◄/►) to highlight the incorrect number and then press CLEAR.
The number is deleted. If the number was before another number, the later numbers are reordered automatically.
To insert a number:
Use the cursor buttons ( /// ) to highlight the number to be placed after the new number and then press the number button(s) of the number to be inserted.
The new number is inserted before the previously selected number.
To stop program play
Press STOP ■.
Notes
- When programming chapters, chapters not programmed may appear on the screen. This is not a malfunction.
- Programming may not be possible with certain DVD discs. On these types of discs, the 📋 mark will appear on the screen when programming is attempted.
- Only chapters within the same title can be programmed during chapter programming.
Programming Video CDs, CDs
A program with a maximum of 24 steps can be memorized.
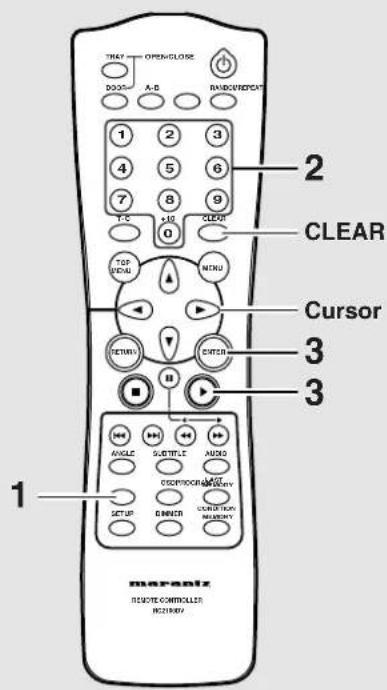
1 Press PROGRAM.
The program screen appears. When a Video CD or CD is loaded, the cursor appears in the program window.
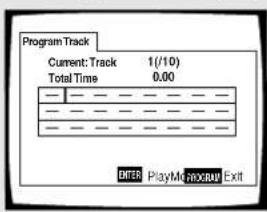
2 Use the number buttons to enter the numbers of the tracks in the order you want to program them in.
• To program tracks 9, 7, and 18 in order, press 9, 7, +10/0 for longer than 1 sec and 8.
- To edit the program, refer to the procedures on the previous page.
3 Press ENTER or PLAY ▶.
- Playback starts in the specified track order.
• To stop the program play, press STOP ■.
Notes
- You cannot program when playing a Video CD using menu selections (during PBC).
Additional programming options
- DVD/Video CD/CD
After you have made a program, it is then possible to confirm, add, or clear the contents of the program.
To confirm the contents of a program:
On a CD or Video CD track program, press PROGRAM to confirm. The program screen displays the current program.
On a DVD, select the program type (title or chapter) with the cursor buttons (◀▶). The current DVD title or chapter program can then be confirmed on the appropriate program screen.
To add to a program:
1 Press PROGRAM.
2 Press a number button to add a new title, chapter, or track at the end of the program.
3 Press PROGRAM to exit the program screen.
To delete a program:
1 Press PROGRAM.
2 Select the program with the cursor buttons (◄/►), then press CLEAR.
3 Press PROGRAM to exit the program screen.
Notes
- The complete program will be deleted even if the disc tray is open.
- Pressing CLEAR when the disc is stopped will clear all programs.
To make a program of your favorite parts of a disc as it plays – DVD/Video CD/CD
With this player, it is possible to make a program as you watch a DVD or Video CD or while listening to a CD.
Press and hold PROGRAM for at least 2 seconds at any point during playback of a title, chapter, or track you want to program, and it will be made into or added to a program without displaying a Program screen. When a title, chapter, or track is successfully added to the program, it is shown momentarily in the display as well as its position in the program.
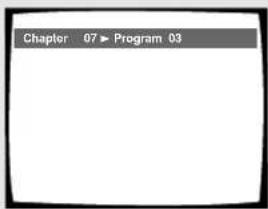
To confirm the contents of a program:
Press PROGRAM.
Notes
- When using this function to program DVDs, the program being created corresponds to the Program screen (chapter or title) that appears when PROGRAM is pressed. Be sure to check that the appropriate program type is selected.
- You cannot make a program containing chapters in different titles.
To save a program in memory – DVD
This player can memorize the programs on up to 24 DVDs. By turning the [Program Memory] to [On], the player will save your program and recall it the next time you use the same DVD. When the program memory exceeds 24, programs will be erased in chronological order from the oldest program in memory.
1 Use the cursor button ( ) to highlight [Program Memory] and use the cursor button (▶) to select [On].
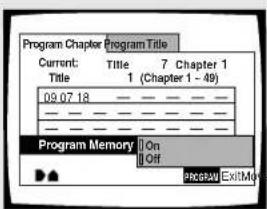
2 Press ENTER.
The program is saved in memory.
Note
When a DVD with a program stored in memory is loaded, program playback may start automatically.
To erase a program saved in memory – DVD
The player erases programs in chronological order when the maximum number of programs that can be held in memory is exceeded. To prevent the player from erasing older programs that you may still use regularly, or when you don't want to use a program anymore, it is possible to manually erase programs stored in memory.
1 Load a DVD that has a program stored in memory.
2 Press PROGRAM.
The program screen appears.
3 Use the cursor button ( ) to highlight [Program Memory] and use the cursor buttons ( / ) to select [Off].
4 Press ENTER.
The program is cleared from memory.
Continuing Playback from a Specified Location (Last Memory) – DVD/Video CD
The Last Memory function is convenient when you want to continue viewing a disc from the point where you were watching before. Unlike the resume function, the Last Memory function is effective even if the DVD is removed from the player (Last Memory locations saved for Video CDs are effective only if the disc remains loaded in the player).
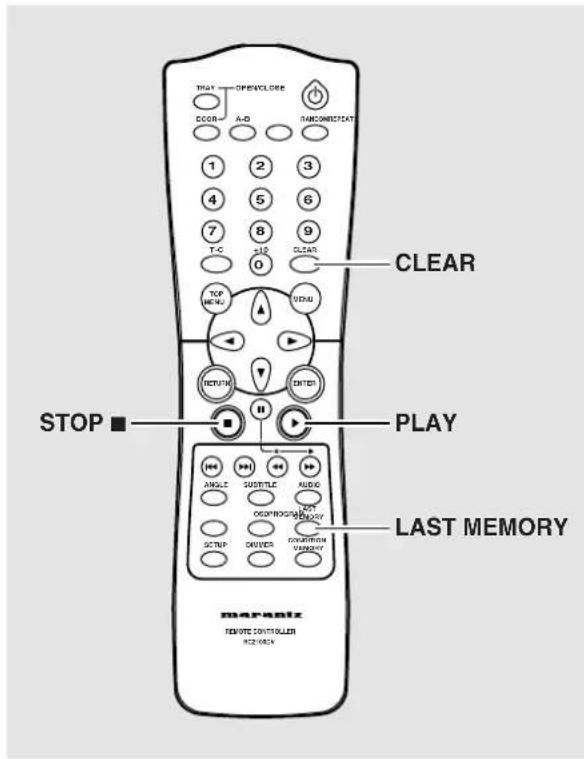
Memorizing a Last Memory location to return to later
1 Press LAST MEMORY during play.
The "LAST MEMO" indicator lights on the player.
2 Press the Power button to turn the power off, or stop playback with STOP ■.
Once memorized, the memorized point will be recalled even if the power is turned off, or if the disc is ejected. Points on up to 5 discs can be memorized, and those points are recalled the next time any of the discs are played back.
- A Last Memory point can be memorized for only one Video CD at a time as the function is only effective until the Video CD is removed from the player.
Resuming playback from where LAST MEMORY was pressed
1 Load a disc that has a Last Memory point memorized.
Some DVDs will start playback automatically when loaded. In this case, press STOP ■ to stop playback.
2 Press LAST MEMORY while in the stop mode.
The disc begins playback at the memorized point.
- Last Memory mode may not function for some DVDs.
- If you register more than five DVDs, details of the latest disc are memorized, while details of the least recent disc (the disc you registered first) is erased.
- Even with a disc you have memorized with Last Memory, playback begins at the start of the disc if you press PLAY ▶.
- This function is for playback of DVDs or Video CDs only. You cannot use it with CDs.
To clear the Last Memory location
Call up the Last Memory location by pressing LAST MEMORY. Then press CLEAR while "Last Memory" is still being displayed on the screen.
The "LAST MEMO" indicator disappears from the display.
Memorizing Settings for Often Viewed DVDs (Condition Memory) - DVD
You can store in memory settings for DVDs you often watch. Settings remain in memory even if you remove the disc from the player, or switch power to the player to standby. If you load a disc that has its settings memorized, "CONDITION" appears in the display. When you start playing the disc, the memorized settings are automatically recalled.
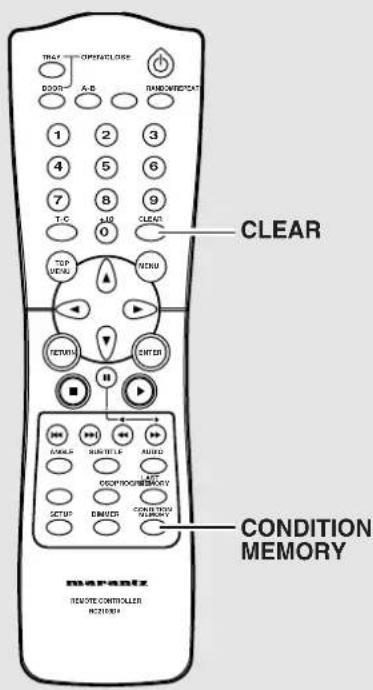
Press CONDITION MEMORY during playback.
Settings are memorized for the disc currently playing.
The following six settings are memorized:
TV Screen (page 29)
On Screen Display (page 30)
Multi-Angle (page 31)
Multi-language (page 34)
Multi-Language subtitles (page 35)
Parental Lock Level (page 37)
When a disc that has memorized settings is loaded
"Condition Memory" will appear on the screen, and the previously memorized settings will be selected.
Erasing the recorded contents
Load a disc that has memorized settings, and press CLEAR while "Condition Memory" is being displayed. The disc's recorded data will be erased.
Notes
- Settings are stored in memory for use any time.
- You can store settings for up to 15 DVDs in memory. If you memorize settings for more than 15 DVDs, previously memorized settings are erased in chronological order from the least recently memorized. Subsequently, if you load a disc with erased settings, the settings of the most recently played disc are used.
- If you make changes to any of the settings memorized in Condition Memory, press CONDITION MEMORY during playback to memorize new settings.
- Switching of the multi-language mode etc., is automatic on some discs.
Viewing Disc Information
- DVD/Video CD/CD
Use OSD to get current information about the disc currently loaded. You can get information about the titles and chapters on a DVD or tracks on a Video CD or CD. When viewing DVDs, you can also check the digital bitstream transmission rate.
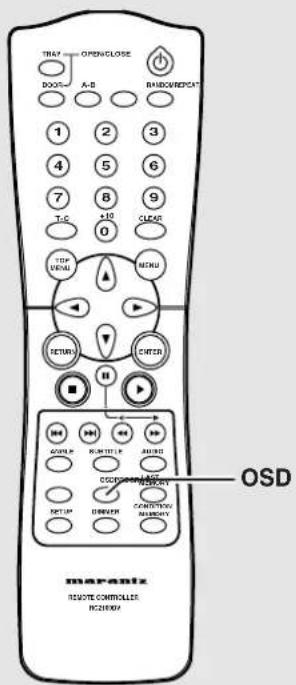
Press OSD during while a disc is playing. Press OSD repeatedly to change the information being displayed.
The disc information is displayed superimposed over the video image on the screen.
Press and hold OSD to display the time remaining on the disc.
When you release the button, the information disappears.
Note
Depending on the format and type of disc being used, not all screens may be displayed.
The display changes for each type of disc as follows each time the button is pressed.
DVD
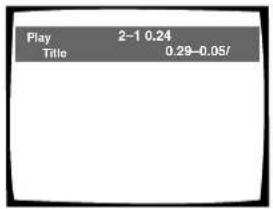
↓
TITLE information:
Top Row: title and chapter number, elapsed time of current title
Bottom Row: remaining time in title, total time of title
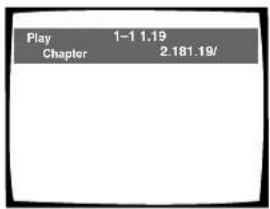
↓
CHAPTER information:
Top Row: title and chapter number, elapsed time of current title
Bottom Row: time in current chapter, total time of chapter
↓
CHAPTER information:
Top Row: title and chapter number, elapsed time of current title
Bottom Row: remaining time in current chapter, total time of chapter
↓
Data transmission rate information:
Top Row: title and chapter number, total elapsed time of DVD
Bottom Row: bitstream transmission rate level
Display off
CD
↓
↓
Display off
Video CD (with PBC disabled)
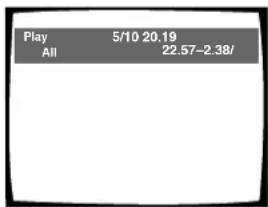
↓
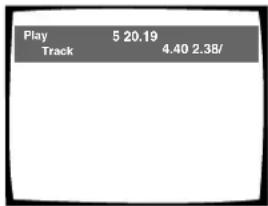
↓
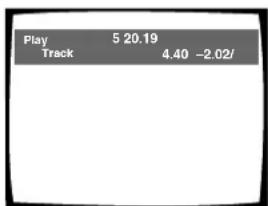
↓
Display off
Track Information:
Top Row: current track number, track time
Bottom Row: remaining time of current track, and total time of track
Disc information:
Top Row: current track number, total number of tracks on CD, total elapsed time of CD
Bottom Row: remaining time of CD, total time of CD
Disc information:
Top Row: current track number, total number of tracks, total elapsed time of Video CD
Bottom Row: remaining time of Video CD, total time of Video CD
Track information:
Top Row: current track number, total elapsed time of Video CD
Bottom Row: track time, total time of track
Track information:
Top Row: current track number, total elapsed time of Video CD
Bottom Row: remaining time of track, total time of track
Note
When playing Video CDs in PBC mode or unfinalized CD-Rs not all the above information is displayed.
Press OSD during while a disc is stopped to display DVD title and chapter information or Video CD and CD track information. Press OSD again to turn the display off.
Information about the titles and chapters or tracks on a disc is displayed. When the information exceeds the space on the screen, use the cursor buttons (◀/▶) to move to other screens.
DVD
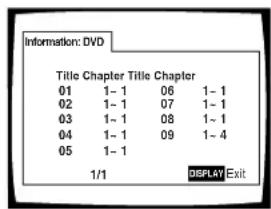
DVD Information
When a DVD is loaded, each title and the number of chapters within each title is displayed.
CD and Video CD
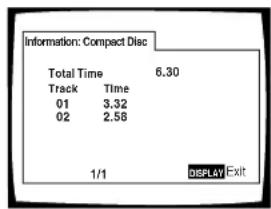
CD and Video CD information
When a CD or Video CD is loaded, the total time of the disc and the time of each track on the disc is displayed.
To exit the title, chapter and track information.
Press OSD to close the title, chapter and track information even "Display" icon is shown on the Screen.
Resetting the Player to System Settings
To reset the player, press and hold ■ (stop) on the front panel when pressing Power switch to turn the power on.
All program memory, saved settings from functions such as Last Memory and Condition Memory are cleared, and all Setup screen menus are returned to factory settings.
Additional Information
Disc Care
How to hold discs
When loading or removing discs, try not to touch their playing surfaces.
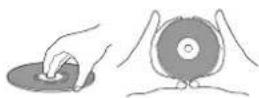
Cleaning
Fingerprints or other dirt on the disc may affect sound and picture quality.
To clean your discs, use a soft clean cloth to wipe them. If necessary, moisten a soft cloth with diluted neutral detergent to remove heavy dirt or fingerprints.
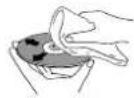
Do not wipe in a circular direction (Concentric scratches in the disc groove tend to cause noise.)

Gently wipe from the inside toward the outer edge.
Discs must not be cleaned with record cleaning sprays, or static prevention sprays, etc. Also do not use volatile liquids such as benzine, or thinner, etc.
Lens cleaner
The player's pickup lens should not become dirty in normal use, but if for some reason it should malfunction due to soiling, contact your nearest MARANTZ service center. Lens cleaners are commercially available, but special care should be exercised in their use since some may cause damage to the lens.
Never play cracked or warped discs
The disc revolves in the player at high speed when it is played. Never play a cracked, scratched or warped disc. This may damage the player or cause it to malfunction.
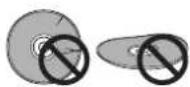
Never use discs with special shapes
CD's with special shapes (heart-shaped CDs, octagonal CDs, etc.) cannot be played on this set. Attempting to do so may damage the set. Do not use such CDs.

After using discs, store them upright
After playing a disc, always remove it from the player and return it to its jacket. Then store it standing upright away from heat and humidity.
- Store discs carefully. If you store discs at an angle, or stacked on top of each other, discs may become warped even when in their jackets.
- Do not leave discs in locations such as the seat of a car, which may become excessively hot.
CAUTION WHEN USING THE DISC
All rights reserved.
Unauthorized public performance, broadcasting or copying is a violation of applicable laws.
Notes on using optical cables
- Do not route cords around sharp angles. When storing, wind the cords so that they have a diameter of at least 15 cm (6 in.).
- When connecting, push all the way into the terminal.
- Do not use cords with a length of over 3 m.
- If moisture or dust has collected on the plug, wipe it with a soft cloth before connecting.
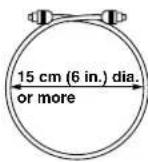
For Proper and Long Use of This Unit
Do not move the unit during playback
During playback, the disc rotates at high speed. Do NOT lift or move the unit during playback. Doing so may damage the disc.
When moving the unit
When changing places of installation or packing the unit for moving, be sure to remove the disc and return the disc table to its original position in the player. Then, press Power switch to turn off, then disconnect the power cord. Moving this unit with the disc loaded may result in damage to this unit.
Installation
- Select a stable place to the side of a TV set or stereo system to be connected to the unit.
- When using the unit with a stereo system, install the speakers a little bit away from the TV.
- Do NOT install the unit on top of a TV or color monitor. Install the unit away from equipment that may be affected by magnetism, such as a cassette deck.
- Do NOT place objects on top of the unit.
Avoid installing in a place that is:
- Exposed to direct sunlight
- Exposed to humidity or where ventilation is poor
• Extremely hot or cold - Exposed to vibration
- Exposed to dust
- Exposed to oily smoke, steam or heat (for example, a kitchen)
Do not block vents
Do NOT use the player on top of a long-fibered carpet, bed or sofa, and do not cover it with a cloth, etc. This will prevent heat radiation and could result in damage.
Avoid heat
Do NOT place the unit on equipment which generates heat, such as an amplifier.
When installing the unit in a rack, place it on the lowest shelf possible (however, not where it is exposed to dust) and separated from the amplifier to avoid the heat generated by the amplifier or other audio equipment.
CAUTION: WHEN PLACING THE UNIT IN A STEREO RACK WITH GLASS DOORS
Be sure there is ample space between the unit and the glass doors when opening the disc table using the remote control. If the disc table opens against strong resistance, such as a closed glass door, damage to the unit may result.
Condensation
Moisture may form in the operating section of the player if the player is brought from cool surroundings into a warm room or if the temperature of the room rises suddenly. When this happens, the player's performance will be impaired. To prevent this, let the player stand in its new surroundings for about an hour before switching it on, or make sure that the room temperature rises gradually.
Condensation may also form during the summer if the player is exposed to the breeze from an air conditioner. In such cases, change the location of the player.
Switch POWER to turn off when not using the unit
Depending on the strength of the TV or radio broadcast signal, having the TV or radio on while power to the unit is on may result in stripes on the TV screen or noise. However, this is not a malfunction of this unit or the TV or radio. In such a case, switch the power of the unit to turn off.
Power-cord caution
Handle the power cord by the plug. Do not pull out the plug by tugging the cord and never touch the power cord when your hands are wet as this could cause a short circuit or electric shock. Do not place the unit, a piece of furniture, etc., on the power cord, or pinch the cord. Never make a knot in the cord or tie it with other cords. The power cords should be routed in such a way that they are not likely to be stepped on. A damaged power cord can cause a fire or give you an electrical shock. Check the power cord once in a while. When you find it damaged, ask your nearest MARANTZ service center or your dealer for a replacement.
Cleaning the player
To clean the PLAYER, wipe with a soft, dry cloth. For stubborn dirt, wet a soft cloth with a mild detergent solution made by diluting one part detergent to 5 or 6 parts water, wring well, then wipe off the dirt. Also use a dry cloth to wipe the surface dry. Do not use volatile liquids such as benzene and thinner which are harmful to the unit.
Language Code List
Language codes are used when setting the audio and subtitle language preferences (page 33).
| Language Input-code | |
| Japanese (ja) | 1001 |
| English (en) | 0514 |
| French (fr) | 0618 |
| German (de) | 0405 |
| Italian (it) | 0920 |
| Spanish (es) | 0519 |
| Chinese (zh) | 2608 |
| Dutch (nl) | 1412 |
| Portuguese (pt) | 1620 |
| Swedish (sv) | 1922 |
| Russian (ru) | 1821 |
| Korean (ko) | 1115 |
| Greek (el) | 0512 |
| Afar (aa) | 0101 |
| Abkhazian (ab) | 0102 |
| Afrikaans (af) | 0106 |
| Amharic (am) | 0113 |
| Arabic (ar) | 0118 |
| Assamese (as) | 0119 |
| Aymara (ay) | 0125 |
| Azerbaijani (az) | 0126 |
| Bashkir (ba) | 0201 |
| Byelorussian (be) | 0205 |
| Bulgarian (bg) | 0207 |
| Bihari (bh) | 0208 |
| Bislama (bi) | 0209 |
| Bengali (bn) | 0214 |
| Tibetan (bo) | 0215 |
| Breton (br) | 0218 |
| Catalan (ca) | 0301 |
| Corsican (co) | 0315 |
| Czech (cs) | 0319 |
| Welsh (cy) | 0325 |
| Danish (da) | 0401 |
| Bhutani (dz) | 0426 |
| Esperanto (eo) | 0515 |
| Estonian (et) | 0520 |
| Basque (eu) | 0521 |
| Persian (fa) | 0601 |
| Finnish (fi) | 0609 |
| Fiji (fj) | 0610 |
| Faroese (fo) | 0615 |
| Frisian (fy) | 0625 |
| Irish (ga) | 0701 |
| Scots-Gaelic (gd) | 0704 |
| Galician (gl) | 0712 |
| Guarani (gn) | 0714 |
| Language Input-code | |
| Gujarati (gu) | 0721 |
| Hausa (ha) | 0801 |
| Hindi (hi) | 0809 |
| Croatian (hr) | 0818 |
| Hungarian (hu) | 0821 |
| Armenian (hy) | 0825 |
| Interlingua (ia) | 0901 |
| Interlingue (ie) | 0905 |
| Inupiak (ik) | 0911 |
| Indonesian (in) | 0914 |
| Icelandic (is) | 0919 |
| Hebrew (iw) | 0923 |
| Yiddish (ji) | 1009 |
| Javanese (jw) | 1023 |
| Georgian (ka) | 1101 |
| Kazakh (kk) | 1111 |
| Greenlandic (kl) | 1112 |
| Cambodian (km) | 1113 |
| Kannada (kn) | 1114 |
| Kashmiri (ks) | 1119 |
| Kurdish (ku) | 1121 |
| Kirghiz (ky) | 1125 |
| Latin (la) | 1201 |
| Lingala (ln) | 1214 |
| Laothian (lo) | 1215 |
| Lithuanian (lt) | 1220 |
| Latvian (lv) | 1222 |
| Malagasy (mg) | 1307 |
| Maori (mi) | 1309 |
| Macedonian (mk) | 1311 |
| Malayalam (ml) | 1312 |
| Mongolian (mn) | 1314 |
| Moldavian (mo) | 1315 |
| Marathi (mr) | 1318 |
| Malay (ms) | 1319 |
| Maltese (mt) | 1320 |
| Burmese (my) | 1325 |
| Nauru (na) | 1401 |
| Nepali (ne) | 1405 |
| Norwegian (no) | 1415 |
| Occitan (oc) | 1503 |
| Oromo (om) | 1513 |
| Oriya (or) | 1518 |
| Panjabi (pa) | 1601 |
| Polish (pl) | 1612 |
| Pashto, Pushto (ps) | 1619 |
| Quechua (qu) | 1721 |
| Language Input-code | |
| Rhaeto-Romance (rm) | 1813 |
| Kirundi (rn) | 1814 |
| Romanian (ro) | 1815 |
| Kinyarwanda (rw) | 1823 |
| Sanskrit (sa) | 1901 |
| Sindhi (sd) | 1904 |
| Sangho (sg) | 1907 |
| Serbo-Croatian (sh) | 1908 |
| Sinhalese (si) | 1909 |
| Slovak (sk) | 1911 |
| Slovenian (sl) | 1912 |
| Samoan (sm) | 1913 |
| Shona (sn) | 1914 |
| Somali (so) | 1915 |
| Albanian (sq) | 1917 |
| Serbian (sr) | 1918 |
| Siswati (ss) | 1919 |
| Sesotho (st) | 1920 |
| Sundanese (su) | 1921 |
| Swahili (sw) | 1923 |
| Tamil (ta) | 2001 |
| Telugu (te) | 2005 |
| Tajik (tg) | 2007 |
| Thai (th) | 2008 |
| Tigrinya (ti) | 2009 |
| Turkmen (tk) | 2011 |
| Tagalog (tl) | 2012 |
| Setswana (tn) | 2014 |
| Tonga (to) | 2015 |
| Turkish (tr) | 2018 |
| Tsonga (ts) | 2019 |
| Tatar (tt) | 2020 |
| Twi (tw) | 2023 |
| Ukrainian (uk) | 2111 |
| Urdu (ur) | 2118 |
| Uzbek (uz) | 2126 |
| Vietnamese (vi) | 2209 |
| Volapük (vo) | 2215 |
| Wolof (wo) | 2315 |
| Xhosa (xh) | 2408 |
| Yoruba (yo) | 2515 |
| Zulu (zu) | 2621 |
Troubleshooting
Incorrect operations are often mistaken for trouble and malfunctions. If you think that there is something wrong with this component, check the points below. Sometimes the trouble may lie in another component. Inspect the other components and electrical appliances being used. If the trouble cannot be rectified even after exercising the checks listed below, ask your nearest MARANTZ service center or your dealer to carry out repair work.
The disc table comes back out automatically, shortly after the disc table is closed.
The disc is dirty or warped.
→Refer to 'Disc Care'(page 51).
The disc is not placed properly on the disc table.
→ Use the disc table guide to align the disc (page 19).
Region number does not conform with this unit.
→If the region number on the disc does not match the number on the player, the disc cannot be used (page 57).
There is condensation on the operating section of the player.
→Allow time for condensation to evaporate. If player is near an air conditioning unit, you should move the player (page 52).
Playback is not possible.
The disc has been loaded upside down.
→Check that the disc has been loaded with the label side facing up.
mark appears on screen.
The selected function does not operate for that disc.
mark appears on screen.
The operation is prohibited by the player.
Picture playback stops and the operation buttons cannot be used.
Player malfunctions.
→ Stop disc playback (press STOP ■), then start playback again.
New settings made in the Setup screen menus while a disc is playing are ineffective.
Some settings can be changed while a disc is playing, but are not effective. This is not a malfunction.
→Make the same setting when the player is stopped.
→ Stop disc playback (press STOP ■), then start playback again. When playback is resumed, the new settings should be in effect. Please note that making settings in the Setup screen menus may cancel the resume function.
When making changes in the Setup screen menus, displayed.
There is a Video CD or CD loaded in the player and the setting that was changed only applies to DVD performance.
→The setting will be effective the next time a DVD is loaded.
No picture.
Connection is incorrect.
→Check that cord connections are correct and that plugs are firmly connected.
Internal player settings are incorrect.
→If AV CONNECTOR connections have been made, make sure that the Setup screen Video menu [Video Out] setting corresponds to the capabilities of the TV or monitor that connections have been made to (page 30).
Operation (settings) of TV or AV amplifier is not appropriate.
→Be sure that your TV, receiver, or amplifier is set up to view DVD playback.
The screen is stretched or aspect does not change.
The multi aspect setting is not appropriate.
→ Change the aspect setting in the [TV Screen] setting in the Setup screen Video menu to the screen type most appropriate to the TV or monitor you are using (page 29).
The screen is suddenly squeezed when the Setup screen is opened.
If the Setup screen is opened during playback of a DVD being viewed in the letter box format, the screen may switch to the wide screen format.
→This is not a malfunction. The screen will return to normal when the Setup screen is closed.
Picture disturbance during playback or dark.
This player is compatible with Macro-Vision System copy guard. Some discs include a copy prevention signal, and when this type of disc is played back, stripes etc., may appear on some sections of the picture depending on the TV.
→This is not a malfunction.
The position of the TV SYSTEM switch was changed during player operations.
→Switching the position of the TV SYSTEM switch is not effective if a disc is playing. Stop playback before performing this operation.
Discs respond differently to particular player functions which may result in the screen becoming black for a brief instant or shaking slightly when the function is executed.
→These problems are largely due to differences between discs and disc content and are not malfunctions of this player.
Audio is output from the analog output jacks but not from the digital output jacks.
Player settings are incorrect.
→In the Audio 1 menu, check that the appropriate digital audio output formats are selected, and that the [Digital Out] setting is not set to [Off] (page 26).
→When the "Dolby V" indicator is lit during playback, PCM output is muted.
When recorded on a VCR or passed through an AV selector, there is disturbance in the playback picture.
This is not a malfunction.
→Due to the player's copy protection circuits, connection of this device through a VCR or an AV selector may prevent recording or cause picture problems.
Remote control operation is not possible.
The rear panel control input jack on the player is being used.
→Point the remote control at the component that the player is connected to (page 14).
The remote control is too far from the player, or the angle with the remote sensor is too wide.
→Be sure to operate the remote from a location within its operating range (page 6).
The batteries are exhausted.
→Replace the exhausted batteries with all new batteries (page 6).
Audio is not output or is distorted.
The Setup screen Audio 1 menu [96 kHz PCM Out] setting is set to [96 kHz]. Digital output is prohibited on some discs.
→On DVDs that contain copy protection, it may not possible to play back the audio at 96 kHz.
→When this type of disc is encountered, even if [96 kHz] is selected, the player automatically outputs the audio at a compressed rate of 48 kHz. This is not a malfunction.
→The [4:3 (Letter Box)] screen setting is selected. Even if [96 kHz] is selected, the player automatically downsamples the audio to a compressed rate of 48 kHz. This is not a malfunction.
→Be sure to make analog audio connections as well as digital connections (page 11, 12).
The disc is dirty.
→Refer to 'Disc Care'(page 51).
The connection plugs are not inserted fully into the terminals or are not connected.
→Check that all connection plugs are firmly inserted.
The connection plug or terminal is dirty.
→Check that the plugs and terminals are wiped clean of dirt, etc.
Audio cable connection is wrong.
→Check to make sure that the audio cables are connected correctly (page 10-12).
Connection is made to the stereo amplifier's PHONO input terminal.
→Change connection to any input terminal except PHONO.
The pause mode is engaged.
→Press PLAY ▶ to exit the pause mode.
Stereo amplifier operation is incorrect.
→Check input (CD, AUX, etc.) selector to determine if it is selected for DVD playback.
Noticeable difference in DVD and CD volume.
DVDs and CDs use different recording methods.
→This is not a malfunction.
Audio mix does not sound right or sounds incomplete (for example, the dialog of the actors cannot be heard).
Audio output selection is incorrect.
When [5.1 Channel] audio output is selected, the front right (R) and left (L) audio channels are also output from the SYSTEM AUDIO OUT jacks. Similarly, when [2 Channel] audio output is selected, the stereo channels are also output from the front right (R) and left (L) audio channels of the 5.1 CH SURROUND AUDIO OUT jacks. Check that the correct output is selected (pages 17, 27, 28).
Caution
Static electricity or other external influence may cause malfunctioning of this unit. In this case, unplugging the power cord and then re-plugging it in will usually reset the unit for proper operation. If this does not correct the problem, please consult your nearest MARANTZ service center.
Terms
Aspect ratio
Aspect ratio refers to the length to height ratio of TV screens. The ratio of a standard TV is 4:3, while the ratio of a high-definition or wide TV is 16:9. The latter allows you to enjoy a picture with a wider perspective.
Chapter number
Chapter numbers are the numbers assigned to sections of a title on the disc, similar to chapters in a book. If the disc includes chapter numbers, you can locate the section you want very quickly using search and other functions.
Condition memory
"Condition" refers to the various mode settings, etc. On this player, various conditions, such as those set during playback, can be memorized. This function allows you to play back the same disc at any time without having to redo your preferred settings.
Digital bitstream
The bitstream does not refer to the audio signal, but rather to the digital data that, once converted, becomes the audio signal. The player outputs digital bitstreams via the digital optical or digital coaxial output. If the bitstream cannot be decoded by the connected AV amplifier etc., digital noise is produced. Digital bitstream formats compatible with different entertainment systems can be selected in the Setup screen Audio 1 menu.
Digital output (Coaxial)
Output of the digital audio signal is transmitted electronically using a coaxial cable. Because the signal being transmitted is digital, connection must be made to the coaxial digital input of another component. Noise will be output if connected to the analog audio inputs as the digital signal cannot be decoded.
Digital output (Optical)
Normally, audio is converted to an electric signal and transmitted through an electric wire from the player to the amplifier, etc. Changing this signal to a digital signal and transmitting it through an fiber-optic cable is called optical digital output. Similarly, optical digital input receives digital signals from external units such as an AV amplifier or receiver.
Dolby Digital
The maximum 5.1 channels of audio used in the surround system (Surround Digital) for movie theaters is digital data compressed by the third generation algorithm encoder.
In order to enjoy Dolby Digital discs, this unit's digital output jack (either coaxial or optical) must be connected to the digital input jack of an AV amplifier or Dolby Digital decoder to enjoy the sound of Dolby Digital soundtracks.
DTS
DTS stands for Digital Theater System. DTS is a surround system different from Dolby Digital that has become a popular surround sound format for movies.

Dynamic range
Dynamic range refers to the difference between the maximum and minimum levels of the audio soundtrack as measured in decibels (dB).
Compressing the dynamic range raises the minimum signal level and lowers the maximum signal level. This allows you to hear voices and other low level audio signals clearly while lowering strong audio signals like the sound of explosions.
MPEG
Short for Moving Picture Experts Group. This is an international standard for compression of moving images. On some DVDs, digital audio has been compressed and recorded in this format.
Multi-angle
When you watch a TV program, you are watching the image filmed through the TV camera. Because of this, the picture is displayed on your TV from the viewpoint of the TV camera's position. In a TV studio, the image is filmed by many cameras at the same time, and one of those images is selected by the program director and transmitted to your TV. If all the filmed images were transmitted to your TV you would be able to select the camera image you want. Some DVD discs are recorded with the angles of more than one camera used for filming, and these can be selected using this player. These types of discs are called multi-angle discs.
Parental lock level
This function was suggested by parents concerned about what type of media their children were able to watch. Parental lock restrictions are restrictions incorporated into titles which include scenes that parents may not wish their children to view.
PCM
PCM stands for Pulse Code Modulation and is digital audio. The digital audio of CDs is PCM. This player also has a function that converts Dolby Digital and MPEG digital bitstreams into PCM to enable you to listen to quality digital sound even without a special decoder.
Playback Control (PBC)
This refers to signals recorded on a Video CD (Version 2.0) enabling playback control.
You can use menus recorded on discs with PBC for easy, interactive search for desired scenes, and playback.
You can also enjoy viewing high-resolution/standard resolution still images.
Regional restriction codes (region number)
Regional restriction codes are built in to DVD players and DVD discs for each sales region. If the regional code of the DVD player does not match one of the regional codes of the DVD disc, playback is not possible. The region number can be found on the rear panel of the DVD player. The illustration below shows the regions and corresponding region numbers.
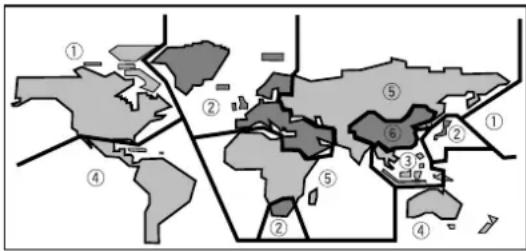
Sampling Frequency
When a sound wave is converted to a digital signal, the sound is sampled and converted to data at a specific frequency rate. For example, a signal with a 96 kHz sampling rate indicates that in one second, the analog signal was sampled 96000 times to produce the digital signal.
Subtitle
Subtitles are language titles superimposed on movies, or other media. Up to 32 different subtitle languages can be recorded on a DVD disc. The subtitle function can be used to select the language of your choice.
S-video
Connecting the S-video output on the player to a TV or monitor with S-video input via an S-video cable produces clearer picture reproduction by sending separate signals for the luminance and the color. These signals are then combined by the television to produce a better quality picture.
Time number
The time number corresponds to the elapsed playback time of a disc from its beginning. When using the time search function, use the time number to locate scenes that occur at the time selected.
Title number
DVD discs are divided into units referred to as titles, and titles are divided into chapters. Menu screens do not belong to any title. A disc which contains a movie may have only one title with many or no chapter divisions. Karaoke discs may have many titles, assigning a title to each song on the disc.
TruSurround
TruSurround is a simulated surround system which produces a surround sound effect from stereo speakers.
Virtual Dolby Digital
Virtual Dolby Digital uses Dolby Digital multichannel audio sources to create a realistic surround sound effect from stereo speakers.
Specifications
General
System ...... DVD system and Compact Disc digital audio system
Power requirements AC 230 V, 50 Hz
Power consumption 17 W
Weight 4.2 kg
Dimensions 420 (W) x 309 (D) x 76 (H) mm (Not including protruding cables, etc.)
Operating temperature ....+5°C to +35°C (+36°F to +96°F)
Operating humidity 5% to 85% (no condensation)
S-Video output
Y (luminance) - Output level 1 Vp-p (75 Ω)
C (color) - Output level 286 mVp-p (75 Ω)
Jacks S-VIDEO jack
Video output
Output level 1 Vp-p (75 Ω)
Jacks ....RCA jack
RGB output in SCART jack
Output level 0.7 Vp-p (75 Ω)
Jacks ....SCART jacks
SYSTEM Audio output
Output level During audio output .... 200 mVrms (1 kHz, -20 dB) Number of channels .... 2 Jacks .... RCA jacks
5.1 CH SURROUND Audio output
Output level During audio output .... 200 mVrms (1 kHz, -20 dB) Number of channel .... 6 Jacks .... RCA jacks
Digital audio characteristics
Frequency response .... 4 Hz to 44 kHz (DVD fs: 96 kHz) S/N ratio .... More than 100 dB Dynamic range .... More than 100 dB Total harmonic distortion .... 0.0025 % Wow and flutter .... Limit of measurement (±0.001% W. PEAK) or lower
Digital output
Optical digital output .... Optical digital jack Coaxial digital output .... RCA jack
Accessories
Remote control unit ....1 AA (R6P) dry cell batteries ....2 Audio/Video Cable ....1 Audio Cable ....2 Euro SCART Cable ....1 Power Cable ....1 Remote Control Cable ....1 Operating Instructions ....1
Note
The specifications and design of this product are subject to change without notice, due to improvement.

- WARNINGS
- CE marking
- EQUIPMENT MAINS WORKING SETTING
- IMPORTANT: (FOR UK version only)
- HOW TO CONNECT A PLUG
- PRECAUTIONS
- GENERAL PRECAUTIONS
- CONGRATULATIONS ON YOUR PURCHASE OF THIS FINE MARANTZ PRODUCT.
- Features of This Player
- Compatible with DVD, Video CD and CD formats
- Compatible with a wide range of DVD digital audio output formats
- Equipped with six channel discrete audio output and an internal Dolby Digital and DTS decoder
- Multiple video output formats that can be selected to best suit your TV or monitor
- (●)TruSurround
- TruSurround and Virtual Dolby Digital
- Frame advance playback in foward and reverse direction
- Easy setup and adjustment using on-screen menus
- Wide range of DVD viewing options
- Multi-Angle (page 31)☆
- Multiple Languages (page 34)☆
- Multi-Language Subtitles (page 35)☆
- Differences in Disc Composition
- DVD
- Video CD/CD
- How to Proceed in This Manual
- Get familiar with the player.
- Make the necessary connections.
- Set up the necessary player menus.
- Play a disc.
- Enjoy the many features available.
- Table of contents
- Before Using ....6
- Names and Functions ....7
- Making Connections ....10
- Setting Up the Player ....15
- Getting Started Using Your DVD Player ...19
- Adjusting Audio and Video Settings .....23
- Setting the Language Options ....32
- Advanced Functions ......37
- Additional Information ....51
- Before Using
- Checking Accessories
- Preparing the Remote Control
- Inserting batteries into the remote control
- Insert batteries.
- Close the cover.
- Notes
- Remote control operation
- Names and Functions
- Front Panel
- Rear Panel
- Display Window
- Remote Control
- Making Connections
- Connecting Your DVD Player
- Connection Guide
- Home Theater Component Connections
- CH SURROUND AUDIO OUT
- Audio Connections
- Digital Audio Connections:
- DIGITAL OUT (Optical)
- DIGITAL OUT (Coaxial)
- Analog Audio Connection:
- CH AUDIO OUT
- Video Connections
- S-VIDEO OUT
- VIDEO OUT
- TV SYSTEM switch
- About MOD. (Modulation) PAL
- AV EUROCONNECTOR Connection
- System Control Connections
- CONNECTIONS
- Remote switch
- - INTERNAL MODE
- - EXTERNAL MODE
- Note
- - SYSTEM MODE
- Note:
- Setting Up the Player
- Using the Setup Navigator
- When setting up for the first time
- Open the Door Panel by hand.
- Press Power switch on the front panel.
- Press SETUP.
- Use the cursor buttons ( ▲/∞) to make a selection.
- Press ENTER.
- To change the answer to a prior question
- To exit the Setup Navigator
- To return to the Setup screen
- Setting the OSD Language (On-Screen Display Language)
- Setting the TV screen size
- Setting analog audio connections to an AV amplifier or receiver
- Settings: 2 Channel\*
- Channel
- Not Connected
- To coordinate your speaker system for 5.1 channel output
- Setting digital audio connections to an AV amplifier or decoder
- Setting compatibility with 96 kHz output
- Confirming the settings
- To exit the Setup screen
- To change other player settings in the Setup screen menus
- Getting Started Using Your DVD Player
- Playing DVDs, Video CDs and CDs – DVD/Video CD/CD
- Press POWER switch on the front panel to turn on the player.
- Press Tray OPEN/CLOSE.
- Load a disc.
- Press PLAY ▶.
- Select the item you want to view.
- When an operation is prohibited
- When a menu screen is displayed
- To open or return to the DVD or Video CD menu screen
- To navigate a menu screen
- To play Video CDs without displaying menu screens
- Chapter (Track) Skip Forward/ Skip Back – DVD/Video CD/CD
- Forward and Reverse Scanning – DVD/Video CD/CD
- Advancing to the next chapter (track)
- Skipping back to the previous chapter (track)
- Fast forward scanning
- Fast reverse scanning
- Resuming playback from where you stopped – DVD/Video CD
- Press STOP ■ once.
- Press PLAY ▶.
- Stopping Playback and Switching Power Off
- Press STOP ■.
- Press Tray OPEN/CLOSE.
- Remove the disc.
- Press Power button on the front panel.
- Close the door panel by hand.
- Adjusting Audio and Video Settings
- Using the Setup Screen Menus
- How to interpret the setting indicator colors in the Setup screen menus
- IMPORTANT
- Changing to the Setup Screen "Expert" Menu Mode
- Setting the Digital Audio Output To Be Compatible with Your AV Component – DVD
- Dolby Digital Out
- DTS Out
- kHz PCM Out
- MPEG Out
- Digital Out ExpDVD/Video CD/CD
- Getting Surround Sound from Stereo Speakers. – DVD/Video CD
- Adjusting the Dynamic Range of the Audio Soundtrack - DVD
- Setting Your Speaker System for Multichannel Audio Playback
- Use the cursor buttons ( ◀/▶) to select the speaker.
- About source audio output
- Setting the TV Screen Size - DVD
- Differences in screen sizes and DVD formats
- Setting the Video Output Format for AV CONNECTOR Connections
- Switching the S-Video Output Expert
- Selecting the type of paused image to display Expert
- Settings: Field
- Frame
- Auto\*
- Setting the position of the on-screen display Expert
- Viewing from a Desired Camera Angle (Multi-Angle)
- Press ANGLE during playback.
- To check whether or not a disc is recorded with angles:
- Turning the angle indicator on and off Expert
- Setting the Language Options
- Setting the on-screen display (OSD) language
- Setting Language and Subtitle Preferences in the Setup Screen Menus
- Selecting an audio language preference
- When "Other" is selected
- Use the cursor buttons to select "Other" and press ENTER.
- Use the cursor buttons (◀/▶) to select either "List of Languages" or "Code".
- If you select "List of Languages", use the cursor buttons ( / ) to select the language.
- Press ENTER to set the new language.
- Changing the Audio Language (Multi-Language Function) - DVD
- Press AUDIO repeatedly to select the desired language.
- Changing Audio Type – Video CD/CD
- Press AUDIO repeatedly during playback to switch the audio type.
- Selecting a Subtitle Language (Multi-Language Subtitles)
- Press SUBTITLE repeatedly during playback.
- Selecting a subtitle language preference
- Setting Auto Language to control subtitle and audio language based on program content
- Selecting a DVD menu language preference Expert
- Selecting subtitles, assist subtitles or no subtitles Expert
- Forcing subtitles to be displayed
- Advanced Functions
- Setting the Parental Lock Level - DVD
- Password Change
- When a DVD with a set Parental Lock level is loaded
- Entering the password
- Use the cursor buttons ( ▲/∞) or the number buttons to select a number between 0 and 9.
- Use the cursor buttons ( ◀/▶) to move the cursor to a different position in the password.
- Press ENTER to set the new password.
- Setting the Parental Lock level
- Select [Level Change] in the [Parental Lock] setting.
- Use the cursor buttons (◀/▶) to adjust the Parental Lock level.
- Press ENTER to set the new level.
- Changing the password
- Select [Password Change] in the [Parental Lock] setting.
- Use the cursor buttons ( ◀/▶/▲/∞) or the number buttons to enter the new password.
- When the new password has been entered, press ENTER.
- Turning the Screen Saver On and Off Expert
- Changing the Background Color of the Screen Expert
- Still Frame/Slow Play/Frame Advance Playback – DVD/Video CD
- Viewing a still frame
- Press PAUSE II.
- To return to normal playback
- Viewing slow playback
- Press FWD ▶▶ for longer than one second during Pause.
- Press REV ◀◀ for longer than one second during Pause.
- Frame by frame advance playback: Viewing one frame at a time
- Press PAUSE II.
- Press FWD ▶▶ or REV ◀◀ rapidly.
- Searching for a Title, Chapter, Track, or Location on a Disc
- - DVD/Video CD/CD
- Press T/C repeatedly to select the type of search.
- Press the number button(s) of the desired title, chapter or track or of the specific time where you would like to begin playback.
- When performing a time search:
- Press PLAY
- To perform a direct title or chapter/track search using the number buttons
- Notes (for direct search)
- Memo
- Repeat Play – DVD/Video CD/CD
- Repeat play of a chapter/track
- Repeat play of a title
- To repeat a program
- To cancel repeat play
- Repeat play of a specified section
- To cancel A–B repeat play
- Return to a specified location on a disc
- To clear the specified location
- Random Play – DVD/Video CD/CD
- Random playback of chapters within one title - DVD
- Random playback of titles - DVD
- Random playback of tracks -Video CD/CD
- Press RANDOM.
- To change titles, chapters, or tracks during random play
- To stop random play
- Playback in a Desired Order (Program Play) – DVD/Video CD/CD
- Programming DVDs
- Press PROGRAM.
- Use the cursor buttons (◀/▶) to select either Chapter or Title program.
- Once the program type is selected. Use the cursor button ( ) to enter the program window.
- In the program window, use the number buttons to enter the numbers of the titles or chapters in the order you want to program them in.
- Press ENTER or PLAY ▶
- To program a pause in a program
- To delete a number:
- To insert a number:
- To stop program play
- Programming Video CDs, CDs
- Use the number buttons to enter the numbers of the tracks in the order you want to program them in.
- Press ENTER or PLAY ▶.
- Additional programming options
- To confirm the contents of a program:
- To add to a program:
- To delete a program:
- Continuing Playback from a Specified Location (Last Memory) – DVD/Video CD
- Memorizing a Last Memory location to return to later
- Press LAST MEMORY during play.
- Press the Power button to turn the power off, or stop playback with STOP ■.
- Resuming playback from where LAST MEMORY was pressed
- Load a disc that has a Last Memory point memorized.
- Press LAST MEMORY while in the stop mode.
- To clear the Last Memory location
- Memorizing Settings for Often Viewed DVDs (Condition Memory) - DVD
- Press CONDITION MEMORY during playback.
- The following six settings are memorized:
- When a disc that has memorized settings is loaded
- Erasing the recorded contents
- Viewing Disc Information
- Press OSD during while a disc is playing. Press OSD repeatedly to change the information being displayed.
- Press and hold OSD to display the time remaining on the disc.
- TITLE information:
- CHAPTER information:
- Data transmission rate information:
- Track Information:
- Disc information:
- Press OSD during while a disc is stopped to display DVD title and chapter information or Video CD and CD track information. Press OSD again to turn the display off.
- DVD Information
- CD and Video CD information
- To exit the title, chapter and track information.
- Resetting the Player to System Settings
- Additional Information
- Disc Care
- How to hold discs
- Cleaning
- Lens cleaner
- Never play cracked or warped discs
- Never use discs with special shapes
- After using discs, store them upright
- CAUTION WHEN USING THE DISC
- Notes on using optical cables
- For Proper and Long Use of This Unit
- Do not move the unit during playback
- When moving the unit
- Installation
- Avoid installing in a place that is:
- Do not block vents
- Avoid heat
- CAUTION: WHEN PLACING THE UNIT IN A STEREO RACK WITH GLASS DOORS
- Condensation
- Switch POWER to turn off when not using the unit
- Power-cord caution
- Cleaning the player
- Language Code List
- Troubleshooting
- The disc table comes back out automatically, shortly after the disc table is closed.
- Playback is not possible.
- mark appears on screen.
- Picture playback stops and the operation buttons cannot be used.
- New settings made in the Setup screen menus while a disc is playing are ineffective.
- When making changes in the Setup screen menus, displayed.
- No picture.
- The screen is stretched or aspect does not change.
- The screen is suddenly squeezed when the Setup screen is opened.
- Picture disturbance during playback or dark.
- Audio is output from the analog output jacks but not from the digital output jacks.
- When recorded on a VCR or passed through an AV selector, there is disturbance in the playback picture.
- Remote control operation is not possible.
- Audio is not output or is distorted.
- Noticeable difference in DVD and CD volume.
- Audio mix does not sound right or sounds incomplete (for example, the dialog of the actors cannot be heard).
- Caution
- Terms
- Aspect ratio
- Chapter number
- Condition memory
- Digital bitstream
- Digital output (Coaxial)
- Digital output (Optical)
- Dolby Digital
- DTS
- Dynamic range
- MPEG
- Multi-angle
- Parental lock level
- PCM
- Playback Control (PBC)
- Regional restriction codes (region number)
- Sampling Frequency
- Subtitle
- S-video
- Time number
- Title number
- TruSurround
- Virtual Dolby Digital
- Specifications
- General
- S-Video output
- Video output
- RGB output in SCART jack
- SYSTEM Audio output
- CH SURROUND Audio output
- Digital audio characteristics
- Digital output
- Accessories
Brand : MARANTZ
Model : DV2100
Category : Uncategorized