
WFS-16X - Fan WILFA - Free user manual and instructions
Find the device manual for free WFS-16X WILFA in PDF.


| Product Type | Standing Fan |
| Brand | Wilfa |
| Model | WFS-16X |
| Color | White/Black |
| Dimensions (H x W x D) | 130 cm x 45 cm x 45 cm |
| Weight | 4.5 kg |
| Power Supply | AC 220-240V, 50/60Hz |
| Power Consumption | 50 W |
| Number of Speed Settings | 3 |
| Oscillation | Yes, 90° horizontal |
| Remote Control | Yes, included |
| Timer | Up to 7.5 hours |
| Adjustable Height | Yes, telescopic pole |
| Blade Diameter | 40 cm |
| Noise Level | ≤ 60 dB |
| Material | Plastic and metal grille |
| Safety Features | Overheat protection, tip-over switch |
| Cleaning | Wipe with damp cloth, do not immerse |
| Maintenance | Lubricate motor annually |
| Spare Parts | Blades, grille, remote available |
| Repairability | Modular design, user-serviceable |
| Certifications | CE, RoHS |
Frequently Asked Questions - WFS-16X WILFA
User questions about WFS-16X WILFA
0 question about this device. Answer the ones you know or ask your own.
Ask a new question about this device
Download the instructions for your Fan in PDF format for free! Find your manual WFS-16X - WILFA and take your electronic device back in hand. On this page are published all the documents necessary for the use of your device. WFS-16X by WILFA.
USER MANUAL WFS-16X WILFA
natural_image
White standing fan with a three blades, no visible text or symbolsWFS-16 STAND FAN16 STAND FAN
NO BRUKSANVISNINGBRUKSANVISNING
SE BRUKSANVISNINGBRUKSANVISNING
DK BRUGSANVISNINGBRUGSANVISNING
FI KÄYTTÖOHJEKÄYTTÖOHJE
GB INSTRUCTION MANUALINSTRUCTION MANUAL
BRUKSANVISNING WFSKSANVISNING
NO
VIKTIGE SIKKERHETSFORANSTALTNINGERVIKTIGE SIKKERHETSFORAN
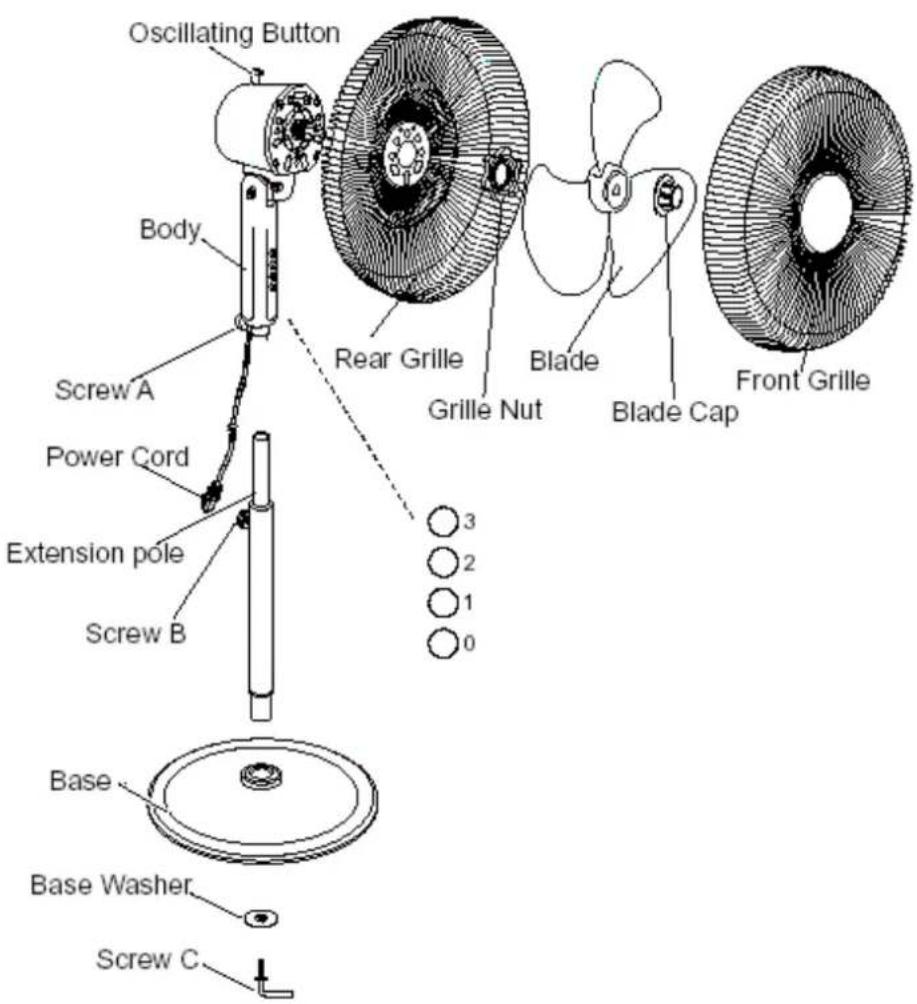
Oscillating button - Svingknapp
Body - Ramme
Rear Grille - Bakre rist
Front Grille - Frontrist
Blade - Blad
Screw A - Skrue A
Grille Nut - Ristmutter
Blade Cap - Mutter
Power Cord - Strømledning
Extension pole - Forlengelsesstativ
Screw B - Skrue B
Base - Fundament
Base Washer - Skive
Screw C - Skrue C
MONTERING AV FUNDAMENTTERING AV FUNDAME
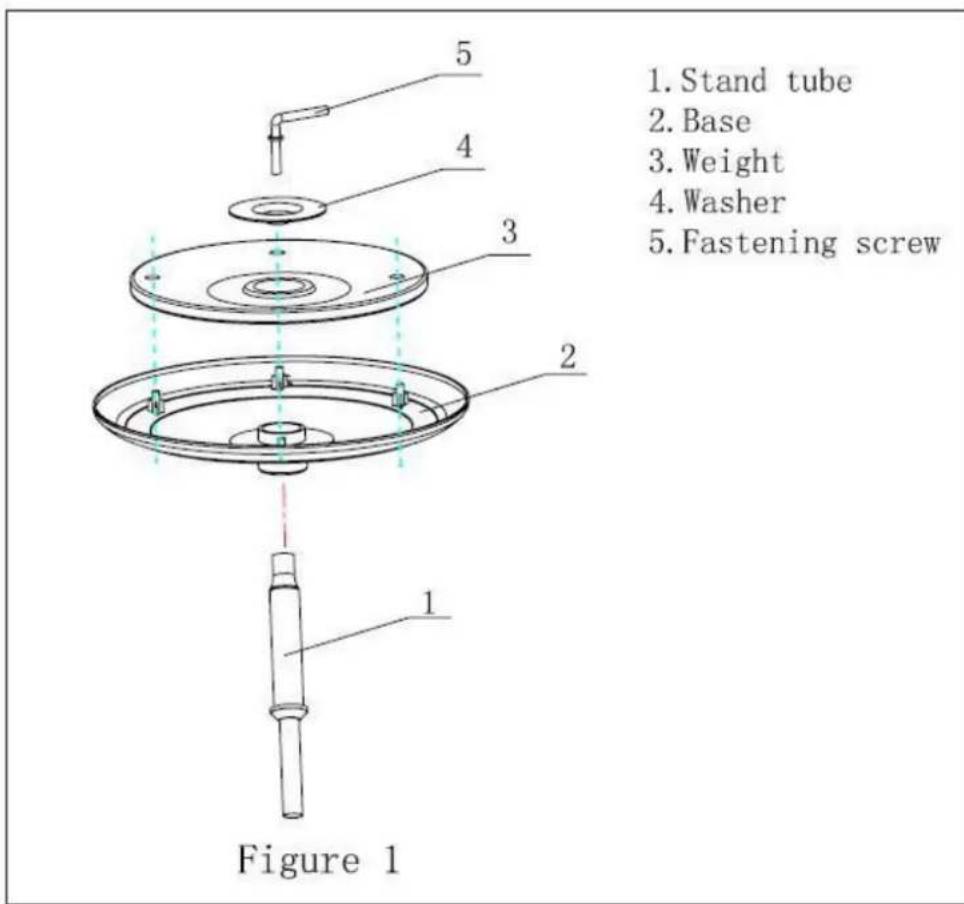
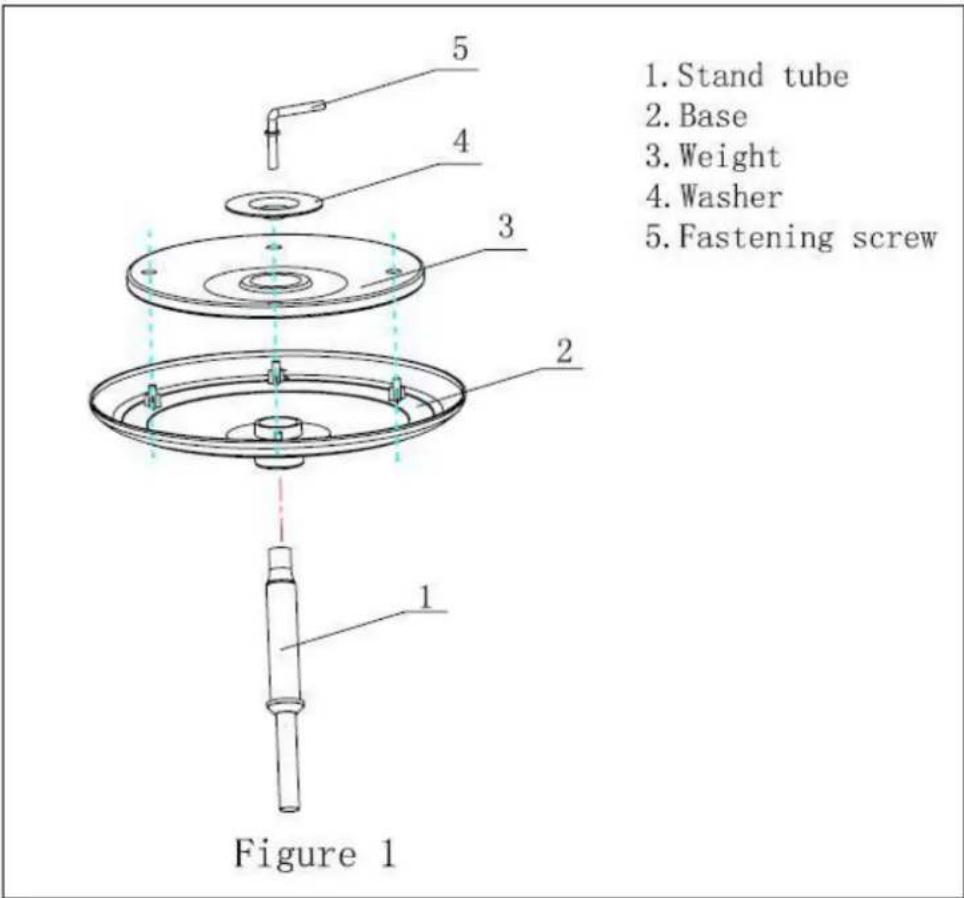
Stand tube - Stativ
Base - Basen
Weight - vektenhet
Washer - skive
Fastening screw - L formet skrue
natural_image
Cross-sectional diagram of a mechanical or electrical component with concentric layers and no visible text or symbolsGrille Nut - Ristmutter Protruding - tapp
natural_image
Diagram showing a fan with rotation arrow and two separate views of a cylindrical device (no text or symbols)ADVARSELADVARSEL
Oscillating Button = Oscillationsknapp
Body = Huvuddel
Screw A = Skruv A
Power Cord = Sladd
Rear grille = Bakre galler
Grille Nut = Grill-mutter
Blade = Fläktblad
Front Grille = Främre galler
MONTERING AV FOTENMONTERING AV FOTEN
1) Placera stativet i foten. Vend enheten upp ned.
MONTERING AV HUVUDDE MONTERING AV HUVUDDE
natural_image
Cross-sectional diagram of a mechanical or electrical component with concentric layers and internal components (no text or symbols)natural_image
Diagram showing a fan with rotation arrow and two mechanical components (no text or symbols)VAR FÖRSIKTIGVAR FÖRSIKTIG
Oscillating button = Oscillationsknap
Body = Ventilatorenhed
Screw A = Skruen A
Power Cord = Ledning
Extension pole = Teleskopstang
Screw B = Skruen B
Base = Fod
SÅDAN MONTERES SÄNANATORENREDENVENTILATORENHEDEN
natural_image
Abstract diagram of a mechanical or fluidic component with concentric lines and circular features (no text or symbols)Grille Nut = Skærmøtrik Protruding = Tappe
at starte oscillationen.
RENG∅RINGRENG∅RING
Oscillating button - Oskillointipainike
Body - Tuulettimen pidike
Rear Grille - Takaritilä
Front Grille - Eturitilä
Stand tube - Teline
Base - Jalusta
Washer - Tiiviste
Fastening screw - Ruuvi
TELINEEN ASENTAMINENTELINEEN ASENTAMINEN
natural_image
Cross-sectional diagram of a mechanical or electrical component with internal layered structure (no visible text or symbols)natural_image
Diagram showing a fan with rotation arrow and two mechanical components with upward arrows (no text or symbols)PUHDISTUSPUHDISTUS
When using electrical appliances, basic safety precautions should always be followed:
Read all instructions.
- In case of damages, caused through not paying attention to this instruction manual, the warranty expires at once. Wilfa does not accept any liability for damage caused as a result of ignorance of the user manual, careless usage or the usage against the instructions in this manual.
- This Product can only be used according to its rated information printed on the rating label.
- Make sure the national Voltage supply is in compliance with the rating label information. If you have any doubt about the way of operating the product or you are not sure about the compliance of the ratings with the national power supply please contact an authorized electrician/Service center.
- The socket must be designed that the attached plug will fit into it.
- This Product is for indoor use only! It is not suitable for outdoor use.
- Please prevent the product to be exposed to excessive dirt and humidity.
- Any other way of operating the product, except the described one, will lead to dangers as, short circuit, fire or else. It is not allowed to modify this product in any way and the housing has not to be opened, otherwise the product will not be any longer in compliance with its safety class.
- Never connect or disconnect the plug with wet hands.
- Never unplug the plug by pulling the power cord. Always pull the plug itself.
- During Installation/Cleaning, please pay attention that the power cord will not be squeezed or damaged.
-
Always disconnect the appliance from the mains and allow the product to cool down to Room temperature;
-
before storing away the appliance
- before cleaning or maintenance
- after use
-
if you are not going to use it for a long period of time
-
Clean the product itself with a slightly damp cloth.
-
Never replace a damaged power cord by yourself. In such case, or in case of malfunction, contact an authorized electrician/Service center for examination, repair or adjustment because special tools are required.
-
Products, which are operated on main supply, do not belong into the hands of children.
-
Children or infirm person should not be allowed to use this product without supervision.
- Children should not be allowed to play with this appliance.
- Keep out of the reach of children and never leave the unit unattended when switched on.
- Make sure that the supply cord does not come into contact with any parts, which generates excessive heat.
-
If you assume that the operating of the product without danger is not any longer possible please make sure that the product will be disconnected and not used any longer. The safe operating of this product is not any longer possible, if:
-
the product or the power cord is damaged in any way
- the product does not work any longer
- after a longer storage under unfavorable conditions
-
after heavy damage through transportation
-
Never immerse the plug or the appliance in water or other liquid.
STAND FAN ASSEMBLING INSTRUCTIONS STAND FAN ASSEMBLING INSTRUCTIONS
BASEMENT ASSEMBLINGBASEMENT ASSEMBLING
1) Put the stand tube into the base.
2) Put the weight and washer cover the base hole and tighten the Screw clockwise.
Section view Section view
BODY ASSEMBLINGBODY ASSEMBLING
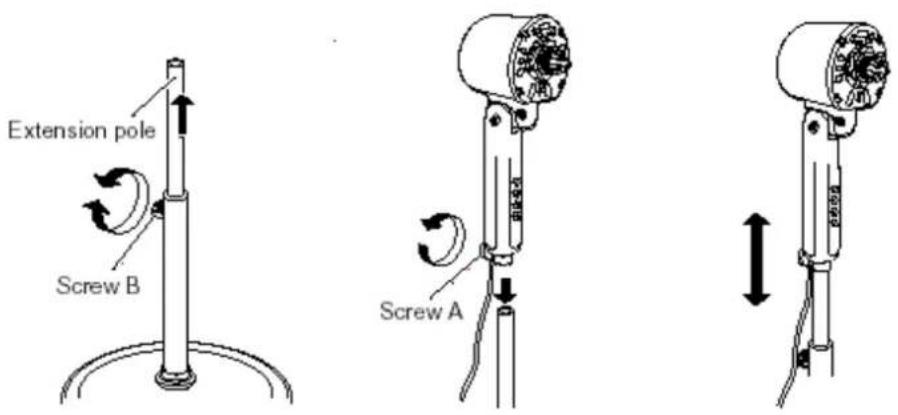
(1) Unscrew screw B and take extension pole up. Then tighten screw B.
(2) Unscrew screw A and put the body into pole. Then tighten screw A.
Unscrew screw B can adjust the fan height. Then tighten screw B
GRILLE AND BLADE ASSEMBLING AND BLADE ASS
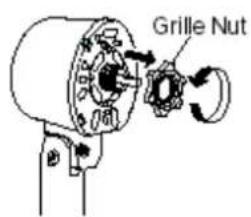
(1) Unscrew grille nut.
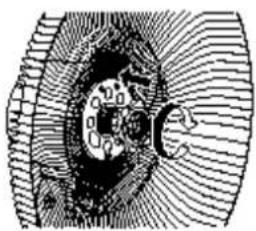
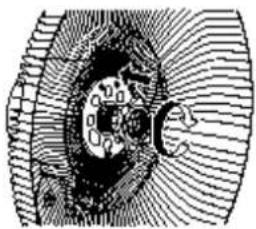
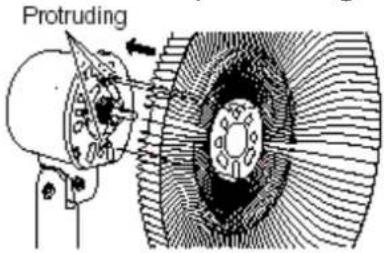
(2) Put the rear grille to the front motor cover, the grille's hole aim at motor cover protruding.
(3) Tighten the grille nut.
natural_image
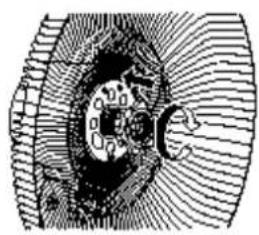
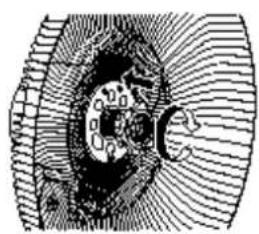
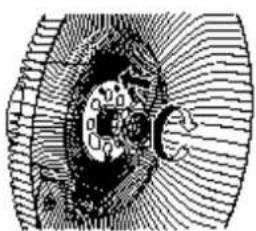
Abstract line drawing of a mechanical or fluidic component with concentric lines and no visible text or symbols(4) Put the blade to the motor's axis. Tighten the Blade Cap.
(5) Put the front grille into the gille ring.
HOW TO USEHOW TO USE
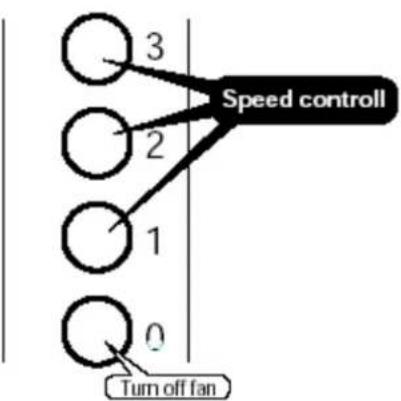
- To adjust the speed, simply push any one to the desired push-button.
flowchart
graph TD
    A["0"] --> B["1"]
    B --> C["2"]
    C --> D["3"]
    style A fill:#fff,stroke:#000
    style B fill:#fff,stroke:#000
    style C fill:#fff,stroke:#000
    style D fill:#fff,stroke:#000
    note right of D: "Speed control"
    note bottom of D: "Turn off fan"
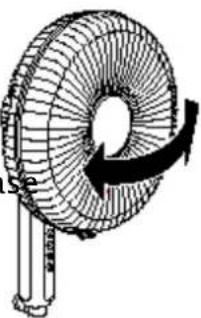
• Take up oscillating button can stop the oscillation function.
- Press down oscillating button can start the oscillation function.
CLEANINGCLEANING
- Use a soft tissue or cloth to clean, with soapy water in of dirt or grime does not come off easily.
- Do not use benzene thinner or other solvents.
ca
natural_image
Line drawing of a folding fan with a black arrow indicating rotation (no text or symbols)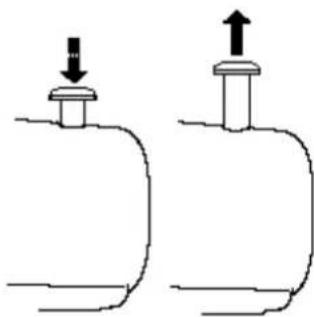
natural_image
Simple line drawing of two containers with arrows indicating downward and upward movement (no text or symbols)CAUTIONCAUTION
- The fan should not be operated without a base nor used laying on its side.
• Before cleaning unplug fan first.
• Take care not to stain the plastic parts with oil.
- Avoid using the place( kitchen or the like) oil is liable to stick to the parts. Damage, deterioration etc. are always caused by oil sticking.
- In the event of any anomaly in the connection to the mains, do not try to replace the cord yourself as it may be dangerous. Take the appliance to an authorized technical department. The same applies to any other breakdown.
According to Waste of Electrical and Electronic Equipment (WEEE) directive, WEEE should be separately collected and treated. If at any time in future you need to dispose of this product please do NOT dispose of this product with household waste. Please send this product to WEEE collecting points where available.
- WFS-16 STAND FAN16 STAND FAN
- BRUKSANVISNING WFSKSANVISNING
- NO
- VIKTIGE SIKKERHETSFORANSTALTNINGERVIKTIGE SIKKERHETSFORAN
- MONTERING AV FUNDAMENTTERING AV FUNDAME
- ADVARSELADVARSEL
- MONTERING AV HUVUDDE MONTERING AV HUVUDDE
- VAR FÖRSIKTIGVAR FÖRSIKTIG
- SÅDAN MONTERES SÄNANATORENREDENVENTILATORENHEDEN
- RENG∅RINGRENG∅RING
- TELINEEN ASENTAMINENTELINEEN ASENTAMINEN
- PUHDISTUSPUHDISTUS
- STAND FAN ASSEMBLING INSTRUCTIONS STAND FAN ASSEMBLING INSTRUCTIONS
- BASEMENT ASSEMBLINGBASEMENT ASSEMBLING
- BODY ASSEMBLINGBODY ASSEMBLING
- GRILLE AND BLADE ASSEMBLING AND BLADE ASS
- HOW TO USEHOW TO USE
- CLEANINGCLEANING
- CAUTIONCAUTION
Brand : WILFA
Model : WFS-16X
Category : Fan