
Design BBQ Advanced Control 42539 - Griddle Gastroback - Free user manual and instructions
Find the device manual for free Design BBQ Advanced Control 42539 Gastroback in PDF.


| Product Type | Contact Grill / Griddle |
| Brand | Gastroback |
| Model | Design BBQ Advanced Control 42539 |
| Power Supply | 230-240 V AC, 50/60 Hz, 2000 W |
| Dimensions (Closed) | Approx. 430 x 345 x 185 mm |
| Dimensions (Open) | Approx. 430 x 485 x 380 mm |
| Dimensions (Flat) | Approx. 430 x 640 x 113 mm |
| Weight | Approx. 8.2 kg |
| Grilling Area (Base & Lid) | Each 340 x 240 mm, total approx. 1632 cm² when flat |
| Temperature Range | 80°C to 240°C (170°F to 460°F), adjustable in 5°C steps |
| Pre-Defined Programs | 6 programs: Vegetables, Meat, Burger/Panini, Poultry, Kebab, Fish |
| Timer | Up to 60 minutes, countdown with acoustic signal |
| Temperature Probe | Core temperature monitoring, set from 45°C to 75°C |
| Non-Stick Coating | High-quality non-stick on both grilling plates |
| Height Control | Adjustable from approx. 2 cm to 5.5 cm, 5 positions |
| Lid Positions | Closed, Open (upright), Flat (180° folded back) |
| Dishwasher Safe Parts | Grilling plates, drip tray, storage tray, inner tray |
| Automatic Shut-Off | After 1 hour of inactivity (no touchscreen input) |
| Control Interface | Touchscreen display with ON/OFF, +/-, program icons, timer, probe, unit toggle |
| Spare Parts Available | Storage tray (98807), Probe (98808), Drip tray (98809), Top plate structured (98810), Bottom plate flat (98811) |
| Certifications | CE |
| Warranty | 2 years for household use |
Frequently Asked Questions - Design BBQ Advanced Control 42539 Gastroback
User questions about Design BBQ Advanced Control 42539 Gastroback
0 question about this device. Answer the ones you know or ask your own.
Ask a new question about this device
Download the instructions for your Griddle in PDF format for free! Find your manual Design BBQ Advanced Control 42539 - Gastroback and take your electronic device back in hand. On this page are published all the documents necessary for the use of your device. Design BBQ Advanced Control 42539 by Gastroback.
USER MANUAL Design BBQ Advanced Control 42539 Gastroback
natural_image
Exterior view of a black and silver SITAMO grill grater with open lid and digital display (no text or symbols on main body)Art.- Nr. 42539 » Design BBQ Advanced Control «
Flache Position....17
Höhenverstellung 17
natural_image
Black and silver electronic device with a small red button, shown against a white background (no text or symbols visible)natural_image
Simple line drawing of a coiled cable with a handle and connector (no text or symbols)Thermometer
Art.-Nr.: 98808

natural_image
Black 3D object resembling a mechanical part or tool, isolated on white background (no text or symbols)Fettauffangschale
Art.-Nr.: 98809

natural_image
Black rectangular object with horizontal grooves, resembling a mesh or plastic tray (no text or symbols visible)natural_image
Black rectangular electronic device with a flat top and side edge (no visible text or symbols)natural_image
Exterior view of a modern stainless steel grating with open lid and digital display (no text or symbols visible)Art.- No. 42539 » Design BBQ Advanced Control «
Read all provided instructions before first usage!
Model and attachments are subject to change
For household use only!

We attach a certain importance to your safety. Thus, we ask you to read all provided instructions and information in this booklet carefully and completely, before you start running the appliance. This will help you to know all functions and properties of your new appliance. We especially ask you to adhere strictly to the safety information mentioned in these instructions.
TABLE OF CONTENTS
Important Safeguards 51
General Safety Instructions....51
Important Safeguards for Electrical Appliances 54
High Temperatures – Risk of Burns 55
Non-Stick Coating 56
Technical Specifications....57
Knowing Your New Contact Grill....58
Control elements Integrated in the Touchscreen....59
Properties of Your New Contact Grill 60
Getting an Overview....60
Locking the Lid to the Base 61
Possible Positions of the Lid....61
Closed Position....61
Open Position....61
Flat Position....62
Height Control Feature....62
Swivel Bearings of the Lid 62
Temperature Probe 62
Pre-Defined Programs....63
Grilling Timer 64
Automatic Shut-Off 65
Tips for Best Results....65
General Grilling Temperature Guide 65
Grilling Meat and Fish....65
How to Check the Doneness of Your Steaks....66
Grilling Sandwiches 67
Before First Use....67
Operation....68
Preparations....69
Selecting a Program....71
Positioning the Lid 71
Adjusting the Height Control Feature 72
Grilling Your Food 72
Setting the Grilling Time....74
Controlling the Core Temperature 75
After Usage 76
Disassembling the Appliance 77
Solving Problems....78
Error Messages of the Appliance 80
Care and Cleaning 81
Cleaning the Appliance 82
Assembling the Appliance 83
Storage 84
Notes for Disposal....85
Information And Service 85
Warranty 86
Household Use 86
Accessories - Design BBQ Advanced Control 87
DEAR CUSTOMER!
The various helpful features of your new DESIGN BBQ ADVANCED CONTROL will satisfy even high expectations easily. To cook your food remarkably quickly and evenly without the need of extremely high temperature settings, you can close the heated lid during operation. Via the height control feature and variable swivel bearing of the lid even delicate food will not be squashed. For getting the best results, the appliance can monitor the core temperature of your food automatically, when using the provided temperature probe. The grilling timer ensures that you will not miss the correct grilling time, when in stimulating conversion with your guests. Thus, apart from steaks and sausages, even sandwich, small pizza, toast and French bread will be done perfectly. Even for preparing larger amounts or keeping the flavours of different types of food separated, the DESIGN BBQ ADVANCED CONTROL will not have to pass. Just fold back the lid by 180° for having two completely separated grilling areas.
Due to the high-quality non-stick coating you can prepare your food without any additional fat. This way of cooking complies with the criteria of modern diet. Avoiding any annoying cleaning effort, the grilling plates and drip tray may be removed and cleaned in an automatic dishwasher.
These instructions for use will inform you about the various functions and features, which make it easy to take pleasure in your new contact grill.
We hope that you will enjoy your new DESIGN BBQ ADVANCED CONTROL.
Carefully read all instructions, before operating this appliance and save for further reference. Do not attempt to use this appliance in any other way and for any other purpose, than described in these instructions (intended use). Any other use, especially misuse, can cause severe injuries or damage by electric shock, heat, or fire.
These instructions are an essential part of the appliance. Do not pass the appliance without this booklet to third parties. Any operation, repair and technical maintenance of the appliance or any part of it other than described in these instructions may only be performed at an authorised service centre (see: 'Warranty'). Please contact your vendor.

GENERAL SAFETY INSTRUCTIONS
- This appliance is for household use only and NOT intended for use in moving vehicles. Do not operate or store the appliance in humid or wet areas or outdoors. Any use of accessories, attachments or spare parts that are not recommended by the manufacturer or damaged in any way may result in injuries to persons and/or damage.
- Check the entire appliance regularly for proper operation (e.g. check for distortion, damaged grilling surfaces, excessively frayed or melted parts, cracks, pollution or corrosion at the pins of the electrical connectors). Do not operate the appliance, when the appliance or any part of it is likely to be damaged, to avoid risk of fire, electric shock or any other injuries to persons and/or damage. The appliance or its parts are likely to be damaged, if the appliance has been subject to inadmissible strain (e.g. overheating, mechanical or electric shock, liquids running into the housing) or if the appliance is not working properly (e.g. overheating). If one of these cases occur during operation, immediately unplug the appliance. Get in contact with an authorized service centre for examination and/or repair.
- Operate the appliance on a well accessible, stable, level, dry, and suitable large table or counter that is resistant against water, fat, and heat. Do not place the appliance over a power cord or on inclined, wet or plastic surfaces or surfaces with plastic coatings (e.g. paint) or surfaces that could crack due to local heat (e.g. glass, stone). Even
while the appliance is cold, do not place the appliance on sensitive and valuable surfaces (e.g. coated furniture). During operation keep the appliance in an appropriate distance of at least 50 cm on each side to the edge of the working space and to furniture, walls, boards, curtains, and any sensitive objects to avoid risk of fire and damage due to heat, steam, and splashes. Do not operate the appliance under over hanging boards or drop lights. RISK OF EXPLOSION AND FIRE! Do not heat any highly alcoholic beverages or food (e.g. mulled wine, grog) via the appliance. Do not operate the appliance near any inflammable, volatile liquids (e.g. highly alcoholic beverages and food, spirit, benzine) to avoid high risk of injuries and damage. Due to the heat, volatile liquids will evaporate easily, generating an inflammable mixture that could catch fire by any source of ignition (e.g. lit candles, cigarettes, parts of the appliance), causing severe injuries to persons and serious damage. The appliance is NOT suited for flambéing!
- Residues of food on the heating elements could be burnt to charcoal during operation and could catch fire. Before assembling the appliance, always check whether the grilling plates are completely clean and dry. Do not operate the appliance, if the grilling plates are polluted or damaged in any way.
- This appliance can be used by persons with reduced physical, sensory or mental capabilities or lack of experience and knowledge (including children aged from 8 years), if they have been given supervision or instruction concerning the use of the appliance in a safe way and understand and consider the hazards involved. Cleaning and user maintenance may not be made by children unless they are older than 8 and supervised. Children must always be supervised to ensure that they do not play with the appliance or any parts of the appliance or the packaging. Always keep the appliance where it is dry, frost-free, and clean, and where young children cannot reach it. Do not leave the appliance or any part of it unattended, when in reach of young children.
- Do not place the appliance or any part of it in a range, or on or near hot surfaces (e.g. burner, heater, or oven). Do not use any parts of the appliance with any other device or for any other purpose.
- Before operation, always ensure that the appliance is assembled completely and correctly according to the instructions in this booklet. Only operate the appliance with both grilling plates and the drip tray inserted correctly, to avoid risk of overheating, fire and electric shock! Do not handle the appliance or any part of it with violence. Always slide the height control clip to the "OPEN" position, before operating the appliance.
- Do not use any hard or sharp-edged objects with the appliance (e.g. metal scrapers). For example, use barbecue tongs made of heat-resistant plastic or wood to take your food. Do not use any utensils that could melt, burn, crack, get distorted, or give off harmful substances, when exposed to heat.
- Fresh moistened food will splash, when placed on the hot grilling area, and hot steam will escape. During operation, do not hold any part of your body or delicate objects over or near the grilling plates. Always ensure that persons (including you) stay in sufficient distance to the appliance during operation. Always expect that splashes of hot fat and juices will escape from the grilling plates. Exclusively use the appliance for domestic use and for cooking food that is fit for consumption.
- Do not leave the appliance unattended, when it is connected to the power supply. Always unplug the appliance, and leave the appliance cool down, before moving, or cleaning the appliance, or assembling or disassembling the grilling plates, or when the appliance is not in use. Open and close the lid carefully without violence to avoid damage and to ensure that the appliance will not fall over. Always ensure to empty the drip tray and grilling plates and slide the height control feature to the "LOCK" position, before tilting and lifting the appliance by the handle (see: 'Height Control Feature'). Do not hold the appliance at the power cord or at the cable connecting the lid and base for moving the appliance.
- Do not place any hard and/or heavy objects on the appliance or any part of it. Do not use any abrasive cleaners, cleaning pads (e.g. metal scouring pads), or any corrosive chemicals (e.g. bleach) for cleaning. Do not place the housing, temperature probe, or power cord of the appliance in an automatic dishwasher.
- Do not leave any food dry on the appliance. Always clean the appliance after each use to prevent an accumulation of baked-on food (see: 'Care and Cleaning'). Always keep the appliance and its parts, where it is clean.

IMPORTANT SAFEGUARDS FOR ELECTRICAL APPLIANCES
The appliance is heated electrically. Place the appliance near a suitable wall power outlet to connect the appliance directly to a protected mains power supply with protective conductor (earth/ground) connected properly. Ensure that the voltage rating of your mains power supply corresponds to the voltage requirements of the appliance (230 - 240 V, 50 / 60 Hz, AC, rated for at least 16 A). The power outlet socket must be installed separately from other power outlet sockets to avoid interference with other appliances.
The installation of a residual current operated circuit breaker (r.c.c.b.) with a maximum rated residual operating current of 30 mA in the supplying electrical circuit is strongly recommended. If in doubt, contact your electrician for further information.
- In various foreign countries, the specifications for power supplies are subject to incompatible norms. Therefore, it is possible that power supplies in foreign countries do not meet the requirements for safe operation of the appliance. Thus, before operating the appliance abroad, ensure that safe operation is possible. Do not use any desk top multi socket outlet, external timer, or remote control systems.
- It is best to avoid using an extension cord, but if you wish to use one, ensure that it is of sufficient length and rated for a maximum continuous current of at least 16 A with safety plug, safety coupler plug, and protective conductor (earth/ground) connected properly.
- When laying power cords, always ensure that no one will step on the power cord or get entangled or trip over the power cord. Also, ensure that no tension is applied to any part of the power cord. Tie the extension cord loosely onto the leg of the table using a separate cord, to ensure that no one will pull the power cord. To disconnect: Always unplug the extension cord from the power supply first.
- Always handle power cords with care. The pins of the power plug must be smooth and clean. Always completely unwind the power cord before use. Do not place the appliance on a power cord. Power cords may never be knotted, twisted, pulled, strained or squeezed. Do not let the plug or power cord hang over the edge of the table or counter. The power cord may never touch hot surfaces or sharp edges. Ensure that no one will pull the appliance by the power cord. Take care not to entangle in the power cord. Always grasp the plug to disconnect the power cord.
- Do not touch the appliance or power plug with wet hands when the appliance is connected to the power supply. DO NOT pour or spill any liquids on or in the housing of the appliance or on the power cord. Do not place or immerse the appliance or power cord in water or other liquids. Always keep the appliance and the table or counter clean and dry, and wipe off spilled liquids immediately. Do not place the appliance on wet surfaces. When liquids overflowed or are spilled into the housing or on the power cord, do not touch the appliance but immediately unplug the appliance. Thereafter, clean the appliance and let it dry for at least 1 day (see: 'Care and Cleaning'). Do not place any clothes or tissue or other foreign objects under or on the appliance during operation, to avoid risk of fire, electric shock and overheating.

HIGH TEMPERATURES - RISK OF BURNS
The DESIGN BBQ ADVANCED CONTROL is designed for cooking food. For this purpose, the grilling surfaces are heated electrically up to 240^ C ( 460^ F). Thus, improper handling could cause severe injuries and damage. Please keep this in mind to avoid burns and damage.
- The grilling plates, drip tray, and complete exterior of the appliance can be very hot during operation and some time thereafter. Additionally, during cooking of your food, hot steam and splashes could escape. Do not touch the hot surfaces with any parts or your body or any objects sensitive to heat, fat, or moisture while the appliance is hot. Only touch the appliance and its parts at the operating elements while the appliance is hot. Beware of hot steam, splashes, and
condensate, when placing food on the grilling surfaces. Protect your hands and arms with oven gloves. Do not leave any foreign objects on the hot grilling surfaces (e.g. barbecue utensils). The grilling surfaces are intended exclusively for heating food. Do not place any foreign objects (e.g. cups, dishes or cooking pots) on the grilling surfaces to avoid damage. Do not leave any cooking utensils lay on the grilling surfaces. DO NOT touch the grilling surfaces via the temperature probe of the appliance. Do not place the temperature probe on the appliance, while the appliance is hot.
- Do not move or disassemble the appliance, when it is hot. Always leave the appliance and all its parts cool down before removing the drip tray and grilling plates, and before moving and cleaning the appliance. Do not place the appliance on heat-sensitive surfaces, while the appliance is hot. Always ensure that the drip tray and the grilling plates are completely empty, before tilting the appliance or moving the appliance to the upright position.

NON-STICK COATING
The grilling surfaces of your DESIGN BBQ ADVANCED CONTROL are provided with high quality non-stick coatings. Even without using additional oil, food will not stick to the coated surfaces. Some types of food may cause discolouration. This will not affect the cooking performance.
Please adhere to the following precautions:
- Before first use and each time after cleaning the grilling plates in an automatic dishwasher: wipe the non-stick coatings of the grilling surfaces with a little cooking oil. Thereafter, there is no need to add any further oil for cooking.
- Do not use the grilling plates, if the non-stick coating is scratched, cracked or detached due to overheating. Exchange the affected grilling plate. For this, contact your vendor.
-
Only use wooden or heat-resistant plastic cooking utensils with the appliance. Do not use any hard or sharp-edged objects for scratching, stirring, or cutting on the coatings. We will not be liable for damage to the non-stick coating, if metal utensils or similar objects have been used.
-
Do not use any oven cleaner or spray-on non-stick coatings with the appliance.
- The non-stick coatings of the grilling plates minimise the effort of cleaning. For cleaning, do not use corrosive or abrasive cleaners or hard, abrasive scouring utensils (e.g. metal scourers, wire brushes). Even stubborn residues can be removed via a soft cloth or nylon brush and warm dishwater or in the automatic dishwasher. For cleaning, always remove the grilling plates from the appliance first (see: 'Care and Cleaning').
TECHNICAL SPECIFICATIONS
| Model: | Art.- No.: 42539 Design BBQ Advanced Control |
| Power supply: | 230-240 V AC, 50 / 60 Hz |
| Power consumption: | 2000 W |
| Length of power cord: | approx. 90 cm |
| Weight: | approx. 8.2 kg |
| Dimensions: | approx. 430 x 345 x 185 mm (geschlossen)approx. 430 x 485 x 380 mm (offen)approx. 430 x 640 x 113 mm (zurückgeklappt)(width x depth x height) |
| Size of grilling areas: | Base: 340 x 240 mmLid: 340 x 240 mm |
| Temperature: | 80°C to 240°C (170°F to 460°F); variable in steps of 5°C (10°F) |
| Certificates: | CE |
These specifications may change without notice.
KNOWING YOUR NEW CONTACT GRILL
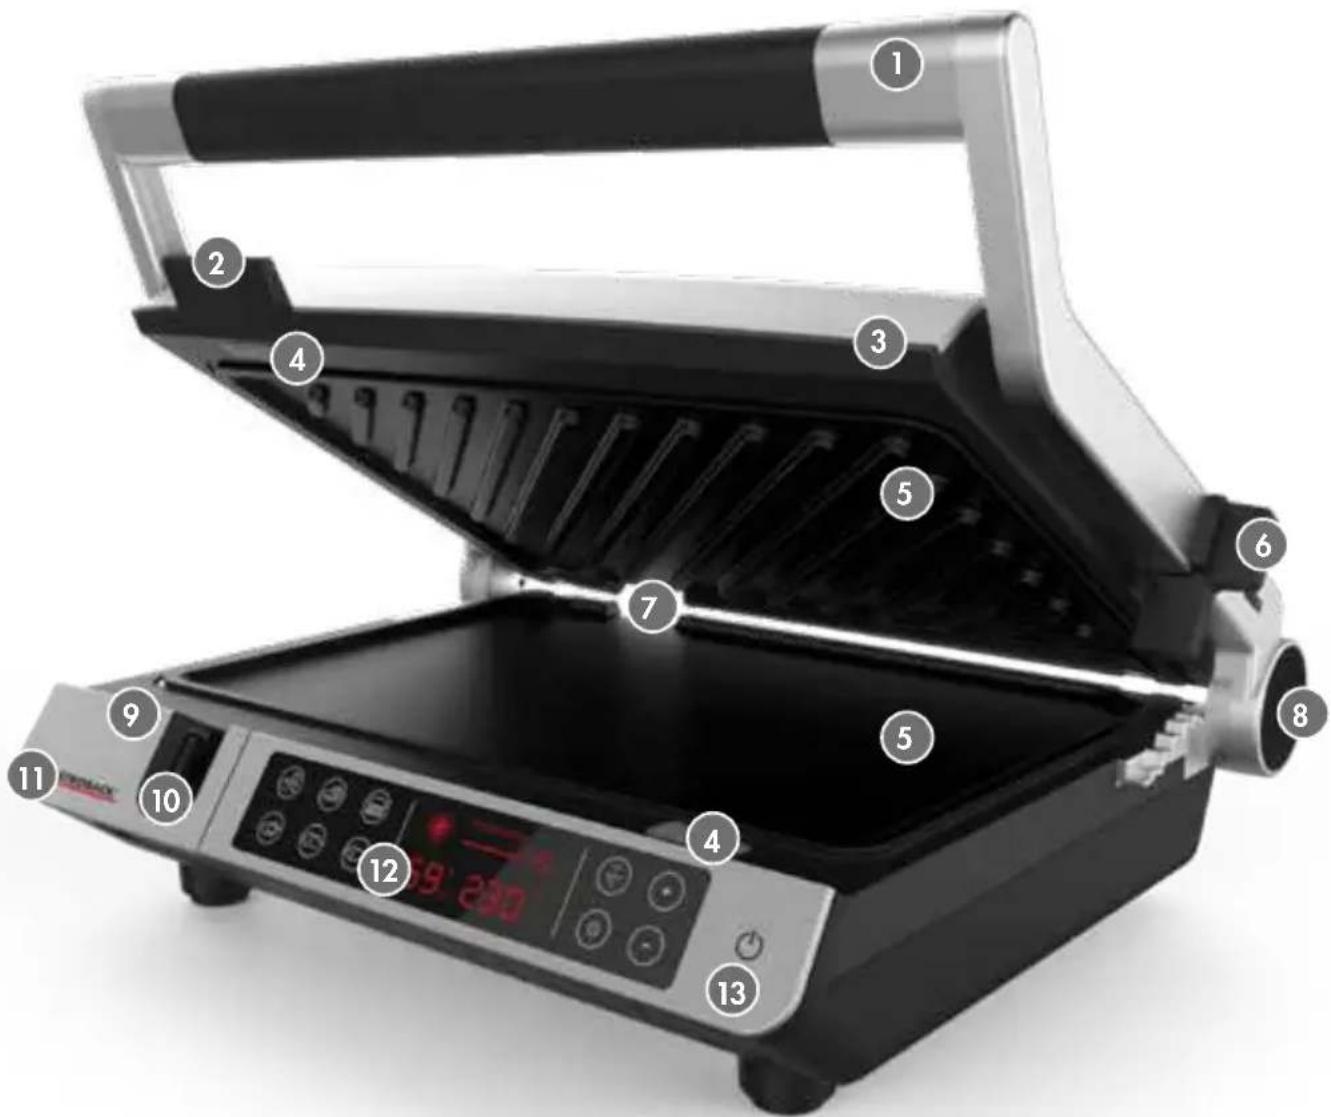
1 STABLE METAL LID
Support with thermally insulated lid handle
2 PLASTIC ADJUSTING TAB
Used for turning the lid to the horizontal position, when grilling delicate food
3 LID WITH SEPARATE GRILLING PLATE
Mounted with height control feature for adjusting the upper grilling plate according to the thickness of your food
4 PLATE RELEASE BUTTONS (EJECT)
Press these buttons to unlock the grilling plates for removing
5 EFFORTLESS REMOVABLE GRILLING PLATES
With integrated heating elements, dishwasher-safe
6 HEIGHT CONTROL CLIP
For adjusting the lid to the thickness of your food
7 DRIP SPOUTS
On each grilling plate for draining surplus juices
8 HINGE RELEASE BUTTON
Press here for folding back the lid to the 180° flat position
9 INTEGRATED STORAGE TRAY
Holding the temperature probe
10 TEMPERATURE PROBE
Use this sensor for monitoring the core temperature of your food
11 HOUSING
Anodized aluminium
Operating symbols and digital display
13 ON/OFF BUTTON
CONTROL ELEMENTS INTEGRATED IN THE TOUCHSCREEN
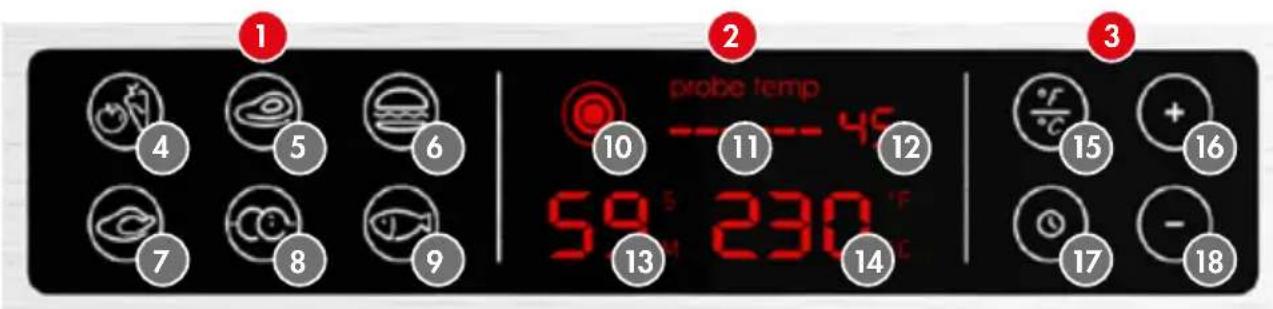
1 PROGRAM AREA
Holding the icons of 6 pre-defined programs: vegetable, meat, burger and panini, poultry, kebab, fish.
2 DISPLAY AREA
Shows the currently set values: grilling time and temperature. The upper half holds the items of the core temperature control.
3 CONTROL AREA
For selecting the required function (timer or temperature unit) and/or controlling the appliance manually.
4VEGETABLES
Use it for all types of vegetables, vegetable balls, fruit
5MEAT
Use it for cuts of meat: beef, veal, pork, lamb, game and venison, meatballs
6 BURGER / PANINI
Use it for any type of vegetables or pre-cooked meat between slices of bread or buns: Burger and Panini, French bread, Sandwich, Toast, pancake, flap-jack, waffle. Ensure that the batter for pancake waffle and the like will not run off the grilling surface.
10 PROBE BUTTON
Press here to activate the core temperature control
11 CURRENT CORE TEMPERATURE
The actual core temperature is shown by a line of dashes flashing and illuminating one by one with the core temperature rising
12 SET CORE TEMPERATURE
The appliance sounds an acoustic signal, if this temperature is reported by the temperature probe. Selectable from 45^ C to 75^ C ( 113^ F to 167^ F)
15 UNIT BUTTON
Press here to toggle the display between °C and °F
16 + TASTE
Use this button to increase the selected value
7 POULTRY
Use it for each type of poultry: chicken, turkey, duck, goose
8 KEBAB
Use it for spits with meat, sausage
9 FISH
Use it for fish, sea food
13 GRILLING TIME
With the timer activated, the remaining grilling time will be shown here as a countdown
14 GRILLING TEMPERATURE
The temperature set for the grilling plates
17 CLOCK BUTTON
For activating timer operation
18 - TASTE
Use this button to decrease the selected value
PROPERTIES OF YOUR NEW CONTACT GRILL
Your new DESIGN BBQ ADVANCED CONTROL is perfectly suited for preparing a wide variety of delicate grilling dishes. Even thin pancakes, flap-jacks, omelettes, and waffles can be made on the flat grilling surface, while getting the typical grilling marks on the structured grilling surface. Useful features will support you.
GETTING AN OVERVIEW
- 6 pre-defined programs for various types of food provide useful grilling temperature settings as a start-up. However, you can adapt the grilling temperature within a reasonable range to your liking at any time during operation.
- You may select the temperature unit any time you like during operation: °C or °F. However, the internal procedures of the appliance are operated on the °C scale. Any values given in °F are computed via an internal conversion term, causing small and unimportant deviations.
- Due to the height control feature, the appliance may be used as a contact grill—even when grilling delicate food like fish or tomatoes. Alternatively, you may leave the lid in the stable upright position or use the full grilling area (approx. 1632 cm ^2 ) by folding back the lid and placing food on the grilling surface of the lid too.
- When folding back the lid or closing the lid for grilling, the lines of the structured grilling plate will apply the typical grilling texture to your food. The level grilling plate will do perfectly for preparing even flap-jacks, crepes and potato fritters.
- Highly powered heating elements heat the grilling surfaces in a quite short time (max. 6 minutes with the lid closed), even when setting the highest possible grilling temperature.
- Via the timer (max. 60 minutes), an acoustic signal can remind you, to take or turn your food in time.
- Use the integrated temperature probe to monitor the core temperature in the centre of your food, thus always getting the desired doneness and optimum consistency of your food.
- The heating elements are integrated in the grilling plates. Due to this direct contact, useless energy losses are avoided. Nevertheless, the grilling plates are removable and completely dishwasher-safe.
- The high performance non-stick coating of the grilling plates enable low fat cooking and ease the cleaning effort.
- Surplus juices accumulate in the drip tray that can be removed sideways easily. If required, you can use the juices for making delicate sauces and dips.
LOCKING THE LID TO THE BASE
You may carry the appliance conveniently by the lid handle. For this, simply lock the lid to the base of the appliance via sliding the height control clip to the "LOCK" position. In this case, the lid will not open, when moving the appliance to an upright position.
Important: The "LOCK" position of the height control feature may only be used for moving and storing the appliance. For operation or cleaning, do not forget to unlock the lid by sliding the height control clip to the "OPEN" position first. With the height control clip in the OPEN" position, the lid will open easily and without effort. Do not attempt to apply any force for opening the lid to avoid damage.
POSSIBLE POSITIONS OF THE LID
The Design BBQ Advanced Control can be used with the lid settled in three different positions. You should prefer contact grilling (closed position; see below). Using this method, your food will be cooked at both sides simultaneously in a time and energy saving way. Additionally, the DESIGN BBQ ADVANCED CONTROL can be used with the lid left in the upright open position or folded back by 180° to use the lid as an additional grilling surface for placing your food.
Closed Position
For using this feature, close the lid during grilling. This feature is useful for pre-heating the grilling surfaces and for grilling most types of food, that can be cooked at both sides (e.g. meat). After placing your food onto the grilling surface of the base, fold the lid down carefully onto your food. If required, adjust the lid via the height control feature to the thickness of your food (see below). Using this method, your food will be cooked energy saving in the quickest possible way, because both sides will be cooked simultaneously.
Typical Usage: for burgers, boneless slices of meat, fish, vegetables. Grilling any combination of ingredients (e.g. vegetables, meats, and cheeses) layered between two pieces of bread or folded tortilla and pita.
Open Position
The lid is folded up to the upright position. After heating up, by the handle, carefully fold the lid up until it remains in the stable upper position. Then place your food onto the grilling surface of the base. During the grilling process, leave the lid in the upright position.
Typical Usage: cooking items, for which the upper grilling plate is not needed (e.g. kebab, fish, pizza, items with soft toppings), because they shall be heated at one side only. Especially thick food (e.g. burger).
Flat Position
In the flat position, the lid is folded back completely, lying level to the base, offering a second grilling surface. Use the flat position to double the grilling area. As an additional benefit of this position, you can use a structured grilling surface for applying the typical grilling marks, while simultaneously grilling other types of food on the flat grilling plate. Using this position, quite different types of food can be cooked simultaneously.
Typical Usage: As with the open position. Grilling larger amounts of food; cooking food with different thickness simultaneously; cooking different types of food on different grilling surfaces simultaneously, if you wish to avoid combining flavours (e.g. fish and sausages); grilling French toast, hash browns, open sandwiches, and kebabs.
HEIGHT CONTROL FEATURE
The lid of the DESIGN BBQ ADVANCED CONTROL can be adjusted to the thickness of your food, using the height control feature. This way, even delicate and tender ingredients (e.g. fish, Burger, or tomatoes) will not be squeezed, when lowering the lid for contact grilling. With the height control feature adjusted, the lid will be locked in the selected distance to the lower grilling surface: from approx. 2cm (position 1) to up to 5.5cm (position 5). Due to the swivel bearings of the lid, the lid can be adjusted parallel to the lower grilling surface, thus cooking your food evenly (see below).
Important: You cannot open the lid of the DESIGN BBQ ADVANCED CONTROL with the height control clip in the "LOCK" position. Before use, always slide the height control clip to the "OPEN" position first. Do not attempt to open the lid violently.
SWIVEL BEARINGS OF THE LID
The lid can be rotated within the lid support. For contact grilling, the lid can be adjusted to slightly touch the food evenly on the complete grilling area. Therefore, those parts near the lid hinge are not squeezed, when lowering the lid onto the food. The lid is not fixed in the swivel bearings and may turn freely. Especially, when grilling cuts of tough meat (e.g. beef steaks, cutlet), the lid adjusts according to your food automatically.
TEMPERATURE PROBE
On the left side of the control panel, the storage tray holding the temperature probe is located. After pulling out and removing the storage tray, the probe connector is accessible. Use the temperature probe for monitoring the core temperature of your food.
Immediately after selecting the core temperature control via the probe button, you may set the desired core temperature. When the set core temperature is reached, an acoustic signal is given (see: 'Operation / Controlling the Core Temperature').
The actual core temperature within your food is shown via a line of dashes in the upper half of the display area. The dashes will flash and then illuminate continuously one by one while the actual core temperature is rising. Each dash is assigned to a temperature value: 45^ C ( 113^ F), 50^ C ( 122^ F), 55^ C ( 131^ F), 60^ C ( 140^ F), 65^ C ( 149^ F), 75^ C ( 167^ F). Each one of these core temperature values can be set as the desired core temperature.
Important: Some programs limit the range of possible core temperature values. if you wish to set another core temperature, select another program or deactivate the currently selected program.
Note
The temperature probe is inserted in an inner tray that can be removed from the storage tray. You may place the inner tray beside the appliance and use it for laying the temperature probe aside. If the temperature probe is not in use during grilling, you should leave the storage tray inserted in the control panel. This way, the probe connector is protected against pollution.
PRE-DEFINED PROGRAMS
6 pre-defined programs are provided for various types of food, holding appropriate settings for the grilling temperature.
| Program Icon | Grilling Temperature | Range Use it for ... | ||
| Vegetables |  | 160°C / 320°F | 130 - 190°C270 - 370°F | All types of vegetables, vegetable balls, fruit |
| Meat |  | 230°C / 450°F | 200 - 240°C390 - 460°F | Cuts of meat: beef, veal, pork, lamb, game and venison, meatballs |
| Burger / Panini |  | 210°C / 410°F | 180 - 240°C360 - 460°F | Any type of vegetables or pre-cooked meat between slices of bread or buns: Burger and Panini, French bread, Sandwich, Toast, pancake, flap-jack, waffleEnsure that the batter for pancake waffle and the like will not run off the grilling surface. |
| Poultry |  | 210°C / 410°F | 180 - 240°C360 - 460°F | Each type of poultry: chicken, turkey, duck, goose |
| Kebab |  | 210°C / 410°F | 180 - 240°C360 - 460°F | Spits with meat, sausage |
| Fish |  | 230°C / 450°F | 200 - 240°C390 - 460°F | Fish, sea food |
GRILLING TIMER
The appliance offers a timer function for setting the desired grilling time. This timer is operating according to an egg watch, reminding you to turn your food in time or remove it from the grilling surface. With a grilling time set, the remaining time duration until the set grilling time elapses, is shown as a count-down. A signal sounds, as soon as the set grilling time runs out. Especially when grilling at low temperature and/or using long grilling times, you can ensure that you do not miss the correct grilling time (see: 'Operation / Setting the Grilling Time').
You may select a grilling time from 1 minute to 60 minutes. For deselecting the grilling timer, set the grilling time to zero ("00 M").
Note
As soon as the remaining grilling time goes below 1 minute, the remaining grilling time is shown in seconds.
While the set grilling time is still running, you may change the currently set grilling time whenever you like without any interruption of the grilling process.
Important: The grilling timer simply reminds you of the grilling time. The heating elements will continue keeping the grilling surfaces hot to enable grilling various types of different food simultaneously, while setting the grilling time according to the food that will be done first. Accordingly, there is no need to restart the appliance, if there are further pieces of food, that shall be cooked yet. This way the grilling timer can assist you in keeping the desired grilling times of different types of food without effort.
AUTOMATIC SHUT-OFF
To ensure safe operation even in exceptional cases, after one hour of operation without any input via the touchscreen, a time-out counter will automatically shut off the appliance. This way, unnecessary operation and useless energy consumption is avoided, if you have forgotten to switch off the appliance after usage.
The time-out counter re-starts with every command, you enter via the touchscreen.
Important: Do not leave the appliance unattended, while it is connected to the power supply. Always switch off and unplug the appliance, when it is not in use and/or when leaving the appliance unattended.
After the automatic shut-off has been triggered, you may simply press the power button to restart the appliance immediately.
TIPS FOR BEST RESULTS
When using the appliance in the closed position (see: 'Properties of Your New Contract Grill / Positioning the Lid'), distribute all your food in a way that ensures that all pieces of food will touch the upper grilling surface slightly. If required, adjust the height control clip and swivel bearings accordingly (see: 'Height Control Feature' and 'Swivel Bearings of the Lid'). Cooking temperatures and cooking times depend on your individual liking, as well as on thickness, type, and consistency of your food. The following sections give some recommendations. If required, you should check your food for the desired consistency during cooking.
GENERAL GRILLING TEMPERATURE GUIDE
- Select a low temperature for heating up food and cooking sandwiches.
- Select medium temperatures for seafood and scallops.
- Select high temperatures for meat and poultry.
GRILLING MEAT AND FISH
Recommended Cuts of Meat:
| Beef | Sirloin (New York), Rump, Rib Eye (Scotch Fillet), Fillet |
| Lamb | Trim Lamb Leg Steaks, Fillet, Eye of Loin, Cutlets, Diced Lamb |
| Pork | Butterfly Loin Steaks, Spare Ribs, Leg Steaks, Fillet, Diced Pork |
- For best grilling results, use cuts of meat of approx. 1 to 3 cm.
- It is recommended not to cook cuts with thick bones such as T-bone steaks or cutlet. You should remove the bone before grilling.
- Tougher cuts such as beef blade, topside steak, lamb forequarter or neck chops can be used, when marinated with wine or vinegar to help break down the connective tissue. After marinating, drain the marinade off and dab with kitchen paper before placing on the grilling surface. Ingredients of the marinate could burn easily on the hot grilling surface.
- Do not overcook meat. Even pork is better served pink and juicy. However, chicken and turkey should be well done always.
- Do not pierce meat with a fork or cut meat during cooking. This will let the juices escape, giving a tougher and dry result.
- Add salt after grilling. Salt dehydrates meat, making it tough and dry.
- Some spices are heat-sensitive and should be added belatedly. E.g. capsicum may get a bitter taste, when heated to high temperature.
- For turning and taking meat, it is best to use barbecue tongs. When grilling fish, use a flat heat-resistant plastic spatula or plastic grill shovel to support the fish, as cooked fish breaks up easily.
How to Check the Doneness of Your Steaks
Use the following table to determine, if meat has reached the desired degree of doneness.
| Degree of doneness | Procedure Consistency | Core temperature | |
| Rare | Cook for a few minutes per side. | The steak feels very soft when pressing on it. | 55-60°C. |
| Medium rare | Cook each side until moisture is just visible on the surface. | The steak feels soft when pressing on it. | 60-65°C. |
| Medium | Cook each side until moisture is accumulating on the surface. | The steak feels elastic. 65-70°C. | |
| Medium Well | Cook each side until moisture is accumulating on the surface. Then reduce the heat and continue to cook until the steak feels firm. | 70 - 75°C | |
| Well Done | Cook each side until moisture is accumulating on the surface. Then reduce the heat and continue to cook until the steak feels very firm. | 75 - 85°C | |
GRILLING SANDWICHES
- Bread: Most types of bread can be used (white, wholemeal, wholegrain, raisin loaf, etc.). The closed position is ideal for grilling foccacia, Turkish bread baguettes as well as bread rolls. Raisin bread, brioche or other sweet breads, which contain high sugar content, will tend to brown quicker.
- Fillings: Prefer canned or pre-cooked fruit, as fresh fruit may give off excessive juices when heated. Be careful when biting into sandwiches containing fillings such as cheese and tomatoes or jam. This type of food retains heat and could burn if eaten too quickly.
- Fat Free Snacks: Due to the non-stick coating, it is unnecessary to use any additional fat on the outside of your grilled snacks.
BEFORE FIRST USE
⚠ WARNING: DO NOT let young children play with the appliance, or any part of it, or the packaging! Always unplug and leave the appliance cool down, before cleaning, moving, or assembling/disassembling any parts of the appliance. Do not immerse the housing (lid and base) or power cord in water or other liquids or spill any liquids on or in the housing or power cord. Do not place the housing or power cord in an automatic dishwasher. Even the exterior of the housing (lid and base) may get hot during operation. Only touch the appliance at the handles and operating elements during operation and while the appliance is still hot.
⚠️ CAUTION: For moving, the lid of the appliance may be locked to the base (see: 'Locking the Lid to the Base'). Do not attempt to open the lid with violence. Always ensure that the height control clip is set to the "OPEN" position, before opening the lid.
- Unpack the appliance and all accessories carefully. Check that no parts are damaged or missing (see: 'Knowing Your New Contact Grill').
- Remove all shipping materials and promotional materials, but DO NOT remove the model label.
- Slide the height control clip at the right side of the lid support to the "OPEN" position. Then grasp the lid of the appliance by the handle and fold the lid up until it rests in the open position (see: 'Positioning the Lid'). Especially ensure that there are no foreign objects (e.g. promotional material, packaging) on the grilling surfaces.
- Before first use and after a longer period of storage, clean the appliance and its parts (see: 'Care and Cleaning').
Important: When using the appliance for the first time, you may notice a fine smoke haze and some smoke may escape. This is caused by heating the components of the appliance. There is no need for concern. To avoid any influence on the taste of your food, you should let the appliance operate approx. 10 minutes on maximum temperature (240°C / 460°F) without any food on it. If the smoke haze persists on further use, unplug the appliance and leave it cool down to room temperature. Then clean the appliance thoroughly, especially ensuring that no residues of food stick to the grilling plates. If the smoke haze still persists, send the appliance to an authorized service centre for examination and repair.
- Before placing food on the grilling surfaces for the very first time: put the appliance into service (see below: 'Operation / Preparations') and set the grilling temperature to the highest possible temperature (240°C). Leave the appliance operate for approx. 20 minutes with the lid closed. Thereafter, switch off the appliance by pressing the ON/OFF button. Let the appliance cool down to room temperature.
Note
There is no need for concern, when heating up the appliance to the highest possible temperature without any food. The heating elements are temperature-controlled, preventing the appliance from overheating, when operating the appliance according to the instructions given in this booklet.
- Wipe the grilling surfaces with some clean, damp kitchen towel. Then wipe dry thoroughly.
- Drip some drops of cooking oil on a dry, clean kitchen towel and wipe the non-stick coatings of the grilling surfaces to prepare the non-stick coatings for use. The appliance is now ready for use.
OPERATION
⚠ WARNING: Always ensure that the appliance and all its parts and accessories are out of reach of young children. Your new DESIGN BBQ ADVANCED CONTROL is intended for cooking edible food and is heated electrically. Thus the surfaces (even the exterior) will become very hot. During operation and while the appliance is still hot, only touch the appliance at the operating elements (handles of the lid, height control clip, operating elements on the control panel) to avoid burns. To avoid risk of overheating and fire: Do not place any clothes or tissue or other foreign objects on or under the appliance during operation. Do not place any inflammable objects on the grilling surfaces. Do not leave any food carbonize on the grilling surfaces. Do not place the appliance on heat-sensitive surfaces during operation.
Only place the appliance on a stable, dry, heat-resistant, and level surface (see:
'General Safety Instructions'). Do not block the ventilation slits at the bottom of the housing. During operation, the used power outlet and the operating elements must be accessible all the time (see: 'Knowing Your New Contact Grill').
Ensure to keep the appliance in an appropriate distance of at least 50 cm on each side to the edge of the working space and any delicate objects. During operation leave at least 1 m of free space above the appliance for free access. Do not operate the appliance under drop lights or overhanging boards.
Before assembling the appliance, always ensure that all parts are in proper working order and completely dry. Do not use any damaged or unsuitable parts or accessories to avoid risk of injuries and damage. Only operate the appliance with BOTH grilling plates and the drip tray inserted correctly, to avoid risk of fire, electric shock, burns, and damage.
Please keep in mind that fresh food will splash and give off hot steam, when coming in contact with the hot grilling surfaces. Do not hold any part of your body or any delicate objects over or near the appliance. Protect your hands and arms with oven gloves. During operation, ensure that all persons (including you) stay in sufficient distance. Expect splashes of hot fat and juices in the surroundings of the appliance.
⚠️ CAUTION: Do not scratch or cut on the grilling surfaces. Do not use any hard or sharp-edged objects (e.g. knives, metal scrapers) with the appliance to avoid damage to the surfaces, especially the non-stick coating. Only use cooking utensils made of wood or heat-resistant plastics.
Important: During the initial use the appliance may give off some light smoke or burning smell. This is normal and will subside with further use (see: 'Before First Use').
PREPARATIONS
⚠️ CAUTION: Do not place the appliance on coated surfaces of delicate furniture, even when the appliance is still cold. Delicate surfaces could get damaged by scratches or abrasion of the rubber feet of the appliance. For moving the appliance, the lid may be locked to the base via the height control clip (position "LOCK"). Do not attempt to open the lid with violence (see: 'Height Control Feature').
- Prepare your food for grilling. Remove all inedible parts (e.g. stalks and bones) and cut your food in pieces of sufficient size and thickness. Leave frozen food thaw, before cooking.
- Completely unwind the power cord of the appliance. Then place the appliance on a suitable horizontal and heat-resistant surface (see: 'General Safety Instruc-
tions') near a suitable wall power outlet (see: 'Important Safeguards for Electrical Appliances'). On each side and to the edge of the working surface, keep at least 50 cm of free space. However, if you wish to place food on the grilling surface of the lid as well, leave at least 80 cm of free space at the rear of the appliance.
⚠ WARNING: Always completely unwind the power cord before connecting the appliance to the power supply. Do not operate the appliance with the power cord wrapped around the cord storage to avoid damage and injuries due to overheating and short circuit. Slide the height control clip on the right side of the lid support to the "OPEN" position (see: 'Locking the Lid to the Base'). Open the lid and ensure that the grilling surfaces are clean and there are no foreign objects on it. Ensure that the grilling plates and drip tray are assembled correctly (see: 'Care and Cleaning / Assembling the Appliance'). The front plate of the drip tray may not protrude the side of the base. Before first use of the appliance and after cleaning the grilling plates in an automatic dishwasher: Wipe the grilling surfaces with a little cooking oil once to prepare the non-stick coatings for usage.
- Close the lid, even if you wish to use the appliance with the lid folded back. With the lid closed, the grilling surfaces will reach the desired cooking temperature quickly, and without useless energy loss. For using the temperature probe: On the left side of the control panel, pull out the storage tray and remove the inner tray from the storage tray, holding the temperature probe. Below the front plate of the storage tray, the probe connector of the temperature probe is accessible. Insert the plug of the temperature probe here and place the temperature probe beside the appliance.
⚠️ CAUTION: Handle and cord of the temperature probe may not touch the grilling surfaces, when the appliance is hot. Do not place the temperature probe on the grilling surface!
Note
When using the temperature probe, we recommend to hold a clean and heat-resistant coaster or flat bowl at hand for placing the temperature probe on it, while it is not in use. You may use the inner tray of the temperature probe. Additionally, it is a good idea to hold a clean, damp cloth at hand for wiping the tip of the temperature probe immediately after each measurement.
- Insert the power plug in a suitable wall power outlet (see: 'Important Safeguards for Electrical Appliances'). A signal sounds an "OFF" flashes on the touchscreen.
- Press the ON/OFF button to switch on the appliance. The grilling temperature flashes on the display area of the touchscreen. At the left side of the grilling temperature, the grilling time is shown ("00 M").
Note
The appliance starts heating immediately after switching on. As soon as the set grilling temperature is reached, the grilling temperature stops flashing and a signal sounds. Depending on the set grilling temperature, it may take 6 minutes at the maximum for reaching the set grilling temperature after start-up.
- If you wish to change the current setting of the grilling temperature, use the "+" and "-" buttons in the control area. However, you can set a grilling temperature by selecting a pre-defined program.
Note
It will take up to 6 minutes for the grilling plates to reach the highest possible temperature.
SELECTING A PROGRAM
You may select one of 6 pre-defined programs, for getting appropriate temperature values for your food. The pre-set grilling temperature values are a starting point for your own settings.
Tip: You do not need to select a program for grilling. You can set the desired values manually from the start. Even with a program selected, you can adapt the pre-set values. Set the grilling temperature to your demands for getting the best results.
- Selecting a program: touch the assigned icon within the program area of the touchscreen. If required, you can adapt the pre-defined grilling temperature via the "+" and "-" buttons in the control area.
Note
When using a program, the range of possible grilling temperature values may be restricted. If you wish to select a grilling temperature above or below this range, you should deactivate the selected program or select another program (see: 'Pre-Defined Programs').
- Deactivating the selected program: simply touch the illuminated icon on the program area. For selecting another program, touch the desired program icon.
POSITIONING THE LID
⚠ WARNING – RISK OF BURNS: Even the exterior of the appliance can get very hot during operation. Especially, when opening the lid, carefully avoid to touch the upper frame of the lid with your arm to avoid burns!
- Ensure that the height control clip is in the "OPEN" position. For positioning food
on the lower grilling surface, carefully lift the lid by the lid handle and position the lid in the stable upright position.
Note
After placing food on the lower grilling surface, you should close the lid whenever possible. For delicate food that could be smashed easily, adjust the height control feature according to the thickness of your food (see below: 'Adjusting the Height Control Feature').
- For placing your food on both grilling surfaces: Grasp the lid by the lid handle. Ensure that you will not touch the top of the lid housing with your arm. While pressing the hinge release button at the right side of the lid hinge, carefully fold back the lid to the 180^ flat position.
ADJUSTING THE HEIGHT CONTROL FEATURE
- Hold the lid with your left hand at the lid handle and ensure that the height control clip is in the "OPEN" position.
⚠ WARNING - RISK OF BURNS: Even the exterior of the appliance may get very hot during operation. During operation and when the appliance is still hot, only touch the appliance at the dark plastic lid handle, adjusting tab, control panel, and height control clip. When opening the lid by the handle, avoid to touch the upper frame of the lid with your arm.
- Move the lid to the desired position above the lower grilling plate. While doing so, you may adjust the lid parallel to the lower grilling surface by turning it via the adjusting tab.
- Slide the height control clip backwards to the hinge of the lid until you distinctly feel resistance.
- Slowly release the lid handle; the lid will stay in the selected position up to 5,5 cm (approx. 2 inches) above the base grilling plate.
- If you wish to lower the lid, first grasp the lid at the handle. Then pull the height control clip a little more to the front of the appliance. Thereafter, you can lower the lid according to the new position of the height control clip.
GRILLING YOUR FOOD
⚠ WARNING – RISK OF BURNS: Even the exterior of the appliance may get very hot during operation. Only touch the hot appliance at the lid handle, adjusting tab, height control clip, and control panel.
⚠ WARNING: During operation or some time thereafter, do not touch the grilling surfaces or other hot components of the appliance with your body or any heat-sensitive object. Especially, when opening the lid, carefully avoid to touch the upper frame of the lid with your arm to avoid scalds! Ensure that you do not tip over the appliance, when opening the lid. Ensure that the drip tray is inserted correctly and does not protrude the left side wall of the appliance.
- Prepare your food and the appliance for cooking (see: 'Preparations'). Close the lid.
- Select the desired grilling temperature. For this, you may use two different ways:
Select a program for setting the grilling temperature accordingly (see: 'Selecting a Program').
On the control area, touch the "+" and "-" buttons for setting the grilling temperature to the desired value manually.
The appliance starts working with the new temperature immediately. After each change, the grilling temperature flashes on the display area, until the set temperature is reached and the corresponding signal sounds.
- Wait, until the signal is given and the set grilling temperature stops flashing. It is a good idea to use this time for seasoning your food and dab dry humid pieces of food via a kitchen cloth.
- Grasp the lid by the handle and fold the lid up to the upright open position.
- If you wish to place food onto the grilling surface of the lid too, hold the lid by the handle and, while pressing the hinge release button, lay the lid slowly back to the 180° flat position (see: 'Positioning the Lid'). Carefully ensure that you do not touch the upper frame of the lid with your arm.
⚠ WARNING: When placing your food on the hot grilling surface, water and fat could splash. Ensure that persons (including you) stay in sufficient distance to the appliance. Ensure that the grilling temperature does not flash any longer. Then place your food onto the grilling surface. If you wish to monitor the core temperature of your food, activate the temperature control by touching the probe button on the display area. Set the desired core temperature via the "+" and "-" buttons (see: 'Controlling the Core Temperature'). Then insert the tip of the temperature probe into your food attempting to place the tip as near as possible to the centre of the desired piece of food. A signal sounds as soon as the set core temperature is reached.
⚠️ CAUTION: The temperature probe and its cable may not touch the grilling surfaces! Depending on the food on the grilling plates, the grilling surface of the lid could touch the temperature probe when closing the lid. In this case, leave the lid open.
Note
When closing the lid, the cooking time will be shorter and you can save energy. Thus, it is best to close the lid whenever possible (see: 'Positioning the Lid'). When grilling delicate food that may be smashed easily, adjust the height control feature. The food items should be adapted in thickness to ensure that the grilling plate of the lid lies evenly on the food for even cooking.
- If grilling with the lid closed (contact grilling) is possible, carefully close the lid. When doing so, you may need to adjust the height control feature for holding the lid above your food (see: 'Positioning the Lid' and 'Adjusting the Height Control Feature'). If you wish to use the grilling timer, touch the clock button on the control area. While the grilling time is flashing, use the "+" or "-" buttons for setting the desired grilling time from 1 minute to 60 minutes (see: 'Setting the Grilling Time'). As soon as the set grilling time elapses, a signal sounds.
Tip: When preparing various types of food simultaneously, you may activate the temperature probe and grilling timer as well. This way, monitoring two different types of food is possible. For the grilling timer, you should set the time required for those types of food that will be done first.
⚠️ CAUTION: Do not cut or scratch on the grilling surfaces. For handling your food, use barbecue utensils of wood or heat-resistant plastic. Do not use any metal utensils. Otherwise, the non-stick coating could be damaged.
- Cook your food to the desired consistency. If required, check the cooking process in the meantime.
- When your food is done, when grilling with the lid closed, by the lid handle fold the lid open to the stable upright position. Take your food from the grilling surface via plastic or wooden barbecue utensils. Thereafter, you can immediately place fresh food on the grilling surface. If required, adjust the settings accordingly.
SETTING THE GRILLING TIME
For using the grilling timer, you simply need to set a grilling time (see: 'Grilling Timer'). The set time is shown as a count-down in the display area and a signal sounds, as soon as the count-down reaches zero. However, the grilling timer has no influence on the temperature of the grilling surfaces.
Note
On normal conditions, the buttons "+" and "-" are used for setting the grilling temperature. Only with the grilling time flashing on the display area, the grilling time can be adjusted.
- For setting the grilling time: press the clock button on the control area. The default grilling time is flashing in the display area. While the grilling time is flashing, touch the buttons "+" and "-" to set the desired value.
- For changing the currently displayed grilling time: press the clock button on the control area. The current grilling time is flashing on the display area. While the grilling time is flashing, touch the buttons "+" and "-" to set the desired value.
CONTROLLING THE CORE TEMPERATURE
⚠️ CAUTION: Do not place the temperature probe on the grilling surfaces. When the temperature probe is not in use, place it beside the appliance.
When the temperature probe is connected to the appliance (see: 'Preparations'), you can monitor the core temperature of your food automatically during cooking, by activating the temperature control (see: 'Temperature Probe'). As soon as the set core temperature is reached, a signal sounds.
Tip: The set core temperature can be given in *F as well. Press the unit button "°C / °F" for changing the temperature unit (see: 'Knowing Your New Contact Grill').
- Ensure that the plug of the temperature probe is inserted in the probe connector (see: 'Preparations').
- On the upper left side of the display area, touch the probe button. This will activate the temperature control function and "PROBE TEMP" illuminates. On the upper right side of the display area, the set core temperature is flashing for some 5 seconds and then illuminated continuously (see: 'Temperature Probe').
Note
With "Er3" flashing on the display area, the temperature probe is not connected correctly or out of order. Ensure that the probe plug is inserted correctly in the probe connector. Turn the probe plug a little to and fro to ensure good contact. The error message "Er3" disappears immediately, if the temperature probe is in correct working order. If the error message persists, the temperature probe may be damaged or the probe plug may be polluted. In this case, the appliance will not work, while the temperature probe function is activated. Touch the probe button for operating the appliance without temperature control.
- As long as the set core temperature flashes on the display area (immediately after activating the temperature control), you can adjust the desired temperature via the "+" and "-" buttons on the control area. In general, the following values are possible: 45, 50, 55, 60, 65, 75°C (see: 'Temperature Probe').
Note
When the set core temperature stops flashing on the display, the buttons "+" and "-" have an effect on the grilling temperature only. If you wish to change the set core temperature, touch the probe button twice to de-activate and re-start the temperature control. Thereafter, you can set another core temperature.
Note
With a program selected, the range of available core temperature values may be restricted. If required, deselect the active program and try again.
- Insert the tip of the temperature probe in your food. The tip should be placed in the centre of the piece of food, you wish to monitor. During the grilling process, the core temperature rises slowly, shown by a line of dashes illuminating one after the other on the upper half of the display area (see: 'Temperature Probe'). As soon as the set core temperature is reached, an acoustic signal sounds.
- Pull the temperature probe out of your food. Do not touch the tip of the temperature probe immediately after taking it out of your food.
- Wipe the tip of the temperature probe via a damp, clean cloth and place the temperature probe beside the appliance. Remove your food from the grilling surface.
Important: The temperature control function does not influence the temperature of the grilling plates. Even after reaching the set core temperature, the grilling plates are kept hot without any changes, thus enabling cooking several different types of food and various batches without interruption.
AFTER USAGE
⚠️ CAUTION: Always keep the appliance out of reach of young children. Do not move the appliance and do not touch or remove the grilling plates, when the appliance is still hot.
Important: Do not dispose of fat and juices in the sink, as this may clog the outlet pipe. Fill the residues into a sufficient container tightly closed and dispose of in domestic waste.
-
After finishing, remove all remaining food and switch off the appliance by pressing the ON/OFF button ("OFF" flashes on the touchscreen). Then unplug the appliance. Leave the appliance cool down completely with the lid open, ensuring that the appliance is out of reach of young children.
-
If required, unplug the temperature probe.
- Using a wooden or plastic spatula or some kitchen towel, push all residues of juices and fat to the drip spouts of the grilling plates and out.
DISASSEMBLING THE APPLIANCE
⚠️ CAUTION: Do not use violence, when pulling out the drip tray or grilling plates. The grilling plates are fixed to the base and lid via the locking mechanism and clamps near the lid hinge. Always unlock the grilling plates and pull them carefully out of the clamps for removing the grilling plates.
For carrying the appliance by the lid handle, the height control clip must be set to the "LOCK" position first.
- Ensure that the appliance is unplugged and the height control clip is in the "OPEN" position. Open the lid to the stable upright position. Ensure that the grilling plates are empty and at room temperature.
- Removing the grilling plates: Press the "eject" buttons at the base and lid of the appliance. Thereafter, carefully pull the grilling plates out of the clamps near the lid hinge.
- Removing the drip tray: Slightly press on the front plate of the drip tray at the left side of the appliance. This will release the lock of the drip tray and the drip tray comes out a little. Carefully pull the drip tray out of the appliance, avoiding to spill the contents. Empty the drip tray.
- For moving the appliance: Slide the height control clip to the "OPEN" position. Close the lid. Then, slide the height control clip to the "LOCK" position. Ensure that lid and base are locked together. Thereafter you may carry the appliance conveniently by the lid handle.
- Food could be burnt to charcoal, smoke, and even catch fire, when overheated! Do not leave any residues of food bake-on and burn-in the surfaces of the appliance. Clean the appliance and its parts after each use (see: 'Care and Cleaning').
SOLVING PROBLEMS
Most problems during use can be solved easily. Use the hints in the following table as an assistance. The meaning of the error messages ("Er1" to "Er4") is given at the end of this chapter.
| Problem The Possible | Reason The Easy Solution | Wipe your finger tip with a moist cloth. Then try again. The appliances gives an acoustic signal with each accepted input. |
| The appliance reacts to your input only hardly. | There may be fat on your finger tip or your skin is very dry. | |
| After switching on the appliance, you notice a burnt smell. May be, smoke escapes from under the grilling plates. | The appliance is heated for the first time. In this case, there is no need to worry. | To prepare the appliance for the very first operation, select 240°C (maximum grilling temperature) and, with the lid closed, leave the appliance operate approx. 20 minutes (see: ‘Before First Use’). |
| The heating chambers (under the grilling plates) or the grilling plates are polluted. | Switch off and unplug the appliance immediately. Leave the appliance cool down. Then remove the grilling plates and clean the heating chambers and grilling plates of base and lid thoroughly (see: ‘Care and Cleaning’).When removing the grilling plates after grilling, ensure that juices from the grilling plates will not drip into the heating chambers. Ensure that the heating chambers and the bottom of the grilling plates are completely clean, before reassembling the appliance (see: ‘Assembling the Appliance’). | |
| You cannot open the lid. | The lid is locked to the base. | Slide the height control clip to the “OPEN” position. Do not use violence! |
| You cannot close the lid completely. | The height control feature is in use. | Hold the lid by the handle and pull the height control clip to the “OPEN” position. Then try again. |
| You cannot fold back the lid to the flat position. | For operating the appliance in the open position, the lid is held in the upright position by a lock in the hinge. | Hold the lid by the handle. While pressing the hinge release button at the right side of the lid hinge, slowly fold back the lid (see: ‘Positioning the Lid’). |
| The desired grilling temperature is not available. | If you have selected a program, the range of possible grilling temperature values may be restricted. | In the program area, select a program, enabling the desired temperature values (see: ‘Pre-Defined Programs’).Alternatively, deselect any programs and adjust the required grilling temperature manually (range: 80°C to 240°C; see: Selecting a Program’). |
| Problem The Possible | Reason The Easy Solution | |
| When using the core temperature control feature, the desired core temperature is not available. | A program is selected that does not enable the desired core temperature. | With some programs, the range of possible core temperature values is restricted.In the program area, deselect the used program or select another program (see: 'Pre-Defined Programs'). |
| Unexpectedly, the appliance does not work any longer. | "OFF" flashes on the touchscreen: The automatic shut-off has been triggered. | For your safety, the appliance is equipped with an automatic shut-off feature (see: 'Automatic Shut-Off'), that will be triggered after 1 hour of continuous use without any input. In this case an unusual acoustic signal sounds. If you wish to operate the appliance further on, simply press the ON/OFF button and enter the desired settings again. |
| The touchscreen is dark:The connection to the power supply is interrupted. | Ensure that the power cord is still connected to the power outlet. When using an extension cord, check the connections of the extension cord.Always ensure that nobody gets entangled in the power cord or pull at the power cord. Do not let the coupling of the extension cord hang down from the table (see: 'Important Safeguards for Electrical Appliances'). | |
| "Er" and a number is displayed: An error occurred. | Solve the problem according to the hints, given below (see: 'Error Messages of the Appliance'). | |
| The storage tray of the temperature probe does not fit into the control panel. | The temperature probe is not inserted in the correct orientation. | The ring in the handle of the temperature probe must face upwards, when inserted into the inner tray. |
| The cable or plug of the temperature probe is not inserted correctly. | Gently press the tip of the temperature probe into the groove of the inner tray. Wrap the cable loosely around the cable support and push the plug of the cable gently down. The parts of the temperature probe may not protrude the rim of the inner tray (see: 'Assembling the Appliance'). | |
| The inner tray is not installed correctly in the storage tray. | The inner tray may not protrude the storage tray. When inserted correctly, the handle of the temperature probe will be seen in the excavation of the storage tray front plate with the ring in the handle facing upwards. | |
| TIP: If you find it difficulty to insert the temperature probe correctly in the inner tray, for storage, it is best to place the inner tray holding the temperature probe beside the appliance and insert the empty storage tray into the control panel of the appliance. | ||
ERROR MESSAGES OF THE APPLIANCE
Note
If an error message is given, the appliance will not work. The error message disappears and the appliance re-assumes operation automatically, as soon as the problem is solved.
| Error Message Meaning Required Action | ||
| “Er1” flashes on the Touch-screen. An acoustic signal sounds every 3 seconds. | The upper grilling plate is missing or not installed correctly. | The appliance can be operated only with both grilling plates installed properly. Ensure to insert and lock the upper grilling plate correctly (see: ‘Assembling the Appliance’). Ensure that the connectors on the underside of the grilling plate are clean, smooth, and undamaged without any corrosion. If required, clean the connectors. |
| “Er2” flashes on the Touch-screen. An acoustic signal sounds every 3 seconds. | The lower grilling plate is missing or not installed correctly. | The appliance can be operated only with both grilling plates installed properly. Ensure to insert and lock the lower grilling plate correctly (see: ‘Assembling the Appliance’). Ensure that the connectors on the underside of the grilling plate are clean, smooth, and undamaged without any corrosion. If required, clean the connectors. |
| “Er3” flashes on the Touch-screen. Maybe, an acoustic signal sounds every 3 seconds. | You attempted to activate the temperature control feature, without connecting the temperature probe to the appliance. | Remove the storage tray and insert the plug of the temperature probe into the probe connector “PROBE” on the left side of the control panel (see: ‘Preparations’). Perhaps, you must remove the storage tray of the temperature probe first for getting access to the probe connector. |
| The plug of the temperature probe is not installed correctly or polluted. | Ensure that the plug of the temperature probe is completely undamaged, dry and clean. Insert the plug correctly into the probe connector. If required, turn the plug to and fro in the probe connector to improve the connection to the appliance. If required, clean the plug using a damp cloth, and wipe dry thoroughly. | |
| The tip or cable of the temperature probe is damaged. | Replace the temperature probe. However, you can operate the appliance without the temperature probe. Touch the probe button on the display area for deactivating the temperature probe. | |
| “Er4” flashes on the Touch-screen. An acoustic signal sounds every 3 seconds. | A serious malfunction occurred. | Immediately unplug the appliance and let the appliance cool down completely (approx. 30 minutes). Thereafter, try to put the appliance into operation again. If the problem persists, return the appliance to an authorized service centre for examination and repair. |
CARE AND CLEANING
⚠ WARNING – RISK OF BURNS: Always ensure that the appliance is out of reach of young children. Before moving, disassembling, or cleaning the appliance: Always switch OFF the appliance (press the ON/OFF button, "OFF" flashes on the touchscreen), then unplug the appliance, and wait until the appliance cooled down completely (at least 30 minutes with the lid open). Do not attempt to move the appliance with fat and juices on the grilling surfaces and in the drip tray still hot! Otherwise, hot fat could be spilled, causing severe injuries and damage.
⚠️ CAUTION: Keep in mind that fat and juices could drip especially from the grilling surfaces and drip tray, when moving the appliance and/or disassembling any parts after grilling. Keep delicate objects in sufficient distance. Do not place the appliance or any part of it on surfaces that are sensitive to heat, fat or moisture.
Before carrying the appliance by the lid handle, always ensure that the lid is locked securely to the base (see: 'Properties of Your New Contact Grill / Locking the Lid to the Base').
Do not use any abrasive cleaners or corrosive chemicals (e.g. bleach) for cleaning the appliance or any parts of it, to avoid damage to the surfaces. Do not use any hard or sharp-edged objects for cleaning any surface of the appliance. Do not immerse the housing or power cord in water or any other liquid. Do not spill or drip any liquids on or in the housing or power cord to avoid risk of fire and electric shock. Do not clean the housing, temperature probe, or power cord in an automatic dishwasher. Do not use violence!
Always keep the heating elements on the underside of the grilling plates completely clean. When using the appliance again, residues of food would burn to charcoal, giving off smoke and a burnt smell. In extreme cases, burnt food could catch fire, during operation!
When removing the grilling plates, avoid spilling any liquid into the base of the appliance or on the lid hinge.
Important: Do not pour surplus fat and juices into the sink, as this could clog the outlet pipe.
After cleaning the grilling plates via an automatic dishwasher, before next use you should wipe the grilling surfaces with some cooking oil again, to maintain best non-stick performance. However, there is no need to do so, when cleaning the grilling plates manually.
CLEANING THE APPLIANCE
- Before cleaning, always ensure that the appliance is unplugged, and cooled down to room temperature. Then disassemble the appliance (see: 'Operation / Disassembling the Appliance'). Clean the drip tray, storage tray, inner tray, and grilling plates in warm dishwater via a soft nylon brush.
Note
You may clean these parts in an automatic dishwasher. Place the plastic parts onto the upper rack.
⚠️ CAUTION: Do not immerse the temperature probe or its cable in any liquids. Do not pull or bent the cable of the temperature probe. For soaking stubborn residues, only immerse the tip of the temperature probe.
The heating elements on the grilling plates must be completely clean, when using the appliance for the next time. Otherwise, residues of food could burn to charcoal, give off smoke, or even catch fire!
- Wipe the temperature probe (tip, handle, and cable) using a soft cloth moistened with warm dishwater. Stubborn residues on the tip of the temperature probe may be soaked. For this, fill some warm dishwater into a small cup or mug with a little dishwater and immerse only the tip of the temperature probe for approx. 10 minutes. Thereafter, wipe the tip with a soft damp cloth.
- Slide the height control clip to the "OPEN" position and lift the lid to the upright open position (see: 'Properties of Your New Contact Grill / Locking the Lid to the Base').
- Wipe the exterior of the appliance using a damp cloth. Always ensure not to drip water into the interior or onto the front plate of the appliance. Check, whether the heating chambers (during operation below the grilling plates) are completely clean. If required, carefully remove any residues via a damp cloth to avoid burning in any residues, when using the appliance next time.
- Thoroughly dry all parts of the appliance after cleaning. Then, leaving the lid of the appliance in the upper open position, let all parts dry naturally for approx. 30 minutes, with all parts out of reach of young children.
- After cleaning, reassemble the appliance to avoid loss and damage to the parts (see below: 'Assembling the Appliance').
ASSEMBLING THE APPLIANCE
- Ensure that the height control clip is in the "OPEN" position and fold up the lid to the stable upright position.
- Check, whether the heating chambers of lid and base (during operation below the grilling plates) as well as the grilling plates are completely clean. Residues within the heating chambers or on the grilling plates would burn to charcoal during operation. If required, clean the heating chambers and grilling plates (see above: 'Cleaning the Appliance').
Important: The grilling plates cannot be exchanged by each other. When mounted in the appliance, the drip spouts of each grilling plate must face to the rear left side of the appliance. All parts of the appliance can be installed without applying any force!
- With the drip spouts facing to the rear of the appliance, carefully slide the notches in the grilling plates into the clamps near the lid hinge. Then press the front part of the grilling plate against the base / lid for engaging the lock of the grilling plates.
- Insert the drip tray in the opening at the left side of the housing of the appliance and push the drip tray into position. The front plate of the drip tray may not protrude the side plate of the appliance.
- Close the lid and slide the height control clip to the "LOCK" position. Ensure that lid and base of the appliance are locked together securely.
- For placing the appliance aside and for storage: Insert the temperature probe into the groove at the left side of the smaller inner tray of the temperature probe and carefully press the tip of the temperature probe down until it snaps into place. Then wrap the cable of the temperature probe loosely around the cable support of the inner tray. Push the plug into the inner tray gently.
- Place the inner tray into the storage tray and push the storage tray into the opening in the control panel of the appliance.
Tip: If you find it difficult to re-place the temperature probe in the inner tray and/or the storage tray in the appliance, you may leave the inner tray aside, but install the storage tray in the control panel without the temperature probe for protecting the probe connector. Store the temperature probe with the appliance.
STORAGE
⚠ WARNING: Young children must always be supervised that they do not play with the appliance or any part of it. When the appliance is not in use, always press the ON/OFF button for switching off ("OFF" flashes on the touchscreen). Thereafter, unplug the appliance and wait until the appliance cooled down completely, before cleaning and moving the appliance for storage. Do not leave the appliance unattended, when it is connected to the power supply to avoid risk of electric shock or fire.
⚠️ CAUTION: Do not hold the appliance by the power cord or by the cable at the rear or the power cord for moving the appliance to avoid damage. Always handle power cords with special care. Power cords may never be knotted, twisted, pulled, strained, or squeezed. Always ensure that no one will pull the appliance by the power cord.
Before moving or tilting the appliance, always remove all residues still on the grilling plates or in the drip tray to avoid damage by spilling juices.
For moving: after cooling down, grasp the appliance at both sides of the base. Alternatively, you may carry the appliance by the handle of the lid. Before lifting the appliance by the handle, always ensure that the lid is securely locked to the base of the appliance and will not open unintentionally! Do not place any hard or heavy objects on or in the appliance or any part of it to avoid damage.
When storing the appliance in an upright position, ensure that the appliance cannot fall over.
- Always clean the appliance and all its parts before storing to avoid that dried-on food carbonizes during next use (see: 'Care and Cleaning').
- Reassemble the appliance completely and correctly, before storing it, to avoid loss and damage to the parts (see: 'Assembling the Appliance'). Do not use any parts or accessories of the appliance for any other purpose than operating the appliance. For storage and before lifting and/or tilting the appliance, always ensure to lock the lid of the appliance to the base. For this, first pull the height control clip to the "OPEN" position. Then close the lid completely and push the height control clip to the "LOCK" position. Ensure that the lid is securely locked to the base. Thereafter, you may carry the appliance by the lid handle. Wrap the power cord loosely around the cord storage at the bottom of the base.
- Ensure to store the appliance where it is clean, dry and safe from frost, direct sunlight and inadmissible strain (mechanical or electric shock, heat, moisture) and where it is out of reach of young children. Place the appliance on a clean and stable surface, where it cannot fall. If you wish to store the appliance in upright position, ensure that it has a stable stand and will not tilt or fall over.
NOTES FOR DISPOSAL
Dispose of the appliance and packaging must be effected in accordance with the corresponding local regulations and requirements for electrical appliances and packaging. Please contact your local disposal company.
Do not dispose of electrical appliances as unsorted municipal waste, use separate collection facilities. Contact your local government for information regarding the collection systems available. If electrical appliances are disposed of in landfills, dumps, or refuse incineration, hazardous substances can leak into the groundwater or can be emitted into air, thus getting into the food chain, and damaging your health and well-being as well as poisoning flora and fauna. When replacing old appliances with new once, the vendor is legally obligated to take back your old appliance for disposal at least for free of charge.
INFORMATION AND SERVICE
Please check www.gastroback.de for further information.
For technical support, please contact Gastroback Customer Care Center by phone: +49 (0)4165/22 25-0 or e-mail info@gastroback.de.
Please refer to our home page for a copy of these operating instructions in pdf format.
WARRANTY
We guarantee that all our products are free of defects at the time of purchase. Any demonstrable manufacturing or material defects will be to the exclusion of any further claim and within 2 years after purchasing the appliance free of charge repaired or substituted. There is no Warranty claim of the purchaser if the damage or defect of the appliance is caused by inappropriate treatment, over loading or installation mistakes. The Warranty claim expires if there is any technical interference of a third party without a written agreement. The purchaser has to present the sales slip in assertion-of-claim and has to bear all charges of costs and risk of the transport.
Restricted use of this appliance for commercial, trade or industrial purposes in offices, guest houses, cafés and baker's shops, and similar facilities is possible. In this case the warranty period is reduced to 1 year.
Note
For repair and service, please send Gastroback products to the following address: Gastroback GmbH, Gewerbestr. 20, 21279 Hollenstedt, Germany.
Please agree that we cannot bear the charge of receipt. Submission of appliances: Please ensure packing the appliance ready for shipment without accessories and attachments. Add the sales slip and a short fault description. The processing time after receipt of the defective appliance will be approx. 2 weeks; we will inform you automatically. After the warranty period, please send defective appliances to the given address. You will get a free quotation and, thereafter, can decide, whether we shall repair the appliance to the costs possibly accrued, send back the defective appliance for free of charge, or dispose of the appliance for free of charge.
HOUSEHOLD USE
The appliance is intended for household use only and not suited for commercial, industrial or trade usage. Do not attempt to use this appliance in any other way or for any other purpose than the intended use, described in these instructions. Any other use is regarded as unintended use or misuse, and can cause severe injuries or damage. There is no warranty claim of the purchaser if any injuries or damages are caused by unintended use.
ACCESSORIES - DESIGN BBQ ADVANCED CONTROL
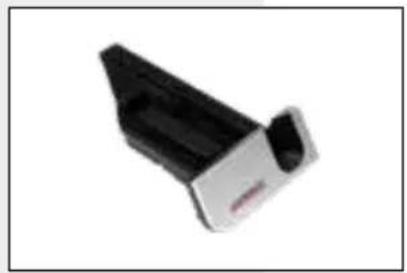
natural_image
Black and silver electronic device component (no visible text or symbols)Storage tray for probe
Art.-No.: 98807

Just scan the QR-Code and order.
https://www.gastroback.de/detail/index/sArticle/651
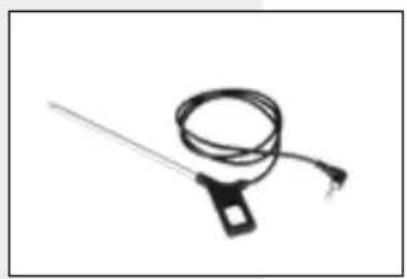
natural_image
Simple line drawing of a coiled cable with a terminal connector (no text or symbols)Probe
Art.-No.: 98808

Just scan the QR-Code and order.
https://www.gastroback.de/detail/index/sArticle/652
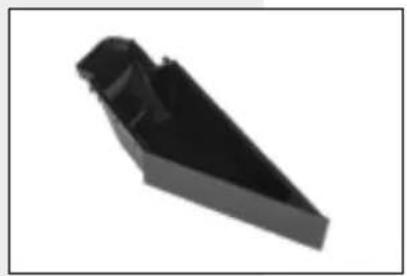
natural_image
Black plastic mechanical component with triangular tip and stepped base (no text or symbols)Drip tray
Art.-No.: 98809

Just scan the QR-Code and order.
https://www.gastroback.de/detail/index/sArticle/653
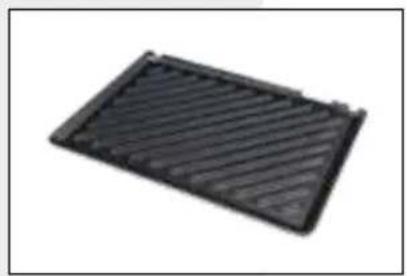
natural_image
Black rectangular object with horizontal grooves, resembling a mesh or filter (no text or symbols visible)Top grill plate - structured
Art.-No.: 98810

Just scan the QR-Code and order.
https://www.gastroback.de/detail/index/sArticle/654
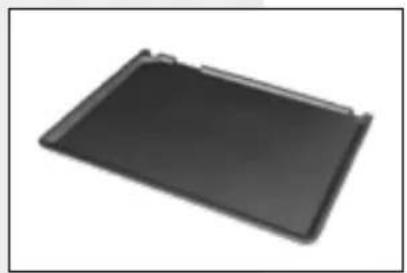
natural_image
Black rectangular electronic device with a flat top and rounded edges (no visible text or symbols)Bottom grill plate - flat
Art.-No.: 98811

Just scan the QR-Code and order.
https://www.gastroback.de/detail/index/sArticle/655
GASTROBACK GmbH
Gewerbestraße 20. 21279 Hollenstedt / Germany Telefon +49(0)4165/2225-0. Telefax +49(0)4165/2225-29 info@gastroback.de . www.gastroback.de
- Thermometer
- Fettauffangschale
- TABLE OF CONTENTS
- DEAR CUSTOMER!
- GENERAL SAFETY INSTRUCTIONS
- IMPORTANT SAFEGUARDS FOR ELECTRICAL APPLIANCES
- HIGH TEMPERATURES - RISK OF BURNS
- NON-STICK COATING
- KNOWING YOUR NEW CONTACT GRILL
- STABLE METAL LID
- PLASTIC ADJUSTING TAB
- LID WITH SEPARATE GRILLING PLATE
- PLATE RELEASE BUTTONS (EJECT)
- EFFORTLESS REMOVABLE GRILLING PLATES
- HEIGHT CONTROL CLIP
- DRIP SPOUTS
- HINGE RELEASE BUTTON
- INTEGRATED STORAGE TRAY
- TEMPERATURE PROBE
- HOUSING
- ON/OFF BUTTON
- CONTROL ELEMENTS INTEGRATED IN THE TOUCHSCREEN
- PROGRAM AREA
- DISPLAY AREA
- CONTROL AREA
- 4VEGETABLES
- 5MEAT
- BURGER / PANINI
- PROBE BUTTON
- CURRENT CORE TEMPERATURE
- SET CORE TEMPERATURE
- UNIT BUTTON
- + TASTE
- POULTRY
- KEBAB
- FISH
- GRILLING TIME
- GRILLING TEMPERATURE
- CLOCK BUTTON
- - TASTE
- PROPERTIES OF YOUR NEW CONTACT GRILL
- GETTING AN OVERVIEW
- LOCKING THE LID TO THE BASE
- POSSIBLE POSITIONS OF THE LID
- Closed Position
- Open Position
- Flat Position
- HEIGHT CONTROL FEATURE
- SWIVEL BEARINGS OF THE LID
- TEMPERATURE PROBE
- Note
- PRE-DEFINED PROGRAMS
- GRILLING TIMER
- AUTOMATIC SHUT-OFF
- TIPS FOR BEST RESULTS
- GENERAL GRILLING TEMPERATURE GUIDE
- GRILLING MEAT AND FISH
- How to Check the Doneness of Your Steaks
- GRILLING SANDWICHES
- BEFORE FIRST USE
- OPERATION
- PREPARATIONS
- SELECTING A PROGRAM
- POSITIONING THE LID
- ADJUSTING THE HEIGHT CONTROL FEATURE
- GRILLING YOUR FOOD
- SETTING THE GRILLING TIME
- CONTROLLING THE CORE TEMPERATURE
- AFTER USAGE
- DISASSEMBLING THE APPLIANCE
- SOLVING PROBLEMS
- ERROR MESSAGES OF THE APPLIANCE
- CARE AND CLEANING
- CLEANING THE APPLIANCE
- ASSEMBLING THE APPLIANCE
- STORAGE
- NOTES FOR DISPOSAL
- INFORMATION AND SERVICE
- WARRANTY
- HOUSEHOLD USE
- ACCESSORIES - DESIGN BBQ ADVANCED CONTROL
- Storage tray for probe
- Probe
- Drip tray
- Top grill plate - structured
- Bottom grill plate - flat
- GASTROBACK GmbH
Brand : Gastroback
Model : Design BBQ Advanced Control 42539
Category : Griddle