HRX 537C HY - Lawn mower Honda - Free user manual and instructions
Find the device manual for free HRX 537C HY Honda in PDF.


| Product type | Self-propelled lawn mower |
| Brand | Honda |
| Model | HRX 537C HY |
| Cutting width | 53 cm |
| Engine | 4-stroke, petrol |
| Displacement | 187 cm³ |
| Power | 3.6 kW (4.9 hp) |
| Cutting height | 20 to 90 mm, centrally adjustable |
| Cutting system | Mulching, rear or side discharge |
| Blade type | MicroCut 4-sided blade |
| Forward speed | Variable, up to 5 km/h |
| Grass collection bag capacity | 80 L, fill indicator |
| Weight (dry) | approx. 42 kg |
| Dimensions (L x W x H) | 1820 x 570 x 1040 mm |
| Fuel type | Unleaded petrol |
| Fuel tank capacity | 1.8 L |
| Engine oil type | 10W-30, capacity 0.5 L |
| Maintenance | Clean after each use, regular blade sharpening |
| Safety | Blade brake, automatic engine stop when driver is absent |
| Spare parts | Blades, filters, spark plugs, belts available at authorized dealer |
| Repairability index | Repairability index 8.2/10 |
| Warranty | 2 years |
| Manual available | French, English, German, etc. |
Frequently Asked Questions - HRX 537C HY Honda
User questions about HRX 537C HY Honda
0 question about this device. Answer the ones you know or ask your own.
Ask a new question about this device
Download the instructions for your Lawn mower in PDF format for free! Find your manual HRX 537C HY - Honda and take your electronic device back in hand. On this page are published all the documents necessary for the use of your device. HRX 537C HY by Honda.
USER MANUAL HRX 537C HY Honda
Thank you for purchasing a Honda lawnmower!
This manual covers the operation and maintenance of the Honda HRX537HYEA and HRX537HZEA lawnmowers.
We want to help you get the best results from your new mower and to operate it safely. This manual contains the information on how to do that; please read it carefully.
This manual should be considered a permanent part of the lawnmower and should remain with it if it is resold.
If you have a problem or questions concerning the mower, contact your supplying dealer.
We recommend that you read the warranty policy to fully understand your rights and responsibilities. The warranty policy is a separate document provided by your dealer.
Honda Power Equipment Mfg., Inc. reserves the right to make charges at any time without notice and without incurring any obligation.
No part of this publication may be reproduced without written permission.
SAFETY MESSAGES
Pay special attention to statements preceded by the following words:

DANGER
You WILL be KILLED or SERIOUSLY HURT if you don't follow instructions.

WARNING
You CAN be KILLED or SERIOUSLY HURT if you don't follow instructions.

CAUTION
You CAN be HURT if you don't follow instructions.
Each message tells you what the hazard is, what can happen, and what you can do to avoid or reduce injury.
DAMAGE PREVENTION MESSAGES
You will also see other important messages that are preceded by the following word:
NOTICE
Your lawnmower or other property can be damaged if you don't follow instructions.
The purpose of these messages is to help prevent damage to your lawnmower, other property, or the environment.

00X39VH7 V040
HONDA
OWNER'S MANUAL
(Original instructions)
HRX537HYEA • HRX537HZEA
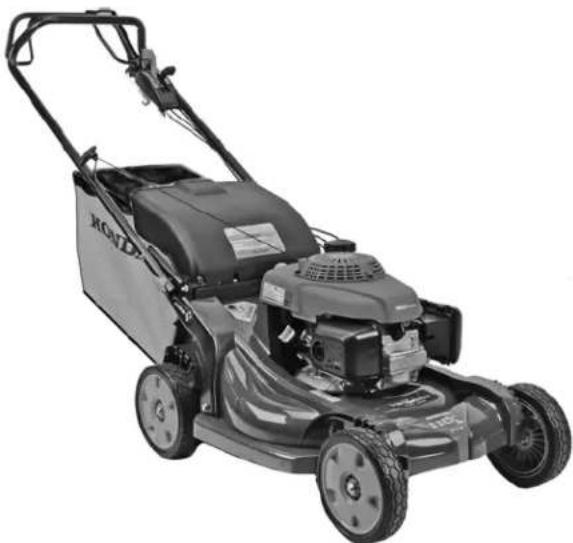
PEDESTRIAN CONTROLLED LAWNMOWER
natural_image
Black-and-white photo of a lawn mower with visible blades and wheels (no text or symbols)CONTENTS
INTRODUCTION....1 MAINTENANCE....13
SAFETY MESSAGES .... 1 The Importance of
SAFETY INSTRUCTIONS ..... 2 Maintenance ..... 13
Safety Label Location ..... 3 Maintenance Schedule ..... 13
Product Identification Plate . . . 3 Engine Maintenance . . . . . . 14
COMPONENT Control Cable
IDENTIFICATION....3 Adjustments....15
SET-UP 4 Cutting means Removal and
CONTROLS 4 Installation 16
GRASS CATCHER Cleaning and
RE-OPERATION CHECKS...5 Replacement....17
Engine Oil Level. 6 TRANSPORTING 17
Fuel 6 TRANSFORTHING 17 STORAGE 18
Mowing Precautions ..... 9
Starting the Engine 9 SPECIFICATIONS 20
Operating the Controls for Honda Warranty Conditions,
Mowing 10 EC Declaration of Conformity,
Stopping the Engine 11 Honda Distributor Locations
Safe Mowing Practices ..... 11 .... Last page
Mowing Tips....12
© 2004 – 2016 American Honda Motor Co., Inc.—All Rights Reserved
C4
HPE.2016.07
PRINTED IN U.S.A.
SAFETY INSTRUCTIONS
WARNING
To ensure safe operation –

- Honda lawnmowers are designed to give safe and dependable service if operated according to instructions. Read and understand the Owner's Manual before operating the mower. Failure to do so could result in personal injury or equipment damage.
- Read instructions carefully, and become familiar with controls and proper use of equipment.
- Use the lawnmower for the purpose it is intended for, that is mowing and collecting grass. Any other use could be dangerous or damage the equipment.
- Never allow children or people unfamiliar with these instructions to use the lawnmower. Local regulations may restrict the age of the operator.
-
Never mow when:
-
People, especially children, or pets are nearby.
- User is under medication or has swallowed substance known to affect judgment or reactions.
-
There is a risk of adverse weather such as lightning or a storm.
-
Keep in mind that the operator or user is responsible for injuries or hazards occurring to other people or their property.
- While mowing, always wear substantial footwear and long trousers. Do not operate the equipment when barefoot or wearing sandals.
- Thoroughly inspect the area where the equipment is to be used, and remove all objects which may be thrown by the machine (stones, branches, wires, bones, etc...).
-
WARNING - Petrol is highly flammable:
-
Store fuel in containers specifically designed for this purpose.
- Refuel outdoors only, before starting the engine, and do not smoke while refueling or handling fuel.
- Never remove the cap of the fuel tank or add petrol while the engine is running or when the engine is hot.
- If petrol is spilled, do not attempt to start the engine, but move the machine away from the area of spillage, and avoid creating any source of ignition until the petrol vapors have dissipated.
- Install fuel caps securely.
-
Before tipping the lawnmower to maintain the cutting means or drain oil, remove fuel from the tank.
-
Replace faulty mufflers.
- Before using, always visually inspect to see that the cutting means, cutting-means bolts, and cutting-means enclosure are not worn or damaged. Replace worn or damaged cutting means and cutting-means bolts in sets to preserve balance.
- Do not operate the engine in a confined space where dangerous carbon monoxide fumes can collect.
- Mow only in daylight or good artificial light.
- If there is a risk of adverse weather such as lightning or a storm, stop operation.
- Avoid operating the equipment in wet grass, where possible.
- While mowing, always keep the safety distance to the cutting means, which is provided by the handle length.
- Walk, never run. Do not let yourself be pulled by the lawnmower.
- Always be sure of your footing on slopes. Mow across the face of slopes, never up and down.
• Exercise extreme caution when changing direction on slopes. - Do not mow slopes of more than 20^ .
- Use extreme caution when pulling the lawnmower toward you.
-
Stop the cutting means if the lawnmower has to be tilted for transporting, when crossing surfaces other than grass, and when transporting the lawnmower to and from the area to be mowed.
-
Never operate the lawnmower with defective guards or shields, or without safety devices such as discharge guard and/or grass catcher.
- Do not change the engine governor setting or over-speed the engine.
- Disengage the cutting-means control and drive clutch control before starting the machine.
- Start the engine carefully according to the instructions and with feet well away from the cutting means.
- Do not tilt the lawnmower when starting the engine. Start the lawnmower on a level surface, free of high grass or obstacles.
- Keep hands and feet away from rotating parts. Do not start the engine when standing in front of the discharge opening.
- Never pick up or carry a lawnmower while the engine is running.
-
Stop the engine and disconnect the spark plug cap:
-
Before any operation under the cutting-means enclosure or the discharge chute.
– Before checking, cleaning, or working on the lawnmower. - After striking a foreign object. Inspect the lawnmower for damage and make repairs before restarting and operating the lawnmower.
- If lawnmower starts to vibrate abnormally, Check immediately the cause of the vibration and perform the necessary repair.
- Stop the engine in the following cases:
- Whenever you leave the lawnmower.
– Before refueling the lawnmower.
- Stop the cutting means in the following cases:
-
When installing or removing the grass catcher.
– Before adjusting the cutting height. -
Reduce the throttle setting during engine shut-down, and turn the fuel valve off at the conclusion of mowing.
- Using any attachments other than those recommended in this manual may cause damage to your lawnmower and such damage will not be covered by your guarantee.
- Keep all nuts, bolts, and screws tight to be sure the equipment is in safe working condition. Regular maintenance is an essential aid to user's safety and retaining a high level of performance.
- Never store the equipment with petrol in the tank inside a building where fumes may reach an open flame, spark or high temperature source.
- Allow the engine to cool before storing in any enclosure.
• To reduce the fire hazard, keep the lawnmower, especially the engine and silencer, the petrol storage area, and battery compartment (if applicable) free of grass, leaves, or excessive grease.
Do not leave container of grass cuttings in or near a building.
- If the fuel tank has to be drained, this should be done outdoors with a cold engine.
- Check the grass catcher frequently for wear or deterioration.
- Do not use the machine with worn or damaged parts.
Part must be replaced, not repaired. Replace worn or damaged parts with Honda genuine parts.
Cutting means must always must always bear the mark Honda and the reference number. Non equivalent quality parts may damage the machine and be prejudicial to your safety.
- Wear thick gloves when removing or installing the cutting means or when cleaning the cutting-means enclosure.
When tightening or loosening the cutting-means bolts, use a wooden block to prevent the cutting means from rotating. - Always make sure the correct balance of the cutting means when sharpening.
- Wear eye protection.
Disposal
To protect the environment, do not dispose of this product, battery, engine oil, etc. carelessly by leaving them in the waste. Observe the local laws and regulations or consult your authorized Honda dealer for disposal.
This label warns you of potential hazards that can cause serious injury. Carefully read the meaning. If the label comes off or becomes hard to read, contact your dealer for a replacement.
| Letter | Meaning |
| A,D | A D5 6 7 10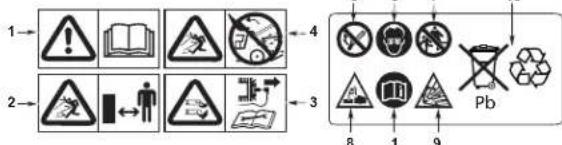 1. Read the owner's manual before using the mower.2. Risk of projections: Keep third persons away from the area during use.3. Risk of cuts. Rotating cutting means: Do not put hands or feet inside the cutting-means enclosure. Disconnect the spark plug cap before performing any operation of maintenance or repairs.4. Do not operate without either rear discharge guard or grass catcher in place.5. No sparks, flames, smoking.6. Wear eye protection.7. Keep out of reach of children.8. Corrosive substance - Can cause blindness or severe burns.9. Explosive gases - Shield eyes.10. Recycle - Contains lead. 1. Read the owner's manual before using the mower.2. Risk of projections: Keep third persons away from the area during use.3. Risk of cuts. Rotating cutting means: Do not put hands or feet inside the cutting-means enclosure. Disconnect the spark plug cap before performing any operation of maintenance or repairs.4. Do not operate without either rear discharge guard or grass catcher in place.5. No sparks, flames, smoking.6. Wear eye protection.7. Keep out of reach of children.8. Corrosive substance - Can cause blindness or severe burns.9. Explosive gases - Shield eyes.10. Recycle - Contains lead. |
| B | 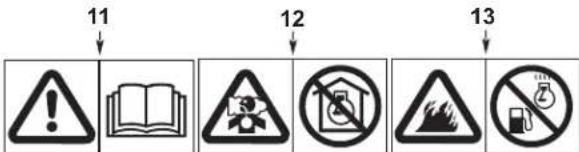 11. Read the owner's manual before using the mower.12. The engine emits toxic carbon monoxide. Do not run in an enclosed area.13. Petrol is highly flammable. Stop the engine before refueling. 11. Read the owner's manual before using the mower.12. The engine emits toxic carbon monoxide. Do not run in an enclosed area.13. Petrol is highly flammable. Stop the engine before refueling. |
PRODUCT IDENTIFICATION PLATE
| Letter Meaning | ||
| C | ||
| 1. Sound power level guaranteed according to directive 2000/14/EC2. Conformity mark according to EC directive3. Conformity mark optional4. Nominal power in kilowatts5. Maximum operating engine speed | 6. Year of manufacture7. Weight in kilograms8. Serial number9. Model10.Name and address of authorized representative11.Name and address of Manufacturer | |
| Name and address of manufacturer and authorized representative are written in the “EC Declaration of Conformity” CONTENT OUTLINE in this Owner’s Manual. | ||
Record the frame and engine serial numbers in the space below. you will need these numbers when ordering parts and when making technical or warranty inquires.
Frame serial number: ____ - ____
Engine serial number: ____ - ____
Date of purchase: ____ / ____ / ____
COMPONENT IDENTIFICATION
![[14] [12] [1] [2] [3] [5] [11] A [LABEL] [6] [10] [4] [9] C [LABEL] [7] [8] [13] D [LABEL] [21] [20] [19] [15] [16] [17] [18] B [LABEL] [9]](/content/2026/05/880387/images/4b12668442bc262a02d6853ef60415c5883372dc6e8a9028861e5d6a7dee8539.jpg)
| 1 | Handlebar 12 |
| 2 | Shift lever 13 Button |
| 3 | Throttle lever |
| 4 | Cutting-means enclosure |
| 5 | Rear discharge guard |
| 6 | Fuel tank cap |
| 7 | Muffler 17 Fuel valve |
| 8 | Oil filler cap 18 Air cleaner |
| 9 | Cutting height adjustment lever (4) |
| 10 | Grass catcher |
| 11 | Key switch (HZEA only) |
| Cutting-means control(Starts and stops the cutting means) | |
| 14 | Drive clutch control(Transmission control which drives the rear wheels) |
| 15 | Handlebar adjust knob (2) |
| 16 | Clip Director knob |
| 19 | Carburetor |
| 20 | Spark plug cap |
| 21 | Recoil starter |
SET-UP
UNPACKING
Remove all the cardboard from around the handlebar.
HANDLEBAR SETUP
- Turn the handlebar adjust knobs [1] 90 degrees into the unlock position (page 7).
- Move the handlebar into the mowing position so that the locating pins align with either the upper, middle, or lower holes on the handlebar mounting brackets.
- Turn the adjust knobs 90 degrees into the lock position and the pins will snap into the holes and lock into position.
![[1]](/content/2026/05/880387/images/c873b84c64a862e2bdb039159d8359bd6aa9ed9ae31f44fe0f1a39e1a00a8295.jpg)
BATTERY (HZEA TYPE)
The lawnmower has an internal charging system. Under normal mowing usage it is not necessary to charge or maintain the battery.
The mower is shipped with the ignition key in the parts bag. Install the key in the key switch.
GRASS CATCHER ASSEMBLY
- Slide the grass catcher frame [1] into the grass catcher [2] and install the plastic clips [3] as shown.
![[1] [2] HONDA [3]](/content/2026/05/880387/images/fff8fa4250a0e8852320874c5fff4262022ecef3fb5a03e7dc619e19001df2cb.jpg)
- Lift the cutting-means enclosure [4] and install the grass catcher.
![HONDA [4]](/content/2026/05/880387/images/b7ce35d762071f163b0e4638ce06c0b3d9a57ebdd6d76da321671fc53d719a64.jpg)
ENGINE OIL
The mower is shipped WITHOUT OIL in the engine.
Add enough SAE 10W-30 API service category SJ or later oil to bring the oil level between the upper limit [2] and lower limit [3] marks on the dipstick [1] as shown.
Refill amount: 0,35 \~ 0,40 L
Do not overfill the engine with oil. If the engine is overfilled, the excess oil may get transferred to the air cleaner housing and air filter.
![[1] [2] [3]](/content/2026/05/880387/images/feff7e4f1d463a66f9dff8267869ceaa2169d533cd97e9cfe84f95b5961bb6cc.jpg)
FUEL
Refer to page 4.
BEFORE USING YOUR LAWNMOWER
Before using the lawnmower, all mower operators must read the following chapters:
• SAFETY INSTRUCTIONS (page 2)
• CONTROLS (page 4)
• PRE-OPERATION CHECKS (page 5)
• OPERATION (page 9)
• MAINTENANCE SCHEDULE (page 13)
CONTROLS
FUEL VALVE
The fuel valve [1] opens and closes the connection between the fuel tank and the carburetor.
![OFF ON [1]](/content/2026/05/880387/images/030812349acf0a2a4121a29ceabc3a75b72b1380e1544326f135d55ba58277c9.jpg)
THROTTLE LEVER
The throttle lever [1] controls the following functions:
![[1]](/content/2026/05/880387/images/104083b415ccb06bc80a91bd48653b9956e664632ef4898a7f282c42f1e27ea7.jpg)
| FAST | For starting the engine and for mowing. | |
| SLOW | For idling the engine. | |
| STOP | For stopping the engine.(HZEA type; Turn the key switch OFF to stop the engine.) |
ENGINE SWITCH [1] (HZEA TYPE)
| ○ | OFF | Stops the engine. |
| I | ON | Running position (the key switch must be in the ON position to use the recoil starter). |
| START | Operates the electric starter. |
![[1] ELECTRIC START](/content/2026/05/880387/images/50bdbe1c39745cb48eb56731cc491e789886717dfcb8b8c74cce01108110eada.jpg)
CUTTING-MEANS CONTROL
The button [1] and cutting-means control lever [2] start and stop cutting means rotation.
![[2] [1]](/content/2026/05/880387/images/e82567d9df5f660bf1d32da324d421db592624bf5948c6b84030afcaee4c53b6.jpg)
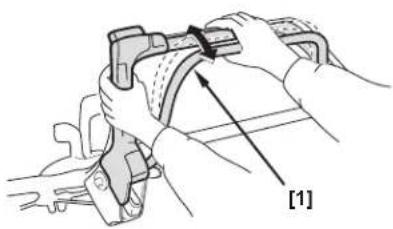
DRIVE CLUTCH CONTROL
The drive clutch control [1] engages and disengages the transmission.
natural_image
Mechanical assembly diagram showing hands assembling a component with a bracket and labeled part [1] (no text or symbols beyond label)SHIFT LEVER
The shift lever [1] selects and controls the mower's drive speed.
With the shift lever [1] all the way back [A] and the drive clutch control engaged, the mower will move slowly or not at all. Use a slow speed for mowing thick grass or maneuvering in small areas.
Use position [B] for maximum self-propelled speed in large, open areas, and for transport.
![[A] [1] [B]](/content/2026/05/880387/images/aefe48b8bb64a861c79b878683ef7ff0f43dd374f634088cc130d47376eef54b.jpg)
CUTTING HEIGHT ADJUSTMENT LEVERS
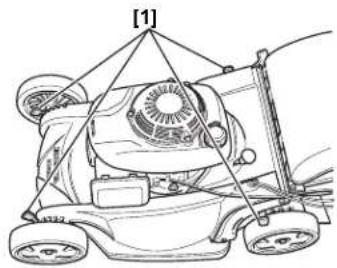
There are seven adjustment settings. The cutting height figures are approximate. The actual height of cut grass will vary with lawn and soil conditions.
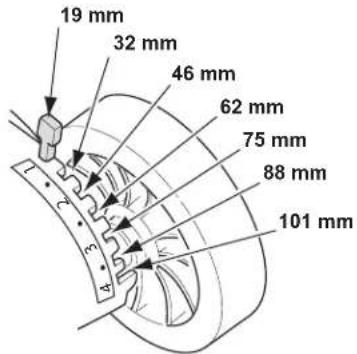
There is one adjustment lever [1] for each wheel.
natural_image
Line drawing of a lawn mower with visible blades and wheels (no text or symbols)CLIP DIRECTOR KNOB
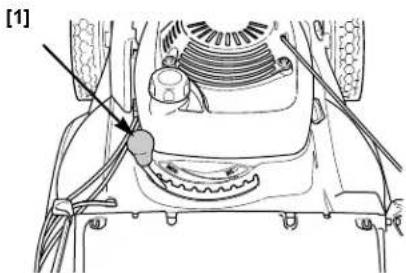
The Clip Director knob [1] controls grass catching, mulching, and rear discharge. The knob has ten adjustment positions.
natural_image
Technical diagram of a mechanical assembly with no visible text or symbolsBe sure to wear protective clothing. Long pants and eye protection can lower your risk of injury from thrown objects. Wear footwear that protects your feet and won't let you slip if you mow on slopes or uneven ground.
CHECK YOUR LAWN
For your safety and for the safety of others, always inspect the area before mowing.
Objects
Anything that can be picked up by the cutting means and thrown is a potential hazard to you and others. Look for things like stones, sticks, bones, and wire. Remove them from the mowing area.
People and Pets
People and animals near the mowing area can move into your path or into a position where they could be struck by thrown objects. Clear the area of people, especially children, and pets. Their safety is your responsibility.
Lawn
Check the length and condition of the grass, so that you will know what cutting height and mowing speed to use.
Avoid mowing wet grass. Not only will wet grass clog your mower deck and collect in clumps on the lawn, it also gives poor traction, increasing your risk of losing your footing.
CHECK YOUR MOWER
Cutting Means
- Move the throttle lever to the STOP position (page 4).
- Move the fuel valve to the OFF position (page 4).
- Disconnect the spark plug cap from the spark plug (page 14).
- Tilt the mower to the right so the fuel cap is up. This will help prevent fuel leakage,
motor oil seeping into the air filter, and hard starting.
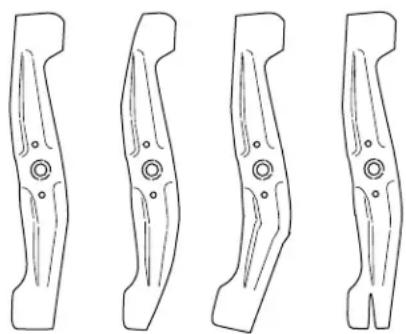
- Inspect the cutting means [1] for damage, cracks, and excessive wear, rust, or corrosion.
![[2] [1]](/content/2026/05/880387/images/55fd002c0a55d5689e65d1a51e130824aeb276adb0c22319a28ff097073776cc.jpg)
natural_image
Four identical line drawings of a blade with circular holes, shown from different angles (no text or symbols)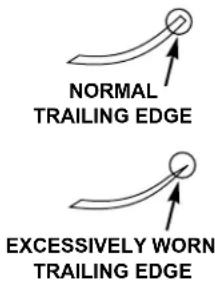
NORMAL WORN BENT CRACKED
WARNING
A worn, cracked, or damaged cutting means can break, and pieces of the damaged cutting means can become dangerous projectiles.
Thrown objects can cause serious injury.
Inspect the cutting means regularly, and do not operate the mower with a worn or damaged cutting means.
A dull cutting means can be sharpened, but a cutting means that is worn out, bent, cracked, or otherwise damaged must be replaced. A worn or damaged cutting means can break, causing cutting means pieces to be thrown from the mower.
When a cutting means needs sharpening or replacement, take the lawnmower to an authorized Honda dealer. Or, if you have a torque wrench, you can remove and install the cutting means yourself.
Check that the cutting means bolts [2] are tight (page 17).
Engine Oil Level
Check the engine oil level with the engine stopped and the mower on a level surface.
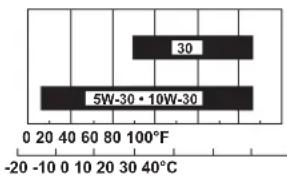
Use 4-stroke motor oil that meets or exceeds the requirements for API service classification SJ or later. Always check the API service label on the oil container to be sure it includes the letters SJ or later.
SAE 10W-30 is recommended for general use. Other viscosities shown in the chart may be used when the average temperature in your area is within the indicated range.
NOTICE
- Running the engine with a low oil level can cause engine damage.
-
Using nondetergent oil can shorten the engine's service life, and using 2-stroke oil can damage the engine.
-
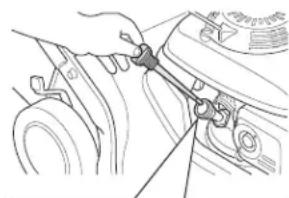
Remove the oil filler cap/dipstick [1], and wipe the dipstick clean.
- Insert the dipstick into the filler neck. Do not screw it down. Remove the dipstick and check the oil level.
- If the oil level is near the low level mark [3], add the recommended oil to bring the level up to the high limit mark [2]. Do not overfill.
- Install and tighten the filler cap/dipstick [1] securely.
natural_image
Line drawing of a mechanical component with a tool inserted, showing no text or symbols![[1] [2] [3]](/content/2026/05/880387/images/3ef5b76002bbc968cd3f0d0387d6136f6c8f92064307ad359c5180f60d67729e.jpg)
Fuel
This engine is certified to operate on unleaded petrol with a research octane rating of 91 or higher.
We recommend refueling after each use to minimize the air present in the fuel tank.
Refuel in a well-ventilated area before starting the engine. If the engine has been running, allow it to cool. Never refuel the mower inside a building where petrol fumes may reach flames or sparks.
You may use regular unleaded petrol containing no more than 10% ethanol (E10) or 5% methanol by volume. In addition, methanol must contain cosolvents and corrosion inhibitors. Use of fuels with content of ethanol or methanol greater than shown above may cause starting and/or performance problems. It may also damage metal, rubber, and plastic parts of the fuel system. In addition, ethanol is hygroscopic, which means it attracts and retains water in the fuel system. Engine damage or performance problems that result from using a fuel with percentages of ethanol or methanol greater than shown above are not covered by warranty.
If your equipment will be used on an infrequent or intermittent basis, (more than 4 weeks before next use) please refer to the Fuel section of the STORAGE chapter (page 18) for additional information regarding fuel deterioration.
WARNING
Petrol is highly flammable and explosive.
You can be burned or seriously injured when handling fuel.
- Stop the engine and allow to cool.
- Keep heat, sparks, and flame away.
- Handle fuel only outdoors.
• Wipe up spills immediately.
Never use stale or contaminated petrol or an oil/petrol mixture. Avoid getting dirt or water in the fuel tank.
NOTICE
Fuel can damage paint and plastic. Be careful not to spill fuel when filling your fuel tank. Damage caused by spilled fuel is not covered under warranty.
Remove the fuel tank cap and check the fuel level. Refill the tank if the fuel level is low. Refuel carefully to avoid spilling fuel. Do not overfill; there should be no fuel in the filler neck [1].
![[1]](/content/2026/05/880387/images/5c4163ffa8862bb17ee6858c21ccf33c1ae185ab40633e78a7410d3687ff7aa5.jpg)
After refueling, tighten the fuel tank cap securely.
Move the mower at least 3 meters away from the fueling source and site before starting the engine.
Fuel Storage Container
Store your petrol in a clean, plastic, sealed container approved for fuel storage. Close the vent (if equipped) when not in use, and store the container away from direct sunlight. If it will take more than 3 months to use the fuel in the container, we suggest adding a fuel stabilizer to the fuel when you fill the container.
Air Cleaner Inspection
Remove cover [1]. Make sure the filter [2] is clean and in good condition. A dirty air filter will restrict air flow to the carburetor, reducing engine performance. Refer to page 14 for air cleaner service.
![[1] [2]](/content/2026/05/880387/images/12d2e95516c4c7983b321145bddbd03a4ed8752c7111bfd7016d3a142e9c7b91.jpg)
Handlebar Height Adjustment
Handlebar height can be adjusted to three positions: high [1], middle [2], and low [3].
- Turn the handlebar adjust knobs [5] 90 degrees into the unlock [7] position.
- Move the handlebar [4] up or down, so the locating pins align with either the higher, middle, or lower holes on the handlebar mounting brackets [6].
- Turn the adjust knobs 90 degrees into the lock position [8] and the pins will snap into the holes and lock into position.
![[1] [2] [3] [4] [5] [6] [7] [8]](/content/2026/05/880387/images/6a8c4d631fdabd871b88294bc3d6e9b53b3872701f9e85f65febccc18591ff66.jpg)
Grass Catcher
A lawnmower works like a vacuum cleaner; it blows air through the catcher, which traps the grass clippings. Always empty the grass catcher before it becomes filled to the limit of its capacity. Catching performance will diminish after the catcher becomes about 90% filled. Also, the catcher is easier to empty when it is not packed full.
Inspection
During normal use, the grass catcher material is subject to deterioration and wear.
NOTICE
Frequently inspect the grass catcher for tears, holes, and excessive wear. Check for necessary replacement. Make sure the new catcher meets the original specifications.
If the grass catcher needs replacement, you can remove and install a catcher yourself (page 17).
Installation
- Raise the cutting-means enclosure [1], and use the grass catcher handle [3] to hook the grass catcher [2] onto the mower deck as shown.
- Release the cutting-means enclosure to secure the grass catcher.
Removal
- Raise the cutting-means enclosure, grasp the grass catcher handle, and remove the grass catcher.
- Release the cutting-means enclosure.
- When the grass catcher is clear of the cutting-means enclosure, you can lift it through the handlebar opening, or you can remove it to the rear of the mower below the handlebar.
Cutting Height
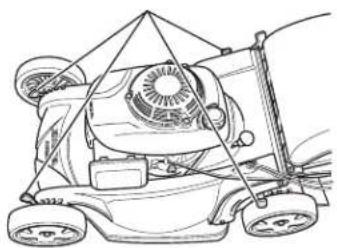
Check the mower deck cutting height settings, and be sure that all four adjustment levers [1] are set to the same cutting height position.
![[2] [3] [1] HONDA](/content/2026/05/880387/images/06d33cd85263f7c9ecd027ad126e12e73aa994797a47261c779ed4d6dab102f2.jpg)
[1]
natural_image
Line drawing of a lawn mower with visible blades and wheels (no text or symbols)To adjust cutting height, pull each adjustment lever [1] toward the wheel, and move it into another notch.
If you are not sure what cutting height to select, start with a high setting and check the appearance of the lawn after mowing a small area. Then readjust cutting height if necessary.
![[1] 19 mm 32 mm 46 mm 62 mm 75 mm 88 mm 101 mm](/content/2026/05/880387/images/383292aa673a571a92e221ebcdce4d0e433ae7e534e1e2c8c832694c639878bb.jpg)
Rear Shield
During normal use the rear shield [1] is subject to deterioration and wear. Remove the grass catcher and raise the cutting-means enclosure [2] to check the rear shield for cracks or tears. If the rear shield is excessively worn, have it replaced by your authorized Honda servicing dealer.
![[2] [1]](/content/2026/05/880387/images/4e4a3c580943e87dd7d8de77a446a72600b754a1106a1cf0f4adceed7dce7c62.jpg)
Clip Director
Clip Director Knob Adjustment
Adjust the Clip Director knob [1] in any one of the ten positions to achieve the desired mowing results.
To adjust the Clip Director knob, pull the knob downward and towards the rear of the mower. The knob adjusts a sliding door [2] from the fully open BAG position to the fully closed MULCH position (see the following page).
![[1] [2] (fully closed) CUTTING- MEANS ENCLOSURE](/content/2026/05/880387/images/f2b6f11bc1a68d2f280103b99668f76f3df6be868abcd496ca53c54dba5998b1.jpg)
If a high resistance is noticed when moving the Clip Director knob from side-to-side, excessive grass may have built up on top of the sliding door.
Some grass accumulation in the discharge chute is normal when the Clip Director is fully closed. To remove this grass, close the cutting-means enclosure, fully open the Clip Director, start the engine, and engage the cutting-means control lever several times.
Important Safety Precaution
Always turn the engine off and disconnect the spark plug cap before lifting the cutting-means enclosure to view or clean around the sliding door. This will prevent contact with the rotating cutting means and prevent objects from being thrown into the discharge area.
Sliding Door Position
The sliding door [2] can be positioned to produce different mowing results. If the preferred sliding door position is unknown, install a grass catcher and begin mowing with the Clip Director knob [1] all the way to the BAG position. Check the appearance of the lawn. As the knob is moved towards the MULCH position, more grass will be
recycled back into the lawn. Adjust the Clip Director knob until the desired result is achieved.
GRASS CATCHING OR REAR
DISCHARGE AND SOME MULCHING
![[1] DISCHARGE AND SOME MULCHING](/content/2026/05/880387/images/00e8c01a96ce38b0158a598bc462e47c08a08dd95e7c31895d1b65f34cdfe785.jpg)
[2] (50% open)
FULL GRASS CATCHING OR REAR DISCHARGE
![[1] (BAG position)](/content/2026/05/880387/images/efe2d424d25e0acc2755a41e68d5f0f91a0cfd79c9182ca88c9c8e075285457b.jpg)
[2] (fully open)
FULL MULCHING
![[1] (MULCH position)](/content/2026/05/880387/images/9f15d2d1cd95c4cad830401e8e80c8d0dda09f5b2bb176b35b6699e199451e1c.jpg)
[2] (fully closed)
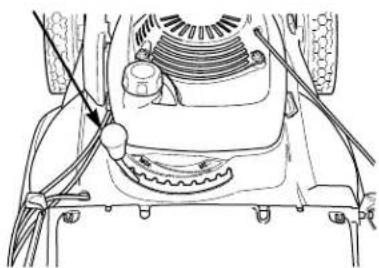
Rear Discharge
To discharge clippings to the rear, remove the grass catcher and position the Clip Director knob [1] in the BAG range.
[1]
natural_image
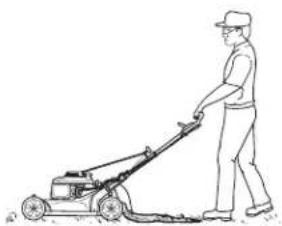
Technical line drawing of a mechanical component with no visible text or symbolsMaximum rear discharge will occur when the Clip Director knob is all the way to the left (BAG) position. As the Clip Director knob is moved toward the right (MULCH) position, less grass will be discharged though the rear cutting-means enclosure.
natural_image
Line drawing of a person using a lawn mower (no text or symbols)OPERATION
MOWING PRECAUTIONS
Before operating the mower for the first time, please review SAFETY INSTRUCTIONS (page 2) and PRE-OPERATION CHECKS (page 5).
Even if you have operated other mowers, take the time to become familiar with how this mower works, and practice in a safe area until you build up your skills.
For your safety, do not start or operate the engine in an enclosed area such as a garage. Your mower's exhaust contains poisonous carbon monoxide gas that can collect rapidly in an enclosed area and cause illness or death.
FREQUENCY OF USE
If your equipment will be used on an infrequent or intermittent basis, (more than 4 weeks before next use) please refer to the Fuel section of the STORAGE chapter (page 18) for additional information regarding fuel deterioration.
STARTING THE ENGINE
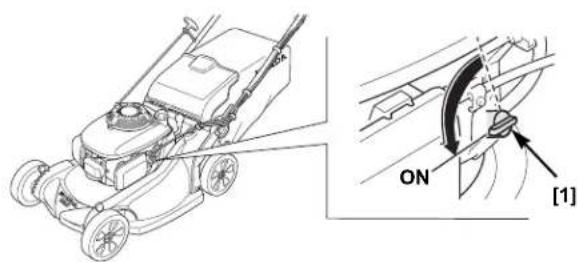
- Turn the fuel valve [1] to the ON position.
- Move the throttle lever [1] to the fast (♂) position.
![[1]](/content/2026/05/880387/images/01d597540c24264ecfd8e41275c42afdfee9fe89aea96e1863ec5c6757d36b29.jpg)
- HYEA type:
Pull the starter grip [1] lightly until you feel resistance, then pull briskly. Return the starter grip gently.
To keep the cutting means from turning and to prevent the mower from moving forward, always release the cutting-means control lever [2] and drive clutch control [3] when you pull the starter.
![[2] [3] [1] HONZ](/content/2026/05/880387/images/7452df1306a00db3b87e2388723497de45cb02833cd2cac73c70fca4a5af24bb.jpg)
HZEA electric start type:
Turn the starter key switch to the START (☐) position. Let the key return to the ON (I) position when the engine starts.
The starter should not be cranked for more than 5 seconds at a time. If the engine fails to start, release the switch and wait 10 seconds before operating the starter again.
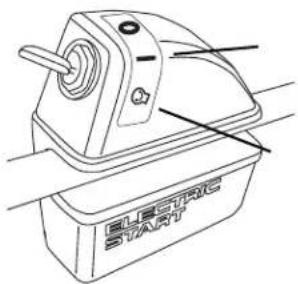
If the battery does not have sufficient charge to start the engine, possibly due to a long storage period, use the recoil starter to start the engine for at least one mowing session. The battery should have sufficient charge after one mowing session (approximately 1 hr).
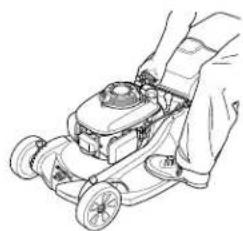
HZEA manual start:
Turn the starter key switch ON. The engine switch must be in the ON (I) position to start the engine with the recoil starter.
Move the throttle lever to the FAST (💡) position.
natural_image
Line drawing of a hand operating a small motor on wheels (no text or symbols)Place your foot on the mower deck step. Pull the starter grip lightly until you feel resistance, then pull briskly. Return the starter grip gently.
- Put the throttle lever [1] in the FAST (↔) position to mow or to the SLOW (↔) position to idle.
To ensure easy restarting and maximum performance from the Auto Choke System, start mowing as soon as the engine starts and allow the engine to run for at least three minutes before stopping the engine.
![[1]](/content/2026/05/880387/images/c1d2106432468349b26d20edaab48a7c8bda555b316661bdbb12e34f87bc5ffa.jpg)
High Altitude Operation
At high altitude, the standard carburetor air-fuel mixture will be too rich. Performance will decrease, and fuel consumption will increase. A very rich mixture will also foul the spark plug and cause hard starting.
High altitude performance can be improved by specific modifications to the carburetor. If you always operate your mower at altitudes above 1,500 meters, have a Honda dealer perform this carburetor modification.
Even with carburetor modification, engine power will decrease about 3.5% for each 300 meter increase in altitude. The effect of altitude on power will be greater than this if no carburetor modification is made.
NOTICE
When the carburetor has been modified for high altitude operation, the air-fuel mixture will be too lean for low altitude use. Operation at altitudes below 1,500 meters with a modified carburetor may cause the engine to overheat and result in serious engine damage. For use at low altitudes, have your authorized Honda dealer return the carburetor to original factory specifications.
OPERATING THE CONTROLS FOR MOWING
Throttle Lever
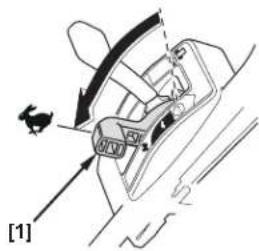
For best cut quality, always mow with the throttle lever [1] in the FAST (♂) position. When the cutting means rotates at the preset fast speed, it creates a strong fan action that lifts and cuts grass more efficiently.
Do not try to increase the preset engine speed; the cutting means could fracture and come apart.
natural_image
Diagram of a car interior showing steering wheel and dashboard (no text or symbols)Cutting-means Control Lever
To start cutting means rotation, press the yellow button [1] on top of the cutting-means control lever [2], then push the lever forward and hold it against the handlebar.
Release the cutting-means control lever [2] to stop the cutting means.
![[2] [1]](/content/2026/05/880387/images/d56ce307f81ac1a5d60525f5532bf9e93bedfcfa57447816ce86704817162ef5.jpg)
Operate the cutting-means control lever with a quick and complete motion, so the
cutting-means control is always either fully engaged or disengaged. This will help to prevent stalling the engine, and it will help prevent damage to the cutting-means control mechanism.
Drive Clutch Control
Push the drive clutch control [1] forward to propel the mower forward.
For self-propelled mowing, press the yellow button [2] on top of the cutting-means control lever [3], push the cutting-means control lever forward to the handlebar, and then push the drive clutch control [1] forward.
![[2] [3] [1]](/content/2026/05/880387/images/612ddde0ad2ca48a977389b1cbedd3b49b66e314638c71c015630e6a193957f5.jpg)
Release the drive clutch control [1] to stop the mower's forward movement.
You can control mower speed with the drive clutch control [1]. The mower will move gradually faster as you push the lever forward. If you push the lever all the way up to the handlebar, the mower will move at the speed determined by the shift lever setting.
Shift Lever
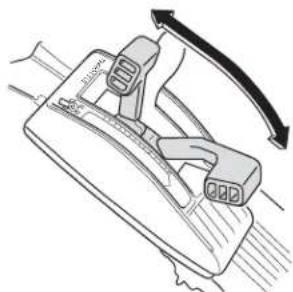
Use the shift lever to select the forward speed at which you wish to mow.
Do not use the throttle lever to adjust your forward speed. The throttle lever must remain in the fast position for good mowing performance. Otherwise, cut quality suffers.
natural_image
Line drawing of a mechanical device with directional arrows indicating motion (no text or symbols)Use the lower speed range for mulching and catching, the higher speed range for transporting.
With the shift lever all the way back and the drive clutch control engaged, the mower will move slowly or not at all.
STOPPING THE ENGINE
- Release the drive clutch control [1] and cutting-means control lever [2].
![[2] [1]](/content/2026/05/880387/images/e9579b11ccdd15e8d30bce4552496dcc063896dcb9024fb35d84e95968e12c9a.jpg)
- HYEA type: Move the throttle lever [1] to the STOP ( ) position to stop the engine.
![[1] HYEA TYPE](/content/2026/05/880387/images/309e56edd81c83a0aac6853d2e690d2145528663592639fceda295e89916ff99.jpg)
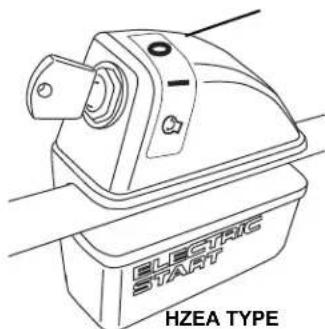
HZEA type: Move the throttle lever to the STOP position and then turn the key switch to the OFF (O) position.
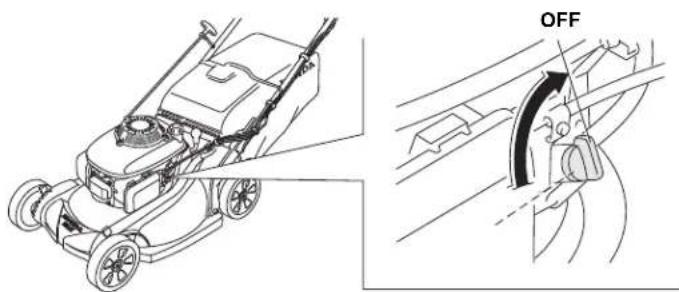
- When the mower is not in use, turn the fuel valve to the OFF position.
natural_image
Technical line drawing of a lawn mower with side view showing OFF button (no text or symbols)- If your equipment will not be used for 3 to 4 weeks, we recommend running the engine's carburetor out of fuel. You can do this by leaving the fuel valve OFF, restarting the engine and running it out of fuel. See "Storage" on page 18 for periods of inactivity that exceed 4 weeks.
SAFE MOWING PRACTICES
For your safety, keep all four wheels on the ground, and be careful to avoid losing your footing and your control of the mower. Keep a firm grip on the handlebar, and walk, never run, with the mower. Be very careful when mowing uneven or rough ground.
If stuck, do not kick or shove the mower with your foot. Use the handlebar to control the mower.
DANGER
The cutting means are sharp and spin at high speed.
If you come in contact with a spinning cutting means, it will cut you severely and can amputate fingers and toes.
- Wear protective footwear.
- Keep your hands and feet away from the mower deck while the engine is running.
- Stop the engine before performing any adjustment, inspection, or maintenance.
Stability
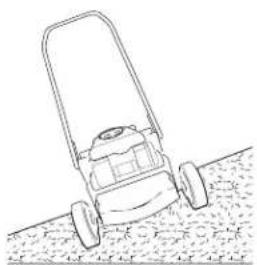
Mow across slopes, not up and down. Avoid steep slopes (more than 20°), and be careful when changing direction. Mowing on a slope when the grass is damp or wet could cause you to slip, fall, and lose control of the mower.
Obstacles
Use the side of the mower to cut close to large obstacles, such as fences or walls.
natural_image
Line drawing of a lawn mower on a textured ground surface (no text or symbols)Release the drive clutch control to disengage the drive when mowing around trees and other obstacles. Push the mower around obstacles for better directional control. Be careful when mowing over obstacles embedded in the lawn, such as sprinkler heads, paving, edging, etc. Avoid anything that sticks up above the surface of the lawn.
If the cutting means hits something, or if the mower starts to vibrate, stop the engine immediately and check for damage. Striking objects may damage the cutting means, bend the crankshaft, and/or break the mower deck or other components. Vibration usually indicates serious trouble.
WARNING
A worn, cracked, or damaged cutting means can break, and pieces of the damaged cutting means can become dangerous projectiles.
Thrown objects can cause serious injury.
Inspect the cutting means regularly, and do not operate the mower with a worn or damaged cutting means.
The warranty does not cover parts damaged by accident or collision.
Gravel and Loose Objects
Gravel, loose stones, and landscaping material can be picked up by the mower and thrown many feet with enough force to cause serious personal injury and/or property damage. The best way to prevent potential injury from thrown objects is to release the cutting-means control lever to stop the cutting means before reaching areas with gravel, loose stones, or landscaping material.
MOWING TIPS
When to Mow
Most grasses should be mowed when they have grown 12 \~ 25 mm above their recommended height.
More frequent mowing is required for mulching than for catching. For best results, you may need to mow the lawn twice a week during the growing season.
Cutting Height
Consult a local nursery or lawn and garden center for cutting height recommendations and advice about specific types of grasses and growing conditions in your area.
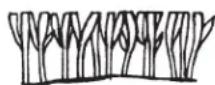
LONG ENOUGH
If you look closely, you'll see that most grass has stems and leaves. If you cut off the leaves, you'll scalp the lawn. Let the grass recover between mowings. Your mower will work better, and your lawn will look better.
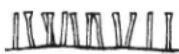
TOO SHORT
If your grass gets too tall, cut it once at the highest cutting height setting, and then mow again in 2 or 3 days. Don't take off more than one third of total grass height in any one mowing, or brown patches may develop.
Cutting height adjustment levers are explained in the CONTROLS chapter (page 4).
Cutting Width
For an even lawn finish, overlap each mowing swath by a few centimeters. If the grass is very tall or thick, use more overlap and a narrower mowing swath.
Cutting Means Speed
The cutting means must spin very fast to cut properly. Always use the fast throttle setting, and keep the engine running at maximum speed.
If engine speed drops, it could mean the engine is being overloaded by the cutting means trying to cut too much grass. Mow a narrower swath, move the mower slower, or raise the cutting height.
Cutting Means Sharpness
A sharp cutting means cuts cleanly. A dull cutting means tears the grass, leaving shredded ends that turn brown. When your cutting means doesn't cut cleanly anymore, have it sharpened or replaced.
Dry Grass
If the ground is too dry, mowing will stir up a lot of dust. Besides being unpleasant to work in, too much dust will clog the carburetor air filter.
If dust is a problem, water your lawn the day before mowing. Mow when the grass is dry to your touch, but the soil is still moist.
Wet Grass
Wet grass is slippery and can make you lose your footing. Also, wet grass clippings will clog the mower deck and collect in clumps on the lawn. Always wait for wet grass to dry before mowing.
Fallen Leaves
Your mower can be used to pick up fallen leaves for disposal. If using the mower to catch large amounts of fallen leaves, and not for mowing, set the cutting height adjustment levers so the front of the mower deck is one or two settings higher than the rear. To start, position the Clip Director knob in the #9 position (not quite full mulching). This setting will allow the leaves to be recirculated and recut until the particles are small enough to pass though the sliding door opening and into the grass catcher.
Depending on the size, type, and water content of the leaves, it may be necessary to open the sliding door to allow for best catching results. Using the sliding door correctly will allow better grass catcher filling, resulting in less grass catcher emptying. Be sure there are no obstacles, including rocks, hidden under the leaves.
If you want to mulch fallen leaves into your lawn, don't let the leaf cover get too deep before you begin. For best results, start mulching while grass still shows through the leaf cover. Position the Clip Director knob in the MULCH position. In places where fallen leaves completely cover the grass, remove the leaves by raking, or use the grass catcher so your mower can pick them up for disposal.
Clogged Cutting-means Enclosure
Before clearing a clogged cutting-means enclosure, stop the engine and turn the fuel valve to the OFF position. With the spark plug cap disconnected, tilt the mower so the air cleaner side is up.
Clear a clogged cutting-means enclosure with a stick, not your hands.
Mowing Patterns
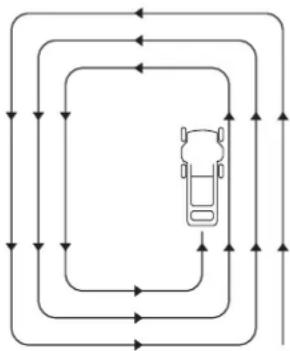
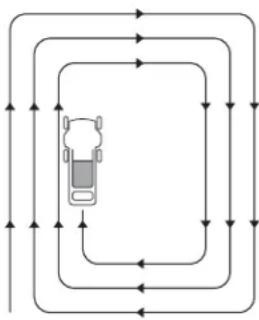
Your Honda mower will work most efficiently if you use the following mowing patterns as much as possible. Mower deck and equipment design, and the direction in which the cutting means rotate, cause these mowing patterns to give the best results.
Mulching
Use a counterclockwise mowing pattern when the Clip Director knob is in the full MULCH position. If the lawn has an irregular shape, or many obstacles, divide it into sections where you can use counterclockwise mowing patterns.
flowchart
graph TD
    A["Top Left Arrow"] --> B["Top Right Arrow"]
    B --> C["Bottom Left Arrow"]
    C --> D["Bottom Right Arrow"]
    D --> E["Bottom Left Arrow"]
    E --> F["Bottom Right Arrow"]
    F --> G["Bottom Left Arrow"]
    G --> H["Bottom Right Arrow"]
    H --> I["Bottom Left Arrow"]
    I --> J["Bottom Right Arrow"]
    J --> K["Bottom Left Arrow"]
    K --> L["Bottom Right Arrow"]
    L --> M["Bottom Left Arrow"]
    M --> N["Bottom Right Arrow"]
    N --> O["Bottom Left Arrow"]
    O --> P["Bottom Right Arrow"]
    P --> Q["Bottom Left Arrow"]
    Q --> R["Bottom Right Arrow"]
    R --> S["Bottom Left Arrow"]
MULCHING PATTERN
Catching
Use a clockwise mowing pattern. This will give the best Clip Director and catching performance, leaving the least amount of clippings on the lawn.
flowchart
graph TD
    A["Top Left Side"] --> B["Top Right Side"]
    B --> C["Bottom Left Side"]
    C --> D["Bottom Right Side"]
    D --> E["Bottom Right Side"]
    E --> F["Bottom Left Side"]
    F --> G["Top Left Side"]
    G --> H["Top Right Side"]
    H --> I["Top Right Side"]
    I --> J["Top Left Side"]
    J --> K["Top Right Side"]
    K --> L["Bottom Left Side"]
    L --> M["Bottom Right Side"]
    M --> N["Bottom Right Side"]
    N --> O["Bottom Left Side"]
    O --> P["Top Left Side"]
    P --> Q["Top Right Side"]
    Q --> R["Top Right Side"]
    R --> S["Bottom Right Side"]
    S --> T["Bottom Left Side"]
    T --> U["Top Right Side"]
    U --> V["Top Left Side"]
CATCHING & REAR-DISCHARGE PATTERN
Rear Discharge Mowing
Remove the grass catcher and close the cutting-means enclosure. Adjust the Clip Director knob to the desired setting and begin mowing in a clockwise mowing pattern. If the lawn has an irregular shape, or many obstacles, divide it into sections.
MAINTENANCE
THE IMPORTANCE OF MAINTENANCE
Good maintenance is essential for safe, economical, and trouble-free operation. It will also help reduce air pollution.
To help you properly care for your mower, the following pages include a maintenance schedule, routine inspection procedures, and simple maintenance procedures using basic hand tools. Other service tasks that are more difficult, or require special tools, are best handled by professionals and are normally performed by a Honda technician or other qualified mechanic.
The maintenance schedule applies to normal operating conditions. If you operate your mower under unusual conditions, consult an authorized Honda dealer for recommendations applicable to your individual needs and use.
Remember that your Honda dealer knows your mower best and is fully equipped to maintain and repair it.
To ensure the best quality and reliability, use only new, Honda Genuine parts or their equivalents for repair and replacement.
WARNING
Improper maintenance, or failure to correct a problem before operation, can cause a malfunction in which you can be seriously hurt or killed.
Always follow the inspection and maintenance recommendations and schedules in this owner's manual.
Maintenance safety
Some of the most important safety precautions follow. However, we cannot warn you of every conceivable hazard that can arise in performing maintenance. Only you can decide whether or not you should perform a given task.
WARNING
Failure to properly follow maintenance instructions and precautions can cause you to be seriously hurt or killed.
Always follow the procedures and precautions in this owner's manual.
Safety Precautions
- Make sure the engine is off before you begin any maintenance or repairs. This will eliminate several potential hazards:
– Carbon monoxide poisoning from engine exhaust.
Be sure there is adequate ventilation whenever you operate the engine.
- Burns from hot parts.
Let the engine and exhaust system cool before touching.
– Injury from moving parts.
Do not run the engine unless instructed to do so.
- Read the instructions before you begin, and make sure you have the tools and skills required.
- To reduce the possibility of fire or explosion, be careful when working around petrol. Use only a nonflammable solvent, not petrol, to clean parts. Keep cigarettes, sparks, and flames away from all fuel-related parts.
MAINTENANCE SCHEDULE
Perform at every indicated month/year or operating hour interval, whichever comes first.
| Regular Service Period | Item Page | |
| Before each use | Check: Grass catcherCheck: Cutting meansCheck: Operation of the cutting-means controlCheck: Engine oil levelCheck: Air filterCheck: Rear shieldCheck: Cutting-means bolt torque | page 4page 6page 6page 6page 7page 8page 16 |
| First month or 5 hours | Change: Engine oil page 14 | |
| First 25 hours | Clean: Air filter ^1 Adjust: Cutting-means control cable ^2 Adjust: Drive clutch cable ^2 Adjust: Throttle cable ^2 | page 14 |
| Every 6 months or 50 hours | Change: Engine oil ^1 Clean: Air filter ^1 | page 14page 14 |
| Every year or 100 hours | 6 month items above plus:Check-adjust: Spark plugClean: Spark arrester ^3 (if equipped)Check: Operation of the cutting-means controlGrease: Pinion gears ^2 Adjust: Throttle cable ^2 Adjust: Drive clutch cable ^2 Adjust: Valve clearance ^2 Adjust: Idle speed ^2 Clean: Fuel tank ^2 | page 14page 15page 6 |
| Every 2 years or 150 hours | Yearly items above plus:Replace: Air filterReplace: Spark plugInspect-grease: Rear wheel adjuster bushing ^2 | page 14page 14 |
| Every 2 years | Check: Fuel lines replace if necessary ^2 |
- Service more frequently when used in dusty areas.
- These items should be serviced by an authorized Honda servicing dealer, unless you have the proper tools and are mechanically proficient. Refer to the Honda shop manual for service procedures.
- In Europe and other countries where machinery directive 2006/42/EC is enforced, this cleaning should be done by your servicing dealer.
Failure to follow this maintenance schedule could result in non-warrantable failures.
ENGINE MAINTENANCE
Engine Oil Change
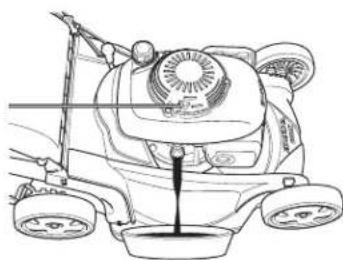
Drain the oil while the engine is warm. Warm oil drains quickly and completely.
-
Put the throttle lever in the STOP position and turn the fuel valve OFF. This will reduce the possibility of fuel leakage (page 4).
-
Wipe the oil filler area clean, and then remove the oil filler cap/dipstick.
-
Place a suitable container next to the mower to catch the used oil, and then tilt the mower on its right side. The used oil will drain through the filler neck. Allow the oil to drain completely.
Please dispose of used motor oil and the containers in a manner that is compatible with the environment. We
natural_image
Line drawing of a car with wheels and a water pump (no text or symbols)suggest you take it in a sealed container to your local recycling center or service station for reclamation. Do not throw it in the trash, pour it on the ground or pour it down a drain.
- Fill with the recommended oil (page 6).
Refill amount: 0.35 \~ 0.40 L
Do not overfill. Measure the oil level as shown.
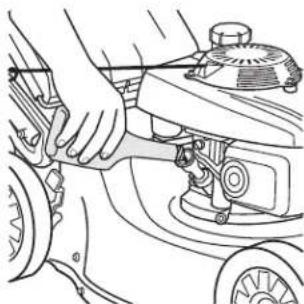
- After changing the engine oil and before starting the engine, check the oil level with the mower on a level surface:
natural_image
Line drawing of a hand operating a car brake system with no visible text or symbolsa. Remove the filler cap/dipstick [1].
b. Wipe the dipstick clean.
c. Insert and remove the dipstick without screwing it into the filler neck. Check the oil level shown on the dipstick.
d. If the oil level is below the low level mark [3], add oil to reach the high limit mark [2] on the dipstick. Do not overfill. If the engine is overfilled, the excess oil may get transferred to the air cleaner housing and air cleaner filter.
natural_image
Line drawing of a hand adjusting a mechanical component with no visible text or symbols![[1] [2] [3]](/content/2026/05/880387/images/f13abe4010b1912dd7cce29e6164227bec3b1f897886e954f9cf59c5fd1ee0c7.jpg)
NOTICE
Running the engine with a low oil level can cause engine damage.
e. Screw in the filler cap/dipstick securely.
Air Cleaner Service
A properly maintained air filter will help prevent dirt from entering your engine. Dirt entering the carburetor can be drawn into small passages in the carburetor and cause premature engine wear. These small passages can become blocked, causing starting or running problems. Always use an air filter specified for your engine to ensure it seals and performs as designed. You will need to clean the filter more frequently if you operate the engine in very dusty conditions.
NOTICE
Operating the engine without an air filter, or with a damaged filter, will allow dirt to enter the engine, causing rapid engine wear. This type of damage is not covered by the warranty.
- Press down on the air cleaner cover [1] tabs, and then remove the cover.
- Remove the filter [2] from the air cleaner housing [3].
- Inspect the filter, and replace it if it is damaged.
- Clean the filter by tapping the filter several times on a hard surface to remove dirt, or blow compressed air (not exceeding 207 kPa) through the filter from the inside. Never try to brush off dirt; brushing will force dirt into the fibers.
- Wipe dirt from the inside of the air cleaner housing and cover, using a moist rag. Be careful to prevent dirt from entering the air duct that leads to the carburetor.
- Reinstall the filter and cover.
Spark Plug Service
Required spark plugs: NGK - BPR5ES
NOTICE
Incorrect spark plugs can cause engine damage.
For good performance, the spark plug [1] must be properly gapped and free of deposits.
- Disconnect the spark plug cap [2], and remove any dirt from around the spark plug area.
![[1] [2]](/content/2026/05/880387/images/9493396fe616a660e573f61b77a23de29db92d97e24c1fa787643945707a4aca.jpg)
- Remove the spark plug with a spark plug wrench [3].
![[3] [3]](/content/2026/05/880387/images/eeec7662add81dfe1097f6e48173bba9f63f8fc38a4b6f50238c0722236bf5e6.jpg)
- Inspect the spark plug. Replace it if the electrodes are worn or if the insulator is cracked or chipped. Clean the spark plug with a wire brush if you are going to reuse it.
![0.7 ~ 0.8 mm [4]](/content/2026/05/880387/images/d073f06d7348949c906571e3c9295138d53b56bc446d6d84ca8f5489660b9622.jpg)
-
Measure the spark plug electrode gap with a suitable gauge. The gap should be 0.7 \~ 0.8 mm. Correct the gap, if necessary, by carefully bending the side electrode.
-
Install the spark plug carefully, by hand, to avoid cross-threading.
-
After the spark plug seats, tighten with a spark plug wrench to compress the washer.
If reinstalling the old spark plug, tighten 1/8 to 1/4 turn after the spark plug seats.
If installing a new spark plug, tighten 1/2 turn after the spark plug seats to compress the washer [4].
NOTICE
A loose spark plug can overheat and damage the engine. Overtightening the spark plug can damage the threads in the cylinder head.
- Install the spark plug cap on the spark plug.
Spark Arrester Service
In Europe and other countries where machinery directive 2006/42/EC is enforced, this cleaning should be done by your servicing dealer.
The spark arrester must be serviced every 100 hours to keep it functioning as designed.
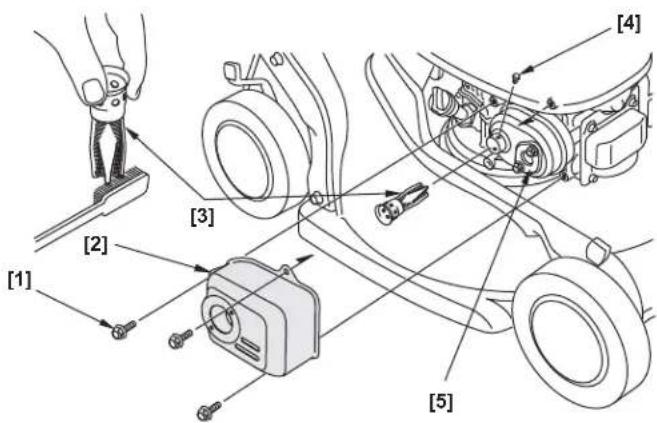
- Allow the engine to cool, and then remove the three bolts [1] from the muffler shield [2] using a 10 mm socket wrench.
- Remove the muffler shield [2].
- Remove the screw [4].
- Remove the spark arrester [3] from the muffler [5].
- Check for carbon deposits on the spark arrester and the exhaust port. Brush carbon deposits away. Be careful to avoid damaging the spark arrester screen.
- Install the spark arrester in the muffler.
- Install the muffler components on the engine, and tighten the three bolts securely.
CONTROL CABLE ADJUSTMENTS
Cutting-means Control Cable
Measure free play at the top of the cutting-means control lever [1], while holding the button down. Free play should be 10 \~ 15 mm. If adjustment is necessary:
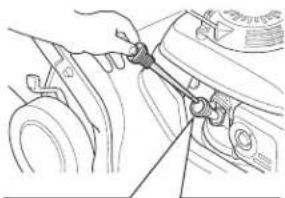
- Loosen the locknuts [2] with a 10 mm wrench, and move the adjuster [3] up or down as required.
- Tighten the locknuts and recheck free play.
- Start the engine outdoors, and operate the cutting-means control lever.
If the cutting means does not start or stop as it should, with correct cable adjustment, take the mower to an authorized Honda dealer for repair.
![10 ~ 15 mm [1]](/content/2026/05/880387/images/b53d7481180f3adf48908bbbd02ea192851fe2a8d88530bc8fd37fac2b54b266.jpg)
![[2] [3]](/content/2026/05/880387/images/bf15fca715d22cdadf97ffe44ce8a0cf77e3ff9d33926ee30d659367b51d206f.jpg)
Drive Clutch Cable Adjustment
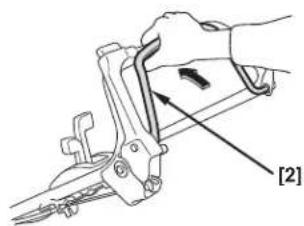
- With the engine stopped, position the control cable bands [1] as shown.
- Pull the shift lever all the way back to the stop position.
- Start the engine and move the throttle lever to the FAST position.
![[1] 280 mm 120 mm](/content/2026/05/880387/images/cd231453161ccd7855b34900830fb5f4a44a28ae9662c7f82f90a3208e76939c.jpg)
- Engage the drive clutch control [2] and confirm the following:
a. Mower does not self-propel.
b. Mower begins to self-propel or creeps very slowly forward when the shift lever is moved one notch forward.
natural_image
Hand operating a mechanical clamp or bracket with a hand holding the lever (no text or symbols visible)If the mower does not operate as outlined above, go to step 5. If the mower does operate as outlined above, adjustment is not required.
- Loosen the top [3] and bottom [4] drive clutch cable locknuts with a 10 mm wrench. Move the adjuster [5] up or down, as required, until the mower operates as outlined in step 4. Tighten the locknuts.
![[3] [4] [5]](/content/2026/05/880387/images/75e629d5f6023b2c44f01d5f71b3cdc672360bc88f120525e24f8bbb7c13705f.jpg)
Throttle Cable Adjustment
-
Move the throttle lever [1] to the fast position [2].
-
Remove air cleaner cover.
-
Check that the control lever [3] just touches the stopper screw [4]. If adjustment is required, proceed to step 5.
-
Loosen lock nuts [5] with a 10 mm wrench. Move adjuster [6] up or down as required to achieve the setting in step 3. Retighten locknuts [5].
![[1]](/content/2026/05/880387/images/90e9ebf9b5c7c855c4ccedd2e626ed043446d1b171eca5069f6a9efe02baf219.jpg)
![[4] [3]](/content/2026/05/880387/images/5552110113402d41a98ee6c2355570080603e461dbc537dd5602b7e6206ad605.jpg)
![[5] [6]](/content/2026/05/880387/images/2caf7eb4bf2c1dde6e76b70a75fa24a72ca3d5fd9fd7e19a755071e399b9a0f7.jpg)
CUTTING MEANS REMOVAL AND INSTALLATION
If you remove the cutting means for sharpening or replacement, you will need a torque wrench for installation. Wear heavy gloves to protect your hands.
CUTTING MEANS SHARPENING: To avoid weakening the cutting means, or causing imbalance or poor cutting, the cutting means should be sharpened by trained staff at an authorized Honda dealer.
CUTTING MEANS REPLACEMENT: Use Honda Genuine replacement cutting means or their equivalent.
Cutting Means Removal
-
HYEA: Put the throttle lever in the STOP position. HZEA: Turn the key to the OFF position.
-
Disconnect the spark plug cap. Tilt the mower to the right so the fuel cap is up. This will help prevent fuel leakage, motor oil seeping into the air filter, and hard starting.
![[1] [2] [3] [4] [5]](/content/2026/05/880387/images/b75a0112bf6ae95e53c82a1dd001a7c764997c446c0d7e2c6608ab45e73c5719.jpg)
-
Use a 14 mm (6 point) socket wrench and remove the two cutting-means bolts [1] and special washers [2] from the cutting-means control assembly [5]. Use a wooden block to prevent the cutting means from turning when removing the bolts.
-
Remove the upper [4] and lower cutting means [3].
Cutting Means Installation
- Clean dirt and grass from around the cutting means mounting area.
- Install the cutting means [3] and [4] using the two cutting-means bolts [1] and special washers [2] as shown.
![[3] [4] [2] [1] [7] [6]](/content/2026/05/880387/images/6034f44245ea051c0a0628901028b4ccd244a0ce0cfb8bbd186de1025f0cf02c.jpg)
WARNING
Operating this mower with only one cutting means will result in an improperly seated cutting means that can be thrown from the mower and seriously hurt or kill someone. Always use both cutting means as a set.
Be sure to install the special washers with the concave side toward the cutting means and the convex side toward the head of the bolt. The cutting-means bolts are specially designed for this application and must not be replaced with other bolts.
- Tighten the cutting-means bolts with a torque wrench [7]. Use a wooden block [6] to prevent the cutting means from turning.
Cutting-means bolt torque: 49 \~ 59 N·m
If you do not have a torque wrench, have an authorized Honda dealer tighten the cutting-means bolts before you use the mower. If the cutting-means bolts are overtightened, they could break. If the cutting-means bolts are not tightened enough, they could loosen or come out. In either case, it would be possible for the cutting means to fly off while you are operating the mower.
GRASS CATCHER CLEANING AND REPLACEMENT
Cleaning
Wash the catcher with a garden hose, and allow it to dry completely before use; a wet catcher will clog quickly.
Replacement
Replace a worn or damaged catcher with a Honda replacement catcher or its equivalent.
Removal
-
Unclip the plastic edges [1] of the catcher [2] from the frame [3].
-
Remove the catcher from the frame.
![[2] RANKS [1] [3]](/content/2026/05/880387/images/2f8b40e2a754cd13355af28ce773c966cc3b16100951a2bb4a2fbe753df186fa.jpg)
Installation
-
Insert the catcher frame [3] into the catcher [2], as shown above.
-
Clip the plastic edges [1] of the catcher onto the frame.
![[1] yuan](/content/2026/05/880387/images/aa5b0d67893ea9b848e44252acae080a414c3891875d4504337c6a3e0c714f17.jpg)
CHARGING THE BATTERY (HZEA TYPE)
The lawnmower engine has an internal charging system. Under normal mowing usage it is not necessary to charge or maintain the battery.
If the mower fails to start or has been stored for an extended period:
- Start the lawnmower using the recoil starter manually for one mowing session. This should charge the battery sufficiently to use the electric starter.
- If you prefer, there is an optional AC powered battery charger available from your Honda dealer.
- If the lawnmower fails to start (after manually starting for one mowing session) check for a blown fuse.
- If it still fails to start, take the lawnmower to an authorized Honda servicing dealer.
REPLACING A FUSE
The electric starter circuit and battery are protected by a 30 amp fuse [1] and 3 amp fuse [2]. If the 30 amp fuse burns out, the electric starter will not operate and if the 3 amp fuse burns out, the battery will not charge. The engine can be started manually if either fuse burns out.
-
Remove the battery cover by removing the three cover mounting screws [3].
-
Remove and inspect the fuses. If they are burned out, replace with the correct fuse.
Never use a fuse with a rating other than shown. Serious damage to the electrical system or a fire can result.
![[3] [1] R.B. BATTERY SHEKELA 4-2 1.0V, 2.0kV, 500-100 MΩ: 100Ω/100Ω Pb 2 [2]](/content/2026/05/880387/images/21ede3b201cc6d34d183d17a546ed5be8c2df6897b7dbaf39b12e30114e6b334.jpg)
If a frequent fuse failure occurs, it usually indicates a short circuit or an overload in the electrical system. Take the mower to an authorized Honda servicing dealer for repair.
TRANSPORTING
Before Loading
If the engine has been running, allow it to cool for at least 15 minutes before loading the mower on the transport vehicle. A hot engine and exhaust system can burn you and can ignite some materials.
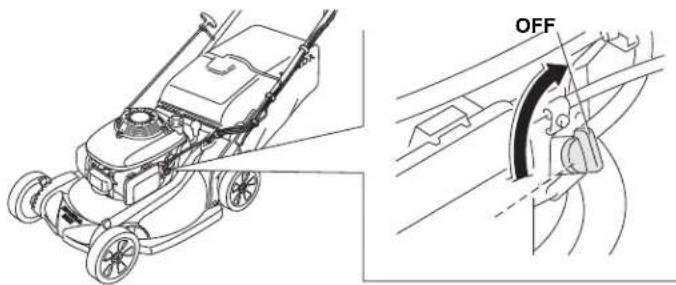
Turn the fuel valve to the OFF position. This will prevent carburetor flooding and reduce the possibility of fuel leakage.
natural_image
Technical line drawing of a lawn mower with mounting bracket and side view showing OFF button (no text or symbols)Handlebar Folding
-
Remove the grass catcher. You can place it on top of the engine, with the catcher opening to the front.
-
Turn the handlebar adjust knobs [1] 90° into the unlock position.
-
Fold handlebar [2] over mower.
![[1] [2]](/content/2026/05/880387/images/cc5a249cf89551d5676c8858b3234d705b33c9990ad86f41c12f54707493ae76.jpg)
When folding the handlebar, be careful to avoid kinking or pinching the control cables.
Loading and Unloading
Position the mower so all four wheels are on the bed of the transport vehicle. Tie the mower down with rope or straps, and block the wheels. Keep the tie-down rope or straps away from the controls, adjustment levers, cables, and the carburetor.
NOTICE
To prevent losing control of or damaging the mower, do not use the drive system when going up or down a loading ramp.
To prevent damaging the drive system, do not engage the clutch when the mower is rolling backwards.
-
Turn the fuel valve to the OFF position.
-
Use a suitable loading ramp.
Adjust the loading ramp so that it is inclined at an angle of less than 15^ . If a loading ramp is not available, two people should lift the mower
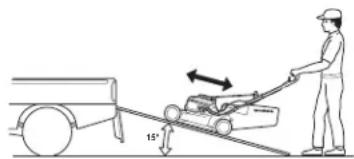
on and off the transport vehicle while keeping the mower level.
STORAGE
Proper storage is essential for keeping your lawnmower troublefree and looking good. The following steps will help protect the mower from rust and corrosion, and make the engine easier to start when you use the lawnmower again.
Cleaning
- Wash the lawnmower, including the underside of the cutting-means enclosure.
Engine
Wash the engine by hand, and be careful to prevent water from entering the air cleaner.
NOTICE
Using a garden hose or pressure washing equipment can force water into the air cleaner. Water in the air cleaner will soak the filters and can enter the carburetor or engine cylinder, causing damage.
Water contacting a hot engine can cause damage. If the engine has been running, allow it to cool for at least a half hour before washing.
Cutting-means Enclosure
If using a garden hose or pressure washing equipment to clean the cutting-means enclosure, be careful to avoid getting water into controls and cables, or anywhere near the engine air cleaner or muffler opening.
Before washing the underside of the cutting-means enclosure, be sure the throttle lever is in the STOP position and the fuel valve is in the OFF position. Tilt the lawnmower to the right so the fuel cap is up. This will help to prevent fuel leakage and hard starting due to carburetor flooding. Wear heavy gloves to protect your hands from the cutting means.
Grass Catcher
Remove the catcher from the mower, and wash it with a garden hose or pressure washing equipment. Allow the catcher to dry completely before storage.
-
After washing the lawnmower, wipe dry all accessible surfaces.
-
With the mower in an upright position, start the engine outdoors, and let it run until it reaches normal operating temperature to evaporate any water remaining on the engine.
-
Stop the engine and allow it to cool.
-
After the lawnmower is clean and dry, touch up any damaged paint, and coat other areas that may rust with a light film of oil.
Fuel
NOTICE
Depending on the region where you operate your equipment, fuel formulations may deteriorate and oxidize rapidly. Fuel deterioration and oxidation can occur in as little as 30 days and may cause damage to the carburetor and/or fuel system. Please check with your servicing dealer for local storage recommendations.
Petrol will oxidize and deteriorate in storage. Old petrol will cause hard starting, and it leaves gum deposits that clog the fuel system. If the petrol in your mower deteriorates during storage, you may need to have the carburetor and other fuel system components serviced or replaced.
The length of time that petrol can be left in your fuel tank and carburetor without causing functional problems will vary with such factors as blend, your storage temperatures, and whether the fuel tank is partially or completely filled. The air in a partially filled fuel tank promotes fuel deterioration. Very warm storage temperatures accelerate fuel deterioration. Fuel deterioration problems may occur within a few months, or even less if the petrol was not fresh when you filled the fuel tank.
Short Term Storage (30-90 days)
If your equipment will not be used for 30 to 90 days, we recommend the following to prevent fuel-related problems:
- Add fuel stabilizer following the manufacturer's instructions.
When adding a fuel stabilizer, fill the fuel tank with fresh petrol. If only partially filled, air in the tank will promote fuel deterioration during storage. If you keep a container of petrol for refueling, be sure that it contains only fresh petrol.
If it will take more than 3 months to use the fuel in your storage container, we suggest adding a fuel stabilizer to the fuel when you fill the container.
-
After adding a fuel stabilizer, run the engine outdoors for 10 minutes to be sure that treated petrol has replaced the untreated petrol in the carburetor.
-
Turn the fuel valve to the OFF position.
-
Continue to run the engine until it stops from the lack of fuel in the carburetor fuel bowl. Running time should be less than 3 minutes. Note:
– All stabilizers have a shelf life and their performance will deteriorate over time.
– Fuel stabilizers will not reconstitute stale fuel.
Long Term or Seasonal Storage (greater than 90 days)
Start the engine and allow it to run long enough to empty all the petrol from the entire fuel system (including the fuel tank). Do not allow petrol to remain in your engine for more than 90 days of inactivity.
Fuel system damage or engine performance problems resulting from neglected storage preparation are not covered under the Distributor's Warranty.
Engine Oil
Change the engine oil (page 14).
Engine Cylinder
If the mower is to be stored for more than 3 months, remove the spark plug (page 14). Pour 5 \~ 10 cm³ of clean engine oil into the cylinder [1]. Pull the starter rope several times to distribute the oil in the cylinder. Reinstall the spark plug.
![[1]](/content/2026/05/880387/images/8bf3c4ac60a81fe28c0fc1d7159cf94446725be13ba4fd69791c6bc7c5f7f60c.jpg)
Pull the starter rope slowly until resistance is felt, then return the starter
grip gently. This will close the valves so moisture cannot enter the engine cylinder.
Placing in Storage
Since your mower will be stored with petrol in the fuel tank and carburetor, it is important to reduce the hazard of petrol vapor ignition. Select a well-ventilated storage area away from any appliance that operates with a flame, such as a furnace, water heater, or clothes dryer. Also avoid any area with a spark-producing electric motor, or where power tools are operated.
If possible, avoid storage areas with high humidity, because that promotes rust and corrosion.
Place the mower with its wheels on a level surface. Tilting can cause fuel or oil leakage.
The handlebar can be folded for compact storage (page 17).
With the engine and exhaust system cool, cover the mower to keep out dust. A hot engine and exhaust system can ignite or melt some materials. Do not use sheet plastic as a dust cover. A nonporous cover will trap moisture around the mower, promoting rust and corrosion.
Removing from Storage
Check your mower as described in PRE-OPERATION CHECKS.
If the cylinder was coated with oil during storage preparation, the engine will smoke briefly at startup. This is normal.
TROUBLESHOOTING
ENGINE WILL NOT START
| Possible Cause Correction | |
| Fuel valve OFF | Turn the fuel valve ON (page 4). |
| Throttle lever in the wrong position | Move the throttle lever to the FAST position. (page 10). |
| Starter turns slow or not at all (HZEA type) | • Use the recoil starter for at least one mowing session to allow the battery to charge (page 9)• Check for blown fuse (page 17) |
| Out of fuel | Refuel (page 4). |
| Bad fuel; mower stored without treating the petrol, or refueled with bad petrol | Refuel with fresh petrol (page 4). |
| Spark plug faulty, fouled, or improperly gapped | Gap or replace the spark plug (page 14). |
| Spark plug wet with fuel (flooded engine) | Dry and reinstall the spark plug. |
| Fuel filter clogged, carburetor malfunction, ignition malfunction, valves stuck, etc. | Take the mower to an authorized Honda servicing dealer or refer to the shop manual for repair. |
LOSS OF POWER
| Possible Cause Correction | |
| Throttle not set to FAST | Move the throttle to FAST (page 10). |
| Grass is too tall to cut | Raise the cutting height (page 8), cut a narrower swath, use a slower ground speed (page 10), or cut more frequently. |
| Cutting-means enclosure is clogged | Clean out the cutting-means enclosure (page 12). |
| Air cleaner is clogged Clean or replace the air cleaner (page 14). | |
| Bad fuel; mower stored without treating petrol, or refueled with bad petrol | Refuel with fresh petrol (page 4). |
| Fuel filter clogged, carburetor malfunction, ignition malfunction, valves stuck, etc. | Take the mower to an authorized Honda servicing dealer or refer to the shop manual for repair. |
VIBRATION
| Possible Cause Correction | |
| Grass and debris lodged under the cutting-means enclosure | Clean out the cutting-means enclosure (page 12). |
| Cutting means loose, bent, damaged, or unbalanced by improper sharpening | Tighten loose cutting-means bolts (page 16).If cutting means are found to be bent or damaged, take the lawnmower to an authorized Honda servicing dealer for inspection. |
| Mechanical damage, such as a bent crankshaft | Take the mower to an authorized Honda servicing dealer or refer to the shop manual for repair. |
MOWING AND GRASS CATCHING PROBLEMS
| Possible Cause Correction | |
| Engine speed is too slow to cut well | Move the throttle lever to the FAST position (page 4). |
| Lawnmower is moving too fast for lawn conditions | Shift to a slow speed (page 10). |
| Cutting height adjustment levers set at different positions | Set all levers at the same cutting height position (page 5). |
| Grass catcher overfilled or clogged | Empty the grass catcher. Wash the grass catcher if it is clogged with dirt (page 17). |
| Cutting-means enclosure is clogged | Clean out the cutting-means enclosure (page 12). |
| Cutting means dull, worn, or damaged | Sharpen or replace the cutting means if necessary (page 16). |
| Wrong cutting means installed | Install correct cutting means (page 16). |
PARTS
| Item Part Number | |
| Air Cleaner | 17211-Z8B-901 |
| Spark Plug | 98078-55846 |
| Cutting Means | 72531-VH7-000 (upper)72511-VH7-000 (lower) |
| Cutting-means Bolt | 90105-960-710 |
| Bolt Washer | 90502-VG3-000 |
SPECIFICATIONS
| MODEL HRX537C4 | ||
| TYPE HYEA HZEA | ||
| DESCRIPTION CODE MAGA | ||
GENERAL
| Length | 1,825 mm | |
| Handlebar height (Middle position) | 1,115 mm | |
| Dry mass | 44.7 kg 46.4 kg | |
| Width | 585 mm | |
| Cut width | 530 mm | |
| Cut height adjustments | 19 mm, 32 mm, 46 mm, 62 mm, 75 mm, 88 mm, 101 mm | |
| Grass catcher capacity | 85 L | |
| Sound pressure level at operator's ears (According to EN ISO 5395-1:2013) | 85 dB(A) | |
| Uncertainty | 1 dB(A) | |
| Sound power level measured (According to 2000/14/EC directive) | 96 dB(A) 97 dB(A) | |
| Uncertainty | 1 dB(A) 1.1 dB(A) | |
| Sound power level guaranteed (According to 2000/14/EC directive) | 98 dB(A) | |
| Vibration transmitted (According to EN ISO 5395-1:2013) | 3.8 m/s^2 | 3.3 m/s^2 |
| Uncertainty | 1.9 m/s^2 | 1.7 m/s^2 |
ENGINE
| Model | GCV190 |
| Type | 4-stroke, single cylinder, vertical shaft, OHC |
| Displacement | 187 cc |
| Bore and stroke | 69 x 50 mm |
| Cooling | Forced air |
| Lubrication | Splash and spray |
| Compression ratio | 8,5:1 |
| Maximum speed | 2,850 ^-0 min ^-1 |
| Idle speed | 1,700 ± 150 min ^-1 |
| Ignition system | Transistorized magneto |
| Spark plug | NGK: BPR5ES |
| Spark plug gap | 0.7 ~ 0.8 mm |
| Air cleaner | Dry element type |
| Recommended fuel | Unleaded petrol with a research octane number (RON) of 91 or higher |
| Fuel tank capacity | 0.93 L |
| Recommended oil | SAE 10W-30, API SJ or later |
| Engine oil capacity | 0.50 L* Refill amount: 0.35 ~ 0.40 L |
* Actual amount will vary due to residual oil in the engine. Always use the dipstick to confirm the actual level (see page 4).
DRIVE
| Type | Hydrostatic |
| Engine to transmission | V-belt |
| Main clutch | Fluid type |
| Mower speed (engine @ 2,850 min ^-1 ) | 1.6 m/s |
| Recommended fluid | Honda hydrostatic |
INTRODUCTION
Madame, Monsieur,
natural_image
Black-and-white photo of a MCL70 lawn mower with visible blades and wheels (no text or symbols)TABLE DES MATIERES
INTRODUCTION.... 1
MESSAGES DE SECURITE.... 1
CONSIGNES DE SÉCURITÉ...2
HUILE MOTEUR
ESSENCE
natural_image
Mechanical assembly diagram showing hands operating a component with a bracket and bracket (no text or symbols)LEVIER DE CHANGEMENT DE VITESSE
natural_image
Technical line drawing of a lawn mower with visible blades and wheel (no text or symbols)BOUTON DE COMMANDE DE LA TONTE
natural_image
Line drawing of a hand adjusting a mechanical component with a tool (no text or symbols)![[1] [2] [3]](/content/2026/05/880387/images/1ca7bf4894f221f729fce288dd15128f2078405edeca4fd0b97fb77bce48cb6c.jpg)
Carburant
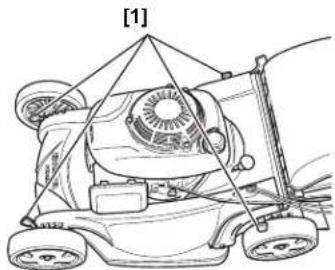
natural_image
Line drawing of a lawn mower with fan and wheels (no text or symbols)![[1] 19 mm 32 mm 46 mm 62 mm 75 mm 88 mm 101 mm](/content/2026/05/880387/images/9ca2523b1a4c37f82ce5bc3080b4f5725654829137ff74331d34869ccef00aa7.jpg)
Déflecteur arrière
natural_image
Technical line drawing of a small wheeled vehicle with a hand operating the wheel (no text or symbols)natural_image
Line drawing of a person using a lawn mower (no text or symbols)FONCTIONNMENT
PRECAUTIONS A PRENDRE POUR LA TONTE
natural_image
Line drawing of a hand using a small cart with wheels, no text or symbols presentnatural_image
Diagram of a car interior showing steering wheel and dashboard (no text or symbols)natural_image
Line drawing of a lawn mower on a textured ground surface (no text or symbols)Obstacles
natural_image
Line drawing of a car with wheels and a bucket, no text or symbols presentnatural_image
Line drawing of a hand operating a mechanical device with gears and wheels (no text or symbols)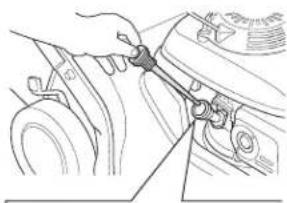
natural_image
Line drawing of a hand adjusting a mechanical component (no text or symbols visible)![[1] [2] [3]](/content/2026/05/880387/images/6c8f66dc7d30ef4fc7ba0d2c4cb334d13c3ea4a06c54cb12f14cc52091eb0798.jpg)
AVIS
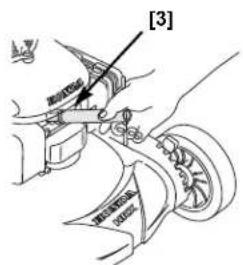
REGLAGE DES CABLES DE COMMANDE
natural_image
Hand operating a mechanical clamp or tool with a directional arrow indicating motion (no text or symbols present)Inspection Du Cable Des Gaz
Installation du sac
RANGEMENT
natural_image
Black-and-white photo of a Honda motorcycle with visible wheels and headboard (no text or symbols)INDICE
INTRODUCCIÓN....1 MANTENIMIENTO....13
MENSAJES DE SEGURIDAD . . . 1 La Importancis Del
ACEITE DEL MOTOR
COMBUSTIBLE
natural_image
Line drawing of a lawn mower with visible blades and wheels (no text or symbols)PERILLA DEL DIRECTOR DE CORTE
Combustible
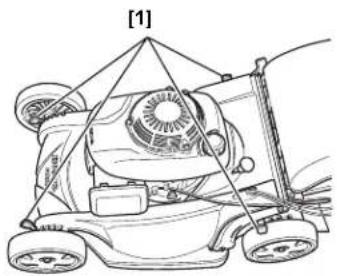
natural_image
Line drawing of a grass lawn mower with a handle and wheels (no text or symbols)![[1] 19 mm 32 mm 46 mm 62 mm 75 mm 88 mm 101 mm](/content/2026/05/880387/images/cec53c6a3c8de2883f9a9ba7ce55215007e2859f89c7e2912e2d3cacc16272c1.jpg)
![[2] [1]](/content/2026/05/880387/images/88d551b0c18fe33e501fa15c12134c2ffa01639d93227edb6520e65c1aedb459.jpg)
Dirección del corte
natural_image
Line drawing of a person using a lawn mower (no text or symbols)OPERACIÓN
PRECAUCIONES AL CORTAR EL CÉSPED
Tipo HZEA:
natural_image
Line drawing of a hand operating a small wheeled motor (no text or symbols)natural_image
Diagram of a car's steering wheel and dashboard mechanism (no text or labels)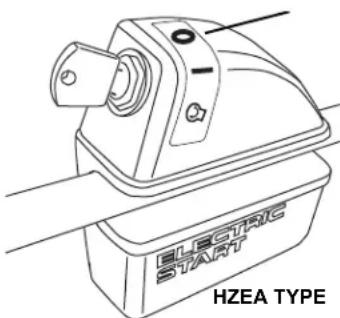
natural_image
Line drawing of a lawn mower on a gravel surface (no text or symbols)Obstáculos
flowchart
graph TD
    A["Top Left Car Icon"] --> B["Top Right Car Icon"]
    B --> C["Bottom Left Car Icon"]
    C --> D["Bottom Right Car Icon"]
    D --> E["Bottom Left Car Icon"]
    E --> F["Bottom Right Car Icon"]
    F --> G["Bottom Left Car Icon"]
    G --> H["Bottom Right Car Icon"]
    H --> I["Bottom Left Car Icon"]
    I --> J["Bottom Right Car Icon"]
    J --> K["Bottom Left Car Icon"]
    K --> L["Bottom Right Car Icon"]
    L --> M["Bottom Left Car Icon"]
    M --> N["Bottom Right Car Icon"]
    N --> O["Bottom Left Car Icon"]
    O --> P["Bottom Right Car Icon"]
    P --> Q["Bottom Left Car Icon"]
    Q --> R["Bottom Right Car Icon"]
    R --> S["Bottom Left Car Icon"]
    S --> T["Bottom Right Car Icon"]
    T --> U["Bottom Left Car Icon"]
    U --> V["Bottom Right Car Icon"]
    V --> W["Bottom Left Car Icon"]
    W --> X["Bottom Right Car Icon"]
    X --> Y["Bottom Left Car Icon"]
    Y --> Z["Bottom Right Car Icon"]
natural_image
Line drawing of a car with wheels and a water pump, no text or symbols presentnatural_image
Line drawing of a person using a mechanical device to adjust or install a vehicle (no text or symbols visible)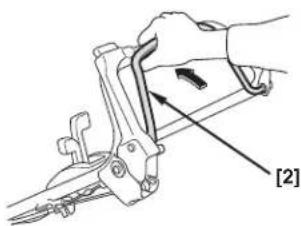
natural_image
Hand operating a mechanical clamp or tool with an arrow indicating direction (no text or symbols present)![[1]](/content/2026/05/880387/images/8df8f1131ac5a903c5c0487309d377991ce6031d1bf0ada9d8ded8f7dbd415b5.jpg)
CARGA DE LA BATERÍA (TIPO HZEA)
natural_image
Black and white photo of a Honda lawn mower with visible blades and wheels (no text or symbols)INHALTSVERZEICHNIS
EINLEITUNG .... 1
![[2] [3]](/content/2026/05/880387/images/dc6e72e412cf4663890918c528fc32f3c0e8d0079113b916285f4668321210df.jpg)
MOTORÖL
BENZIN
Siehe Seite 6.
VOR DEM BETRIEB
GASHEBEL
natural_image
Illustration of hands assembling a mechanical component with a bracket and guide pin (no text or symbols)natural_image
Line drawing of a lawn mower with visible blades and wheel (no text or symbols)Benzin
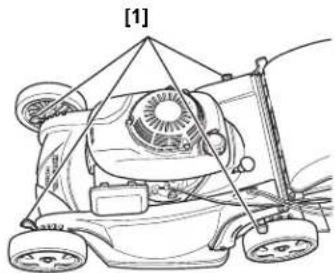
natural_image
Line drawing of a mechanical device with gears and a fan, no text or symbols presentnatural_image
Line drawing of a person using a lawn mower on a grassy field (no text or symbols)BETRIEB
natural_image
Line drawing of a hand operating a small wheeled motor (no text or symbols)natural_image
Diagram of a car interior showing steering wheel and dashboard (no text or symbols)natural_image
Line drawing of a lawn mower with visible blades and wheels (no text or symbols)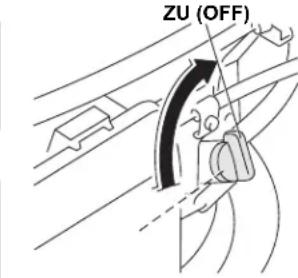
natural_image
Line drawing of a lawn mower on gravel ground (no text or symbols)Hindernisse
natural_image
Line drawing of a car with wheels and a water pump, no text or symbols presentnatural_image
Line drawing of a person using a tool on a vehicle wheel (no text or symbols)ZUR BEACHTUNG
natural_image
Diagram of a hand using a tool to adjust or install a mechanical component, labeled with number [2] (no text or symbols on the diagram itself)natural_image
Diagram of a car interior showing steering wheel and dashboard (no text or symbols)DAS LADEN DER BATTERIE (NUR HZEA TYP)
[2]
natural_image
Technical line drawing of a lawn mower with attached components and directional arrow (no text or symbols)LAGERUNG
natural_image
Illustration of a hand holding a tool with a spring, no text or symbols presentnatural_image
Black-and-white photo of a Honda lawn mower with visible blades and wheels (no text or symbols)INDICE
INTRODUZIONE....1
COMUNICAZIONI SULLA
SICUREZZA....1
ISTRUZIONI SULLA SICUREZZA2
![[1]](/content/2026/05/880387/images/99b8df92fd085b2c4de9e77ef71c5e271bed9f4113fa3e2ac44572823026b371.jpg)
OLIO DEL MOTORE
CARBURANTE
LEVETTA DEL GAS
natural_image
Mechanical assembly diagram showing hands fastening a component with a bracket and guide pin (no text or symbols)LEVETTA DEL CAMBIO
natural_image
Line drawing of a lawn mower with visible blades and wheels (no text or symbols)natural_image
Technical diagram of a mechanical assembly with no visible text or symbolsCONTROLLI PRIMA DELL'USO
SIETE PRONTI PER TOSARE?
Carburante
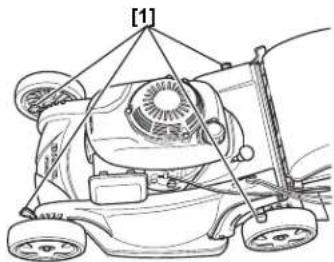
natural_image
Line drawing of a cartoon-style robot with wheels and a handle, no text or symbols present![[1] 19 mm 32 mm 46 mm 62 mm 75 mm 88 mm 101 mm](/content/2026/05/880387/images/d3df9bab7a89fa5b516cfcb5bb0595a99d4a98b75c2363835a2e564848b17091.jpg)
![[2] [1]](/content/2026/05/880387/images/78ccb9bbf24355c8f2fea93d5eee77cb0ae2afe17396e19baeca9e3d6c3e8db3.jpg)
natural_image
Top-down diagram of a vehicle's rear view showing steering wheel, dashboard, and steering wheel (no text or symbols)natural_image
Technical line drawing of a lawn mower base with attached wires and mechanical components (no text or symbols)natural_image
Line drawing of a person using a lawn mower to lift a lawn (no text or symbols)USO
Tipo HZEA :
natural_image
Line drawing of a hand operating a small wheeled motor (no text or symbols)natural_image
Diagram of a car interior showing steering wheel and dashboard (no text or symbols)natural_image
Line drawing of a lawn mower on a slope (no text or symbols)natural_image
Line drawing of a car with a fan and bucket, no text or symbols presentnatural_image
Line drawing of a person operating a mechanical device with gears and a valve (no text or symbols)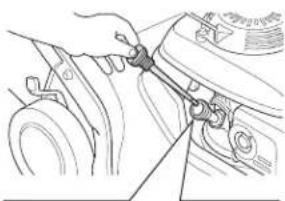
natural_image
Line drawing of a hand adjusting a mechanical component (no text or symbols visible)![[1] [2] [3]](/content/2026/05/880387/images/2a275a209188b95e60b28fdb522349aa3c5e5e51035da5ba240485beb9b92dda.jpg)
NOTA
Candele consigliate: NGK - BPR5ES
NOTA
natural_image
Hand operating a mechanical clamp or tool with a directional arrow indicating motion (no text or symbols present)Montaggio del sacco
natural_image
Black-and-white photo of a hybrid lawn mower with visible blades and wheels (no text or symbols)INHOUD
INLEIDING....1
WAARSCHUWINGEN
BETREFFENDE DE
VEILIGHEID....1
VEILIGHEIDSVOOR-
SCHRIFTEN....2
WAARSCHUWINGSSTICKER . 3
Produkt-Identifikatie-Plaatje....3
OVERZICHT VAN
ONDERDELEN 3
IN ELKAAR ZETTEN ..... 4
BEDIENING 4
VOORDAT U GAAT MAAIEN ... 5
Oliepeil....6
Benzine 6
DE MAAIER GEBRUIKEN ..... 9
WAARSCHUWINGSSTICKER
![[2] [3]](/content/2026/05/880387/images/844f1472b80c3e0f5bed525e6de8f85037705e17b254a29dbd4de6aa41f6cfe5.jpg)
Til de afvoerbeschermkap [4] omhoog en monteer de graszak.
![HONDA [4]](/content/2026/05/880387/images/aa1513f13b0c806a19da4daf7253dbb4310635d006bb4a1ffc389a3ace451f87.jpg)
MOTOROLIE
GASHENDEL
natural_image
Line drawing of a lawn mower with a handle and fan, no text or symbols presentMAAISELRICHTERKNOP
VOORDAT U GAAT MAAIEN
BENT U KLAAR OM TE MAAIEN?
Benzine
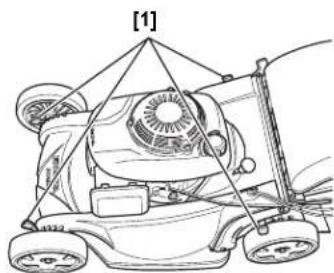
natural_image
Technical line drawing of a mechanical device with no visible text or symbolsALLES IN ZAK OPVANGEN OF
AFVOEREN NAAR ACHTEREN
![[1] (stand BAG)](/content/2026/05/880387/images/2d12e9f51dd9ddeb0293cbcdcef21fb70f61cd484cd3b6274ac6e6f03fd14a9d.jpg)
[2] (volledig geopend)
![VOLLEDIG MULCHEN [1] (stand MULCH)](/content/2026/05/880387/images/7ecd22dc268d0ca578539e99aa20b4e4b688477763cba6ca9bb08fa1a76c6a0f.jpg)
natural_image
Diagram of a lawn mower system with attached blades and fan (no text or labels)natural_image
Line drawing of a person pushing a lawn mower (no text or symbols)DE MAAIER GEBRUIKEN
VOORZORGSMAATREGELEN
HZEA-type:
Elektrische start.
natural_image
Line drawing of a hand operating a small motor cart (no text or symbols)- Zodra de motor op
natural_image
Diagram of a car interior showing steering wheel, dashboard, and steering wheel (no text or symbols)Meskoppelingshendel
natural_image
Line drawing of a lawn mower with visible blades and wheels (no text or symbols)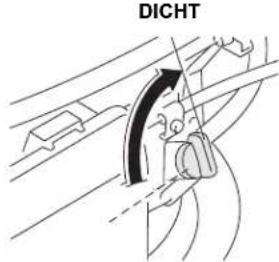
natural_image
Line drawing of a lawn mower on a gravel surface (no text or symbols)Obstakels
natural_image
Line drawing of a spray gun with a mounted gun and bucket (no text or symbols)natural_image
Line drawing of a person using a mechanical device to adjust or install a vehicle (no text or symbols visible)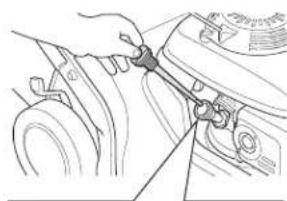
natural_image
Line drawing of a mechanical assembly with a hand adjusting a component (no text or symbols visible)![[1] [2] [3]](/content/2026/05/880387/images/22940e87e6c7afd987786f197b2ba5447e978a0867f7529e87e1cf14b277809e.jpg)
OPMERKING
- Breng de bougiekap weer aan.
Vonkenvanger
KOPPELINGSKABELS NASTELLEN
Meskoppelingskabel
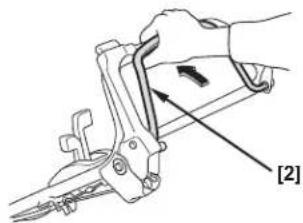
natural_image
Diagram of a hand using a tool to adjust or install a mechanical component, labeled with number [2] (no text or symbols on the diagram itself)![[3] [4] [5]](/content/2026/05/880387/images/d7dfdd6f1570edee71b1ad43d112400af9870aff06e227bb43fed6bb21458917.jpg)
Gaskabel inspecteren
natural_image
Diagram of a car interior showing steering wheel and dashboard (no text or symbols)![[4] [3]](/content/2026/05/880387/images/40a1eb3bab39aca481e12b22af04876dc63a01a09bc0aa2712d5d3b5e7e790c1.jpg)
Aanbrengen
Honda Warranty Conditions
Thank you for purchasing your Honda lawn mower.
Honda warrants your new mower to be free of defects in materials or workmanship for a period of 2 years from the date of purchase (3 months for commercial use).
This warranty is in addition to your statutory rights.
However, in the unlikely event that you encounter a problem with your mower, please contact your original retailer. Should your machine require repair under warranty, you will need to take it to an authorised Honda dealer with either the warranty card or your proof of purchase.
There are, of course, some Terms and Conditions that apply to the Honda warranty. Listed here are items that are not covered:
- Any damage resulting from neglect of the periodic maintenance specified by Honda.
- Any damage resulting from repair or maintenance performed by non-authorized Honda service points.
- Any damage resulting from operating methods other than those indicated in the owner's manual of the product.
- Any damage resulting from the use of non-genuine Honda parts, other than recommended lubricants and fluids, and accessories other than those approved by Honda.
- Any damage or deterioration due to natural wear and tear (natural fading of painted or plated surfaces, sheet peeling and other natural deterioration).
- Consumable parts: Honda does not warrant parts deterioration due to natural wear and tear. The parts listed below are not covered by warranty (unless they are needed as a part of another warranty repair):
- Spark plug, petrol filter, air cleaner element, brake pad, clutch disc, tyre, wheel, wheel bearing, recoil starter rope, cable, belt, cutter blade.
- Lubricant: oil and grease.
-
Cleaning, adjustment, and normal periodic maintenance work (carburetor cleaning, engine oil draining, blade sharpening, belt and cables adjustment).
-
Expenses incidental to the warranty claim, including:
- Compensation for loss of time, commercial loss or rental costs for a substitute product.
- Costs incurred for transportation to and from the dealership.
- Any damage resulting from exposure of the product to soot and smoke, chemical agents, bird droppings, sea water, sea breeze, salt or other environmental phenomena.
Conditions D'application De La Garantie Honda
EC Declaration of Conformity
1. The undersigned, Peter Neckebroeck, on behalf of the authorized representative, herewith declares that the machinery described below fulfils all the relevant provisions of:
- Directive 2006/42/EC on machinery
- Directive 2014/30/EU on electromagnetic compatibility
- Directive 2000/14/EC – 2005/88/EC on outdoor noise
2. Description of the machinery
a) Product: Lawnmower
b) Function: cutting of grass
c) Model d) Type e) Serial number
HPG536C6 MZCG 8600001 - 9999999
HRC56C6 MZCG 880001 9999999
HPG536C7 MZCG 8910001 9999999
HRS536C1 MZBZ 6260001 0000000
HRX537C4 MAGA 2510001 - 9999999
3. Manufacturer 4. Authorized representative and able to
Honda Power Equipment Mfg., Inc.
PO Box 37 Honda Motor Europe Ltd.
Honda Drive, NC Hwy 119
Cain Road, Bracknell, RG12 1HL
Swepsonville, NC 27359 USA
[Non-Text]
5. References to harmonized standards 6. Other standards or specifications
EN ISO 14982:2009
EN ISO 5395-1:2013
EN ISO 5395-2:2013
7. Outdoor Noise Directive
a) Measured sound power dB(A): 97 (MZCG), 94 (MZBZ), 97 (MAGA)
b) Guaranteed sound power dB(A): 98 (MZCG, MZBZ, MAGA)
c) Noise parameter (kW/min ^-1 ) : 2.7/2850 (MZCG), 2.7/2850 (MZBZ),
3.2/2850(MAGA)
d) Conformity assessment procedure: Annex VI
e) Notified body: SNCH
2a. Kalchesbruck
L – 1852 Luxembourg
[Non-Text]
ne at: Aalst, BELGIUM
te: 21 December 2015
Peter Neckebroeck
Manager of the Homologation Department
m = 311
m = 311
m = 311
The Ground Truth image displays a single, solid horizontal line. According to Rule 2 (UNDERSCORE & LINE RULES), this is a stylistic or background line, not a placeholder underscore. Therefore, the OCR result must ignore it and output nothing or only meaningful text. The provided OCR content is "____", which consists of four underscores. This is an incorrect interpretation of the line as a placeholder, violating the rule that stylistic lines must be ignored. The OCR has hallucinated underscores where none should exist based on the GT's visual context. Hence, the OCR result is inconsistent with the Ground Truth.
| Lietuviu kalba (Lithuanian)EB alikilises deklamacija1. Igaloitoj atstovo varcu palašrąsę Peter Neckebrockp pavirina, kad Zemiau oprąbyi maśina attinka visas ivardinu direktyv umostatas:* Mechanizmu direktyva 2006/42/EB* Elektromagnetinio sudarinumno direktyva 2014/30/ES* Trukāmiu luks direktyva 2000/14/EB - 2005/88/EB2. Prietaiso oprąfymasa) Ganirys . Zołajpovęb) Funkcija : żołas pjvinasa) Modella d) Tipase) Serijos numeris3. Gamintojas4. Igaiotasis sistovas ir galintis sudaryti technine dokumentacijeta. Nuomdos i suderintus standartus6. Kit standartal ir specifikacja7. Trukāmiu luks direktyva b) Harnatuclas garso galingumo lygis b) Garantuyamas garso gaingumo lygisc) Trukāmiu parametrased) Tipasei) Registratuta įstaiga8. Vida 9. Data | Bylgarącki (Bulgarian)EÓ dekuparania za sčotvetствие1. Допулодиконит Peter Neckebrocek, ot imeto na upylnomocienня представителя, с настоящото декларими, че машините, списани по-долу, отговарят на васчищъответни разпоредби на:* Директива 2006/42/EÖ относно машините* Директива 2014/30/ΕС относно спектромагнитата сливместимст* Директива 2000/14/EÖ - 2005/88/EÖ относно шумовите емиси на съоруження, преднаVNENIENI за употреба казвы срадите2. Ovisane na машинitatea) Produkt : Koszniab) Purniunna : korene na trpeac) Model c) Tinie) Серinen номер3. Привиздигля4. Ульгноморди представител и отговорник за сътавне на техниёска документация5. Съответствие с керкизомирани стандарти6. Други стандарти или специфициари7. Директива относно шумовите емиси на съоруження, преднаVNENIENI за употреба казвы срадитеa) Намерена звукова мощностb) Гарентиранза звукова мощностc) Париантель ръчшуnd) ПриSEDUPERA TA UZENHA NA SČTRETSTIVETOe) Holofiniwanir orprie8. Maćto na kostavanie 9. Data на kostavanie | Norek (Norwara)EF - Samwanserklaring1.Undertegnede Peter Neckebrockp ka vegne av autoriser representant harved erklanzer al maskinen beskevet nedentor inmitr relevant informasjon fra folgende forskriter.* Maskindirektivet 2006/42/EF* Direktiv EMC: 140/30/EUElektronmagnetek kompabitet* Direktiv om stey ulanders 2000/14/EF - 2005/88/EF2. Beskvelnse va produkta) Produkt . Greesklipperb) Function : Klippe grassc) Model d) Typee) Soriennummer3. Procuest4. Autoriser representant og i stand til å utarbeide den tekniske dokumentasjonen5. Referanse til harmonisarte standardar6. ∅vrige stercardier eller speslifikasjoner7. Ulenders direktiv far staya) Måll stalyb) Maks steyc) Konstant stayd) Vardi vurderings proserynde) Giedene Kyerstavykoprprstammelskrog8. Stod 9. Data |
| Türk (Turkish)AT Ugyunluk Beyan!A sągađa imzasi bulunan Peter Neckebrock, yerkli temici adina, bu yazıva birlikė apągidaki makine Ile ligit tõm hückümülläkterin yerine getiridigini beyan elmektađir:* Makina Emniyet Yönetmeigi 2005/42/AT* Elektromanyelik Uzyumluk Yönetmeigi 2014/30/AB* Açık Alanda Kullanilan Techizat Tarafindan Oluşturulan Čevredeki Gürütü Emisyoru ile ligili Yönetmilk 2000/14/AT-2005/88/AT2. Makhinani tantià: Ümun : Çim hiçme makinesii) İşleti : Çimiert keistinesii) Codel d) TipiSet numarası3. Imalańci4. Teknik doeyayi hazriamakla yetkil olan Teplukia yerišk yetkillemiskii5. Uyumlisztinimių standartlara atir6. Diger standartlar veya speifikasyonlar7. Ajık alan gürdülu Yönetmeigiä) Ölçolen ses giicii6. Garanti edilen ses giicii6. Gürtulu parametrasid) Ugyunluk deterlondimne prosedirüe) Onaylaninis kuruluş8. Beyanin yeri 9. Beyanin tarihi : | Islenska(Icelandic)EB-Samramisnyfinlysing1. Undinitdarur Peter Neckebrockp stačestir hér međ fyirn hõnd loggitta adila að uppsirsunar um veltübnah rör að neden eru tamrandi hvač valdar alla tilheyrandi malafolika, svo sem* Leičbeininger fyirt veltübna 2006/42/EB* Leičbeininger fyirt rašegulisvi 2014/30/UE* Leičbeininger um havšeðamengun 2000/14/EB-2005/88/EB2. Lysing a veltübnači a) Okuteni : Slistivelib) Virkni : Cras alegióc) Gerd d) Tegunde) Serial nömer3. Framlebandi4. Logglidir adillar og fær um að taka saman takneksljin5. Tilvsun om heilder stadei6. Abir studlarla pela sprestačur7. Lečbeininger um havšeðamenguna) Maidur haváva styrkur8. Staftestur haváva styrkurc) Haváva breytelikii4. Staftesting a geobastóčlume) Markingare8. Geri hija 9. Dagsstning | Hrvatski(Croatian)EK Ujava o sukladncizi1. Potpisan: Peter Neckebrockp, u ime ovlaštenog predstavnics, ovime izjavljue da strojevi navedeni u nastavku ispunjavaju sve važeće odrbesha:* Propisa za strojeve 2006/42/EK* Propisa o elektromagnetskoj kompatibilnosti 2014/30/EU* Propisa o buci na otvorone 2000/14/EK-2005/88/EK2. Opis strjevaa) Proizvod : Kosilica za travuh) Funktionalnad : rozanje stevac) Model d) Tipa) Sertijski broj3. Proizvočić4. Ovlavlšini predstavnik i osoba za sastavljanje tehnike dokumentacije5. Reference na uskladne normo6. Ostale norme i specifikacije7. Propis o buci na otvoronea) Iztnjerena jačina zvukab) Zajamčena jačina zvukac) Parametr buked) Postupak za ocjenu sukladncalie) Otavijesišleno ljeloc8. U 9. Datum |
| Portugues (Portuguese)Declarazione CE de Conformidade1. O abatto assinado, Peter Neckebroeck, declarata deste modo, em nome do mandatário, que a máquina abatto descrito cumpre todas as estpulações relevantes da:• Direciva 2006/42/CE relativa às máquinas• Direciva 2014/30/UE relativa à compatibilidade electromagnética• Direciva 2005/14/CE - 2005/88/CE relativa às emissões sonoras para o meio ambiente dos equipamentos para utilização no exterior2. Descrição da máquinaa) Produito : Corla relvab) Função : corte de relvac) Modelo d) Tipoe) Número de série3. Fabricante4. Mandatario com capacidade para compilar documentação técnica5. Referência a nomais harmonizadas6. Outras normas e especificações7. Direciva relativa às emissões sonoras para o meio ambiente dos equipamentos para utilização no exteriora) Potência sonora medidab) Potência sonora garanticac) Parámetro de ruidod) Procedimento de avaliação da conformidadee) Organismo notificado8. Feito em 9. Data | Polski (Polish)Deklarsacja zgodności WE1. Nižje podpisany, Peter Neckebroeck, w imleniu upowaznionego przedstawiciola, ninijszym sekariuje, że urządzenie opisane poniże speínis wszystkie odpowiednie postanowienia:* Dyrektywa Maszynova 2006/42/WEWdyrektyw Kompatybilniciš iElektromagnetiycznej 2014/30/UE* Dyrektywa Halasova 2000/14/WE - 2005/88/WE2. Ops urządzeniaa) Produkt : Kosarka b) Funkoja : scinanie trawy c) Model d) Type) Numery seryne3. Produenci4. Upowazniony Przgestawliciei oraz osoba upowazniona do przygotowania dokumentaci technicznej5. Zastasowana normy zharmonizowane6. Pozostale normy i przepély7. Dyrektywa Halasovaa) Znileziony poziom mocy akustycznejb) Gwarantowany poziom mocy akustycznejc) Wartočki halasu4. Procedura oceny zgodnoście) Jednostka notifykowana5. Miejsco 9. Data | Suomi / Suomen kiell (Finnish)EY-VAATIMUSTEN/MUKAIUSUASVAKUUTIS1. Alekiryolitanut. Peter Neckebroeck valtuutetu valmistajan udustaja, vakutitina falen elita alla maintitu konnetuote týztás kaikli seurasvi mátraykis:* Koneidirektivi 2006/42/EYWDirektivi 2014/30/EU sahkomagnestitinen yhteenespitivus* Direktivi 2000/14/EE - 2005/88/EY ymparisidin merjunt2. TUOTTEEN KUVAUSa) Tujote : Ruchonleikkurib) Tominito : nuhon leikkausc) Malli d) TYYPPIe) SARJANUMERO3. VALMISTAJA4. Valmistajan udustaja ja teknisten dokumentien lasia5. VITTÄUS YHTEISIIN STANDARDEIHIN6. MUU STANDARDI TAI TEKNISET TIEDDY7. Ymparisin meludirkilivia) Miliatlu meultascb) Todensmukainen melutaso4) Melu paramebt4) Vindermukaisusden avionnin menatelmae) Teconantizelin9. TEHTY 9. PÁVAMÁÁRÁ |
| Magyar (Hungarian)EK-megfalósítági nyilatkazala1. Alluitrott Peter Neckebroeck, a gyárto ceg törványes képviselőjekänt nyilatkozom, hogy az allalunk gyártoż gág megfeleł az oaszes. alabb felsomii direktivának:* 2006/42/EK Direktivának berendszésekre2014/30/EU Direktivának elektrömagnées pesjefleiségre* 2000/14/EB - 2005/88/EC Direktivának költesi zajzejntre2. A gág leirásaa) Termek : Fúnyírób) Funkció : fiú levágásac) Model d) Tipuse Sorozatszám3. Gyárto4. Meghalalmazoti képviselője és képes ossezallitani a műszaki dokumentáclót5. Hivalkozassal a szolványokra6. Más előirások, megjegyzásek7. Kölleti zajzint Direktivaa) Merit hangerób) Szavoltoli hangaróc) Zaizint paraméterd) Megfelőlaségi becdási ajárásc) Kijáltoli szorozet9. Keltezés helye9. Keltezés ideje | Cestina (Czech)ES – Prohlášení o shodě1. Podepsany Peter Neckebroeck, jako autorizovaná osoba zde potvrzuje, že stroj popsaný niže spírluje požadavky přístušných opafření:* Smérnice 2006/42/ES pro strojní zařizení* Smérnice 2014/30/EU stanovující technická požadavky na vyroky z hídiska elektromagnetičke kompatibily* Smérnice 2000/14/ES - 2005/88/ES stanovující technická požadavky na vyroky z hídiska emisi híku zařizení pro venkovní použitci2. Popis zařizenía) Vyrobek : Sekačka na trávub) Funkice : Sekáni trávyc) Model d) Typa) Vyrobni číslo3. Vytoboe4. Zplnomocený zástupca a oscha pověřená kompetaoí techniká dokumentace5. Ociezy na harmonizované normy6. Betaltu použité normy a specifikvace7. Směrnice pro híku pro venkovní použitci) Nameřeny skustikvý výkon8. Garantovany skustikvý výkonc) Parametr híkuč) Způsob posužení shodye) Notifikovaná osoba9. Podepsánc v 9. Datum | Latvieu (Latvian)EK ablsítibas deklaracija1. Peter Neckebroeck ar savu parakstu zen ší dokumenta, autorizitá párstavlja várds, pazino, ka zenárak aprakesítbe mašina, albist vislami zenák nomadite direktivu soidam:* Direktiva 2006/42/EK par mašlinám* Direktiva 2014/30/ES atlektiba uz elektrömagnetiško savietosamitu2. Direktiva 2000/14/EE - 2005/88/EK par trokřína emeliju viča2. Iekarias apraksisa) Produkte : Zlèves plávejáb) Funkcija : zrales plávašanac) Modelis d) Tipsa) Sarijas numurs3. Razotlja4. Autorizidais párstavis, kas spoj sastadit tehnisko dokumentáclu5. Alsaucu uz saskogolajcem standariem6. Cti niecktle standart vai specifikácijas7. Arejo troklpi Direktivaa) Arstimov a troklpi leiumeb) Palajamaais troklína lieumsc) Troklpa parametíb) Albisítas vortejuma procedínae) Informátá listáde8. Vieta 9. Datums |
| Slovenčina (Slovak)ES výnaslenie o zhode1. Dolupodpisany, Peter Neckebroeck, ako autorizovaný zástupca výrbocu, tymto výnaslaje. Ze uvedený strojová je v zhode s naslecovyními esmamiceni:* Smernica 2006/42/ES (Strojne zařadenia)* Smernica 2014/30/EU (Elektromagnetička kompatibilita)* Smernica 2000/14/ES - 2005/88/ES (Emise hluku)2. Popis strojaa) Produkt : Kasačka na trávu b) Funkola : Kosenie trávyc) Model d) Typey robné číslo3. Výchce4. Autorizovaný zástupca schopný zostavít technickiokumentáciu5. Referencia k harmonizovaným standardom6. Dalíse standardy alebo špecifikacie7. Svennica pre omisle hluku vo vofnom priestranstvea) Namerana hledina akustikéchého výkonu b) Zurančena hledina akustikéchého výkonu c) Rozmzer4. Procedurá posudzovania zhodye) Notifikovaná osoba8. Miesto 9. Datum | Eesti (Estonian)EU vastavudeklaratslocin1. Kaeselevaga kinnilab allakrijulanu, Peter Neckebroeck, vollitulac esildajá nimel, ef alipool kirjeldatou masina vastab kõidele aljatrgnevate direktivide ostelete;* Mesrate direktiv 2006/42/EU* Elektromagnetilise Ohilduvuse direktiv 2014/30/EL* Valismára direktiv 2000/14/EU - 2005/88/EU2. Saeimate kirjeldasa) Toode : Muruniticukb) Funktiskopcn : muru niltrinnec) Mude d) T30p e) Seeranumber3. Tootja4. Voštastud osindaja, kes on padev tailma tehniši dokumentatisioni5. Vidke ihlustatud standardile6. Muuz standardi ja spesifikatsiconid7. Visimára direktiva) Mitodutuc helvidīnsuse taseb) Lubatut helvidīnsuse tasec) Mūra parameeter4. Vastavushindamismanelluse5. Tevatistud asutus8. Koht 9. Kuņupšav | Slovensčina (Slovenian)ES izjava o skladnosti1. Spodaj podpisani, Peter Neckebroeck, ki je podblašćena cesba in vimentu prolizvajalca izgajda, la spodat opisana stro ustraza vesm naviederin sm direktivam:* Direktiva 2006/42/ES a strojhij* Direktiva 2014/30/EU o elektromagnetni zdnžiživosti* Direktiva 2000/14/ES - 2005/88/ES o hrupnosti2. Opis napravaa) Protizvod : Vrina koslinicab) Funkcija : košanje travec) Modeld) Tipe) Serijska stevilka3. Prozvajlec4. Poolašeni predstavnik kl lahko predziči tehnično dokumentacijo5. Uspotsvani harmonizirani standardo6. Ozali standardi ali specifikacj7. Direktiva o hrupnostia) Izmerjana zvočna močb) Carantirana zvočna močc) Parameterd) Postopeke) Postopek opravil8. Kraj 9. Datum |
AUSTRIA
Honda Austria Branch of Honda
Motor Europe Ltd
Hondastraße 1
2351 Wiener Neudorf
Power Products Trading
162, Yiannos Kranidiotis Avenue
2235 Latsia, Nicosia
Tel. : + 357 22 715 300
M50 Business Part, Ballymount
Dublin 12
Tel. : +353 1 4381900
Fax : +353 1 4607851
http://www.hondaireland.ie
E-mail: Service@hondaireland.ie
MALTA
The Associated Motors Company
Ltd.
New Street in San Gwakkin Road
Aries Power Equipment Sp. z o.o.
ul. Wroclawska 25
01-493 Warszawa
Tel.: +48 (22) 861 43 01
Fax : +48 (22) 861 43 02
http://www.grow.com.pt
mail: abel.leiriao@grow.com.pt
REPUBLIC OF BELARUS
Scanlink Ltd.
Kozlova Drive, 9
220037 Minsk
Tel.: +375 172 999090
Fax: +375 172 999900
http://www.hondapower.by
ROMANIA
Hit Power Motor Srl
str. Vasile Stroescu nr. 12, Camera 6,
Sector 2, 021374 Bucuresti
Tel.: +40 21 637 04 58
Fax: +40 21 637 04 78
http://www.honda.ro
E-mail: hit_power@honda.ro
SERBIA & MONTENEGRO
ITH Trading Co Doo
Majke Jevroscme 26
1100 Beograd
Serbia
email:sstevanovic@ithtrading.co.rs
SLOVAK REPUBLIC
Honda Motor Europe Ltd Slovensko,
organizačná zložka
Prievozská 6 821 09 Bratislava
Tel.: +421 2 32131111
Fax: +421 2 32131112
http://www.honda.sk
SLOVENIA
AS Domzale Moto Center D.O.O.
Blatnica 3A
1236 Trzin
Tel.: +386 1 562 22 62
Fax: +386 1 562 37 05
http://www.honda-as.com
Greens Power Products, S.L.
Poligono Industrial Congost –
- SAFETY MESSAGES
- DAMAGE PREVENTION MESSAGES
- HONDA
- OWNER'S MANUAL
- CONTENTS
- SAFETY INSTRUCTIONS
- WARNING
- To ensure safe operation –
- Disposal
- PRODUCT IDENTIFICATION PLATE
- SET-UP
- UNPACKING
- HANDLEBAR SETUP
- BATTERY (HZEA TYPE)
- GRASS CATCHER ASSEMBLY
- ENGINE OIL
- FUEL
- BEFORE USING YOUR LAWNMOWER
- CONTROLS
- FUEL VALVE
- THROTTLE LEVER
- ENGINE SWITCH [1] (HZEA TYPE)
- CUTTING-MEANS CONTROL
- DRIVE CLUTCH CONTROL
- SHIFT LEVER
- CUTTING HEIGHT ADJUSTMENT LEVERS
- CLIP DIRECTOR KNOB
- CHECK YOUR LAWN
- Objects
- People and Pets
- Lawn
- CHECK YOUR MOWER
- Cutting Means
- Engine Oil Level
- NOTICE
- Fuel Storage Container
- Air Cleaner Inspection
- Handlebar Height Adjustment
- Grass Catcher
- Inspection
- Installation
- Removal
- Cutting Height
- Rear Shield
- Clip Director
- Clip Director Knob Adjustment
- Important Safety Precaution
- Sliding Door Position
- Rear Discharge
- OPERATION
- MOWING PRECAUTIONS
- FREQUENCY OF USE
- STARTING THE ENGINE
- HZEA electric start type:
- HZEA manual start:
- High Altitude Operation
- OPERATING THE CONTROLS FOR MOWING
- Cutting-means Control Lever
- STOPPING THE ENGINE
- SAFE MOWING PRACTICES
- DANGER
- Stability
- Obstacles
- Gravel and Loose Objects
- MOWING TIPS
- When to Mow
- Cutting Width
- Cutting Means Speed
- Cutting Means Sharpness
- Dry Grass
- Wet Grass
- Fallen Leaves
- Clogged Cutting-means Enclosure
- Mowing Patterns
- Mulching
- Catching
- Rear Discharge Mowing
- MAINTENANCE
- THE IMPORTANCE OF MAINTENANCE
- Maintenance safety
- Safety Precautions
- MAINTENANCE SCHEDULE
- ENGINE MAINTENANCE
- Engine Oil Change
- Air Cleaner Service
- Spark Plug Service
- Spark Arrester Service
- CONTROL CABLE ADJUSTMENTS
- Cutting-means Control Cable
- Drive Clutch Cable Adjustment
- Throttle Cable Adjustment
- CUTTING MEANS REMOVAL AND INSTALLATION
- Cutting Means Removal
- Cutting Means Installation
- Cutting-means bolt torque: 49 \~ 59 N·m
- GRASS CATCHER CLEANING AND REPLACEMENT
- Cleaning
- Replacement
- CHARGING THE BATTERY (HZEA TYPE)
- REPLACING A FUSE
- TRANSPORTING
- Before Loading
- Handlebar Folding
- Loading and Unloading
- STORAGE
- Engine
- Cutting-means Enclosure
- Short Term Storage (30-90 days)
- Long Term or Seasonal Storage (greater than 90 days)
- Engine Cylinder
- Placing in Storage
- Removing from Storage
- TROUBLESHOOTING
- INTRODUCTION
- TABLE DES MATIERES
- HUILE MOTEUR
- ESSENCE
- LEVIER DE CHANGEMENT DE VITESSE
- BOUTON DE COMMANDE DE LA TONTE
- Carburant
- Déflecteur arrière
- FONCTIONNMENT
- PRECAUTIONS A PRENDRE POUR LA TONTE
- AVIS
- REGLAGE DES CABLES DE COMMANDE
- Inspection Du Cable Des Gaz
- Installation du sac
- RANGEMENT
- INDICE
- ACEITE DEL MOTOR
- COMBUSTIBLE
- PERILLA DEL DIRECTOR DE CORTE
- Dirección del corte
- OPERACIÓN
- PRECAUCIONES AL CORTAR EL CÉSPED
- Obstáculos
- CARGA DE LA BATERÍA (TIPO HZEA)
- INHALTSVERZEICHNIS
- MOTORÖL
- BENZIN
- VOR DEM BETRIEB
- GASHEBEL
- BETRIEB
- Hindernisse
- ZUR BEACHTUNG
- DAS LADEN DER BATTERIE (NUR HZEA TYP)
- LAGERUNG
- OLIO DEL MOTORE
- CARBURANTE
- LEVETTA DEL GAS
- LEVETTA DEL CAMBIO
- CONTROLLI PRIMA DELL'USO
- SIETE PRONTI PER TOSARE?
- USO
- Tipo HZEA :
- NOTA
- Montaggio del sacco
- INHOUD
- WAARSCHUWINGSSTICKER
- MOTOROLIE
- GASHENDEL
- MAAISELRICHTERKNOP
- VOORDAT U GAAT MAAIEN
- BENT U KLAAR OM TE MAAIEN?
- Benzine
- DE MAAIER GEBRUIKEN
- VOORZORGSMAATREGELEN
- Meskoppelingshendel
- Obstakels
- OPMERKING
- Vonkenvanger
- KOPPELINGSKABELS NASTELLEN
- Meskoppelingskabel
- Gaskabel inspecteren
- Aanbrengen
- Honda Warranty Conditions
- Conditions D'application De La Garantie Honda
- AUSTRIA
- Honda Austria Branch of Honda
- Motor Europe Ltd
- Power Products Trading
- MALTA
- The Associated Motors Company
- Ltd.
- Aries Power Equipment Sp. z o.o.
- REPUBLIC OF BELARUS
- Scanlink Ltd.
- ROMANIA
- Hit Power Motor Srl
- SERBIA & MONTENEGRO
- ITH Trading Co Doo
- SLOVAK REPUBLIC
- Honda Motor Europe Ltd Slovensko,
- organizačná zložka
- SLOVENIA
- AS Domzale Moto Center D.O.O.
- Greens Power Products, S.L.
Brand : Honda
Model : HRX 537C HY
Category : Lawn mower