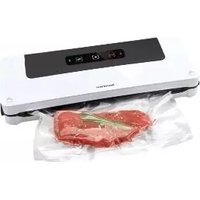
SFS 120 A1 - Vacuum packing machine SILVERCREST - Free user manual and instructions
Find the device manual for free SFS 120 A1 SILVERCREST in PDF.


| Product Type | Vacuum packing machine |
| Brand | SilverCrest |
| Model | SFS 120 A1 |
| Power Supply | 220-240V~, 50/60Hz |
| Power Consumption | 120 W |
| Dimensions (approx.) | 400 x 200 x 100 mm |
| Weight (approx.) | 1.5 kg |
| Vacuum Pressure | -0.8 bar |
| Sealing Bar Length | 300 mm |
| Functions | Vacuum seal, seal only, pulse vacuum, marinate function |
| Compatible Bags | Up to 300 mm wide, textured or smooth bags |
| Accessory Port | For canisters and wine stoppers |
| Bag Cutter | Built-in roll cutter |
| Housing Material | High-quality plastic |
| Sealing Bar Material | Stainless steel with non-stick coating |
| Safety Features | Overheat protection, automatic shut-off |
| Cleaning and Maintenance | Wipe exterior with damp cloth; clean sealing bar after use; do not immerse in water |
| Spare Parts | Replacement sealing tape set, vacuum bags, accessory hose |
| Repairability | User-replaceable sealing tape; professional service for other issues |
| Included Accessories | 10 vacuum bags (2 sizes), roll of bags, instruction manual |
Frequently Asked Questions - SFS 120 A1 SILVERCREST
User questions about SFS 120 A1 SILVERCREST
0 question about this device. Answer the ones you know or ask your own.
Ask a new question about this device
Download the instructions for your Vacuum packing machine in PDF format for free! Find your manual SFS 120 A1 - SILVERCREST and take your electronic device back in hand. On this page are published all the documents necessary for the use of your device. SFS 120 A1 by SILVERCREST.
USER MANUAL SFS 120 A1 SILVERCREST
VACUUM SEALER SFS 120 A1
GB IE NI CY
VACUUM SEALER
Operating instructions
DE AT CH
VAKUUMIERER
Bedienungsanleitung
GR CY
Before reading, unfold the page containing the illustrations and familiarise yourself with all functions of the device.
GR CY
GB/IE/NI/CY Operating instructions Page 1
Limitation of liability 2
Intended use 2
Package contents and transport inspection .... 3
Unpacking 3
Disposal of packaging materials 3
Description of the appliance ....4
Technical data 4
Safety guidelines .... 5
Setting up and connecting 7
Set-up location requirements 7
Electrical connection 7
Welding a tube film 8
Vacuuming the tube film 10
Cleaning 12
Cleaning the appliance .... 1 2
Storage 12
Disposal 13
Kompernass Handels GmbH warranty 13
Service 15
Importer 15
Ordering replacement parts 16
Introduction
Congratulations on the purchase of your new appliance!
You have decided in favour of a modern, high-quality product. These operating instructions are part of this product. They contain important information on safety, usage and disposal. Before using the product, familiarise yourself with all handling and safety guidelines. This appliance may only be used as described and for the purposes indicated. Please also pass these operating instructions on to any future owner(s).
Copyright
This documentation is protected by copyright.
Any reproduction, or any reprint even in the form of excerpts, as well as the rendition of figures even in modified form, is only permitted with the manufacturer's written consent.
Limitation of liability
All the technical information, data and instructions regarding installation, connection and operation contained in these operating instructions corresponds to the latest information available to us at the time of printing and takes our previous experience and know-how into account.
No claims can be derived from the details, illustrations and descriptions in these instructions.
The manufacturer assumes no responsibility for damage caused by failure to observe these instructions, improper use, incompetent repairs, unauthorised modifications or for the use of non-approved replacement parts.
Intended use
This appliance is intended exclusively for the sealing and vacuum-packing of foodstuffs in household quantities and only in private households. This device is not intended for commercial or industrial applications or for continuous use.
It is not intended for any other use or use beyond that specified. Claims of any kind for damage arising as a result of incorrect use will not be accepted. The risk shall be borne solely by the user.
Package contents and transport inspection
The appliance is supplied with the following components as standard:
• Vacuum Sealer
- 1 x tube film
- 1x replacement sealing ring
• These operating instructions
NOTE
▶ Check the package for completeness and for signs of visible damage.
▶ If the consignment is incomplete or damaged due to defective packaging or carriage, contact the Service hotline (see the chapter Service).
Unpacking
◆ Remove the appliance, the tube film and the operating instructions from the carton.
◆ Remove all packaging material.
◆ Remove the protective film from the control panel.

DANGER
▶ Packaging materials should not be used as a plaything. Risk of suffocation.
Disposal of packaging materials
The packaging protects the appliance from damage during carriage.
The packaging materials have been selected for their environmental friendliness and ease of disposal, and are therefore recyclable.

Returning the packaging to the materials cycle conserves raw materials and reduces the amount of waste that is generated. Dispose of packaging materials that are no longer needed in accordance with applicable local regulations.
NOTE
If possible, keep the original packaging during the warranty period so that the device can be properly packed for returning in the event of a warranty claim.
Description of the appliance
Figure A
① Appliance lid
② Suction tube
③ Cable retainer
4 Welding wires
5 Lower sealing ring
6 Rear limiters
⑦ Front limiters
8 Lid release
9 Upper sealing ring
10 Press seal
Figure B
11 Red control lamp
12 [::=] button (seal)
⑬ button (stop)
⑭ [特] button (vacuum/welding)
15 Green control lamp
Technical data
| Operating voltage 100 - 240 V ~, 50/60 Hz | |
| Power consumption 120 W | |
| Protection class | II/☐ |
Safety guidelines

RISK OF ELECTRIC SHOCK
■ Prior to use, check the device for visible external damage. Never operate an appliance that is damaged.
■ To avoid risks, arrange for a defective power cable to be replaced by qualified technicians or by our Customer Service Department.
■ NEVER use the appliance with a defective power cable.
■ Do not use extension cables or power socket strips that do not meet the required safety standards.
■ Never open the appliance housing!
■ Remove the plug from the mains power socket before beginning to clean the device.
■ Ensure that no moisture can penetrate the device during cleaning.

RISK OF INJURY!
■ All repairs must be carried out by authorised specialist companies or by the Customer Service department. Improper repairs may result in a risk of injury to the user or damage to the appliance. They will also invalidate any warranty claim.
■ The mains power socket must be easily accessible, so that the power cable can be easily disconnected in the event of an emergency.

RISK OF INJURY!
■ Cleaning and user maintenance tasks may not be carried out by children unless they are supervised.
■ The appliance and its connecting cable must be kept away from children younger than 8 years old.
■ This appliance may be used by children aged 8 years and above and by persons with limited physical, sensory or mental capabilities or lack of experience and knowledge, provided that they are under supervision or have been told how to use the appliance safely and are aware of the potential risks.
■ Children must not play with the appliance!
■ Children should be supervised to ensure that they do not play with the appliance.
■ Do not leave the appliance unsupervised when it is ready for use. To prevent it being switched on accidentally, always unplug the appliance after use or during breaks.

CAUTION - PROPERTY DAMAGE!
■ Do not use an external timer switch or a separate remote control system to operate the appliance.
Setting up and connecting
Set-up location requirements
For safe and trouble-free operation of the device, the set-up location must fulfil the following requirements:
■ When setting it up, place the appliance on a firm, flat and horizontal surface.
■ Do not place the device in a hot, wet or extremely damp environment or in the vicinity of flammable materials.
■ The mains power socket must be easily accessible, so that the power cable can be easily disconnected in the event of an emergency.
Electrical connection
CAUTION
▶ Before you connect the appliance, compare the connection data (voltage and frequency) on the data plate with that of your mains power network. These data must agree so that no damage is sustained by the device.
▶ Ensure that the power cable is undamaged and is not routed over hot surfaces and/or sharp edges.
▶ Ensure that the power cable is not taut or kinked.
▶ Do not let the power cable hang over edges (trip wire effect).
◆ Insert the plug into the mains mains power socket.
Welding a tube film
NOTES ON THE FILM
The film width may not exceed 28 cm. Otherwise it cannot be welded correctly.
▶ Use only nylon-PE films with a structure (points or grooves) on one side and that have a structure (points or grooves) on one side and a thickness of approximately 0.17 - 0.29 mm (170 - 290 μ).
Otherwise the weld seam will not be tight and the appliance may be damaged. You can recognise films of this type from the information on the packaging. The quality of the weld seam will vary depending on the type and thickness of the film.
The supplied film is suitable for temperatures between -20°C and +100°C.
1) Cut the desired length for your bag from the tube film using a pair of scissors. Cut as straight as possible.
2) Open the appliance lid ① by pressing the lid release ⑧ and opening the lid ⑪ upwards.
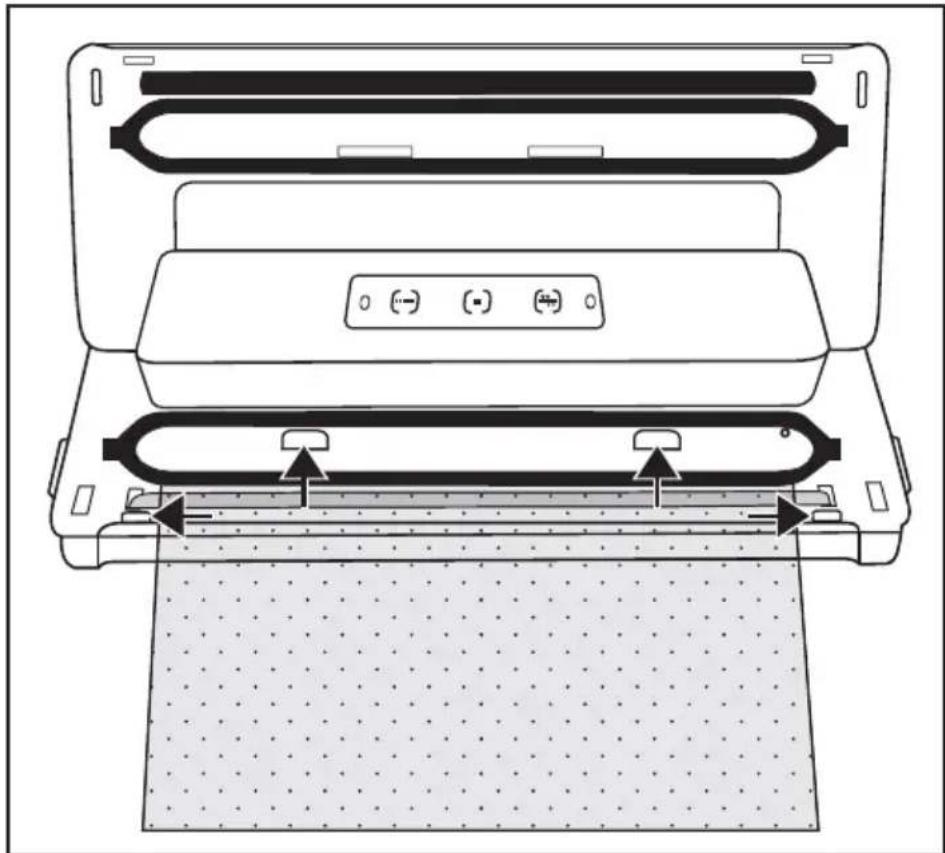
3) Lay the open end of the bag as far into the appliance so that the opening of the bag is located centrally under the lower sealing ring ⑤. The bag should be inserted no further than the rear limiters ⑥ and must lie between the front limiters ⑦. If the bag lies over one or both of the two limiters ⑦, then the bag cannot be correctly welded.
NOTE
The bag opening must lie flat on the welding wire ④. Otherwise the welding does not work properly.
4) Close the appliance lid ①. The press seal ⑩ presses the bag onto the welding wire ④, to create a smooth seam. Ensure that both corners of the appliance lid ① click closed. If necessary, press them down once again on the markings and so that the appliance lid ① clicks into place and locks shut.
5) Press the[---] button ⑫. The red control lamp ⑪ lights up. As soon as the sealing process is finished, the red control lamp ⑪ goes off.
NOTE
▶ You can halt the sealing process at any time by pressing the [■] button ⑬. The red control lamp ⑪ goes out.
CAUTION - PROPERTY DAMAGE!
If the red control lamp Ⓤ does not go out after a maximum of 10 seconds, there is a fault with the appliance.
▶ Remove the plug from the mains power socket immediately. Do not attempt to repair the appliance yourself. Contact the Customer Service department.
6) Open the appliance lid ① by pressing the lid release ⑧ and flipping the lid ⑪ upwards. Remove the bag. This is now sealed at one end.
NOTE
▶ Ensure that the weld seam is properly closed. A correct weld seam should be a smooth, straight stripe without any creases.
7) Fill the bag. You must leave at least 6 cm of the bag free up to the edge to be welded.
CAUTION - PROPERTY DAMAGE!
▶ Fill the bag so that no food scraps or liquids can leak out during welding and get into the appliance.
8) If you do not want to vacuum the bag, you can now weld the other, open side.
NOTE
- Wait 15 seconds before sealing the next bag to allow the appliance to cool down. During this cool-down phase, you cannot start the "seal" function.
Vacuuming the tube film
You can also suck the air out of the bag (vacuum) during welding:
CAUTION - PROPERTY DAMAGE!
Do not evacuate bags that contain liquids. These will get into the appliance and damage it.
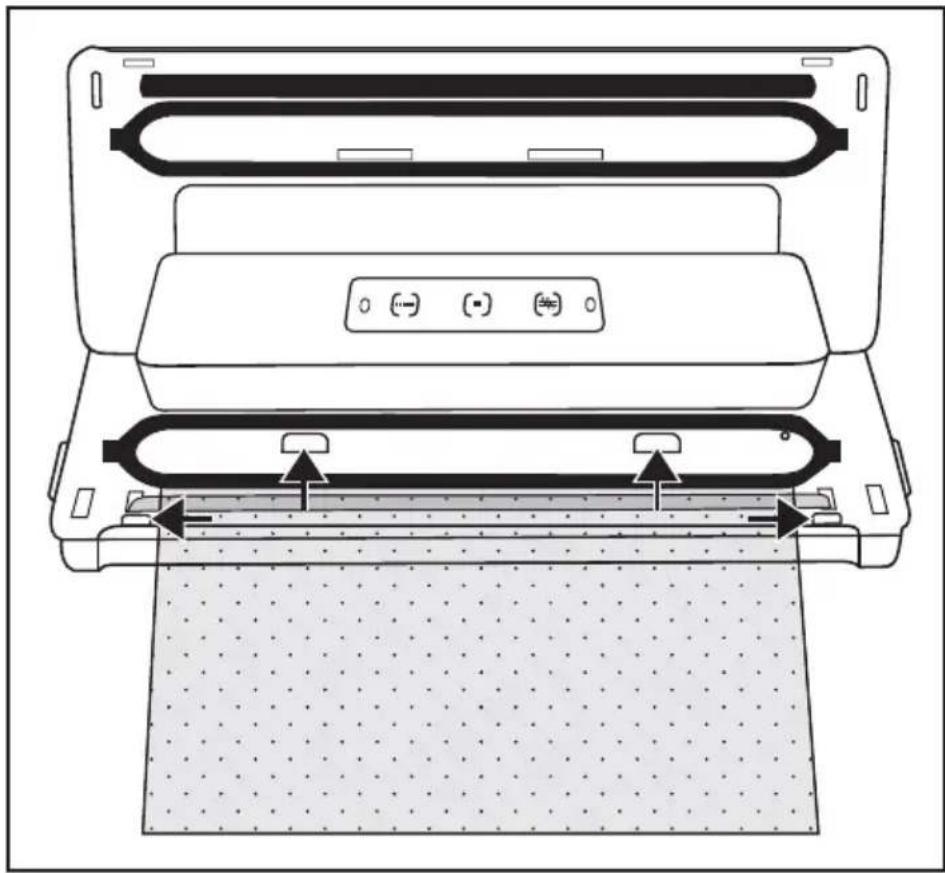
1) Lay the open end of the bag as far into the appliance so that the opening of the bag is located centrally under the lower sealing ring ⑤. The bag should be inserted no further than the rear limiters ⑥ and must lie between the front limiters ⑦. Otherwise the vacuuming and welding will not function correctly:
2) Close the appliance lid ①. Ensure that both corners of the appliance lid ① click closed. If necessary, press them down once again on the markings and so that the appliance lid ① clicks into place and locks shut.
NOTE
▶ Ensure that the upper ⑨ and the lower sealing rings ⑤ are not damaged! Otherwise the device cannot suck the air out of the bag.
If either one of the sealing rings 9/5 is damaged, simply pull it out of the groove and press the replacement sealing ring into the groove.
3) Press the [bell] button 14. The green control lamp 15 lights up and the appliance sucks the air out of the bag. As soon as all the air is sucked out, the green control lamp 15 goes out and the red control lamp 11 lights up. The appliance now seals the bag.
4) If both control lamps ⑪/⑮ have gone out, you can open the lid by pressing the lid catch ⑧ and flipping the lid ⑪ upwards. Remove the vacuum-sealed bag.
NOTE
▶ You can halt the air extraction process at any time by pressing the [■] button 13. The green control lamp 15 will then go off. Press the [■■] button 14 again to resume the extraction process.
If the appliance has already switched to the sealing process and the red control lamp ⑪ is lit, the process can be stopped with the [■] button ⑬. The appliance then stops the sealing process.
▶ Once you have sealed 5 bags in a row, allow the appliance to cool down for about 1 minute.
During this cool-down phase, you cannot start the appliance. After the cool-down phase, you can use the appliance as normal.
TIP - "SOUS-VIDE COOKING"
As the supplied film is suitable for temperatures between -20°C and +100°C, it can be used for the so-called "sous-vide" cooking process (vacuum cooking).
"Sous-vide" is French and means "under vacuum".
In vacuum cooking, the food (usually fish or meat, but vegetables can also be used) is vacuum-sealed in a bag and then cooked in water or steam cooked at a relatively low temperature (50 to 90 C). The advantage of this is that volatile flavours or aroma are not lost during cooking. The food does not dry out and the vitamins and flavours are preserved. Herbs or spices that are vacuum-sealed in the bag with the food give off a more intense flavour.
Cleaning

DANGER
Risk of fatal injury from electrocution!
▶ Remove the plug from the mains power socket before beginning to clean the device.
▶ Ensure that no moisture can penetrate the device during cleaning.
CAUTION
Possible damage to the appliance.
▶ Do not use aggressive or abrasive cleaning agents, as these may corrode the surface of the casing.
▶ Do not use any hard or sharp objects to remove any adhesive from the welding wire ④. Otherwise the welding wire ④ or the insulation could be damaged.
Cleaning the appliance
- Clean the surface of the housing of the appliance with a lightly moistened cloth and a mild detergent.
Wipe off the upper ⑨ and the lower sealing rings ⑤, as well as the press seal ⑩ with a damp cloth. Ensure that the appliance is dry before using it again.
Storage
The appliance has a built-in cable retainer ③ on the underside of the housing, on which you can wrap the power cable when it is not in use. This prevents the power cable from getting caught or soiled, or becoming a source of danger by hanging loosely down.
CAUTION
Possible damage to the appliance.
Do not click the appliance lid ① closed for storage! When the appliance lid ① is clicked closed it exerts permanent pressure on the upper ⑨ and lower sealing rings ⑤, as well as the press seal ⑩. This can negatively affect their function.
◆ Store the appliance in a clean, dry place away from direct sunlight.
Disposal

Under no circumstances should you dispose of the appliance with the normal household waste.
This product is subject to the provisions of European Directive 2012/19/EU (Waste Electrical and Electronic Equipment).
Dispose of the appliance via an approved waste disposal company or your municipal waste disposal facility. Please observe applicable regulations. In case of doubt, please contact your waste disposal centre.
This appliance has a 3-year warranty valid from the date of purchase. If this product has any faults, you, the buyer, have certain statutory rights. Your statutory rights are not restricted in any way by the warranty described below.
Warranty conditions
The validity period of the warranty starts from the date of purchase. Please keep your original receipt in a safe place. This document will be required as proof of purchase.
If any material or production fault occurs within three years of the date of purchase of the product, we will either repair or replace the product for you at our discretion. This warranty service is dependent on you presenting the defective appliance and the proof of purchase (receipt) and a short written description of the fault and its time of occurrence.
If the defect is covered by the warranty, your product will either be repaired or replaced by us. The repair or replacement of a product does not signify the beginning of a new warranty period.
Warranty period and statutory claims for defects
The warranty period is not prolonged by repairs effected under the warranty. This also applies to replaced and repaired components. Any damage and defects present at the time of purchase must be reported immediately after unpacking. Repairs carried out after expiry of the warranty period shall be subject to a fee.
Scope of the warranty
This appliance has been manufactured in accordance with strict quality guidelines and inspected meticulously prior to delivery.
The warranty covers material faults or production faults. The warranty does not extend to product parts subject to normal wear and tear or fragile parts such as switches, batteries, baking moulds or parts made of glass.
The warranty does not apply if the product has been damaged, improperly used or improperly maintained. The directions in the operating instructions for the product regarding proper use of the product are to be strictly followed. Uses and actions that are discouraged in the operating instructions or which are warned against must be avoided.
This product is intended solely for private use and not for commercial purposes. The warranty shall be deemed void in cases of misuse or improper handling, use of force and modifications / repairs which have not been carried out by one of our authorised Service centres.
Warranty claim procedure
To ensure quick processing of your case, please observe the following instructions:
■ Please have the till receipt and the item number (e.g. IAN 12345) available as proof of purchase.
■ You will find the item number on the type plate, an engraving on the front page of the instructions (bottom left), or as a sticker on the rear or bottom of the appliance.
If functional or other defects occur, please contact the service department listed either by telephone or by e-mail.
■ You can return a defective product to us free of charge to the service address that will be provided to you. Ensure that you enclose the proof of purchase (till receipt) and information about what the defect is and when it occurred.

You can download these instructions along with many other manuals, product videos and software on www.lidl-service.com.
Service
GB Service Great Britain
Tel.: 0871 5000 720 (£ 0.10/Min.)
E-Mail: kompernass@lidl.co.uk
IE Service Ireland
Tel.: 1890 930 034
(0,08 EUR/Min., (peak))
(0,06 EUR/Min., (off peak))
E-Mail: kompernass@lidl.ie
CY Service Cyprus
Tel.: 8009 4409
E-Mail: kompernass@lidl.com.cy
IAN 288381
Importer
Please note that the following address is not the service address. Please use the service address provided in the operating instructions.
KOMPERNASS HANDELS GMBH
BURGSTRASSE 21
DE-44867 BOCHUM
GERMANY
www.kompernass.com
Ordering replacement parts
You can order the following replacement parts for the product SFS 120 A1:
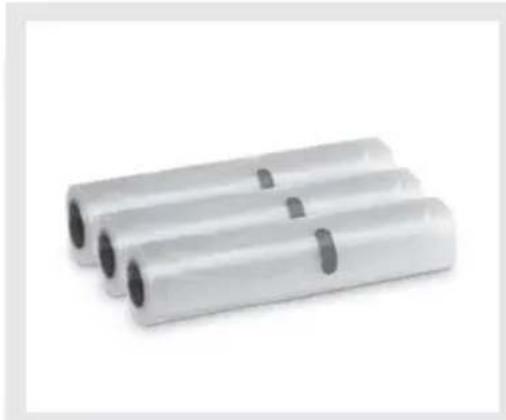
▶ 3-piece set of tubular film rolls, narrow (20 x 300 cm)
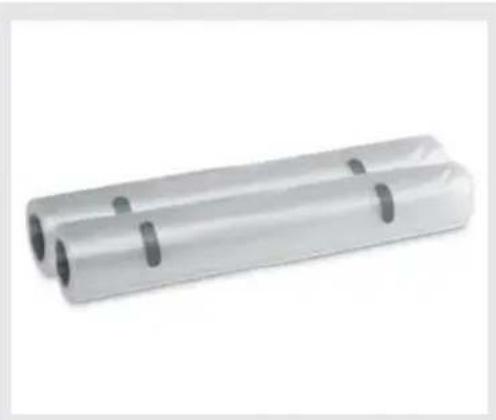
▶ 2-piece set of tubular film rolls, wide (28 x 300 cm)
Order the replacement parts via the service hotline (see section "Service") or simply visit our website at www.kompernass.com.

NOTE
▶ Have the IAN number of the appliance ready (can be found on the cover of these operating instructions) when you place your order.
Περιεχόμενα
Εισαγωγή 18
ΥΠΟΔΕΙΞΗ
KOMPERNASS HANDELS GMBH
BURGSTRASSE 21
DE-44867 BOCHUM
ГЕРMANIA
www.kompernass.com
УПОДЕН
HINWEIS
KOMPERNASS HANDELS GMBH
BURGSTRASSE 21
DE-44867 BOCHUM
DEUTSCHLAND
www.kompernass.com
▶ 3er-Set Folienschlauchrollen schmal (20 x 300 cm)
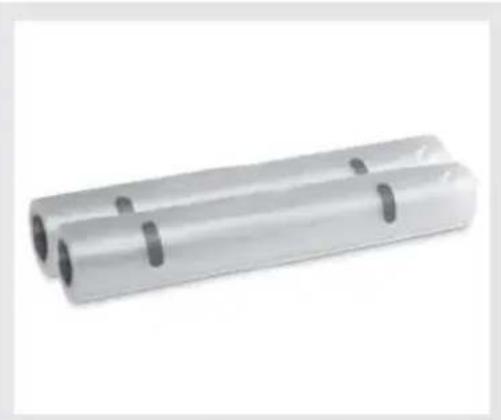
▶ 2er-Set Folienschlauchrollen breit (28 x 300 cm)
HINWEIS
KOMPERNASS HANDELS GMBH
BURGSTRASSE 21
DE-44867 BOCHUM
GERMANY
www.kompernass.com

- VACUUM SEALER SFS 120 A1
- GR CY
- INTENDED USE 2
- PACKAGE CONTENTS AND TRANSPORT INSPECTION .... 3
- DESCRIPTION OF THE APPLIANCE ....4
- TECHNICAL DATA 4
- SAFETY GUIDELINES .... 5
- SETTING UP AND CONNECTING 7
- WELDING A TUBE FILM 8
- VACUUMING THE TUBE FILM 10
- CLEANING 12
- STORAGE 12
- DISPOSAL 13
- KOMPERNASS HANDELS GMBH WARRANTY 13
- ORDERING REPLACEMENT PARTS 16
- INTRODUCTION
- COPYRIGHT
- LIMITATION OF LIABILITY
- INTENDED USE
- PACKAGE CONTENTS AND TRANSPORT INSPECTION
- NOTE
- UNPACKING
- DANGER
- DISPOSAL OF PACKAGING MATERIALS
- DESCRIPTION OF THE APPLIANCE
- FIGURE A
- FIGURE B
- TECHNICAL DATA
- SAFETY GUIDELINES
- RISK OF ELECTRIC SHOCK
- RISK OF INJURY
- CAUTION - PROPERTY DAMAGE
- SETTING UP AND CONNECTING
- SET-UP LOCATION REQUIREMENTS
- ELECTRICAL CONNECTION
- CAUTION
- WELDING A TUBE FILM
- NOTES ON THE FILM
- IF THE RED CONTROL LAMP Ⓤ DOES NOT GO OUT AFTER A MAXIMUM OF 10 SECONDS, THERE IS A FAULT WITH THE APPLIANCE
- VACUUMING THE TUBE FILM
- TIP - "SOUS-VIDE COOKING
- CLEANING
- RISK OF FATAL INJURY FROM ELECTROCUTION
- POSSIBLE DAMAGE TO THE APPLIANCE
- CLEANING THE APPLIANCE
- STORAGE
- DISPOSAL
- WARRANTY CONDITIONS
- WARRANTY PERIOD AND STATUTORY CLAIMS FOR DEFECTS
- SCOPE OF THE WARRANTY
- WARRANTY CLAIM PROCEDURE
- SERVICE
- IMPORTER
- ORDERING REPLACEMENT PARTS
- ΠΕΡΙΕΧΌΜΕΝΑ
- ΥΠΟΔΕΙΞΗ
- УПОДЕН
- HINWEIS
Brand : SILVERCREST
Model : SFS 120 A1
Category : Vacuum packing machine