
Ray Danz TS9030 - Soundbar TCL - Free user manual and instructions
Find the device manual for free Ray Danz TS9030 TCL in PDF.

| Product Type | Soundbar with wireless subwoofer |
| Model | Ray Danz TS9030 |
| Brand | TCL |
| Total Power Output | 300 W RMS |
| Channels | 2.1 |
| Subwoofer | Wireless, 6.5 inch driver |
| Connectivity | Bluetooth 5.0, HDMI ARC, Optical, USB, 3.5mm Aux |
| Audio Decoding | Dolby Audio, DTS Virtual:X |
| Sound Modes | Movie, Music, Voice, Night, Standard |
| Dimensions (Soundbar) | 90 x 6.5 x 8.5 cm (35.4 x 2.6 x 3.3 inches) |
| Dimensions (Subwoofer) | 20 x 35 x 35 cm (7.9 x 13.8 x 13.8 inches) |
| Weight (Soundbar) | 2.5 kg (5.5 lbs) |
| Weight (Subwoofer) | 4.1 kg (9.0 lbs) |
| Power Supply | AC 100-240V, 50/60Hz (Soundbar); AC 100-240V, 50/60Hz (Subwoofer) |
| Power Consumption | 30 W (Soundbar), 40 W (Subwoofer), Standby < 0.5 W |
| Wall Mountable | Yes (brackets included) |
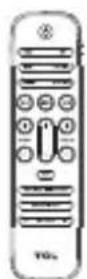
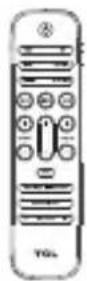
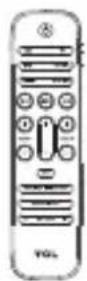
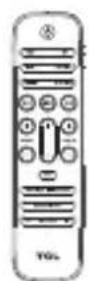
| Remote Control | Included (battery type: CR2025) |
| Cleaning Instructions | Wipe with a soft, dry cloth. Do not use solvents or abrasive cleaners. |
| Safety Warnings | Do not expose to liquids. Unplug during storms or if unused for long periods. |
| Spare Parts Availability | Contact TCL support for replacement power cords or remote controls. |
| Repairability Index | 5.9 / 10 (estimated) |
Frequently Asked Questions - Ray Danz TS9030 TCL
User questions about Ray Danz TS9030 TCL
0 question about this device. Answer the ones you know or ask your own.
Ask a new question about this device
Download the instructions for your Soundbar in PDF format for free! Find your manual Ray Danz TS9030 - TCL and take your electronic device back in hand. On this page are published all the documents necessary for the use of your device. Ray Danz TS9030 by TCL.
USER MANUAL Ray Danz TS9030 TCL
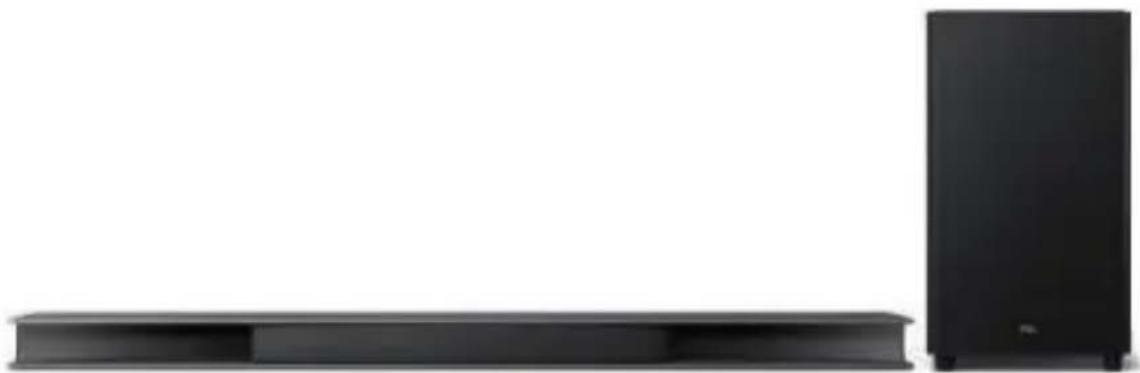
natural_image
Exterior view of a modern black audio equipment setup with a flat-screen base and a vertical black tower (no text or symbols visible)User manual
Contents
1 Before you begin 3
2 Welcome 4
What's in the box 4
Overview of the Sound Bar main unit 6
Overview of the wireless subwoofer 8
Remove the Sound Bar back cover 9
Set up your Sound Bar system 9
3 Connect, install and pair 14
Connect to your TV 14
Optional: Connect your Blu-ray player 16
Connect your Sound Bar to power supply 17
Install/replace the remote control batteries 18
Pair your wireless subwoofer to the Sound Bar 19
4 Optional connections 21
Connect with the supplied optical cable 21
Connect with the audio cable 23
Pair the Sound Bar with your Bluetooth device 24
5 Use your Sound Bar system 26
Operate your Sound Bar with the top panel 26
Sound Bar LED display 26
Listen to music from your Bluetooth device 28
Use the USB device for music playback 29
6 Specifications 30
7 Notice 31
Declaration of conformity 31
Disposal of your old product and battery 31
8 Trademarks 33
9 FAQ 35
1 Before you begin
- Carefully read and observe all safety instructions in the safety leaflet
- This soundbar is intended for indoor use only. In case it accidentally gets in contact with small amounts of water, unplug immediately and use a dry cloth to remove the water.
- Unplug the soundbar if it is not used for long periods of time or during lightning storms.
- Make sure the soundbar is installed on a solid surface or solidly wall-mounted below your TV for the best experience.
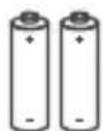
- Only use AAA 1.5V non-rechargeable batteries for the remote control.
- In case any of the cables are visibly damaged or pinched, unplug the soundbar and replace the cable.
- Be careful not to sharply bend the HDMI and optical cable as they may affect the performance.
- Protect your hearing by adjusting to a proper volume. Predefined and customizable sound settings are available for your listening comfort.
2 Welcome
Congratulations on the purchase of your new TCL Sound Bar! After it is set up and connected, you can experience a superb sound quality and state-of-the-art design to best fit your home entertainment system. You are recommended to read through this user manual which helps you set up, connect and operate the product easily and properly.
Let's get started.
What's in the box

natural_image
Simple line drawing of a rectangular frame with supports at both ends (no text or symbols)Sound Bar main unit with wireless subwoofer
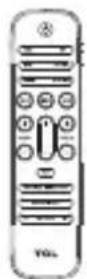
Remote control
natural_image
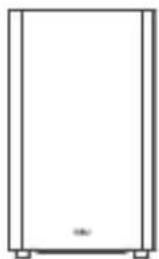
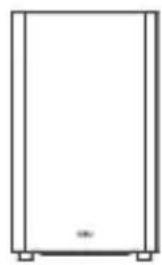
Simple line drawing of a rectangular cabinet or enclosure with no text, numbers, or symbolsWireless subwoofer

natural_image
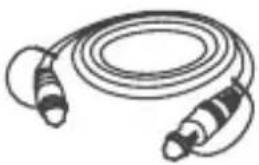
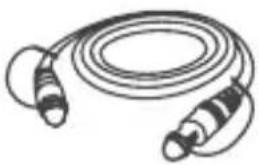
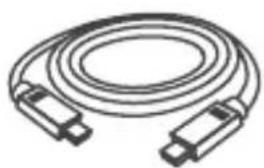
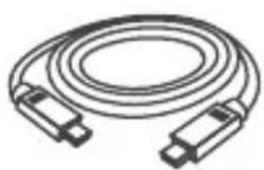
Illustration of a coiled cable with two connectors (no text or symbols)HDMI cable
natural_image
Illustration of a coiled cable with two connectors (no text or symbols)Optical cable

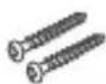
Wall mounting screw x 2
natural_image
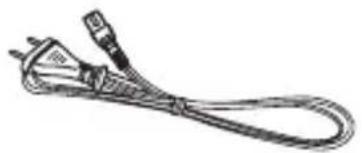
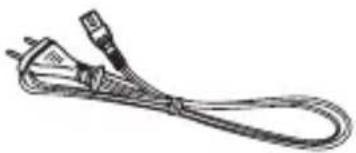
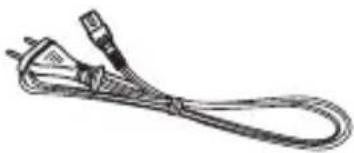
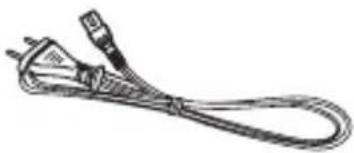
Line drawing of a coiled electrical plug with two terminal connectors (no text or symbols)AC power cord x 2
Wall mount template
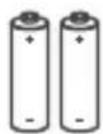
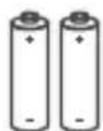
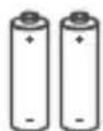
AAA battery x 2
QSG
Quick start guide
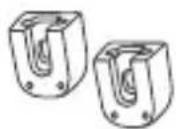
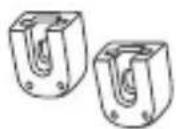
Wall mount bracket x 2
Safety instructions
Safety leaflet

Wall screw x 2

Wall anchor x 2
Overview of the Sound Bar main unit
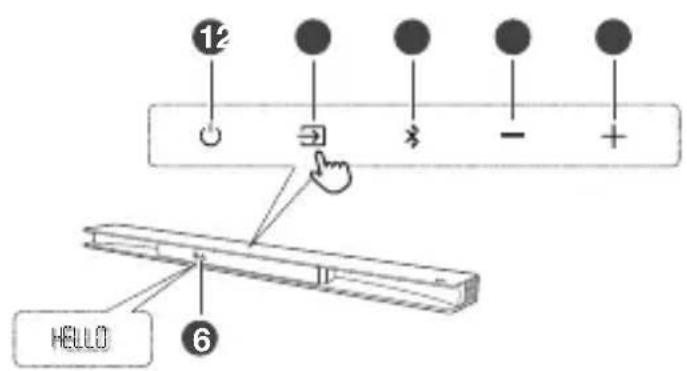
1 Ⓧ
Press to turn the Sound Bar main unit on or off.
2 →
Press to switch the audio source among
AUX/Bluetooth/Optical/HDMI in/HDMI ARC/USB modes.
3
Press to select the Bluetooth source. Press and hold to enter pairing mode.
4 -
Press to decrease the volume level.
5 +
Press to increase the volume level.
6 LED display
It indicates the Sound Bar status (e.g. volume level, sound bar status).
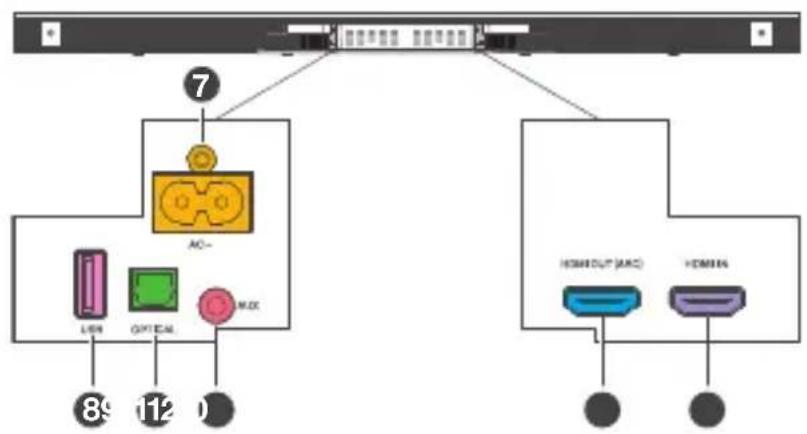
7 AC input power connector
8 USB Type A connector (only for music playback)
9 Optical input connector
10 AUX input connector
11 HDMI OUT (ARC) connector
12 HDMI IN connector
Overview of the wireless subwoofer

1 AC input power connector
2 Amber LED indicator
- flashes slowly when the subwoofer is in standby mode.
• flashes slowly when pairing is in progress.
• remains on solidly when pairing is successful.
3 PAIR
Press to activate pairing with the Sound Bar main unit.
Note
- The subwoofer is already paired at the factory. Manual pairing is needed only in case of troubleshooting.
Remove the Sound Bar back cover
Remove the back cover of your Sound Bar before connecting cables.

natural_image
Diagram showing a device with an internal structure and a base layer, no text or symbols presentSet up your Sound Bar system
Notes
- Make sure you read all the safety information before you mount the Sound Bar main unit on the wall. (see ‘Before you begin’ on page 3).
- Make sure you use screws provided or specified by the authorized manufacturer.
- TCL Corporation bears no responsibility for accidents or damage caused by improper wall mounting and screws installation or insufficient wall strength, etc.
• Additional tools (not supplied) are required for installation.
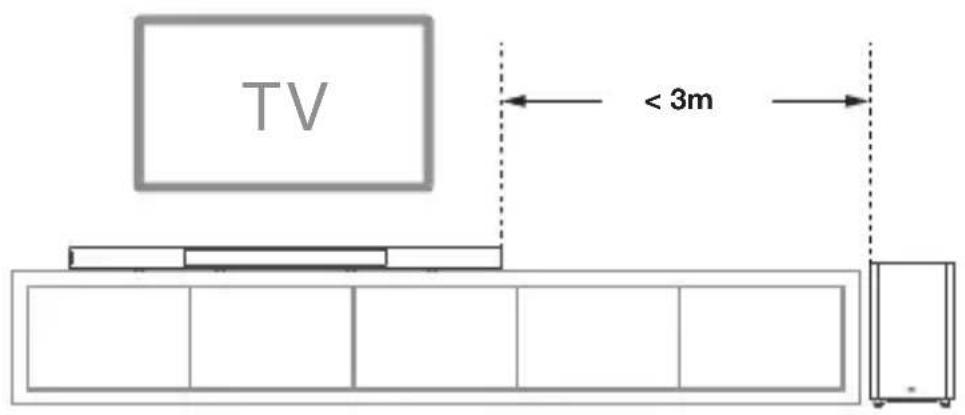
Place your Sound Bar and subwoofer
You are recommended to place the Sound Bar main unit on the top of the table and right below the center of your TV. The distance between the subwoofer and the Sound Bar main unit should be less than 3 meters.
Wall mount your Sound Bar main unit
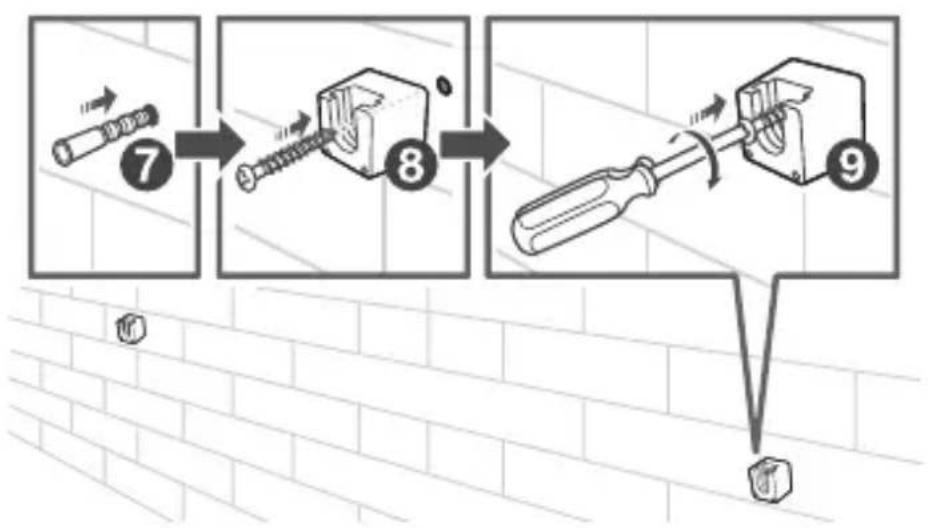
1 Place the supplied wall mount template on the wall. Make sure the wall mount template is at least 5cm below the center of the TV.
2 Use a level to make sure the Sound Bar is positioned accurately.
3 Use the tape to stick the wall mount template firmly on the wall.
4 Mark on the wall using each marking on the template through the mounting holes.
5 Take away the wall mount template.
6 Drill a screw hole at each marking on the wall.
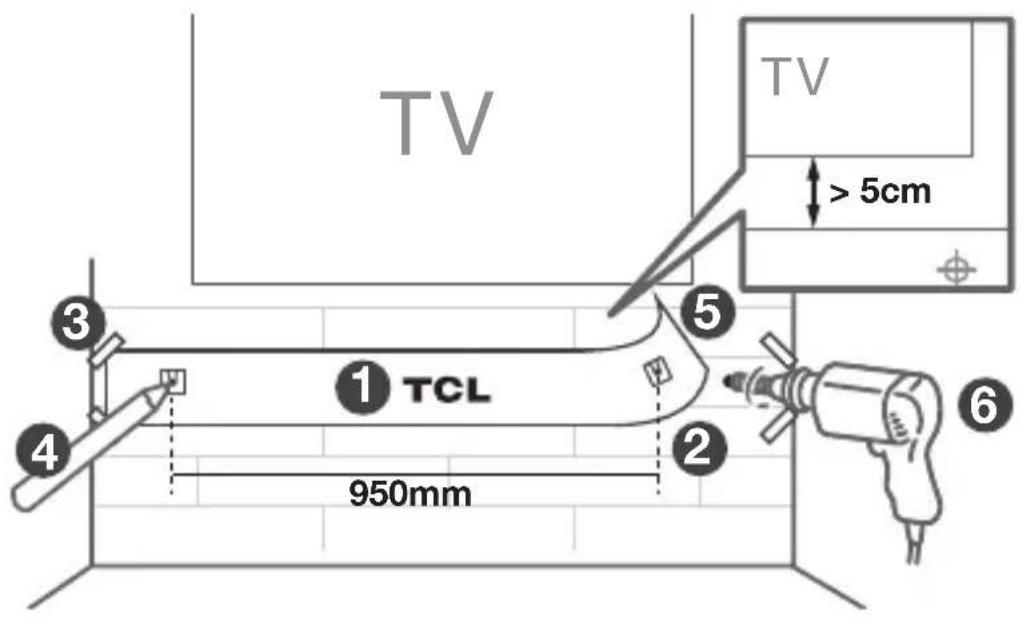
7 Insert the supplied wall anchors into 2 screw holes on the wall.
8 Insert the supplied wall bracket screws through the wall brackets into the wall anchors.
9 Fix and tighten the screws on the wall.

flowchart
graph TD
    A["Pinning Pin"] --> B["Screwdriver"]
    B --> C["Adjustment to Screwdriver"]
    C --> D["Final Mounting Tool"]
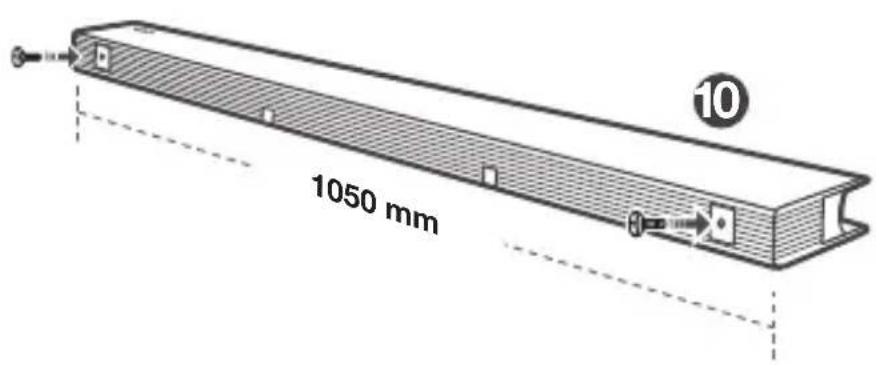
10 Insert the supplied wall mounting screws into the screw holes in the back of the Sound Bar main unit.
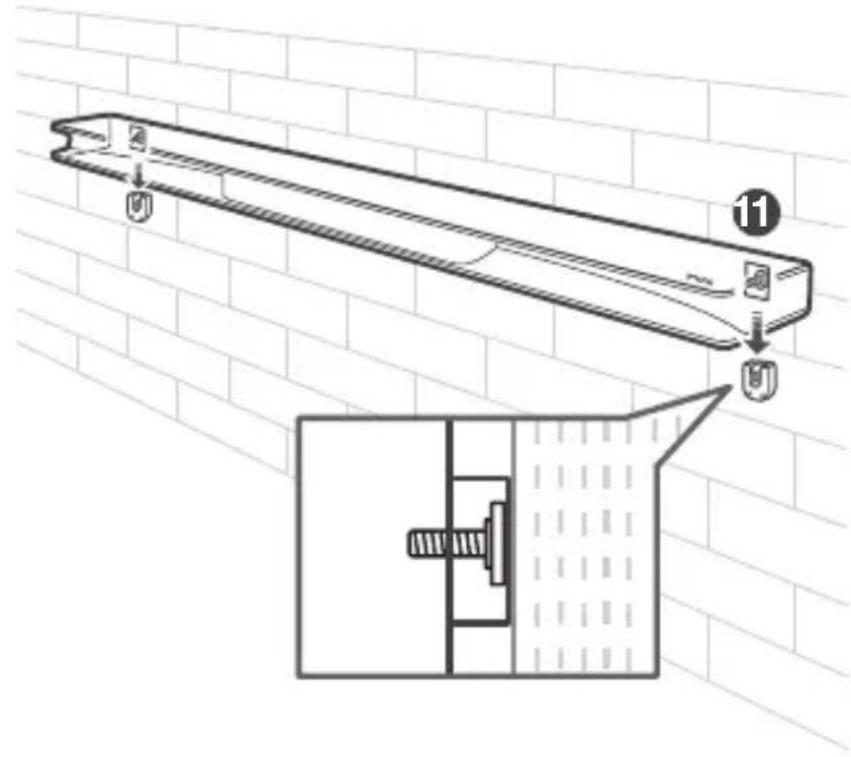
11 Hang the Sound Bar main unit on the wall mount brackets.
Notes
- Check the installation location before you mount the Sound Bar on the wall.
- You may consider to connect the cables first before mounting the Sound Bar on the wall.
3 Connect, install and pair
After you have fixed the position of the Sound Bar main unit, you can start connecting it to your TV, installing the remote control and pair it with the Sound Bar main unit.
Connect to your TV
Note
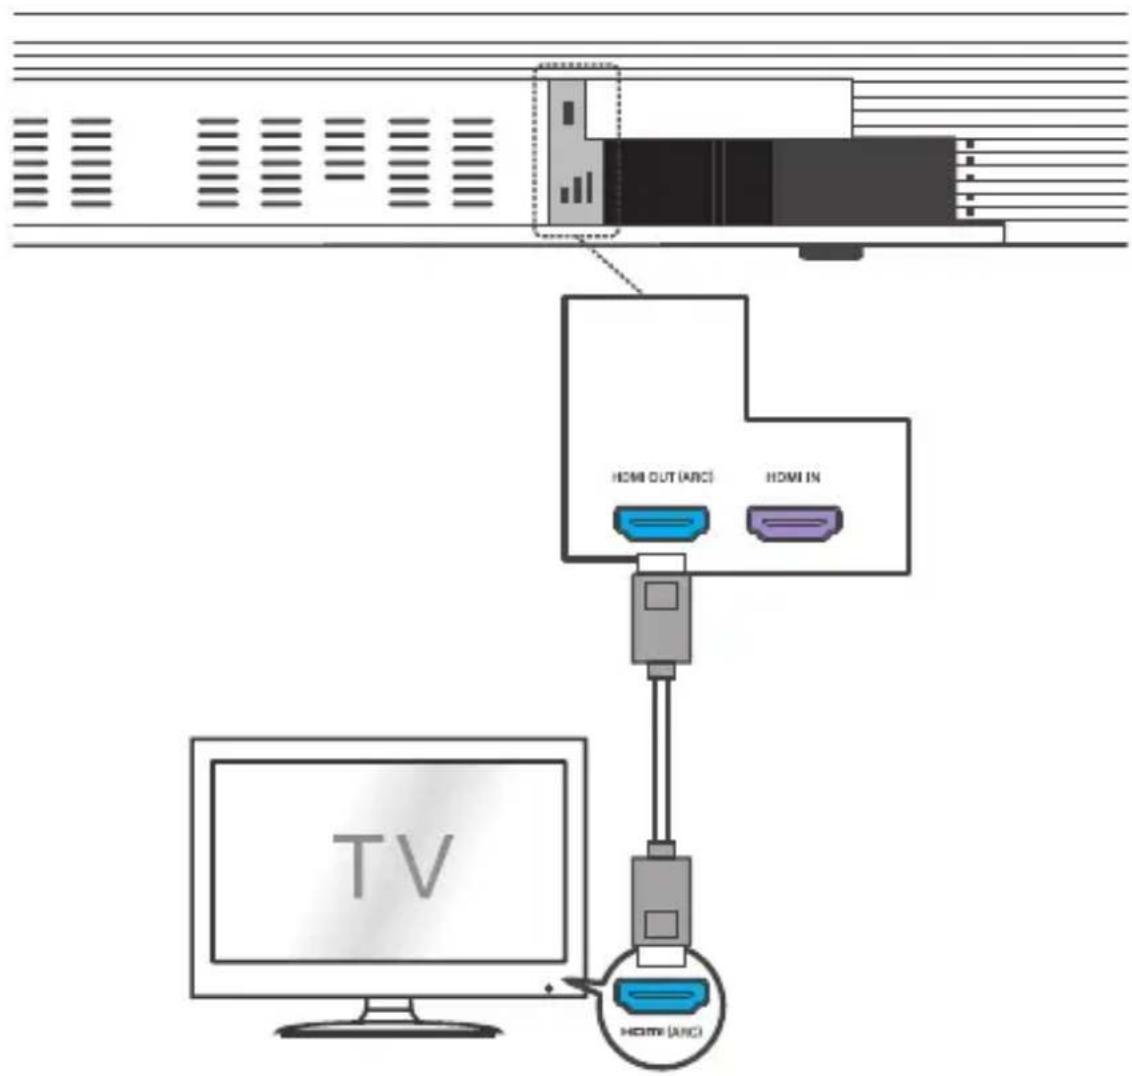
- Make sure your TV or device supports the HDMI ARC feature. For information, check the user manual of your TV or device.
Connect one end of the supplied HDMI cable to the HDMI input connector on your Sound Bar main unit and another end to the HDMI ARC output connector of your TV or device.
flowchart
graph TD
    A["TV"] --> B["Home OUT (ARC)"]
    A --> C["Home IN"]
    B --> D["Computer"]
    C --> E["Computer"]
    D --> F["Video Device"]
    E --> G["Video Device"]
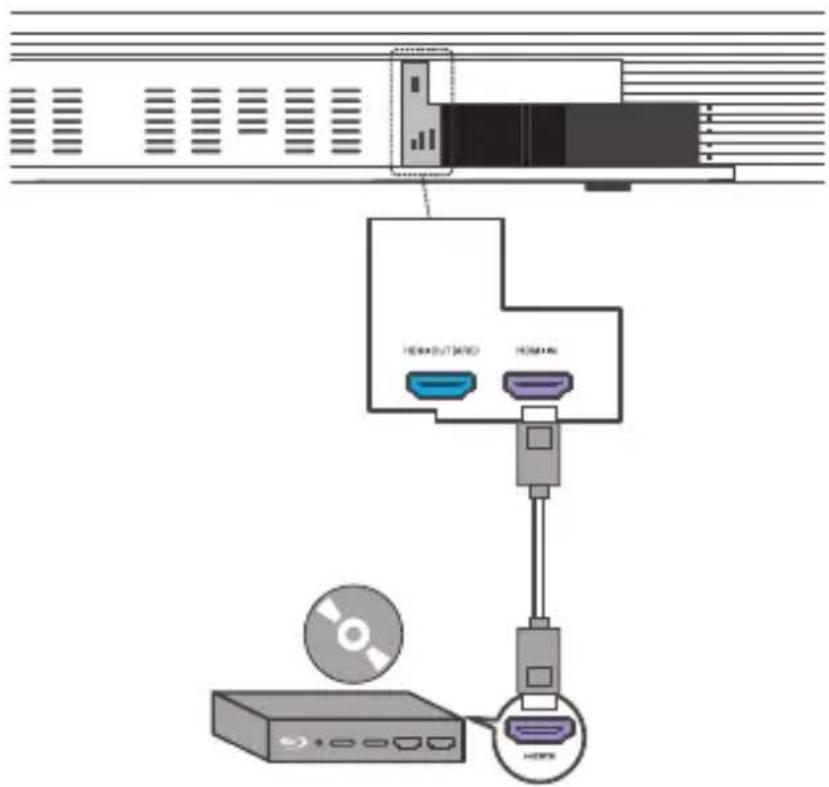
Optional: Connect your Blu-ray player
For ease of use, you are advised to connect a Blu-ray player to the TV and enjoy the Sound Bar through HDMI-ARC. However, in order to enjoy Dolby TrueHD based Atmos content that not all TVs may support through HDMI-ARC, you can optionally connect your Blu-ray player directly to the Sound Bar using the HDMI-in port.
Note
The Sound Bar will pass on the video signal to the TV. If it is not successful, turn on the Sound Bar and try again.
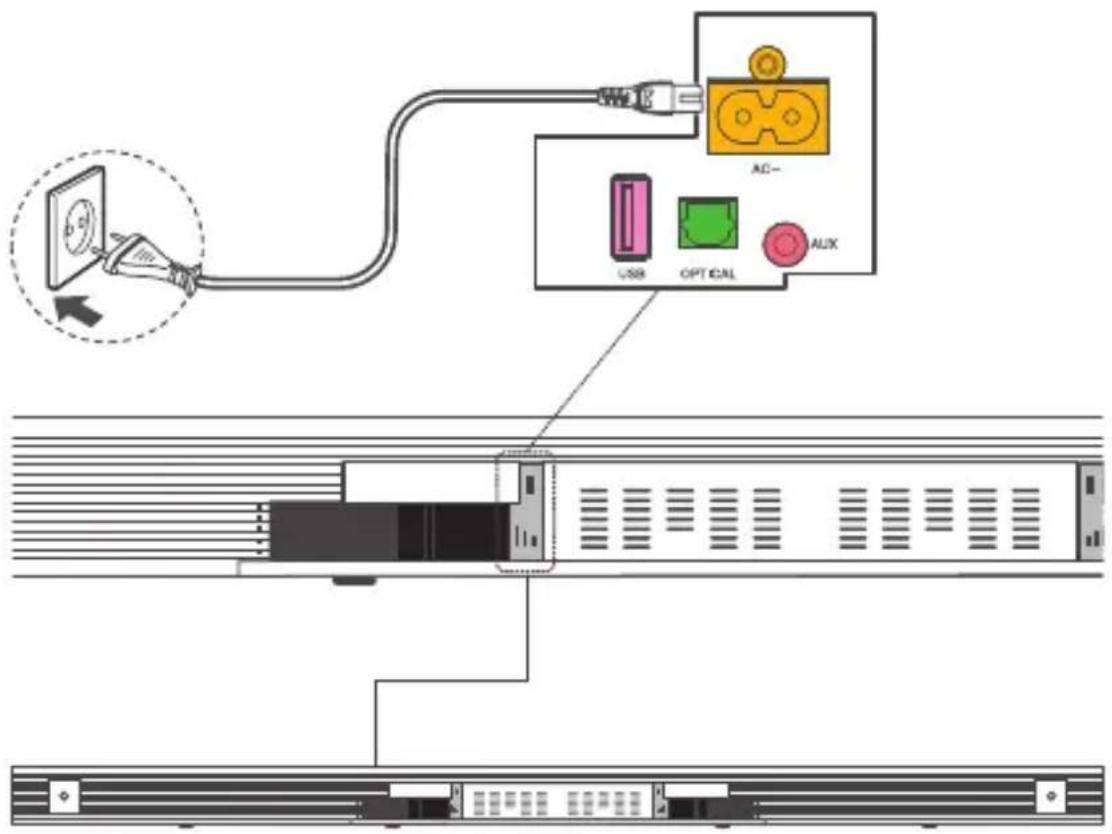
Connect your Sound Bar to power supply
1 Make sure that you have completed all other connections before connecting the Sound Bar to power supply.
2 Make sure the power supply voltage complies with your country's safety standards (see 'Specifications' on page 30).
3 Connect one end of a supplied AC power cord to the AC input connector on your Sound Bar main unit and another end to the power socket on the wall.
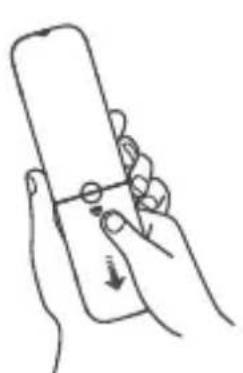
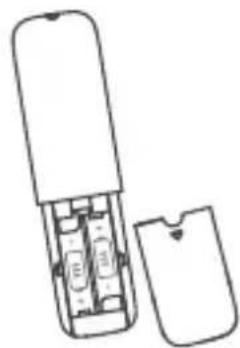
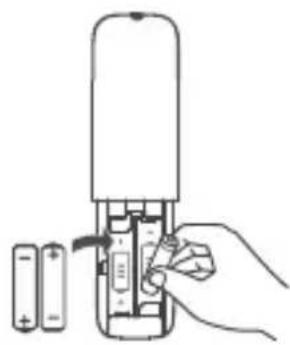
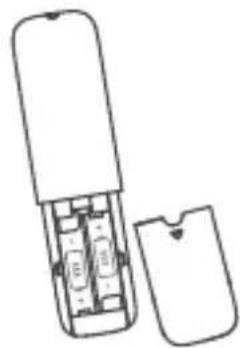
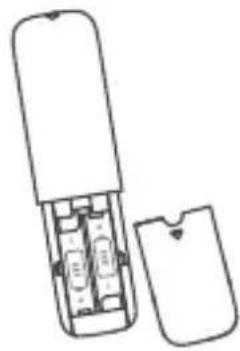
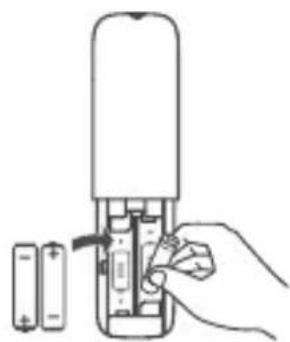
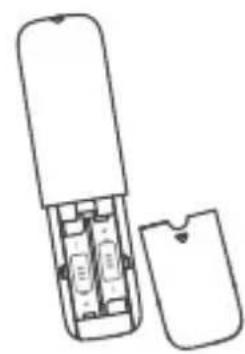
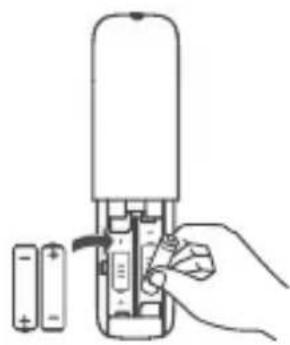
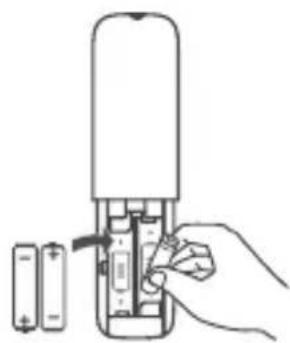
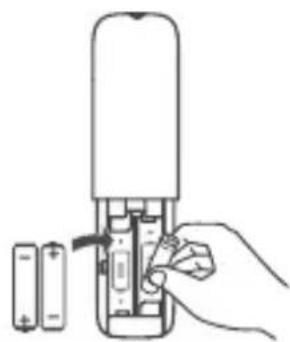
Install/replace the remote control batteries
Warnings
- Replace only with same or equivalent types of batteries. Performance may be affected when using NiMH rechargable batteries.
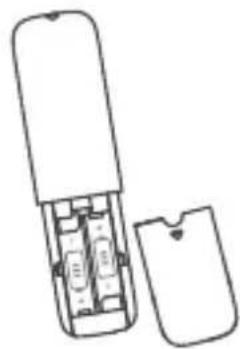
1 Open the battery compartment, remove the old batteries if necessary.
2 Place two new AAA batteries into the battery compartment with the correct polarity (+/-).
3 Close the battery compartment.
natural_image
Line drawing of a hand holding a smartphone with a finger pointing at it (no text or symbols)1
natural_image
Line drawing of a portable electronic device with internal components and an open lid (no text or symbols)●
natural_image
Hand inserting a battery into a cylindrical device (no text or symbols visible)●
Setup is complete. Your Sound Bar is ready to use. For more information about how to access different connection options on your Sound Bar, see the following chapter.
Pair your wireless subwoofer to the Sound Bar
When the wireless subwoofer is connected, you can enjoy powerful deep bass sounds and a truly immersive audio experience.
Auto pairing
Make sure both the Sound Bar and wireless subwoofer are connected to the power supply and are turned on.
→ The Sound Bar will pair with the subwoofer automatically.
→ The amber LED will flash when pairing is in progress.
→ The amber LED will remain on solidly when pairing is successful.
Note
- Do not press PAIR at the back of the wireless subwoofer during auto pairing.
- If auto pairing is not successful, you can pair the subwoofer with the Sound Bar manually.
Manual pairing
1 Make sure the Sound Bar and wireless subwoofer are properly connected to the power supply.
2 Press PAIR at the back of the wireless subwoofer until the amber LED on the subwoofer flashes slowly.
→ The wireless subwoofer is ready to pair.
3 Press on the top panel of your Sound Bar main unit or remote control to power on your Sound Bar main unit.
→ The Sound Bar and wireless subwoofer will pair automatically.
→ Pairing is successful. The amber LED remains on solidly.
Note
- If the amber LED at the back of the subwoofer still flashes after pairing, it means pairing is not successful. Disconnect the AC power cord from the wireless subwoofer and then connect again after 3 minutes. Then repeat steps 1 to 3.
4 Optional connections
You can also connect the Sound Bar with your TV or other audio devices through the optical or audio cable.
Note
- The best way to connect your TCL Sound Bar to your TV is (in order of preference): 1) HDMI-ARC; 2) Digital optical (SPDIF); 3) AUX (audio cable); 4) Bluetooth.
Connect with the supplied optical cable
1 Make sure you have muted the audio of your TV. For information, check the user manual of your TV.
2 Make sure Sound Bar back cover is removed.
3 Remove the protective caps from the optical cable.
4 Connect one end of the optical cable to the optical input connector on your Sound Bar main unit and another end to the optical output connector of your TV or device.

Note
- If there is no sound output from the Sound Bar main unit and the LED flashes rapidly, try to activate the PCM signal output on your TV. PCM is the most common digital audio format used and ensures compatibility.
Direction for setting up your Sound Bar using an optical cable

Do not bend or kink the optical cable (SPDIF) as it is fragile and can easily get damaged and broken.

To get the best possible audio experience using the optical cable:
1 Press the settings button on your TCL TV remote.
2 Navigate to Audio options.
3 Set TV speakers to off.
Connect with the audio cable
1 Make sure Sound Bar back cover is removed.
2 Connect one end of the audio cable (not supplied) to the AUX input connector on your Sound Bar main unit and another end to the headphone or audio output connector on your TV or device. This will disable the sound of your TV built-in speakers.

Pair the Sound Bar with your Bluetooth device
You can stream music from your mobile device through Bluetooth connection.
Notes
- Make sure your wireless device supports the Bluetooth function.
- The operational range between the Sound Bar main unit and your Bluetooth device is approximately 10 meters (without any obstacle between the Bluetooth device and Sound Bar main unit).
1 Press ☐ on the top panel of your Sound Bar main unit or remote control.
2 Press *on the top panel of your Sound Bar or BT on the remote control to enter the Bluetooth mode.
3 There are two ways to do the pairing:
- Press and hold ➤ on the top panel of your Sound Bar main unit; or
- Press and hold OK on the remote control.
→AIA is flashing on the LED display. The Sound Bar is ready to pair.
4 Power on your Bluetooth device and activate its Bluetooth function.
5 Select TCL RAY-DANZ on the pairing list of your Bluetooth device.
→ You hear a sound signal.
→ Pairing is successful.
Tip
- When you turn on the Sound Bar next time, it will be reconnected to the last connected Bluetooth device. automatically.
6 To disconnect the Bluetooth function, you can:
- press on the Sound Bar main unit to switch to another source; or
- disable the Bluetooth function on your device; or
- press and hold ▶I/OK on the remote control for 3 seconds. If you cannot find the model name TCL RAY-DANZ on your Bluetooth device, press and hold ▶OK on the remote control. You will see PAIR flashing on the LED display. Now the Sound Bar main unit is entering the pairing mode.
5 Use your Sound Bar system
Operate your Sound Bar with the top panel
1 Make sure the Sound Bar is properly connected to power supply and sources.
2 Press on the top panel of your Sound Bar main unit or remote control to power on the Sound Bar.
3 Press on the Sound Bar or the source buttons on the remote control to switch to the correct source.
Sound Bar LED display
The LED display on the front of the Sound Bar gives you information about different Sound Bar status.
| Sound Bar status LED display | |
| Power Power on | HELLO |
| Power off | STANDBY |
| Standby | • |
| Source Bluetooth | BT |
| Optical | OPT |
| HDMI IN | HDMI1 IN |
| HDMI ARC | HDMI2 ARC |
| USB | USB |
| Bluetooth Searching mode | BT FLASHING |
| Pairing mode | PAIR |
| Volume control Volume level | VOL08 |
| Minimum volume reached | V MIN |
| Maximum volume reached | V MAX |
| Mute | MUTE |
| Bass/Treble BASS +/- | BAS+3 |
| TREBLE +/- | TRE-3 |
| Vertical SURROUND ON | SUR ON |
| surround mode SURROUND OFF | SUR OFF |
| Sound modes Movie, Music, TV, BOOST | MOVIE MUSIC TVBOOST |
| Others Unsupported format | NOT SUPPORT FORMAT |
| USB unavailable | NO USB |
| Audio format detected | PCM AUDIO / DOLBYAUDIO /DOLBY ATMOS |
Listen to music from your Bluetooth device
1 Make sure that your device supports A2DP and/or AVRCP. For information, check the specification of your device.
2 Pair your Bluetooth device with the Sound Bar main unit (see ‘Pair the Sound Bar with your Bluetooth device’ on page 24).
3 Start listening to music stored in your Bluetooth device through the Sound Bar.
- If your Bluetooth device supports A2DP, you can listen to music, but you cannot control the playback.
- If your Bluetooth device supports AVRCP, you can listen to music and control music playback with the remote control. Press ▶OK on the remote control to pause or resume music playback. Press ◀◀ ▶▶ to skip to the previous/next track.
Note
- The operational range between the Sound Bar main unit and your Bluetooth device is approximately 10 meters (without any obstacle between the Bluetooth device and Sound Bar main unit).
Use the USB device for music playback
- Press /OK on the remote control to listen to/pause/resume the music.
- Press ◀◀ or ▶▶ on the remote control to skip to the previous or next track.
- Press + or - to increase or decrease the volume level.
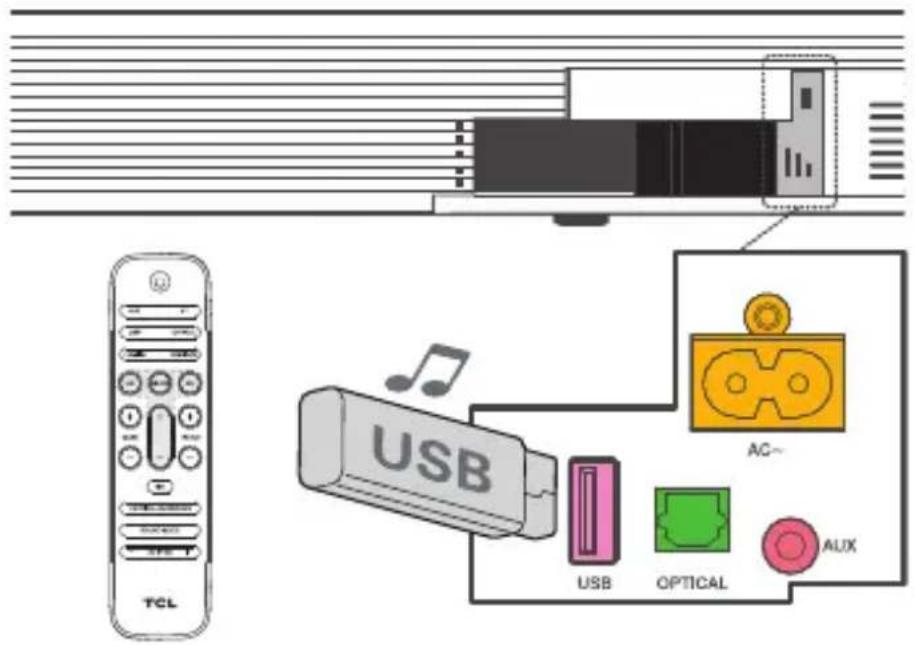
Tip
- This Sound Bar can support USB devices of up to 32GB memory and the supported file formats are MP3, WAV, FLAC.
6 Specifications
Sound Bar main unit
• Power supply: AC\~100-240V, 50/60Hz
• Power consumption: 30 W
• Power consumption at standby mode: < 2W
- Impedance: 6 Ω
• Frequency response: 150 Hz\~ 20 kHz
• Dimensions (W x D x H): 1050 x 110 x 55 mm
- Weight: 2.6 kg
• Operating temperature: 0°C - 45°C
Wireless subwoofer
• Power adapter: AC\~100-240V, 50/60Hz
• Power consumption: 30 W
• Power consumption at standby mode: ≤ 2W
• Frequency response: 40 Hz-150 Hz
• Frequency range: 2404.5 Mhz – 2479.5 Mhz
• Max transmitting power: -3.11 dBm
• Dimensions (W x D x H): 240 x 240 x 420 mm
- Weight: 5.5 kg
Bluetooth
- Bluetooth version: 5.0, Bluetooth profile - Bluetooth stereo supported (Advanced Audio Distribution Profile - A2DP; Audio Video Remote Control Profile - AVRCP)
• Frequency range: 2402 Mhz – 2480 Mhz
• Max transmitting power: 9.7 dBm
Wi-Fi
• 2.4G Wi-Fi Maximum E.I.R.P: 17.0dBm
• 2.4G Wi-Fi Frequency bands: 2412 MHz \~ 2462 MHz
- 5G Wi-Fi (Band 1, Band 2, Band 3) Maximum E.I.R.P: 17.99dBm
• 5G Wi-Fi (Band 4) Maximum E.I.R.P: 10.0dBm - 5G Wi-Fi Frequency bands: 5150 MHz \~ 5350 MHz, 5470 MHz \~ 5850 MHz
Remote control
• Distance/Angle: 6m/30°
- Battery type: 1.5V AAA battery x 2, user replaceable.
7 Notice
Declaration of conformity
Hereby, TCL Corporation declares that this product is in compliance with the essential requirements and other relevant provisions of Directive 2014/53/EU.
Disposal of your old product and battery

Your product is designed and manufactured with high quality materials and components, which can be recycled and reused.

This symbol on a product means that the product is covered by European Directive 2012/19/EU.
This symbol means that the product contains a battery covered by European Directive 2013/56/EU which cannot be disposed of with normal household waste. Inform yourself about the local separate collection system for electrical and electronic products and batteries. Follow local rules and never dispose of the product and batteries with normal household waste. Correct disposal of old products and batteries helps prevent negative consequences for the environment and human health.
Remove the disposable battery
To remove the disposable batteries, see the section 'Install/replace the remote control batteries'.
Environmental protection and sustainability
We have omitted all unnecessary packaging and make sure it is eco-friendly and sustainable.
8 Trademarks
Bluetooth

Bluetooth®
The Bluetooth® word mark and logos are registered trademarks owned by Bluetooth SIG, Inc. and any use of such marks by TCL Corporation under license. Other trademarks and trade names are those of their respective owners.
Dolby Atmos

DOLBY
ATMOS
Manufactured under license from Dolby Laboratories. Dolby, Dolby Audio, Dolby Atmos, and the double-D symbol are trademarks of Dolby Laboratories. All rights reserved.
HDMI

HIGH-DEFINITION MULTIMEDIA INTERFACE
HDMI, and HDMI logo and High-Definition Multimedia Interface are trademarks or registered trademarks of HDMI licensing LLC.
9 FAQ
No power
- Make sure the AC power cord and AC input connector are connected properly.
- Make sure there is power supply.
- Make sure the Sound Bar has turned on.
No sound
- Make sure the audio cable is connected to the Sound Bar and your device.
- Make sure you have selected the correct source.
- Press + to increase the volume level.
- Make sure the Sound Bar is not muted.
The remote control does not work.
- Make sure the distance of the remote control and the Sound Bar main unit is within operational range.
- Make sure the batteries are correctly inserted.
I hear distorted sound.
- Make sure the cables are properly connected.
- Make sure you have selected the correct source.
- Make sure the TV is muted if you play audio from the TV.
I cannot find the Bluetooth name of this Sound Bar on my Bluetooth device.
- Make sure the Bluetooth function is activated on your Bluetooth device.
- Make sure the Sound Bar has paired with your Bluetooth device.
- Make sure the Sound Bar has unpaired with another device.
Does this Sound Bar work with any TV?
- The Sound Bar is compatible with any TV that has one of the these ports: 1. HDMI supporting ARC (preferred); 2. Optical audio output (TOSLink); 3. Headphone output.
When the Sound Bar and TV are both on, there's an echo effect.
- Simply mute the TV speaker to have the Sound Bar as the singular source of sound.
How many sound modes are available?
Four sound modes – Movies, Music, TV and Boost.
How do I get the best Wi-Fi connection?
- Use the 5GHz band on your wireless router if available for best Wi-Fi performance.
- If you see a lock icon, your Wi-Fi network requires a password, so make sure you have it available.
- Ensure your Internet is working properly. Restarting your router and modem will solve most Wi-Fi network issues.
What are the subwoofer LED indicator status during pairing?
- Pairing: flashes quickly.
- Paired: on solidly.
- Standby mode: flashes slowly.
For further support, visit www.tcl.com
WE ARE READY TO
HELP contact us first with any questions

www.tcl.com
TS9030
Саундбар система RAY·DANZ 3.1
Atmos с безжичен субуфер
natural_image
Exterior view of a modern office building (no signage)Ръководство за
употреба
Съдържание
natural_image
Simple line drawing of a rectangular frame with horizontal supports (no text or symbols)natural_image
Simple line drawing of a rectangular cabinet or enclosure with no text, numbers, or symbolsБезжичен субуфер
natural_image
Illustration of a coiled cable or connector with two connectors (no text or symbols)HDMI кабел

natural_image
Illustration of a coiled cable with two connectors (no text or symbols)Оптичен кабел
natural_image
Line drawing of a coiled electrical plug with two terminal leads (no text or symbols)Забележки
natural_image
Line drawing of a hand holding a smartphone with a finger pointing to the screen (no text or symbols)1
natural_image
Line drawing of a mobile phone case with an open lid and internal compartments (no text or symbols)②

natural_image
Hand inserting a battery into a cylindrical device (no text or symbols visible)③
natural_image
Exterior view of a modern office building (no signage)Naudojimo vadovas
Turinys
1 Prieš pradedant 3
2 Sveikiname 4
Pakuotės turinys 4
natural_image
Simple line drawing of a rectangular frame with horizontal supports (no text or symbols)natural_image
Simple line drawing of a rectangular cabinet or enclosure with no text, numbers, or symbolsnatural_image
Illustration of a coiled cable or connector with two connectors (no text or symbols)HDMI kabelis
natural_image
Illustration of a coiled cable with two connectors (no text or symbols)Optinis kabelis

natural_image
Line drawing of a cord with two connected power plugs (no text or symbols)2 KS maitinimo laidai
2 AAA baterijos

1 KS jėjimo galios jungtis
2 Gintarinis šviesos diodu (LED) indikatorius
flowchart
graph TD
    A["7 Pinning"] --> B["8 Screw"]
    B --> C["9 Screw"]
Pastabos
natural_image
Line drawing of a hand holding a smartphone with a finger pointing to the screen (no text or symbols)1
natural_image
Line drawing of a mobile phone case with internal compartments and an open casing (no text or symbols)②
natural_image
Hand inserting a battery into a cylindrical device (no text or symbols visible)③
natural_image
Exterior view of a modern office building (no signage)natural_image
Simple line drawing of a rectangular object with horizontal and vertical lines, no text or symbols present.Skañas joslas ierīce ar bezvadu zemfrekvences skaļruni
Talvadibas pults
natural_image
Simple line drawing of a rectangular cabinet or enclosure with no text, numbers, or symbolsBezvadu zemfrekvences skalrunis

natural_image
Line drawing of a coiled cable or connector with two connectors (no text or symbols)HDMI kabelis

natural_image
Illustration of a coiled cable with two connectors (no text or symbols)Optiskais kabelis

natural_image
Line drawing of a straight electrical plug with two terminal leads (no text or symbols)Mainstrāvas vads x 2
AAA akumulators x 2


1 ⏻
flowchart
graph TD
    A["7: Screw assembly"] --> B["8: Screw assembly with screw"]
    B --> C["9: Product being finished"]
Piezīmes
natural_image
Line drawing of a hand holding a smartphone with a finger pointing at it (no text or symbols)1
natural_image
Diagram of a mobile phone case with internal compartments and an open casing (no text or symbols)②

natural_image
Hand inserting a battery into a mobile phone case, showing internal components and battery terminals (no text or symbols visible)③
natural_image
Exterior view of a modern office building (no signage)Manwal tal-utent
Werrej
1 Qabel tibda 3
2 Merhba 4
X'hemm fil-kaxxa 4
natural_image
Simple line drawing of a rectangular frame with supports (no text or symbols)natural_image
Simple line drawing of a rectangular cabinet or enclosure with no text, numbers, or symbolsSubwoofer bla fili
natural_image
Line drawing of a coiled cable or connector with two connectors (no text or symbols)Kejbil HDMI

natural_image
Illustration of a coiled cable with two connectors (no text or symbols)Kejbil ottiku
natural_image
Line drawing of a straight electrical plug with two terminal leads (no text or symbols)Wajer tal-elettriku AC x 2

Batterija AAA x 2
Brakit ghall-immuntar
mal-ħajt x 2
Vit ghall-hajt x 2

Ankra ghall-ħajt x 2
1 Konnettur tal-elettriku tal-input AC
2 Indikatur tal-LED Ambra
- iteptep bil-mod meta s-subwoofer ikun fil-modalità standby.
- iteptep bil-mod meta l-akkopjar ikun għaddejja.
- jibqa' mixghul meta l-akkopjar jirnexxi.
3 AKKOPJAR
7 Daħħal l-ankri tal-ħajt fornuti f'2 toqob bil-kamin mal-ħajt.
8 Dahhal il-viti tal-brakits tal-hajt fornuti fil-brakits tal-hajt fl-ankri tal-hajt.
9 Wahhal u ssikka l-viti fil-hajt.
flowchart
graph TD
    A["7 Pinning"] --> B["8 Screwdriver"]
    B --> C["9 Screwdriver"]
Noti
- Iččekkja I-post tal-installazzjoni qabel timmonta s-Sound Bar mal-ħajt.
- Tista' tikkunsidra li tqabbad il-kejbils l-ewwel qabel timmonta Sound Bar mal-hajt.
3 Qabbad, installa u akkopja
Wara li tkun ippożizzjonajt l-unità principali tas-Sound Bar, tista' tibda tikkonnettjaha mat-televixin tiegħek, tinstalla l-kontroll remot u takkoppjaha mal-unità principali tas-Sound Bar.
Installa/ibdel il-batteriji tal-kontroll remot
Twissijiet
- Ibdel biss bl-istess tipi jew tipi ekwivalenti ta' batteriji. Il-prestazzjoni tista' tigi affettwata meta jintużaw batteriji rikarikabbli NiMH.
1 Iftaħ il-kompartiment tal-batterija, neħħi l-batteriji qodma jekk meħtieġ.
2 Poġġi żewġ batteriji ĝodda AAA fil-kompartiment tal-batterija bil-polarità korretta (+/-).
3 Aghlaq il-kompartiment tal-batterija.

natural_image
Line drawing of a hand holding a smartphone with a small download icon (no text or symbols)1

natural_image
Line drawing of a mobile phone case with internal components and an open lid (no text or symbols)②

natural_image
Hand inserting a battery into a mobile phone case, showing internal components and battery terminals (no text or symbols visible)③
Akkoppja s-Sound Bar mat-tagħmir Bluetooth tiegħek
natural_image
Exterior view of a modern office building (no signage)Gebruiksaanwijzing
Inhoud
1 Voor u begint 3
2 Welkom 4
natural_image
Simple line drawing of a rectangular beam or support structure (no text or symbols)natural_image
Simple line drawing of a rectangular cabinet or enclosure with no text, numbers, or symbolsDraadloze subwoofer
Afstandsbediening

natural_image
Illustration of a coiled cable or connector with two connectors (no text or symbols)HDMI-kabel

natural_image
Illustration of a coiled cable with two connectors (no text or symbols)Optische kabel
natural_image
Line drawing of a cord with two terminal plugs (no text or symbols)2 netsnoeren
2 AAA batterijen
Opmerkingen
flowchart
graph TD
    A["TV"] --> B["Home (AUC)"]
    B --> C["Internet"]
    C --> D["Home OUT (ARC)"]
    C --> E["HOME IN"]
natural_image
Line drawing of a hand holding a smartphone with a finger pointing to the screen (no text or symbols)1

natural_image
Line drawing of a handheld device with internal compartments and a lid (no text or symbols)②
natural_image
Line drawing of a hand inserting a component into a battery module (no text or symbols)3
natural_image
Exterior view of a modern office building (no signage)Manual de utilizare
Cuprins
natural_image
Simple line drawing of a rectangular frame with internal supports (no text or symbols)natural_image
Simple line drawing of a rectangular cabinet or enclosure with no text, numbers, or symbolsSubwoofer wireless
Telecomandă
natural_image
Illustration of a coiled cable or connector with two connectors (no text or symbols)Cablu HDMI

natural_image
Illustration of a coiled cable with two connectors (no text or symbols)Cablu optic

natural_image
Line drawing of a cord with two connected power plugs (no text or symbols)Cablu de alimentare CA x 2

Baterie AAA x 2
flowchart
graph TD
    A["7 Pinning"] --> B["8 Screw"]
    B --> C["9 Screw"]
    C --> D["Bottoming Box"]
Note
natural_image
Line drawing of a hand holding a smartphone with a finger pointing at it (no text or symbols)1
natural_image
Line drawing of a mobile phone case with internal compartments and an open lid (no text or symbols)②
natural_image
Hand inserting a battery into a mobile phone case, showing internal components and battery terminals (no text or symbols visible)③
natural_image
Exterior view of a modern office building (no signage)natural_image
Simple line drawing of a rectangular frame with no text or symbolsnatural_image
Simple line drawing of a rectangular cabinet or enclosure with no text, numbers, or symbolsnatural_image
Illustration of a coiled cable or connector with two connectors (no text or symbols)Kabel HDMI

natural_image
Illustration of a coiled cable with two connectors (no text or symbols)Optični kabel

natural_image
Line drawing of a coiled electrical plug with two terminal leads (no text or symbols)Opombe
- Preverite mesto namestitve, preden zvočno palico vgradite na steno.
- Morda boste morali najprej priključiti kable in šele nato zvočno palico vgraditi na steno.
natural_image
Line drawing of a hand holding a smartphone with a finger pointing to the screen (no text or symbols)1

natural_image
Line drawing of a mobile phone case with internal compartments and an open casing (no text or symbols)②
natural_image
Hand inserting a battery into a cylindrical device (no text or symbols visible)③
Opomba
- Contents
- Before you begin 3
- Welcome 4
- Connect, install and pair 14
- Optional connections 21
- Use your Sound Bar system 26
- Specifications 30
- Notice 31
- Trademarks 33
- FAQ 35
- Before you begin
- Welcome
- What's in the box
- Overview of the Sound Bar main unit
- Overview of the wireless subwoofer
- AC input power connector
- Amber LED indicator
- PAIR
- Note
- Remove the Sound Bar back cover
- Set up your Sound Bar system
- Notes
- Place your Sound Bar and subwoofer
- Wall mount your Sound Bar main unit
- Connect, install and pair
- Connect to your TV
- Optional: Connect your Blu-ray player
- Connect your Sound Bar to power supply
- Install/replace the remote control batteries
- Warnings
- Pair your wireless subwoofer to the Sound Bar
- Auto pairing
- Manual pairing
- Optional connections
- Connect with the supplied optical cable
- Connect with the audio cable
- Pair the Sound Bar with your Bluetooth device
- Select TCL RAY-DANZ on the pairing list of your Bluetooth device.
- Tip
- To disconnect the Bluetooth function, you can:
- Use your Sound Bar system
- Operate your Sound Bar with the top panel
- Sound Bar LED display
- Listen to music from your Bluetooth device
- Use the USB device for music playback
- Specifications
- Sound Bar main unit
- Wireless subwoofer
- Bluetooth
- Wi-Fi
- Remote control
- Notice
- Declaration of conformity
- Disposal of your old product and battery
- Remove the disposable battery
- Environmental protection and sustainability
- Trademarks
- Bluetooth®
- HDMI
- FAQ
- No power
- No sound
- WE ARE READY TO
- HELP contact us first with any questions
- Съдържание
- Забележки
- Turinys
- Prieš pradedant 3
- Sveikiname 4
- Pastabos
- Piezīmes
- Werrej
- Qabel tibda 3
- Merhba 4
- Konnettur tal-elettriku tal-input AC
- Indikatur tal-LED Ambra
- AKKOPJAR
- Noti
- Qabbad, installa u akkopja
- Installa/ibdel il-batteriji tal-kontroll remot
- Twissijiet
- Akkoppja s-Sound Bar mat-tagħmir Bluetooth tiegħek
- Inhoud
- Opmerkingen
- Cuprins
- Opombe
- Opomba
Brand : TCL
Model : Ray Danz TS9030
Category : Soundbar