
Babyline 5.1 - Baby monitor Lionelo - Free user manual and instructions
Find the device manual for free Babyline 5.1 Lionelo in PDF.


| Product type | Video baby monitor with 5.1-inch color screen |
| Brand | Lionelo |
| Model | Babyline 5.1 |
| Parent unit dimensions | 10 x 7 x 3 cm |
| Baby unit dimensions | 8 x 6 x 5 cm |
| Parent unit weight | 180 g |
| Baby unit weight | 150 g |
| Power supply | Included rechargeable Li-ion batteries, AC adapters |
| Battery life | Up to 10 hours standby, 5 hours continuous use |
| Range | Up to 300 meters outdoors, 50 meters indoors |
| Main features | Infrared night vision, two-way communication, lullabies, temperature display, night light, sound level indicator |
| Screen | 5.1-inch color LCD, 480 x 272 resolution |
| Camera | Digital pan/tilt, 2x digital zoom |
| Frequency | 2.4 GHz FHSS (frequency hopping) |
| Temperature | Displays baby's room temperature |
| Lullabies | 4 pre-recorded lullabies with adjustable volume |
| Night light | Built-in LED night light on baby unit, remotely activated |
| Care and cleaning | Clean with a soft, dry cloth; do not use abrasive cleaners or solvents |
| Safety | CE compliant, encrypted link to prevent interference |
| Spare parts and repairability | Batteries and adapters available as options; repair by authorized center |
| Warranty | 2 years |
| Box contents | 1 parent unit, 1 baby unit, 2 AC adapters, 2 batteries, user manual |
Frequently Asked Questions - Babyline 5.1 Lionelo
User questions about Babyline 5.1 Lionelo
0 question about this device. Answer the ones you know or ask your own.
Ask a new question about this device
Download the instructions for your Baby monitor in PDF format for free! Find your manual Babyline 5.1 - Lionelo and take your electronic device back in hand. On this page are published all the documents necessary for the use of your device. Babyline 5.1 by Lionelo.
USER MANUAL Babyline 5.1 Lionelo
natural_image
White portable electronic device with a newborn photo displayed on its screen, featuring musical notes and control buttons (no readable text or symbols)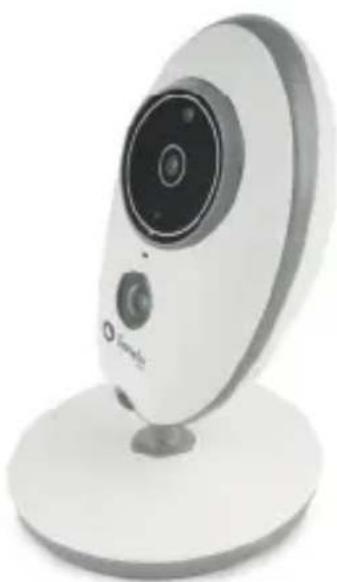
natural_image
White remote camera with circular lens and stand (no visible text or symbols)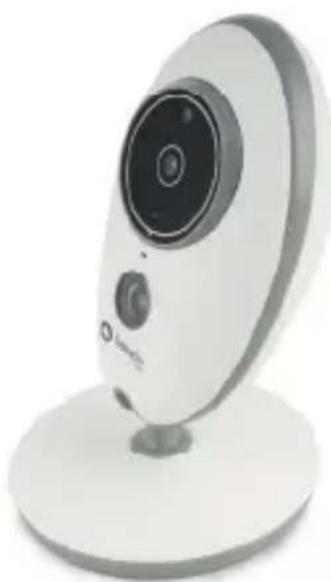
natural_image
White remote camera with circular lens and stand (no visible text or symbols)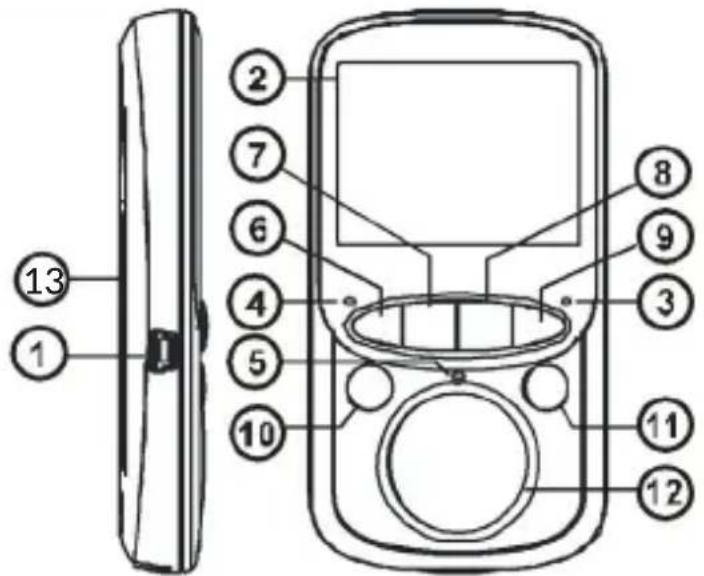
1
2
3
natural_image
Line drawing of a remote control device with cable and power plug (no text or symbols)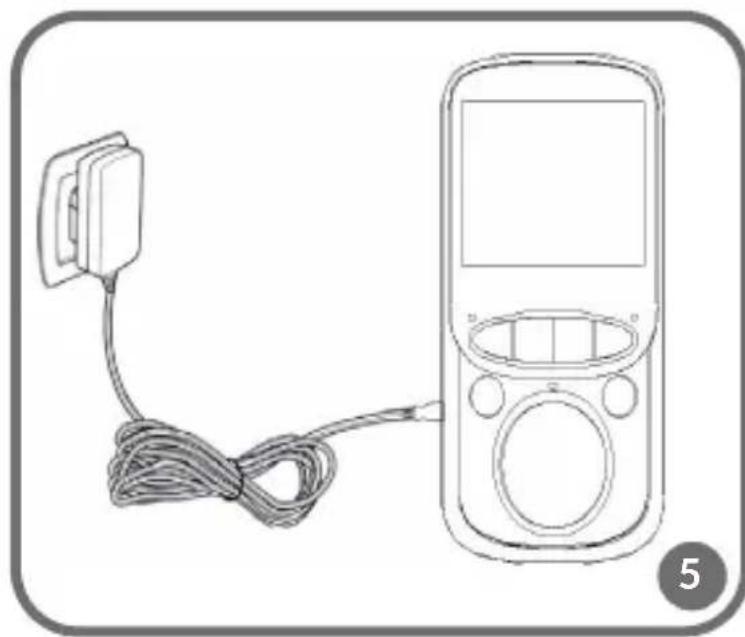
natural_image
Line drawing of a portable electronic device connected to a cable, no text or symbols present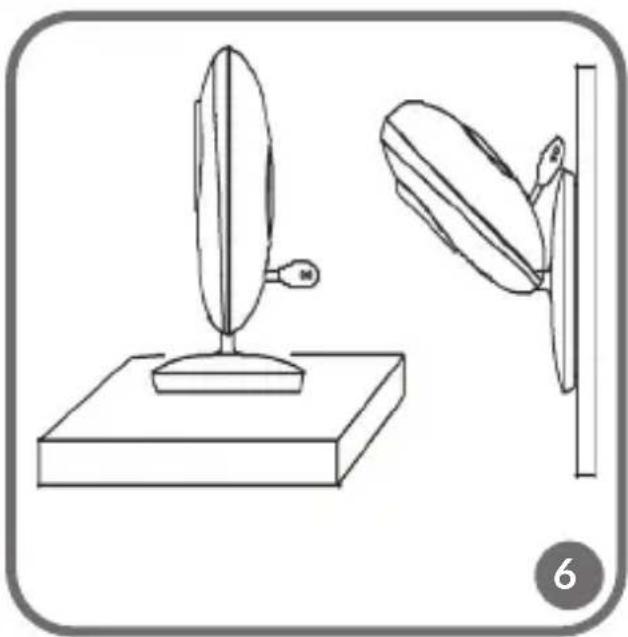
natural_image
Line drawing of a mechanical device with two views: one showing a curved blade mounted on a base, the other showing a flanged blade mounted on a vertical post (no text or symbols)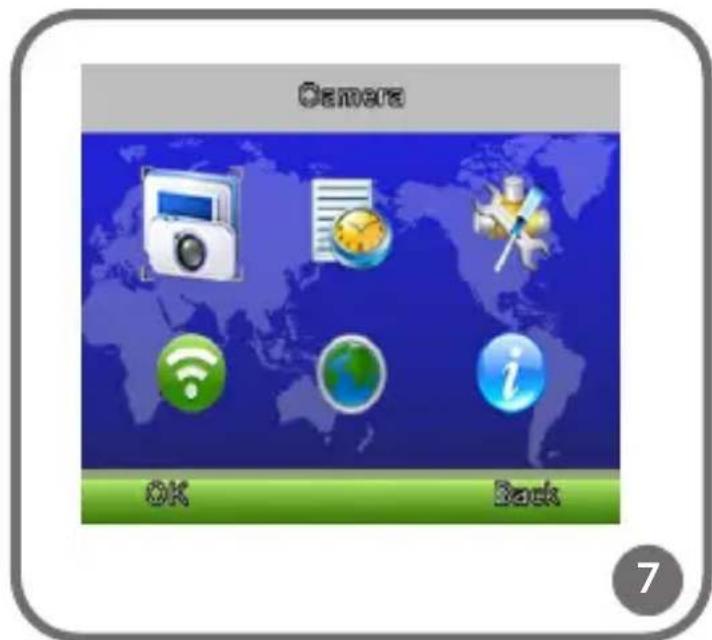
9
10
Dear Customer!
In case of any questions or comments on the purchased product, please contact us: help@lionelo.com
Producer:
BrandLine Group Sp. z o. o.
Please read this manual before you use the device for the first time to see all its functions and use it in accordance with intended use.
- Only adults are allowed to install the device. Keep the device out of reach of children.
- This device is not a toy. Do not let children play with it.
- This product does not serve to replace adult supervision.
- Do not place a baby unit or cables in the baby's cot or within its reach (at least 1 meter of distance must be kept) because the child may get injured or be strangled!
- Do not use the product near water or sources of heat.
- Use feeder cables supplied only.
- Make sure plug contacts and cables do not contact sharp or metal items.
DESCRIPTION OF PARENT UNIT (located near parent) fig.1
- Power connector
- LCD display
- Power LED
- Signal LED
-
Microphone
-
Volume key – (volume down) / „left” button / automatic unit switch
- Music ON/OFF
- Talk key/MENU navigation key
- Volume key + (volume up / „right" button / manual unit switch
- OK / Menu key
- Power/return key
- Speaker
- Battery
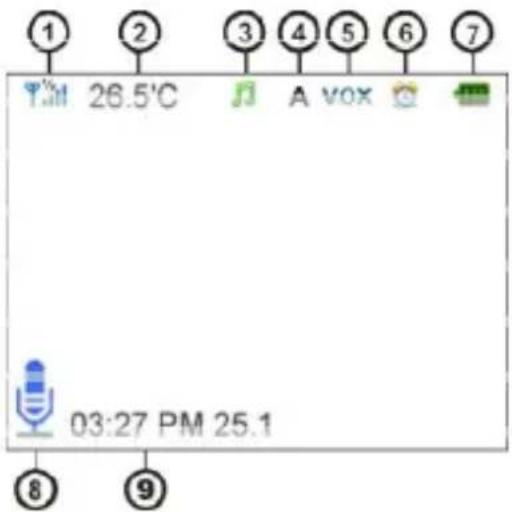
PARENT UNIT SCREEN ICONS fig .2
-
Signal strength indicator and unit number (1 or 2)
-
Unit temperature
-
Lullaby play
-
Automatic switch activated
-
VOX mode activated
-
Alarm activated
-
Battery charging indicator
-
Talk function activated
-
Date and time
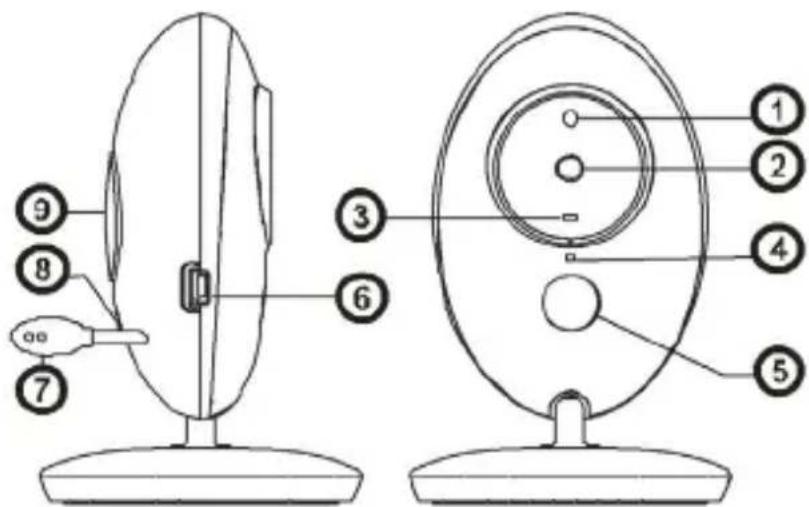
DESCRIPTION OF BABY UNITS (located near child) fig. 3
-
Light sensor
-
Camera
-
Power LED
-
Microphone
-
Infrared light
-
Feeder connector
-
Temperature sensor
-
Steam key
-
Speaker
USE
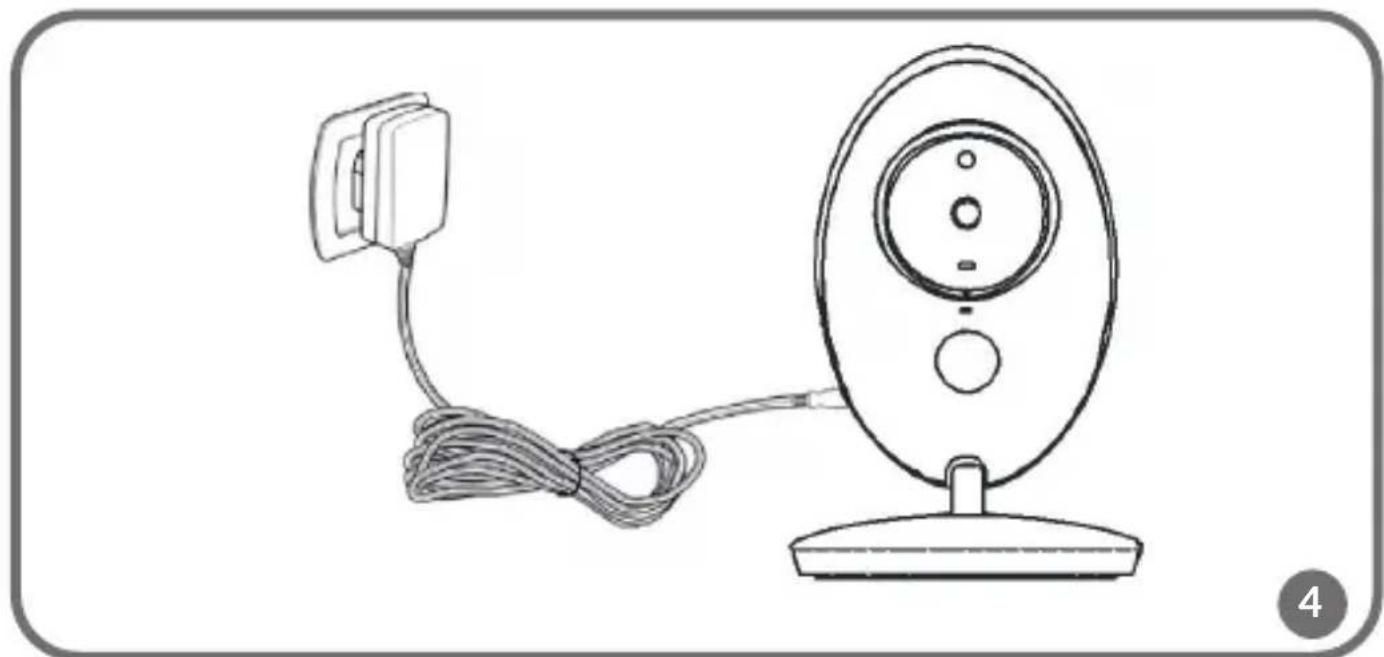
How to provide power supply and switch the unit on (fig. 4)
- Connect a feeder plug to a baby unit and the other end to the socket. NOTE: Use the feeder cable supplied only.
- The baby unit will activate automatically after you have provided power supply.
- Blue LED suggests that the baby unit is active.
How to provide power supply and switch the unit on (fig. 5)
It is advisable to charge the parent unit fully before you use it. By doing so, the device can work on battery in case of a power failure.
-
Connect the feeder plug to the parent unit and the other end to the socket. NOTE: Use the feeder cable supplied only.
-
The display will illuminate after a few seconds and charging icon will be displayed. This means that battery is being charged.
- Press and hold the power button to switch the parent unit on.
- To switch the unit off, press and hold the power button.
Place the baby unit in a convenient place (e.g. on the table) and point the camera towards the area you want to monitor (fig. 6).
NOTE
Do not place the baby unit or cables in the baby's cot or within its reach (at least 1 meter of distance must be kept) because the child may get injured or be strangled!
In the event of image or sound interference, change the location of the devices and make sure they are not close to other electric equipment.
Pairing units
The baby unit and parent unit are paired by default. It is not necessary to pair them again, unless the baby unit has lost connection with the parent unit. If necessary, see MENU – Camera registration.
VOX function
VOX mode can be activated in the device's menu.
VOX mode automatically puts the display in the sleep mode to save battery.
When the baby unit detects any sound, the parent unit responds to this, activates the display and preview of a unit which detected the sound.
Music player
Press the music button to play the lullaby in baby units. Press the button again to turn it off.
Talk function
In the screen you can see icon 1 or 2 which tell you which baby unit is currently displayed in the screen. If you wish to start talking to your child, press and hold talk function button. The talk symbol will be displayed at the bottom of the screen.
Volume adjustment
When playing, press the volume – key to decrease volume or volume + to increase it. The display will show current volume.
Automatic/manual camera switch
Press and hold „left“ key to activate/deactivate automatic baby unit switching. The active mode will be signaled by the icon “A” on the parent unit’s display. The image from baby units will switch every 5 seconds.
Press and hold „right“ key to switch image from one camera to the other manually.
MENU
Main menu (fig. 7)
Press „OK./Menu” key on the screen to enter the main menu. You can find 6 items there:
-
Camera registration (pairing units)
-
VOX
- Languages
-
System info
-
Alarm
-
Settings
To move a cursor and select an item, press “left” or “right” button. Next press “OK/Menu” button to enter the item you have selected.
Press power/return button to return to main screen.
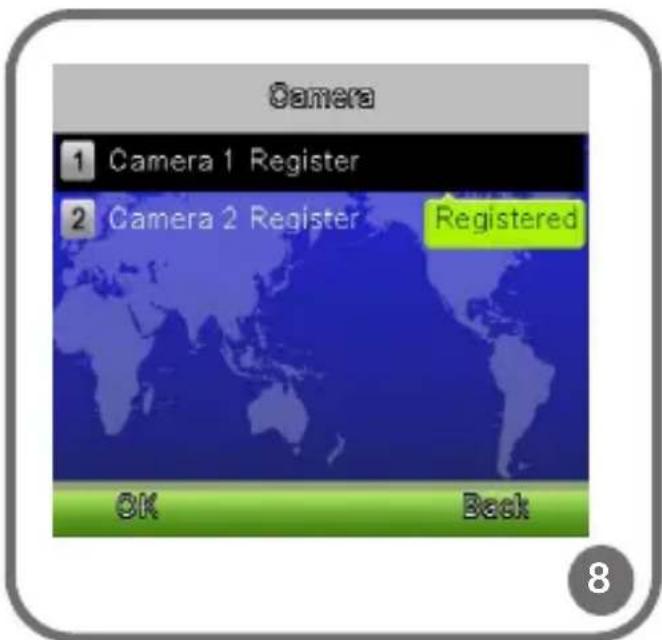
Camera registration (fig. 8)
Press „OK./Menu” button to enter registration window, select “camera 1 register”, next press pairing button on the baby unit.
Select "Camera 2 register", press pairing button on the other baby unit.
This way you can pair baby units with the parent unit.
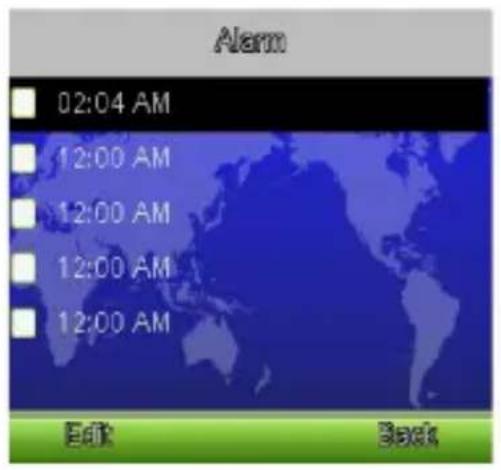
Alarm (fig. 9)
Enter alarm functions, press „right” button to activate, next press talk function button to move a cursor and “right/left” button to change value.
Settings
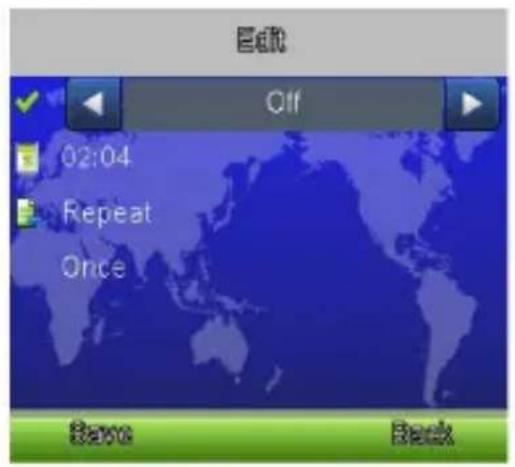
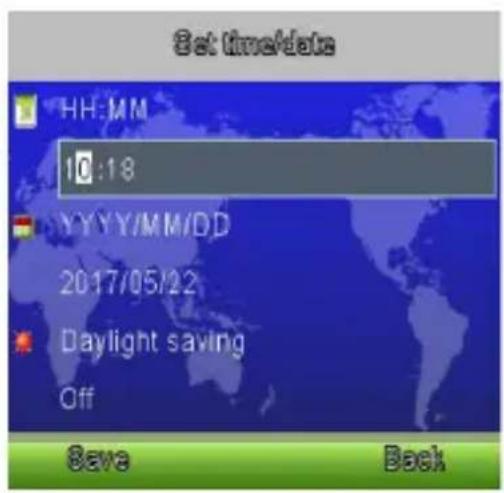
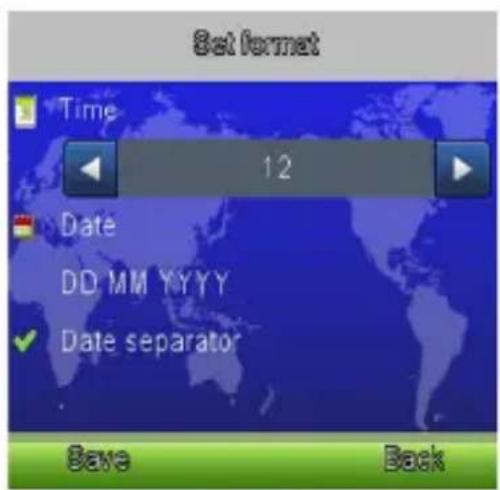
Date and time (fig. 10)
This menu contains 2 options:
Set time/date
Set format
Temperature unit
Set the temperature in Celsius or Fahrenheit.
Anti-flicker
In this option you can set a frequency - 50/60Hz - in order to reduce interference in the image.
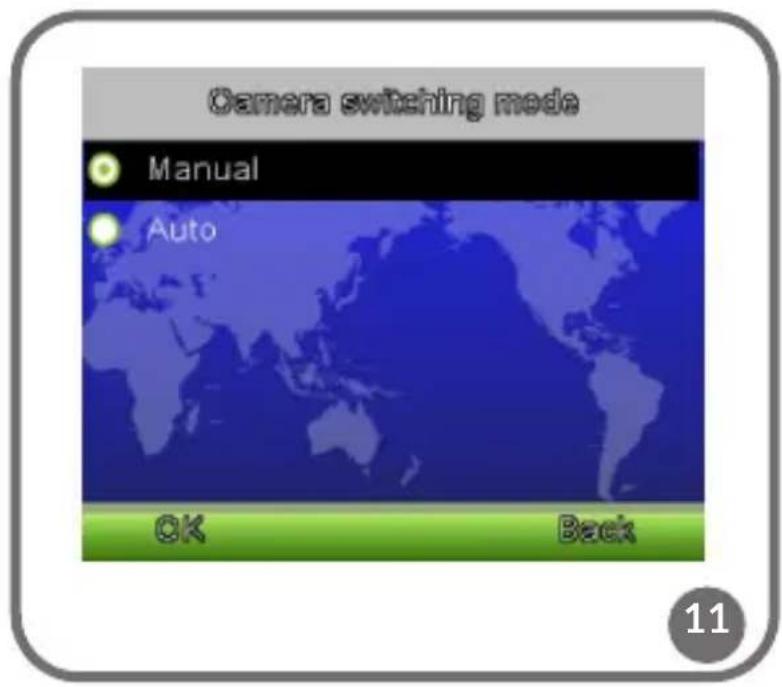
Camera switching mode (fig. 11)
There are two camera switching modes: automatic and manual, press “right” button to move a cursor and select either mode. You can also set modes with “left/right” buttons (see: Automatic/manual camera switching).
LCD backlight
It is possible to adjust the brightness of LCD and sleep mode time in menu.
VOX mode
This menu contains 2 items:
Set working mode of the device: normal or VOX.
Change VOX mode sensitivity.
Language
Here you can select language.
System information
It displays information on the system.
Pictures are for reference only. The real design of products may differ from pictures presented.
Drogi Kliencie!
EN: Simplified EU declaration of conformity
BrandLine Group Sp. z o. o. hereby declares that the “BABYLINE 5.1” product complies with the directive: 2014/53/EU - RED Directive, 2014/30/EU - EMC Directive, 2014/35/EU - LVD Directive, 2011/65/EU - RoHS Directive.
Full content of EU declaration of conformity is available on the following website:
Detailed warranty conditions are available on the website:
Thank you for purchasing our product
- Dear Customer!
- Producer:
- DESCRIPTION OF PARENT UNIT (located near parent) fig.1
- PARENT UNIT SCREEN ICONS fig .2
- DESCRIPTION OF BABY UNITS (located near child) fig. 3
- USE
- How to provide power supply and switch the unit on (fig. 4)
- How to provide power supply and switch the unit on (fig. 5)
- NOTE
- Pairing units
- VOX function
- Music player
- Talk function
- Volume adjustment
- Automatic/manual camera switch
- MENU
- Main menu (fig. 7)
- Camera registration (fig. 8)
- Alarm (fig. 9)
- Settings
- Date and time (fig. 10)
- Temperature unit
- Anti-flicker
- Camera switching mode (fig. 11)
- LCD backlight
- VOX mode
- Language
- System information
- Drogi Kliencie!
- EN: Simplified EU declaration of conformity
Brand : Lionelo
Model : Babyline 5.1
Category : Baby monitor