
RS600 - Vacuum Cleaner Campomatic - Free user manual and instructions
Find the device manual for free RS600 Campomatic in PDF.


| Product Type | Carpet Cleaner / Extractor |
| Brand | Campomatic |
| Model | RS600 |
| Power Rating | 1200 W (estimated) |
| Voltage | 120 V (estimated) |
| Dimensions (L x W x H) | 48 x 35 x 110 cm (estimated) |
| Weight | 8 kg (estimated) |
| Cord Length | 7.6 m (estimated) |
| Solution Tank Capacity | 3.8 L (estimated) |
| Recovery Tank Capacity | 4.0 L (estimated) |
| Included Attachments | Brush tool, Hand-held recovery tank, Accessories holder |
| Agitator Type | Revolving bar |
| Cleaning Method | Spray and extract |
| Supported Surfaces | Carpet, Upholstery (W or WS coded) |
| Safety Features | Automatic shut-off when recovery tank full, Agitator motor circuit breaker |
| Housing Material | Plastic |
| Assembly Required | Yes (handle assembly) |
| Maintenance | Empty recovery tank regularly, clean nozzle and brush |
Frequently Asked Questions - RS600 Campomatic
User questions about RS600 Campomatic
0 question about this device. Answer the ones you know or ask your own.
Ask a new question about this device
Download the instructions for your Vacuum Cleaner in PDF format for free! Find your manual RS600 - Campomatic and take your electronic device back in hand. On this page are published all the documents necessary for the use of your device. RS600 by Campomatic.
USER MANUAL RS600 Campomatic
Instruction Manual RC600W
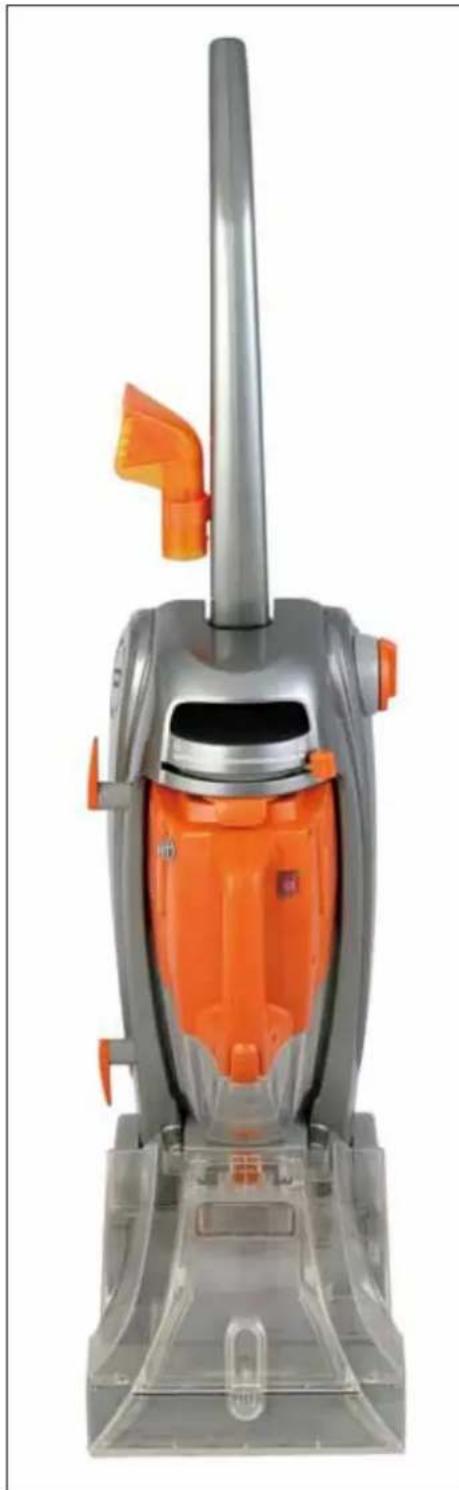
natural_image
Exterior view of a modern vacuum cleaner with gray body and orange interior (no text or symbols visible)Important Safety Instructions!
When using an electrical appliance, please follow the basic precautions, including:
Read all instructions before using appliance.

WARNING:
To reduce the risk of fire, electric shock or injury:
- Use extractor only for its intended use as described in this User's Guide.
● Use only on wet surfaces by the cleaning process.
● Do not clean over surface electrical outlets.
● Do not expose to rain, please store indoors.
● Be extra careful when cleaning stairs. - Use only manufacturer's recommended attachments.
- Do not use without tank in place.
● Always disconnect cord from electrical outlet before using the extractor.
● Never handle plug or appliance with wet hands. - Do not pull or carry by cord, use cord as a handle, close door on cord or pull cord around sharp edges or corners. Do not run appliance over cord. Keep cord away from heated surfaces.
- Do not use extractor if it has been dropped, damaged, left outdoors or dropped into water. Have it repaired at an Authorized Service Center.
● Unplug extractor when not in use. Turn off all controls before unplugging. - Close supervision is necessary when any appliance is used by or near children. Do not allow extractor to be used as a toy or to run unattended at any time.
● Never spray at people or pets. - Keep detergents and other cleaners out of children’s reach.
- Do not use to pick up flammable or combustible liquids such as gasoline or use in areas where they may be present.
- Do not pick up chlorine bleach; drain cleaner, gasoline or any other toxic material with this appliance.
- Do not pick up anything that is burning or smoking, such as cigarettes, matches, or hot ashes.
- Do not pick up hard sharp objects with the extractor. They may damage the machine.
- Do not expose hair, loose clothing, fingers or body parts to openings or moving parts.
- Do not put any object into openings. Do not use with any opening blocked; keep free of dust, lint hair, and anything that may reduce airflow.
Product View
Front View
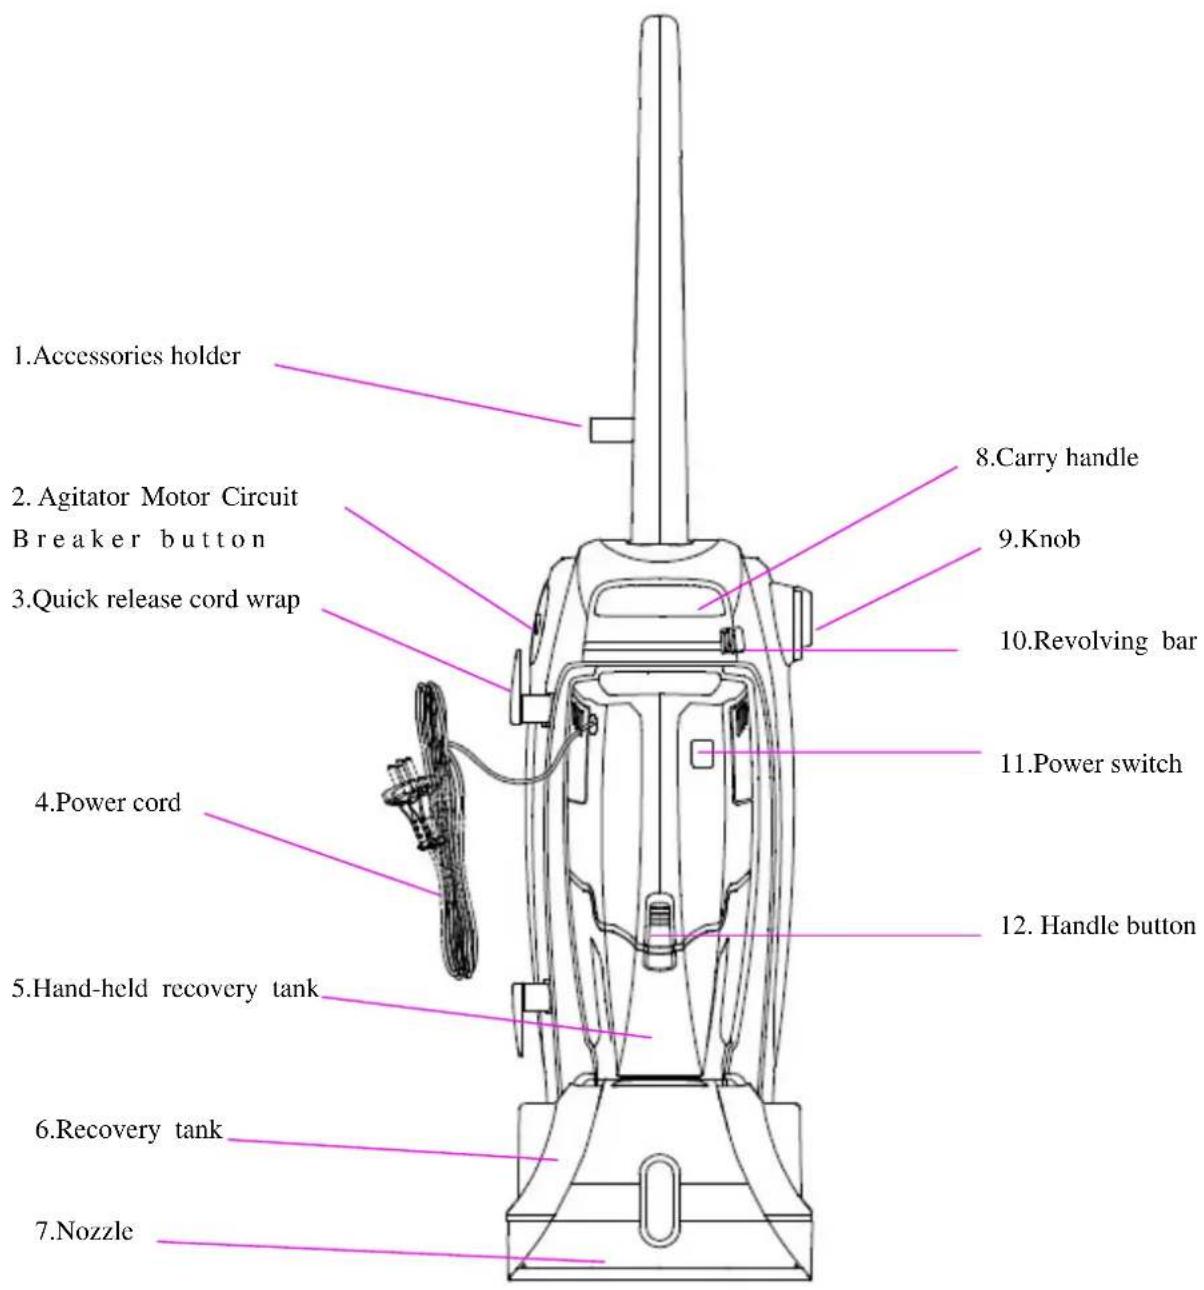
Back View
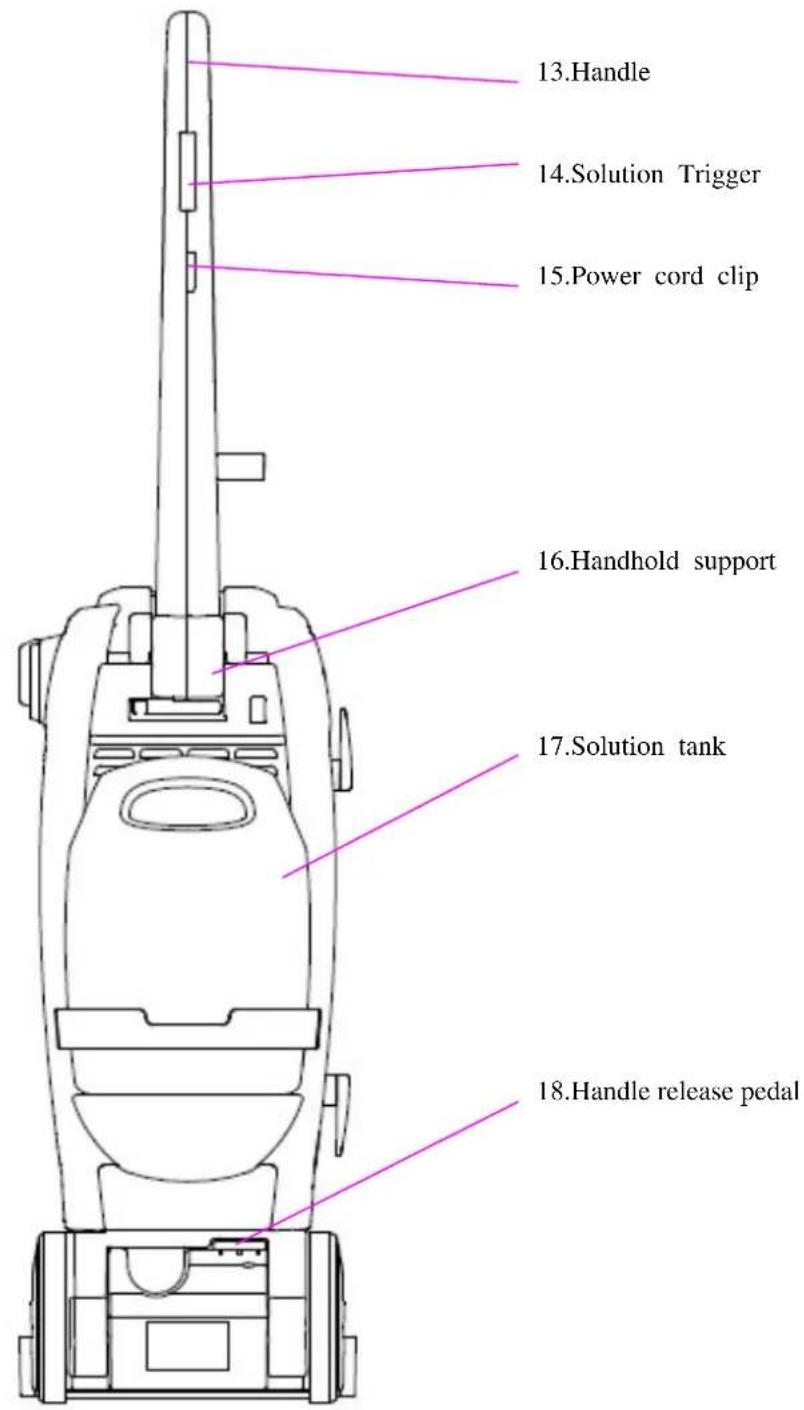
Product Features
- Accessories holder
- Agitator Motor Circuit Breaker button
- Quick release cord wrap
- Power cord
- Hand-held recovery tank
- Recovery tank
- Nozzle
- Carry handle
- Knob
- Revolving bar
- Power switch
- Handle button
- Handle
- Solution trigger
- Power cord clip
- Handhold support
- Solution tank
- Handle release pedal
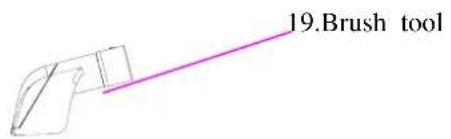
- Brush tool
Extractor Basics
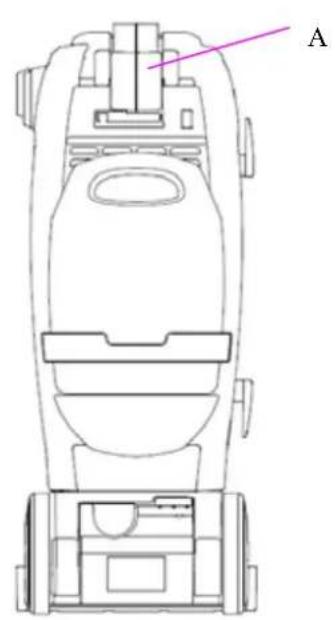
Assembly of handle
Insert vertically the assembly of handle (B) into the upper port of handhold support (A), and fasten it by the flexibility of plastic.
natural_image
Technical line drawing of a mechanical device with labeled component A (no text or symbols beyond label)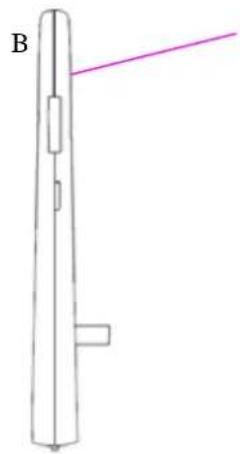
natural_image
Simple line drawing of a vertical cylindrical object with a labeled point B and a diagonal line extending from its top (no text or symbols on the object itself)Fill the solution tank
✿ Pull up on solution tank handle (A), then remove solution tank (Fig.4).
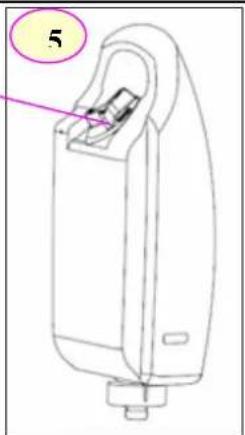
Turn tack perpendicularity plumb and anti-clockwise the lid (B) (Fig.5).
Pour one lid of detergent into the tank.
Fill the tank completely with hot tap water (below 60 degree) until the limited line. Replace the lid (B).
✧ Place tank back into extractor, pressing firmly to be sure tank is fully positioned.
Caution: Detergents contain Anionic and Nonionic Surfactants. Avoid contact with the eye and skin.
B
natural_image
Line drawing of a mechanical device with a labeled component (no text or symbols present)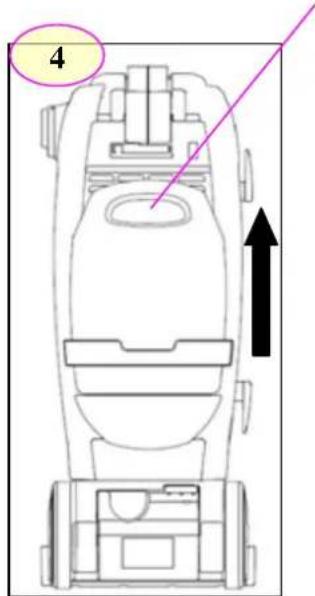
Empty the recovery tank
Unplug extractor from electrical outlet.
An automatic shut-off device prevents the extractor from picking up more dirty water than it can hold in the recovery tank.
You will know the tank needs to be emptied
When the motor sound rises in pitch.
You do not see dirty solution coming up through the recovery tank lid.
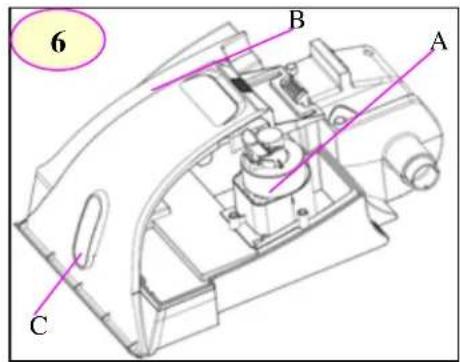
The float (A) inside the recovery tank has risen to the top of the tank (Fig.6), and is visible through the transparent tank (B).
✨ Unlock button (C) in the nozzle. (Fig.6)
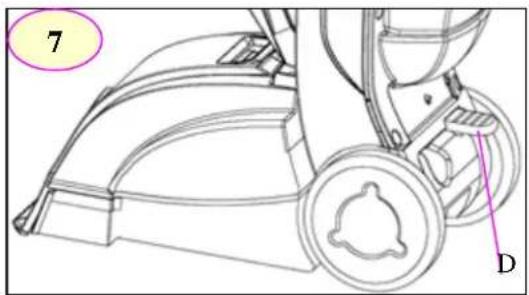
Step on handle release pedal (D) to lower handle and (Fig.7)
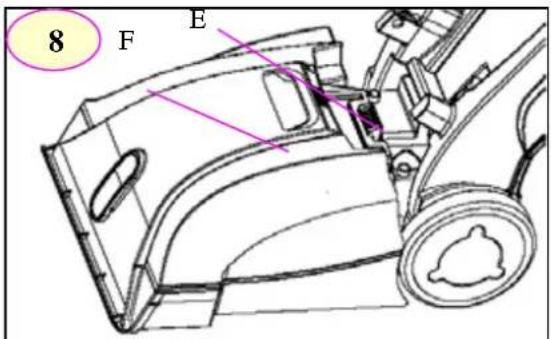
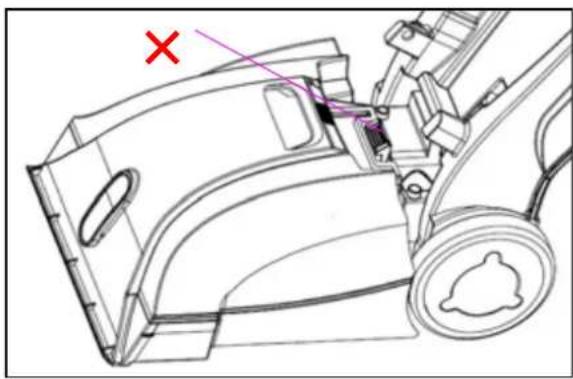
✧ Unlock the recovery tank. Using recovery tank hook (E), lift up on tank lid (F) and pull off (Fig8)
✿ Press the button clip (G), and remove the tank lid. Empty tank. (Fig.9)
Replace lid, revolve the tank handle until the tank lid is locked and place tank to the cleaner.
Lock the button (C) (Fig.6) between nozzle and nozzle cover.
✨ Return handle to upright position.
Caution: Make sure hook the nozzle cover before you lift up on tank lid!
natural_image
Technical line drawing of a mechanical assembly with no visible text or symbols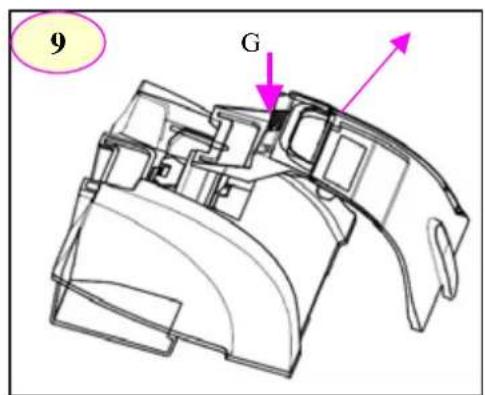
Using the tools
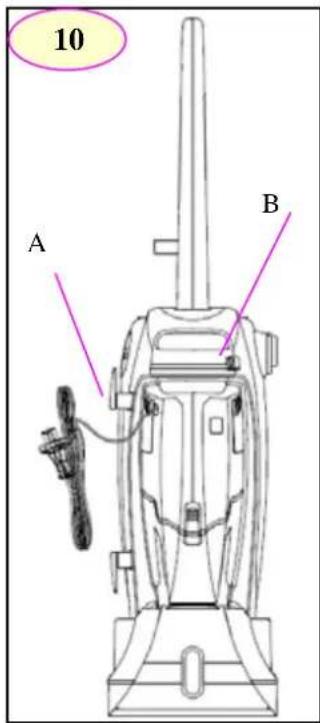
Turn the two Quick release cord wrap (A) upside down.
Turn the revolving bar (B) from the right side to the left side (Fig10).
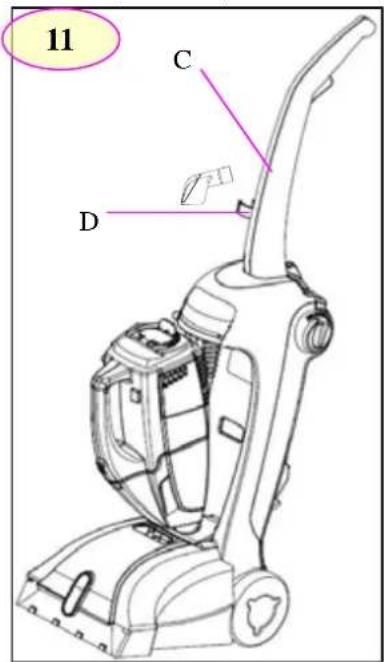
Hold the handle (C) of the hand-held, press the incline forward. (Fig.11).
Take the hand-held out.
Take brush out from accessories holder (D).
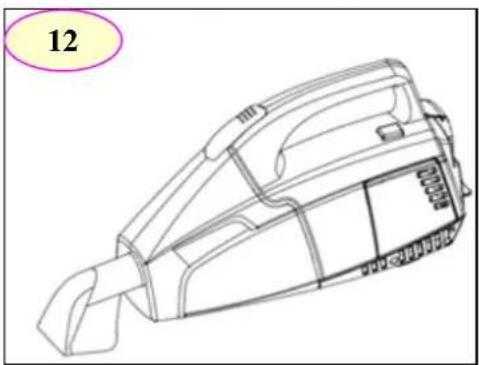
Put the brush into the hand-held recovery tank until it locks in place. (Fig.12)
natural_image
Line drawing of a handheld vacuum cleaner device with no visible text or symbolsEmpty the hand-held recovery tank
✿ Push the handle button(E), and then you can separate the hand-held recovery tank. (Fig.13)
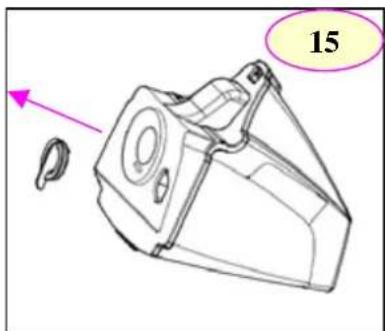
Lift up with the button (F). (Fig14)(Fig15)
✨ Empty the dirty water.
✿ Recover the handle and the hand-held recovery tank.
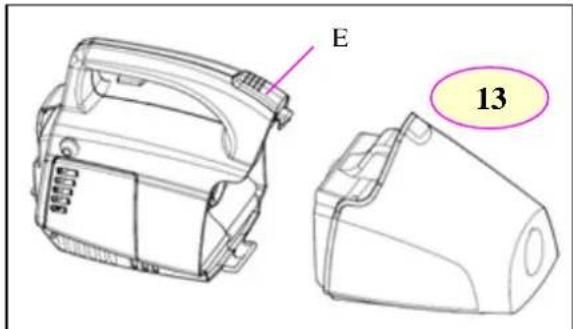
natural_image
Technical line drawing of a device component with labeled parts (E and 13), no readable text or symbols beyond labels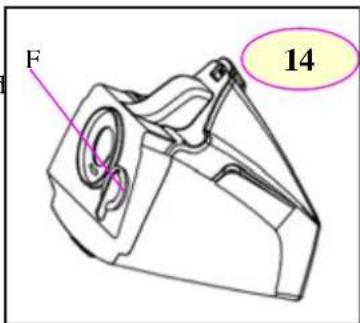
Cleaning carpet
-
Remove lightweight furniture (table, lamps, etc.) from area to be cleaned. Protect any remaining furniture by pinning up furniture skirts and placing aluminum foil or plastic under legs.
-
Vacuum carpet thoroughly to remove loose dirty, hair, lint and other debris.
-
Test detergent for colorfastness on a hidden area of carpet. Wet a while cloth or paper tower with some detergent. Gently rub onto a hidden area of carpet. Wait ten minutes. Blot with white cloth or paper towel and check for color transfer.
-
Retreat spots stains and high traffic areas with Spray offered. Spray spot or area with the spray. Then proceed with the next cleaning steps.
-
Fill solution tank with hot tap water proper amount of detergent.
-
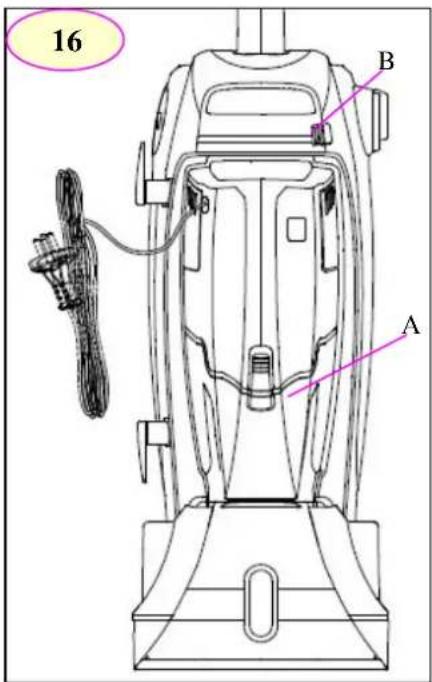
Put the Hand-held (A) in the extractor body. Make sure it is in the right position and turn the revolving bar to the right side (B). (Fig16) Step on handle release pedal. Turn extractor ON.
-
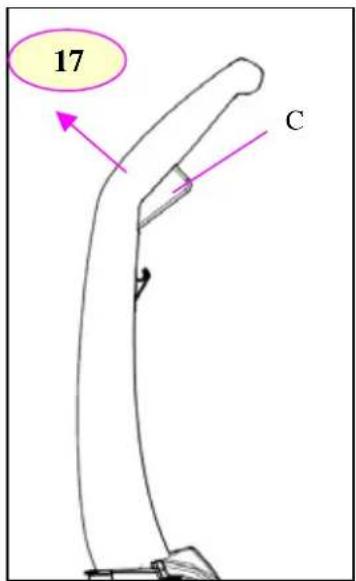
Pull the trigger up with the inclined direction to release cleaning solution (Fig17). Push extractor forward slowly then pull it back slowly.
-
Let go of trigger (C)(Fig.17) and push extractor over same area to pick up dirty solution without putting down more solution. Continue using dry strokes until you see only a little solution coming up through the nozzle (front of extractor) or recovery tank.
-
Do not make the carpet too wet! Use no more than two sets of forward and backward strokes while releasing solution. Always follow with dry strokes-the more the better.
-
Listen carefully! When the motor sound changes (rising in pitch), the recovery tank needs to be emptied. When water has reached the maximum capacity in the recovery tank, the float will rise to the top of the tank and the extractor will not pick up dirty solution.
-
Allow carpet to dry. Avoid walking on the carpet until it is dry. Increased air circulation (open doors, turn on fans, etc.) will help carpet dry thoroughly to prevent the growth of mold or mildew.
-
Vacuum thoroughly after carpet has dries. This will reduce any shading left by the extractor's brushes.
Cleaning upholstery
-
Check fabric-cleaning code. Look on the furniture manufacture's tag for a "W" or "WS" code. These codes indicate that it is all right to use your extractor to cleaning to clean the upholstery.
Do not use the extractor on upholstery marked “S”, “X” or “Dry cleaning only”.
Vacuum upholstery with your vacuum cleaner's attachments. -
Test detergent for colorfastness on a hidden area of upholstery.
-
Wet a white cloth or paper tower with some detergent. Gently rub onto a hidden area of upholstery. Wait ten minutes. Blot with white cloth or paper towel and check for color transfer.
-
Retreat spots and stains with Spray offered. Spray spot or area with Spray. Then proceed with the using the tools in page 8.
-
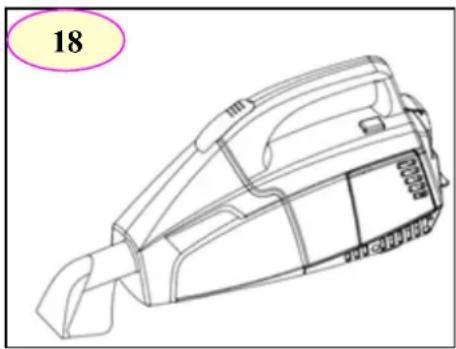
Hold the Hand-held. Turn it ON (Fig18).
-
Using the cleaning solution Spray offered to Spray the cleaning solution. Gently press tool into fabric and slowly pull the tool over the fabric.
-
Do not make the upholstery too wet!
-
Allow upholstery to dry.
natural_image
Line drawing of a handheld vacuum cleaner device with no visible text or symbolsTroubleshooting
P r o b l e m
Cleaner won't run.
Lower suction during floor cleaning
Cleaning solution won't dispense
Agitator brush won't run
S o l u t i o
- Check electrical plug
2 . C h e c k t h e
-
Empty the recovery tank; it may be full and the automatic shut-off engaged.
-
Make sure recovery tank and lid are properly installed.
-
Make sure solution tank is fully inserted and securely in place.
-
Refill the solution tank if it is er
-
MotResSircuitthereakeAlgittator:
- Important Safety Instructions!
- WARNING:
- To reduce the risk of fire, electric shock or injury:
- Product View
- Product Features
- Extractor Basics
- Assembly of handle
- Fill the solution tank
- Empty the recovery tank
- Unplug extractor from electrical outlet.
- Using the tools
- Empty the hand-held recovery tank
- Cleaning carpet
- Cleaning upholstery
- Troubleshooting
Brand : Campomatic
Model : RS600
Category : Vacuum Cleaner