
RC20BL - Vacuum Cleaner Campomatic - Free user manual and instructions
Find the device manual for free RC20BL Campomatic in PDF.

| Product Type | Wet & Dry Vacuum Cleaner |
| Brand | Campomatic |
| Model | RC20BL |
| Power | 1400 W |
| Voltage | 220-240 V~, 50/60 Hz |
| Dust Barrel Capacity | 16 L |
| Cord Length | Approx. 5 m (retractable) |
| Weight | Approx. 6 kg |
| Dimensions | Approx. 40 x 40 x 50 cm |
| Functions | Dry vacuuming, Wet vacuuming, Blowing |
| Accessories Included | Floor brush, Absorbing brush, Triangle brush, Crevice tool, Blowing door |
| Safety Features | Float safety device (auto shut-off when water full), Overheat protection |
| Filter Type | Reusable washable filter bag |
| Body Material | Plastic |
| Electrical Class | Class II (double insulated) |
| Application | Household |
Frequently Asked Questions - RC20BL Campomatic
User questions about RC20BL Campomatic
0 question about this device. Answer the ones you know or ask your own.
Ask a new question about this device
Download the instructions for your Vacuum Cleaner in PDF format for free! Find your manual RC20BL - Campomatic and take your electronic device back in hand. On this page are published all the documents necessary for the use of your device. RC20BL by Campomatic.
USER MANUAL RC20BL Campomatic
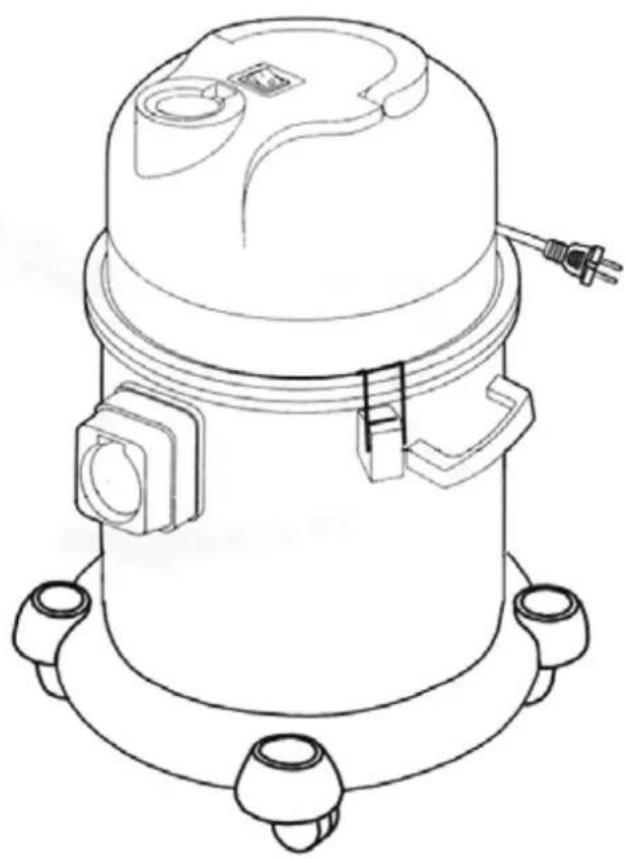
Dual Purpose Vacuum Cleaner
natural_image
Technical line drawing of a mechanical component with mounting flanges and a central housing (no text or symbols)Made in China

Characteristic
Dry & Wet Dual Purpose
1400W Strong Suction
Cord Retractable
Safety Protection Device to ensure normal work of the motor
Base with jack to store accessories easily
Blowing function to satisfy deferent people's requirement
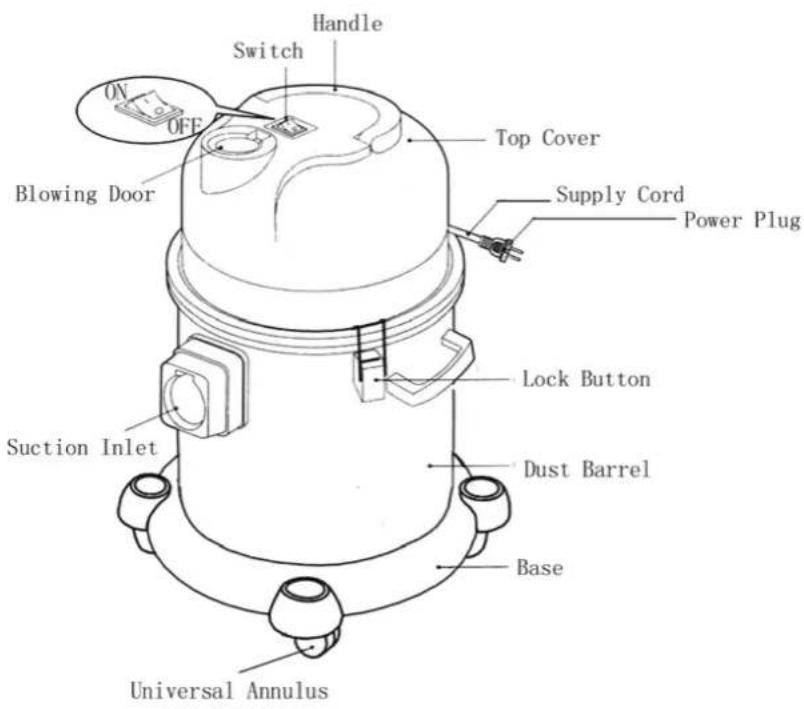
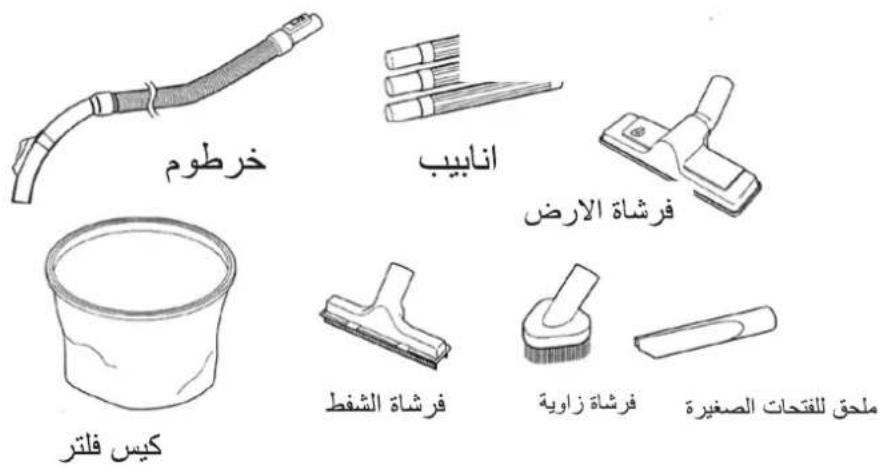
Name of Parts

You can choose suitable accessories for different condition.
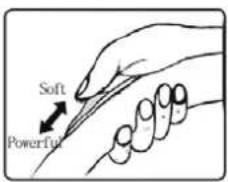
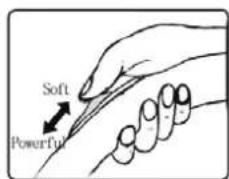
- Floor Brush
Press down the side of bristle button with mark “—” and then use the bristle extended for hard floor. Press down the side of bristle button with mark “—” and then use the bristle retracted for hard floor.
natural_image
Illustration of a hand using a tool to remove wood and plant material (no text or symbols)
- Absorbing Brush
For clean the water on the hard floor or the carpet.
- Triangle Brush
For cleaning bookshelf, windows, desktop etc.
natural_image
Illustration of a hammer striking a surface with a base, showing no text or symbols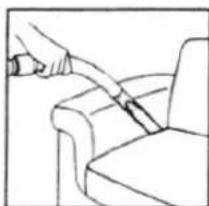
natural_image
Line drawing of a hand using a tool to lift or lift a chair (no text or symbols)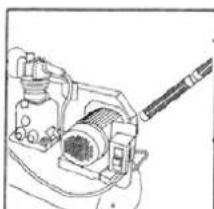
natural_image
Technical line drawing of a mechanical device with no visible text or symbols- Crevice Tool
For cleaning corner edge and draws etc where is difficult to clean.
- Blowing Door
For blowing the dust in the gap.
Warning
- Read this instruction booklet carefully.
- This appliance is for domestic use only. Use as described in this instruction booklet.
- Before using the appliance, check if the mains power voltage corresponds to the voltage shown on the rating plate.
- It is class II electric appliance, so it need not be earthed.
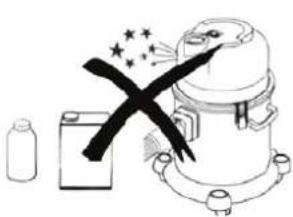
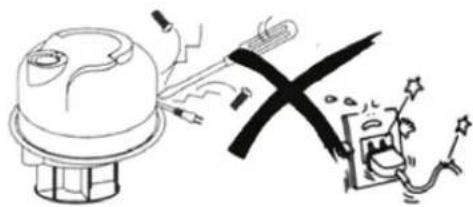
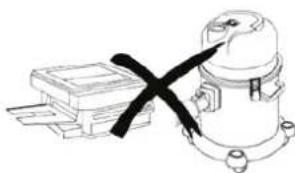
- Do not use it in the flammable and explosive place. (Fig1)
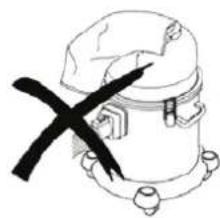
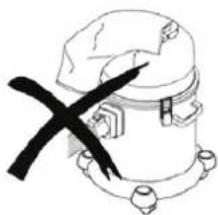
- Do not block the flow of air. Blocking the air suction or exit may damage the motor. (Fig2)
natural_image
Illustration of a chemical reactor with a black X mark, accompanied by a bottle and a battery (no text or symbols)Fig1
natural_image
Simple line drawing of a mechanical device with a black X mark on its side (no text or symbols)Fig2
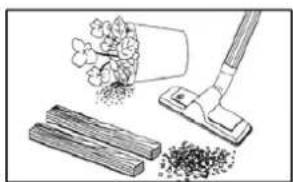
- Do not use the appliance to vacuum all the latter things:
- lighted stub ,hot ashes and other combustible things (Fig3)
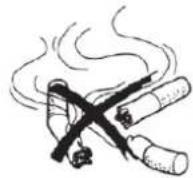
Fig3
natural_image
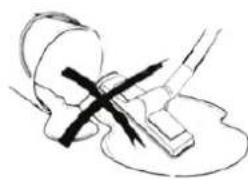
Simple line drawing of a mechanical or electrical component with a cross mark, no text or symbols presentFig4
• those matter due to oil (Fig4)
- sharp matter (Fig5)
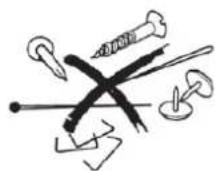
Fig5
natural_image
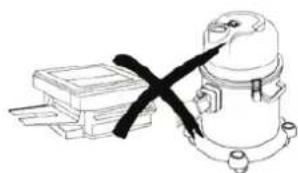
Simple line drawing of a mechanical device with a black X-marked cable, no text or symbols presentFig6
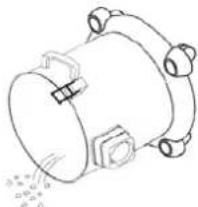
- those tiny powder like power of lime, land plaster etc. They may block the filter bag and the flow of air. It may damage the motor. (Fig6)
- those things that can produce lather like washing powder, cleanser etc. There may be some bubble blowing from the air exit. Please dry it first and then restart it.
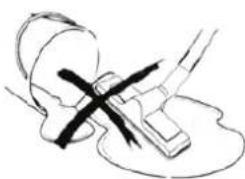
- Do not turn over the vacuum cleaner. Otherwise the water may enter the motor to damage it. (Fig7)
- Do not use the appliance as a lift pump.
- We suggest you do not use it as a producer's equipment.
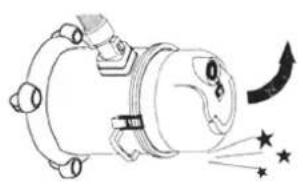
natural_image
Diagram of a mechanical device emitting particles with star symbols (no text or labels)Fig7
natural_image
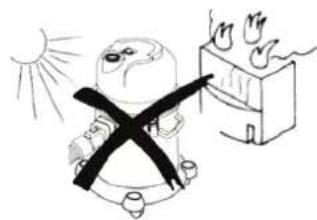
Illustration of a cartoon character with a cross crossed by a window, emitting smoke from the sun (no text or symbols)Fig8
-
Always remove the plug from the power socket when the appliance is not in use and before carrying out any cleaning or maintenance operations.
-
Keep the vacuum cleaner away from direct irradiation sunshine and the place with high temperature. Heat can deform and discolor the plastic parts of unit. (Fig8)
-
Check the hose periodically. Replace it in time if there is any way damaged. (Fig9)

Fig9
natural_image
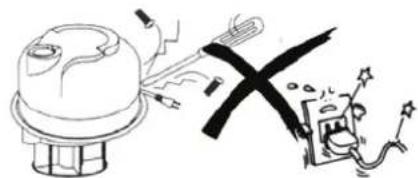
Illustration of a device emitting electric shockwave waves, with no visible text or symbolsFig10
- If the supply cord is damaged, it must be replaced by the manufacturer or its service agent or a similarity qualified person in order to avoid a hazard. (Fig10)
How to use
1. Ready for use
Connection
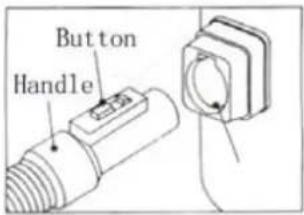
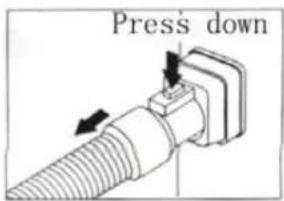
- Insert the flexible tube into the air intake duct. To do this, slide intake duct cover insert the tube and press until it clicks into position. (Fig11) To remove it, press down the button and pull out the hose. (Fig12)
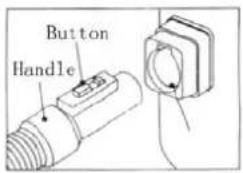
Fig11
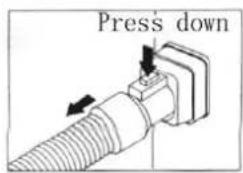
Fig12
To use the blowing function, just need plug the hose into blowing door.
- Connect the flexible tube, extensive tube and accessories correctly.
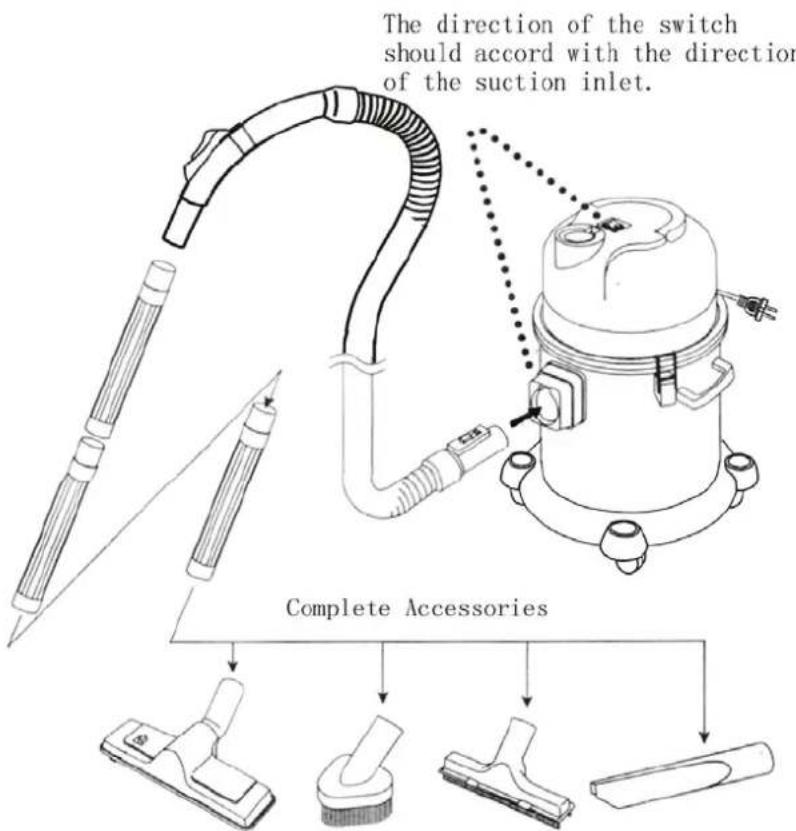
- Switch on the appliance
Before use please check the filter bag is installed. Do not work with no filter back.
-
While pressing down the cable winding button with one hand, draw out the cable. When you find the yellow sign, please draw it slowly. If you find the red sign please stop drawing. Insert the plug into the power socket. If you need retract the cable, just press down the cable winding button. (Fig13)
-
Press the ON/OFF button to switch the appliance on. (Fig14)
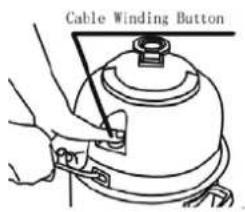
Fig13
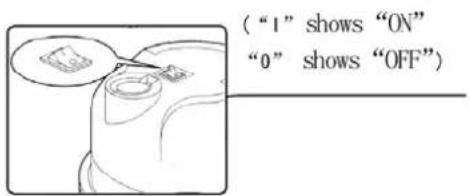
Fig14
Change the air power control knob on handle can adjust the suction. The greater air door the smaller suction.
Safety Device
- When there is full of water in the dust barrel(about 16L), the float will be risen and the appliance will stop working. In addition you can hear abnormal sound. The power supply hasn't been cut off yet at that time. So cut off the power supply immediately. And spill the water in the barrel. Restart the machine.
- When the vacuum is overturned, the float will rise. In that case cut off the power supply and upturn the vacuum.
- If you run the vacuum or leave it alone while the float is risen, it may damage the motor and lead to fire.
Maintenance
- Clean the dust barrel
When finishing cleaning or the suction decreased obviously, cut off the power supply and empty the barrel in time.
Refer to the following steps:
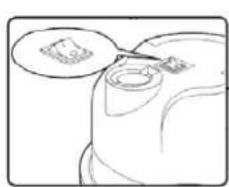
(1) Release the lock button and lift the top cover. (Fig15)
(2) Before remove the fi
shake it about 20 times up and down. (Fig16)
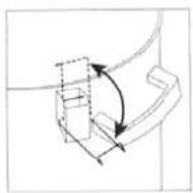
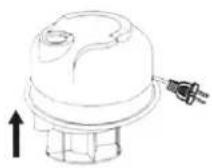
Fig15
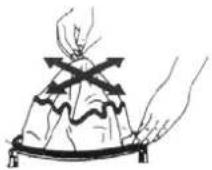
Fig16
(3) Remove the filter bag and clean the dust in the barrel. (Fig17)
(4) Replace the bag and the top cover. (Fig18)
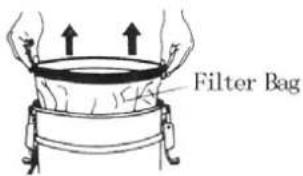
Fig17
natural_image
Line drawing of a cylindrical mechanical component with mounting flanges and bolt holes (no text or symbols)Fig18
If you do not empty the barrel in time, the dust in the barrel will emit smell. So please clean the barrel periodically. Before use again dry it.
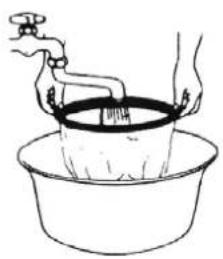
- Clean the filter
If the filter bag is blocked badly, clean it with water. If you need you can use some neutrality cleanser.
(1) Remove the filter bag.
(2) Clean it (Fig19)
(3) Dry it (Fig20)
After dry it replace it according to primary steps.
Do not use boiled water to clean it or dry it wit fire.
- Clean the vacuum cleaner and the accessories
natural_image
Line drawing of hands washing a cup with a faucet, no text or symbols presentFig19

natural_image
Simple line drawing of a sun and a bucket with a rod, no text or symbols presentFig20
- Clean the accessories and vacuum with soft cloth dipping water or neutrality cleanser. (Fig21)
(1) Do not clean the body of vacuum cleaner in petrol or oil-like liquid. Please wipe it with water or neutral detergent.
(2) When you wipe the appliance please dry the soft cloth by screwing.
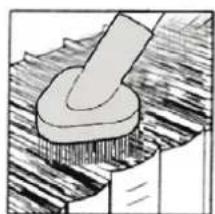
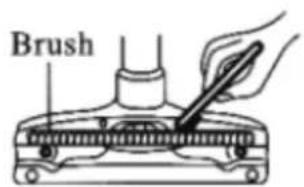
- Remove the sundries adhering to the floor brush with old toothbrush every month. (Fig22)
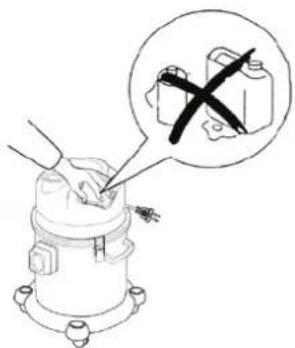
Fig21

Fig22
Troubleshooting
| Trouble Check | Part Resolve | |
| Motor doesn’t work | Power Plug If it doesn’t plug in, plug in. | |
| Suction decrease | Hose | If hose is blocked, clean it. If straight tube doesn’t connect well, connect it well. |
| Dust Barrel | If there is full of dust or water, empty it. | |
| Filter Bag | If it is blocked, clean it. | |
| Hose comes away from the seat | Hose Connection | Plug the hose into the seat. |
Technique parameter
| Model No. Power Voltage Frequency | ||
| XXXX 1400W 220-240V~ 50/60Hz | ||
Circuit diagram

كيفية الاستعمال:
(“1” shows “ON”
“0” shows “OFF”)
natural_image
Diagram of a mechanical device emitting particles with arrows indicating motion (no text or symbols)Fig7

natural_image
Illustration of a person with a cross-shaped bandage pointing at a fire extinguisher, with sun and smoke visible (no text or symbols)Fig8

natural_image
Abstract black-and-white graphic with intersecting lines and stars (no text or symbols)Fig9
natural_image
Cartoon illustration of a robot emitting smoke next to a crossed-out black X symbol, with a distressed character and sparkles nearby (no text or symbols)Fig10
نفخ الغبار:
natural_image
Illustration of a chemical reactor with a black X mark, accompanied by a bottle and a battery (no text or symbols)Fig1
natural_image
Simple line drawing of a mechanical device with a black X mark, no text or symbols present.Fig2
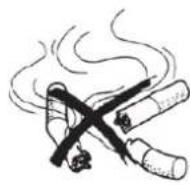
Fig3
natural_image
Simple line drawing of a mechanical component with a cross mark, no text or symbols presentFig4
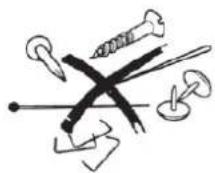
Fig5
natural_image
Simple line drawing of a mechanical device with a black X mark, no text or symbols presentFig6
الملحقات:
فرشاة الارض:
natural_image
Illustration of a cleaning tool with a hand holding a cloth and three stacked bricks (no text or symbols)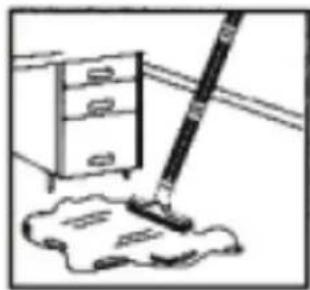
natural_image
Simple line drawing of a mop and dust pile next to a cabinet (no text or symbols)فرشاة الشفط:
natural_image
Mechanical component diagram showing a lever pressing down on a textured surface (no text or symbols)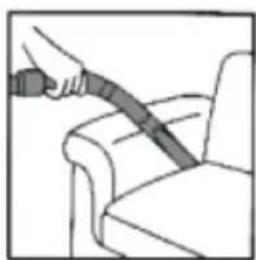
natural_image
Illustration of a hand using a cable to lift a seatbelt (no text or symbols)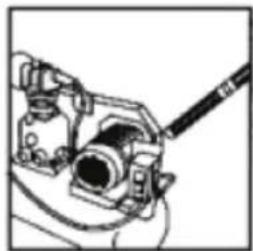
natural_image
Mechanical assembly diagram showing a lever mechanism with no visible text or symbolsnatural_image
Line drawing of a mechanical device with mounting flanges and a central dome (no text or symbols)صنع في الصين

كتيب التعليمات
Brand : Campomatic
Model : RC20BL
Category : Vacuum Cleaner