
SZ 350 - Camera Maginon - Free user manual and instructions
Find the device manual for free SZ 350 Maginon in PDF.


| Product Type | Digital Camera |
| Brand | Maginon |
| Model | SZ 350 |
| Dimensions (approx.) | 100 x 60 x 30 mm |
| Weight (approx.) | 150 g (without batteries) |
| Power Supply | 2 x AA batteries (not included) |
| Image Resolution | 16 Megapixels (interpolated) |
| Optical Zoom | 4x optical zoom |
| Digital Zoom | 4x digital zoom |
| Display | 2.7-inch LCD screen |
| Storage Media | SD/SDHC memory card (up to 32GB) |
| File Format | JPEG, AVI |
| Video Resolution | 720p HD video |
| Interface | USB 2.0 |
| Main Functions | Photo capture, video recording, playback, self-timer, face detection |
| Maintenance & Cleaning | Clean lens with soft dry cloth; keep camera dry |
| Safety | Keep away from water and extreme temperatures; remove batteries if not in use |
| Spare Parts & Repairability | Contact Maginon support for parts; not user-serviceable |
| General Information | Compact design suitable for beginners |
Frequently Asked Questions - SZ 350 Maginon
User questions about SZ 350 Maginon
0 question about this device. Answer the ones you know or ask your own.
Ask a new question about this device
Download the instructions for your Camera in PDF format for free! Find your manual SZ 350 - Maginon and take your electronic device back in hand. On this page are published all the documents necessary for the use of your device. SZ 350 by Maginon.
USER MANUAL SZ 350 Maginon
Congratulations on purchasing a high quality MAGINON product.
You have acquired a modern digital camera with excellent technical features and respective accessories, which are particularly easy to operate. Please study this information in detail observing, in particular, the safety instructions.
The camera comes with a 3 year warranty. You will need the enclosed warranty card and your sales receipt in the event of the camera developing a fault.
Keep these in a safe place together with the Instruction Manual.
Please include the Instruction Manual when passing on the camera to a third party.
1. Package Contents
Please unpack the camera carefully and check that all of the following items are included:
- Digital Camera SZ 350
- 1 Li-lon battery
- USB Charger
- USB cable
- Picture editing software
- Instruction manual
- Warranty documents

Note:
- Remove the protective plastic from the screens and possibly from the lens of the camera by pulling on the protruding tab.
- Attention! Keep plastic films and bags away from babies and toddlers, there is a danger of suffocation.
After Sales Support

00 800 - 78 77 23 68
MODEL: SZ 350

YEARS WARRANTY
MAGINON
2. Table of contents
- PACKAGE CONTENTS 1
- TABLE OF CONTENTS 2
- HAZARD, SAFETY AND WARNING NOTICES 4
- THIS IS YOUR CAMERA 7
4.1. Camera buttons 9
4.2. Navigation Control 10
- GETTING STARTED 12
5.1. Attach the Camera Strap 12
5.2. Inserting the Battery 13
5.3. Camera Memory 14
5.4. Inserting an SD/SDHC/SDXC Memory Card 15
5.5. Charging the Battery by USB 16
5.6. Turning the Power On and Off 17
5.7. Initial Settings 17
- THE LCD MONITOR 18
6.1. Photo Mode Screen Layout 18
6.2. Movie Screen Layout 20
6.3. Playback Mode Screen Layout 21
- RECORDING IMAGES AND VIDEOS 23
7.1. Taking Images 23
7.2. Setting the Zoom Control 23
7.3.EV Compensation 24
7.4. Flash 25
7.5.Self-timer 26
7.6. Setting the Focus Mode 27
7.7. The AE/AF LOCK button 27
7.8. The delete button 28
7.9. Recording videos 30
After Sales Support

00 800 - 78 77 23 68
MODEL: SZ 350

YEARS WARRANTY
MAGINON
- MODE DIAL 31
8.1. Intelligent scene 32
8.2. Scene mode 33
- RECORD MENU 42
9.1. Photo menu 42
9.2. Movie Menu 50
- PLAYBACK....52....
10.1. Viewing in Single Navigation 52
10.2. Viewing Thumbnails 52
10.3. Magnify 53
10.4. Playing Videos 54
10.5. Playing Voice Memo 55
10.6. Playback Menu 56
-
SETUP MENU 68
-
CONNECTING THE CAMERA TO A TV 72
-
CONNECTING THE CAMERA TO A PC 72
-
CONNECTING THE CAMERA TO A PRINTER 73
-
ABOUT FOLDER AND FILE NAMES 75
-
CLEANING....76
-
DISPOSAL 76
-
CONFORMITY 77
-
WARRANTY AND SERVICE 77
-
LICENSE STATEMENT....78
-
TECHNICAL SPECIFICATIONS 79
After Sales Support

00 800 - 78 77 23 68
MODEL: SZ 350

YEARS WARRANTY
MAGINON
3. Hazard, safety and warning notices
If the camera and accessories are handled incorrectly, this can pose a danger source for yourself and others, or respectively damage or destroy the camera. Please read and strictly observe the following hazard, safety and warning notices.
Intended use
This camera is intended to be used as an acquisition device for digital photos and video clips. It is designed for domestic use and is not suitable for commercial applications.
Risks for children and persons with limited abilities to use electronic devices
■ Caution! Danger of suffocation! The packaging material is not a toy. Children can choke on plastic bags, films and polystyrene parts. Therefore, always keep packaging materials away from children. Dispose of unwanted packaging according to local recycling requirements.
This device is not intended to be used by persons (including children) with restricted physical, sensory or mental abilities or lack of experience and/or knowledge, unless they are supervised by a person responsible for their safety or receive instructions from them on how to operate the device. Children should be supervised to ensure that they do not play with the device.
Electrical hazard
■ The camera and the accessories should not be immersed or exposed to drips or splashes. Furthermore, no objects filled with liquids, such as vases or glasses, may be placed on or near the accessories. This is a fire and electric shock hazard.
■ Only open the battery or card compartment when the camera is dry. Do not open these compartments if the camera is still wet. Otherwise there is a fire and electric shock hazard.
■ If foreign objects have entered the camera, turn it off and remove the batteries. Otherwise there is a risk of fire or electric shock.
If the camera has fallen or the housing is damaged, turn it off and remove the batteries. Otherwise there is a risk of fire or electric shock.
■ The camera must not be taken apart, modified or repaired. There is a risk of fire or electric shock.
After Sales Support

00 800 - 78 77 23 68
MODEL: SZ 350

YEARS WARRANTY
MAGINON
■ The mains adapter may not be used during thunderstorms, danger of electrocution.
■ Only use the supplied USB mains adapter with the mains voltage specified on the rating plate, otherwise there is danger of fire and electrocution. Disconnect from mains by pulling plug out of mains socket. The plugged-in USB mains adapter can continue to consume power and represent a hazard source.
Heat damage, fire hazard
■ Do not leave the camera laying around in places where the temperature could rise significantly (e.g. in a vehicle). This could damage the housing or the parts inside, which in turn could cause a fire.
■ Do not wrap the camera in anything and do not place it on textiles. This might cause heat to build up in the camera, resulting in a deformation of the housing, and it can also cause a fire.
Hazards through the use of batteries
■ Remove the batteries from the camera if it is not used for an extended period of time.
■ Do not remove the batteries after using the camera for an extended period of time. Allow to cool down first. The batteries often become hot during use.
There is danger of explosion if the batteries are replaced incorrectly or if the wrong type of battery is inserted. Therefore, MAGINON Lithium-Ion battery NP120, 3.7 V / 1700 mAh or a Lithium-Ion battery with the same specification. Ensure that the battery polarity corresponds with that shown on the camera
■ Never expose the batteries to excessive heat such as sunlight, fire, etc. This is a fire or explosion hazard.
- Keep the batteries out of the reach of children. If you suspect a battery to have been swallowed, seek immediate medical advice!
■ Batteries must not be thrown into the fire, short circuited or disassembled. There is an explosion danger.
■ Remove batteries prior to disposing of the camera.
■ Do not dispose of batteries in household waste. Dispose of in accordance with local recycling requirements.
If leaking, remove battery from the camcorder using a cloth and dispose of correctly. Avoid battery acid coming into contact with eyes. In case of contact with eyes, rinse eyes with plenty of water and contact doctor immediately. In case of contact with skin, wash area with plenty of soap and water.
After Sales Support

00 800 - 78 77 23 68
MODEL: SZ 350

YEARS WARRANTY
MAGINON
Injuries and property damage
■ Only place the camera on stable surfaces. Otherwise the camera could fall, causing damage to the unit.
■ Do not use the camera whilst walking or driving. You could trip or cause a traffic accident.
■ Only use USB power adaptor specified for the camcorder. No liability shall be accepted for damage caused by the use of an incorrect USB power adaptor.
■ The 230V socket used for the power supply must be accessible at all times so that the power supply can be quickly disconnected from the mains if necessary.
■ Provide adequate ventilation and do not cover the camera, to avoid overheating.
■ Do not expose to any open flame sources, such as lighted candles on or near the unit.
■ Make sure that the LCD monitor is not exposed to impact or point pressure. This could result in the glass of the monitor being damaged or that liquid from the inside his discharged. If the liquid gets into the eyes or onto the skin, it must be rinsed off immediately with clean water. If the liquid gets into contact with the eyes, seek medical attention immediately.
■ Damage to the electronics, monitors, or the lens, which were caused by external influences such as shock, drop, or otherwise, are not covered by the warranty and will therefore not be repaired free of charge.
■ Do not trigger the flash too close to anyone's eyes. This can cause damage to the eyes.
■ Do not let the camera drop or get bumped and always treat it with care. Otherwise, it could get damaged.
After Sales Support

00 800 - 78 77 23 68
MODEL: SZ 350

YEARS WARRANTY
MAGINON
4. This is your camera
Front view

-
Self-timer LED
-
Lens
Back view

-
LCD display
-
Continuous shot
-
LED indicator light
-
AE/AF Lock button
-
Playback button
-
OK button/4-way navigation control button
-
Delete button
-
Menu button Front view
After Sales Support

00 800 - 78 77 23 68
MODEL: SZ 350

YEARS WARRANTY
MAGINON
Top and bottom view


11.Zoomdial
12.Shutterbutton
13. Movie button
14. Powerbutton
- Mode dial
- Microphone
- Battery/Memory card compartment
- Tripod screw hole
Side views
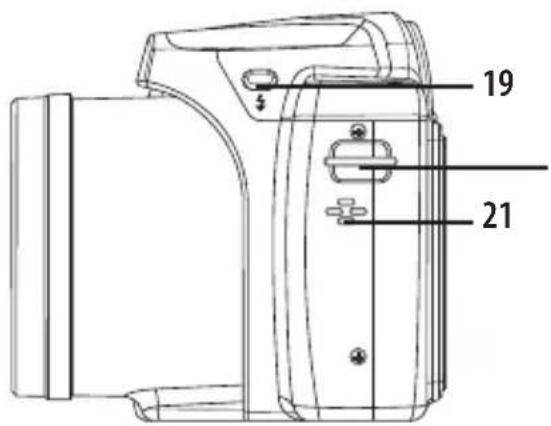
20

- Flashbutton
20.Strapring
21.Speaker
22.USB/TVout
After Sales Support

00 800 - 78 77 23 68
MODEL: SZ 350

YEARS WARRANTY
4.1. Camera buttons
| Button Element Description | ||
 ON/OFF ON/OFF | Power Press the Power button to turn the power on/off. | |
 | Shutter Press to capture an image. | |
 | Zoom dial | In Photo mode and Recording video, spin the zoom dial to left to zoom out, right to zoom in.In Playback mode, spin to zoom in to magnify image or zoom out to enter thumbnails. |
 | Menu Press to enter or exit menu/submenu. | |
 | Delete In Playback mode, press to delete an image, video or audio clip. | |
 | Playback Press to enable Playback mode or return Record mode. | |
 | Movie Press to start/stop recording video. | |
 | AE/AF LOCK button | Press this button on your camera to lock focus and exposure. See „Using the AE/AF LOCK Button“ on page 33 to know more about AE/AF LOCK button. |
 | Continuous shot Press to capture a series of continuous images | |
 | Mode dial | There are 8 recording modes can be set. Once turning the mode dial, it enters the selected mode immediately even in Playback mode or during movie recording. |
After Sales Support

00 800 - 78 77 23 68
MODEL: SZ 350

YEARS WARRANTY
MAGINON
4.2. Navigation Control
The 4-way Navigation Control and the OK button allow you to access the various menus available from the On Screen Display (OSD). You can configure a wide range of settings to ensure maximum results from your images and videos. Further functions of these buttons are as follows:
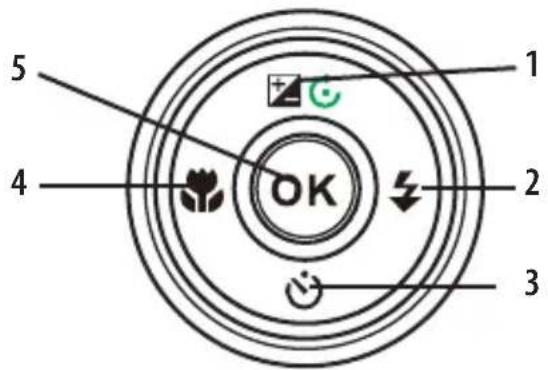
| Button Element Description | ||
| 1. | EV/Rotate/Up | 1. In Photo mode press to change the EV settings.2. Playing Video file, press to Pause/Start video playback.3. In Playback photo mode, press to rotate the image clockwise 90 degrees by each press of the button. This feature is applicable for still images only.4. In Menu, press to navigate through the menu and submenu selections. |
| 2. | Flash/Right | 1. In Photo Mode, press to scroll through the flash mode options. (Auto, Red-eye Reduction, Forced On, Slow Sync and Forced Off)2. In Playback mode, press to view the next image or video clip.3. In playback Movie mode, press to Forward video playback.4. In Menu, press to enter the submenu or to navigate through the menu selections. |
After Sales Support

00 800 - 78 77 23 68
MODEL: SZ 350

YEARS WARRANTY
| Button Element Description | ||
| 3. | Self-timer/Down | 1. In Photo Mode, press to scroll through Self-time options. (Off, 10 sec., 2 sec. and Double)2. Playing video file, press to stop video playback.3. In Menu, press to navigate through the menu and submenu selections. |
| 4. | Focus/Left | 1. In Photo Mode, press to scroll through Focus options. (AF, Macro, Super Macro, Infinity, MF)2. In Playback mode, press to view the previous image or video clip.3. In Playback movie mode, press to Rewind video playback.4. In Menu, press to exit a submenu or to navigate through the menu selections. |
| 5. | OK | 1. Confirm a selection when using the OSD menus.2. In Playback Movie mode, press to start video playback. |
After Sales Support

00 800 - 78 77 23 68
MODEL: SZ 350

YEARS WARRANTY
MAGINON
5. Getting Started
5.1. Attach the Camera Strap
- Please make sure the lens cap and the cap strap are well combined.
- Attach the lens cap to the camera strap as the illustration.
- Follow the steps below to attach the camera strap to the camera.

flowchart
graph TD
    A["Image: Cable strap"] --> B["Step 1: Cable strap is attached"]
    B --> C["Step 2: Cable strap is attached at two places"]
    C --> D["Step 3: Cable strap is attached"]
    D --> E["Step 4: Cable strap is attached at two places"]
    E --> F["Final Image: Cable strap attachment"]
    Note["Please make sure the camera strap is attached at two places."]

Note:
- In order to avoid dropping the camera, attaching the neck strap before using the camera is recommended.
- Wrapping the strap around your neck is dangerous. Take care that children do not hang the strap around their neck.
- The cap is the protection for the lens, please be careful not to lose the lens cap.
After Sales Support

00 800 - 78 77 23 68
MODEL: SZ 350

YEARS WARRANTY
MAGINON
5.2. Inserting the Battery
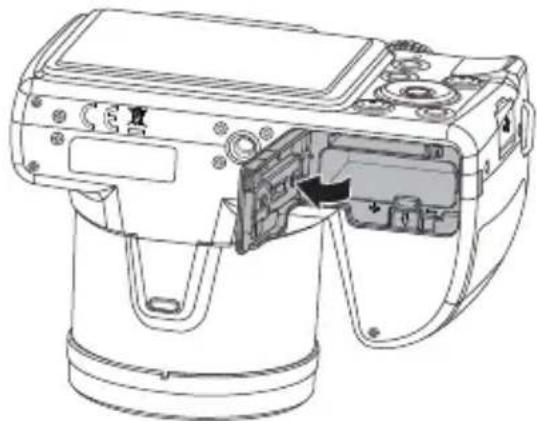
Follow these instructions to insert the rechargeable battery into the battery/memory card compartment.
Please read „Battery Information“ on page 5 before inserting/removing batteries.
- Make sure the power is off before open the battery/memory card compartment.
- Unlock and open the battery/memory card compartment at the bottom of the camera.
- Insert the batteries into the compartment with the terminal facing inside the camera with correct orientation as shown.

natural_image
Technical line drawing of a camera module with internal components and wiring (no text or symbols)
natural_image
Technical line drawing of a camera module with no visible text or symbolsAfter Sales Support

00 800 - 78 77 23 68
MODEL: SZ 350

YEARS WARRANTY
MAGINON
- Close and lock the battery/memory card compartment. In order to prevent the battery from dropping, please make sure the compartment is locked firmly.

5.3. Camera Memory
Internal memory
Your camera is equipped with 128 MB of internal memory. Users can store files up to approximately 87 MB. If there is no memory card inserted in the memory card slot, all images and videos recorded are automatically stored in the internal memory.
External storage
Your camera supports SD cards of up to 4 GB in size. It also supports SDHC cards with a maximum capacity of 32 GB. Then also supports SDXC cards with a maximum capacity of 64 GB. If there is a storage card inserted in the memory slot, the camera automatically saves all images and videos in the external storage card. The icon [→] indicates the camera is using SD card.

Note:
- Not all cards may be compatible with your camera. When purchasing a card, please check the card's specifications and take the camera with you.
After Sales Support

00 800 - 78 77 23 68
MODEL: SZ 350

YEARS WARRANTY
5.4. Inserting an SD/SDHC/SDXC Memory Card
Expand your camera's storage by using SD, SDHC or SDXC memory cards.
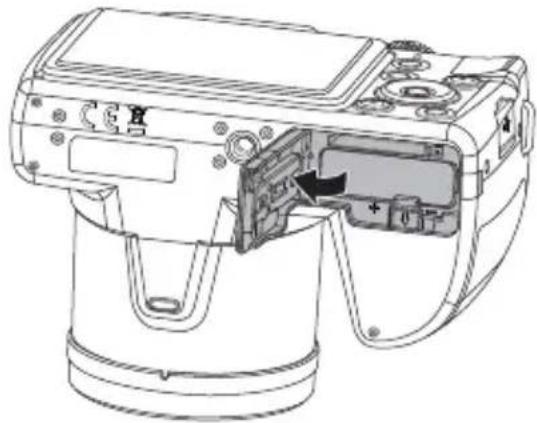
- Unlock and open the Battery/memory card compartment at the bottom of the camera.
- Insert the SD/SDHC/SDXC card into the memory card slot with the metallic part facing the back side of the camera.
- Push the SD/SDHC/SDXC card into the memory slot until it clicks into place.
- Close and lock the Battery/memory card compartment.
To remove the SD/SDHC/SDXC card:
-
Unlock and open the battery/memory card compartment.
-
Gently push the card until it pops out.
-
Pull out the card carefully.
natural_image
Line drawing of a camera module with visible internal components and wiring (no text or symbols)
natural_image
Technical line drawing of a camera module with no visible text or symbols
Note:
- Windows 2000/XP does not support SDXC card (exFAT format). But in Windows XP (Service Pack 2 or 3), you can download exFAT patch update to support SDXC card.
• To use the SDXC card with Mac OS, the OS version should be 10.5 or higher. - The memory card that is not inserted correctly may cause damage to the camera. Please be careful when inserting the memory card.
- To prevent children from swallowing the memory card, please keep the memory card out of reach of children.
After Sales Support

00 800 - 78 77 23 68
MODEL: SZ 350

YEARS WARRANTY
MAGINON
5.5. Charging the Battery by USB
In other way charging the battery, you can use the USB cable to connect the camera with PC or USB adapter.
- Connect the camera with the USB cable as shown.
- Connect the other end with the USB adapter and plug it into a power outlet or with the USB port of PC directly for charging.
■ When the battery is charging, the LED indicator flashes.
■ When the battery is fully charged, the LED indicator goes off.
■ When the battery is unusual charged, the LED indicator flashes rapidly.
■ When the camera charges without the battery inside, the LED indicator goes off.


Note:
- It's recommended not operating the camera when charging. Actual charging time depends on current battery capacity and charging conditions.
- You can also charge the battery with Apple adapter. Its power output meets the standard 5V/500mA.
- When the battery is removing during charging, it will recover charging after you unplugging and replugging USB port.
After Sales Support

00 800 - 78 77 23 68
MODEL: SZ 350

YEARS WARRANTY
5.6. Turning the Power On and Off
There are two ways to turn on the camera:
- Press the Power button, the startup image displays briefly and the startup sound plays if enabled. The zoom lens extends and the camera is turned on in Record mode.
- Press the Playback button, the camera is turned on in Playback mode. The zoom lens is not extended.
To turn off the camera, press the Power button.
5.7. Initial Settings
When you turn on your camera for the first time, you will be asked to do the initial settings of your camera. First is the setup of language menu. Specify in which language menus and messages are to be displayed on the LCD monitor.
Setting the Language
- Press ▲, ▼ or ◀ move through the selection.
- Select a language, and then press OK to apply.
Setting the Date & Time
- Press or to move through the selection.
- Press ▲ or keys to change the value for the date and time.
- Press OK to apply.
- If necessary, press [ ] to close the menu.
Now, you are ready to start taking images and videos.

Note:
Holding
down
or
keys to change the values continuously.
After Sales Support

00 800 - 78 77 23 68
MODEL: SZ 350

YEARS WARRANTY
MAGINON
6. The LCD monitor
The LCD monitor shows all important information regarding camera settings as well as the visual image of your image or video. The display on the LCD monitor is called the On Screen Display or OSD.
6.1. Photo Mode Screen Layout

| No. Item Description | ||
| 1 | Record Mode Indicates the current mode. | |
| 2 | Flash Indicates flash settings. | |
| 3 | Self-timer Indicates Self-timer settings. | |
| 4 | Zoom indicator Displays zoom. | |
| 5 | Shots remaining Indicates the remaining shots available. | |
| 6 | Battery Indicates battery level. | |
| 7 | Storage media Indicates current storage media in use. | |
After Sales Support

00 800 - 78 77 23 68
MODEL: SZ 350

YEARS WARRANTY
| No. Item Description | ||
| 8 Wind Cut Reduces wind noise during movie recording. | ||
| 9 Movie size Indicates movie size. | ||
| 10 | Date stamp Indicates date stamp is enabled. | |
| 11 Shake warning | Indicates the light is not enough and the camera is shaking, which may cause the captured image blurred. If the shake warning appears, you can still capture images. However, enable Stabilizer, flashlight or use tripod is recommended, these ways will stabilize the camera. | |
| 12 Stabilizer Indicates stabilizer function is enabled. | ||
| 13 Histogram Graphic display of Brightness. | ||
| 14 ISO Displays ISO settings. | ||
| 15 Shutter speed Displays shutter speed settings. | ||
| 16 Aperture value Displays aperture settings. | ||
| 17 Focus area Indicates focus area. | ||
| 18 AE/AF Lock Indicates AE/AF Lock is enabled. | ||
| 19 EV Compensation Displays exposure compensation settings. | ||
| 20 Focus mode Indicates focus is enabled. | ||
| 21 White balance Displays white balance settings. | ||
| 22 Face tracking Indicates face tracking is enabled. | ||
| 23 Tracking AF Indicates tracking AF is enabled. | ||
| 24 Metering Displays metering settings. | ||
| 25 Quality Displays quality settings. | ||
| 26 Photo size Displays photo size settings. | ||
| 27 AF lamp Indicates AF lamp is enabled. | ||
| 28 Exp. bracketing Displays Exposure bracketing settings. | ||
| 29 Stylish Indicates Stylish function is enabled. | ||
After Sales Support

00 800 - 78 77 23 68
MODEL: SZ 350

YEARS WARRANTY
MAGINON
6.2. Movie Screen Layout

natural_image
Black-and-white photo of children running on a beach with a striped umbrella, no visible text or symbols| No. Item Description | ||
| 1 PIV available | Indicates that you can capture screenshot without stopping movie recording. | |
| 2 Recording status Indicates recording status. | ||
| 3 Recorded time Displays recorded time. | ||
| 4 AE/AF lock Indicates AE/AF Lock is enabled. | ||
| 5 Key indicator Displays the commands on 4-way Navigation Control button. | ||
After Sales Support

00 800 - 78 77 23 68
MODEL: SZ 350

YEARS WARRANTY
6.3. Playback Mode Screen Layout
The Playback mode display varies depending on the type of image being viewed.
Playback mode display of still images:
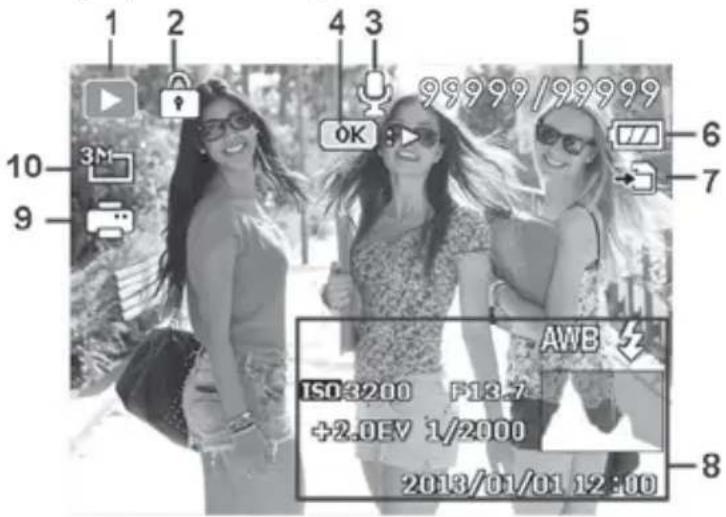
| No. Item Description | ||
| 1 | Playback mode Indicates playback mode. | |
| 2 | Protect Indicates file is protected. | |
| 3 | Voice memo Indicates voice memo is attached. | |
| 4 | Button intro Indicates the button to press on the camera to play a video file. | |
| 5 | File no./Total no. | Indicates the file number over the total number of files in the storage card. |
| 6 | Battery Indicates battery level. | |
| 7 | Storage media Indicates used storage memory. | |
| 8 | Rec. info. Displays recording information of the file. | |
| 9 | DPOF Indicates the file is marked for printing. | |
| 10 | Photo Size Displays the image size settings. | |
After Sales Support

00 800 - 78 77 23 68
MODEL: SZ 350

YEARS WARRANTY
MAGINON
Playback mode of videos:


No. Item Description
| 1 Playback mode Indicates playback mode. | ||
| 2 Protect Indicates file is protected. | ||
| 3 Video clip Indicates the file is a video. | ||
| 4 | Button indicator Displays the button info of Playback mode. | |
| 5 | File no./Total no. | Indicates the file number over the total number of files in the storage card. |
| 6 Battery Indicates battery level. | ||
| 7 Storage media Indicates used storage memory. | ||
| 8 | Recording date & time | Displays the date and time of the video clip. |
| 9 Video size Indicates the size of the video clip. | ||
| 10 Button intro Indicates the button to press on the camera to adjust the volume. | ||
| 11 Video length Display the total length of the video clip. | ||
| 12 Played time Indicates the played time of the video. | ||
| 13 Playing status Displays playing status. | ||
| 14 Button intro Indicates the button to press on the camera to play a video file. | ||
After Sales Support

00 800 - 78 77 23 68
MODEL: SZ 350

YEARS WARRANTY
7. Recording Images and Videos
7.1. Taking Images
Now that you are familiar with your camera, you are now ready to take your images. Taking images with your camera is very simple.
- Turn on the camera by pressing the Power button.
- Frame the shot using the focus bracket on the LCD monitor. See illustration on the right.
- Pressing the Shutter button down halfway automatically focuses and adjusts the exposure, and pressing the Shutter button down fully captures the images.
When the shake warning icon [ ] appears, hold the camera steadily, with your arms at your side or use a tripod to stabilize the camera to prevent blurred images.

7.2. Setting the Zoom Control
Using a combination of 35 times optical zoom and 8 times digital zoom permits zoom photography at up to 280 times magnification. While the digital zoom can be a useful feature, the more an image is enlarged (zoomed), the more pixelated (grainier) the image will appear. Please refer to „Setting the Digital Zoom“ on page 47 on how to setup digital zoom.

To adjusts the optical zoom:
- Spin the Zoom dial to zoom in or zoom out an image.
- The zoom indicator appears on the LCD monitor. [W□T]
Zoom dial
- Spin the dial clockwise (right) to zoom in. [ ]
- Spin the dial counterclockwise (left) to zoom out. [ ]w
After Sales Support
00 800 - 78 77 23 68
MODEL: SZ 350
3
YEARS WARRANTY
MAGINON
To adjusts the digital zoom:
- Activate digital zoom. See „Setting the Digital Zoom“ on page 47.
- Spin the Zoom dial clockwise/counterclockwise to set digital zooms in/out to the maximum until it stops.
- Release the Zoom dial.

7.3. EV Compensation
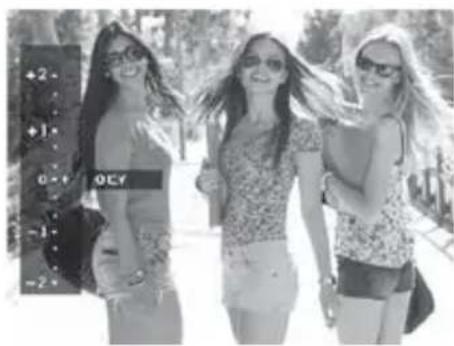
Images can be captured with the overall scene intentionally made brighter or darker. These settings are used when a suitable brightness (exposure) cannot otherwise be obtained in circumstances where the difference in brightness between the subject and the background (the contrast) is large, or when the subject that you wish to capture is very small within the scene. Available for still images only.

- Press the EV/Up button on your camera to launch the EV Compensation function.
- To adjust EV settings, press the or keys to increase/decrease the value. As you adjust the settings, the LCD monitor synchronously displays the image applying the EV settings. Press the OK button to save and apply changes.
- The EV setting is only available in shooting still images.
natural_image
Three women posing outdoors in casual attire, no visible text or symbolsAfter Sales Support

00 800 - 78 77 23 68
MODEL: SZ 350

YEARS WARRANTY
7.4. Flash
When taking pictures in difficult lighting conditions, use the Flash/Right button to get correct exposure. This function cannot be activated in recording videos or continuous shooting.
To activate Flash:
- Press the Flash/Right button on your camera to launch the Flash function.
• To select flash options, press the or keys. Press the OK button to save and apply changes. Flash/Right button
Your camera is equipped with five flash modes:
- [A] Auto Flash: The flash fires automatically whenever extra lighting is needed.
- [4] Red-eye reduction: The flash fires twice to reduce the red-eye effect.
- [⚡] Forced on: The flash fires whenever you press the Shutter button regardless of lighting conditions.
• [4SL] Slow sync: The flash fires with a slow shutter speed.
• [ Forced off: The flash is turned off.
Flash / Right button


Note:
- Flash function is only available in shooting still images, but not available in Continuous shooting mode and D-Lighting.
- Do not charge the flash while spinning the Zoom dial. Charge the flash after releasing the zoom dial if necessary.
- The flash mode will remain at „Flash Off“ if the flash does not open.
- When the flash is closed, flash mode is automatically set to flash off.
- When activating flashlight, the Flash won't pop up automatically. Please open the Flash manually by pressing the Flash button.
After Sales Support
00 800 - 78 77 23 68
MODEL: SZ 350

YEARS WARRANTY
MAGINON
7.5. Self-timer
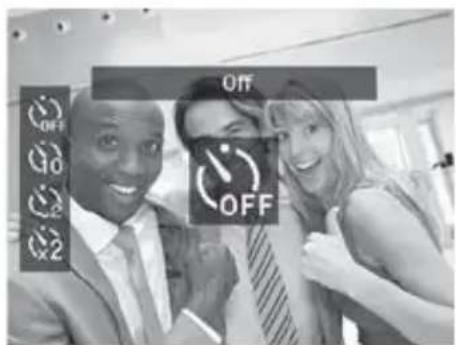
The Self-timer allows you to take images after a pre-defined delay. While burst lets you take consecutive shots. This function is only available in recording still images. The Self-timer setting is automatically set to off when you turn off the camera.
To activate Self-timer:
- Press the Self-timer/Down button on your camera to launch the Self-timer function.
- To select Self-timer options, press the or keys. Press the OK button to save and apply changes.
Self-timer/Down button
Your camera is equipped with 4 Self-timer modes:
• [OFF] Off: Captures an image without time delay.
- [①] 10 Sec: Sets a 10-second delay to capture image after pressing the Shutter button.
• [②] 2 Sec: Sets a 2-second delay to capture image after pressing the Shutter button.
• [x2] Double: Performs delay and capture twice:
■ Performs a 10-second delay, then captures the image.
■ Performs another 2-second delay then captures the image again.

Self timer/ Down button
After Sales Support

00 800 - 78 77 23 68
MODEL: SZ 350

YEARS WARRANTY
7.6. Setting the Focus Mode
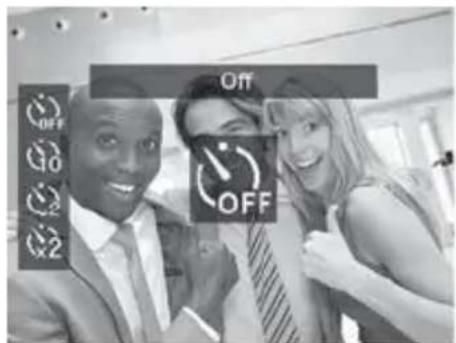
This function allows users to define the type focus when recording a still image. To set the Focus mode
- Press the Focus/Left button on your camera to launch the Focus function.
- To select focus options, press the ◀ or ▶ keys. Press the OK button to save and apply changes.

Focus/Left button
Your camera supports the 4 focus modes:
- [AF] Auto Focus: With auto focus, the camera will focus on the subject automatically.
- [✗] [✗]Macro/Super Macro: This mode is designed for close-up photography. When Super Macro is set, the focus cannot be adjusted until Super Macro is canceled.
• [A] Infinity: When Infinity is set, the camera focuses on distant objects.
- [MF] Manual Focus: With manual focus, you can adjust the focus distance from Macro to Infinity by press Up/Down button. Press OK button to lock the focus and exit the adjusting screen.
7.7. The AE/AF LOCK button
Use the AE/AF LOCK button on your camera to lock focus and exposure.

- To lock AE/AF, press the AE/AF LOCK button during movie recording or half press the shutter button then press the AE/AF LOCK button in Photo mode. The AE/AF would be kept locked even release the shutter button.
- To unlock AE/AF by any one of the following ways:
- Press the AE/AF LOCK button
- Rotate the zoom control
- Rotate the Model dial
- Press the MENU/Playback/Movie/Power button to launch another function
• Lower/Raise the built-in flash
After Sales Support
00 800 - 78 77 23 68
MODEL: SZ 350
3
YEARS WARRANTY
MAGINON
7.8. The delete button
Use the Delete button on your camera to delete an image/video/audio clip.

The Delete function allows to remove unwanted files in the internal memory or on the memory card. Protected files cannot be erased, to delete, unprotect the file first. See „Protect“ on page 57.
To delete an image/video clip:
- Press the Playback button [ ] on the camera.
- View images/videos clips in Single navigation mode.
- Use the◀ or ▶ keys to scroll the display.
- When the desired image/video clip is displayed on the LCD monitor, press the Delete button.
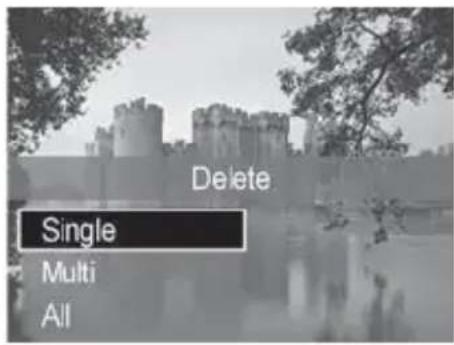
- A confirmation selection appears on screen.
- To close the Delete function and go back to the single navigation mode, press Menu button.
To delete a single file:
- After a confirmation selection appears on screen. Select Single.
- Press the OK button and select Yes to delete.
- The next image is displayed on the LCD monitor. To delete another file, use the ◄ or ▶ keys to scroll through the images/videos clip. Repeat steps 1 to 2.
- To close the Delete function and go back to the single navigation mode, press Menu button.
To delete attached voice memo:
- After a confirmation selection appears on screen. Select Single.
- A deleted voice memo option will be added to the selection.

After Sales Support

00 800 - 78 77 23 68
MODEL: SZ 350

YEARS WARRANTY
MAGINON
- Select and press OK to delete voice memo only and back to single navigation.
- Or select Yes to delete both image and its voice memo.
To delete multiple files:
- After a confirmation selection appears on screen. Select Multi.
- The images are displayed in thumbnail view on the LCD monitor.
- Use the or keys to move through the files.
- When the desired image/video clip is highlighted, use the or keys to mark/unmark image/video clip for deletion.
- Repeat step 4 until all desired images for deletion are marked.
- Press the OK button. A confirmation selection appears.
- Select Yes to confirm.
- Press the OK button to delete marked files.
To delete all files:
- After a confirmation selection appears on screen. Select All.
- Select Yes.
- Press the OK button to delete all files.


Note:
- In Record mode, press Delete button to delete the last captured image directly.
After Sales Support

00 800 - 78 77 23 68
MODEL: SZ 350

YEARS WARRANTY
MAGINON
7.9. Recording videos
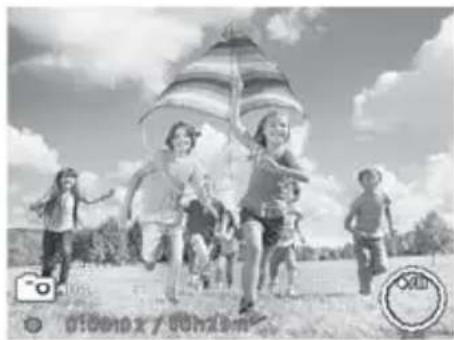
You can record videos with the camera, the available recording time depends on the capacity of the memory card. Videos can be recorded until the maximum memory capacity has been reached. However the length of a single video may be limited (the limitation depends on the camera model).
natural_image
Black-and-white photo of children playing with a striped beach umbrella outdoors under a cloudy sky (no text or symbols visible)- Press the Movie button [] to start recording.
- Focus your camera on the subject that you want to take.
- Use the Zoom dial to zoom in and zoom out an image.
- To stop recording, press the Movie button.

Note:
• The camera will automatically stop recording when the memory capacity is full.
- It will automatically stop recording when the recording time is over 29 minutes or the file size is over 4 GB.
- When the temperature of CCD Sensor is over 63°C, the camera will display the warning message.
- When the temperature of CCD Sensor is over 65irc C , the camera will shutdown automatically.
PIV function
During the movie recording, press shutter button, an icon displays on LCD means that the current screen can be stored as a photo without stopping movie recording by full pressing the shutter button. The PIV feature only applicable to movie size: 720p30 and VGAp30.

Note:
- When the movie size is 720p (30fps), the capture photos are saved at 1280 x 720 resolution.
- When the movie size is VGA (30fps), the capture photos are saved at 640 x 480 resolution.
After Sales Support

00 800 - 78 77 23 68
MODEL: SZ 350

YEARS WARRANTY
8. Mode dial
There are 8 recording modes can be set by turning the Mode dial, such as Intelligent Scene, Scene mode, Panorama, Art Effect, Manual Exposure, Aperture Priority, Shutter Priority and Program. Once turning the Mode dial, it will enter the selected mode immediately even in Playback mode or during movie recording.

The table below shows the available settings for Mode dial.
| Icon Mode Description | ||
 | Intelligent Scene | The camera detects the shooting conditions and automatically switches to the appropriate scene mode. . |
 | Scene mode | Turns the mode dial to enter last used Scene mode. Press the MENU button to select other scene mode. |
 | Panorama | Use this feature to create a panoramic photo by panning or tilting the camera. |
 | Art Effect This feature applies different art effect on the still images. | |
 | Manual Exposure | This feature lets users to adjust the shutter speed and aperture value to correctly expose your images. |
 | Aperture Priority | This feature lets users to adjust the aperture value and the camera automatically selects the shutter speed to match the brightness. |
 | Shutter Priority | This feature lets users to adjust the shutter speed and the camera automatically selects the aperture value to match the brightness. |
 | Program | The camera automatically adjusts suitable shooting settings like shutter speed and aperture values. |
After Sales Support

00 800 - 78 77 23 68
MODEL: SZ 350

YEARS WARRANTY
MAGINON
8.1. Intelligent scene
This feature is most useful for novice users to capture great images even without basic knowledge of photography. Simply frame the shot with the help of Intelligent Scene Mode, the camera automatically recognizes 7 kinds of scenes – Portrait, Landscape, Macro, Backlight, Backlight Portrait, Night Scene and Night Portrait – and selects the ideal settings.
Intelligent scene icon. After the camera detects the-shooting conditions, this icon changes to show the detected scene mode.

natural_image
Black-and-white photo of a castle with reflection in water, framed by trees and camera icons (no readable text or symbols)The camera changed to Landscape mode automatically.

natural_image
Black-and-white photo of a castle with reflection in water, framed by tree branches (no visible text or symbols)To activate Intelligent Scene
- Turn the Mode dial to icon .
- Focus the camera on the subject to capture.
- The camera detects the shooting conditions and switches to an appropriate scene mode.
- Half press the Shutter button to focus the subject. The frame turns green to indicate focus is set.
- Press the Shutter button to take the shot.
After Sales Support

00 800 - 78 77 23 68
MODEL: SZ 350

YEARS WARRANTY
8.2. Scene mode
By simply selecting one of the following 20 modes, you can capture the image with the most appropriate settings.
- Turn the Mode dial to icon SCN to enter last used Scene mode (Default: Portrait). Press MENU button to select other scene modes.
- Use the navigation controls to move through the selection.
- Press the OK button to save and activate the selected scene mode.
The table below shows the available scene mode settings.
| Icon Mode Description | ||
| Portrait The camera blurs the background to focus on the subject. | ||
| Landscape This feature is used to emphasize wide scenic views. | ||
| Sunset This feature enhances the red hue for recording sunset images. | ||
| Backlight | This feature is used to capture the image of a backlight object by changing the metering. | |
| Kids This feature is used to capture still images of moving kids. | ||
| Night Scene This feature is used to capture images with night scenery background. | ||
| Fireworks This feature slows shutter speed to capture fireworks explosions. | ||
| Snow This feature is used for beach and snow scenes. | ||
| Sports This feature captures still images in high speed motions. | ||
After Sales Support

00 800 - 78 77 23 68
MODEL: SZ 350

YEARS WARRANTY
MAGINON
| Icon Mode Description | ||
| [WAZW] | Party This feature is used for wedding or indoor party settings. | |
 | Candlelight This feature is used to capture warm candle light effects. | |
| [12CS] | Night Portrait | This feature is used to capture portrait pictures with night or dark background. |
 | Flowing Water | This feature enhances smooth effects like water or silk. |
 | Food | This feature is used to capture food images. The increased saturation in this mode makes the captured image more enticing. |
 | Love Portrait | This feature uses face tracking to auto detect faces to capture portraits images without the help of others. When over two faces are detected, AF is automatically activated. The camera starts count down and captures a picture in two seconds. |
| [3222] | Self Portrait | This feature sets zoom to wide end. When one face is detected, AF automatically activated and plays the sound (Bi) for notice. Then camera starts count down and captures a picture in two seconds. |
 | D-Lighting | This feature applies digital processing only to the necessary portion(s) of the image and preserves details in highlights and shadows with natural contrast. |
| [SWZH] | Time Lapse | Use this feature to take photos automatically at the specified intervals. See "Using Time Lapse" on page 42 for more details. |
 | Burst | Full press and hold the shutter button to take a continuous shooting until release the shutter button or memory card is full. |
| [HZCK] | Speedy Burst | Captures 30 images in a shot when the Shutter button is pressed. Auto set Photo Size to 4:3 VGA only. |
After Sales Support

00 800 - 78 77 23 68
MODEL: SZ 350

YEARS WARRANTY
MAGINON
Kids Mode
Tactically, kids are the most difficult to photograph. They tend to be highly animated and can be a real challenge to make them pay attention for more than just a second or two. To capture a great moment for your kids, just keep the camera in kid mode. The mode provides higher shutter speed and always focuses on moving subject.
Sports Mode
When you need a series of sports motion images, such as a golf swing, or try to capture the images of a flying hummingbird/butterfly, be sure to switch the scene mode to sports mode.
Party Mode
Let the Party mode on! It can be difficult to get everyone on a party. While you have the whole gang together, take a group or family portrait. Party mode features on Red-eye reduction flash and face tracking. You'll miss fewer shots, and have more time to focus on enjoying the party.
Food Mode
How to share your dining experiences and comments of interesting widgets on your blog by close-up images? Just get the camera and set the scene with food mode. This mode features on macro focus and auto flash designed for close-up photography.
Self Portrait
When you are the one taking the picture for yourself, then self portrait mode is necessary besides the tripod. With your long arm's help, the camera begin face tracking in self portrait mode. If a face had been recognized, the camera performs 2-second countdown with a beep notice then take a shot without pressing the Shutter button.
Tips to make a great shape by self portrait photography:
- Lean in towards the camera to reduce double chin.
- Angle your body and bend your arms to look slimmer.
- Keep your shoulders back.
After Sales Support
00 800 - 78 77 23 68
MODEL: SZ 350

YEARS WARRANTY
MAGINON
Love Portrait
Want to take a good image when there are just two of you? All you have to do is hold the camera and show your smiles together. If over two faces had been recognized, the camera performs 2-second countdown with a beep notice then take a shot without pressing the Shutter button.
Time Lapse
Use this feature to take photos automatically at the specified intervals. The photo size will be 16:9 (2M). In Time Lapse mode, press Down button to launch the Time Lapse menu, and then press Up/Down button to select the options.
Available options are 30 sec. (Default), 1 min., 5 min., 10 min., 30 min., 60 min. Press OK button to apply the setting and close the menu.
You can full press the Shutter button to start recording, and full press the Shutter button again to stop recording. The Time Lapse photos will be merged into a Time Lapse movie at 10 fps.


Burst/Speedy Burst
Burst and Speedy Burst allow you to easily capture fast-moving targets, for example children
playing, running dogs or exciting sport events.
- Burst: Full press and hold the shutter button to take a continuous shooting until release the shutter button or memory card is full.
- Speedy Burst: Captures 30 images in a shot when the Shutter button is pressed. Auto set Photo Size to 4:3 VGA only.

natural_image
Black-and-white photo of children running on a beach with a striped tent in the background (no visible text or symbols)After Sales Support

00 800 - 78 77 23 68
MODEL: SZ 350

YEARS WARRANTY

Note:
- If the remaining shots are less then 30 images, Speedy Burst will be disabled.
- When Speedy Burst is enabled, the Photo Size will be fixed at VGA, the Flash will be fixed at Forced Off, and the ISO will be fixed at Auto
Panorama Mode
Use this feature to create a panoramic photo from multiple shots. You can combine several shots into one single image quickly and easily.
- The actual size of stitched image may be different due to the panoramic angle and stitching result as well as the level of camera shaking.
- The longest time of capturing is approximately 30 seconds.
- If you select From Top to Bottom or From Bottom to Top in 360-degree panorama, it is recommended to turn the camera over 90 degrees in order to make sure the stability during capturing.

Note:
- It is recommended to use a tripod to stabilize the camera, and then move the camera slowly during capturing.
- Uneven brightness may result in difference between the captured image and its actual scene.

natural_image
Snowy mountain landscape with scattered houses and trees, no visible text or symbolsTo stitch the still image
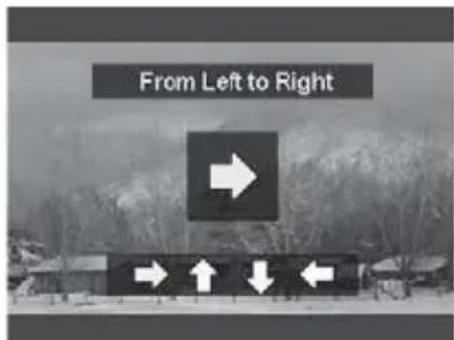
- Press ▼ key to launch the Angle Menu. Use the ◀ or ▶ keys to select options. Press the OK button to save and apply changes.

After Sales Support

00 800 - 78 77 23 68
MODEL: SZ 350

YEARS WARRANTY
MAGINON
- Press ▶ key to launch the Direction Menu. Use the ◀ or ▶ keys to select options. Press the OK button to save and apply changes.
- Full press the shutter button to start shooting. When shooting starts, a white-cross locates on the center and a yellow line displays horizontally (or vertically) through the screen. In addition, a shooting bar displays to present the shooting position and the white portion of the bar indicates where has been taken.
- If you move camera without keeping straight, the yellow line will move with the moving scene.
- When the white portion of the bar goes to the end. The camera would finish automatically and save the panorama image.

natural_image
Snowy outdoor scene with trees and buildings, no visible text or symbols
natural_image
Grayscale aerial view of a forested landscape with a small inset image showing a bird and a scale bar (no readable text or symbols)
natural_image
Simple geometric pattern with a central star-like shape on a dark square background (no text or symbols)After Sales Support

00 800 - 78 77 23 68
MODEL: SZ 350

YEARS WARRANTY
Art Effect
Effect that cannot be presented on Preview does not apply to movie recording and continuous shooting.
Press ▲ keys to select between the following settings:

- Stylish: This feature is used to capture images with over-saturated colors, off-kilter exposure or blurring.
- Soft Focus: Produces halo around the photographed object to achieve the effect of soft focus.
• Light Tone: Reduces contrast to create a smooth and relaxed atmosphere. - Vivid: The camera captures the image with more contrast and saturation emphasizing on the bold colors.
- Miniature Effect: Blur the parts of photo to make the scene looks like a miniature scale model. It is recommended to capture from a high angle to simulate the miniature effect.
- Fisheye Lens: This feature captures images with fisheye lens effects.
• Astral: Image is applied with starburst.
• Poster: This feature captures images with old poster or illustration effects. - Impressive Art: This feature captures images with dramatic contrast.
• B&W: Images are captured in black and white. - Sepia: Images are captured in sepia tones.
• Color Accent (Red): Retains red tone while the rest of the scene becomes black and white. - Color Accent (Orange): Retains orange tone while the rest of the scene becomes black and white.
• Color Accent (Yellow): Retains yellow tone while the rest of the scene becomes black and white.
• Color Accent (Green): Retains green tone while the rest of the scene becomes black and white.
• Color Accent (Blue): Retains blue tone while the rest of the scene becomes black and white. - Color Accent (Purple): Retains purple tone while the rest of the scene becomes black and white.
After Sales Support

00 800 - 78 77 23 68
MODEL: SZ 350

YEARS WARRANTY
MAGINON
Manual Exposure
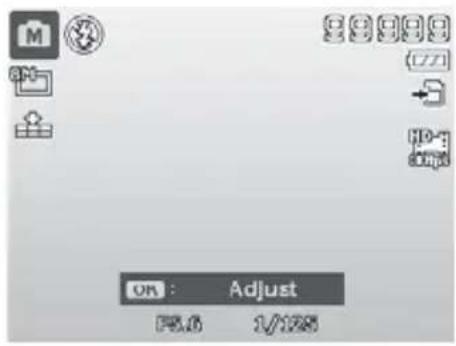
When the camera is in the manual exposure mode, you can change either aperture or shutter speed, or both. To activate Manual Exposure:
- Turn the Mode dial to icon Manual Exposure.
-
Press OK button to enter Adjust mode then use ▲r▼ keys or ◀r keys to select the aperture value or shutter speed in loop.
-
Press the Shutter button to capture the image.
Aperture Priority Mode
This mode is designed for control the aperture value by user and let camera decide the shatter speed. The main impact that aperture had on images was with regards to Depth of Field. (DOF)
- Choose lager aperture, only one subject in focus but the background nice and blurred. (Shallow DOF)
- Choose smaller aperture, an image with everything in focus. (Great DOF)
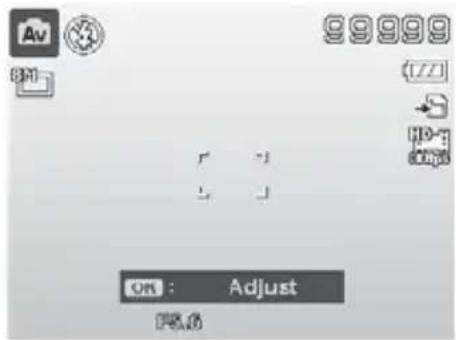
To set Aperture values:
- Turn the Mode dial to icon Aperture Priority.
- Press OK button to enter Adjust mode then use ▲r keys to select the aperture value in loop.
- Press the Shutter button to capture the image.
After Sales Support

00 800 - 78 77 23 68
MODEL: SZ 350

YEARS WARRANTY
MAGINON
Shutter Priority Mode
This mode is designed for capturing moving subjects. A faster shutter speed is required to freeze a motion (flying birds), while the slower shutter speed creates a sense of motion (water flowing).
To set Shutter values:

- Turn the Mode dial to icon Shutter Priority.
- Press OK button to enter Adjust mode then use ◀ or ▶ keys to select the shutter speed in loop.
- Press the Shutter button to capture the image.
After Sales Support

00 800 - 78 77 23 68
MODEL: SZ 350

YEARS WARRANTY
MAGINON
9. Record Menu
If you are in Photo Mode, you can access the Record menu simply by pressing the MENU button on your camera. When the menu is displayed, use the 4-way navigation control and the OK button to move through menu selections and apply your desired settings. To close the menu anytime, press the menu button again. The Record menu allows you to change modes, and setup other capture settings.
- To go to Record Menu:
- Turn on the camera by pressing Power button.
- Press [to launch the Record Menu.
- Use the▲r keys to move through the menu
- To select an item, press ▶ or OK button.
- Change the submenu settings using the 4-way navigation control.
- Press the OK button to save and apply settings.

9.1. Photo menu
Photo Size
The Photo Size function is used to set the resolution before you capture the image. Changing the Photo Size affects the number of images that can be stored in your memory card. The higher the resolution, the more memory space is required.
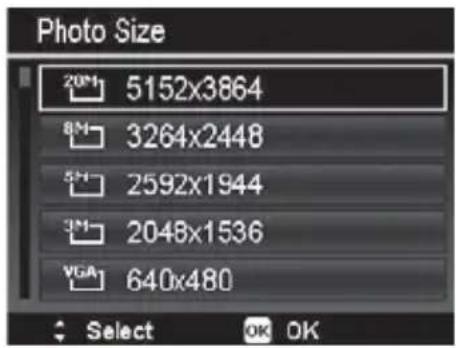
After Sales Support

00 800 - 78 77 23 68
MODEL: SZ 350

YEARS WARRANTY
The table below shows the Photo Size values for still images.
| Icon Pixel Size | Printing Size Suggestion | |
 | 5152 x 3864 A2 | Size |
 | 3264 x 2448 A3 | Size |
 | 2592 x 1944 A4 | Size |
 | 2048 x 1536 4" | x 6" |
 | 640 x 480 E-mail | |
| Icon Pixel Size | Printing Size Suggestion | |
 | 5152 x 3435 | Standard print paper |
 | 5152 x 2898 HDTV | |
 | 1920 x 1080 HDTV | |
 | 2992 x 2992 | Square Composition |
Quality
The Quality sets the quality (compression) at which the image is captured. The quality determines the amount of compression applied to your images. Fine quality would give you the best images with sharper details and less compression. However, the higher the quality, the more memory space is required in your memory card.

| Icon Item Description | ||
 | Superfine 5x compression rate. | |
 | Fine 8x compression rate. | |
 | Normal 12x compression rate. | |
After Sales Support

00 800 - 78 77 23 68
MODEL: SZ 350

YEARS WARRANTY
MAGINON
White Balance
This sets the white balance for a variety of lighting conditions and permits images to be captured that approach the conditions that are seen by the human eye.
- As you move through the selection, you can see the preview on the LCD monitor synchronously.
- Press▶ to enter WB Shift. This feature allows you to correct the white balance of AWB option.

| Icon Item Description | ||
| AWB | Auto White Balance | The camera automatically adjusts the white balance. |
 | Daylight Ideally used for bright sunny conditions. | |
 | Cloudy Ideally used for cloudy conditions. | |
 | Tungsten | Ideally used for indoor images with tungsten or halogen lighting without a flash. |
 | Fluorescent 1 | Ideally used for indoor images with bluish fluorescent lighting conditions. |
 | Fluorescent 2 | Ideally used for indoor images with reddish fluorescent lighting conditions. |
 | Custom | Used when light source cannot be specified.Press for the camera to automatically adjust the appropriate white balance setting according to the environment. |
After Sales Support

00 800 - 78 77 23 68
MODEL: SZ 350

YEARS WARRANTY
MAGINON
ISO
This sets the sensitivity for capturing images. When the sensitivity is raised (and the ISO figure is increased), photography will become possible even in dark locations, but the more pixelated (grainier) the image will appear.
- Use a higher ISO setting in dim conditions and a lower ISO setting in brighter conditions.
Maximum ISO Auto
This feature allows the camera to adjust the ISO Auto from ISO 100 to the value set in Maximum sensitivity, according to light conditions. Available options are 200 (Default), 400, 800.
Metering
This sets the metering method for calculating the exposure.
- Multi: The entire area of the screen is measured, and the exposure is calculated.
- Center: Averages the light metered from the entire frame, but gives greater weight to the subject matter at the center.
- Spot: A very small portion of the center of the screen is measured, and the exposure is calculated.
Setting the Exposure Bracketing
Use this feature to take photos with different exposure compensation. Bracketing records 3 continuous images in the following order: Standard exposure, Overexposure and Underexposure.
Available settings are: Off, ±0.3, ±0.7 and ±1.0.


After Sales Support

00 800 - 78 77 23 68
MODEL: SZ 350

YEARS WARRANTY
MAGINON
Setting the AF Area
AF stands for Automatic Focus. This feature determines the area on which the camera focuses. To set AF Area:
- From the Record menu, select AF Area.
- Use the▲r keys to go through the selection.
- Press the OK button to save and apply changes.

Below shows the available AF area settings:
• Face Tracking: This feature auto detects faces and tracks continuously.
- Wide: The camera automatically selects focus area within the wide frame.
• Center: The focus area is fixed on the center.
- Tracking AF: The camera will focus the subject as it moves and keep it continually in focus automatically.
Setting the AF Lamp
The AF Lamp function allows you to record images even low light conditions.
If AF Lamp is set to Auto, the AF lamp located in the front of the camera, see „Front View“ on page 12, emits an red light by half pressing the Shutter button allowing the camera to focus easily.

To set AF Lamp:
- From the Record menu, select AF Lamp.
- Use the▲ or ▼ keys to go through the selection.
- Press the OK button to save and apply changes.
After Sales Support

00 800 - 78 77 23 68
MODEL: SZ 350

YEARS WARRANTY
MAGINON
Setting the AE-L/AF-L
This feature allows locking exposure or focus or both of them by pressing AE/AF LOCK button. You can define the AE/AF LOCK button to be one of the following functions:
- AE-L: Lock/Unlock exposure.
- AF-L: Lock/Unlock focus.
• AE-L & AF-L: Lock/Unlock both of exposure and focus.
Press the AE/AF LOCK button to unlock it.
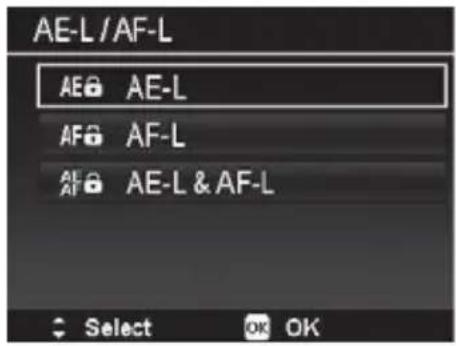
To lock AE/AF, press the AE/AF LOCK button during movie recording or half press the Shutter button then press the AE/AF LOCK button in Photo mode.
Setting the Digital Zoom
This feature controls the digital zoom mode of your camera. Your camera enlarges an image
using the optical zoom first. When the zoom scale exceeds 35X, the camera uses digital zoom.
To set Digital Zoom:
- From the Record menu, select Digital Zoom.
- Use the▲r keys to go through the selection.
- Press the OK button to save and apply changes.

Below shows the available Digital Zoom settings.
- On: Enlarges all image sizes, but the image quality deteriorates.
- Off: Uses the optical zoom only.

Note:
• Digital Zoom is not available in Face Tracking on.
After Sales Support

00 800 - 78 77 23 68
MODEL: SZ 350

YEARS WARRANTY
MAGINON
Setting the Date Stamp
The date of recording can be printed directly on the still images. This function must be activated before the image is captured. Once date and time are stamped on an image, they can no longer be edited or deleted.
Limitations of Date Stamp functions are as follows:
• Available for still images only.
- This feature does not apply to continuous shooting mode.
- In vertical or rotated images, the date and time on your images still appear horizontally.
To set Date Stamp:
- From the Record menu, select Date Stamp.
- Use the▲r keys to go through the selection.
- Press the OK button to save and apply changes.
Setting Auto Review
The Auto Review function lets you view the captured image right after shooting it. If Auto review is On, the camera will display the captured image for 1 second on the LCD monitor.
To set Auto Review:
- From the Record menu, select Auto Review.
- Use the▲r keys to go through the selection.
- Press the OK button to save and apply changes.


After Sales Support

00 800 - 78 77 23 68
MODEL: SZ 350

YEARS WARRANTY
MAGINON
Blink Detection
Nothing ruins a great picture more than having your subjects' eyes closed. Blink Detection provides you with extra assurance when capturing once-in-a-lifetime moments like holding a trophy with teammates after winning a basketball game.

If closed eyes are detected, a saving confirmation menu appears on the screen, allowing you to re-take the shot before your subject or subjects move on. To activate Blink Detection:
- Enable Blink Detection from Record menu.
- Half press the Shutter button to focus the subject. The frame turns green to indicate focus is set.
- Press the Shutter button to capture the image and automatically save the Image.
- If the camera detects subject blinked eye, a „Save image“ or „Cancel“ option appears on the screen.
- Select „Save image“ to save or „Cancel“ to disregard.

Note:
- Blink Detection appears in Record menu only when Face Tracking is turned on.
Setting Grid Line
The Grid Line function will show a framing grid on preview for taking pictures.
Available settings are: On, Off.
The configuration of Grid Line will be changed with different aspect ratio.

After Sales Support

00 800 - 78 77 23 68
MODEL: SZ 350

YEARS WARRANTY
MAGINON
Setting Stabilizer
This function allows you to prevent blurred images caused by shaking.
- Enable the Stabilizer under the Record Menu.
- Use the▲r keys to go through the selection.
- Press the OK button to save and apply changes.

9.2. Movie Menu
You can access the Movie menu simply by pressing the MENU button [ On your camera.
When the menu is displayed, use the 4-way navigation control and the OK button to move through menu selections and apply your desired settings. To close the menu anytime, press the menu button again.
Setting Movie Mode
Use this function to adjust the resolution and quality of movie clips.


Note:
- The options FHD and HD are only available when a SDHC class 4 or class 6 card is inserted.
- Due to limits from the FAT format, the maximum recording size is approximately 4 GB
After Sales Support

00 800 - 78 77 23 68
MODEL: SZ 350

YEARS WARRANTY
MAGINON
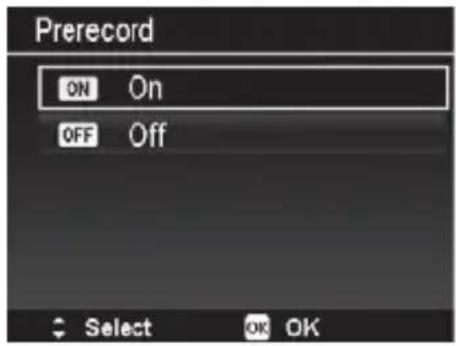
Setting Prerecord
You can catch the first three seconds of action you would have potentially missed. Once enable this function, the camera starts recording video automatically before pressing Shutter button. As soon as the Shutter button is hit, the most recent three seconds of video is added to the beginning of the clip.
Display the icon in red while turning Prerecord on.
Prerecord will be canceled in the following situation:
• After recording starts.
- Switch to Playback mode.
• Power off the camera.
- Enter USB mode.
- Launch the Menu.
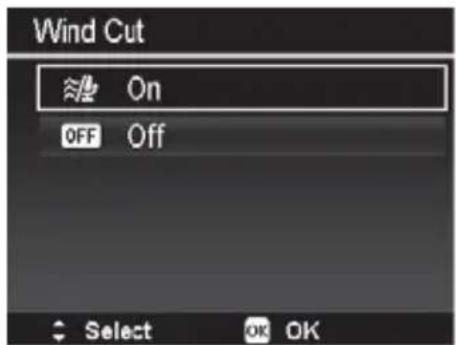
Setting Wind Cut
This feature reduces wind noise during movie recording.
Continuous AF
This function allows you to record video with auto focus method.
- Enable the Continuous AF under the Movie Menu.
- Use the▲r keys to go through the selection.
- Press the OK button to save and apply changes.


MAGINON
10. Playback
You can playback the still images, video clips on the LCD monitor.
10.1. Viewing in Single Navigation
The Single navigation mode displays the image one by one on the LCD monitor. To view images/video clips, follow the steps below.
- Press the Playback button ☐ on the camera.
- The LCD monitor displays an image. To understand the icons and other information on the screen, please see „Photo Mode Screen Layout“ on page 18.
- Use the◀ or ▶ keys to view next/previous image/video.
- To play a video clip, press the OK button. See „Playing Videos“ on page 54 for more details.

Note:
- When playing videos under playback mode, lens will retract after 15 seconds, but the video playback will still continue.
10.2. Viewing Thumbnails
This function allows you to view 9 or 36 thumbnail images on the LCD monitor at the same time. Searching numerous of images is much easier then single view navigation.
To set 9-images or 36-images mode
- Press the Playback button ☐ on the camera.
- Spin the Zoom dial counterclockwise (left) once to enter 9-images mode or twice to enter 36-images mode.
- Use the navigation controls to move through the items.
- Press the OK button to select the image and view it normally.
After Sales Support

00 800 - 78 77 23 68
MODEL: SZ 350

YEARS WARRANTY
MAGINON
Scroll bar
If scroll bars appear, it indicates that the screen can be scrolled. It can be displayed 9 images (3x3) or 36 images (6x6) at one time in Thumbnail Screen. Use the 4-way navigation control to select the file and press the OK button to display the selected file in Single Navigation.

natural_image
Collage of black-and-white photos including a bus, children in hats, beach, and filmstrip (no text or symbols)
natural_image
Grid of grayscale portrait photos arranged in rows, each with a small icon and a small inset image (no text or symbols visible)Thumbnail icons
When you view the thumbnails, some images may contain icons. These icons indicate the type of file or recording.
- File Error: Indicates an error file.
• Video: Displays a indicate videos by roll film pattern.
10.3. Magnify
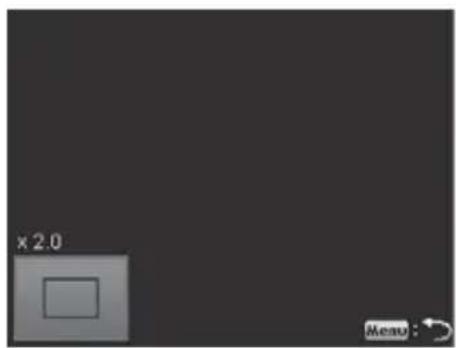
The zoom view function works with still images only.
- In normal view, spin the Zoom dial clockwise (right) repeatedly until the desired zoom view.
- You can zoom to view an image of up to 12X.
- Use the navigation controls to view the zoomed image.
- Press the Menu button to return to Single Navigation.
natural_image
Simple gray square with a small square inside, no text or symbols presentAfter Sales Support
00 800 - 78 77 23 68
MODEL: SZ 350
3
YEARS WARRANTY
MAGINON
10.4. Playing Videos
- Press the Playback button ☐ on the camera.
- Use the navigation controls to scroll through the saved images. A video clip has a video icon displayed on screen.
- Press the OK button to play the video.
- During playback, press and hold the ◀ or ▶key to fast forward or rewind the video. The camera supports forward and rewind speed of up to 4x.
- During playback, use the Zoom dial to control volume. Spin clockwise (right) to increase volume/Spin counterclockwise (left) to decrease volume.
- Press the▲ key to pause playback. Press the key ▲ again to resume. When paused, the play info will remain on screen except .
- To forward or rewind the video frame by frame, press the key ▲o pause playback, then press the ◀r key.
- Press the key to stop the playback. The LCD monitor displays the video frame image in Single navigation mode.

Note:
- The play info, except the icon , will be displayed when the video is paused, during REW/FF or frame by frame modes
• Volume cannot be adjusted when paused or during REW/FF modes.
After Sales Support

00 800 - 78 77 23 68
MODEL: SZ 350

YEARS WARRANTY
10.5. Playing Voice Memo
Voice memo is separately recorded and attached to a captured image. See „Voice Memo“ on page 66 on how to record voice memo.
- Press the Playback button [ ] on the camera.
- Use the navigation controls to scroll through the saved images. An image file with voice memo has a voice memo icon located on the top center of the LCD monitor. See picture on the right.
- Press the OK button to play the voice recording.
- During playback, use the Zoom dial to control volume. Spin clockwise (right) to increase volume/Spin counterclockwise (left) to decrease volume.
- Press the key ▲ to pause playback. Press the key again to resume. When paused, the play info will remain on screen except w.r
- Press the key ▼ to stop the playback. The LCD monitor displays the image in Single navigation mode.

natural_image
Black-and-white photo of a knitted teddy bear toy with a striped background (no visible text or symbols)
Note:
• Volume cannot be adjusted when you pause the voice memo.
After Sales Support

00 800 - 78 77 23 68
MODEL: SZ 350

YEARS WARRANTY
MAGINON
10.6. Playback Menu
The Playback menu allows you to edit images, record voice memo, and setup playback settings.
To go to Playback Menu:
- Press the Playback button ☐ on the camera.
- Press Menu button to launch the Playback Menu.
- Use the▲ or ▼ keys to move through the menu selections.
- To select a menu, press ▶ or the OK button.
-
Press the OK button to save and apply settings.
-
Change the submenu settings using the 4-way navigation control.

Slide Show
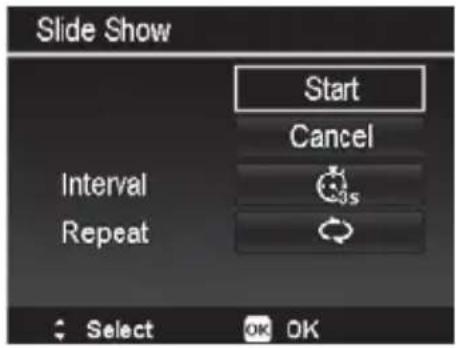
The slide show function enables you to playback your still images automatically in order one image at a time.
To view Slide Show:
- From the Playback menu, select Slide Show. The Slide Show menu appears.
- Set the slide show settings.
-
Select Start, then press the OK button to start the slide show.
-
During Slide Show, press the ▲ button to pause slide show.
-
Use the▲ or ▼ keys to move through the options. Select whether to Continue or Exit the slide show.
-
Press the OK button to apply selected option.
After Sales Support

00 800 - 78 77 23 68
MODEL: SZ 350

YEARS WARRANTY
MAGINON
To change slide show settings:
- From the Slide show menu, use the ▲ or ▼eys t to move through the selections.
- Select Interval setting. Press the ◀ or ▶ keys to adjust. Choose among the available interval settings: 1 sec., 3 sec., 5 sec., and 10 sec.
- Select Repeat setting. Press the ◀ or ▶ keys to adjust. Available settings are: Yes, No.
Protect
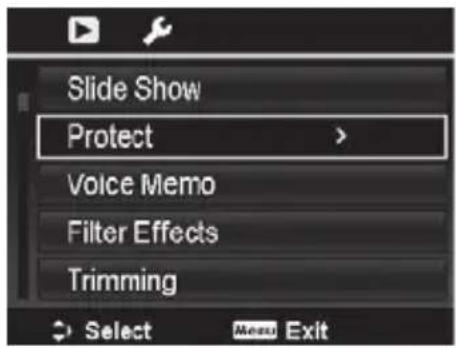
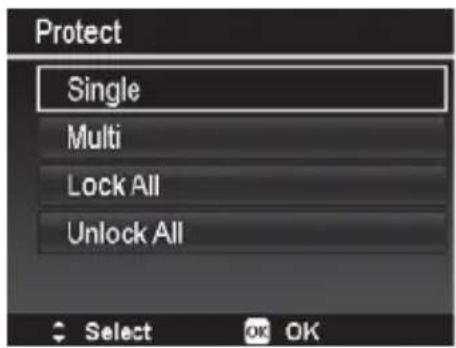
Set the data to read-only to prevent images from being erased by mistake. A protected file has a lock icon when viewed on Playback mode.
To protect files:
- From the Playback menu, select Protect.
- The Protect submenu is displayed on the LCD monitor.
Available select settings:
- Single: Select one file to lock/unlock.
- Multi: Select multiple files from the thumbnail view to lock/unlock.
- Lock All: Lock all files
- Unlock All: Unlock all files.
To protect/unprotect a single file:
- Select Single in the Protect submenu, the images are displayed on the LCD monitor in single navigation mode.
- Use ◀ or ▶ keys to scroll the display.
- When the desired file is displayed on the LCD monitor, press the OK button to select Lock/Unlock.
- To close the protect/unprotect function and go back Playback menu, select Exit.
After Sales Support

00 800 - 78 77 23 68
MODEL: SZ 350

YEARS WARRANTY
MAGINON
To protect/unprotect multiple files:
- Select Multi in the Protect submenu, the images are displayed in thumbnail view on the LCD monitor.
- Use the◀ or ▶keys to move through the files.
- When the desired file is highlighted, use the ▲ or ▼ keys to mark/unmark the file for protection.
- Repeat step 3 until all desired files to protect are marked.
- Press the OK button to lock files and go back to Playback menu.
To protect all files:
- Select Lock all in the Protect submenu. A confirmation message appears.
- Select Yes.
- Press the OK button to lock all files.
To unlock all files:
- Select Unlock all in the Protect submenu. A confirmation message appears.
- Select Yes.
- Press the OK button to unlock all protected files.


After Sales Support

00 800 - 78 77 23 68
MODEL: SZ 350

YEARS WARRANTY
MAGINON
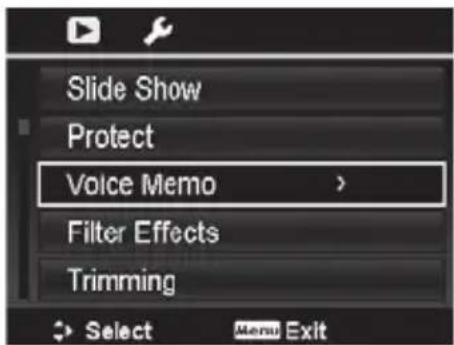
Voice Memo
A maximum of 30 seconds of audio can be recorded as a memo for captured still images.
To record voice memo:
- Press the Playback button [+] on the camera.
- Press the ◀ or ▶ keys to scroll and select an image to attach voice memo to.
- Press the MENU button to launch the Playback menu.
- Select Voice Memo.
- Select Start, then press the OK button to start recording.
- Press the OK button again to stop recording.

Time left for recording.

Note:
- When you record voice memo to an image with an existing voice memo, the old recording file would be replaced by the new one.
After Sales Support

00 800 - 78 77 23 68
MODEL: SZ 350

YEARS WARRANTY
MAGINON
Filter Effects
Filter Effects function is only applicable to aspect ratio 4:3 photos with different artistic effect. Edited images in this function are saved as new files.
To activate Filter Effects:
- Press the Playback button ☐ on the camera.
-
Press the◀ or ▶ keys to scroll and select an image to edit.
-
Press the MENU button to launch the Playback menu.
-
Select Filter Effects. The Filter Effects submenu appears.
-
Press the▲ or ▼ keys to scroll and OK button to select an option.
The succeeding list shows the available settings.
- Soft: Image is applied with soft effect.
- Color Emphasis: Retains the color tone you choose while the rest of the scene becomes black and white.
- Vivid: Image is applied with more contrast and saturation emphasizing on the bold colors.
- Miniature Effect: The parts of image will be blurred and make the scene looks like a miniature scale model. It is recommended to apply the image that captured from a high angle to simulate the miniature effect.
• Astral: Image is applied with starburst.
- Impressive Art: Image is applied with dramatic contrast.
- Painting: Image is applied with watercolor effect. Please note that if one image is applied with Painting function already, it cannot be applied with Astral again.
- Negative: Image appears to be the opposite of the original image.
• B&W: Image is applied with black and white.
- Mosaic: Image is applied with mosaic tiles.
- Sepia: Image is applied with sepia tones.

After Sales Support

00 800 - 78 77 23 68
MODEL: SZ 350

YEARS WARRANTY
MAGINON
Trimming
The Trim function allows you to trim an image to another image size. This function is only available for still images.
To trim an image:
- Press the Playback button [+] on the camera.
- Press the◀ or ▶ keys to scroll and select an image to trim.
- Press the MENU button to launch the Playback menu.
- Select Trimming. The Trim screen layout is displayed on the LCD monitor.
- Use the Zoom dial to change the trimming frame as zoom in/out.
- Use the navigation controls to move the image.
- Press the OK button to apply changes. A menu selection appears.
- Select whether to:
• Yes: Save the new file as a new one.
- Cancel: Cancel setting and back to Playback Menu.
- Press the OK button to save/cancel changes.


Note:
- Trim function is not available for images with image size set to VGA.
- All images will be trimmed in 4:3 ratio regardless of its original image ratio.
After Sales Support

00 800 - 78 77 23 68
MODEL: SZ 350

YEARS WARRANTY
MAGINON
Resize
Resizes a previously saved image to create a small copy photo and only resizing to a smaller size is available.
To resize an image:
- Press the Playback button [ ] on the camera.
- Use the◀ or ▶keys to scroll and select an image to resize.
- Press the MENU button to launch the Playback menu.
- Select Resize. The Resize submenu is displayed on the LCD monitor.
- Select size among: 640, 320, and 160.
- After selecting size, a menu selection appears.
- Press the OK button to save/cancel changes.
- The resized image is saved as a new photo.


Note:
- Resize function is only applicable to aspect ratio 4:3 photos.
- The original photos can be resized more than once. However, each resized photo cannot be resized again
After Sales Support

00 800 - 78 77 23 68
MODEL: SZ 350

YEARS WARRANTY
MAGINON
Startup Image
You can specify the startup image from the captured images for camera.
- Press the MENU button to launch the Playback menu.
- Select Startup Image. The menu selection appears.
- Select options:
• System: Use camera default image.
- My Photo: Use the ◀ or ▶ keys to scroll and select desired image.
- Off: Disable the startup image.
- Press the OK button to apply changes.


Note:
- The startup image will still be displayed startup even if the selected image was deleted.
DPOF
DPOF is the abbreviation for Digital Print Order Format, which allows you to embed printing
information on your memory card. You can select the images to be printed and how many prints to make with the DPOF menu in the camera and insert the memory card to the card compatible printer. When the printer starts printing, it will read the embedded information on the memory card and print the specified images.
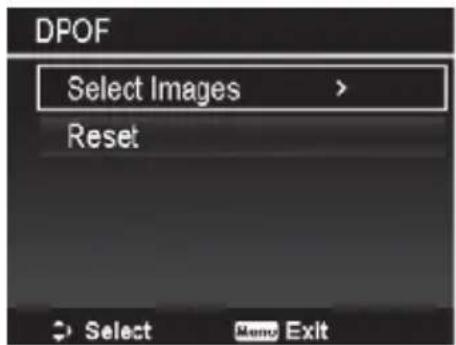
To set DPOF:
- Press the Playback button [ ] on the camera.
- Press Menu button to launch the Playback Menu.
-
Select DPOF. The submenu appears. Available settings are as follows:
-
Select Images: Mark images in the memory card.
- Reset: Reset all DPOF settings to initial default settings.
After Sales Support

00 800 - 78 77 23 68
MODEL: SZ 350

YEARS WARRANTY
MAGINON
To set DPOF on images:
- Select Select Images on the DPOF submenu.
- Use the◀ or ▶ keys to scroll and select images to mark for printing.
- When the desired image is highlighted, use the ▲ or ▼ to increase/decrease number.
- Press the OK button to define the DPOF settings and select Done to save DPOF settings.
To reset DPOF:
- Select Reset on the DPOF submenu.
- The camera auto reset all DPOF settings.

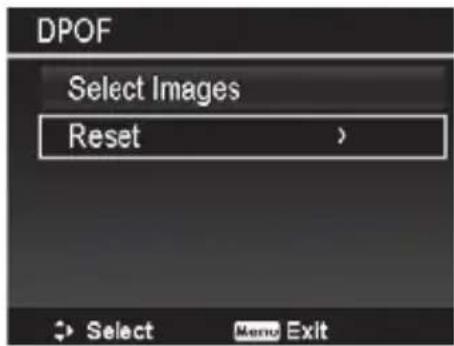
After Sales Support

00 800 - 78 77 23 68
MODEL: SZ 350

YEARS WARRANTY
MAGINON
Copy
Use this feature to copy images between internal memory and memory card.
To copy images between internal memory and memory card:
- Press the Playback button [ ] on the camera.
- Press Menu button to launch the Playback Menu.
-
Select Copy and choose a method you want to copy images to. After choosing, available settings are as follows:
-
Selected images: Select images to the storage device you prefer.
- All images: Copy all images to the storage device you prefer.
To copy selected images:
- Select Selected images on the Copy submenu.
- Use the◀ or▶ keys to scroll and select images to mark for Copying.
- When the desired image is highlighted, use the ▲ or ▼ keys to mark/unmark the file for copying.
- Press the OK button and select Yes to start copying.
To copy all images:
- Select All images on the Copy submenu.
- Select Yes to start copying.
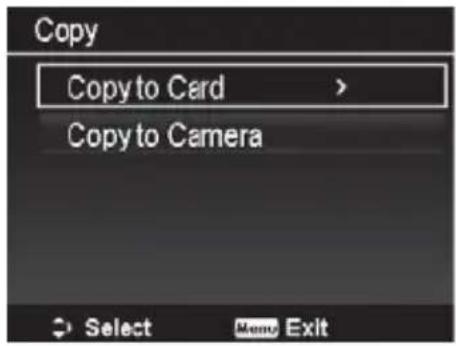


Note:
- If no memory card or a locked card is inserted, this option would be gray.
After Sales Support

00 800 - 78 77 23 68
MODEL: SZ 350

YEARS WARRANTY
MAGINON
Movie Paste
Use this feature to combine two videos with the same specification (movie size and fps) into one video.
To combine two videos:
- Press the Playback button ☐ on the camera.
- Use the◀ or ▶keys to scroll and select the original video.
- Press the MENU button to launch the Playback menu.
- Select Movie Paste. The videos with the same specification as the original video are displayed on the LCD monitor.
- Use the◀ or ▶ keys to scroll and the ▶ key▼ to mark/unmark the second video.
- Press the OK button and select Yes to merge it to the end of the original video and overwrite it.

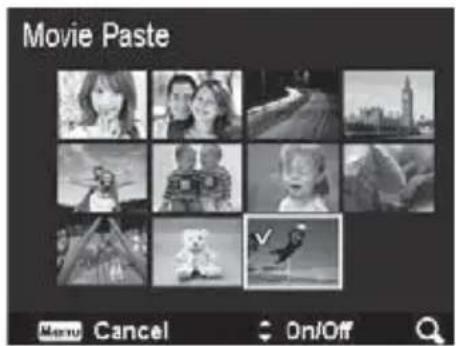

Note:
• The total length of the combined video cannot be over 30 minutes.
• After combining videos, the second video will no longer exist with a separate file.
After Sales Support

00 800 - 78 77 23 68
MODEL: SZ 350

YEARS WARRANTY
MAGINON
Face Retouch
This function is only applicable to still images that captured with Face Tracking.
When enter the Face Retouch menu, locate the cursor on the picture if it has over two faces, or locate the cursor on function at the right side of the menu if only one face on the picture.
Only one face can be retouched each time. All function will be reset to 0 when exit from Face Retouch menu, no matter save the picture or cancel the setting.
Pictures that have been performed Face Retouch will be saved as a new image and can be performed this function again.
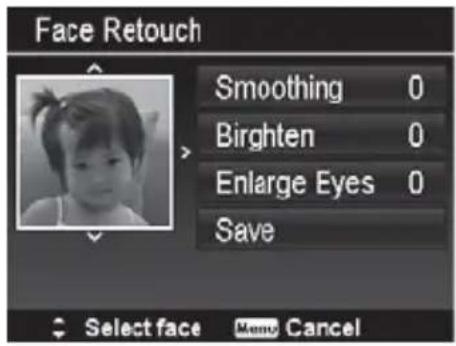

| Item Available Settings Description | ||
| Smoothing 0-3 The Smoothing level are 0-3. | ||
| Brighten 0-3 The Brighten level are 0-3. | ||
| Enlarge Eyes 0-3 The Enlarge Eyes level are 0-3. | ||
| Save N/A Save the image. | ||
After Sales Support

00 800 - 78 77 23 68
MODEL: SZ 350

YEARS WARRANTY
MAGINON
11. Setup Menu
You can access the Setup menu whether you are in Record or Playback mode. The Setup menu allows to configure general camera settings.
To go to Setup Menu:
- Press Menu button [+] to launch the Record/Playback Menu.
- Use the◀ or ▶ keys to switch the menu tab to Setup menu.
- Use the ▲ or ▼ keys to move through the menu selections.
- To select an item, press the OK button or ▶ key.
- Change the submenu settings using the 4-way navigation control.
- Press the OK button to save and apply settings.
Setting Sounds
Use the Sound menu functions to control the sounds produced by the camera.
- From the Setup menu, select Sounds.
- Adjusts sound settings.
- Press the OK button to apply changes.

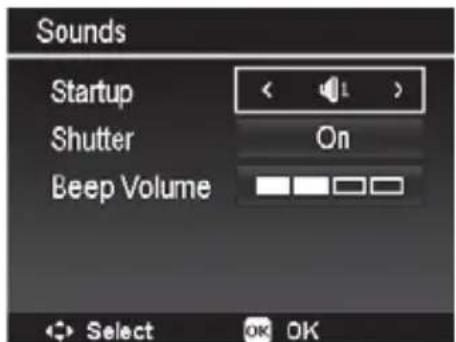
| Item Available Settings Description | ||
| Startup | Sound 1, Sound 2, Sound 3, Off | Selects the startup sound when camera is turned on. |
| Shutter On, Off | Enables or disables shutter sound when Shutter button is pressed. Shutter sound is not available when recording videos. | |
| Beep volume 0-4 | Adjusts volume. | |
After Sales Support

00 800 - 78 77 23 68
MODEL: SZ 350

YEARS WARRANTY
MAGINON
Setting Power Save
The Power Save function allows you to set an idle time after which the camera automatically sets to sleep mode to save power. After a minute of being in sleep mode, the camera eventually turns off power.
This function is not available in the following instances:
- Recording a video file
- Playing a Slide Show/video file
• Using the USB connector - AE/AF has been locked
- During Movie Paste
• During interval time on Time Lapse
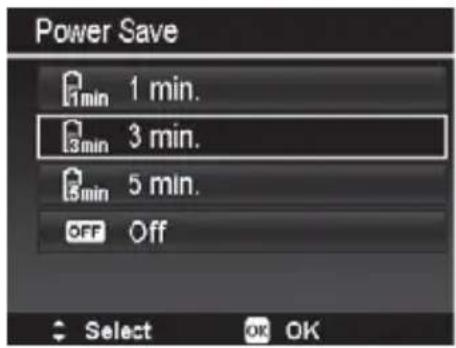
Use the Date & Time function to set the date and time of your camera. This function is useful in attaching date stamps on captured images. Your camera uses a 24-hour time format.
-
Press the navigation controls to adjust date and time value. By holding down the ▲ or keys, the numeric values changes continuously.
-
Press the OK button to apply changes.
Setting Language
Specify in which language menus and messages are to be displayed on the LCD monitor.
- Use the navigation control to scroll through the list and select the desired language.
- Press the OK button to confirm and apply settings.
After Sales Support

00 800 - 78 77 23 68
MODEL: SZ 350

YEARS WARRANTY
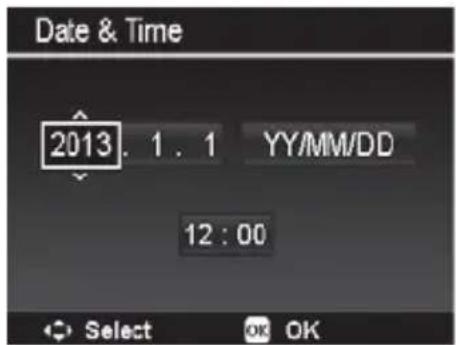

MAGINON
Setting Display Mode
This function controls the icon display on LCD monitor for both Record mode and Playback mode.
Available settings are: On, Detailed Info, Off.
If set Display Mode to Off, the mode icon and remaining shots will display for 2 seconds in following situations:
• Power on the camera
- Switch from Playback to Record mode
• After shooting
- Close the menu and back to preview
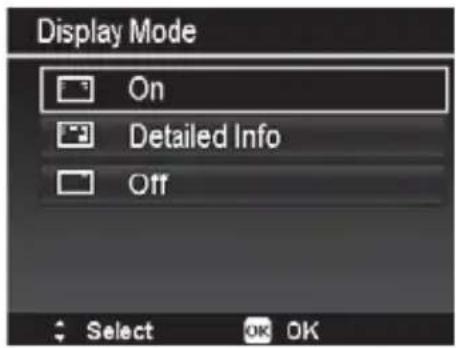
Setting TV Out
Use the TV Out function to adjust video output signal to accommodate different regional settings. If TV out is not set correctly, the image may not display properly on TV.
Available settings are:
• NTSC: Applicable in Japan, USA, Canada, Taiwan and others.
• PAL: Applicable in Europe, Asia (excluding Taiwan), Oceania and others.

Setting LCD Brightness
Select a brightness level for the LCD monitor.
Available settings are:
• Auto: Auto detects the LCD brightness.
• Bright: Enhance the LCD brightness.
• Normal: Normal LCD brightness.
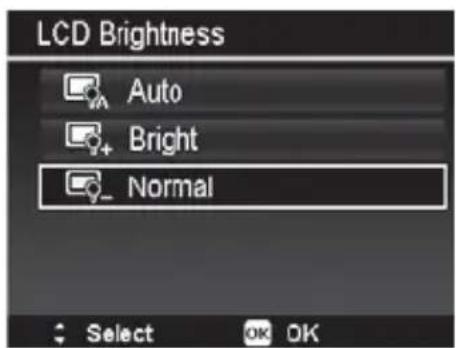
After Sales Support

00 800 - 78 77 23 68
MODEL: SZ 350

YEARS WARRANTY
MAGINON
Setting Format
This utility formats current used memory (Internal memory or Memory card) and erases all stored images and data.


Note:
- If a locked card has been inserted, the option would be gray.
Reset All
Use this function to reset the camera to its factory settings. However, the following settings are exceptions and not affected by Reset.
- Date & Time
- Language
- TV Settings
- Custom White Balance data

After Sales Support

00 800 - 78 77 23 68
MODEL: SZ 350

YEARS WARRANTY
MAGINON
12. Connecting the Camera to a TV
You can play back your images on a TV screen. Before connecting to any video devices, make sure to select NTSC/PAL to match the broadcast standard of the video equipment you are going to
connect to the camera.
To connect your camera to a TV:
- Turn on the camera.
- Set the TV out to match the TV's video out format. See „Setting TV Out“ on page 76.
- Connect the USB/AV 2-in-1 cable to the USB port on the bottom of your camera.
- Connect the other end of the cable to the TV's AV input port.
- The LCD monitor turns black and all images and video clips are displayed on the TV.

13. Connecting the Camera to a PC
You can transfer images and video files to your PC:
- Connect one end of the USB cable to an available USB port on your computer
- Connect the other end of the USB cable to the USB terminal on the camera.
- Turn on the camera.

After Sales Support

00 800 - 78 77 23 68
MODEL: SZ 350

YEARS WARRANTY
MAGINON
- The PC starts to detect the connection while the LCD monitor appears Connecting...
- The LCD monitor will be turned off after the connection is established.
- Access the files in the camera by your PC.
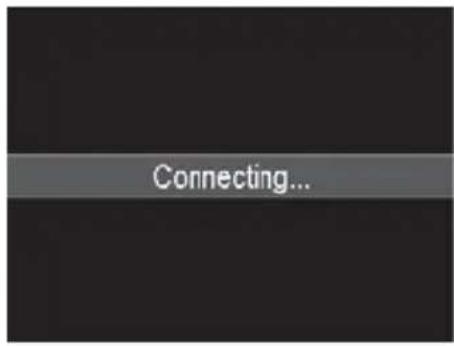

Note:
- The camera's internal memory and memory card would display as removable drives in Vista/Win7/Win8 PC.
- When this camera is connected to your PC, two removable drives will display. Please click AP link (Magix) in the second drive, and then Setup window will dispaly (an Internet connection is required). After installation, you can import / edit your photos, movies and music. Please note that AP link (Magix) is the trial version and will be used permanently after registration.
14. Connecting the Camera to a Printer
You can print your images directly using a PictBridge compatible printer.
- Turn on your Printer. Check that the printer is turned on, there is paper in the printer, and there are no printer error messages.
- Connect one end of the USB cable to the printer while the other end to USB terminal on the camera.
- Enter the print mode and print the selected images.

natural_image
Diagram showing a printer connected to a digital camera via cable, with an inset close-up of the printer's cable (no text or symbols present)For details on the following page „Setting the Print Mode Menu“.
After Sales Support

00 800 - 78 77 23 68
MODEL: SZ 350

YEARS WARRANTY
MAGINON
Setting the Print Mode Menu
Print Mode menu appears on the screen after the connection between a printer and your camera is established.
Print Mode includes three major settings:
- Print Select: An image can then be selected to print.
• Print All: Prints all images. - Print DPOF: Prints the images which are set DPOF.
Before performing DPOF Print, please make sure to have the memory card inserted into the camera.

To set Print Select:
- Use the◀ or ▶ keys to scroll and select an image for printing.
- Specify the number of copies. Use the ▲ or ▼ key to increase/decrease number.
- Press the OK button to enter printer settings.
To set Print All and Print DPOF
Repeat the same steps 1 to 2, then enter printer settings. To set Printer Settings

- Use the▲ or ▼key to specify a print option.
- Modify paper size, quality, date and info by the ◀ or ▶key.
Available setting:
• Paper size: Default / A4 / 4"x6"
• Quality: Default / Fine / Normal
• Capture Date: Yes / No
• Capture Info: Yes / No
- Select Print on the screen for printing or Cancel to go back Print Mode.

After Sales Support

00 800 - 78 77 23 68
MODEL: SZ 350

YEARS WARRANTY
MAGINON
Start Printing
• LCD monitor appears „Now printing...“.
- Or press Menu button to stop printing anytime.
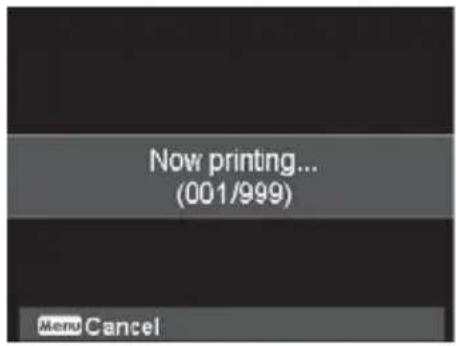
15. About Folder and File Names
Your camera automatically creates specific directory of folder in the internal memory cards to organize captured image and video files.
File Naming
File names begin with „DSCI“ and followed by a 4-digit number that increases in sequence. File numbering starts from 0001 when a new folder is created.
The highest file number is 9999, if exceeds 9999, the camera will start over the file number from 0001.

Note:
- Do not change the folder and file names in the memory card using your PC. It may be unable to playback the data using the camera..
After Sales Support

00 800 - 78 77 23 68
MODEL: SZ 350

YEARS WARRANTY
MAGINON
16. Cleaning
CAUTION! When cleaning the device, never use solvents or corrosive/ abrasive cleaners, otherwise the surfaces could be damaged. Carefully clean the device with a soft dry cloth. Remove stubborn dirt by lightly moistening the cloth, but be careful that no moisture penetrates into the device. Subsequently, wipe the device completely dry.
17. Disposal
Dispose of packaging according to its type and in an environmentally friendly manner using the provided collection containers. Batteries and rechargeable batteries are not allowed to be disposed of with household waste. The consumer is legally obligated to return the batteries to the designated collection facilities or the the batterie's point of sale. Batteries and rechargeable batteries are therefore labelled with the adjacent displayed symbol.

Correct disposal of this product:
The adjacent displayed label indicates that no electrical devices in the EU may be disposed of with normal household waste.
Please use the return and collection systems in your community or contact the retailer where the product was purchased.
This will prevent any potential negative impacts on the environment and health, that could develop through an inappropriate disposal. For further information please contact your local council.

natural_image
Two identical line-drawn icons of a trash bin with 'No' symbols crossed out, no text or labels present.After Sales Support

00 800 - 78 77 23 68
MODEL: SZ 350

YEARS WARRANTY
18. Conformity
The Manufacturer hereby declares that the CE marking was applied to the product in accordance with the basic requirements and other relevant provisions of the following European Directives:
2011/65/EC RoHs Directive
2001/95/EC General Product Safety
2006/95/EC (LVD)
2009/125/EC (ErP)

The EC Declaration of Conformity can be requested from the address specified on the Warranty card.
19. Warranty and Service
If problems should occur during the operation of the device, we are available under service address to handle any questions and problems you may have. We will issue a manufacturer's warranty for the device for 3 years. For details, please refer to the separately enclosed warranty card. Before you send us a defective unit, please contact our hotline.
Serviceadress:
Sertronics LTD
MAGINON Service
45 Regal Drive, Walsall Enterprise Park
Walsall, WS2 9HQ
United Kingdom
Tel.: 00800 - 78 77 23 68
Manufacturer's address:
supra
The software used in this product is licensed subject to a license pursuant to the GNU – General Public License conditions. We expressly draw attention to the fact that under the GNU – General Public License conditions no liability is accepted.
The starting point for the software is the software published online at
http://sg-gpl.net/
The software listed there is licensed pursuant to the GNU – General Public License conditions. Device related changes have been made to this software for the product in question. The source text of the software implemented in the product in question can be obtained in response to an enquiry sent to the e mail address
info@supra-elektronik.com
In this instance your e mail must contain details of what the relevant product is, the relevant serial number and documentary evidence of your commercial source of supply as well as documentary evidence of the date on which the product was purchased from the trade source of supply. We guarantee supply of the source text of the implemented software for a period of at least three years from date of purchase from the trade source of supply where the trade source of supply has sourced the product from us directly or via strictly trade only dealers.
After Sales Support

00 800 - 78 77 23 68
MODEL: SZ 350

YEARS WARRANTY
21. Technical specifications
| Element Description | |
| Image Sensor 20.0 Megapixel CCD sensor | |
| Object Lens | F=3.0~5.9 / f=4.5 ~ 157.5 mm; (equivalent to 25~875 mm film format) |
| Monitor 3.0" TFT colour LCD | |
| Focus Range | Normal: Wide: 50 cm ~ infinity /Tele: 200 cm ~ infinity |
| Macro: Wide: 1 cm ~ infinity / Tele: 150 cm ~ infinity | |
| Super Macro: Wide: 1 cm ~ infinity | |
| Shutter Speed | Auto: 1 - 1/2000 sec |
| Manual: 15 - 1/2000 sec. | |
| Night: 1/4 - 1/2000 sec. | |
| Fireworks: 4 sec. | |
| File Format JPEG (EXIF 2.3), | Motion JPEG (AVI), WAV |
| Image Resolution | Aspect Ratio 4:3 - 20M (5152 x 3864), 8M (3264 x 2448), 5M (2592 x 1944), 3M (2048 x 1536), VGA (640 x 480) |
| Aspect ratio 3:2 - 5152 X 3435 | |
| Aspect ratio 16:9 - 14M (5152 x 2898), 2M (1920 x 1080) | |
| Aspect ratio 1:1 - 2992 x 2992 | |
| Video Resolution HD 1280 x | 720 (30fps); VGA 640 x 480 (30fps) |
| Optical Zoom 35x optical zoom | |
| Digital Zoom 8x digital zoom | |
| ISO Auto, 100, 200, 400, 800, 1600, 3200, 6400 | |
| Self Timer Off, 10 sec., 2 sec., Double | |
After Sales Support

00 800 - 78 77 23 68
MODEL: SZ 350

YEARS WARRANTY
MAGINON
| Element Description | |
| Storage | Internal memory: 128MB flash memory |
| External memory: SD (up to 4GB), SDHC card (up to 32GB guaranteed), SDXC card (up to 64GB guaranteed) | |
| Connections USB 2.0 / AV-Out | |
| TV system NTSC/PAL (selected by Setup MENU) | |
| Power supply Li-ion battery: NP120 (3.7V, 1700mAh) | |
| Operating Temperature 0°C - 40°C | |
| Operating Humidity 0% - 90% | |
| Microphone Built-in | |
| Speaker Built-in | |
| Dimensions approx. 128 x 86.1 x 90.9 mm | |
| Weight approx. 450g (without batteries and memory card) | |

Note:
- During the course of product improvement, we reserve the right to make technical and optical modifications to the device.
System requirements
| Windows® Macintosh | |
| ■ Pentium® IV 3.0 GHz or higher■ Windows® XP/ Vista/7/8■ 2 GB RAM■ 1 GB of available hard disk space■ Microsoft DirectX 9.0C■ Available USB port and CD or DVD drive | ■ PowerPC G5 or higher■ OS 10.3.9 ~ 10.8 (Mass storage)■ 1 GB RAM■ 1 GB of available hard disk space■ Quick Time player ver. 6.0.3 or above■ Available USB port and CD or DVD drive |
After Sales Support

00 800 - 78 77 23 68
MODEL: SZ 350

YEARS WARRANTY
- Package Contents
- Note:
- MAGINON
- Table of contents
- Hazard, safety and warning notices
- Intended use
- Risks for children and persons with limited abilities to use electronic devices
- Electrical hazard
- Heat damage, fire hazard
- Hazards through the use of batteries
- Injuries and property damage
- This is your camera
- Camera buttons
- Navigation Control
- Getting Started
- Attach the Camera Strap
- Inserting the Battery
- Camera Memory
- Internal memory
- External storage
- Inserting an SD/SDHC/SDXC Memory Card
- Charging the Battery by USB
- Turning the Power On and Off
- Initial Settings
- Setting the Language
- Setting the Date & Time
- The LCD monitor
- Photo Mode Screen Layout
- Movie Screen Layout
- Playback Mode Screen Layout
- Recording Images and Videos
- Taking Images
- Setting the Zoom Control
- Zoom dial
- EV Compensation
- Flash
- Self-timer
- Setting the Focus Mode
- The AE/AF LOCK button
- The delete button
- To delete an image/video clip:
- To delete a single file:
- To delete attached voice memo:
- To delete multiple files:
- To delete all files:
- Recording videos
- PIV function
- Mode dial
- Intelligent scene
- Scene mode
- Kids Mode
- Sports Mode
- Party Mode
- Food Mode
- Self Portrait
- Love Portrait
- Time Lapse
- Burst/Speedy Burst
- Panorama Mode
- To stitch the still image
- Art Effect
- Manual Exposure
- Aperture Priority Mode
- Shutter Priority Mode
- Record Menu
- Photo menu
- Photo Size
- Quality
- White Balance
- ISO
- Maximum ISO Auto
- Metering
- Setting the Exposure Bracketing
- Setting the AF Area
- Setting the AF Lamp
- Setting the AE-L/AF-L
- Setting the Digital Zoom
- Setting the Date Stamp
- Setting Auto Review
- Blink Detection
- Setting Grid Line
- Setting Stabilizer
- Movie Menu
- Setting Movie Mode
- Setting Prerecord
- Setting Wind Cut
- Continuous AF
- Playback
- Viewing in Single Navigation
- Viewing Thumbnails
- Scroll bar
- Thumbnail icons
- Magnify
- Playing Videos
- Playing Voice Memo
- Playback Menu
- Slide Show
- Protect
- Voice Memo
- Filter Effects
- Trimming
- Resize
- Startup Image
- DPOF
- To set DPOF on images:
- To reset DPOF:
- Copy
- Movie Paste
- Face Retouch
- Setup Menu
- Setting Sounds
- Setting Power Save
- Setting Language
- Setting Display Mode
- Setting TV Out
- Setting LCD Brightness
- Setting Format
- Reset All
- Connecting the Camera to a TV
- Connecting the Camera to a PC
- Connecting the Camera to a Printer
- Setting the Print Mode Menu
- Start Printing
- About Folder and File Names
- Cleaning
- Disposal
- Conformity
- Warranty and Service
- Serviceadress:
- Sertronics LTD
- Manufacturer's address:
- supra
- Technical specifications
Brand : Maginon
Model : SZ 350
Category : Camera