LAC08C16 - Air conditioner Logik - Free user manual and instructions
Find the device manual for free LAC08C16 Logik in PDF.
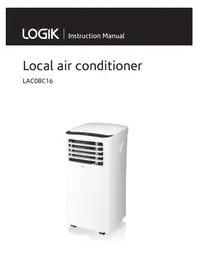


| Product Type | Portable Air Conditioner |
| Brand | Logik |
| Model | LAC08C16 |
| Cooling Capacity | 8000 BTU/h |
| Dehumidification Capacity | 1.2 L/h |
| Airflow | 350 m³/h |
| Dimensions (W x D x H) | 450 x 350 x 700 mm |
| Weight | 25 kg |
| Power Supply | 220-240 V ~ 50 Hz |
| Power Consumption (Cooling) | 800 W |
| Refrigerant | R290 (flammable) |
| Controls | Digital display with remote control |
| Timer | 24-hour programmable timer |
| Fan Speeds | 3 speeds (Low, Medium, High) |
| Modes | Cool, Fan, Dehumidify |
| Drainage | Continuous or manual drain |
| Noise Level | ≤ 52 dB(A) |
| Energy Efficiency Class | A |
| Maintenance | Clean air filter every 2 weeks; wipe unit with damp cloth |
| Safety Features | Auto restart after power failure; overload protection |
| Spare Parts & Repairability | Remote control and air filter available; service centers accessible |
| General Information | Portable design with castors for easy mobility; exhaust hose included |
Frequently Asked Questions - LAC08C16 Logik
User questions about LAC08C16 Logik
0 question about this device. Answer the ones you know or ask your own.
Ask a new question about this device
Download the instructions for your Air conditioner in PDF format for free! Find your manual LAC08C16 - Logik and take your electronic device back in hand. On this page are published all the documents necessary for the use of your device. LAC08C16 by Logik.
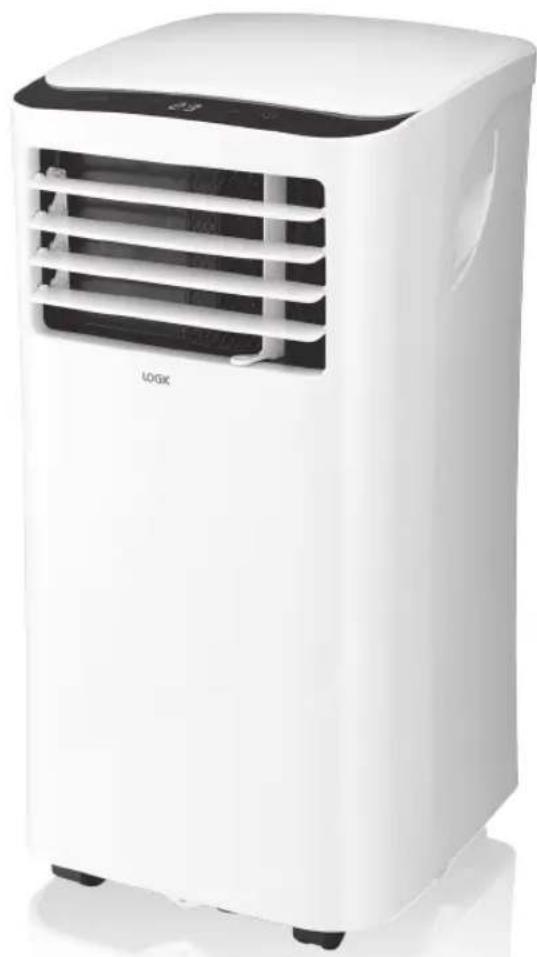
USER MANUAL LAC08C16 Logik
Local air conditioner
LAC08C16
Contents
Safety Warnings....4
Unpacking......7
Product Overview......8
Front View 8
Rear View 8
Control Panel....9
Remote Control....10
Moving the Unit....10
Installing the Exhaust Hose 11
Window Installation....11
Wall Installation....13
Installing the Batteries (Remote Control)....14
Switching the Unit On/Off....15
General Operation....15
Adjusting the Louvre....15
Setting the Auto On/Off Time 15
Using the Dry Mode....15
Using the Fan Mode....16
Using the Cool Mode....16
Enabling/Cancelling Sleep Mode 16
Cleaning and Maintenance....17
Cleaning the Exterior 17
Cleaning the Air Filter 17
Draining the Water....17
Storing the Unit....17
Hints and Tips 18
Error Codes 18
Specifications....19
GENERAL SAFETY
- For your continued safety and to reduce the risk of injury or electric shock, read all instructions carefully before using the unit and keep them for future reference. Please follow all the safety precautions listed below.
- Retain this manual. Include this manual if you pass the unit onto a third party.
- Keep ventilation openings in the unit enclosure clear of obstructions.
- Choose a location for your unit away from heat sources such as radiators or fires. • Children should be supervised to ensure that they do not play with the unit.
- Keep mains cable out of reach from children.
- This appliance can be used by children aged from 8 years and above and persons with reduced physical, sensory or mental capabilities or lack of experience and knowledge if they have been given supervision or instruction concerning use of the appliance in a safe way and understand the hazards involved. Children shall not play with the appliance. Cleaning and user maintenance shall not be made by children without supervision.
ELECTRICAL
- All wiring must comply with local and national electrical codes and be installed by a qualified service agent. If you have any questions regarding the following instructions, contact a qualified service agent.
- Check the available power supply and resolve any wiring issues before installation and operation of this unit.
- For your safety and protection, this unit is grounded through the power cord plug when plugged into a matching wall outlet. If you are not sure whether the wall outlets in your home are properly grounded, please consult a qualified service agent. Do not use plug adaptors or extension cords with this unit.
- Do NOT use the unit if the mains cord or plug is loose or damaged or requires repair / replacement. If the supply cord is damaged, it must be replaced by the manufacturer, its service agent or similarly qualified person in order to avoid a hazard. • Use ONLY the supplied cord and plug.
MOVING / TRANSPORTATION
• Always transport the unit in a vertical position. • A minimum of 2 people are needed to move this unit safely.
POSITIONING
- If the unit is knocked over during use, turn off the unit and unplug from the mains immediately. Leave the unit to settle for a few hours before using. This ensures the coolant has fully filled the compressor and will help prevent the unit from initiating the auto-cut off function due to overheating.
- Ensure the unit is securely placed on a stable, level surface.
• Do not trap the mains cord in any way.
LOCATION
- Place and store away from direct sunlight, e.g., do NOT place or store under a window or next to a sliding glass patio door.
- Do NOT place or store the unit where it can fall or be pulled into water or any other liquid.
- Your unit should be used in such a way that it is protected from moisture, e.g., condensation and splashes of water.
- Do NOT operate your unit in a wet room, such as a bathroom or laundry room, or in any other room that will get wet.
- Do NOT use the unit in the presence of inflammable substances or vapours, such as alcohol, insecticide, petrol, etc.
- Ensure that there is at least 30cm of clear space all around the unit.
- Do NOT place the unit in front of drapes, curtains or other hangings, in case they fall against the rear air intake. • Do NOT place near furniture and walls.
- Do NOT operate this unit in an enclosed cabinet area.
OPERATION
- Do NOT cover and/or obstruct the unit.
- Do NOT place objects or let any person or pet sit on top of the unit. • Never remove any fixed covers.
- Never use the unit if it is not working properly, or has been dropped or damaged. Contact a qualified service agent for assistance.
- Never use the mains socket switch or plug to start and stop the unit. Always use the ON/OFF switch on the unit or remote control.
- Do NOT operate the unit near other electrical / electronic items.
- Do NOT operate the unit with wet/damp hands, or when barefoot.
- Do not operate this appliance with anything other than your hands. Do not use the appliance with wet hands. • Do not wet the housing or control panel. • Make sure the unit is thoroughly dry before use. • Always operate with the filter and grille correctly and securely installed.
- If not using the unit for a long time (e.g., going on holiday), disconnect it from the mains socket.
- Do NOT insert hands or fingers or other objects into the air inlet or outlet at any time.
BATTERIES
- Batteries used in the remote control for this unit are easily swallowed by young children and this is dangerous.
- Keep loose batteries away from young children and make sure that the battery holder tray is secure in the remote control. Seek medical advice if you believe a cell has been swallowed.
- Please dispose of batteries correctly by following the guidance in this manual.
- Do not expose the battery to direct sunlight or sources of excessive heat.
CLEANING AND MAINTENANCE
- Always turn off the unit and unplug it from the mains socket after use and before cleaning.
- Always contact a qualified service agent to carry out repairs or any non-user serviceable maintenance, e.g., interior of the unit.
- Never use hazardous chemicals to clean the unit, or allow them to come into contact with the unit. Use only a soft cloth.
- Regularly clean the unit's filters. This helps the unit remain efficient and increases its service lifespan.

IT IS HAZARDOUS FOR ANYONE OTHER THAN AUTHORISED SERVICE PERSONNEL TO CARRY OUT SERVICING OF REPAIRS WHICH INVOLVE THE REMOVAL OF COVERS.
TO AVOID THE RISK OF AN ELECTRICAL SHOCK DO NOT ATTEMPT REPAIRS YOURSELF.
Thank you for purchasing your new Air Conditioner.
We recommend that you spend some time reading this instruction manual in order that you fully understand all the operational features it offers. You will also find some hints and tips to help you resolve any issues.
Read all the safety instructions carefully before use and keep this instruction manual for future reference.
Unpacking
Remove all items from the packaging. Retain the packaging. If you dispose of it please do so according to local regulations.
The following items are included:
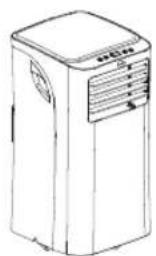
Main Unit Window Slider Kit Remote Control (with AAA batteries x 2)
Remote Control
Window Slider Kit
(with AAA batteries x 2)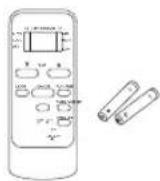
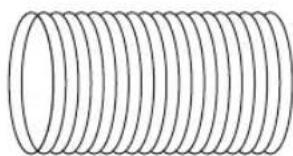
Exhaust Hose
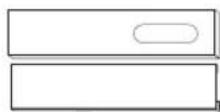
Window Slider Kit Plug
Exhaust Hose Adapter (with Window Slider)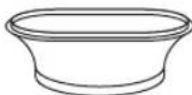
Exhaust Hose Adapter (with Wall Exhaust Adapter)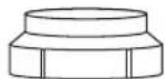
Wall Exhaust Adapter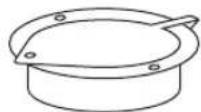
Sealing Foam x 3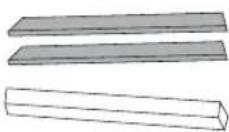
Screw x 4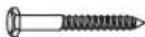
Anchor x 4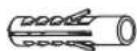
Exhaust Hose Adapter (with Main Unit)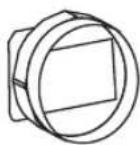
Drain Tube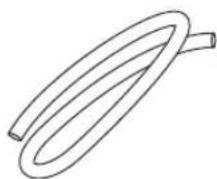
Instruction Manual

If items are missing or damaged, please contact Partmaster (UK only). Tel: 0344 800 3456 for assistance.
Front View
- Control Panel
- Remote Control Sensor (hidden behind enclosure)
- Louvre
- Casters
- Recessed Handle
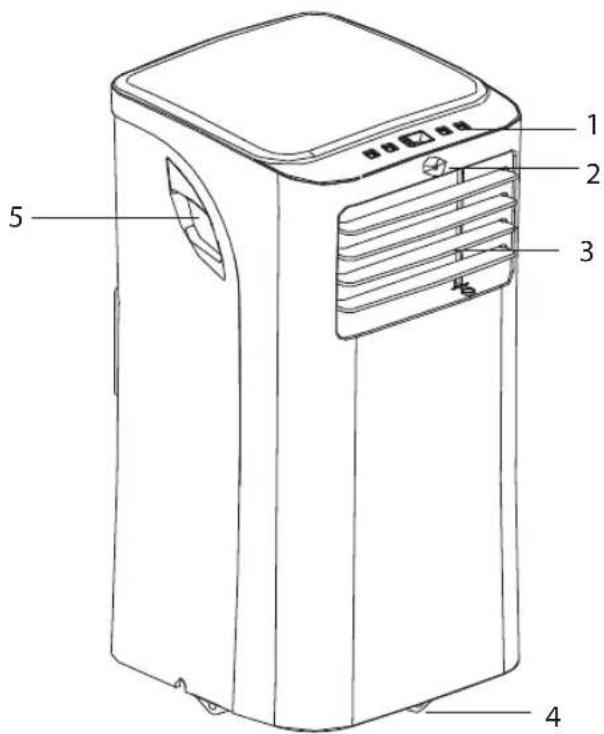
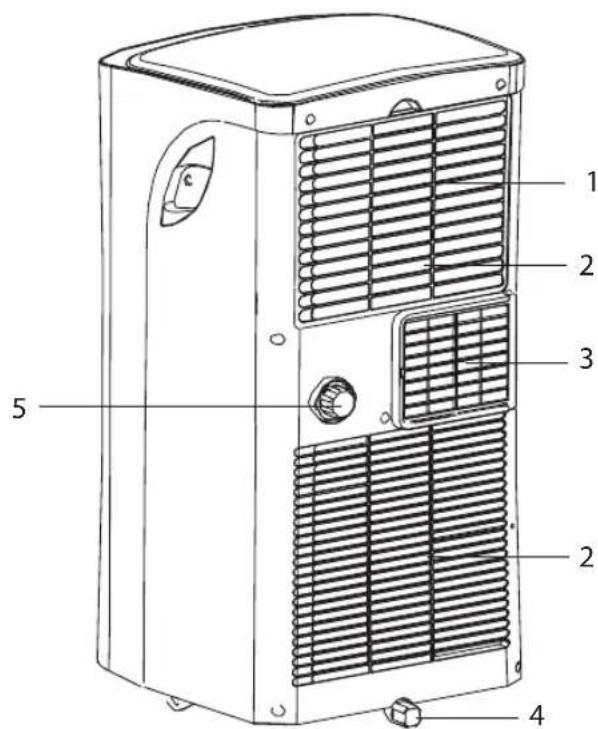
Rear View
- Air Filter
- Air Intake
- Exhaust Air Outlet
- Bottom Tray Drain Outlet
- Drain Outlet
Control Panel
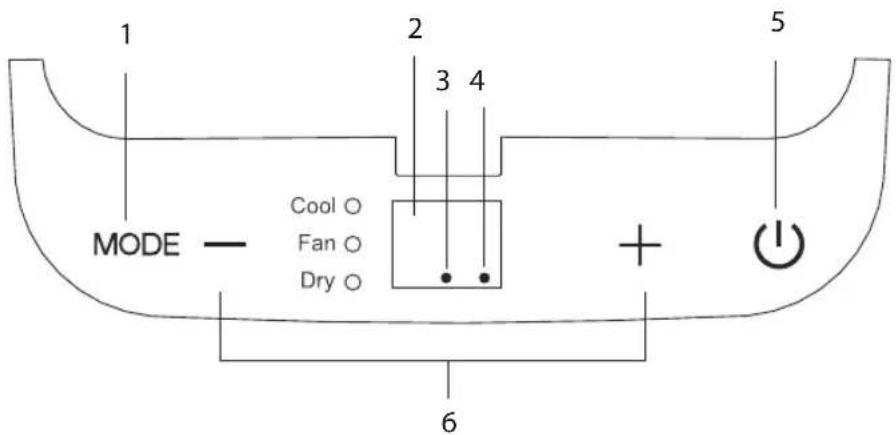
1. MODE Button
Select "Cool", "Fan" or "Dry". The indicator light will illuminate when selected.
2. LED Display
• In Cool mode, display the set temperature. - In Fan and Dry mode, display the room temperature. - Display error codes.
3. Power Indicator
4. Timer Mode Indicator
5. ⏻ Button
Switch the unit on or off.
6. + / - Buttons
- Adjust the temperature setting.
- Press both buttons together for 3 seconds or more to change from Celsius to Fahrenheit and vice versa.
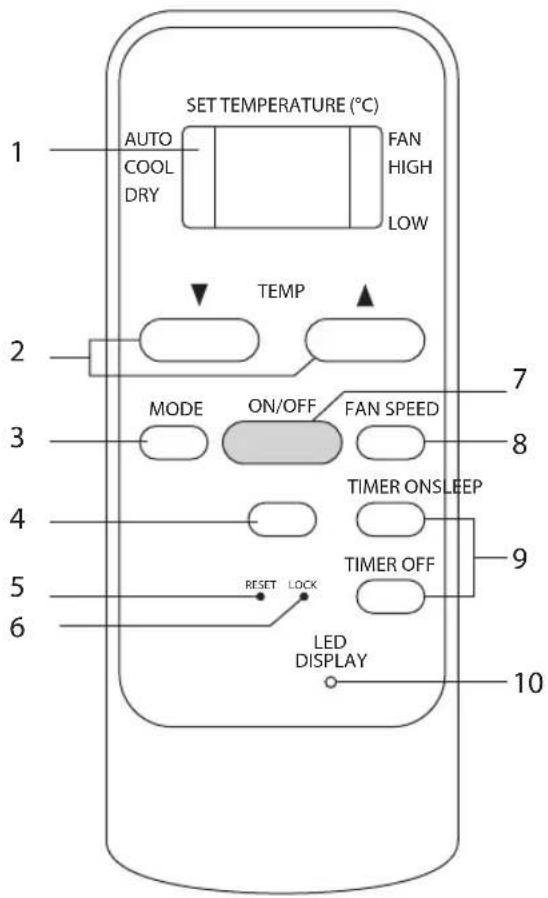
Remote Control
1. LED Display
2. TEMP ▲▼ Buttons
Increase or decrease the temperature.
3. MODE Button
Select "Dry", "Fan", "Auto" ("Auto" mode is not applicable to this model) or "Cool".
4. SLEEP Button
Set the unit for Sleep feature in Cool mode.
5. RESET Button
Cancel all current settings on the remote control and reset the remote control to default.
6. LOCK Button
- Press to lock all buttons.
- Press again to unlock.
7. ON/OFF Button
Switch the unit on or off.
8. FAN SPEED Button
Select "Auto", "High" or "Low".
9. TIMER ON/OFF Buttons
Set the unit's auto on/off time.
10. LED Display Button
Switch the unit's LED display on or off.
Moving the Unit
The unit is on casters. When moving the unit, keep it upright and stable. Do NOT tilt or turn sideways. Grip the recessed handles and push the unit to another location.
Window Installation
Window Slider Kit Installation
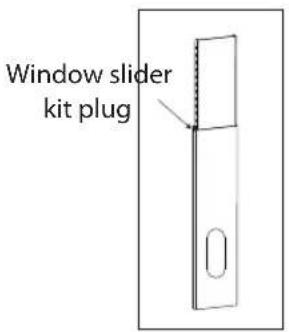
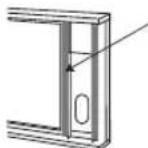
It may be necessary to adjust the length of the window slider kit in order to fit your window. Never cut out the hole in the window slider kit. You can use the window slider kit plug to fix the window slider kit after adjustment.
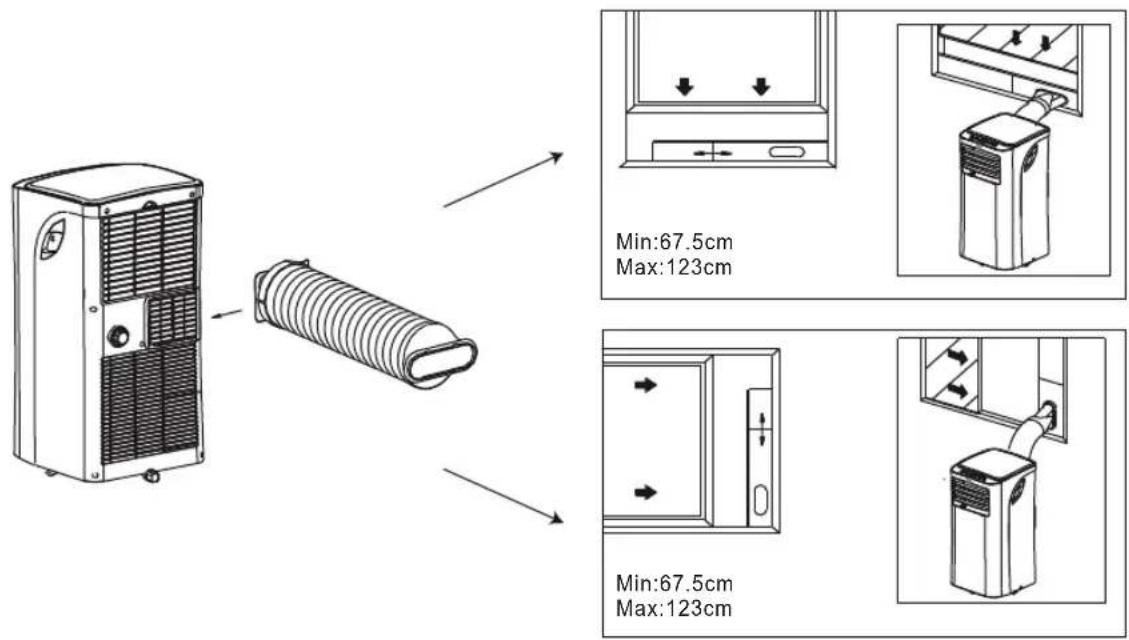
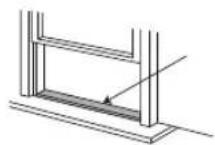
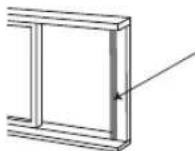
Installation in a Double-Hung or Sliding Sash Window
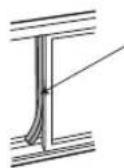
- Cut the sealing foam (adhesive one) to the proper length and attach it to the window stool (double-hung) or window frame (sliding).
- Adjust the length of the window slider kit according to the window, then attach it to the window stool (double-hung) or window frame (sliding).
- Cut the other sealing foam (adhesive one) to the proper length and attach it on the other side of the window slider kit.
- Close the window sash securely against the window slider kit.
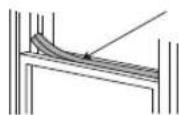
- Cut the sealing foam (non-adhesive one) to the proper length and seal the gap between the sash windows.
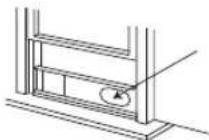
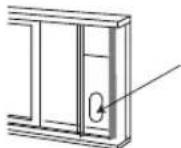
or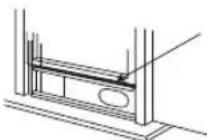
Wall Installation
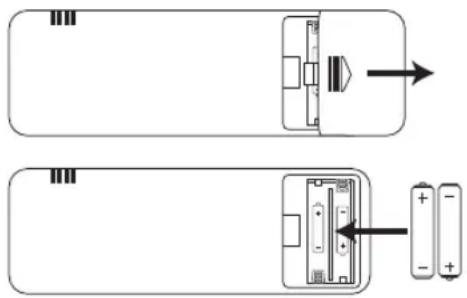
- Remove the cover on the back of the remote control by sliding the battery compartment cover off.
- Insert 2 x AAA batteries, ensuring that their polarities (+ / -) are pointing in the right direction.
- Slide the cover back into place. It will click when securely fitted.

Handling the Battery
- Improper or incorrect use of batteries may cause corrosion or battery leakage, which could cause fire, personal injury or damage to property. • Only use the battery type indicated in this manual.
- When the batteries are exhausted, the remote control will not function. Replace both batteries at the same time with new ones.
- Do not install new batteries with used ones and do not mix different types of batteries.
- Do not dispose of used batteries as domestic waste. Dispose of them in accordance with local regulations.
Handling the Remote Control
- Do not drop or cause impact to the remote control.
- Do not spill water or any liquid on the remote control.
- Do not place the remote control on a wet object.
- Do not place the remote control under direct sunlight or near sources of excessive heat.
- Remove the battery from the remote control when not in use for a long period of time, as it could cause corrosion or battery leakage and may result in physical injury and/or property damage including fire.
Switching the Unit On/Off
- Plug the unit into the mains supply. The Power Indicator will light up, indicating the unit is in standby mode.
- Press on the unit or ON/OFF on the remote control to switch on the unit. The Power Indicator light will turn off. • To completely switch off the unit, unplug from the mains supply.
General Operation
Adjusting the Louvre
You can adjust the louvre to the desired position manually.

• Ensure the louvre is fully opened during operation. • Do not put objects or hands into the louvre opening.
Setting the Auto On/Off Time
You can set the unit's auto on/off time from the remote control only.
- Press TIMER ON repeatedly to select the auto on time. To confirm, stop pressing and wait for the confirmation tone.
- Press TIMER OFF repeatedly to select the auto off time. To confirm, stop pressing and wait for the confirmation tone. The Timer Mode Indicator will light up. The unit is now programmed to auto on/off.
To change the auto on/off time setting, repeat from step 1.
To cancel the auto on/off time setting, set the timer to 0.0.
Using the Dry Mode
For the best dehumidifying effect, keep all windows and doors closed.
- Remove the drain outlet plug from the back of the unit.
- Connect one end of the drain tube to the drain outlet opening and the other end to your drain area.
- Press MODE and select "Dry" to start drying.
To stop drying, press MODE to switch to other modes or switch off the unit. Make sure all water is drained before removing the drain tube and replacing the drain outlet plug onto the back of the unit.
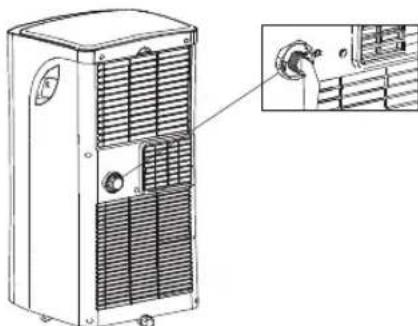

Fan speed and temperature cannot be adjusted under dry mode.
Using the Fan Mode
- Press MODE and select "Fan". The unit will operate the auto fan speed automatically.
- Press FAN SPEED on the remote control to select Low, High or Auto fan speed.

Fan speed can only be adjusted from the remote control. Auto fan speed is selected when the pointer on the remote control display has disappeared.
Using the Cool Mode
- Press MODE and select "Cool". The unit will operate the auto fan speed automatically.
- Press +/- on the unit or TEMP ▲▼ on the remote control to select the temperature.
- Press FAN SPEED on the remote control to select the fan speed.

Fan speed can only be adjusted from the remote control.
Enabling/Cancelling Sleep Mode
Sleep mode can only be selected from the remote control.
When sleep mode is enabled, the selected temperature will increase automatically by 1°C/2°F after 30 minutes and 60 minutes. This newly adjusted temperature will be maintained for 7 hours. Then it will return to the original selected temperature.
- To enable sleep mode, select the desired temperature on the remote control. Then press SLEEP. • To cancel sleep mode, press SLEEP on the remote control.

Sleep mode is not available in fan and dry modes.
Cleaning and Maintenance

Make sure to unplug the unit before cleaning and maintenance.
Cleaning the Exterior
• Use a soft cloth to wipe down the exterior. - Do NOT use any abrasive cleaning agents or detergents. - Do NOT immerse any part of the unit in water or any other liquid.
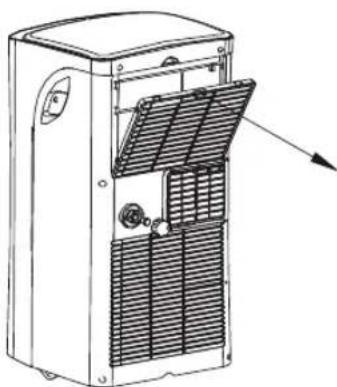
Cleaning the Air Filter
- Pull out the filter.
- Clean the filter in warm water with neutral detergent. Make sure the filter is thoroughly dry before installing back.
Draining the Water
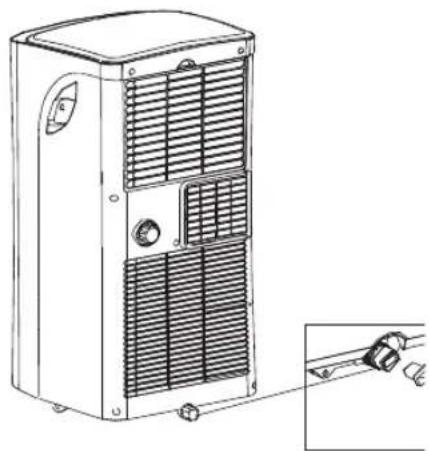
When the LED display shows "P1", it means the bottom tray is full of water and needs draining. The unit will stop automatically and cannot be started until the water is drained.
- Move the unit to a drain location.
- Remove the bottom tray drain outlet cover and plug.
- After the water is fully drained, replace the plug and cover.
- Switch on the unit until "P1" disappears.

If "P1" continues to display, unplug the unit and call for a qualified service agent for assistance.
Storing the Unit
If the unit will not be used for a long period, make sure it is stored properly.
- Ensure the unit is completely drained of water and dry. • Ensure the air filter is cleaned. • Ensure the unit is unplugged.
- Ensure the batteries are removed from the remote control.
| Problem Solution | |
| Unit does not start or there is no power when pressing ⏻ on the unit or ON/OFF on the remote control. | Check that the unit is firmly plugged in and the mains socket is switched on.Set a different temperature.Drain the water from the Bottom Tray Drain Outlet. |
| Room is not cool enough.• Check that all windows and doors are closed.Remove or switch off all heat sources if possible.Check that the exhaust air duct is connected properly and not blocked. If blocked, clean and re-connect.Clean the air filter and re-fit securely before continuing operation.Lower the temperature. | |
| Noisy or excessive vibration. Move the unit to a stable, flat and level surface. | |
| Gurgling is heard. This is normal; it should not be considered a fault. | |
If problem(s) persists, contact a qualified service agent for assistance.
Error Codes
| LED Display Description Action | ||
| E1 | Internal malfunction. | Switch off the unit.Unplug and re-plug the unit.If the error persists, call for a qualified service agent for assistance. |
| E2 | ||
| E4 | ||
| P1 Bottom tray is full. | Drain the water. Please refer to the section “Draining the Water”. | |
| Brand Logik | ||
| Model LAC08C16 | ||
| Sound power level (LWA) 64 dB(A) | ||
| Refrigerant R410A / 300g, GWP:2088 | ||
| Refrigerant leakage contributes to climate change. Refrigerant with lower global warming potential (GWP) would contribute less to global warming than a refrigerant with a higher GWP, if leaked into the atmosphere. This appliance contains a refrigerant fluid with a GWP equal to 2088. This means that if 1kg of this refrigerant fluid were leaked into the atmosphere, the impact on global warming would be 2088 times higher than 1kg of CO2 over a period of 100 years. Never try to interfere with the refrigerant circuit yourself or disassemble the product yourself. Always asks a professional. | ||
| Energy efficiency Class A | ||
| Energy consumption 0.884 kWh per 60 minutes, based on standard test results. Actual energy consumption will depend on how the appliance is used and where it is located. | ||
| Rated cooling capacity (Prated) 2.3 kW (8000 BTU/h) | ||
| Rated cooling power input (PEER) 0.905 kW | ||
| Energy efficiency ratio (EERd) 2.6 | ||
| Power consumption in thermostat-off mode (PTO) | 0.452 W | |
| Power consumption in standby mode (PSB) | 0.823 W | |
| Rated voltage 220 - 240V~ 50Hz | ||
| Rated power input 1100 W | ||
| Dimension (H) x (W) x (D) Approx. | 703 mm x 345 mm x 355 mm | |
| Weight Approx. 23.5 kg | ||
This appliance contains Fluorinated Greenhouse Gas R410A hermetically sealed.
Charge size: 300g (0.63 tonnes CO2 equivalent)
Global Warming Potential (GWP): 2088

For general information about this appliance and handy hints and tips, please visit www.knowhow.com/knowledgebank or call 0344 561 1234.

Visit Partmaster.co.uk today for the easiest way to buy electrical spares and accessories. With over 1 million spares and accessories available we can deliver direct to your door the very next day. Visit www.partmaster.co.uk or call 0344 800 3456 (UK customers only). Calls charged at National Rate.
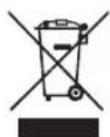
The symbol on the product or its packaging indicates that this product must not be disposed of with your other household waste. Instead, it is your responsibility to dispose of your waste equipment by handing it over to a designated collection point for the recycling of waste electrical and electronic equipment. The separate collection and recycling of your waste equipment at the time of disposal will help conserve natural resources and ensure that it is recycled in a manner that protects human health and the environment.
For more information about where you can drop off your waste for recycling, please contact your local authority, or where you purchased your product.
Notes for battery disposal
The batteries used with this product contain chemicals that are harmful to the environment. To preserve our environment, dispose of used batteries according to your local laws or regulations. Do not dispose of batteries with normal household waste. For more information, please contact the local authority or your retailer where you purchased the product.
- LOCAL AIR CONDITIONER
- CONTENTS
- SAFETY WARNINGS
- UNPACKING
- PRODUCT OVERVIEW
- MOVING THE UNIT
- INSTALLING THE EXHAUST HOSE
- INSTALLING THE BATTERIES (REMOTE CONTROL)
- SWITCHING THE UNIT ON/OFF
- GENERAL OPERATION
- CLEANING AND MAINTENANCE
- HINTS AND TIPS
- SPECIFICATIONS
- GENERAL SAFETY
- ELECTRICAL
- MOVING / TRANSPORTATION
- POSITIONING
- LOCATION
- OPERATION
- BATTERIES
- THANK YOU FOR PURCHASING YOUR NEW AIR CONDITIONER
- FRONT VIEW
- REAR VIEW
- CONTROL PANEL
- MODE BUTTON
- LED DISPLAY
- POWER INDICATOR
- TIMER MODE INDICATOR
- ⏻ BUTTON
- BUTTONS
- REMOTE CONTROL
- TEMP ▲▼ BUTTONS
- SLEEP BUTTON
- RESET BUTTON
- LOCK BUTTON
- ON/OFF BUTTON
- FAN SPEED BUTTON
- TIMER ON/OFF BUTTONS
- LED DISPLAY BUTTON
- WINDOW INSTALLATION
- INSTALLATION IN A DOUBLE-HUNG OR SLIDING SASH WINDOW
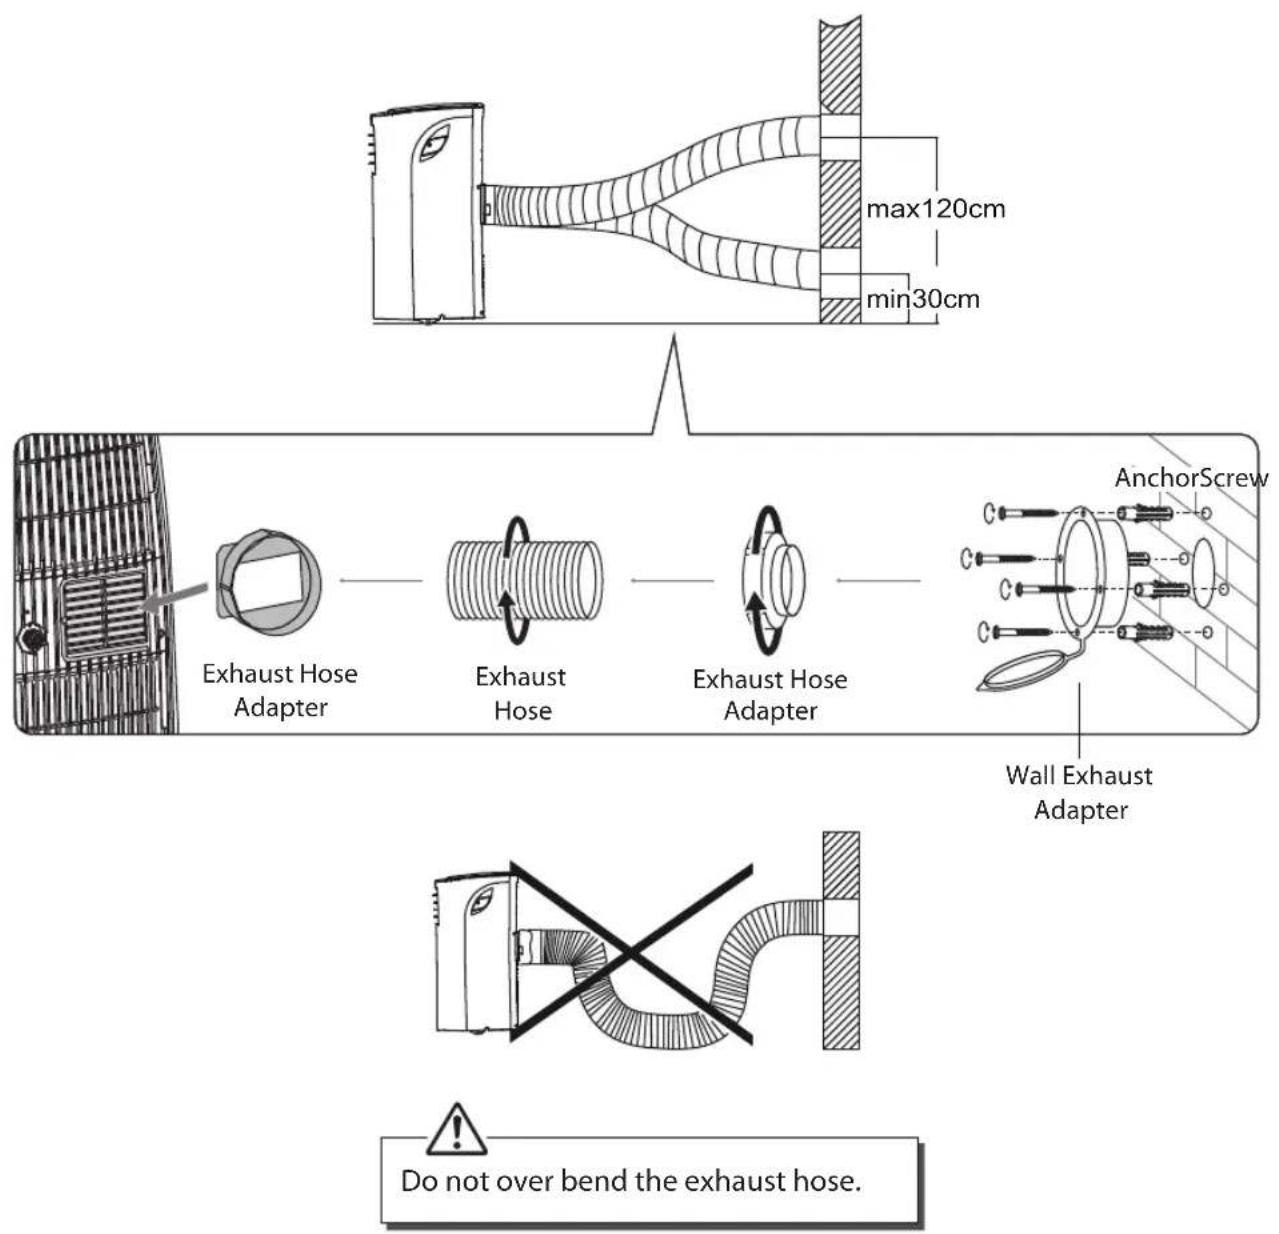
- WALL INSTALLATION
- HANDLING THE BATTERY
- HANDLING THE REMOTE CONTROL
- ADJUSTING THE LOUVRE
- SETTING THE AUTO ON/OFF TIME
- USING THE DRY MODE
- USING THE FAN MODE
- USING THE COOL MODE
- ENABLING/CANCELLING SLEEP MODE
- CLEANING THE EXTERIOR
- CLEANING THE AIR FILTER
- DRAINING THE WATER
- STORING THE UNIT
- ERROR CODES
- NOTES FOR BATTERY DISPOSAL
Brand : Logik
Model : LAC08C16
Category : Air conditioner