PKVS18SL - Vacuum sealer Nutrichef - Free user manual and instructions
Find the device manual for free PKVS18SL Nutrichef in PDF.


| Product Type | Vacuum Sealer Machine |
| Brand | Nutrichef |
| Model | PKVS18SL |
| Dimensions (L x W x H) | 40 x 10 x 20 cm |
| Weight | 2.5 kg |
| Power Supply | 220-240 V, 50 Hz |
| Power | 120 W |
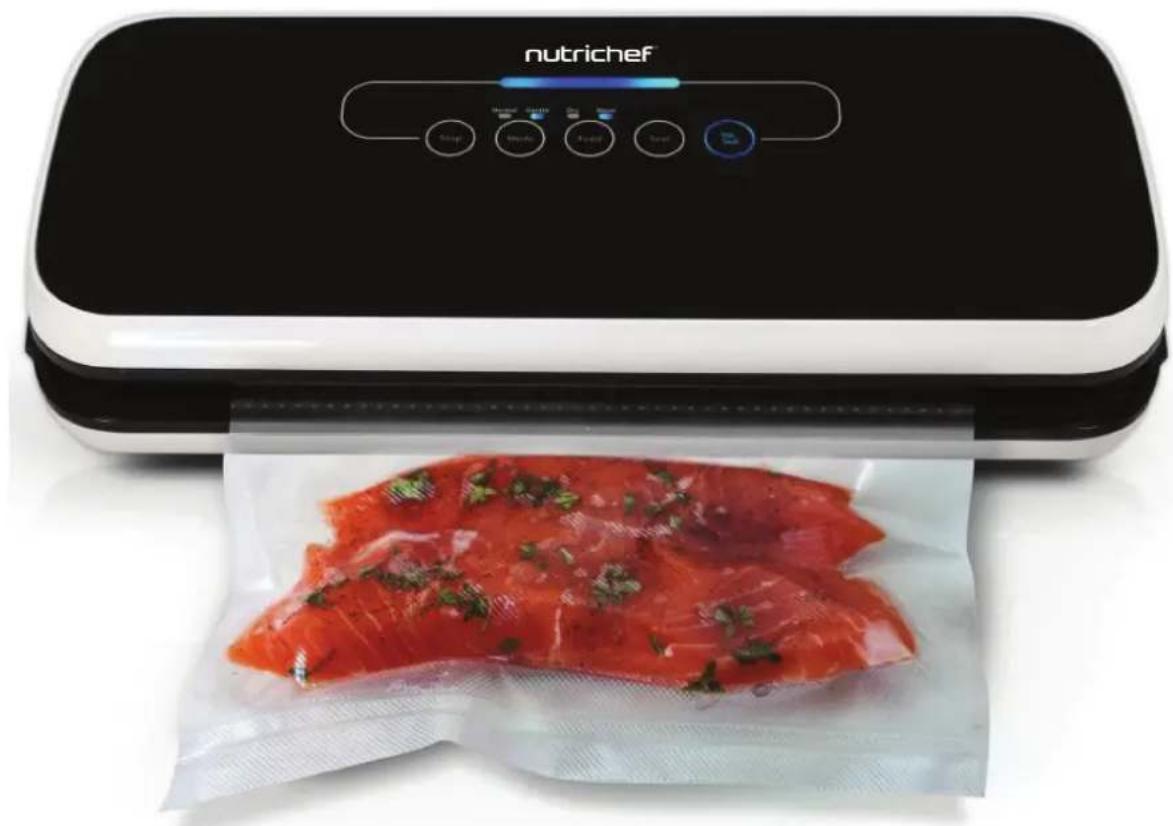
| Main Functions | Vacuum sealing and bag sealing |
| Sealing Type | Single seal |
| Sealing Width | 30 cm |
| Bag Compatibility | Embossed and smooth vacuum bags (up to 30 cm) |
| Housing Material | ABS plastic and stainless steel |
| Care and Cleaning | Clean with a damp cloth, do not immerse |
| Safety | Automatic shut-off, lid locking system |
| Spare Parts and Repairability | Replaceable sealing gasket and sealing bar |
| General Information | Household use, 1-year warranty |
Frequently Asked Questions - PKVS18SL Nutrichef
User questions about PKVS18SL Nutrichef
0 question about this device. Answer the ones you know or ask your own.
Ask a new question about this device
Download the instructions for your Vacuum sealer in PDF format for free! Find your manual PKVS18SL - Nutrichef and take your electronic device back in hand. On this page are published all the documents necessary for the use of your device. PKVS18SL by Nutrichef.
USER MANUAL PKVS18SL Nutrichef
natural_image
Exterior view of a modern office building (no signage)About NutriChef
A mission born out of need
NutriChef was created on the principle that healthy home cooking should be attainable to all, regardless of skill level and economic status. Starting in 2014, we noticed the disconnect in our lives and in the lives of those around us. We were so busy, always rushing forward, and our health and personal lives suffered. We needed to find some way to slow down and put our health first, all without sacrificing convenience or taste. Could we somehow create healthier versions of our favorite foods, easily in our own kitchens? The answer was a resounding yes, and NutriChef was born.
We create products that make life a little easier and a little healthier
Our brand was created out of a desire to provide an alternative to fast food convenience and reintroduce people to home cooking. A healthy home-cooked meal is what brings families and friends together. We believe strongly in the value of simple pleasures. An evening spent cooking and sharing a meal of wholesome, nourishing foods is a memory in the making.
We believe a moment shared is price-less
Today, we have built upon our original mission and now in addition offer products that make the art of entertaining a simpler one. Entertaining and hosting family and friends are one of the great joys of life. Why waste a moment stuck in the kitchen? We offer products that free you up to socialize, while never sacrificing quality or taste.
Features:
• Automatic Vacuum Air Sealing Made Easy
- Save Time & Money with Smart Meal Prep
• Lab Tested to E ectively Increase Food Shelf Life
• Hassle-Free Operation & Simple Electric Plug-in Design
- Selectable Sealing Modes: Seals 'Dry' and 'Moist' Food
• Used for Dieting by Pre-Determining Food Portions
- Creates Strong, Air-Tight Bags via Heat-Sealing
• Re-Usable & Waterproof Air-Sealing Bags
• High-Power Suction Element
- Top Panel Control Center
- Soft Touch Digital Button Controls
• Stain-Resistant & Easy-to-Clean Housing
- Safe Placement on Any Kitchen Table/Countertop
- LED Indicator Lights
- Can Also be Used for Preserving/Waterproofing Non-Food Items
What's in the Box:
- Vacuum Sealer
- Wine Stopper Cork
- Air Suction Hose
• (5) Medium Vacuum Bags (7.8" x 11.8" -inches) (19.8 x 29.9-cm)
• (1) Extra Long Vacuum Bag Roll (7.8" x 79.0" -inches) (19.8 x 200-cm)
Technical Specs:
• High-Power Suction Element: 110 Watt
• Vacuum/Suction Strength: 12L/min
- Sealable Bags: Environment Friendly Polyamide
- Withstands Food Temperature of 212 Max.
• Construction Material: Engineered ABS
• Power Cord Length: 3.3' ft./1.0 m
- Power: 120V
- Dimensions (L x W x H): 14.1" x 6.0" x 3.0" -inches (35.8 x 15.2 x 7.62 -cm)
Initial Use Odor Warning
Your new appliance may produce a burnt plastic-like smell during initial use due to protective coatings. This odor is temporary and will vanish after a few uses. Use in well-ventilated areas.
IMPORTANT SAFETY INSTRUCTIONS READ CAREFULLY AND KEEP FOR FUTURE REFERENCE

WARNING: Cancer and Reproductive Harm - www.P65warnings.ca.gov
SAFEGUARDS & TIPS
Please read and follow these safety instructions carefully before using the Automatic Food Vacuum Sealer Electric Air Sealing Preserver System:
- Check if the local power supply voltage matches the voltage indicated on this appliance before use.
- Do not operate the appliance with a damaged power cord or plug. If there is any malfunction or damage, the cord or appliance must be returned to an authorized service center.
- To disconnect the power, unplug the cord from the electrical outlet. Do not pull the power cord.
- If the power cord is damaged, it must be replaced by the manufacturer, its service agent, or a qualified person to avoid hazards.
- Do not use an extension cord with the appliance.
- When the appliance is not in use or needs cleaning, unplug it from the power outlet first.
- Do not use the appliance on wet or hot surfaces.
- Do not immerse any part of the appliance, power cord, or plug in any liquid.
- Use only accessories or attachments recommended by the manufacturer.
- Use the appliance only for its intended purpose. Do not use the product outside the work area.
- Close supervision is required when children use the appliance. Do not allow children to play with the appliance.
- Allow the machine to rest for up to 60 seconds between each use to prevent damage to the unit.
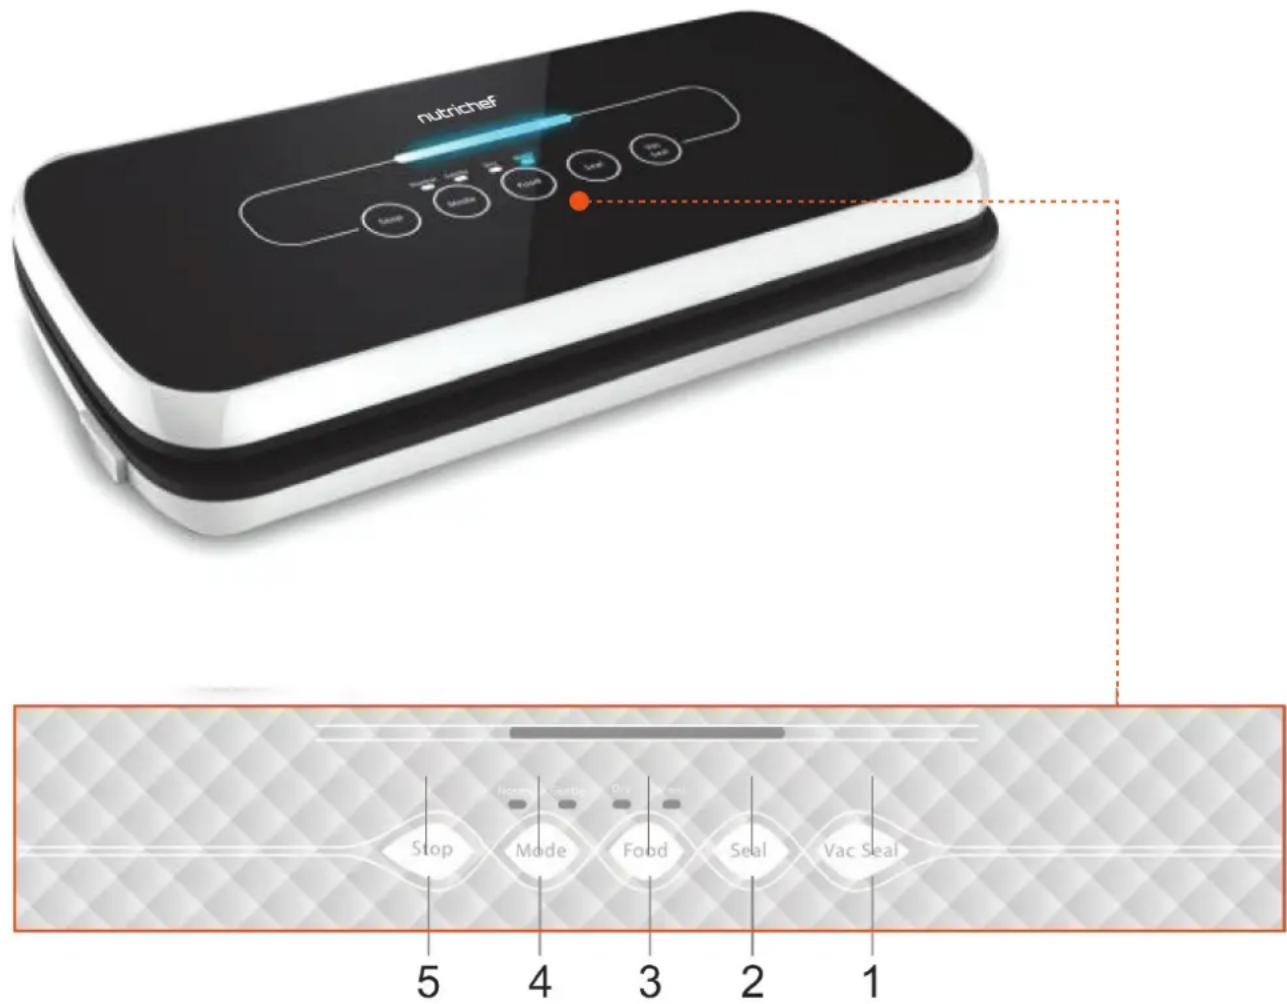
STRUCTURES AND FUNCTIONS
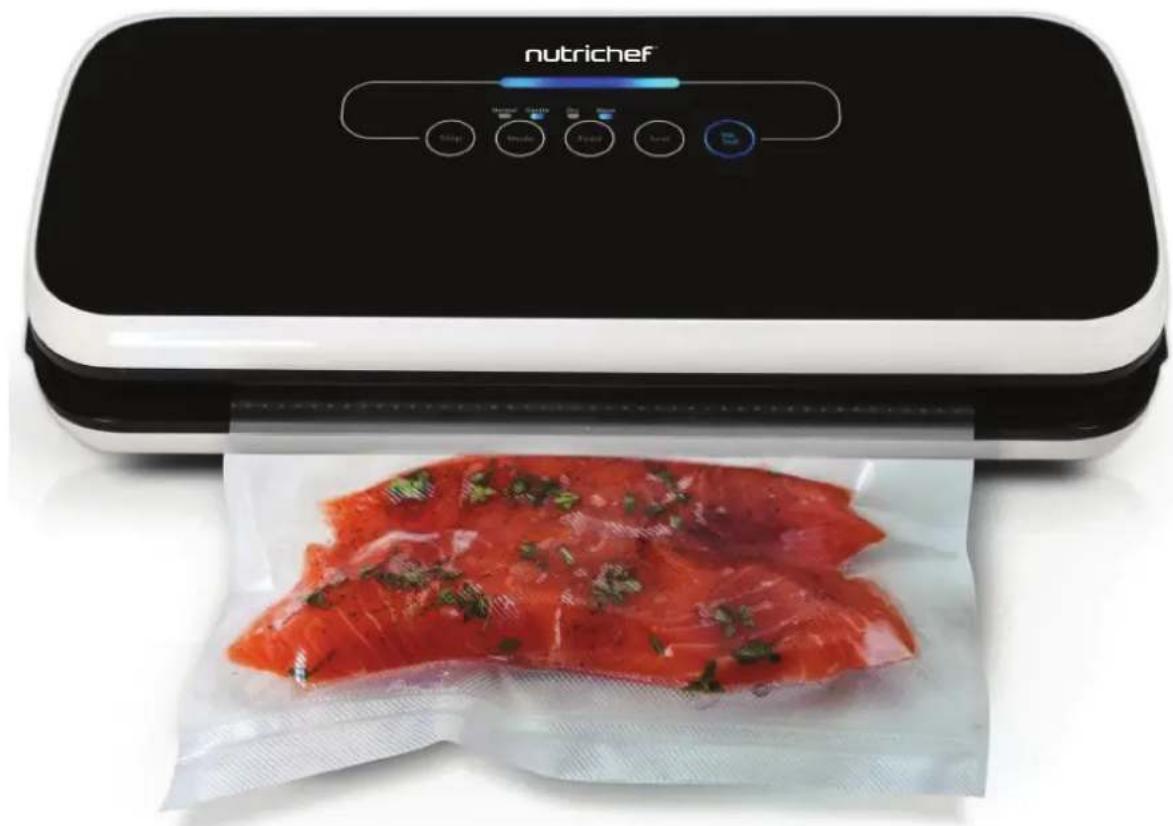
- Vac/Seal button: Press to vacuum and seal the bag (Allow up to a minute for the unit to cool down after each seal).
- Seal button (with LED): Press to seal the bag (Allow up to a minute for the unit to cool down after each seal).
- Food button: Two settings (Dry and Moist). Default is Dry; press to switch to Moist mode for different food types.
- Mode button: Two settings (Normal and Gentle). Default is Normal. When food is crumbly, switch to Gentle mode. Press the "Seal" button at any time to seal automatically.
- Stop button: Press to instantly stop vacuuming or sealing operations.
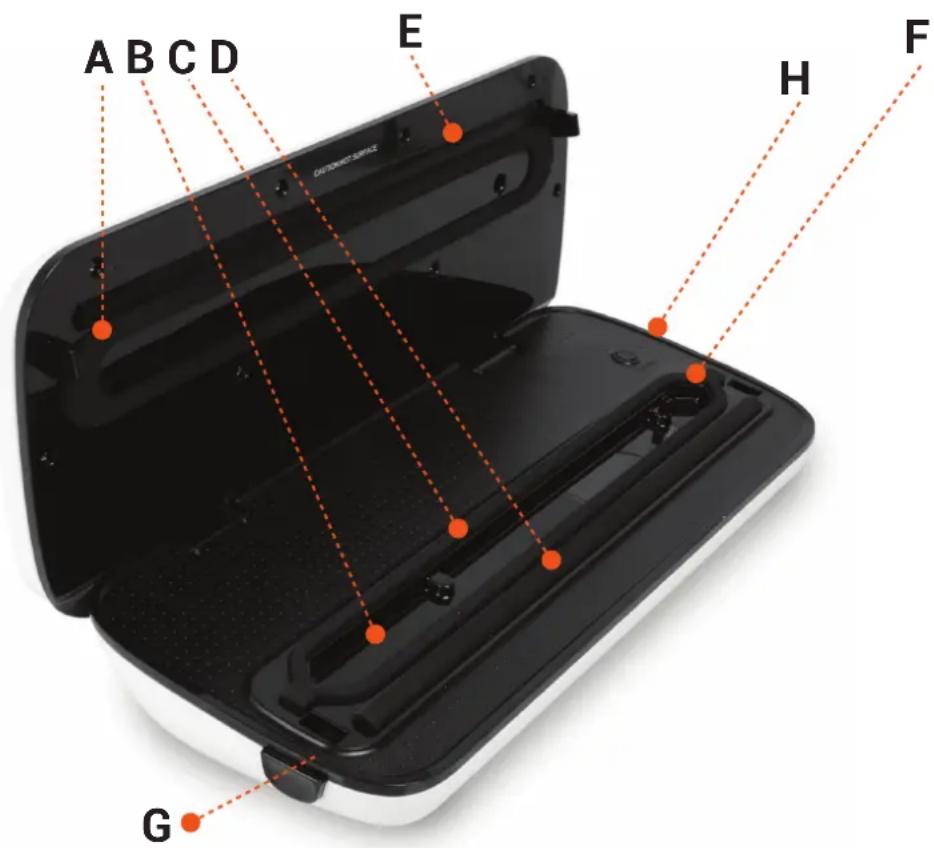
A. Locking Hook: Press cover down until it clicks to lock the bag in place.
B. Vacuum Chamber: Place bag within for proper vacuuming.
C. Lower Gasket: Ensures airtight seal, prevents leaks, improves suction.
D. Rubber Lip: Ensures flat sealing without damaging bag.
E. Sealing Bar: 3mm width for secure sealing.
F. Vacuum Nozzle: Insert hose gently for external vacuum canister, wine stopper, or accessories. Do not block nozzle during use to avoid damage.
G. Release Button: Press both sides to unlock lid and retrieve sealed food.
H. Canister Button: Activate vacuum packaging for external canisters.
OPERATING INSTRUCTIONS
natural_image
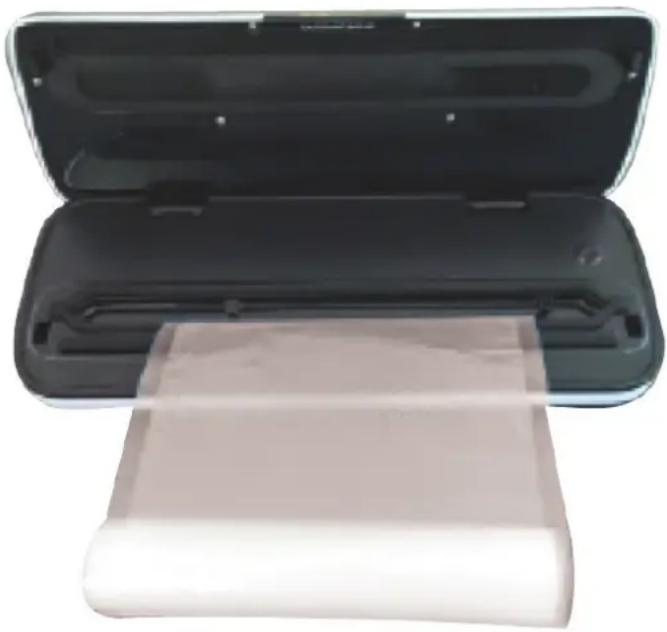
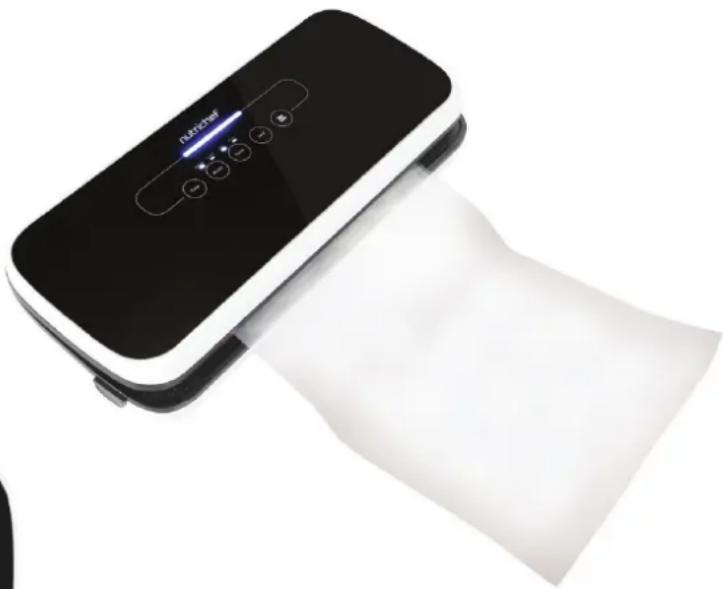
Open black plastic printer case with a blank sheet of paper placed inside (no text or symbols visible)B. Press cover down until you hear a click, indicating the locking hooks are secure. Choose vacuum or seal function.
A. Place bag opening in vacuum chamber, ensuring it does not cover the vacuum nozzle If using a roll, cut to size and seal one side first.
natural_image
Black and white digital device with a paper roll, showing its screen and control buttons (no visible text or symbols)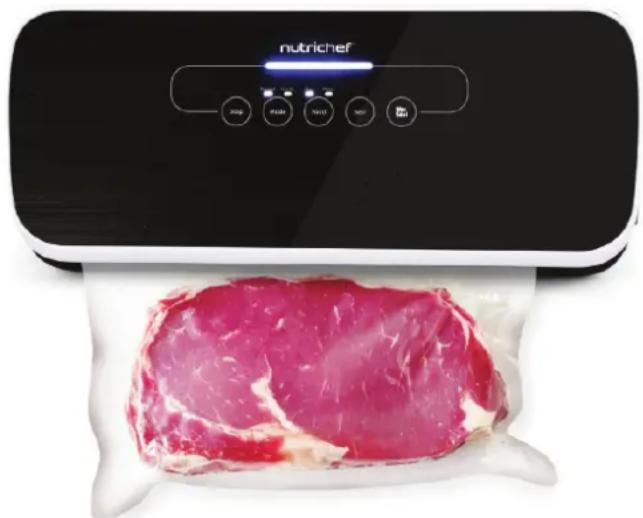
natural_image
Exterior view of a modern office building (no signage)C. After sealing, press the "Release Buttons" to unlock lid and retrieve food.
SEAL VACUUM BAGS AND VACUUM CANISTER SEAL PLASTIC BAGS
- Plug appliance in and switch on.
- Insert bag opening into vacuum chamber.
- Press side latches until they click.
- Press "Seal" button; LED lights and turns off when sealing is complete.
- Press "Release Button" to open and retrieve sealed bag.
PRESERVATION WITH VACUUM BAG
- Plug appliance in and switch on.
- Place items in bag.
- Clean and straighten bag opening.
- Insert bag into vacuum chamber.
- Press latches until they click.
- Press "Vacuum/Seal" button; LED lights until process completes.
- Press release buttons to open and retrieve sealed items.
Note: If the food is wet, please choose Moist mode.
PRESERVATION WITH VACUUM CANISTERS
- Place items in canister and cover with lid.
- Insert hose into appliance's Suck Air Hole and canister lid hole.
- Press "Canister" button to start vacuuming.
- Press "Stop" to halt process.
- Disconnect hose from canister and appliance.
- Press center button on canister lid to release air before opening.
TIPS ON USING CANISTERS:
- Remove lid before placing in microwave.
- Refrigerate canister for optimal preservation.
HELPFUL HINTS
- Do not overfill bags; leave ample length at opening for easy placement in vacuum chamber.
- Ensure bag opening is dry and flat for tight seals.
- Vacuum sealing does not replace refrigeration or freezing for perishable foods.
- Keep plastic bag openings clean and flat to prevent leaks.
- Stretch bulky item bags flat before vacuuming to avoid wrinkles.
- Use cushioning for sharp-edged items; consider canisters for these items.
- Leave 1-inch space in canisters or containers when using accessories.
- Pre-freeze fruits, blanch vegetables before vacuum sealing for best results.
- Allow 40-second intervals after sealing or vacuuming.
- Reseal bags if unsure of initial seal.
- Use PKVS18 brand Bags, Canisters, Containers, and Accessories for optimal results.
TIPS ON VACUUM SEALING WITH ACCESSORIES
Before using PKVS18 accessories (canister, container, wine stopper):
- Leave at least 1-inch space between objects and container edges.
- Wipe jar, container, or bottle edges clean and dry.
- Secure lid on canister or container; insert wine stopper into bottle.
- Use lid knob for vacuuming; turn off after process completes; remove hose.
CARE AND CLEANING
- Always unplug unit before cleaning.
- Do not immerse in water or liquid.
- Avoid abrasive cleaners; use damp cloth or mild soap for external cleaning.
- Wipe vacuum chamber with tissue for food or liquid residues.
- Dry thoroughly before next use.
- Clean liquid box periodically.
TROUBLESHOOTING
Nothing happens when vacuum packaging:
- Check power cord connection.
- Inspect power cord for damage.
- Test electrical outlet with another appliance.
- Ensure latches are locked.
- Verify bag placement in vacuum chamber.
- Allow appliance 40 seconds to cool between uses.
Note:
To prevent overheating, allow the appliance to cool for 40 seconds before using it again, and keep the cover open.
Air remains in bag after vacuum operation:
- Ensure bag opening is fully inside vacuum chamber.
- Check bag for leaks by submerging in water.
- Use a new bag if bubbles appear.
- For customized bags, check seal; reseal if wrinkled.
Air re-enters bag:
- Cut and reseal bag if wrinkles along seal.
- Wipe bag interior; reseal for food material or moisture.
- Discard spoiled food if gases are present.
Bag melts:
Wait 5 minutes for appliance to cool before vacuuming.
Register Product
Thank you for choosing Nutrichef. By registering your product, you ensure that you receive the full benefits of our exclusive warranty and personalized customer support. Complete the form to access expert support and to keep your Nutrichef purchase in perfect condition.

nutrichefkitchen.com/ register
nutrichef™

Questions or Comments?
We are here to help!
Phone: 1.718.535.1800
nutrichefkitchen.com/ContactUs
nutrichef™
natural_image
Exterior view of a modern Nutrichef air purifier with a raw fish wrapped in green herbs, placed on a white plastic sheet (no text or symbols visible on the dish itself)Acerca de NutriChef
natural_image
Line drawings of kitchen utensils including frying pan, rolling pin, pot, thermos, and cooking pot (no text or symbols)
natural_image
Line drawings of three kitchen utensils: a cup, a steamer, and a toaster (no text or symbols)
natural_image
Simple line drawings of four objects: a balance scale, a glass, a wine glass, and a wine glass (no text or symbols)
natural_image
Five simple line drawings of battery, capacitor, ring, and washer symbols (no text or labels)
natural_image
Simple line drawings of kitchen utensils including a plate, fork, knife, and knife (no text or symbols)
natural_image
Line drawings of three kitchenware items: a pot, a lid, and a kettle (no text or symbols)Características:
natural_image
Open black plastic printer with a blank sheet of paper placed inside (no text or symbols visible)natural_image
Black and white electronic device with a digital display showing control buttons, emitting a white sheet of paper (no visible text or symbols)natural_image
Exterior view of a modern office building (no signage)BOLSAS DE VACÍO SELLADAS Y RECIPIENTE ASPIRADOR DE PLÁSTICO PARA SELLAR AL VACÍO
nutrichefkitchen.com/ register
nutrichef™

nutrichefkitchen.com/ContactUs
nutrichef™
natural_image
Exterior view of a modern Nutrichef air grater with a bag of raw meat wrapped in green herbs, placed on top (no text or symbols on the food or background)STRUCTURES ET FONCTIONS
natural_image
Open black plastic printer case with a blank sheet of paper placed inside (no text or symbols visible)natural_image
Exterior view of a modern office building (no signage)natural_image
Black and white electronic device with digital display and paper roll, no visible text or symbolsnutrichefkitchen.com/ register
nutrichef™

nutrichefkitchen.com/ContactUs
- About NutriChef
- A mission born out of need
- We create products that make life a little easier and a little healthier
- We believe a moment shared is price-less
- Features:
- What's in the Box:
- Technical Specs:
- Initial Use Odor Warning
- IMPORTANT SAFETY INSTRUCTIONS READ CAREFULLY AND KEEP FOR FUTURE REFERENCE
- SAFEGUARDS & TIPS
- Please read and follow these safety instructions carefully before using the Automatic Food Vacuum Sealer Electric Air Sealing Preserver System:
- STRUCTURES AND FUNCTIONS
- OPERATING INSTRUCTIONS
- SEAL VACUUM BAGS AND VACUUM CANISTER SEAL PLASTIC BAGS
- PRESERVATION WITH VACUUM BAG
- PRESERVATION WITH VACUUM CANISTERS
- TIPS ON USING CANISTERS:
- HELPFUL HINTS
- TIPS ON VACUUM SEALING WITH ACCESSORIES
- CARE AND CLEANING
- TROUBLESHOOTING
- Nothing happens when vacuum packaging:
- Note:
- Air remains in bag after vacuum operation:
- Air re-enters bag:
- Bag melts:
- Register Product
- nutrichef™
- Acerca de NutriChef
- Características:
- BOLSAS DE VACÍO SELLADAS Y RECIPIENTE ASPIRADOR DE PLÁSTICO PARA SELLAR AL VACÍO
- STRUCTURES ET FONCTIONS
Brand : Nutrichef
Model : PKVS18SL
Category : Vacuum sealer