
M12VCB16E - Vacuum Cleaner MATSUI - Free user manual and instructions
Find the device manual for free M12VCB16E MATSUI in PDF.


| Product Type | Canister Vacuum Cleaner |
| Brand | Matsui |
| Model | M12VCB16E |
| Voltage | 230 V ~ 50 Hz |
| Power Consumption | 1200 W |
| Maximum Dust Bag Capacity | 1.5 L |
| Dust Bag Type | Paper (3 included) or optional cotton (not included) |
| Filtration | Interior filter (washable) and exhaust filter (washable) |
| Accessories Included | Hose, 3 tubes, floor brush, nozzle, 3 paper dustbags (1 pre-installed) |
| Cord Rewind | Yes, with button |
| Dustbag Full Indicator | Yes |
| On/Off Switch | Yes, on top of unit |
| Carrying Handle | Yes |
| Safety Features | Motor protection filter required; do not vacuum liquids or flammable substances |
| Maintenance | Empty dustbag when full; wash interior and exhaust filters with lukewarm water and dry thoroughly |
Frequently Asked Questions - M12VCB16E MATSUI
User questions about M12VCB16E MATSUI
0 question about this device. Answer the ones you know or ask your own.
Ask a new question about this device
Download the instructions for your Vacuum Cleaner in PDF format for free! Find your manual M12VCB16E - MATSUI and take your electronic device back in hand. On this page are published all the documents necessary for the use of your device. M12VCB16E by MATSUI.
USER MANUAL M12VCB16E MATSUI
natural_image
Exterior view of a gray vacuum cleaner with handle and clasp (no text or symbols visible)Contents
GB
Safety Warnings....4
Unpacking 19
Product Overview 20
Preparation Before Use....21
Operation....22
Power Off and Storage 22
Emptying the Dustbag 23
Cleaning the Interior Filter 25
Cleaning the Exhaust Filter....26
Specifications....27
Sisältö
FI
For your continued safety and to reduce the risk of injury or electric shock, please follow all the safety precautions listed below.
- Read all the instructions carefully before using the appliance and keep them for future reference.
- Retain the manual. If you pass the appliance onto a third party make sure to include this manual.
- Check that the voltage marked on the rating label matches your mains voltage.
- Consult your dealer if you are ever in doubt about the installation, operation or safety of your appliance.
- Do not remove any fixed cover as this may expose dangerous voltages.
- Do not allow any electrical appliance to be exposed to dripping or splashing.
• To protect against electrical shock, do not immerse mains cable, mains plug, or any part of the appliance in water or other liquids.
• Make sure the dust bag is properly installed before use.
- Never vacuum up water or any other liquids. Never vacuum up flammable substances and do not vacuum up ashes until they are cold.
- Never use the appliance without the motor protection filter. This damages the motor and shortens the life of the appliance.
• If a blockage is found in the brushes, hoses or tubes, it should be removed before use.
- Store and use the appliance well away from heat sources such as radiators or gas/electric fires.
- Do not run over the mains cable with the appliance.
- Close supervision is necessary when any appliance is used by or near children.
- This appliance can be used by children aged from 8 years and above and persons with reduced physical, sensory or mental capabilities or lack of experience and knowledge if they have been given supervision or instruction concerning use of the appliance in a safe way and understand the hazards involved. Children shall not play with the appliance. Cleaning and user maintenance shall not be made by children unless they are older than 8 and supervised.
- Keep the appliance and its cord out of reach of children less than 8 years.
• Children should be supervised to ensure that they do not play with the appliance.
- Do not point the hose, tube or any other accessory at the eyes, ears or mouth during operation.
- Unplug the appliance from the mains socket when it is not in use and before replacing filter.
- Allow the appliance to cool completely before cleaning or storing.
- Do not use the appliance for other uses than its intended use.
- The use of accessories not recommended by the appliance manufacturer may cause injuries.
- Do not use the appliance outdoors.
- Do not operate an appliance with a damaged mains cable or mains plug, or in an abnormal state. If the mains cable is damaged it must be replaced by the manufacturer, its service agent, or similarly qualified persons in order to avoid a hazard.
- Do not continue to operate the appliance if you are in any doubt about it working normally (e.g. abnormal noise, smell, smoke), or if it is damaged in any way - switch off, withdraw the mains plug and consult your dealer.
- Any maintenance and repair must be handled by a professional technician. Do not try to repair by yourself.
Remove all packaging from the unit. Retain the packaging. If you dispose of it, please do so according to any local regulations.
The following items are included:

natural_image
Line drawing of a mechanical device casing with circular ports and adjustment knobs (no text or symbols)The Main Unit

natural_image
Pure mechanical diagram showing a curved pipe or pipe passing through a circular path, with no text, numbers, or symbols present.Hose

natural_image
Simple line drawing of a vertical cylindrical object (no text or symbols)Tube x 3
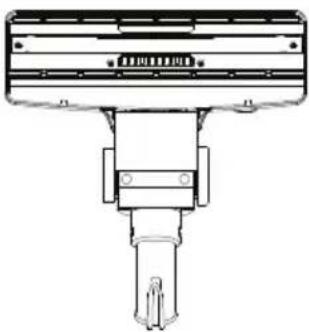
natural_image
Technical line drawing of a mechanical component with no visible text or symbolsFloor Brush
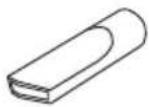
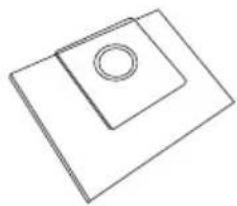
Nozzle
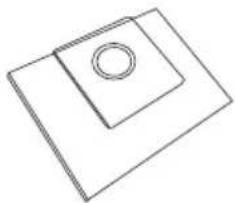
natural_image
Simple line drawing of a square with a circular top and bottom, no text or symbols present.Paper Dustbag x 3
(1 x already installed)

- Dustbag Full Indicator
- ON/OFF button
- Handle
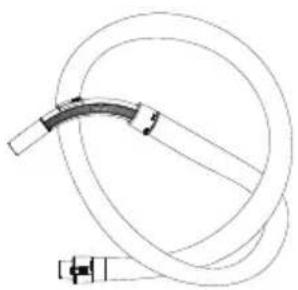
- Hose connection opening
- Cover
- Cord rewind button
- Clip
- Hose handgrip
-
Hose connector
-
Hose clip
- Tube
- Lever
- Interior filter
- Dustbag holder
- Paper Dustbag
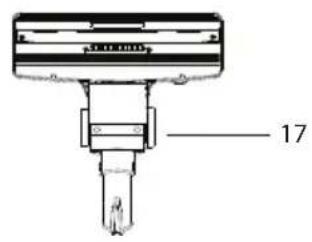
- Nozzle
- Floor Brush
-
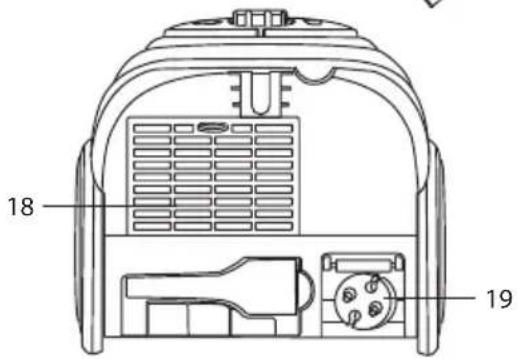
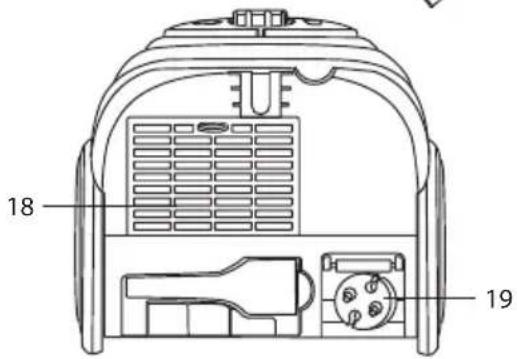
Exhaust filter grille
-
Mains plug
- Recessed handle
- Front wheel
- Rear wheel

Preparation Before Use
GB
- To connect the hose, insert the hose connector into the hose connection opening until you hear a click.

natural_image
Line drawing of a hand inserting a plug into a device (no text or symbols)- To connect the tube(s) to the handgrip of the hose, insert the narrow section into the wider section.

natural_image
Illustration of a hand holding a tool with an arrow indicating motion (no text or symbols)- The floor brush can be used with the brush lowered or raised. You may also connect the nozzle to vacuum corners, slots or grooves.

natural_image
Line drawing of a mechanical device pressing down on a grid-patterned surface (no text or symbols)
Make sure the dustbag and the dustbag holder are fully inserted, otherwise you will not be able to close the vacuum cleaner's cover.

Operation
- Hold the mains plug and pull the retractable mains cable out of the vacuum cleaner. Connect it to the mains socket.

The YELLOW mark indicates the ideal length for the extended cable. Do NOT extend the mains cable beyond the RED mark, which indicates the maximum mains cable length.
- Press the ON/OFF button on the top of the vacuum cleaner to turn it on.
- To move the vacuum from room to room, you can unplug and carry it either by the handle or the handgrip. Never use the mains cable to pull the vacuum cleaner.

Power Off and Storage
- Press the ON/OFF button on the top of the vacuum cleaner to turn it off.
- Unplug the mains cable from the mains socket.
- Press the cord rewind button to rewind the retractable mains cable.
-
Detach the floor brush / nozzle from the tube or hose.
-
Pull the tube(s) firmly to detach it from the hose.

natural_image
Line drawing of a mechanical device with a lever and handle, showing an arrow indicating motion (no text or symbols)
natural_image
Illustration of a hand holding a cylindrical tool with a curved grip, showing motion direction (no text or symbols)- Press both clips together on either side and pull firmly to disconnect the hose.
- Place the floor brush at the back of the vacuum cleaner.

natural_image
Line drawing of a hand holding a small object with directional arrows indicating motion (no text or symbols)
natural_image
Line drawing of a vacuum cleaner device with handle and wheels (no text or symbols)
Emptying the Dustbag

Always unplug the vacuum cleaner from the mains socket before emptying the dustbag.
- The dustbag indicator will be on to indicate that it is full and needs to be disposed of, or emptied.

natural_image
Simple line drawing of a curved container with a sun icon and circular patterns (no text or symbols)GB
-
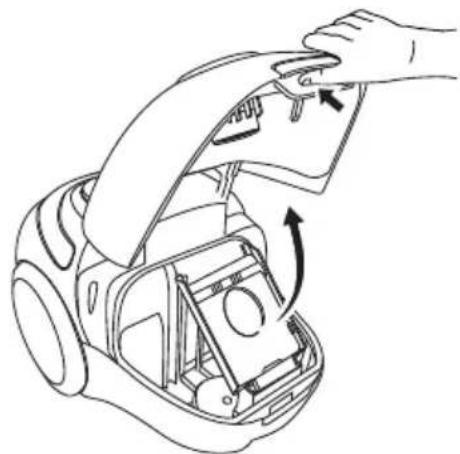
Squeeze the cover lever to open the vacuum cleaner cover.
-
Using the ridge on the dustbag holder, pull the dustbag holder out of the vacuum cleaner.
-
Slide the dustbag out of the dustbag holder. Dispose of the dustbag or empty it according to the type of dustbag you are using:
• There are 2 types of dustbag that can be used with this vacuum cleaner:
a) Paper dustbag (x 3 included): dispose of the whole paper dustbag completely in a bin. Insert a new paper dustbag into the dustbag holder.
b) Cotton dustbag (not included): carefully empty the contents of the cotton dustbag into a bin. Close the cotton dustbag and replace in the dustbag holder.
-
Make sure you have inserted a new or clean dustbag into the dustbag holder. Firmly and fully slide the dustbag holder (with dustbag) back into its slots.
-
Close the vacuum cleaner cover firmly; it will click.

natural_image
Line drawing of a robotic car interior with a hand adjusting the handle (no text or symbols)
natural_image
Line drawing of a car interior showing hand turning a component with arrows indicating motion (no text or symbols)
natural_image
Line drawing of hands installing or adjusting a device component (no text or symbols present)• Make sure the dustbag and the dustbag holder are fully inserted, otherwise you will not be able to close the vacuum cleaner's cover.
- If you are replacing the dustbag for the first time, replace the interior filter at the same time.

Ensure the vacuum cleaner is fully unplugged from the mains socket.
-
Open the vacuum cleaner cover by squeezing the button and lifting the cover.
-
Remove the dustbag holder and the dustbag.
-
Slide the white filter out up and out of its grooves.
-
Wash the filter in lukewarm water; allow it to dry thoroughly before replacing it. (The coarse side of the filter faces the motor grille; the soft side faces the dustbag.)

natural_image
Technical line drawing of a robotic vacuum cleaner's internal components being adjusted, showing hand placement and assembly steps (no text or symbols)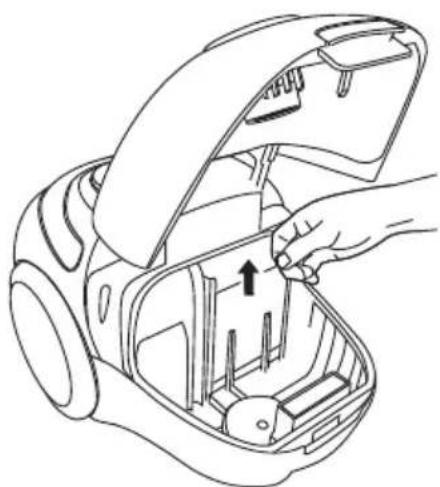
natural_image
Line drawing of a car interior with hand holding lid and internal compartments (no text or symbols)Cleaning the Exhaust Filter

Ensure the vacuum cleaner is fully unplugged from the mains socket.
-
Pull down on the recessed area of the grille; it will automatically pop down and out.
-
The white filter will come off with the grille.
-
Wash the filter in lukewarm water; allow it to dry thoroughly before replacing it.
-
Slot the grille and filter back into the grille slots. Push firmly; the grille will click when fitted fully back into place.

natural_image
Illustration of a hand inserting a component into a device housing (no text or symbols visible)
natural_image
Diagram of a device interior showing a grid-patterned panel, a plug socket, and a base block (no text or symbols)| Model M12VCB16E | |
| Voltage 230 V ~ 50 Hz | |
| Power Consumption | 1,200 W |
| Maximum Dust Bag Capacity 1.5 L |
We continually strive to improve our products, specifications may change without prior notice.
NO

Pakke opp
natural_image
Line drawing of a mechanical device casing with circular ports and mounting brackets (no text or symbols)Hovedenheten

natural_image
Pure mechanical diagram showing a curved pipe or pipe passing through concentric circles, with no text, numbers, or symbols present.Slange
natural_image
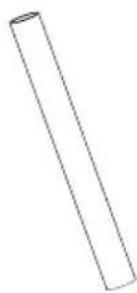
Simple line drawing of a vertical cylindrical object (no text or symbols)Teleskoprør x 3

natural_image
Technical line drawing of a mechanical component with no visible text or symbolsBørste for gulv

Munnstykke
natural_image
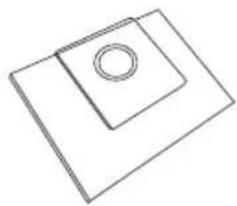
Simple line drawing of a square with a circular hole in the center (no text or symbols)Papirstøvpose x 3
(1 x allerede montert)
* Alle bilder i denne bruksanvisningen er kun for illustrasjon – detaljene kan være annerledes på den enkelte enheten.
NO

natural_image
Line drawing of a hand inserting a plug into a device (no text or symbols)- For å koble teleskoprøret til håndtaket på slangen setter du den smale delen inn i den store delen.

natural_image
Illustration of hands holding a cylindrical object with a black arrow indicating motion (no text or symbols)natural_image
Technical line drawing of a mechanical assembly with no visible text or symbols
natural_image
Line drawing of a mechanical device with a lever and handle, showing a left-hand rule (no text or symbols)natural_image
Illustration of a hand holding a tool with an arrow indicating motion (no text or symbols)NO
natural_image
Line drawing of a hand holding a small object with directional arrows indicating motion (no text or symbols)natural_image
Line drawing of a vacuum cleaner device with handle and wheels (no text or symbols)
Tømme støvposen

Koble alltid støvsugeren ut av stikkontakten før du tømmer støvposen.
natural_image
Simple line drawing of a curved container with a sun icon and circular patterns (no text or symbols)natural_image
Line drawing of a car interior with a hand adjusting the handle (no text or symbols)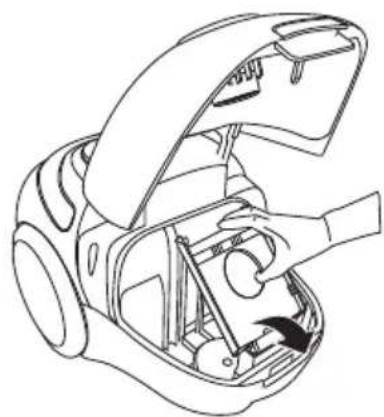
natural_image
Line drawing of a car interior showing the hood, engine compartment, and dashboard (no text or symbols)
natural_image
Line drawing of hands holding a device with arrows indicating motion (no text or symbols)
natural_image
Line drawing of a robotic car interior with hand and tool, showing mechanical components and motion arrows (no text or symbols)
natural_image
Line drawing of a car interior showing the hood, seat, and base plate (no text or symbols)
natural_image
Line drawing of a car interior showing hand holding tool, no text or symbols presentnatural_image
Line drawing of a hand inserting a plug into a device panel (no text or symbols)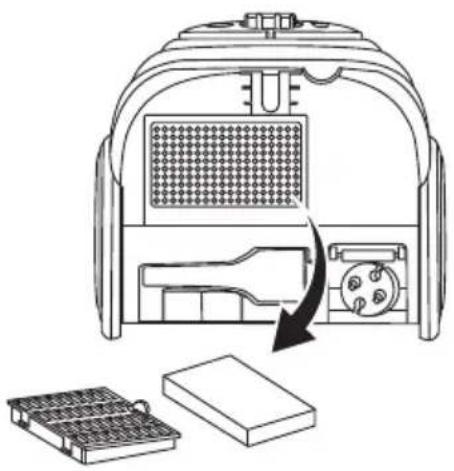
natural_image
Diagram of a device interior showing internal components and a downward arrow indicating a process or transformation (no text or symbols present)| Modell M12VCB16E | |
| Spenning 230 V ~50 Hz | |
| Strømforbruk 1,200 W | |
| Maksimalt volum for strøvposen 1,5 L |
natural_image
Line drawing of a mechanical component with circular ports and mounting base (no text or symbols)Huvudenheten

natural_image
Pure mechanical diagram showing a curved pipe or shaft with a circular motion path, no text or symbols present.Slang

natural_image
Simple line drawing of a vertical cylindrical object (no text or symbols)Teleskoprör x 3

natural_image
Technical line drawing of a mechanical component with no visible text or symbolsBorste för golv

Munstycke

natural_image
Simple line drawing of a square with a circular hole in the center (no text or symbols)natural_image
Simple line drawing of a vertical rod with a labeled length (11) on its side, no other text or symbols present.


natural_image
Line drawing of a hand inserting a plug into a device (no text or symbols)SE

natural_image
Illustration of a hand holding a cylindrical tool with an arrow indicating motion (no text or symbols)
natural_image
Technical line drawing of a mechanical assembly with no visible text or symbols
natural_image
Line drawing of a mechanical device with a lever and handle, showing a left-hand rule (no text or symbols)natural_image
Illustration of a hand holding a tool with an arrow indicating motion (no text or symbols)natural_image
Line drawing of a hand holding a car tire with arrows indicating motion (no text or symbols)SE
natural_image
Line drawing of a vacuum cleaner device with handle and wheels (no text or symbols)
natural_image
Simple line drawing of a curved container with a sun icon and circular patterns (no text or symbols)natural_image
Line drawing of a robotic car interior with a hand adjusting the handle (no text or symbols)
natural_image
Line drawing of a car interior showing hand operating the hood and handle (no text or symbols)
natural_image
Line drawing of hands installing or adjusting a device component (no text or symbols present)
natural_image
Line drawing of a hand adjusting a car interior with arrows indicating motion (no text or symbols)
natural_image
Line drawing of a vacuum cleaner's internal structure with a close-up view of its lid and base plate (no text or symbols)
natural_image
Line drawing of a robotic car interior with a hand adjusting the handle (no text or symbols)natural_image
Line drawing of a hand inserting a plug into a device housing (no text or symbols)- Det vita filtret lossnar nu med gallret.

natural_image
Diagram of an electronic device showing internal components and a downward arrow indicating rotation or assembly (no text or symbols present)natural_image
Line drawing of a mechanical device casing with circular ports and adjustment knobs (no text or symbols)Laite
natural_image
Pure technical line drawing of a curved pipe or tube with no text, numbers, or symbolsLetku

natural_image
Simple line drawing of a vertical cylindrical object (no text or symbols)natural_image
Technical line drawing of a mechanical component with no visible text or symbolsLattian harja

Suutin
natural_image
Simple line drawing of a square with a circular hole in the center (no text or symbols)natural_image
Line drawing of a hand inserting a plug into a device (no text or symbols)
natural_image
Illustration of a hand holding a cylindrical object with a black arrow indicating motion or force direction (no text or symbols)
natural_image
Line drawing of a mechanical device pressing down on a grid-patterned surface (no text or symbols)
natural_image
Line drawing of a mechanical device with a handle and lever, showing a left-hand rule for adjustment (no text or symbols)natural_image
Illustration of a hand holding a cylindrical tool with an arrow indicating motion (no text or symbols)natural_image
Line drawing of a hand adjusting a car seatbelt with directional arrows indicating movement (no text or symbols)FI
natural_image
Line drawing of a vacuum cleaner device with handle and wheels (no text or symbols)
natural_image
Simple line drawing of a curved object with a sun-like symbol on the left side (no text or labels)natural_image
Line drawing of a car interior with hand holding a tool, showing mechanical components and motion arrows (no text or symbols)
natural_image
Line drawing of a car interior showing the hood, engine compartment, and hand tool (no text or symbols)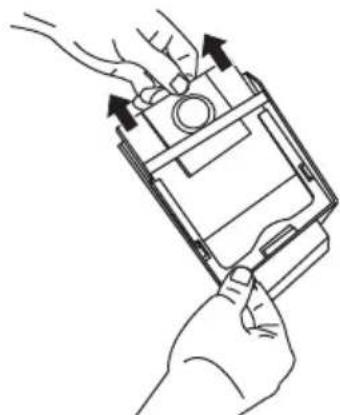
natural_image
Line drawing of hands installing or adjusting a device component (no text or symbols present)FI

natural_image
Line drawing of a robotic car interior with hand and tool, showing mechanical components and motion arrows (no text or symbols)
natural_image
Line drawing of a car interior showing the hood, seat, and camera module (no text or symbols)
natural_image
Line drawing of a robotic car interior with a hand adjusting the handle (no text or symbols)natural_image
Line drawing of a hand inserting a plug into a device panel (no text or symbols)natural_image
Diagram of a device interior showing internal components and a downward arrow indicating a process or transformation (no text or symbols present)natural_image
Simple line drawing of a T-shaped object with a labeled dimension (11) on its length (no other text or symbols)



natural_image
Line drawing of a hand inserting a plug into a device (no text or symbols)natural_image
Illustration of a hand holding a cylindrical tool with an arrow indicating motion (no text or symbols)natural_image
Technical line drawing of a mechanical assembly with no visible text or symbols
natural_image
Line drawing of a mechanical device with a lever and handle, showing an arrow indicating motion (no text or symbols)natural_image
Illustration of a hand holding a cylindrical tool with a curved blade, showing motion direction (no text or symbols)natural_image
Line drawing of a hand holding a small object with directional arrows indicating motion (no text or symbols)natural_image
Line drawing of a vacuum cleaner device with handle and wheels (no text or symbols)DK

natural_image
Simple line drawing of a curved container with a sun icon and concentric rings (no text or symbols)natural_image
Line drawing of a robotic car interior with a hand adjusting the handle (no text or symbols)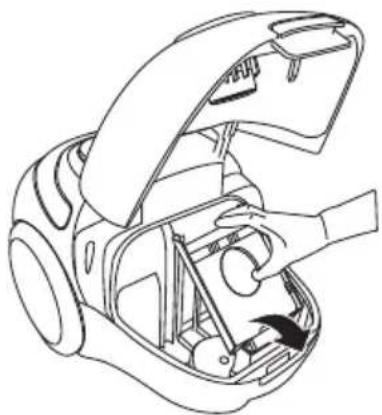
natural_image
Line drawing of a car interior showing hand operating the hood and handle (no text or symbols)
natural_image
Line drawing of hands installing or adjusting a device component (no text or symbols present)natural_image
Line drawing of a robotic car interior with hand adjusting the handle (no text or symbols)DK
natural_image
Line drawing of a robotic vacuum cleaner's internal structure with a close-up view of its base panel (no text or symbols)natural_image
Line drawing of a robotic car interior with hand holding tool (no text or symbols)natural_image
Line drawing of a hand inserting a component into a device housing (no text or symbols)DK
natural_image
Diagram of an electronic device showing internal components and a downward arrow indicating a process or transformation (no text or symbols present)The symbol on the product or its packaging indicates that this product must not be disposed of with your other household waste. Instead, it is your responsibility to dispose of your waste equipment by handing it over to a designated collection point for the recycling of waste electrical and electronic equipment. The separate collection and recycling of your waste equipment at the time of disposal will help conserve natural resources and ensure that it is recycled in a manner that protects human health and the environment.
For more information about where you can drop off your waste for recycling, please contact your local authority, or where you purchased your product.
NO
GB www.knowhow.com/knowledgebank
NO www.elkjop.no/support
www.lefdal.com/support
SE www.elgiganten.se/support
Brand : MATSUI
Model : M12VCB16E
Category : Vacuum Cleaner