CTC3860V - Washing machine Elvita - Free user manual and instructions
Find the device manual for free CTC3860V Elvita in PDF.


| Product Type | Freestanding Washing Machine |
| Brand | Elvita |
| Model | CTC3860V |
| Capacity | 8 kg |
| Spin Speed | 1200 rpm |
| Energy Efficiency Class | A |
| Dimensions (H x W x D) | 85 cm x 60 cm x 60 cm |
| Weight | 70 kg |
| Power Supply | 230 V / 50 Hz |
| Water Connection | Cold water only |
| Wash Programs | Cotton, Synthetics, Delicates, Wool, Quick Wash, Rinse & Spin |
| Control Type | Electronic with LED display |
| Noise Level (Wash/Spin) | 60 dB / 75 dB |
| Safety Features | Child lock, Overflow protection, Unbalanced load detection |
| Maintenance | Clean detergent drawer, Clean filter monthly, Descaling as needed |
| Installation Type | Freestanding |
| Color | White |
| Door Opening | Left hinge |
Frequently Asked Questions - CTC3860V Elvita
User questions about CTC3860V Elvita
0 question about this device. Answer the ones you know or ask your own.
Ask a new question about this device
Download the instructions for your Washing machine in PDF format for free! Find your manual CTC3860V - Elvita and take your electronic device back in hand. On this page are published all the documents necessary for the use of your device. CTC3860V by Elvita.
USER MANUAL CTC3860V Elvita
Before using this product, please read the user manual carefully. Save the user manual for future reference.

natural_image
Front view of a white washing machine with control panel and display (no visible text or symbols)Innehåll
natural_image
Symbol of a trash bin with crossed lines indicating no waste or discharge (no text or labels)Installation
natural_image
Simple line drawing of a washing machine with a black X mark on its side (no text or symbols)
WARNING!
natural_image
Illustration of a box with an arrow pointing upward, next to a magnified inset showing a small structure (no text or symbols)
OBS!
natural_image
Line drawing of a kitchen sink with faucet and sink (no text or symbols)

WARNING!

OBS!
Extra Dry/Normal Dry/Gentle Dry.

natural_image
Line drawing of a hand cleaning a washing machine (no text or symbols)
OBS!
natural_image
Line drawing of a hand gripping a curved object (no text or symbols)Underhåll
natural_image
Diagram of a mechanical valve or pump assembly with rotating arrows indicating motion (no text or symbols)
natural_image
Line drawing of a hand holding a tool with a brush (no text or symbols)
natural_image
Illustration of a hand using a tool to adjust or install a mechanical component (no text or symbols visible)
natural_image
Simple line drawing of a mechanical device with a magnified circular component (no text or symbols)
OBS!
natural_image
Symbol of a trash bin with crossed lines indicating no waste or discharge, and a solid black rectangle below (no text or labels)Installasjon
natural_image
Simple line drawing of a washing machine with a black X mark on its side (no text or symbols)natural_image
Illustration of a box with an arrow pointing upward, showing a close-up of a ship's hull (no text or symbols present)natural_image
Diagram of a mechanical component with curved arrows indicating motion or rotation (no text or symbols)Trekk til klemmemutteren

natural_image
Diagram of a mechanical assembly with a coiled pipe and directional arrow (no text or labels)
OBS!
natural_image
Line drawing of a kitchen sink with faucet and drain (no text or symbols)

ADVARSEL!
- Fest vannutløpsslangen med klemme eller buntbånd när du har installert den.
- Hvis vannutløpsslangen er for lang, anbefaler vi at overskytende lengde plasseres på egnet måte utenfor vaskemaskinen (hvis du trykker den inn i vaskemaskinen, kan dette forårsake ulyd).
Bruk
Kom i gang

FORSIKTIG!
Flytende vaskemiddel Pulvervaskemiddel Trekk ut vaskemiddelskuffen

FORSIKTIG!
- Fyll kun vaskemiddel i rom l når du har valgt forvask på enhet med denne funksjonen.

OBS!

OBS!
Stille inn Delay (utsatt start)
Extra Dry/Normal Dry/Gentle Dry.

natural_image
Line drawing of a hand cleaning a washing machine (no text or symbols)
OBS!
natural_image
Line drawing of a hand gripping a curved object (no text or symbols)Vedlikehold
natural_image
Diagram of a faucet with rotating arrows indicating clockwise motion (no text or symbols)
natural_image
Line drawing of a hand holding a tool with a brush (no text or symbols)
natural_image
Illustration of a hand using a tool to adjust or install a mechanical component (no text or symbols visible)
natural_image
Simple line drawing of a mechanical device with a circular component and lever (no text or symbols)
OBS!
Safety instructions 67
Safety Instructions 67
Installation 74
Product description 74
Installation
Operation 79
Quick start 79
Before each wash 80
Detergent dispenser 81
Control panel 83
Options
Other functions 87
Programs 88
Table of washing programs 89
Maintenance 90
Cleaning and care 90
Troubleshooting 94
Technical specifications 95
Product data sheets 96

CAUTION: HOT SURFACE!

CAUTION: RISK OF FIRE!
Safety instructions
For your safety, the information in this manual must be followed to minimize the risk of fire or explosion, electric shock, or to prevent property damage, personal injury or loss of life. Explanation of symbols:

Warning!
This combination of symbol and signal word indicates a potentially dangerous situation which may result in death or serious injury unless it is avoided.

Caution!
This combination of symbol and signal word indicates a potentially dangerous situation which may result in slight or minor injury or damage to property and the environment.

Note!
This combination of symbol and signal word indicates a potentially dangerous situation which may result in slight or minor injury.
Safety instructions

WARNING!
Electric shock!
- If the supply cord is damaged, it must be replaced by the manufacturer, the manufacturer's service agent or similarly qualified persons in order to avoid a hazard.
- The new hose sets supplied with the appliance should be used. Do not reuse old hose sets.
- Before carrying out any maintenance on the appliance, unplug it from the power socket.
- Always unplug the appliance and turn off the water supply after use. The max. inlet water pressure, in pascals. The min. inlet water pressure, in pascals.
- To ensure your safety, connect the plug to an earthed three-pole socket. Check carefully to ensure that your socket is properly and reliably earthed.
- Make sure that the appliance is connected to water and electrical supplies by a suitably qualified person in accordance with the manufacturer's instructions and local safety regulations.
- Unplug the appliance from the power socket before cleaning or maintenance.
- Do not use any socket with a current rating lower than that of the appliance. Never unplug the appliance with wet hands.
- Please remember to turn off the appliance after the clothes have been washed.
Safety instructions
Risk to children!
- The appliance can be used by children aged from 8 years and above and by persons with reduced physical, sensory or mental capabilities or lack of experience and knowledge if they have been given supervision or instruction concerning safe use of the appliance and they understand the hazards involved. Children must not be allowed to play with the appliance. Cleaning and user maintenance must not be carried out by children without supervision.
• Children under the age of 3 should be supervised to ensure that they do not play with appliance.
- There is a risk that animals and children may climb into the machine. Check the machine before every operation.
- Children must be supervised to ensure they do not play with the appliance.
- The glass door may get very hot during operation. Keep children and pets well away from the machine during the operation. The appliance must not be used in very wet rooms or rooms where there is a risk of explosive or caustic gases.
- Remove all packaging and transport bolts before using the appliance. Otherwise, serious damage may result.
Risk of explosion!
- Do not wash or dry articles that have been cleaned in, washed in, soaked in, or dabbed with
Safety instructions
combustible or explosive substances (such as wax, oil, paint, gasoline, degreasers, dry-cleaning solvents, kerosene, etc.). This may result in fire or explosion.
- The washer dryer is not to be used if industrial chemicals have been used for cleaning.
- The exhaust air must not be discharged into a flue that is used for exhausting fumes from appliances burning gas or other fuels.
- Rinse any contaminated items of laundry thoroughly by hand before washing.

CAUTION!
Installing the product!
- This appliance is for indoor use only.
- It is not intended for integration into a cabinet.
- The openings must not be obstructed by a carpet.
- The appliance must not be installed in a very wet room, or where there is a risk of explosive or caustic gases.
- If the appliance only has a single water inlet it must be connected to the cold water supply. If the appliance has two water inlets it must be correctly connected to the hot water and cold water supply.
- The plug must be accessible after installation.
- The appliance must not be installed behind a lockable door, a sliding door or a door with a hinge on the opposite side to that of the washer dryer.
- The appliance must not be installed in a humid
Safety instructions
location.
Risk of damage to the appliance!
- The domestic appliance is not intended for integration into a cabinet.
- Remove all packaging and transport bolts before using the appliance. Otherwise, serious damage may result.
- Your product is only intended for domestic use and is only designed for machine washing and drying.
- Do not climb up or sit on top of the machine.
- Do not lean against the door of the appliance.
-
Caution when moving the appliance:
-
The transport bolts must be reinstalled in the machine by a suitably qualified person.
- Any water in the appliance must be drained out before moving.
- Handle the machine carefully. Never hold protruding parts of the appliance while lifting. The door of the appliance must not be used to lift it during transport.
- This appliance is heavy. Transport with care.
- Do not hold on to the water drain hose while lifting.
- Please do not close the door with excessive force. If you find it difficult to close the door, please check that it is not obstructed by items of clothing.
- Do not wash rugs in the appliance.
Safety instructions
Operating the appliance!
- Before washing clothes for the first time, run a complete cycle without any clothes inside the appliance.
- Flammable and explosive or toxic solvents are forbidden. Gasoline and alcohol etc. must not be used as detergents. Only use detergents that are suitable for machine washing.
- Make sure that all pockets are emptied. Sharp and rigid items, such as coins, brooches, nails, screws or stones etc., may cause serious damage to this appliance.
- Please check whether the water inside the drum has been drained before opening its door. Do not open the door if there is any water visible.
• Take care to avoid scalding when hot water is being emptied from the appliance.
• After the program is finished, wait for two minutes before opening the door (some models). - Never refill with water by hand during washing.
- If fabrics are contaminated with cooking oil or hair care products, before being placed in a tumble dryer they must first be washed in hot water with extra detergent. This will reduce, but not eliminate, the risk of fire.
- Adequate ventilation must be provided to avoid the back flow of gases into the room from appliances that burn fuels, including open fires.
- Do not dry unwashed items in the appliance.
- Items that are contaminated with substances such
Safety instructions
as cooking oil, acetone, alcohol, petrol, kerosene, stain removers, turpentine, waxes and wax removers must be washed in hot water with extra detergent before being dried in the appliance.
- Items such as foam rubber (latex foam), shower caps, water-proof textiles, rubber-backed articles and clothes or pillows fitted with foam rubber pads should not be dried in the appliance.
- Fabric softeners, or similar products, should be used as specified in the fabric softener instructions.
- The appliance door cannot be opened during water extraction; it takes 15 seconds or more for water extraction to stop completely.
- There is no heating during the final part of a washer dryer cycle (cool-down cycle) to prevent damage to items of clothing.
- Remove all objects from pockets, such as lighters and matches, before using the appliance.
- WARNING: Never stop a washer dryer before the end of the drying cycle unless all items are quickly removed and spread out so that the heat is dissipated.
Packaging/Old appliance
This symbol indicates that this product should not be disposed of with other household waste throughout the EU. To prevent possible harm to the environment or human health from uncontrolled waste disposal, please recycle it responsibly to promote the sustainable reuse of material resources. To return your used device, please use the collection system or contact the retailer where the product was purchased. The retailer can collect the appliance and ensure it is recycled correctly.

natural_image
Symbol of a trash bin with crossed lines indicating no waste or discharge, and a solid black rectangle below (no text or labels)Installation
Product description


NOTE!
The product illustration is for reference only, your product may differ in appearance.
Accessories
  Transport hole plug Transport hole plug | 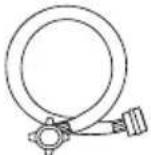 Supply hose cold water Supply hose cold water | 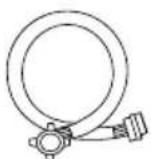 Supply hose hot water (optional) Supply hose hot water (optional) | 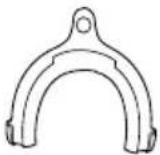 Drain hose support (optional) Drain hose support (optional) |  Owner's manual Owner's manual |
Installation
Installation area

WARNING!
• Stability is important to prevent the product from wandering!
• Make sure the appliance does not stand on the power cord.

Keep the following in mind when choosing a location to install the appliance:
- Rigid, dry, and level surface
- Avoid direct sunlight
- Sufficient ventilation
- Room temperature is above 0^ C
- Keep away from heat sources such as coal or gas appliances.

natural_image
Simple line drawing of a washing machine with a black X mark on its side (no text or symbols)Unpacking the washer dryer

WARNING!
- Packaging material (e.g. plastic films, Styrofoam) can be dangerous for children.
• There is a risk of suffocation! Keep all packaging well away from children.

natural_image
Illustration of a box with an arrow pointing upward, next to a small circular inset showing a ship silhouette (no text or symbols)- Remove the cardboard box and styrofoam packing.
- Lift the washer dryer and remove the base packing. Make sure the small triangular piece of foam has been removed together with the bottom piece. If not, lay the appliance on its side, then remove the small piece of foam from the bottom of the appliance.
- Remove the tape securing the power supply cord and drain hose.
- Remove the inlet hose from the drum.
Installation
Removing transport bolts

WARNING!
- You must remove the transport bolts from the rear of the appliance before using it.
- You'll need the transport bolts again if you move the product, so make sure you keep them in a safe place.
Remove the transport bolts as follows:
- Undo the 4 bolts with a spanner, then remove them.
- Plug the holes with the transport hole plugs.
- Keep the transport bolts for future use.

natural_image
Diagram of a hand using a tool to switch a device into a speaker chamber (no text or symbols present)Levelling the washer dryer

WARNING!
- The lock nuts on all four feet must be screwed tightly against the housing.
- Check that the feet are securely attached to the cabinet. If not, screw them fully in and tighten the nuts.
- Loosen the lock nuts and turn the feet until they each make contact with the floor.
- Adjust the feet and lock the nuts with a spanner, making sure the appliance is steady.

Installation
Connecting the water supply hose

WARNING!
• To prevent leakage or water damage, follow the instructions in this chapter!
- Do not kink, crush, modify or sever the water supply hose.
- For models equipped with a hot water inlet, connect this to a hot water tap using the hot water supply hose. Energy consumption will decrease automatically for some programs.
Connect the supply hose as indicated, there are two ways to connect the supply hose.
- Connection between ordinary tap and supply hose.

Loosen clamp nut and four bolts

natural_image
Pure mechanical diagram showing a rotating component with curved arrows indicating rotation (no text or symbols)Tighten clamp nut Pull back the slide bushing, push hose on to tap


natural_image
Diagram of a mechanical assembly with a coiled pipe and directional arrow (no text or labels)Connection complete
- Connection between screw coupling and supply hose.


Connect the other end of supply hose to the inlet valve at the rear of the appliance and turn the coupling clockwise until tight.

Installation
Drain hose

WARNING!
- Do not kink or stretch the drain hose.
- Position the drain hose properly, as it could lead to a water leak if it is damaged.
There are two ways to connect the drain hose:
- Insert in floor drain. 2. Connect it to a sink drain pipe.


NOTE!
If the machine has a drain hose support, please install it as shown.

natural_image
Line drawing of a kitchen sink with faucet and sink (no text or symbols)

WARNING!
- When you install the drain hose, secure it with a clip or cable tie.
- If the drain hose is too long, do not force it into the washing machine as it will cause unusual noises.
Operation
Quick start

CAUTION!
- Before washing, please make sure the appliance is correctly installed.
- Before washing for the first time, the washing machine must be run through a full cycle without any clothing inside.
1. Before washing


NOTE!
You only need to add detergent to “compartment I” after selecting pre-wash for appliances with this function.
2. Washing


NOTE!
If default is selected, step 3 can be skipped.
3. After washing
Buzzer beeps or "End" appears on the display.
Operation
Before each wash
- The ambient temperature in the room should be (0–40)°C. If used under 0°C, the inlet valve and drainage system may be damaged. The appliance should be placed in a room where the temperature is above 0°C to ensure the water supply hose and drain hose do not freeze.
- Please check the labels and the detergent instructions before washing. Use non-foaming or low-foaming detergent suitable for machine washing.


WARNING!
- If you wash single items it may unbalance the drum and cause vibration. We recommend that you add one or two more items to be washed together to ensure smooth spin-drying.
- Do not wash clothes that are contaminated with kerosene, petrol, alcohol or other flammable materials.
Operation
Detergent dispenser
I Pre wash detergent
II Main wash detergent
Softener


Liquid detergent Powder detergent Pull out the dispenser

CAUTION!
- You only need to add detergent to “compartment I” after selecting pre-wash for appliances with this function.

NOTE!
- If the detergent tends to become clogged in the detergent tray it is suggested that you add some water to dilute the detergent so that the tray does not overflow when filling with water.
- To get the best washing results and minimize water and energy consumption, choose a detergent that is suitable for your chosen washing temperature.
Operation
| Program | I | II | |
| Cotton | ● | ○ | |
| Cotton Eco | ● | ○ | |
| 1 Hour W/D | ● | ○ | |
| Jeans | ● | ○ | |
| Colours | ● | ○ | |
| Mix | ● | ○ | |
| Wool | ● | ○ | |
| Rinse & Spin | ○ | ||
| Dry Only | |||
| Spin Only | |||
| Delicate | ● | ○ | |
| Quick (15') | ● | ○ | |
| Sportwear | ● | ○ | |
| Baby Care | ● | ○ | |
| Synthetic | ● | ○ |
- Means essential
○ Means optional
Operation
Control panel


NOTE!
The chart is for reference only; your appliance may differ slightly.
① On/Off
Turns appliance on or off.
② Start/Pause
Press the button to start or pause the washing cycle.
③ Option
This allows you to select an additional function and will light up when selected.
④ Programs
Available according to the laundry type.
⑤ Display
The display shows the settings, estimated time remaining, options and status messages for your appliance. The display will remain on throughout the cycle.


Operation
Delay
Option
Delay
To set the Delay function:
- Select a program
- Press the Delay button to choose the time (between 0 and 24 hours)
- Press [Start/Pause] to start the delay timer


On/Off Choose the pro-
gram
Set the time Start
Cancelling the Delay function:
Press the [Delay] button until the display shows OH. This must be set before you start the program. If the program has already started, press the [On/Off] button to reset the program.

CAUTION!
If there is any interruption in the power supply while the machine is operating, a special memory stores the selected program. When the power is restored you simply press the [On/Off] button to resume the program.
Temp.
Temp./Temperature
Press the button to select the temperature (Cold, 20°C, 30°C, 40°C, 60°C, 90°C).
Operation
Speed
Speed
Press the button to change the speed.
1400:0-400-600-800-1000-1200-1400
| Programs Default speed (rpm) | |
| 1400 | |
| Cotton 1400 | |
| Cotton Eco 800 | |
| Baby Care 1000 | |
| Delicate 600 | |
| Mix 1000 | |
| Wool 400 | |
| Colours 800 | |
| Sportwear 800 | |
| Jeans 800 | |
| Spin Only 800 | |
| Rinse & Spin 800 | |
| Dry Only 1400 | |
| Quick (15') 800 | |
| Synthetic 1200 | |
| 1 Hour W/D 1400 | |
Operation

Dry setting
Press the Dry button repeatedly to choose the dry setting:
Extra Dry/Normal Dry/Gentle Dry.

Extra Dry: Choose this setting if you need to wear items as soon as possible.

Normal Dry: The normal setting for drying clothes.

Gentle Dry: For delicate fabrics that require gentle drying.

NOTE!
- Drying hints
– Clothing can be dried after spinning
- To ensure efficient drying sort clothing according to the fabric type and drying time.
- Select a suitable drying time for synthetic fabrics.
- If you want to iron clothes after drying, please set them aside for a while to cool.
- Items not suitable for drying:
- Particularly delicate items such as synthetic curtains, wool and silk, garments with metal inserts, nylon stockings, bulky clothes such as anoraks, bed covers, quilts, sleeping bags and duvets must not be machine-dried.
- Items that contain padding made from foam-rubber or similar materials must not be machine-dried.
- Fabrics that contain traces of setting lotions or hair sprays, nail solvents or similar solutions must not be machine-dried, to avoid the formation of harmful vapours.
Operation

Other functions
Muting the buzzer
To activate the buzzer function, press the buttons again for 3 seconds. The setting will be remembered until the next reset.

On/Off

Temp.
Press the [Temp.] button for 3 seconds to mute the buzzer.

CAUTION!
When the buzzer is muted it you will not hear it any more.

My Cycle
Memory for frequently used programs. Press [♥/♥] for 3 seconds to add the current program to memory. The default is Cotton.

Child Lock
To avoid accidental operation by children.

flowchart
graph LR
    A["①"] --> B["▶"]
    B --> C["Temp."]
    C --> D["Speed"]
    D --> E["/"]
    E --> F["Speed"]
    E --> G["Delay"]
On/Off Start Press [Temp]/[Delay] and [Speed] for 3
seconds until the buzzer beeps.

CAUTION!
- Press both buttons again for 3 seconds to release the child lock.
- The child lock will lock all buttons except [On/Off].
- When the power is turned off, the child lock will be released.
• However on some models, the child lock will remain effective when the power is restored.
Operation
Programs
Programs can be selected according to the laundry type.
| Programs | |
| Cotton Hard-wearing textiles, heat-resistant textiles made of cotton or linen. | |
| Cotton Eco This improves washing performance and increases washing time. | |
| Synthetic | For washing synthetic items, such as shirts, coats and blended fabrics. When knitted garments are washed the amount of detergent should be reduced to avoid excessive foaming. |
| Baby Care | For washing baby clothes. This improves washing and rinsing performance to protect baby's skin. |
| Jeans Specially for jeans. | |
| Mix Mixed load consisting of textiles made of cotton and synthetics. | |
| Colours For washing brightly coloured clothes. This protects colours better. | |
| Sport Wear For washing active wear. | |
| Quick | Extra-short program. Suitable for lightly soiled washing and small amounts of laundry. |
| Delicate | For delicate, washable textiles, e.g. made of silk, satin, synthetic fibres or blended fabrics. |
| Wool | Hand or machine-washable wool or wool-rich textiles. Especially gentle wash program to prevent shrinkage, with longer program pauses. |
| Spin Only Extra spin with selectable spin speed. | |
| Rinse & Spin Extra rinse with spin. | |
| Dry Only | Select this to dry clothes. The temperature and drying time should be chosen to suit the load. |
| 1 Hour W/D | For small amounts of synthetic items or shirts. The load limit is 1 kg (about 4 shirts). When you have an urgent appointment but no more clean shirts left in your cupboard, this program will help you. Time duration is only 1 hour including wash and dry. Note: This program is not suitable for large towels or jeans, as they take longer to dry. |
Operation
Table of washing programs
| Program | Washing/Drying load (kg) | Temp. (°C) | Default time (H) |
| 8.0 Default | |||
| Cotton Eco 8.0 30 1:07 | |||
| Sport Wear -- 1:19 | |||
| Quick (15') 2.0 Cold 0:15 | |||
| Delicate 2.5 30 1:00 | |||
| Wool 2.0 40 1:07 | |||
| Colours -- 1:00 | |||
| Jeans | -- 1:48 | ||
| Spin Only | 8.0 | - 0:12 | |
| Rinse & Spin | 8.0 | - 0:31 | |
| Baby Care 8.0/4.0 | 60 1:45 | ||
| Dry Only -/6.0 | - 4:28 | ||
| Mix | 8.0/4.0 | 40 1:13 | |
| Synthetic -- 2:20 | |||
| Cotton | 8.0/6.0 | 40 2:40 | |
| 1 Hour W/D | 1.0/1.0 | Cold 1:00 | |
• Energy efficiency class is A. Energy test program: Cotton ECO 40°C/60°C. Speed: maximum speed /default speed. Half load for 8.0 kg machine: 4.0 kg.
- “Cotton Eco 60°C/40°C” is the standard washing program and “Dry only” is the standard drying program to which the information on the label and in the data sheet relates It is suitable for washing normally soiled cotton laundry and is the most efficient program in terms of combined energy and water consumption for washing this type of cotton laundry. The actual water temperature may differ from the declared cycle temperature.

NOTE!
- The parameters in this table are only for user guidance. The actual values may differ from the values in the table above.
- Programs that have the ⚙ symbol can be combined with drying.
Maintenance
Cleaning and care

WARNING!
Before starting maintenance, please unplug the machine and close the tap.
Cleaning the cabinet
Correct maintenance of the washer dryer can extend its working life. The exterior can be cleaned with diluted non-abrasive neutral detergents when necessary. If there is any water overflow, use a cloth to wipe it up immediately. Do not use sharp cleaning tools.

natural_image
Line drawing of a hand cleaning a washing machine (no text or symbols)
NOTE!
Do not use formic acid or solvents, such as alcohol and chemical products, etc.
Cleaning the drum
Any rust that is left inside the drum by metal articles must be removed immediately using a chlorine-free detergent. Never use steel wool.

NOTE!
Do not put laundry in the washing machine while cleaning the drum.
Cleaning the door seal and glass
Wipe the glass and seal after each wash to remove lint and stains. If lint builds up it can cause leaks. Remove any coins, buttons and other objects from the seal after each wash.

natural_image
Line drawing of a hand gripping a curved object (no text or symbols)Maintenance
Cleaning the inlet filter

NOTE!
Inlet filter must be cleaned if the water supply becomes restricted.
Washing the filter in the tap:
- Turn off the tap.
- Remove the water supply hose from the tap.
- Clean the filter.
- Reconnect the water supply hose.
Washing the filter in the washer dryer:
- Unscrew the water supply pipe from the rear of the machine.
- Pull out the filter with long-nose pliers and reinstall it after washing it.
- Use a brush to clean the filter.
- Reconnect the water supply pipe.

natural_image
Diagram of a faucet with rotating arrows indicating clockwise motion (no text or symbols)
natural_image
Line drawing of a hand holding a tool with a screwdriver (no text or symbols)
natural_image
Illustration of a hand using a tool to adjust or install a component, with no visible text or symbols.
natural_image
Simple line drawing of a mechanical device with a circular component and handle (no text or symbols)
NOTE!
- If you cannot get the filter clean with a brush, it can be removed and washed separately.
- Reconnect, turn on the tap.
Cleaning the detergent dispenser
- Press down on the button indicated by the arrow inside the dispenser drawer.
- Lift up the clip, remove the softener cover and wash all the grooves with water.
- Refit the softener cover and push the drawer into position.


natural_image
Line drawing of a mechanical device with a faucet inserted into a basin (no text or symbols)Clean the dispenser drawer under water

natural_image
Line drawing of a hand inserting a plug into a socket (no text or symbols)Clean inside the recess with an old toothbrush

natural_image
Technical line drawing of a mechanical or electrical component with internal compartments and a handle (no text or symbols)Insert the dispenser drawer

NOTE!
Do not use alcohol, solvents or chemical products to clean the machine.
Maintenance
Cleaning the drain pump filter

WARNING!
- Be careful of the hot water!
- Allow detergent solution to cool down.
- Unplug the machine to avoid electrical shock before washing.
- The drain pump filter is designed to trap fibres and small foreign objects from laundry.
- Clean the filter periodically to ensure normal operation of the washer dryer.

CAUTION!
- Make sure the valve cap and emergency drain hose are reinstalled properly; fittings must be correctly aligned otherwise water may leak.
- Some machines do not have an emergency drain hose, so steps 2 and 3 can be skipped. Rotate lower filter cover to make water run into basin.
- When the appliance is in use and depending on the program selected there may be hot water in the pump. Never remove the pump cover during a wash cycle, always wait until the appliance has finished the cycle and is empty. When replacing the cover, ensure it is securely re-tightened.
Maintenance
Cleaning the drain pump filter


Maintenance
Troubleshooting
The appliance does not start or it stops during operation. First try to find a solution to the problem. If you cannot solve it yourself, contact the service centre.
| Description Reason Solution | ||
| Washer does not start | Door is not closed properly | Close the door and try to start again. Check if clothing is stuck |
| Door can't be opened | Washer safety interlock is working | Disconnect the power, restart the appliance |
| Water leak | Connection between inlet hose or outlet hose is not tight | Check and tighten water hoses. Clean up outlet hose |
| Detergent residue in the tray | Detergent is damp or clumped | Clean and wipe the detergent tray |
| Indicator or display does not come on | The power PC board or harness has a connection problem | Check that the power is turned on and the plug is inserted correctly |
| Abnormal noise | Check if the fixing bolts have been removed.Check that the appliance is installed on a solid and level floor | |
| E30 | Door is not closed properly | Close the door and try to start again. Check if clothing is stuck |
| E10 | Water injecting problem while washing | Check if the water pressure is too low, Straighten the water hose. Check if the inlet valve filter is blocked |
| E21 | Water takes too long to drain | Check if the drain hose is blocked |
| E12 | Water overflowing Restart the washer | |
| EXX | Other problem | Please try again, then call service line if problem persists |

NOTE!
After trying the suggested solution, turn on the appliance. If the problem persists or the display shows other alarm codes again, call the service line.
Maintenance
Technical specifications
| Max. current 10 A | |
| Standard water pressure | 0.05 MPa ~ 1 MPa |

| Model CTC3860V | |
| Power supply 220–240 V~, 50 Hz | |
| Washing capacity 8.0 kg | |
| Drying capacity 6.0 | |
| Dimensions (W*D*H mm) 595*475*850 | |
| Weight 65 kg | |
| Rated power 1900 W | |
| Drying power 1300 W | |
Maintenance
| Model CTC3860V | |
| Washing capacity 8 kg | |
| Drying capacity 6 kg | |
| Spin speed 1400 rpm | |
| Energy efficiency class 1 | A |
| Energy consumption per cycle (to wash and dry a full-capacity wash load at 60°C) | 5.44 kWh/cycle |
| Water consumption per cycle (total) 152 l/cycle | |
| Annual energy consumption (using the dryer) 2 | 1088 kWh |
| Annual water consumption (using the dryer) 2 | 30,400 l |
| Annual energy consumption (never using the dryer) 3 | 192 kWh |
| Annual water consumption (never using the dryer) 3 | 12,800 l |
| Washing performance class 4 | A |
| Spin-drying efficiency class 5 | A |
| Standard washing cycle 6 | Cotton Eco |
| Energy consumption for Cotton Eco 60°C with full load (washing) 0.88 kWh/cycle | |
| Water consumption for Cotton Eco 60°C with full load (washing) 64 l/cycle | |
| Remaining moisture content for Cotton Eco 60°C with full load (washing) 44% | |
| Program duration for Cotton Eco 60°C with full load (washing) 305 min | |
| Energy consumption for Dry with full load (drying) 4.56 kWh/cycle | |
| Water consumption for Dry with full load (drying) 88 l/cycle | |
| Remaining moisture content for Dry with full load (drying) 0% | |
| Program duration for Dry with full load (drying) 340 min | |
| Power consumption when switched off 0.5 W | |
| Power consumption in standby mode 1.0 W | |
| Noise level during washing | 58 dB(A) |
| Noise level during spinning | 78 dB(A) |
| Noise level during drying | 62 dB(A) |
Maintenance

NOTE!
- Program setting for testing in accordance with applicable standard EN 50229:2015 and Commission Directive 96/60/EC.
- When using the test programs, wash the specified load using the maximum spin speed.
- The actual parameters will depend on how the appliance is used, and may differ from the values shown in the table above.
- When the standard program (drying) is tested, the load is composed of two parts that are tested separately. The energy consumption, water consumption and program duration are the total of these two parts.
- This appliance is equipped with an energy-saving system. The duration of standby mode is less than 1 minute.
Remarks
① The energy efficiency class is from A (highest efficiency) to D (lowest efficiency).
② Estimated annual energy and water consumption for a four-person household, always using the dryer (based on 200 cycles) per year.
③ Estimated annual energy and water consumption for a four-person household, never using the dryer (based on 200 cycles) per year. Water consumption per year based on 220 standard washing cycles for standard program at 60°C and 40°C with full and partial load. Actual water consumption will depend on how the appliance is used.
④ Washing performance class.
⑤ Spin-drying efficiency is ranked from class G (least efficient) to class A (most efficient).
⑥ The standard program is the standard washing program. This program is suitable for washing normally soiled cotton laundry and is the most efficient program in terms of combined energy and water consumption for washing this type of cotton laundry. The actual water temperature may differ from the declared cycle temperature.
Please choose the most suitable type of detergent for your chosen washing temperatures to get the best washing performance with minimum water and energy consumption.

natural_image
Gray circular icon with three white gear symbols, no text or labels present.GARANTI WARRANTY
Quality warranty applies to consumer

ELVITA
- Innehåll
- Installation
- WARNING!
- OBS!
- Underhåll
- Installasjon
- ADVARSEL!
- Bruk
- Kom i gang
- FORSIKTIG!
- Vedlikehold
- Safety instructions 67
- Installation 74
- Operation 79
- Maintenance 90
- Safety instructions
- Caution!
- Note!
- Electric shock!
- Risk to children!
- Risk of explosion!
- Installing the product!
- Risk of damage to the appliance!
- Operating the appliance!
- Packaging/Old appliance
- Product description
- Accessories
- Installation area
- Unpacking the washer dryer
- Removing transport bolts
- Levelling the washer dryer
- Connecting the water supply hose
- Drain hose
- Operation
- Quick start
- Before washing
- Washing
- After washing
- Before each wash
- Detergent dispenser
- Control panel
- Delay
- Option
- Cancelling the Delay function:
- Temp.
- Temp./Temperature
- Speed
- Dry setting
- Other functions
- Muting the buzzer
- My Cycle
- Child Lock
- Programs
- Maintenance
- Cleaning the cabinet
- Cleaning the drum
- Cleaning the door seal and glass
- Cleaning the inlet filter
- Cleaning the detergent dispenser
- Cleaning the drain pump filter
- Troubleshooting
- Technical specifications
- Remarks
- GARANTI WARRANTY
Brand : Elvita
Model : CTC3860V
Category : Washing machine