
LifeForce+ NSW-16 - Smartwatch Naxa - Free user manual and instructions
Find the device manual for free LifeForce+ NSW-16 Naxa in PDF.


| Product Type | Smartwatch |
| Brand | Naxa |
| Model | LifeForce+ NSW-16 |
| Dimensions (approx.) | 45 x 38 x 11 mm (case only) |
| Weight (approx.) | 50 g (including strap) |
| Display | 1.3-inch TFT LCD, touchscreen |
| Battery | Lithium-ion 300 mAh, rechargeable via USB magnetic charger |
| Charging Time | Approximately 2 hours |
| Battery Life | Up to 7 days typical use, 10 days standby |
| Water Resistance | IP67 (splash and dust resistant, not for swimming) |
| Connectivity | Bluetooth 5.0 |
| Compatibility | Android 5.0+ and iOS 9.0+ |
| Sensors | Heart rate monitor, accelerometer, pedometer |
| Main Functions | Step counting, heart rate tracking, sleep monitoring, notifications (calls, messages), sedentary reminder, stopwatch, alarm |
| Strap Material | Silicone, adjustable length |
| Cleaning | Wipe with a soft, dry cloth. Avoid harsh chemicals. Remove strap for thorough cleaning. |
| Safety | Not a medical device. Consult a doctor for health metrics. Keep away from children under 3. |
| Spare Parts | Available from Naxa support: charging cable, straps, screen protectors |
| Repairability | Battery and strap replaceable by user. Other repairs by authorized service center. |
| Warranty | 1 year limited warranty from date of purchase |
Frequently Asked Questions - LifeForce+ NSW-16 Naxa
User questions about LifeForce+ NSW-16 Naxa
0 question about this device. Answer the ones you know or ask your own.
Ask a new question about this device
Download the instructions for your Smartwatch in PDF format for free! Find your manual LifeForce+ NSW-16 - Naxa and take your electronic device back in hand. On this page are published all the documents necessary for the use of your device. LifeForce+ NSW-16 by Naxa.
USER MANUAL LifeForce+ NSW-16 Naxa
THE NEW GENERATION IN TECHNOLOGY
LifeForce+ Smart Watch with Bluetooth®
NSW-16

Instruction Manual
Please read carefully before use and keep for future reference.
Table of Contents
Thank You 3
In the Box 3
Features 4
Getting Started 5
What You'll Need ....5
Charging the Module 5
Removing the Module from the Band .... 5
Installing the Companion App.
Connecting to a Smartphone 7
Disconnecting the Unit 7
Operating the Unit 8
Functions 8
Watch Face 8
Pedometer 8
Heart Rate Monitor 9
Messages 9
Multi-Sport Mode 10
More 10
About 11
Power Off ....11
Find Phone 11
Gesture Control ....11
Warnings and Precautions 17
Support 20
Thank You
We know you have many choices when it comes to technology; thank you for choosing us here at Naxa Electronics. Established in 2001 in Los Angeles, California, we are dedicated to delivering products that entertain and delight.
We trust that you will be happy with your purchase. Please read this manual carefully and save it for reference. You may also find the latest FAQ, documentation, and other product material at our website. Come visit us on the web at www.naxa.com and see all that we have to offer!
In the Box
Please take a moment to make sure that you have everything in the list below. Although we make every effort to ensure that each Naxa device is securely packed and sealed, we know a lot can happen in between us and you. If anything is missing, check back with your local retailer to get immediate assistance. If they cannot help you, please contact our Naxa Support team at www.naxa.com/naxa_support.
• NSW-16 LifeForce+ Smart Watch
- Adjustable fitness band
- USB charge cable
Features
- Downloadable companion app in the Google Play Store™ or Apple App Store™
- Step counter and calorie tracking helps you improve your health with easy to reach goal and activity monitoring
- Get energized! Sleep monitoring helps you improve your sleep quality
• Durable and adjustable wristband - Bluetooth® low-energy wireless sync
- Displays incoming calls, messages, emails, and social media activity
Getting Started
What You'll Need
To start using your LifeForce+ Smart Watch, you'll need the following:
• An internet connection
• A smartphone or tablet that has the following:
- Bluetooth
- Android OS or iOS
• A fully charged NSW-16
Charging the Unit
The unit contains all of the sensors and processors, as well as a built-in rechargeable battery that will need to be charged from time to time.
Use the included USB cable to charge the module.
- Once a power charger is plugged in, the Smart Watch will activate automatically.
- Please charge the unit when it is low battery mode.

To ensure optimal performance, fully charge the battery the first time you use the band.
Removing the Module from the Band
You will need to remove the module from the band in order to charge it.
- Turn the band over so that the back is facing you.
- Grip either end of the module at the point where the band tapers to a thin strap.
- Gently bend one end of the band away from you, as if peeling the band apart. The module will pop free from the band.

Installing Companion App
Before using your new Smart Watch, first you will want to download the companion app from the Google Play Store™ or App Store™.

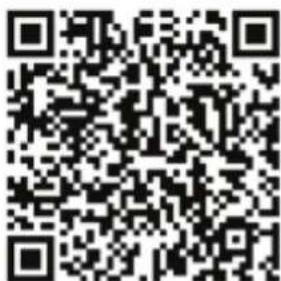
For Android Devices For IOS Devices
Search for “Orunning” in the Google Play or App Store, or scan the QR code given above in order to download and install the companion app.
Page 6 Naxa Electronics
Connecting to a Smartphone
You can easily connect your new Smart Watch with a Bluetooth-enabled smartphone by following these steps:
- Enable Bluetooth on your smartphone device.
- Open the Orunning app on your smartphone and set your profile in the settings.
- Tap "Connect Device" in the settings menu.
- Select "Bracelet Connect".
- Search for the Smart Watch and connect it to your smartphone device.
Disconnecting the Unit
To disconnect the unit from your smartphone device, follow these steps:
- Open Orunning on your smartphone device.
- Tap "Disconnect Device" in the settings menu.
- Forget the unit in your smartphone device's Bluetooth settings.
Operating the Unit
- In order to light up the screen, you can raise your hand or press the touch key.
- Press the touch key to switch between the various menu interfaces.
- Press and hold the touch key to confirm the function.
Functions
1. Watch Face
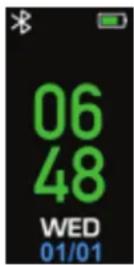
Press and hold the touch button to change the watch face dial. Press the touch button to set your desired dial.
2. Pedometer


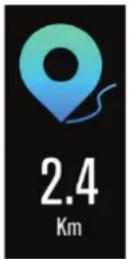
The Smart Watch automatically records your daily activity.
Press the touch button to switch between steps, calories, and distance screens.
After syncing with the Orunning app, you can freely check your activity data on your smartphone device.
3. Heart Rate Monitor


The Smart Watch automatically keep track of your heart rate and record the data.
Press the touch button to switch to the Heart Rate Monitor screen.
After syncing with the Orunning app, you can freely check your heart rate data on your smartphone device.
4. Messages
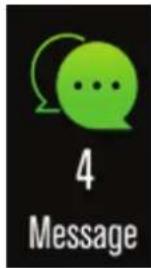
The Smart Watch has the ability to notify you of incoming calls, messages, and social media notifications from your connected smartphone.
Press the touch button to switch to the Message screen.
Press the touch screen to enter and view the notification directly on the Smart Watch.
4. Multi-Sport Mode
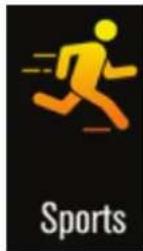

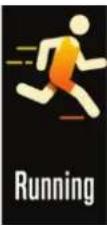

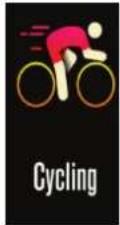
The Smart Watch also comes with a Multi-Sport mode. Press and hold the touch button to switch to the Multi-Sport screen.
Press the touch button to enter the Multi-Sport mode and select from the various sports.
The Smart Watch comes equipped with 4 sport modes:
Walking, Running, Climbing, and Cycling.
You can choose between these modes to get more accurate data for your activity.
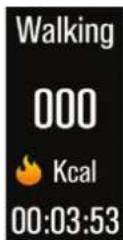
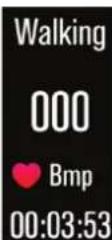


After finishing an exercise, you can press the touch screen to stop your movement and save the data.
Note: If your activity time is less than 1 minute, the data will not be saved.
5. More
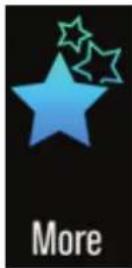
Press and hold the touch button to switch to the More screen.
"More" contains two more modes, "About" and "Power Off".
6. About

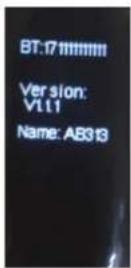
The About screen shows the unit details.
7. Power Off

In Power Off mode, you can press and hold the touch button to turn the unit off.
8. Find Phone
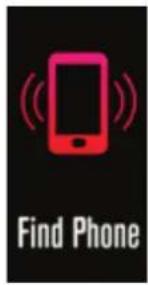
After the Smart Watch has been connected to the Orunning app, the "find phone" will appear on more submenus.
Press and hold the touch button, your android phone will ring.
If you use an iPhone, you must display your Orunning display on the screen.
9. Gesture Control
You can set the gesture control style on Orunning.
- Raising hand: while raising your hand, the screen will light up.
- Turning wrist: while turning your wrist, the screen will light up.
Warnings and Precautions
CAUTION
WARNING: SHOCK HAZARD. DO NOT OPEN. AVIS: RISQUE DE CHOC ELECTRIQUE. NE PAS OUVRIR
CAUTION: TO REDUCE THE RISK OF FIRE AND ELECTRIC SHOCK, DO NOT REMOVE THE COVER (OR BACK) OF THE UNIT. REFER SERVICING ONLY TO QUALIFIED SERVICE PERSONNEL.
The lightning flash with arrowhead symbol within an equilateral triangle is intended to alert the user to the presence of uninsulated "dangerous voltage" within the product's enclosure that may be of significant magnitude to constitute risk of electric shock
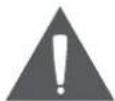
The exclamation point within an equilateral triangle is intended to alert the user to the presence of important operation and servicing instructions in the literature accompanying the appliance.
CAUTION
- Do not block the ventilation openings or holes.
- Do not place any naked flames (such as lighted candles) on the apparatus.
- When discarding batteries, follow all local rules and laws governing the disposal of batteries. Consider the environmental impact of your actions!
• To prevent fire or shock hazard, do not expose this appliance to rain or moisture.
Important Safety Information
- Read Instructions: All the safety and operating instructions should be read before the product is operated.
- Retain Instructions: The safety and operating instruction should be retained for future reference.
- Heed Warnings: All warnings on the product and in the operating instructions should be adhered to.
- Follow Instructions: All operating and usage instructions should be followed.
- Cleaning: Unplug this product from the wall outlet before cleaning. Do not use liquid cleaners or aerosol cleaners. Use a damp cloth for cleaning.
- Attachments: Use only attachments recommended by the manufacturer. Use of other attachments may be hazardous.
- Water and Moisture: Do not use this product near water (e.g., near a bathtub, washbowl, kitchen sink, laundry tub, in wet basements, or near a swimming pool and the like).
- Power Sources: This product should be operated only from the type of power source indicated on the rating label. If you are not sure of the type of power supply to your home, consult your product dealer or local power company. For products intended to operate from battery power or other sources, refer to the operating instructions.
- Grounding or Polarization: This product may be equipped with a polarized alternating-current line plug that has one blade wider than the other. This plug will only fit into the power outlet in one direction. This is a safety feature. If you are unable to insert the plug fully into the outlet, try reversing the direction of the plug. If the plug should
still fail to fit, contact an electrician to replace the obsolete outlet. Do not defeat the safety purpose of the polarized plug.
-
Power-Cord Protection: Power supply cords should be routed so that they are not likely to be walked on or pinched by items placed upon or against them, paying particular attention to cords at plugs, convenience receptacles, and at the point which they exit from the product.
-
Protective Attachment Plug: The product may be equipped with an attachment plug with overload protection. This is a safety feature. See the operating instructions for replacement or directions to reset the protective device. If replacement of the plug is required, be sure the service technician has used a replacement plug that has the same overload protection as the original plug as specified by the manufacturer.
-
Overloading: Do not overload wall outlets, extension cords, or integral convenience receptacles as this can result in a risk of fire or electric shock.
-
Object and Liquid Entry: Never push objects of any kind into this product through openings as they may touch dangerous voltage points or short-out parts that could result in a fire or electric shock. Never spill liquid of any kind on the product.
-
Servicing: Do not attempt to service this product yourself as opening or removing covers may expose you to dangerous voltage or other hazards. Refer all servicing to qualified service personnel.
-
Damage Requiring Service: Unplug this product from the wall outlet and refer servicing to qualified service personnel under the following conditions: a) when the power-supply or plug is damaged; b) if liquid has been spilled or if objects have fallen into the product; c) if the product has been exposed to rain or water; d) if the product does not operate normally by following the operating instructions. Adjust only those controls that are covered by the operating instructions as improper adjustment of other controls may result in damage and will often require extensive work by a qualified technician to restore the
product to its normal operation; e) if the product has been dropped or damaged in any way; f) when the product exhibits a distinct change in performance—this indicates a need for service.
- Replacement Parts: When replacement parts are required, be sure that your service technician has used replacement parts specified by the manufacturer or have the same characteristics as the original part. Unauthorized substitutions may result in fire, electric shock, or other hazards.
- Safety Check: Upon completion of any service or repairs to this product, ask the service technician to perform safety checks to ensure that the product is in proper operating condition.
- Heat: The product should be situated away from heat sources such as radiators, heat registers, stoves, or other products (including amplifiers) that produce heat.
WARNING:
This product contains lead, a chemical known to the State of California to cause cancer and birth defects or other reproductive harm. Wash hands after handling.
FCC NOTICE
This device complies with Part 15 of the FCC Rules. Operation is subject to the following two conditions: (1) this device may not cause harmful interference, and (2) this device must accept any interference received, including interference that may cause undesired operation.
Note: This equipment has been tested and found to comply with the limits for a Class B digital device, pursuant to Part 15 of the FCC Rules. These limits are designed to provide reasonable protection against harmful interference in a residential installation. This equipment generates, uses and can radiate radio frequency energy and, if not installed and used in accordance with the instructions, may cause harmful interference to
radio communications. However, there is no guarantee that interference will not occur in a particular installation. If this equipment does cause harmful interference to radio or television reception, which can be determined by turning the equipment off and on, the user is encouraged to try to correct the interference by one or more of the following measures:
- Reorient or relocate the receiving antenna.
- Increase the separation between the equipment and receiver.
- Connect the equipment into an outlet on a circuit different from that to which the receiver is connected.
- Consult the dealer or an experienced radio/TV technician for help.
CAUTION ON MODIFICATIONS
Any changes or modifications not expressly approved by the grantee of this device may void the authority granted by the FCC to operate the equipment.
Trademark & Regulatory Statements
Bluetooth ® is a registered trademark of Bluetooth SIG, Inc. Other trademarks and names are those of their respective owners.
Support
If you have problems with your device, please consult the instructions in this manual. Please also visit us on the web at www.naxa.com to get up to the minute news, alerts, and documentation for your device. For additional assistance, please contact Naxa Technical Support.
NAXA Technical Support
2320 East 49th St.
Vernon, CA 90058
http://www.naxa.com/naxa_support/

- TABLE OF CONTENTS
- THANK YOU
- IN THE BOX
- FEATURES
- GETTING STARTED
- WHAT YOU'LL NEED
- CHARGING THE UNIT
- REMOVING THE MODULE FROM THE BAND
- INSTALLING COMPANION APP
- CONNECTING TO A SMARTPHONE
- DISCONNECTING THE UNIT
- OPERATING THE UNIT
- FUNCTIONS
- WATCH FACE
- PEDOMETER
- HEART RATE MONITOR
- MESSAGES
- MULTI-SPORT MODE
- MORE
- ABOUT
- POWER OFF
- FIND PHONE
- GESTURE CONTROL
- WARNINGS AND PRECAUTIONS
- CAUTION
- IMPORTANT SAFETY INFORMATION
- WARNING
- FCC NOTICE
- CAUTION ON MODIFICATIONS
- TRADEMARK & REGULATORY STATEMENTS
- SUPPORT
Brand : Naxa
Model : LifeForce+ NSW-16
Category : Smartwatch