
Crush BL-1200V2 - Blender WILFA - Free user manual and instructions
Find the device manual for free Crush BL-1200V2 WILFA in PDF.


| Product Type | Countertop blender |
| Brand | Wilfa |
| Model | Crush BL-1200V2 |
| Power Supply | AC 220-240V, 50/60Hz |
| Power Output | 1200 W |
| Jar Material | Glass with level markings |
| Jar Capacity | 1.5 L (estimated) |
| Control Type | Rotary knob (MIN-MAX) and push buttons |
| Programmed Functions | Crush ice, Smoothie, Pulse/Auto clean |
| Play/Stop Button | Yes, with blue/orange indicator |
| Safety Features | Built-in safety lock, thermal fuse, over current protector |
| Blade Assembly | Removable, stainless steel blades |
| Sealed Ring | Yes, must be installed correctly |
| Continuous Operation Limit | 3 minutes max, then cool down |
| Dishwasher Safe Parts | All removable parts |
| Housing Material | Plastic and metal |
| Intended Use | Household only |
| Warranty | Refer to manual |
| Weight | Approx. 3 kg |
| Dimensions (H x W x D) | 25 x 18 x 18 cm (approx) |
Frequently Asked Questions - Crush BL-1200V2 WILFA
User questions about Crush BL-1200V2 WILFA
0 question about this device. Answer the ones you know or ask your own.
Ask a new question about this device
Download the instructions for your Blender in PDF format for free! Find your manual Crush BL-1200V2 - WILFA and take your electronic device back in hand. On this page are published all the documents necessary for the use of your device. Crush BL-1200V2 by WILFA.
USER MANUAL Crush BL-1200V2 WILFA
natural_image
Exterior view of a modern kitchen blender with clear glass and silver casing (no visible text or symbols)Wilfa Crush
Blender
Bruksanvisning
Bruksanvisning
Brugsanvisning
Käyttöohje
Instruction manual
BL-1200V2
Blender
Advarsel 3
- Sett knivbladenheten på knivenhetsadapteren.
natural_image
Simple line drawing of a lamp with a downward arrow indicating light or illumination (no text or symbols)natural_image
Line drawing of a blender with an arrow pointing to its base (no text or symbols)natural_image
Line drawing of a blender with a handle and lid, showing a downward arrow indicating process (no text or symbols)natural_image
Line drawing of a pitcher with a lid and arrow indicating downward motion (no text or symbols)natural_image
Simple diagram showing a container being lowered into a roof, with a red arrow indicating the process (no text or symbols)natural_image
Simple diagram showing a downward arrow and a lever mechanism (no text or symbols)natural_image
Simple line drawing of a lamp with a downward arrow indicating light or illumination (no text or symbols)natural_image
Line drawing of a blender with an arrow pointing to its base (no text or symbols)natural_image
Line drawing of a blender with a handle and lid, showing a downward arrow indicating process (no text or symbols)- Anslut stickkontakten.
natural_image
Line drawing of a pitcher with a lid and handle, showing a red downward arrow indicating compression or reduction (no text or symbols)natural_image
Simple diagram showing a container being lowered into a roof, with a red arrow indicating the process (no text or symbols)natural_image
Simple diagram showing a downward arrow and a lever mechanism (no text or symbols)natural_image
Simple line drawing of a lamp with a downward arrow indicating light or illumination (no text or symbols)natural_image
Line drawing of a blender with an arrow pointing to its base (no text or symbols)natural_image
Line drawing of a blender with a handle and lid, showing a downward arrow indicating process (no text or symbols)natural_image
Line drawing of a pitcher with a lid and arrow indicating downward motion (no text or symbols)natural_image
Simple diagram showing a container being lowered into a roof, with a red arrow indicating the process (no text or symbols)natural_image
Simple line drawing of a lamp with a downward arrow indicating light or illumination (no text or symbols)natural_image
Line drawing of a blender with an arrow pointing to its base (no text or symbols)natural_image
Line drawing of a blender with a red downward arrow indicating process (no text or symbols)natural_image
Line drawing of a pitcher with a lid and handle, showing a red downward arrow indicating compression or reduction (no text or symbols)natural_image
Simple line drawing showing a container being lowered into a roof (no text or symbols)Using the appliance 7
How to assemble the appliance 9
How to use the blender jar.... 10
Cleaning 11
Technical Data 13
Important
Read this user manual carefully before you use the appliance and save it for future reference.
Warning
■ Never leave the appliance unattended when it is connected to the mains.
■ Never immerse the appliance in water.
■ Is the cable damaged, it must be replaced by authorized service personnel to avoid a hazard.
■ Is there damage to the device or that it does not work, it must be serviced only by authorized personnel.
■ Connect the appliance only to a properly installed wall socket with a voltage matching the technical data of the appliance.
■ Do not let the cord hang over edge of the table or counter or touch hot surface.
■ The motor must not come into contact with water or any other liquid, as there is the danger of an electric shock. Therefore, do not use the appliance near to a wash Basin, not with wet hands or while standing on a wet ground. If the appliance has turned wet, pull the mains plug immediately out of the socket before touching the appliance.
■ Do not use the appliance outdoors.
■ This product is intended for household use and not for commercial use.
■ Use the appliance only for the purpose it was designed for.
■ Do not use appliance, if it or parts of it show visible damage or if the appliance was dropped.
■ Always disconnect the appliance from the supply if it is left unattended and before assembling, disassembling or cleaning.
■ This appliance shall not be used by children. Keep the appliance and its cord out of reach of children.
■ Appliance can be used by persons with reduced physical, sensory or mental capabilities or lack of experience and knowledge if they have been given supervision or instruction concerning use of the appliance in a safe way and if they understand the hazards involved.
■ This appliance shall not be used by children. Keep the appliance and its cord out of reach of children.
■ Children shall not play with the appliance.
Caution
■ There is a potential injury from misuse. The care shall be taken when handling the sharp cutting blades, emptying the bowl and during cleaning.
■ To reduce the risk of injury, never place cutter-assembly blades on base without jar properly attached.
■ Switch off the appliance and disconnect from supply before changing accessories or approaching parts that move in use.
■ The use of accessory attachments not recommended by the appliance manufacturer may cause injuries.
■ Be careful is hot liquid is poured into the blender as it can be ejected out of the appliance due to a sudden steaming.
We are very safety conscious when designing and manufacturing consumer products, but it is essential that the product user also exercise care when using an electrical appliance. Listed below are precautions which are essential for the safe use of an electrical appliance:
Safety precautions for your table blender
■ Operate the blender with lid closed
■ Blades are very sharp. Handle with care.
■ Only remove the jar while motor is off.
■ Avoid overwork of motor.
■ Handle carefully with glass jar.
■ Never place your hands into the glass jar while the motor is on.
■ Avoid contact with moving parts.
Remarks:
The unit is equipped with two separate safety devices.
1. Thermal-fuse.
The thermal fuse is used to avoid overheating of the electric motor. The fuse can be triggered when the unit is run for a longer time than specified with a demanding task. When this occurs the unit will stop working until it has cool down, the fuse will then reset itself and the unit can be used again. If this happens unplug the cord and let the device rest for 5-10 minutes.
2. Over current protector.
The over current protector is used to avoid the device from causing any harmful situation related to electric failure/overheating. It is a secondary protection and will become active if the thermal fuse is not sufficient. Once the fuse has been triggered it cannot be reset and the device will no longer work.
Parts description
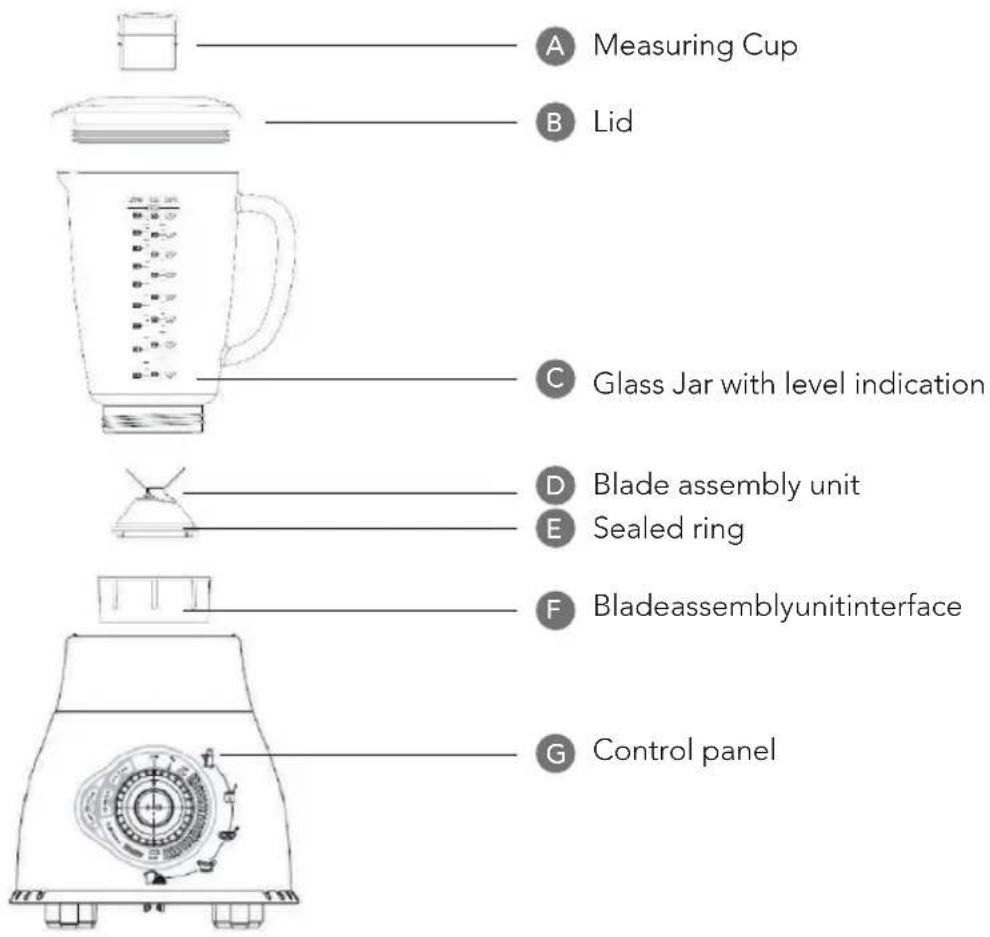
Built-in safety lock
This function ensures that user can only switch the appliance on when the accessories have been placed on the unit in correct position. When the accessories have been fixed properly, the unit can only be switched on. (i.e. Built-in safety lock function is disabled at this moment)
Before first use
Clean the unit and parts thoroughly before you use the appliance for the first time.
Using the appliance
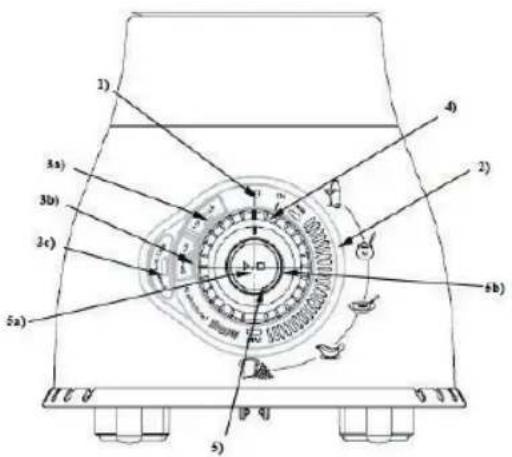
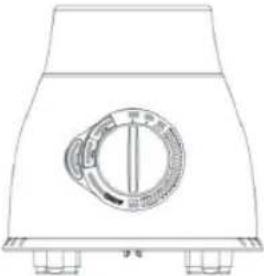
1 ON/OFF switch
2 Speed control (MIN -> MAX)
3 Quick-select button
a) Crush ice button
b) Smoothie button
c) Pulse / Auto clean button
4 Knob indicator
5 PLAY/STOP button
a) Blue light indicator (Start condition)
b) Orange light indicator (Stop/Pause condition)
To switch on the appliance, turn the knob to "ON" position. The "ON" light will be illuminated. To control the rotary speed, turn the knob at between "MIN" & "MAX" position. The light will be illuminated at the desired position. To use the programmed function, turn the knob to "ON" position. The light on the three buttons start to blink. Press the programmed function button, the light on the specific button will be illuminated. The orange light indicator on PLAY/STOP button will be blinked at this moment.
Crush ice button
Press this button to crush the ice. The appliance starts crushing according to the pre-set speed profile. Press the button again to stop the process. Or the unit will operate automatically after running for 30 seconds.
Warning :
Each time added not more than 8pcs ice cubes (less than 20 x 20 x 20mm size of the ice) in glass jar.
Smoothie button
Press this button to make delicious smoothies. The appliance starts mixing according to the pre-set speed profile. Press the button again to stop the process; Or the unit will operate automatically after running for one minute.
Pulse / Auto clean button
Press the button to run the Auto mode. The appliance starts operating according to the pre-set speed profile. Press the button again to stop the process. Or the unit will operate automatically after running for 45 seconds.
PLAY/STOP button
This button is used to control the "PLAY / STOP" of the running mode condition. When the programmed function is chosen (Orange light indicator will blink at this moment), press the PLAY / STOP button once to stop the programmed function. (The light on the three programmed function buttons will start to blink. You can choose any programmed function at this moment.)
When the speed control is turned to specific location between MIN and MAX, the blue light will start to blink at this moment. Press the PLAY / STOP button once to start the operation. (Orange light indicator will then blink.) The operation can be paused by pressing the PLAY / STOP button again. (Blue light indicator will then blink at this moment.)
How to assemble the appliance
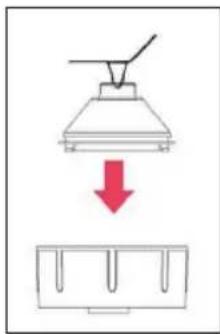
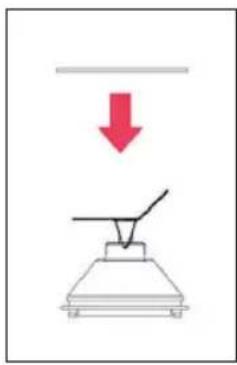
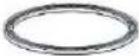
- Place the sealed ring on the blade assembly unit. Warning: The sealed ring MUST install into the blade base groove correctly. Not allow any warp or bend of the sealed ring after installation.
natural_image
Simple line drawing of a lamp with a downward arrow and a handle, no text or symbols present.- Place the blade assembly unit on the interface.
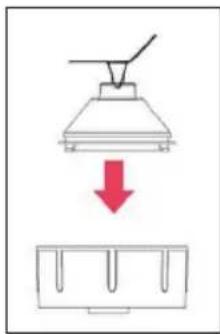
natural_image
Simple line drawing of a lamp with a downward arrow indicating light or illumination (no text or symbols)- Screw the unit interface onto the glass jar bottom until it is fixed properly.
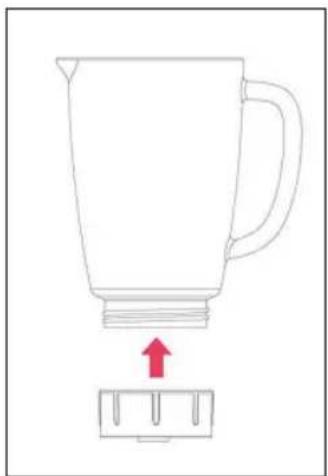
natural_image
Line drawing of a blender with an arrow pointing to its base (no text or symbols)- Place the glass jar with blade assembly unit interface on the motor unit. The handle can be placed in two positions: either located at the right hand side or left hand side.
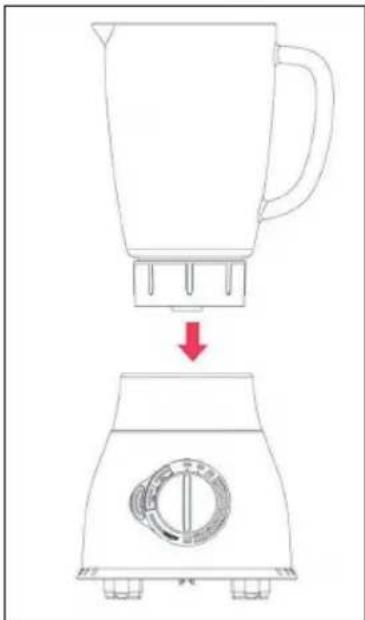
natural_image
Line drawing of a blender with a handle and lid, showing a downward arrow indicating process (no text or symbols)- Connect to main power supply.
How to use the glass jar
-
Place the ingredients in the glass jar.
-
Place the lid on the jar and close it tightly.
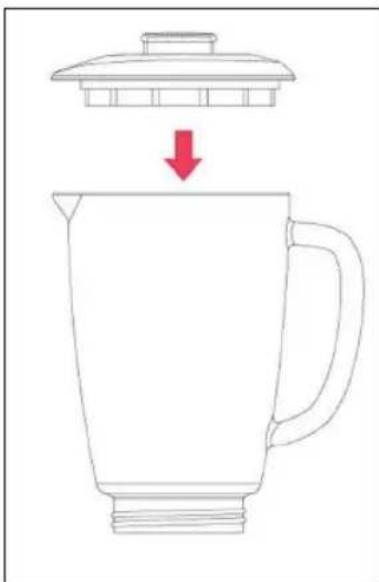
natural_image
Line drawing of a pitcher with a lid and handle, showing a red downward arrow indicating compression or reduction (no text or symbols)- Insert the measuring cup into the lid opening.
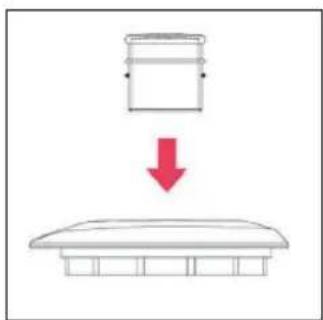
natural_image
Simple diagram showing a container being lowered into a roof, with a red arrow indicating the process (no text or symbols)- Select the speed by turning the control knob or press the Quick-select button.
Note: Do not let the appliance to operate more than 3 minutes continuously. Let the appliance to cool down to room temperature before continue operating the appliance.
After using the blender
- Disconnect the power from main supply.
- Remove the lid (together with measuring cup) from the jar.
- Remove the jar (together with blade assembly unit interface) from the motor part.
- Detach the blade assembly unit interface from the bottom of the jar.
Note: Always clean the removable parts immediately after use.
Note: It is recommended to cut the meat or other food into smaller pieces before putting them in the jar. Do not operate with large quantities of food at one time.
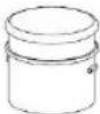
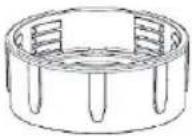
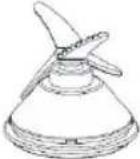
Cleaning
Always clean the removable parts immediately after use.
Note: Be careful when cleaning the parts. Avoid touching the sharp blades!
- Disconnect the power from main supply.
- Disassemble all removable parts before cleaning.
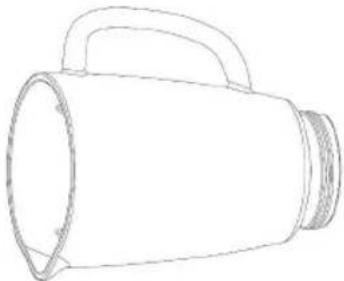
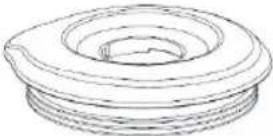
- Clean all removable parts in dishwasher or in lukewarm water with dishwashing liquid.
- Use dry cloth to clean the main body.
How to clean the different parts:
 | |||
 |  |  | |
 |  |  |  |
 |  |  |  |
 |  |  |  |
 | |||
 |  |  |  |
 |  |  |  |
Technical Data
Model: BL-1200V2
Power Supply: AC 220V-240V 50/60Hz
Output: 1200W
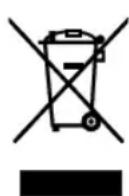
This marking indicates that this product should not be disposed with other household wastes throughout the EU. To prevent possible harm to the environment or human health from uncontrolled waste disposal, recycle it responsibly to promote the sustainable reuse of material resources. To return your used device, please use the return and collection systems or contact the retailer where the product was purchased. They can take this product for environmental safe recycling.
Under the Waste Electrical and Electronic Equipment Directive (WEEE), such waste must be collected separately and processed. If in future you need to discard this product, please do not throw it out with your normal rubbish. Please send this product to a collection point where one is available.

AS WILFA
Industriveien 25
1481 Hagan
Norway wilta.com

in homes since 1948
- Wilfa Crush
- Blender
- Important
- Warning
- Caution
- Safety precautions for your table blender
- Remarks:
- Thermal-fuse.
- Over current protector.
- Parts description
- Built-in safety lock
- Before first use
- Using the appliance
- Crush ice button
- Warning :
- Smoothie button
- Pulse / Auto clean button
- PLAY/STOP button
- How to assemble the appliance
- How to use the glass jar
- After using the blender
- Cleaning
- Technical Data
Brand : WILFA
Model : Crush BL-1200V2
Category : Blender