
Smooth BL-800S - Blender WILFA - Free user manual and instructions
Find the device manual for free Smooth BL-800S WILFA in PDF.


| Product Type | Blender |
| Brand | Wilfa |
| Model | Smooth BL-800S |
| Motor Power | 800 W |
| Voltage | 220–240 V, 50/60 Hz |
| Jug Capacity | 1.5 L |
| Jug Material | BPA-free Tritan |
| Blade Material | Stainless steel |
| Number of Speeds | 2 speeds + pulse |
| Functions | Ice crushing, smoothies, soups, grinding |
| Dimensions (HxWxD) | 40 x 18 x 18 cm |
| Weight | 3.0 kg |
| Cord Length | 1.2 m |
| Safety Features | Overload protection, non-slip feet, locking lid |
| Cleaning | Dishwasher-safe jug and lid; wipe base with damp cloth |
| Spare Parts Available | Jug, lid, blade assembly, seal ring |
| Repairability | Replaceable parts; professional service recommended |
| Warranty | 2 years |
Frequently Asked Questions - Smooth BL-800S WILFA
User questions about Smooth BL-800S WILFA
0 question about this device. Answer the ones you know or ask your own.
Ask a new question about this device
Download the instructions for your Blender in PDF format for free! Find your manual Smooth BL-800S - WILFA and take your electronic device back in hand. On this page are published all the documents necessary for the use of your device. Smooth BL-800S by WILFA.
USER MANUAL Smooth BL-800S WILFA
natural_image
Exterior view of a modern kitchen blender with visible control buttons and volume markings (no text or symbols on the device itself)Wilfa Smooth
Blender
Bruksanvisning
Bruksanvisning
Operating Instructions
BL-800S
Viktig....3
natural_image
Line drawing of a blender with a red upward arrow indicating compression or lifting (no text or symbols)3 Plasser glassbeholderen på motordelen.
natural_image
Line drawing of a blender with a downward arrow indicating process (no text or symbols)Bruk
OBS:
natural_image
Line drawing of a blender with a red upward arrow indicating heat or vibration (no text or symbols)natural_image
Diagram showing a blender being placed on top of a smaller blender with a handle, indicating cooling or disassembly (no text or symbols present)Drift
Försiktighet:
natural_image
Line drawing of a blender with a red upward arrow indicating compression or lifting (no text or symbols)natural_image
Line drawing of a blender with a handle and blade, showing the process from top to bottom (no text or symbols)Betjening
Forsigtig:
natural_image
Line drawing of a blender with a red upward arrow indicating compression or heat transfer (no text or symbols)natural_image
Line drawing of a blender with a handle and lid, showing a drop in the base (no text or symbols)Käyttö
Huomautus:
Safety precautions for your blender....5
Parts description....6
Feature....7
Before first use....7
How to assemble the Blender 8
Care and Cleaning 10
Tips of using your blender....10
Table of suggested speed 10
Important
Read this user manual carefully before you use the appliance and save it for future reference.
Warning
■ Never leave the appliance unattended when it is connected to the mains.
■ Never immerse the appliance in water.
■ Is the cable damaged, it must be replaced by authorized service personnel to avoid a hazard.
■ Is there damage to the device or that it does not work, it must be serviced only by authorized personnel.
■ Connect the appliance only to a properly installed wall socket with a voltage matching the technical data of the appliance.
■ Do not let the cord hang over edge of the table or counter or touch hot surface.
■ The motor must not come into contact with water or any other liquid, as there is the danger of an electric shock. Therefore, do not use the appliance near to a wash basin, not with wet hands or while standing on a wet ground. If the appliance has turned wet, pull the mains plug immediately out of the socket before touching the appliance.
■ Do not use the appliance outdoors.
■ This product is intended for household use and not for commercial use.
■ Use the appliance only for the purpose it was designed for.
■ Do not use appliance, if it or parts of it show visible damage or if the appliance was dropped.
■ Always disconnect the appliance from the supply if it is left unattended and before assembling, disassembling or cleaning.
■ Appliance can be used by persons with reduced physical, sensory or mental capabilities or lack of experience and knowledge if they have been given supervision or instruction concerning use of the appliance in a safe way and if they understand the hazards involved.
■ This appliance shall not be used by children.
- Keep the appliance and its cord out of reach of children.
■ Children shall not play with the appliance.
Caution
■ There is a potential injury from misuse. The care shall be taken when handling the sharp cutting blades, emptying the bowl and during cleaning.
■ To reduce the risk of injury, never place the blade assembly on the base without the jar properly attached.
■ Switch off the appliance and disconnect from supply before changing accessories or approaching parts that move in use.
■ The use of accessory attachments not recommended by the appliance manufacturer may cause injuries.
■ Be careful if hot liquid is poured into the blender as it can be ejected out of the appliance due to a sudden steaming.
We are very safety conscious when designing and manufacturing consumer products, but it is essential that the product user also exercise care when using an electrical appliance.
Listed below are precautions which are essential for the safe use of an electrical appliance:
Safety precautions for your blender
■ Operate the blender with lid closed.
■ Blades are very sharp. Handle with care.
■ Only remove the jar while motor is off.
■ Avoid overwork of motor.
■ Handle carefully with glass jar.
■ Never place your hands into the glass jar while the motor is on.
■ Avoid contact with moving parts.
Parts description
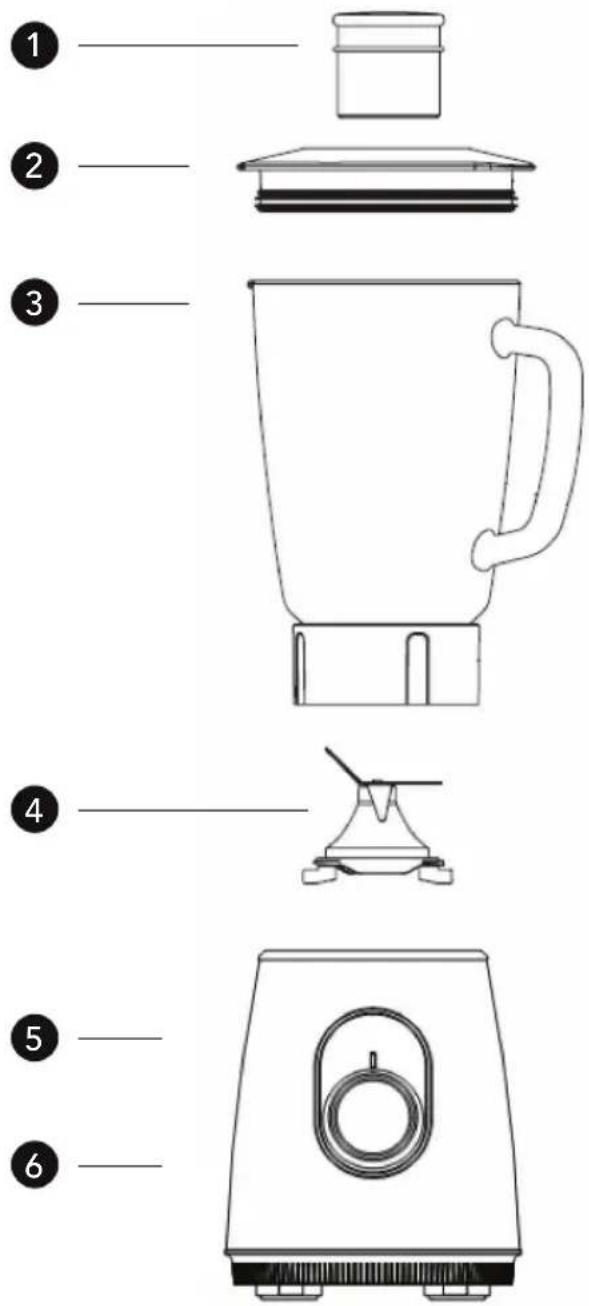
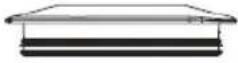
1 Measuring cup
2 Lid
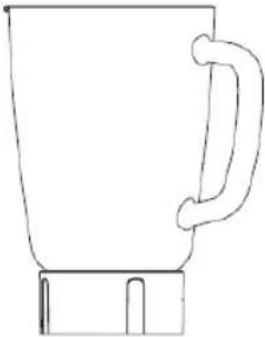
3 Glass jar
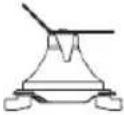
4 Blade assembly unit
5 Control panel
6 Motor unit
5
6
5
5
5
5
5
Feature
Measuring cup
Allows you to add ingredients without removing the lid. Turn anti-clockwise to open.
Glass jar
Allows you to see the ingredients and the volume of the ingredients inside the jar.
Speed control
Speed control gives maximum and minimum rotating speed to blend different food.
Pulse
Quick select button.
Before first use
■ Unpack the blender.
- Place the base on a flat surface.
■ Clean the blender with a damp cloth, never immerse in water or place it under running water.
■ Wash the jar, lid and blades in warm water. Rinse and dry thoroughly.
How to Assemble the Blender
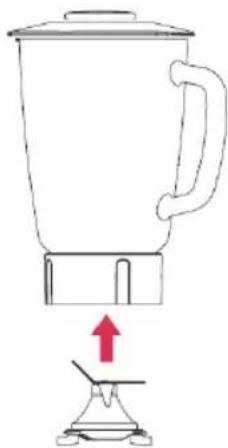
1 Please check the blending blade carefully before use the blender every time.
2 Insert the blending blade into the glass jar. A lock / open symbol are shown at the bottom of the blending blade. To lock the blending blade, turn it in anticlockwise direction to the lock symbol. To release the blending blade, turn it in clockwise direction to the open symbol.
natural_image
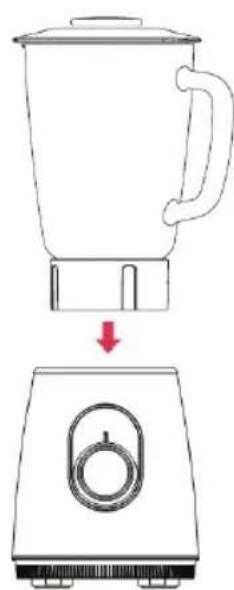
Line drawing of a blender with a red upward arrow indicating compression or lifting (no text or symbols)3 Place the glass jar onto the motor unit.
Note: Please ensure the glass jar is in position tightly.
natural_image
Line drawing of a blender with a handle and lid, showing a drop in the base (no text or symbols)Operation
Caution:
Do not place the blade assembly unit on the motor unit before it is installed into the jar.
Avoid touching the sharp blades.
Never touch the rotating parts which are still in motion.
- Switch off the appliance before changing accessories or approaching parts that move in use.
- Place the motor unit on a flat surface.
- Ensure the speed control is turned to off.
Blender
- Assemble the glass jar.
- Plug the appliance into a socket.
- Add ingredients into the glass jar. Cover the glass jar with the lid.
- Turn the speed control to the chosen speed.
- See the table for recommended blending times.
- To stop the operation, turn the speed control to off.
- Wait until the motor stops completely, remove the glass jar from the motor unit.
- Unplug the appliance after use.
WARNING: The maximum operation level is 1.5L. Do not blend more than 1.5L ingredients.
WARNING: Do not remove the lid from the glass jar while the blender is on.
WARNING: Stop the blender before adding new ingredients or use the measuring cup to add ingredients.
Care and Cleaning
Switch off the appliance before changing accessories or approaching parts which move in use.
WARNING: Handle the glass jar with care. The blade is very sharp. Wash with care. Never touch the blade with your fingers.
■ To maintain your blender in best quality, always clean the jar every time after use.
■ Unplug the blender.
- Rinse and dry thoroughly. Clean all removable parts in dishwasher except the blades assembly or in lukewarm water with cleanser.
■ Clean the motor with a damp cloth, never immerse it in water or place it under running water.
■ Place the blender in a safe place.
Tips of Using your Blender
■ Do not blend dry, thick or heavy mixtures for more than 60 seconds continuously. Let the appliance cool down to room temperature before continue operating the appliance again.
■ Do not place the lid into boiling water, the lid may deform.
■ Always hold the edge of the lid while operating the blender.
Table of Suggested Speed for Blender Cup
Speed Recommended application Time
| Max Blending chunks of carrots and water for sauces in max speed. Max:1.5L (max load 650g carrot +850g water) | 60-120s |
| Max Blending instant juices, soft fruit and cocktails with alcohol. Max: 1L | 40-60s |
| Max Blending soup, milkshakes with hard fruits. | 40-60s |
| Max: 1L |
| Max Making sauces, baby food, blending hard fruits or vegetables. Max: 1L | 60s |
| Ice Crush Crushing ice cubes. Max: 80-100g ice cubes at a time | Short time operation |
After every max operation period, please let the appliance cool down to room temperature (15-20min) before continue operating the appliance again.
 |  |  | |
 |  |  |  |
 |  |  |  |
 |  |  |  |
 |  |  |  |
 |  |  |  |
| 10 | |
| 11 | |
| 12 | |
| 13 | |
| 14 | |
| 15 | |
| 16 | |
| 17 | |
| 18 | |
| 19 | |
| 20 | |
| 21 | |
| 22 | |
| 23 | |
| 24 | |
| 25 | |
| 26 | |
| 27 | |
| 28 | |
| 29 | |
| 30 | |
| 31 | |
| 32 | |
| 33 | |
| 34 | |
| 35 | |
| 36 | |
| 37 | |
| 38 | |
| 39 | |
| 40 | |
| 41 | |
| 42 | |
| 43 | |
| 44 | |
| 45 | |
| 46 | |
| 47 | |
| 48 | |
| 49 | |
| 50 | |
| 51 | |
| 52 | |
| 53 | |
| 54 | |
| 55 | |
| 56 | |
| 57 | |
| 58 | |
| 59 | |
| 60 | |
| 61 | |
| 62 | |
| 63 | |
| 64 | |
| 65 | |
| 66 | |
| 67 | |
| 68 | |
| 69 | |
| 70 | |
| 71 | |
| 72 | |
| 73 | |
| 74 | |
| 75 | |
| 76 | |
| 77 | |
| 78 | |
| 79 |
Under the Waste Electrical and Electronic Equipment Directive (WEEE), such waste must be collected separately and processed. If in future you need to discard this product, please do not throw it out with your normal rubbish. Please send this product to a collection point where one is available.

AS WILFA
Industriveien 25
Postboks 146
1483 Hagan
Norway
wilfa.com
| 10.2 | 10.3 | 10.4 | 10.5 | 10.6 | 10.7 | 10.8 | 10.9 | 11.0 | 11.1 | 11.2 | 11.3 | 11.4 | 11.5 | 11.6 | 11.7 | 11.8 | 11.9 | 12.0 |
- Wilfa Smooth
- Bruk
- OBS:
- Drift
- Försiktighet:
- Betjening
- Forsigtig:
- Käyttö
- Huomautus:
- Important
- Warning
- Caution
- Safety precautions for your blender
- Parts description
- Feature
- Measuring cup
- Glass jar
- Speed control
- Pulse
- Before first use
- How to Assemble the Blender
- Operation
- Caution:
- Blender
- Care and Cleaning
- Tips of Using your Blender
Brand : WILFA
Model : Smooth BL-800S
Category : Blender