
Stretch 3.0 - Electricity Meter Plugwise - Free user manual and instructions
Find the device manual for free Stretch 3.0 Plugwise in PDF.


| Product Type | Energy Monitoring Gateway |
| Brand | Plugwise |
| Model | Stretch 3.0 |
| Power Supply | 230 V AC adapter, 5 W |
| Network Connectivity | WiFi (2.4 GHz) and Ethernet (LAN) |
| Wireless Protocol | ZigBee (proprietary Plugwise) |
| LED Indicators | 3 LEDs: WLAN, STATUS, LAN |
| Button | 1 black button for WPS and reset |
| Compatible Devices | Plugwise Circle, Circle+, Stealth |
| Maximum Range (ZigBee) | 5–10 m between devices, reduced by concrete walls |
| Package Contents | Stretch 3.0, wall plate, adapter, adapter cable, installation manual |
| Identification | 8-letter short ID on back sticker |
| Power Consumption | 5 W (adapter rating) |
| WiFi Configuration | WPS, Plugwise Connect app (Android), or web interface via AP mode |
| Reset Network Settings | Press button for 5 seconds until STATUS blinks 5 times |
| Regulatory Compliance | CE, R&TTE Directive 1999/5/EC |
| Disposal | Do not dispose with household waste; use municipal collection points |
| Warranty | Refer to official documentation |
| Manual Languages | EN, NL (other languages available on request) |
| Support | www.plugwise.com/technical-contact |
Frequently Asked Questions - Stretch 3.0 Plugwise
User questions about Stretch 3.0 Plugwise
0 question about this device. Answer the ones you know or ask your own.
Ask a new question about this device
Download the instructions for your Electricity Meter in PDF format for free! Find your manual Stretch 3.0 - Plugwise and take your electronic device back in hand. On this page are published all the documents necessary for the use of your device. Stretch 3.0 by Plugwise.
USER MANUAL Stretch 3.0 Plugwise
© Plugwise Stretch 3
Installation manual
105-03
Precautions and safety 10
More information 10
In the package 10
Installation 11
- Place the Stick in the Stretch 11
- Place the Stretch 11
- Connect to the network 11
- Validate the network connection? 12
Having trouble using WiFi? 13
Behaviour of the lights 14


Installatie
Copyright 2017, Plugwise. All rights reserved.
This document contains information about the installation procedure of this product. For more information about the functionalities of this product, we refer to online information and documentation.
CE
Plugwise B.V. hereby declares that this product is in compliance with the applicable essential requirements of the appropriate EC-Directives, including 1999/5/EC (R&TTE). A copy of the EU declaration of Conformity is available at www.plugwise.com/product-conformity.

Old electrical and electronic appliances very often contain valuable materials. Therefore, never dispose of discarded appliances with normal household waste. Always hand in your old appliances at the municipal collection points for electrical and electronic equipment.
This is the short installation manual for the Plugwise Stretch 3. The Stretch is the gateway that works together with the Plugwise Circle or Stealth using the Plugwise ZigBee protocol. The Stretch is the manager in the Plugwise network. With the Circle or Stealth you can measure the electricity consumption and switch appliances on or off in your home.
In this manual we shortly describe how to install the Stretch. Because you will always use the Stretch in combination with a Circle or Stealth, we also briefly explain how to set up a good network using the Stretch and Circles. The Stealth has the same functionalities as the Circle, but unlike the Circle that you plug into a socket, the Stealth is a built-in module*.
Explanation symbols:
Warning, be aware! You must carry out this step Advice
Precautions and safety
We advise you to always be careful when installing the Plugwise Stretch 3.
Do not use the product when it is damaged or if it is malfunctioning.
△ Avoid contact with water or other liquids.
△ Never open the casing of the product. The product does not contain components that you can repair yourself.
Check the availability and the quality of the WiFi network beforehand near the location where you want to install the Stretch. Make sure you have the password of the WiFi network to which you will connect the Stretch.
Do you want to connect the Stretch to the network using a LAN cable? Make sure you install the Stretch nearby your router.
Keep the short ID of the Stretch at hand. The short ID is the 8 letter code on the sticker on the back of the Stretch.

stuvwxyz ssid: stretch_ abcdef
More information
More information about the Stretch can be found on our website:
www.plugwise.com/stretch-3
In the package
This short installation manual
Plugwise Stretch 3 Gateway to control your Plugwise network
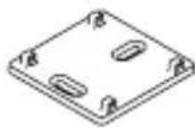
Wall plate
Adapter 230VAC - 5W
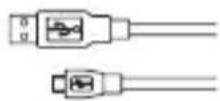
Adapter cable


Installation
the Stretch with as many Circles as
possible.
The installation can be described in 3 steps:
- Place the Stick in the Stretch.
- Place the Stretch.
- Connect the Stretch to the network.
- Validate the network connection.
1. Place the Stick in the Stretch

Remove the cover of the back of the Stretch and place the Stick in the Stretch.

2. Place the Stretch
![graph TD A["Circle"] --> B["Node"] C["Circle"] --> B D["Circle+"] --> B B --> E["Central Node"] style A fill:#f9f,stroke:#333 style C fill:#f9f,stroke:#333 style D fill:#f9f,stroke:#333 style E fill:#ccf,stroke:#333](/content/2026/05/868140/images/9fc23e10f7144ec4c6176ae57cdd9d51c790a8c821e88c54ce8a09102f2879f7.jpg)

Place the Stretch centrally located in the house, for example near the stairwell at the first floor.

Make sure that there is direct contact of

The Circle+ (the Circle that contains a grey back) should always be placed within a 5-meter range of the Stretch. The Circle+ behaves like a 'router' in the network. The Circle+ is always reachable for other Circles.

All Circles should be positioned at a maximum distance of 5 to 10 meters of at least one other Circle or the Stretch.

Concrete walls and ceilings will reduce the range of the network.

For a highly responsive network, install as many Circles as possible.
3. Connect to the network

Connect the adapter cable to the adapter and the Stretch and plug the adapter into the wall socket. Wait until the Stretch has booted up: the upper light (WLAN) and the light in the middle (STATUS) of the Stretch are blinking slowly.
WiFi via WPS?

WiFi via WPS is only supported via a special WPS button on the router.

Press the black button on the Stretch for 2 seconds. Wait until the upper (WLAN) light is blinking quickly and
regularly.
√ Enable WPS on the WiFi router to connect to WiFi. Wait until the Stretch has booted up: the upper light (WLAN) and the light in the middle (STATUS) of the Stretch are on when connected to the network.
If after 2 minutes the Stretch has not made a connection yet to your WiFi network, the Stretch will return back to the access point mode: the upper (WLAN) light and the light in the middle (STATUS) are blinking slowly.
WiFi?
Do you want to connect the Stretch to WiFi and you have an Android smartphone or tablet?

Search for the Plugwise Connect app in the Google Playstore. The app will guide you connecting the Stretch to the WiFi network.
No Android? Follow the steps below to connect the Stretch to the WiFi network.
Connect your smartphone or tablet to the WiFi network of the Stretch, starting with 'stretch_'.
√ Enter the short ID as your password.
√ Open the web browser on your
smartphone or tablet and navigate to a random web address. Because you are connected to the network of the Stretch, you will be redirected to the web page of the Stretch.
√ Go to the settings via the button in the bottom right of the web page

√ Go to the WiFi/LAN settings.
√ Press 'Scan' and select your own WiFi network.
√ Enter the password of you own WiFi network and save the settings. Wait until the Stretch has booted up: the upper light (WLAN) and the light in the middle (STATUS) of the Stretch are on when connected to the network.
Network cable?
√ Connect a network cable between the router and the Stretch.
√ Restart the Stretch by plugging the adapter out and into the wall socket. Wait until the Stretch has booted up: the light in the middle (STATUS) and the lower light (LAN) are on when connected to the network.
4. Validate the network connection? Open the web page of the Stretch
√ Make sure that your smartphone or
tablet is reconnected to the same network as to which the Stretch is connected to. This is also necessary when you want to add the Stretch to the Plugwise app.
√ Go to connect.plugwise.net.
Use your short ID to log in. You will be redirected to the web page of the Stretch when the Stretch is connected to the network.
Having trouble using WiFi?
Reset the network connection
√ Press the black button on the Stretch for 5 seconds until the light in the middle (STATUS) has blinked 5 times and the upper light (WLAN) starts to blink rapidly.
√ The network settings will be deleted. Wait until the Stretch has booted up, then try to connect the Stretch to your WiFi network again.
First connect the network cable
√ Connect a network cable between the router and the Stretch.
√ Restart the Stretch by plugging the adapter out and into the wall socket.
√ Follow the steps "Validate the network connection? - Open the web page of the Stretch" on the previous page to open
the webpage of the Stretch.
√ Go to the settings via the button in the bottom right of the web page
√ Go to the WiFi/LAN settings.
√ Select your own WiFi network, enter the password of your own WiFi network and save the settings. Disconnect the Stretch from the network cable when instructed.
Go to the settings via the button inthe bottom right of the web page
Go to the WiFi/LAN settings.
Select your own WiFi network, enter the password of your own WiFi network and save the settings. Disconnect the Stretch from the network cable when instructed.
Behaviour of the lights
The Stretch has 3 LEDs. In the table below the most important behaviour of the lights of the Stretch is explained.
| LED Colour Pattern Description | |||
| STATUS | Green | Blink slowly | The Stretch is starting up. Wait until the Stretch is ready.When in access point mode, the LEDs STATUS and WLAN are blinking slowly. |
| STATUS Green | Blink slowly, | then on | The Stretch is starting up. Wait until the Stretch is ready:when connected via a network cable, the LEDs STATUS and LAN are turned on.when connected to WiFi, the LEDs STATUS and WLAN are turned on. |
| WLAN | Green | Blinking | Communication with the WiFi network. |
| WLAN | Green | Blink slowly | Cannot connect to the WiFi network. Has something been changed in the router settings? Follow the steps below “having trouble using WiFi?”. |
| LAN | Green | Blinking | Communication with the network via the network cable. |
© Plugwise
Plugwise B.V.
Wattstraat 56
2171 TR Sassenheim
The Netherlands
www.plugwise.com
Support: www.plugwise.com/technical-contact


- © PLUGWISE STRETCH 3
- INSTALLATION MANUAL
- INSTALLATIE
- CE
- PRECAUTIONS AND SAFETY
- MORE INFORMATION
- IN THE PACKAGE
- INSTALLATION
- PLACE THE STICK IN THE STRETCH
- PLACE THE STRETCH
- CONNECT TO THE NETWORK
- WIFI VIA WPS
- WIFI
- NETWORK CABLE
- VALIDATE THE NETWORK CONNECTION? OPEN THE WEB PAGE OF THE STRETCH
- HAVING TROUBLE USING WIFI
- RESET THE NETWORK CONNECTION
- FIRST CONNECT THE NETWORK CABLE
- BEHAVIOUR OF THE LIGHTS
- © PLUGWISE
Brand : Plugwise
Model : Stretch 3.0
Category : Electricity Meter