C-DMM-2002 - Accessory Havis - Free user manual and instructions
Find the device manual for free C-DMM-2002 Havis in PDF.


| Product Type | Dash Monitor Mount Bracket |
| Brand | Havis |
| Model | C-DMM-2002 |
| Compatible Vehicles | 2013-2017 Ford Police Interceptor Sedan (Standard Interior and Interior Upgrade Package) |
| Compatible Displays | Havis TSD-101 Touch Screen Display |
| Mounting Pattern | VESA 75 (for monitors up to 5 lbs) |
| Material | Metal bracket with hardware |
| Installation Type | Dashboard mounted, replaces center dash top trim panel |
| Tools Required | Socket set, drill, 1.5" hole saw, Phillips screwdriver, trim tools |
| Hardware Included | Bolts, nuts, washers, screws, grommets, bumpers, dome plugs, vinyl cap |
| Adjustability | Tilt and swivel via included hinge |
| Weight Capacity | Up to 5 lbs (for VESA mounting) |
| Overall Dimensions | Approx. 10 x 6 x 2 inches (estimate) |
| Weight | Approx. 2 lbs (estimate) |
| Power | None (mechanical mount only) |
| Maintenance | Clean with damp cloth; check hardware periodically |
| Safety Notes | Ensure harness slack and no pinching; tighten all bolts securely |
| Spare Parts | Contact Havis for replacement hardware |
| Warranty | Refer to Havis warranty policy |
Frequently Asked Questions - C-DMM-2002 Havis
User questions about C-DMM-2002 Havis
0 question about this device. Answer the ones you know or ask your own.
Ask a new question about this device
Download the instructions for your Accessory in PDF format for free! Find your manual C-DMM-2002 - Havis and take your electronic device back in hand. On this page are published all the documents necessary for the use of your device. C-DMM-2002 by Havis.
USER MANUAL C-DMM-2002 Havis
INSTALL INSTRUCTIONS
C-DMM-2002 Dash Monitor Mount
2013-2017 Police Interceptor Sedan Standard Interior and Interceptor with Interior Upgrade Package (Ford option code 12P)
Notes:
-
The C-DMM-2000 series Dash Monitor Mount brackets are specifically designed to work with Havis, Inc, model # TSD-101 Touch Screen Display.
-
The display mount bracket includes a VESA 75 hole pattern that can also be used for some light weight tablet docking station applications under 5 lbs. . Acceptable positioning must be determined by end user.
-
The C-DMM-2002 will work with all Havis, Inc. consoles made for the Interceptor Sedan.
-
The C-DMM-2002 Does NOT work in the Retail Taurus sedan.
TOOLS REQUIRED: (some tools are not needed for all vehicle installations)
- Socket set - metric & standard
- Drill & drill bits
- 1.5" hole saw
- Tape measure
• Phillips screwdriver
- Trim removal tools
- Pencil / Marker
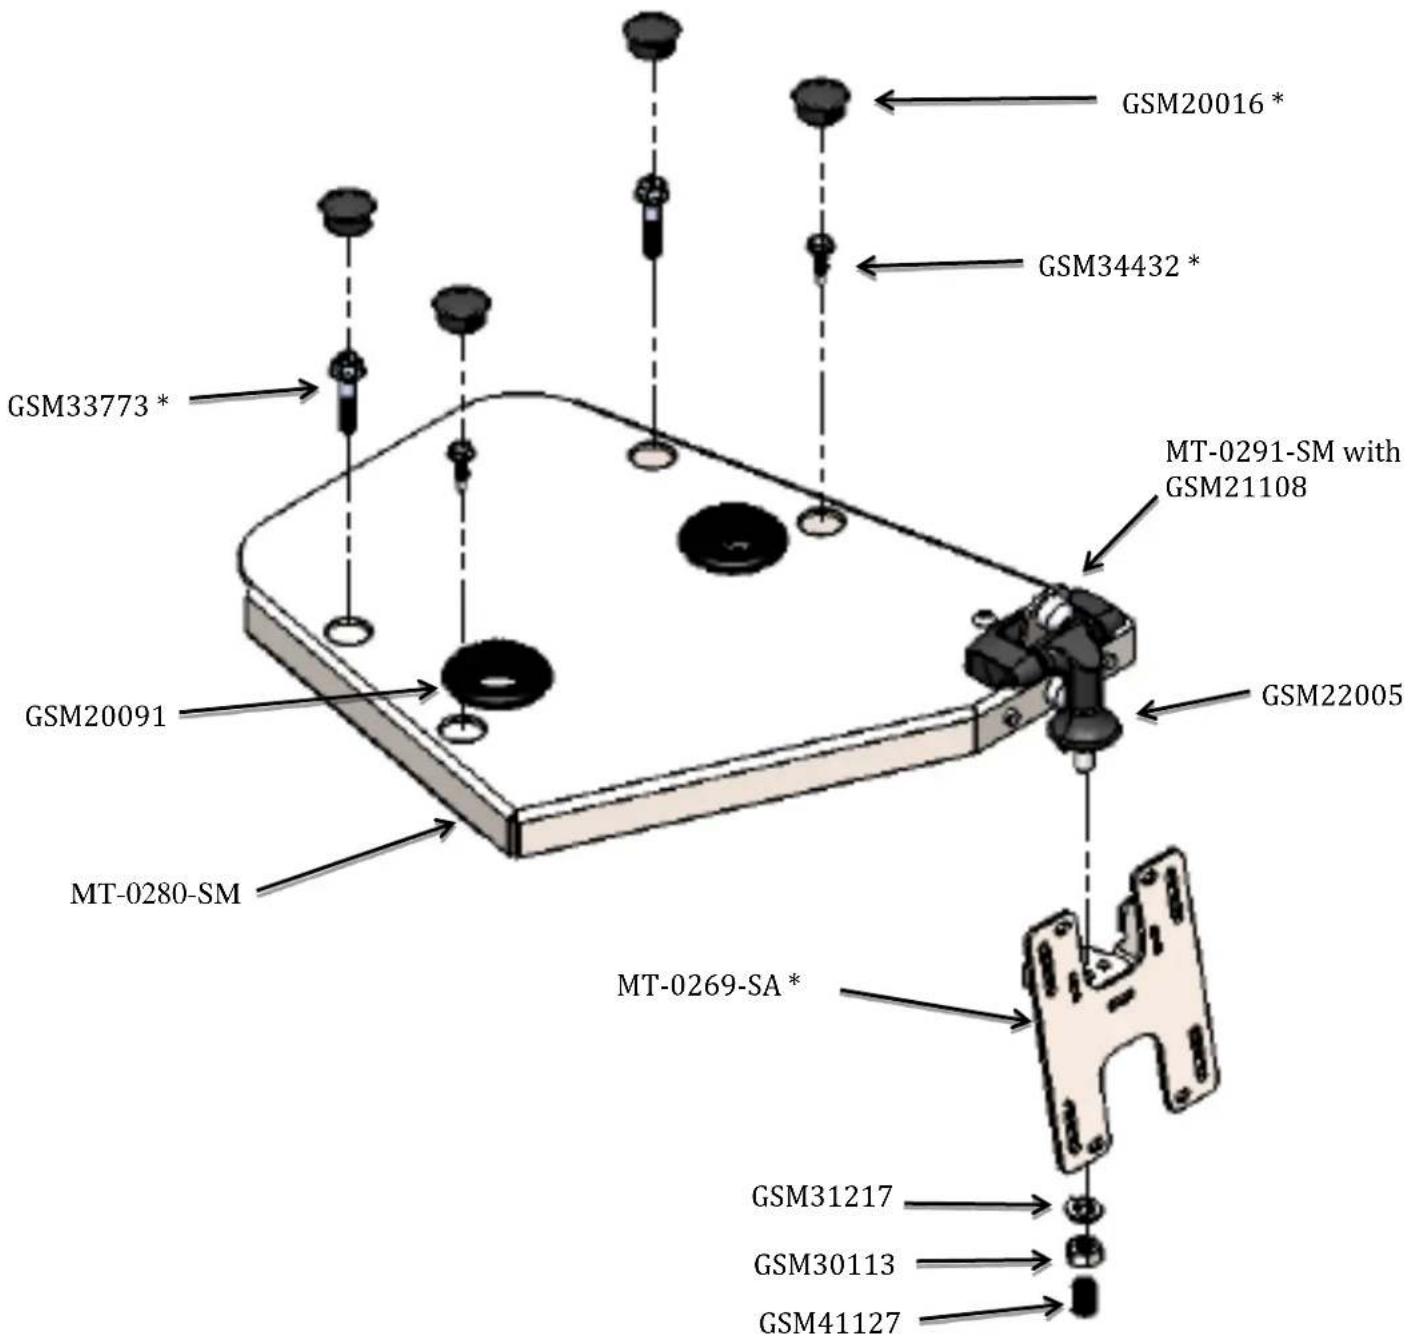
MOUNT BRACKET PARTS and HARDWARE:
Installation parts with * come loose in hardware kit bag. Other parts are preassembled
QTY: DESCRIPTION: PART #:
1 Main dash mount bracket MT-0280-SM
1 Pivot / display mount bracket MT-0269-SA *
1 Tilt swivel hinge GSM22005
2 M6 x 30mm Hex head bolt GSM33773 *
1 M8 hex nut SS GSM30113
1 M8 lock washer SS GSM31217
2 #10 x 3/4" Hex head self tapping screw GSM34432
4 34 " Dome Plug GSM20016
1 Vinyl cap (.50" high x .312 - .375 id) GSM41127
1 Stop bracket MT-0291-SM
2 M5 x 10mm Thread forming screw GSM33774
2 Grommet (1.75" wide) GSM20091
2 Pull through bumper (3mm head) GSM21109
2 Push in bumper (10mm head) GSM21108
3 8-32 x .312" Phillips truss head machine screw GSM34077 *
ALWAYS!
- Read all instructions before installing any Havis, Inc products.
- Use hardware provided with install kit
C-DMM-2002 assembly
natural_image
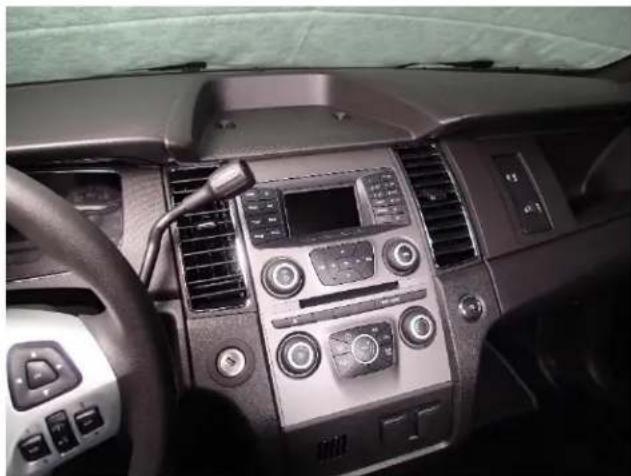
Interior view of a car dashboard with air conditioners and steering wheel (no visible text or symbols)View of Interceptor Sedan prior to installation.
natural_image
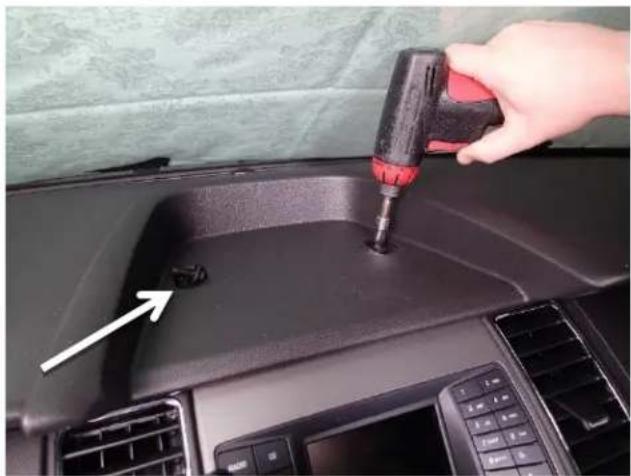
Close-up of a hand using a power drill to press down the dashboard of a car (no visible text or symbols)Remove the center dash top trim panel. (8 mm socket)
natural_image
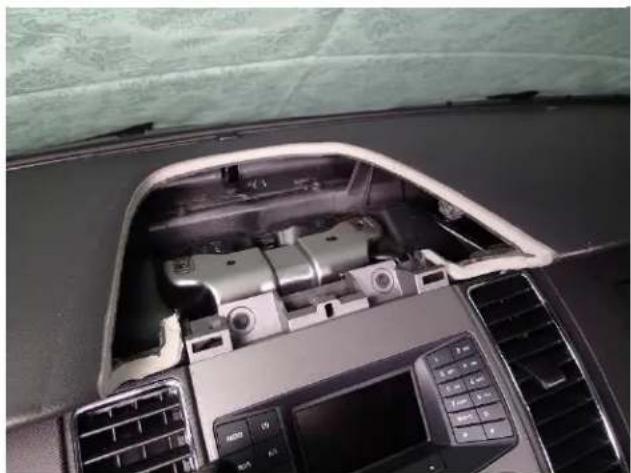
Interior view of a car dashboard with air vent, control panel, and internal compartments (no visible text or symbols)Top trim panel removed.
natural_image
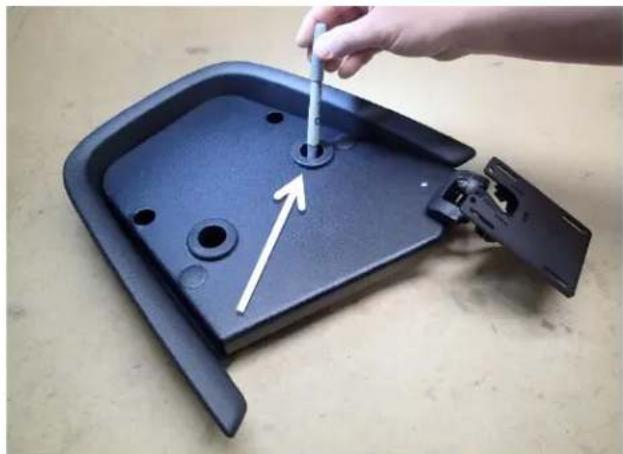
Hand using a screwdriver to adjust or install a black plastic tray component (no text or symbols visible)Place main dash mount bracket inside top trim panel. Line up with the two (2) OEM mounting holes and mark location for one (1) wire access hole on passenger side as shown.
natural_image
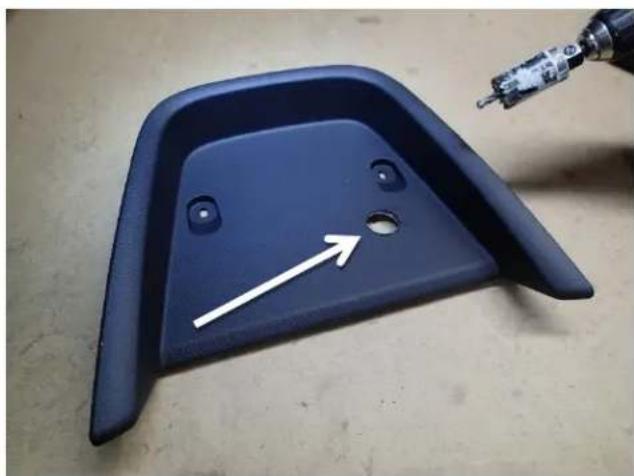
Close-up of a dark blue plastic seat with a white arrow pointing to a hole, next to a mechanical tool (no text or symbols visible)Cut wire access hole with 1-1/8" hole saw and deburr panel.
natural_image
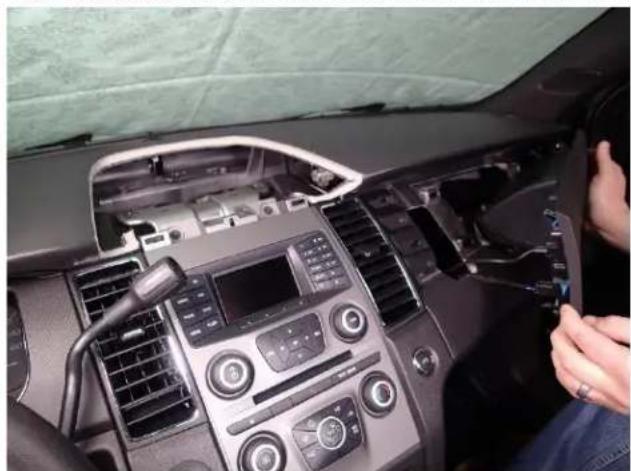
Interior view of a car dashboard with air conditioners and a hand interacting (no visible text or symbols)Remove and unplug passenger side dash panel. This helps with routing harnesses.
natural_image
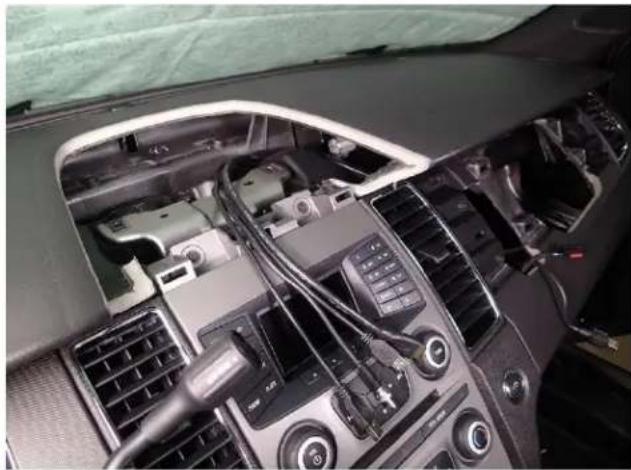
Interior view of a car dashboard with airbags, motors, and control panels (no visible text or symbols)Route harnesses up into center dash area. Make sure to provide plenty of slack.
natural_image
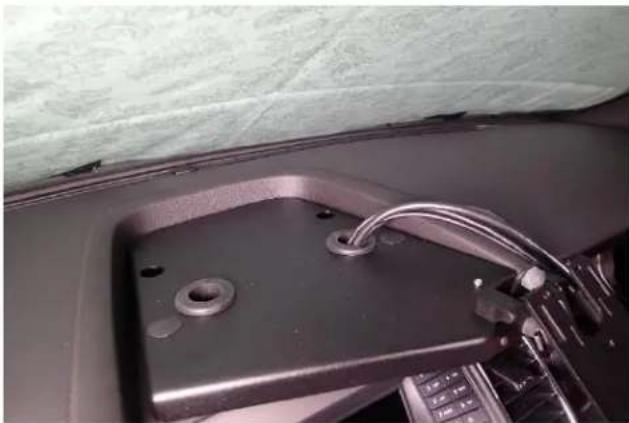
Close-up of a car's front compartment showing a metal plate, screwdriver, and wiring (no visible text or symbols)Place dash mount bracket inside top trim panel and route harnesses through hole.
natural_image
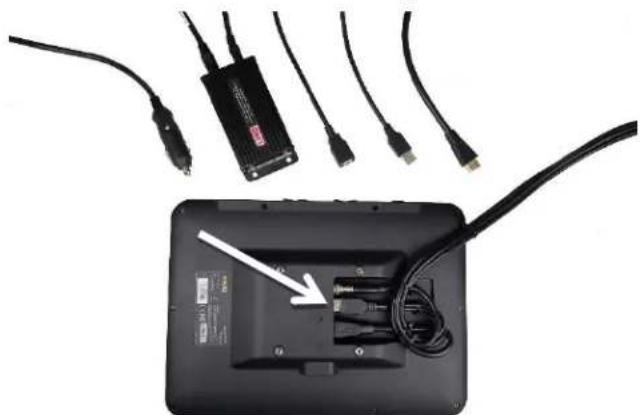
Black-and-white photo of a device with cables and connectors, showing an open panel with cable ends and a white arrow pointing to a component (no text or symbols visible)Connect harnesses to the back of the TSD-101 display. It is important to also double wire tie the harnesses to provide sturdy strain relief for the plugs. USB connection from remote Docking station must plug into USB plug closest to front of display. Refer to TSD-101 owner's manual for power and computer connection details.
natural_image
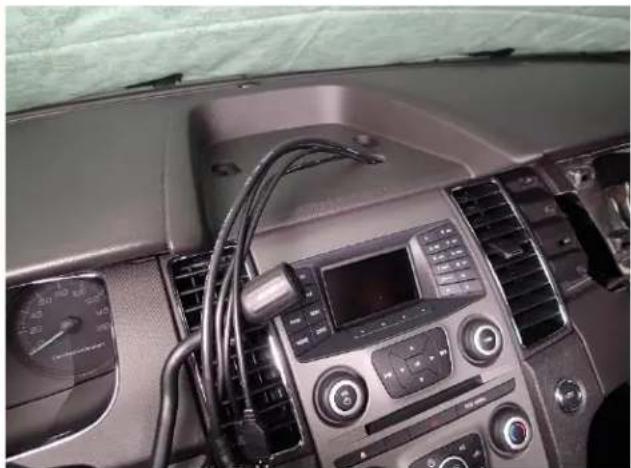
Interior view of a car dashboard with air conditioners, steering wheel, and digital display (no visible text or symbols)Place OEM trim panel back onto dash and route harnesses through hole.
natural_image
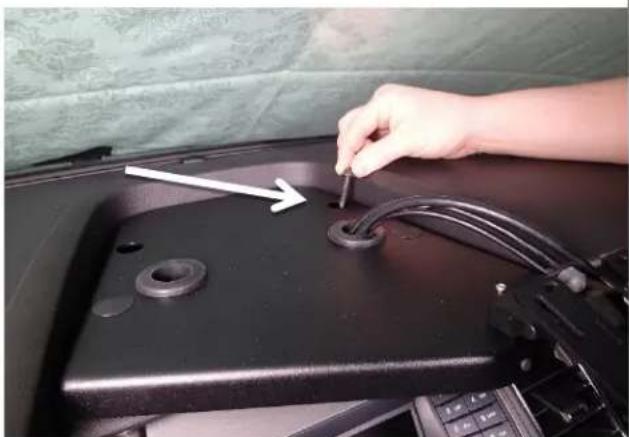
Close-up of a hand inserting a cable into a car's hood, with no visible text or symbolsAttach dash mount bracket to OEM mounting points with supplied M6 x 30mm Hex head bolts. Do not tighten until you conirm you have enough harness length.
natural_image
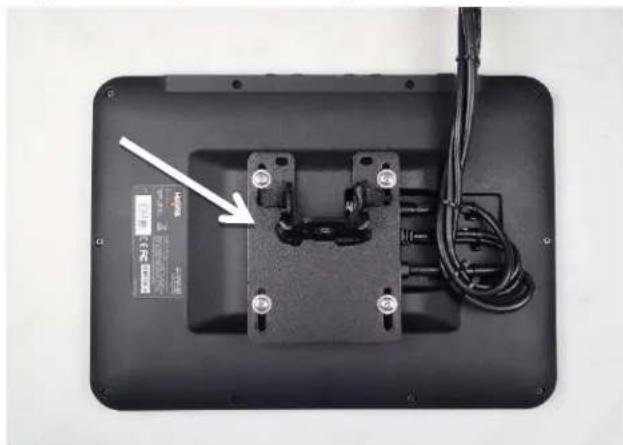
Top-down view of a black electronic device with attached components and wires, no visible text or symbolsAttach pivot / display mount bracket to display with M4 x 0.7 x 10mm Phillips head machine screws, lock washers and lat washers. Display mount hardware is included with TSD-101 hardware kit. (Phillips screwdriver)
natural_image
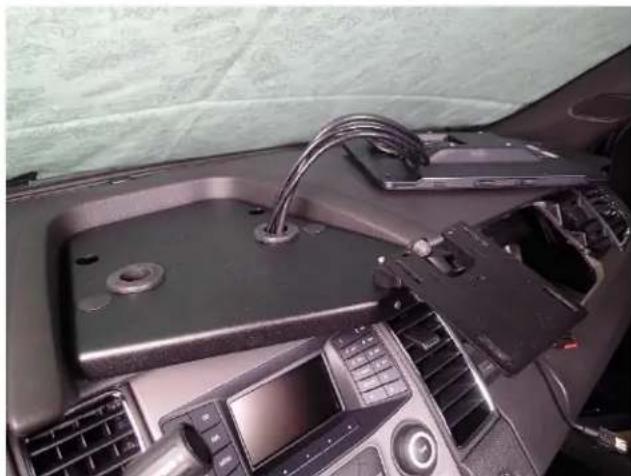
Interior view of a car dashboard with electronic equipment and a central display (no visible text or symbols)Harness connections and attaching bracket as shown in previous steps are best done on top of dash.
natural_image
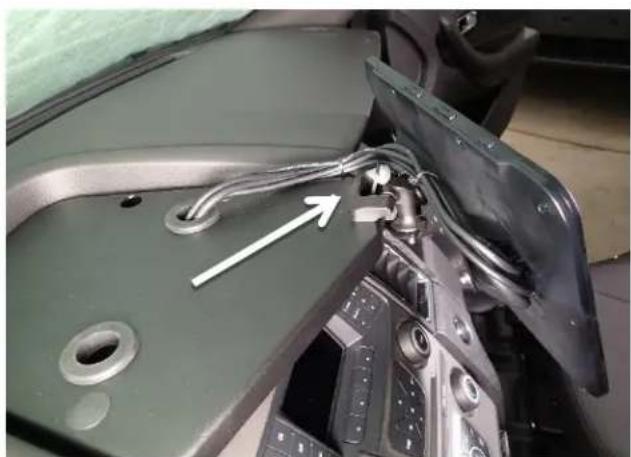
Close-up of a car's front bumper with visible wiring and mechanical components (no text or symbols)Wire tie / strain relief the harnesses to main mount bracket.
Leave slack for full display movement
natural_image
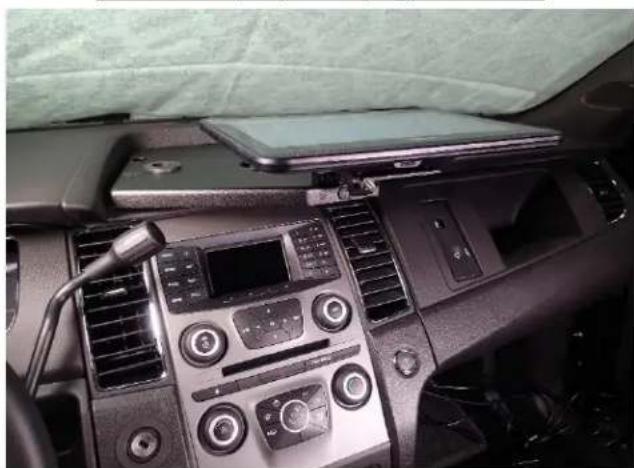
Interior view of a car dashboard with air conditioners, controls, and a tablet (no visible text or symbols)Refer to TSD-101 owner's manual for power and computer connection details.
natural_image
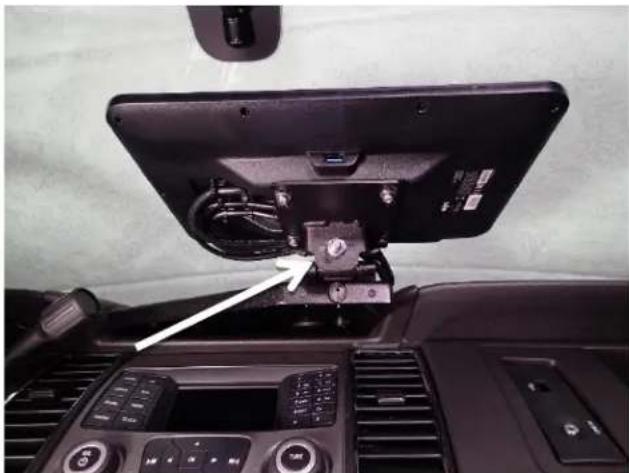
Interior view of a car dashboard with a mounted electronic device and control panel (no visible text or symbols)Attach bracket with display to the tilt swivel hinge with M8 hex nut and lock washer. Tighten nut and attach vinyl cap on M8 bolt threads.
natural_image
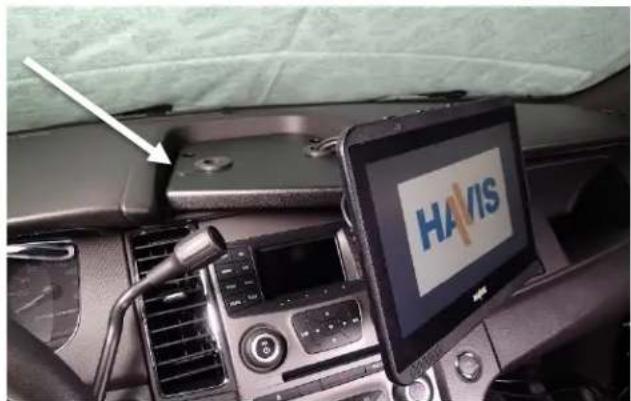
Interior view of a car dashboard with a Havis display and a mounted device (no visible text or symbols on the device itself)Use two (2) #10 x 3/4" hex head self tapping screws to attach rear of mount bracket to dash panel.
Tighten mounting hardware and make sure wire harnesses do not get pinched by hinge.
Insert 34 " plugs into mount screw access holes.
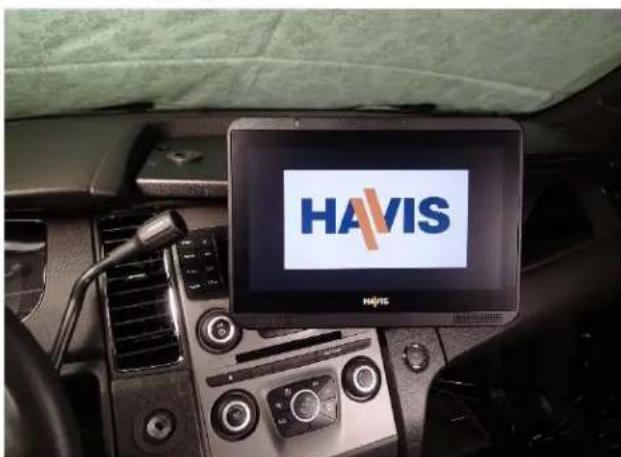
Installation of C-DMM-2002 with TSD-101 complete.
Brand : Havis
Model : C-DMM-2002
Category : Accessory