S12BL13E - Blender Sandstrøm - Free user manual and instructions
Find the device manual for free S12BL13E Sandstrøm in PDF.


| Product Type | Blender |
| Brand | Sandstrøm |
| Model | S12BL13E |
| Power | 750 W |
| Voltage / Frequency | 230 V ~ 50 Hz |
| Jug Capacity | 1.5 L (max recommended 1.25 L) |
| Speed Settings | 5 continuous speeds + Pulse mode + Ice Crush mode |
| Timer / Auto Shut-off | 3 minutes continuous operation; auto shut-off after 3 min |
| Duty Cycle | 3 minutes ON, 1 minute OFF |
| Blade Material | Stainless steel |
| Safety Features | Interlock: jug must be properly fitted to base; lid must be secured |
| Cleaning | Hand wash only; not dishwasher safe |
| Included Accessories | Blender jug, lid, measuring cup, instruction manual |
| Construction Material | Stainless steel and plastic (jug material not specified) |
| Ice Crushing Capacity | 12 to 15 ice cubes at a time |
Frequently Asked Questions - S12BL13E Sandstrøm
User questions about S12BL13E Sandstrøm
0 question about this device. Answer the ones you know or ask your own.
Ask a new question about this device
Download the instructions for your Blender in PDF format for free! Find your manual S12BL13E - Sandstrøm and take your electronic device back in hand. On this page are published all the documents necessary for the use of your device. S12BL13E by Sandstrøm.
USER MANUAL S12BL13E Sandstrøm
5 Speeds Stainless Steel Blender
GB
Instruksjonsmanual
Blender med 5 hastigheter i rustfritt stål
NO
Instruktionsbok
5 hastigheters mixer i rostfritt stål
SE
Käyttöopas
natural_image
Exterior view of a modern kitchen blender with control panel and brand logo (no text-heavy elements)Contents
GB
Safety Warnings....5
Unpacking....9
Product Overview....10
First Time Use....10
Preparing and Filling the Ingredients......10
Fitting the Lid....11
Fitting the Measuring Cup 11
Fitting the Jug to the Base Unit 11
Operation 12
After Use....13
Cleaning 13
Cleaning the Blender Jug 13
Cleaning the Base....14
Storage 14
Specifications....14
For your continued safety and to reduce the risk of injury or electric shock, please follow all the safety precautions listed below.
- Read all the instructions carefully before using your appliance and keep them for future reference.
- Unplug the appliance from the mains supply when not in use, when removing or attaching the blender jug, or before cleaning any part of the appliance.
- This appliance is for household use only. Do not use it for professional catering.
• Do not use the appliance outdoors. - Do not immerse the appliance base unit or the mains cable or plug in liquids.
- Do not use the appliance near a source of heat or on an unstable surface.
- Do not use your appliance in damp or wet conditions.
- Never let children operate this appliance. Close supervision is necessary when this appliance is used near children.
- This appliance is not intended for use by persons (including children) with reduced physical, sensory or mental capabilities, or lack of experience and knowledge unless they have been given supervision or instruction concerning the use of the appliance by a person responsible for their safety.
• Children should be supervised to ensure that they do not play with the appliance. - Ensure that the mains cable does not touch any hot surface and that it does not overhang the edge of your work surface.
• There are no user serviceable parts in your appliance. - Do not operate the appliance with a damaged mains cable or mains plug or after the appliance or any attachment has been damaged. Seek qualified technicians for assistance.
- If the mains cable is damaged it must be replaced by the manufacturer, its service agent, or similarly qualified persons in order to avoid a hazard.
- Do not use attachments or accessories which are not recommended by the manufacturer. They may cause malfunction or injury.
- Store the appliance away from direct sunlight and out of the reach of children.
When operating your blender:
- Do not place your hand in the blender jug. The sharp blades may cause injury.
- Never insert any hard object or implement into the blender jug when it is operating. This may cause damage to the appliance and personal injury.
- Do not place meat containing bones or fruits with large hard stones in the blender jug.
- If the blender becomes clogged, switch off and unplug the mains cable from the mains socket before cleaning the obstruction. Check carefully for damage.
- Do not use the appliance for any purpose not expressly specified in this manual.
Thank you for purchasing your new Sandstrøm Blender.
We recommend that you spend some time reading this instruction manual in order to fully understand all the operational features it offers.
Read all the safety instructions carefully before use and keep this instruction manual for future reference.
Unpacking
Remove all packaging from the unit. Retain the packaging. If you dispose of it please do so according to local regulations.
The following items are included:
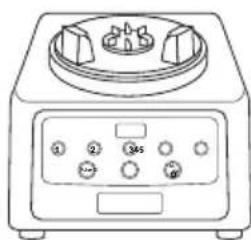
natural_image
Line drawing of a laboratory instrument with control panel and rotary knob (no text or symbols)Base Unit
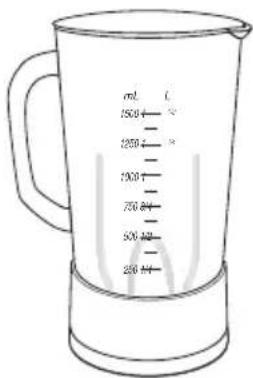
Blender Jug Blender Jug Lid


Measuring Cup

Instruction Manual
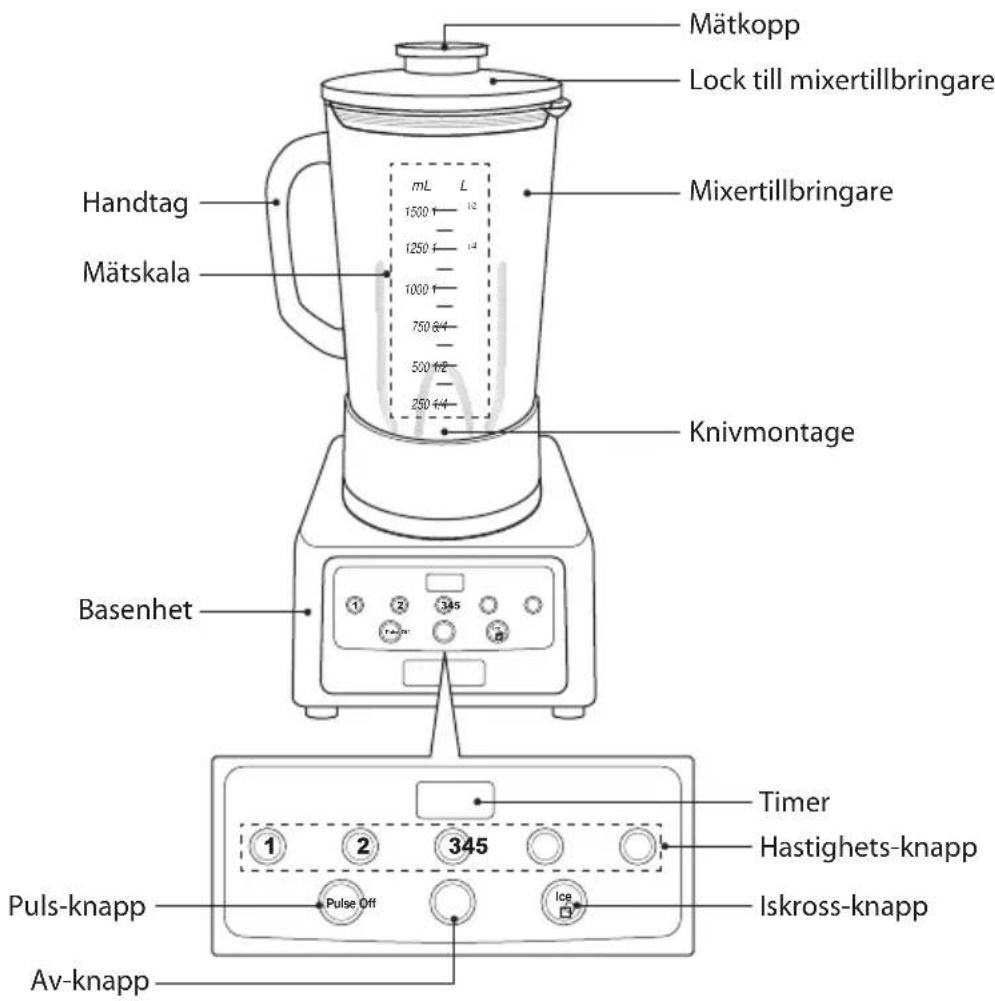
Product Overview
GB

First Time Use
- Before using your blender for the first time, wash the jug, blade assembly, lid and stopper. Rinse thoroughly and dry.
- Place the base unit on a stable surface, free from heat and moisture and within easy reach of a mains socket. The mains cable should not be taut.
Preparing and Filling the Ingredients
- Cut the ingredients into 25mm (1") cubes before placing them into the jug. If the food is very solid or dry, cut the pieces into smaller cubes.
- Fill the blender jug with the ingredients.
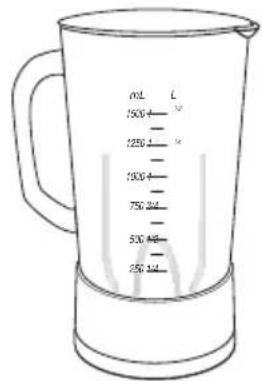
- Do not overfill the jug. The maximum capacity is 1500 ml, but we suggest you do not exceed 1250 ml. If you are preparing a large quantity use several smaller batches.
- If the ingredients are very dry, put some liquid into the jug. You should never try to reduce dry ingredients in the blender.
Fitting the Lid
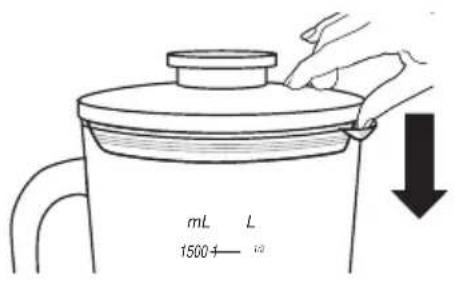
Place the lid on the top of the jug and slightly push the lid to release the air pressure from the jug. Make sure that the lid is properly secured.
GB
Fitting the Measuring Cup
The measuring cup has an integral measuring cup which is useful for measuring small amounts of ingredients.
Place the measuring cup in the slots on the lid and turn anti-clockwise to lock. Make sure the measuring cup is properly secured. To avoid splashing, always operate the blender with the measuring cup firmly in place.

natural_image
Hand pressing a circular component on a rotating wheel (no text or symbols)Fitting the Jug to the Base Unit
Place the blender jug on the base unit as shown. The jug will fit in 4 positions: handle facing front, left, right, back. If the jug is not properly fitted to the base, the blender will not start.

The lid must be secured to the jug and the jug to the base otherwise the blender will not operate!

Operation
- Open the lid and put food into the jug. Close the lid and slightly push the lid to release the air pressure from the jug.
- Make sure the jug, measuring cup and the lid are secure and the jug is properly fitted to the base.
- Plug your blender into the mains and switch on the power.
- The timer will display 0:00 and the Off button will illuminate.
| Blender's Operation Modes | |
| Continuous (Normal) operation | To turn on the blender in continuous mode, press one of the following Speed buttons: 1 (slowest), 2, 3, 4 or 5 (fastest). The button for the speed you select will illuminate blue and the blender's timer will display the seconds.The blender will run continuously after you press the Speed button. It will stop if you press the same Speed button again. The timer will also stop. To continue simply press the same Speed button again. When the timer reaches 3 minutes, the unit will automatically shut off.You can change blender speeds by pressing a different Speed button without pressing the Off button. The timer feature will continue while you are blending and will pause in its count when you re-push a Speed button to shut the blender off. The timer will re-set itself to zero only if you press the Off button. |
| Pulsed operation | To run the blender intermittently (pulse mode) rather than continuously, first press the Pulse button. The Pulse button light will flash blue. Then press and hold one of the five Speed buttons above it to run the blender at that speed. The Speed button you press will illuminate blue. When you release the button the blender will stop and turn Off.The Pulse operation time can accumulate up to 3 minutes. |
| Ice Crushing | The Ice Crush button is the highest and strongest blender speed. When crushing ice, make sure that the lid is firmly closed.The blender will begin to operate at this speed as soon as you press the Ice Crush button, but will only continue to operate as long as you hold the Ice Crush button down (up to 3 mins). Press the Ice Crush button in quick succession but do not hold the button down. While the Ice Crush button is pressed, it illuminates blue. As soon as you stop pressing the button, the blender turns Off.Put some ice cubes into the jug (12 to 15 ice cubes). There is no need to add water. When the ice is ready, stop the blender. Use spoon to pour out the crushed ice. |
During blending, you can feed in small amounts of food or liquid through the jug lid. To do this:
- Stop the blender and hold the lid.
- Turn the measuring cup slowly clockwise to free it and then lift it out.
- Gradually feed pieces of food or liquids into the jug through the feeder.
- Fit the measuring cup back when you have finished.

- Do not run the appliance continuously for more than 3 minutes. After 3 minutes the appliance will auto-stop. Allow the blender to rest for 1 minute before using it again.
- Never blend very hot liquids in the blender. This is dangerous as the pressure inside the jug will build up and may cause the contents to escape from the jug.
• If you spill liquid on the blender base immediately switch off and wipe dry. - Do not run the appliance without securing the lid and measuring cup.
After Use
After you have finished blending:
- Press the off button.
- Unplug the blender from the mains socket.
- Hold the jug by the handle and carefully raise to release the jug. (This may be easier with one hand on the base and one hand holding the jug handle).
- Lift off the lid and pour or spoon out the contents carefully.
Cleaning
Cleaning the Blender Jug
- Pour about 500ml of warm soapy water into the jug and place the jug on the base.
- Use Speed '1' for a few seconds to loosen any food particles and free them from the blades.
- Remove the jug, pour away the water and rinse in fresh running water. Repeat steps 1 and 2 with fresh water.
- Alternatively the jug may be immersed in warm soapy water and cleaned using a long handled brush. Do not touch the blades when cleaning.
- Wash the lid and measuring cup separately in warm soapy water, rinse and allow to dry.

- The jug body should be handled carefully. The jug contains moving parts - do not leave the jug immersed in water for longer than necessary to clean it or you may affect the operating performance of the blender.
- Handle blades with care especially during cleaning as they are extremely sharp.
• DO NOT wash the jug or attachments in a dishwasher.
Cleaning the Base
- Ensure the blender is switched off and unplugged from the mains.
- Wipe the outer surface of the motor unit with a damp cloth. Never use abrasive cleaners or scouring creams.

Never immerse the base in water when cleaning.
Storage
After all the components have been washed and dried, re-assemble the blender and store it out of direct sunlight and out of the reach of children.
The mains cable may be wound around the lugs at the bottom of the appliance for easier storage.
Specifications
| Model S12BL13E | |
| Power 230V~50Hz, 750W | |
| Capacity of Jug 1.5 L | |
| Duty Cycle 3 minutes ON; 1 minute OFF |
Features and specifications are subject to change without prior notice.
natural_image
Line drawing of a laboratory instrument with control panel and rotary knob (no text or symbols)Sokkelenhet
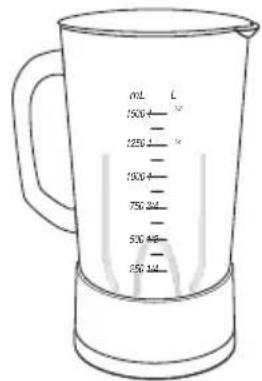
Blendermugge Lokk til blendermugge
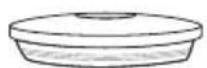

Målekopp

Bruksanvisning
Produktoversikt
NO

Førstegangsbruk
natural_image
Hand pressing a circular component on a rotating wheel (no text or symbols)Sette muggen på sokkelenheten
natural_image
Line drawing of a laboratory instrument with control panel and rotary knob (no text or symbols)Basenhet

Mixertillbringare Lock till
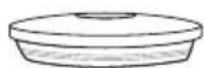
mixertillbringare

Mätkopp

Instruktionsmanual
Produktöversikt
Första användning
natural_image
Hand pressing a circular component on a rotating wheel (no text or symbols)natural_image
Line drawing of a laboratory instrument with control knobs and a central rotary knob (no text or symbols)Alusta

Käyttöopas
natural_image
Hand pressing a circular component on a rotating wheel (no text or symbols)natural_image
Line drawing of a laboratory instrument with control panel and rotary ports (no text or symbols)Baseenhed

Blenderkande Låg til blenderkande
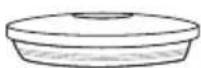

Målekop

Brugervejledning
Produktoversigt
DK

Ved første brug
natural_image
Hand pressing a circular component on a rotating wheel (no text or symbols)natural_image
Line drawing of a laboratory instrument with control knobs and a central rotary knob (no text or symbols)Základna
natural_image
Hand pressing a circular component on a rotating wheel (no text or symbols)natural_image
Line drawing of a square electronic device with a top panel and control buttons (no text or symbols)Motorová jednotka

natural_image
Hand pressing a circular component on a rotating wheel (no text or symbols)SK
This symbol on the product or in the instructions means that your electrical and electronic equipment should be disposed at the end of its life separately from your household waste. There are separate collection systems for recycling in the EU. For more information, please contact the local authority or your retailer where you purchased the product.
NO
- Contents
- When operating your blender:
- Thank you for purchasing your new Sandstrøm Blender.
- Unpacking
- Product Overview
- First Time Use
- Preparing and Filling the Ingredients
- Fitting the Lid
- Fitting the Measuring Cup
- Fitting the Jug to the Base Unit
- Operation
- After Use
- Cleaning
- Cleaning the Blender Jug
- Cleaning the Base
- Storage
- Specifications
- Produktoversikt
- Førstegangsbruk
- Sette muggen på sokkelenheten
- Produktöversikt
- Första användning
- Produktoversigt
- Ved første brug
- NO
Brand : Sandstrøm
Model : S12BL13E
Category : Blender