631-037 - Bike light Kayoba - Free user manual and instructions
Find the device manual for free 631-037 Kayoba in PDF.


| Product Type | Bicycle Light |
| Brand | Kayoba |
| Model | 631-037 |
| Brightness | 1000 lm |
| Bulb | LED CREE XML_T60 |
| Service Life Bulb | 50,000 hours |
| Battery | Li-ion 8.4 V / 4,400 mAh |
| Battery Service Life | 500 charging cycles |
| Charging Time | 3.5 hours |
| Runtime (100% brightness) | 4 hours |
| Runtime (50% brightness) | 8 hours |
| Runtime (flashing) | 8 hours |
| Light Modes | Full beam, half beam, flashing |
| Enclosure Class | IPX4 |
| Housing Material | Aluminium alloy 6061-T6 with anodised surface |
| Mounting | Rubber rings for handlebar |
| Protection Features | Overcharge, overdischarge, short-circuit, thermal reduction |
| Battery Indicator | Five-step: Green (75-100%), Blue (50-74%), Yellow (25-50%), Red (5-25%), Red flashing (<5%) |
| Cable Length | 105 cm |
| Maintenance | Keep battery fully charged before storage; clean charger with dry cloth |
| Safety | Do not look into light, avoid eye contact, keep away from children, do not short-circuit |
Frequently Asked Questions - 631-037 Kayoba
Blue: 50-74%
Yellow: 25-50%
Red: 5-25%
Red flashing: less than 5% charged.
User questions about 631-037 Kayoba
0 question about this device. Answer the ones you know or ask your own.
Ask a new question about this device
Download the instructions for your Bike light in PDF format for free! Find your manual 631-037 - Kayoba and take your electronic device back in hand. On this page are published all the documents necessary for the use of your device. 631-037 by Kayoba.
USER MANUAL 631-037 Kayoba
natural_image
Product photo of a black electric light bulb with attached harness and green safety ring (no text or symbols visible)SE Bruksanvisning för cykelbelysning
NO Bruksanvisning for sykkelbelysning
PL Instrukcja obsługi oświetlenia rowerowego
EN User Instructions for bicycle light
SE - Bruksanvisning i original
NO - Bruksanvisning i original
EN - Operating instructions in original
Date of production: 2014-06-12
© Jula AB
SVENSKA....4
SÄKERHETSANVISNINGAR....4
BESKRIVNING ....5
Egenskaper....5
Teknisk data 5
MONTERING 6
HANDHAVANDE 6
UNDERHÅLL 6
NORSK 8
SIKKERHETSANVISNINGER 8
BESKRIVELSE....9
Egenskaper....9
Tekniske data 9
MONTERING....10
HÄNDTERING 10
VEDLIKEHOLD 10
POLSKI 12
ZASADY BEZPIECZEŃSTWA 12
OPIS 13
Właściwości 13
SAFETY INSTRUCTIONS....16
DESCRIPTION 17
Features: 17
Technical data 17
ASSEMBLY....18
OPERATION....18
MAINTENANCE 18
SÄKERHETSANVISNINGAR
natural_image
Red and black headlamp with coiled cable (no text or symbols visible)Lampa
natural_image
Black plastic object with coiled straps and a loop handle (no text or symbols visible)Batteri
natural_image
Black rectangular electronic device with a power plug and coiled cable (no visible text or symbols)Laddare Gummiringar
TEKNISK DATA
natural_image
Close-up of hands holding a small mechanical component with coiled wires (no visible text or symbols)natural_image
Close-up of hands assembling a black mechanical component with threaded leads (no visible text or symbols)- Montera lampan på styret med gummiringen
natural_image
Two black athletic belt accessories with straps, one being held and the other holding a tool (no visible text or symbols)natural_image
Symbol of a trash bin with diagonal lines crossing it, no text or labels presentVärna om miljön!
natural_image
Red and black headlamp with coiled cable (no text or symbols visible)Pære
natural_image
Black plastic object with coiled straps and a loop handle (no text or symbols visible)Batteri
natural_image
Black rectangular electronic device with a power plug and coiled cable (no visible text or symbols)Lader Gummiringer
TEKNISKE DATA
natural_image
Close-up of hands holding a small mechanical component with coiled wires (no visible text or symbols)natural_image
Close-up of hands assembling a black mechanical component with threaded leads (no visible text or symbols)- Monter lykten på styret med gummiringen
natural_image
Two black athletic belt accessories with straps, one being held and the other holding a tool (no visible text or symbols)natural_image
Four black-and-white product photos: a red headlamp, a black hard hat with cable, a charging plug, and a black ring knot (no text or symbols visible)Żarówka LED CREE XML_T60
natural_image
Close-up of hands holding a black mechanical component with coiled wires (no visible text or symbols)natural_image
Close-up of hands using a BKE-branded optical instrument to adjust internal components (no visible text or symbols)natural_image
Two black athletic belt accessories with straps, one being adjusted and the other holding a device (no visible text or symbols)natural_image
Pure electrical circuit lines without any symbolsDBAJ O ŚRODOWISKO!
Read the operating instructions carefully before use!
Please retain for future reference.
- Store out of reach of children.
- Do not look directly into the light and do not aim it at anyone else's eyes as the strong light can cause eye damage.
- Do not short-circuit the battery or the charger.
- A new battery must be fully charged before it is used for the first time.
- Store the charger in a dry place. It is only intended for indoor use.
- Never touch the light or the charger with wet hands.
- Use caution with the charger/battery and do not subject them to impacts or drop them. The batteries must not be crushed or punctured.
- Never charge the battery with a charger which is not approved by the battery manufacturer.
- Do not expose the product to open flames.
- Never place the battery or products on hot surfaces, e.g. on or next to microwave ovens, stoves or radiators; the batteries may explode if they are overheated.
- Do not hold the light when it is lit as it may overheat.
- The battery must be stored in a cool, dry place and fully charged.
- If the battery acid has leaked out, do not touch it; if you have come into contact with battery acid, immediately contact a hospital information desk.
- Make sure that the battery does not come into contact with metal objects as this may cause short-circuiting which damages the battery.
- Keep the battery and charger free of dust and dirt to ensure they work correctly. Clean the charger by first pulling out the plug and then wiping it with a dry dusting cloth. Never open the battery charger.
DESCRIPTION
FEATURES:
• Full beam, half beam, flashing
- One charge lasts (for about): 4 hours at full brightness, 8 hours at 50% brightness and 8 hours in the flashing setting.
• Anti-reflexive and scratch-proof light glass
• Highly efficient reflector
• Cover made of aluminium alloy 6061-T6 with durable, anodised surface
- Easy-to-install rubber rings
- Automatic protection function – brightness reduced from 100% to 50% if the light gets too warm. Brightness returns to 100% as soon as the lamp has cooled. It is unlikely that the light will get too warm while you are cycling, however it might happen if you stand still with the bicycle for a longer time.
• Built-in protection against excessive charging and discharging as well as short-circuiting
• The battery capacity is at most reduced by 10% after 500 charging cycles
• Five-step battery indicator
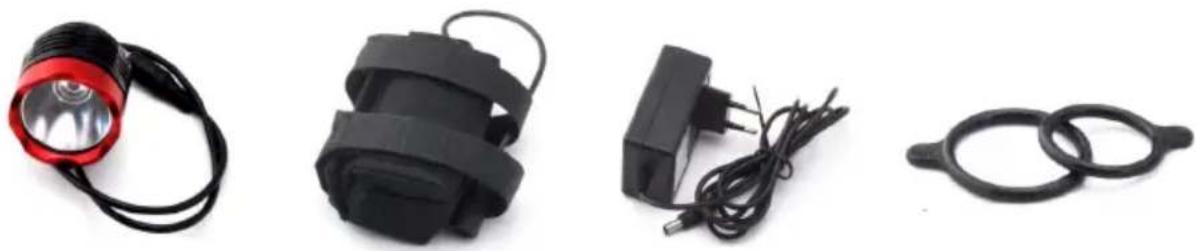
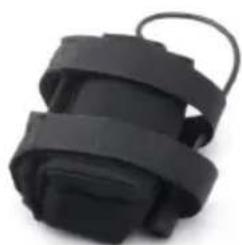
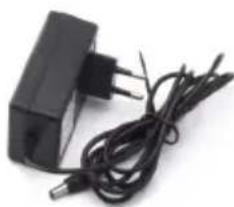
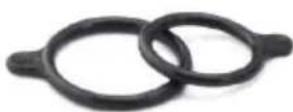
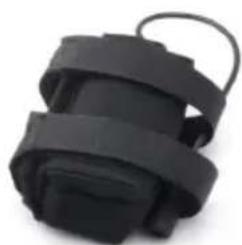
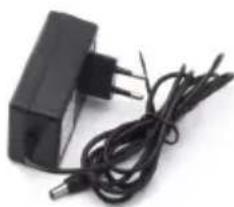
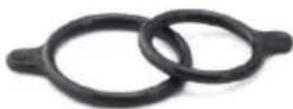
Bulb Battery Charger Rubber rings
TECHNICAL DATA
Enclosure class IPX4
Bulb LED CREE XML_T60
Service life, bulb 50,000 hours
Brightness 1,000 lm
Charging time 3.5 hours
Battery (chargeable) Li-ion 8.4 V/ 4,400 mAh
Service life, battery 500 charging cycles
Cable length 105 cm
ASSEMBLY
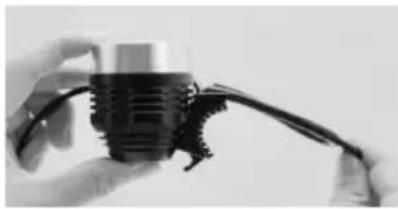
natural_image
Close-up of hands holding a small mechanical component with coiled wires (no visible text or symbols)- Attach the rubber ring to the light
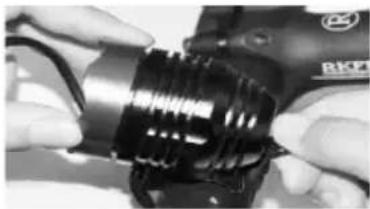
natural_image
Close-up of hands assembling a mechanical component with threaded leads (no visible text or symbols)- Use the rubber ring to mount the light onto the handlebar
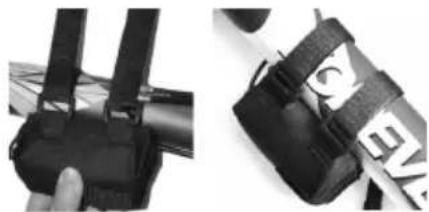
natural_image
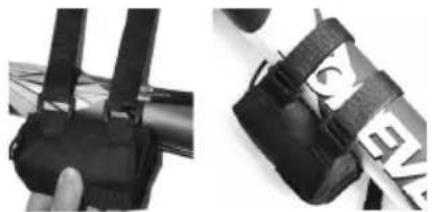
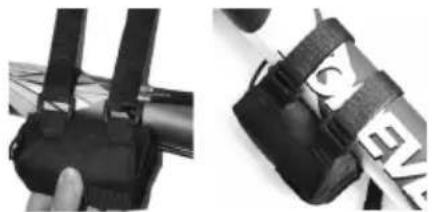
Two black athletic belt accessories with straps, one being held and the other holding a pen (no visible text or symbols)- Wind the strap round the frame and make sure that the battery is securely in place

- Connect the battery to the light cable
OPERATION
Functions
Press the button to change between 100% brightness → 50% brightness → flashing → off. Hold in the button for two seconds, regardless of setting, to turn off the light.
Battery charging
Connect the battery to the charger; Connect the charger to a 230 V power outlet. Note the following indicators.
• Red: Battery is charging
• Green: Battery is fully charged
Battery indicators
Green 75–100% charged
Blue 50–74% charged
Yellow 25–50% charged
Red 5–25% charged
Red + flashing <5% charged
MAINTENANCE
Make sure that the battery is fully charged before storing for longer periods.
Jula reserves the right to make changes. In the event of problems, please contact our service department. www.jula.com
natural_image
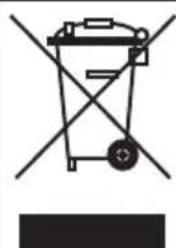
Symbol of a trash bin crossed with no text or labels, representing waste sorting or disposal (no text present)Care for the environment!
Must not be discarded with household waste!
This product contains electrical or electronic components that should be recycled.
Leave the product for recycling at the designated station e.g. the clocal authority's recycling station.
- SVENSKA....4
- SÄKERHETSANVISNINGAR....4
- BESKRIVNING ....5
- Egenskaper....5
- Teknisk data 5
- MONTERING 6
- HANDHAVANDE 6
- UNDERHÅLL 6
- NORSK 8
- SIKKERHETSANVISNINGER 8
- BESKRIVELSE....9
- Egenskaper....9
- Tekniske data 9
- MONTERING....10
- HÄNDTERING 10
- VEDLIKEHOLD 10
- POLSKI 12
- ZASADY BEZPIECZEŃSTWA 12
- OPIS 13
- Właściwości 13
- SAFETY INSTRUCTIONS....16
- DESCRIPTION 17
- Features: 17
- Technical data 17
- ASSEMBLY....18
- OPERATION....18
- MAINTENANCE 18
- SÄKERHETSANVISNINGAR
- Värna om miljön!
- TEKNISKE DATA
- DBAJ O ŚRODOWISKO!
- Read the operating instructions carefully before use!
- DESCRIPTION
- FEATURES:
- TECHNICAL DATA
- ASSEMBLY
- OPERATION
- Functions
- Battery charging
- Battery indicators
- MAINTENANCE
- Care for the environment!
Brand : Kayoba
Model : 631-037
Category : Bike light