
954-060 - Walkie-talkie Marquant - Free user manual and instructions
Find the device manual for free 954-060 Marquant in PDF.


| Product Type | Talkie Walkie (Two-way radio) |
| Brand | Marquant |
| Model | 954-060 |
| Color | Black |
| Dimensions | Approx. 160 x 55 x 30 mm |
| Weight | Approx. 120 g (including batteries) |
| Power Supply | 3x AAA batteries (not included) |
| Output Power | 0.5 W (high), selectable low power |
| Number of Channels | 8 |
| Frequency Range | 446.00625 to 446.09375 MHz (PMR446) |
| Range | Up to 5 km (open field, depending on conditions) |
| Battery Life | Approx. 30 hours (typical) |
| Display | LCD (shows channel, volume, TX, RX, low power) |
| Special Features | LED lamp (works even when off), belt clip, microphone, speaker |
| Functions | Scan, Monitor, Call signal, Volume/Channel adjustment |
| Antenna | Fixed (integral) |
| Belt Clip | Detachable |
| Energy Saving | Automatic after 6 seconds inactivity |
| Low Battery Indication | Audible beep and red LED flash every 15 seconds |
| Certification | CE, RoHS, compliant with R&TTE Directive |
| Country of Use | EU countries (see list in manual) |
| Care | Clean with soft dry cloth; do not use chemicals |
| Safety | Do not immerse in water; keep away from children; do not disassemble |
| Included in Box | One walkie-talkie, user manual |
Frequently Asked Questions - 954-060 Marquant
User questions about 954-060 Marquant
0 question about this device. Answer the ones you know or ask your own.
Ask a new question about this device
Download the instructions for your Walkie-talkie in PDF format for free! Find your manual 954-060 - Marquant and take your electronic device back in hand. On this page are published all the documents necessary for the use of your device. 954-060 by Marquant.
USER MANUAL 954-060 Marquant
Operating instructions for walkie-talkie
954-060

natural_image
Black handheld electronic device with control panel and display screen (no visible text or symbols)SV Bruksanvisning i original
NO Bruksanvisning i original
EN Operating instructions in original
SVENSKA 4
TEKNISKA DATA 4
KANALTABELL 4
BESKRIVNING 4
LCD-display 5
Switching on the walkie-talkie....20
Adjusting the volume....20
Receiving signals 20
Transmitting a signal....20
OPERATION....21
Getting started 21
Inserting the batteries 21
Loosening the belt clip 21
Attaching the belt clip 21
Changing channel 21
Selecting high/low output 21
Monitoring 21
Using the lamp....21
Automatic energy saving function 21
Low battery voltage indication 22
Scanning channels....22
Sending call signals 22
TROUBLESHOOTING 22
LCD-DISPLAY
natural_image
Technical line drawing of two views of a handheld device with internal components (no text or symbols)Lossa bältesklämman


LCD-DISPLAY
natural_image
Technical line drawing of a handheld device showing front and side views (no text or symbols)Løsne belteklemmen

WYŚWIETLACZ LCD
Symbol TX
Symbol niskiej mocy
Symbol RX
natural_image
Technical line drawing of a handheld device showing front and side views (no text or symbols)Read these instructions carefully before use!
TECHNICAL DATA
| No. of channels | 8 |
| Output power (TX) | 0.5 W |
| Battery life | Approx. 30 hrs |
| Range | Approx. 5 km |
CHANNEL TABLE
| Channel | Frequency (MHz) |
| 1 | 446.00625 |
| 2 | 446.01875 |
| 3 | 446.03125 |
| 4 | 446.04375 |
| 5 | 446.05625 |
| 6 | 446.06875 |
| 7 | 446.08125 |
| 8 | 446.09375 |
DESCRIPTION
- Antenna
- LCD screen. Displays the selected channels and other status symbols.
- Lamp (). Press this button to switch on the LED lamp.
- Up button (▲) for volume adjustment and channel selection. Press this button to adjust the volume and channel number upwards.
- Down button (▲) for volume adjustment and channel selection. Press this button to adjust the volume and channel number downwards.
- Call button (C). Press this button to send call signals.
- Battery compartment (on rear). Holds three AAA batteries or rechargeable NiMH batteries (not included).
- Speaker.
- Catch to lock the battery compartment cover (on rear).
- Scan button (S). Hold down for one second to scan the channels and hold weak signals.
- Microphone.
- Menu/Power switch On/Off (). Holddown to switch the walkie-talkie on/off. You can change channels and select high or low power from the menu.
- PTT button (Push To Talk). Press this button to transmit.
- LED indicator for TX (transmission). Shines red during transmission. Comes on every 15 seconds to indicate low battery voltage.
- LED bulb.
- Belt clip (on rear).

LCD DISPLAY
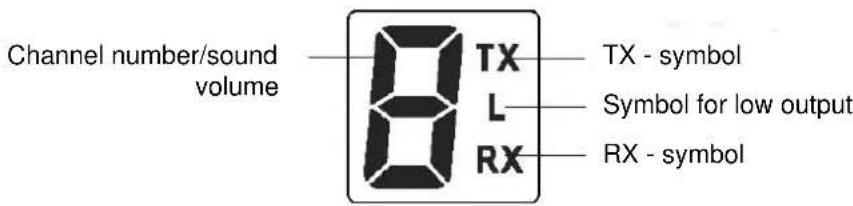
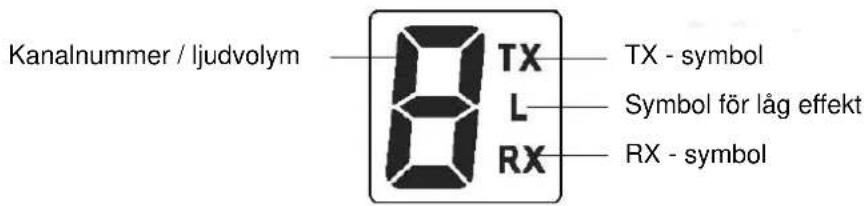
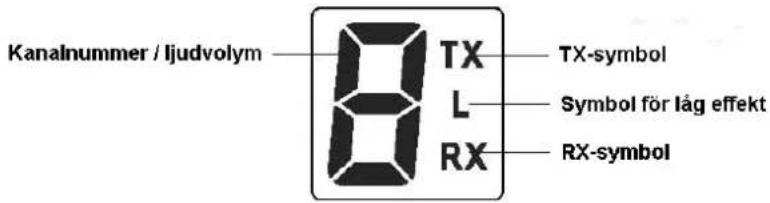
Channel number/sound volume: The display shows from 1 to 8 the set channel or volume.
TX: Lit up in transmission mode.
L: Lit up at low output level.
RX: Lit up in reception mode.
Switching on the walkie-talkie
Press and hold the power switch (m/o). The walkie-talkie emits a double "beep" and the display briefly shows the self-test window.
Adjusting the volume
- Press the up button to increase the volume.
- Press the down button to decrease the volume.
- The display shows the set volume from 1 to 8.
Receiving signals
The walkie-talkie is always in receive mode when it is turned on and not in transmission mode. When a signal is received on the selected channel, the RX-symbol and the red status lamp come on.
Transmitting a signal
- Check the channel activity with the monitor function, see below. You will hear static noise if the channel is available. Do not transmit if someone is talking on the channel. Press the PTT button to transmit. The TX symbol shines red. Hold the walkie-talkie upright with the microphone 5 to 7.5 cm from your mouth.
- With the PTT button held down, speak into the microphone in a normal voice.
- Release the PTT button when you have finished speaking.
NOTE! In order for other people to receive your transmission, they must have your channel set, see Changing channel under Operation below.
OPERATION
Getting started
Carefully remove the walkie-talkie from the package. If you discover any visible damage, do not use the walkie-talkie and contact your dealer.
Inserting the batteries
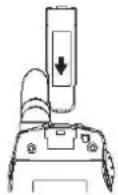
- Release the catch on the battery compartment cover and remove the cover.
- Insert three AAA batteries or rechargeable NiMH batteries.
- Refit the cover so that it snaps into place.
- Switch the walkie-talkie off after use to save the batteries.
- Remove the batteries if the walkie-talkie is not going to be used for a long time.

natural_image
Technical line drawing of a handheld device showing front and side views (no text or symbols)Loosening the belt clip


- Pull the belt clip catch away from the walkie-talkie.
- While pulling the catch, move the belt clip upwards to loosen it from the walkie-talkie.
Attaching the belt clip
- Push the belt clip into the bracket, see the figure to the right above.
- You hear a "click" when the catch locks in position.
Changing channel
The walkie-talkie has eight selectable channels. To change channel:
- Press the power switch until the current channel number flashes on the display.
- While the channel number is flashing:
- Press the up button to select a higher channel number.
- Press the down button to select a lower channel number.
- The channel number changes from 1 to 8 or from 8 to 1.
- Press the PTT button to confirm the selected channel and return to normal mode.
Selecting high/low output
- Press the power button twice to enter the function to select a high/low output.
- Press the up or down button to select the output level. "L" is displayed when low level is selected. A low output level can extend battery life, but at the same time reduces the range.
Monitoring
You can select monitor to check weak signals on the selected channel.
- Press the power switch three times to enable this function.
- Press the power switch once again to disable the function.
Using the lamp
Press the lamp button to switch on the lamp. The lamp also works when the walkie-talkie is switched off.
Automatic energy saving function
The walkie-talkie automatically enters an energy power saving mode to extend battery life six seconds after the last operation. However, the walkie-talkie can still receive transmissions in this mode.
Low battery voltage indication
An audible signal is emitted and the red LED lights up every 15 seconds when the battery drops to a certain level. Replace the batteries as soon as possible.
Scanning channels
The Scan channels function (button 10) searches for active signals in a continuous sequence from 1 to 8.
-
Hold down the Scan button (S) for one second to enable the scan function. The channel number on the display changes quickly until an active signal is found. In Scan channels mode:
-
Hold the PTT button down to speak to others using the same channel.
- Press the call button (C) to transmit a call signal on the active channel.
- Hold the Scan button down again for one second to disable the scan function.
- When an active signal is detected (1 of 8 channels) the function stops and holds the signal.
- Press the PTT button to communicate via the active channel and disable the scan function.
- When an active signal is detected, but another channel is required, press the up or down arrow to continue the search for another active channel.
Sending call signals
You can send call signals (C button) to let people know that you are trying to contact them. You can also use the same button to start or stop a transmission.
- Press and release the C button twice. The TX symbol lights and the call signal is activated for three seconds.
- Release the C button. The call signals are transmitted to nearby receivers that are set to the same channel.
TROUBLESHOOTING
Problem: No power.
- Make sure the batteries are installed correctly.
- The batteries may be weak. Replace or recharge the batteries if they are discharged.
Problem: Weak reception.
- Press the up button to increase the volume.
- The incoming signal may be weak or outside the range of the walkie-talkie.
- If this happens, use the monitor function.
Problem: Cannot change channels.
- To change channel, press until the channel number is flashing:
- Press the up or down button to change the channel.
• The batteries may be weak.
Problem: Limited range.
• The batteries may be weak.
- The maximum range depends on the terrain and other environmental factors.
- Open fields offer the best range. The range may be limited in steel/concrete buildings, dense forests and vehicles.
• The range is also limited if the walkie-talkie is worn close to the body, e.g. in a pocket or on a belt.
Problem: Noise interference.
- If you are transmitting, speak in a normal voice 5 to 7.5cm from the microphone.
- If you are receiving a transmission, lower the volume to a suitable level.
- A walkie-talkie is located too close. Keep units at least 1.5 metres apart from each other.
- Too great distances between the units or obstacles block the transmission. In open fields, without obstacles the range is up to five kilometres.
The walkie-talkie may be used in the following countries:
- Belgium
- Bulgaria
• Cyprus - Denmark
- Estonia
- Finland
- France
-
Greece
-
Ireland
- Iceland
- Italy
- Croatia
• Latvia - Liechtenstein
• Luxembourg -
Netherlands
-
Norway
- Poland
- Portugal
- Romania
- Switzerland
- Slovakia
- Slovenia
- Spain
• UK
- Sweden
- Czech
Republic/Slovakia
- Turkey
- Germany
- Hungary
- Austria
Jula reserves the right to make changes. In the event of problems, please contact our service department.
www.jula.com

Care for the environment!
Must not be discarded with household waste!
This product contains electrical or electronic
components that should be recycled.
Leave the product for recycling at the designated
station e.g. the local authority's recycling station.

EC DECLARATION OF CONFORMITY
EG FÖRSÄKRAN OM ÖVERENSSTÄMMELSE
EF SAMSVARSERKLÆRING
DEKLARACJA ZGODNOŚCI WE

Jula AB, Box 363, SE-532 24 SKARA, SWEDEN
Radio and Telecommunications Terminal Equipment 1999/5/EC
EN 301 489-5 v1.3.1, EN 300 296-2 v1.4.1, EN 301 489-1 V1.9.2
EN 60065:2002+A1:2006+A11:2008+A2:2010+A12:2011
RoHS Directive 2011/65/EU
This product was CE marked in year - 06
Skara 2014-11-19

Henrik Christensson
PRODUCT MANAGER
- SVENSKA 4
- LCD-DISPLAY
- Lossa bältesklämman
- Løsne belteklemmen
- WYŚWIETLACZ LCD
- Read these instructions carefully before use!
- DESCRIPTION
- LCD DISPLAY
- Switching on the walkie-talkie
- Adjusting the volume
- Receiving signals
- Transmitting a signal
- OPERATION
- Getting started
- Inserting the batteries
- Loosening the belt clip
- Attaching the belt clip
- Changing channel
- Selecting high/low output
- Monitoring
- Using the lamp
- Automatic energy saving function
- Low battery voltage indication
- Scanning channels
- Sending call signals
- TROUBLESHOOTING
- Problem: No power.
- Problem: Weak reception.
- Problem: Cannot change channels.
- Problem: Limited range.
- Problem: Noise interference.
- The walkie-talkie may be used in the following countries:
- Care for the environment!
- EC DECLARATION OF CONFORMITY
- EG FÖRSÄKRAN OM ÖVERENSSTÄMMELSE
- EF SAMSVARSERKLÆRING
- DEKLARACJA ZGODNOŚCI WE
Brand : Marquant
Model : 954-060
Category : Walkie-talkie