
AH 61 - Range hood ARCTIC COOLING - Free user manual and instructions
Find the device manual for free AH 61 ARCTIC COOLING in PDF.


| Product Type | Range Hood |
| Brand | Arctic Cooling |
| Model | AH 61 |
| Voltage | 200-240 V |
| Frequency | 50/60 Hz |
| Motor Speeds | 3 (Light, Medium, Heavy) |
| Illumination Lamp | 1 x 40 W max |
| Filter Type | Synthetic (non-washable, replaceable) |
| Ducting Options | Ducted (external) or Recirculation (with carbon filter) |
| Installation Type | Under-cabinet |
| Minimum Height (Electric Hob) | 65 cm |
| Minimum Height (Gas Hob) | 75 cm |
| Duct Diameter | 120 mm |
| Control Type | Sliding switches |
| Material | Stainless steel / painted metal |
| Usage | Household |
| Lifetime (Spare Parts Availability) | 10 years |
| Maintenance | Clean with mild detergent; do not use abrasive cleaners |
| Filter Replacement | Monthly check; replace synthetic filter when dirty |
| Safety Features | Disconnect before cleaning; do not operate without filters; keep flame away |
Frequently Asked Questions - AH 61 ARCTIC COOLING
User questions about AH 61 ARCTIC COOLING
0 question about this device. Answer the ones you know or ask your own.
Ask a new question about this device
Download the instructions for your Range hood in PDF format for free! Find your manual AH 61 - ARCTIC COOLING and take your electronic device back in hand. On this page are published all the documents necessary for the use of your device. AH 61 by ARCTIC COOLING.
USER MANUAL AH 61 ARCTIC COOLING
We wish our product, which has been produced in modern facilities and which has been passed through strict quality control to provide you the best efficiency. For this, we kindly request you to read the whole of this guide very carefully before using your product and to keep it as a source of reference.
arctic
INDEX

Section 1: The points that you need to pay attention before using your aspirator and safety precautions.

Section 4 : The use of your aspirator.

Section 2: Technical properties of your aspirator.

Section 5: The information in relation to the maintenance cleaning and transportation.

Section 3 : Installation of your aspirator.

SECTION 1 : The points that you need to pay attention before using your aspirator and safety precautions.
- Please do not plug in your aspirator before completing its installation.
• The operating voltage is 200 240 volts. - The preparation of the place and the electrical installation of the product is on the customer's account.
- Please do not make connection to those stacks to which the stoves are connected to, to the stacks where waste gas is discharged or to those stacks where flames rise.
- The height between the lower surface of your aspirator and the upper surface of the oven / range should not be less than 65 cm for electrical ranges and should not be less than 75 cm for the gas ranges or for the mixed ranges.
- Do not operate your aspirator without filter. Do not take out the filters while your aspirator is operating.
- Do not touch the bulbs of your aspirator after you operate the lamps for a long period. The hot bulbs may burn your hands.
- Please check your aspirator once a while while frying. Overheated oil may create danger by splashing your aspirator.
- Flaming risk may happen at your aspirator in case periodical cleaning is not made.
- Please do not form high flames under your aspirator. Otherwise fire may burst out by the flaming of the oils on the aluminum filters.
- Do not keep the flame on any of the ranges of the range while the aspirator is operating in case you using a gas range.
Certainly turn off the range when you remove the food container from the range. We advise you to turn off the range before taking the food container out from the range.
- Please operate your aspirator after you put the pot or fan on the range(s).
- Please operate your aspirator for a while, after the cooling or frying work is finished for the good cleaning of the air in the kitchen from odors and from the vapours that are being formed while the dish is cooked.
- Please provide fresh air to the medium especially while the gas ranges are used simultaneously with the aspirator.
- Please keep the packaging materials away from the reach of children since these may form a hazard.
- The length of the stack connection tube (flue) may be as long as 4 to 5 metres in case no bend or elbow is made during the installation. The use of your aspirator with a carbon filter is advised for internal use in case there is an obligation for the flue to be longer than 5 meters.
- Please make sure that your children do not play with this piece of equipment. Please do not let the small children to use the aspirator.
- Our company will not be responsible due to the problems that originate from not complying with the above warnings.
• This product has been designed for being used in homes. - Please apply to the closest Artic Authorized Service to you for the installation of your aspirator.
SECTION 2 : Technical properties of your aspirator.


- Motor Command switch
- Panel with holes (filter protection panel)
- Panel with holes hatch
- Lamp / illumination glass
The values shown in the markings on the product or the values given in the printed matter delivered together with the product are the values attained under the laboratory medium in accordance with the related standards. These values may change in accordance with the conditions of usage or in accordance with the conditions of the environment.
Usage Lifetime : 10 years (the spare parts availability period for the product)

SECTION 3 : Installation of your aspirator.
Your aspirator may be installed on your kitchen furniture (Figure 1)

(Figure 1)
• Installation on the cupboard that has been previously drilled :
Please make connection under the cupboard by making use of the 4 each 4.2 x 45 mm screws (given together with your aspirator) through the previously drilled holes. In such case, there is no need to dismantle the filter protection panel / cassette filter.
- Installation un the cupboard, which has not been drilled:
Please drill 4 each connection holes by making use of the paper template that is being furnished together with the aspirator and please apply the above instructions.
Usage Method
Your aspirator may operate to discharge the sucked air to outside medium (by being connected to a stack) and may also operate in compliance with internal recirculation (with carbon filter).
All kitchen aspirators operate in a more efficient manner with being connected to a stack. However, the operation of the aspirator at the internal recirculation position may prove to be more economical during winter for not disharging the heat in the medium to outside.
Usage With Stack Connection
Please open the filter protection cover of the aspirator.
Put the selective switch on the DUCTING position (Figure 2).
There are connections on and at the rear side of your aspirator for discharging air to outside in order to be able to make connection to the stack (Figure 3).
Please install the 120 mm diameter tube connection part, which is being furnished together with your aspiratorin such a manner just to be fit on its place for the hatches of the tube connector. Please do not interfere anyway with the blind cap, which is present at the rear outlet under such condition.
Please dismantle the blind cap from the where it is put and please install it to the top, in case you want to make a connection from the rear. Please fit the tube connection part on the place of the blind cap. Please never connect the stack connection of the aspirator while you perform the necessary procedures to a stack, which is being used for other purposes.
Usage Without Stack Connection
(With Carbon Filter)
Please take the aluminum filters out.
Please put the selective switch on the RECYCLING position (Figure 2). Under such condition the fitting of the carbon filter to the aspirator is needed. Please fit the carbon filter after you get in on the fixing cap (Figure 4).
Please put the aluminum filters on again.

Figure 2

natural_image
Two circular objects: a cylindrical container and a solid black circle, both placed above a horizontal line (no text or symbols)Figure 3

Figure 4
Synthetic Filter (AH 61 / AH 62)
The synthetic filter of your over-the-range aspirator has the property of holding (capturing) oil. Please check your filter with intervals of 1 month long and discard your filter when you see that it is dirty and put on a new one.

natural_image
Diagram showing two circular views of a human figure with shaded regions and dotted lines, labeled Figure 5 (no text or symbols on the figures themselves)- To Change Filter : Please push the two each Ratches in the front part of the panel with holes towards internal side (Figure 5).
- Take the panel with holes out of its place by releasing the holders from their places.
- Put the panel with holes that you take out on a level place and remove the two each filter holders.
Take the dirty filter out and fit the new one in its place and fix the filter by the filter holders and then put the panel withholes in its place (Figure 6)
Attention : Do not wash your synthetic filter in the dishwasher or to not wash it manually. This filter must be discarded as they get dirty and new ones must be put in.

natural_image
Abstract geometric illustration of a grid-patterned object on a flat surface (no text or symbols)Figure 6
Oil Holding (arresting) filter (AH 51 / AH 51 G)
Your over-the-range aspirator has the property of holding oil, thanks to the special filter. The reason for manufacturing the filter out of aluminum material is that it is clenable. Please check your filter with intervals of that month long and wash it in water with detergent, rince and dry it. Then fit it again in its place.
- To Change Filter: Please push the two each Ratches in the front part of the panel with holes towards internal side (Figure 5).
- Take the panel with holes out of its place by releasing the holders from their places.
- Put the panel with holes that you take out on a level place and remove the two each filter holders.
Please fit the filter again its place after you take it out and you wash it and fix the filter by the filter holders and then put the panel with holes in its place (Figure 6).
Attention: please do not wash your filter in dishwasher.
SECTION 4 : The use of your aspirator.
Your aspirator is commanded through a control panel, which is placed on the front panel with sliding controls (switches).
Your aspirator has 3 speed stages :
1st position: Light aspiration
2nd position: Medium aspiration
3rd position: Heavy aspiration
0 position: Motor does not operate, no aspiration occurs.
Note: The motor must be in open position for using the motor positions of AH 62 model.
Functions on the switch keys (AH 51 / AH 51 G / AH 61)

Functions on the switch keys (AH 62)

Illumination Lamp:
You may open and close the illumination lamp independent of the motor through the lamp switch on the control panel.

SECTION 5: The information in relation to the maintenance cleaning and transportation.
Maintenance and Cleaning
- Upling the plug from the receptade before starting the cleaning. Please pay attention that the cleaning material, which you are going to use does not contain particles that would scratch the surfaces with paint or made out of stainless steel. Use cream or liquid cleaners.
- Please try to clean your aspirator especially just after dishes by frying.
- Please wipe clean your aspirator by a wet cloth wetted in warm water or in water with detergent. You may use the cleaners that you obtain from the market for oil, etc. that does not wipe out by paying attention to the warnings on these. However, please do not use scratching and abrasive cleaning materials.
Changing of Illumination lamp
There is 1 each 40 W lamp in your AH 51 / AH 51 G and AH 61 model aspirator and there are 2 each 40 W lamps in your AH 62 model aspirators. You may comfortably take out and change the lamps by opening the panel with holes in the AH 51 / AH 51 G / AH 61 and AH 62 models.
AH 51 / AH 51 G / AH 61 AH 62

natural_image
Silhouette of a hand holding a large object, possibly a lamp or abstract form (no text or symbols visible)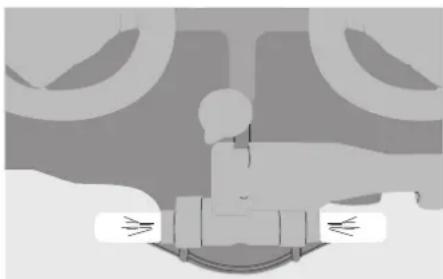
natural_image
Illustration of a person standing on a platform with abstract background elements (no text or symbols)Figure 8
In Case You Need Transportation :
- Please carry the aspirator in its original package and please obey the transportation instructions on the box.
- Please tape the guard (screen) glass to the panel with hole to avoid its movement during transportation, in case you do not have the original packing.
- Please take measures against impacts that may come on the glass or on the other painted surfaces.
- Please keep the product in its normal position during the transportation.
Stimate client,
natural_image
Two abstract geometric shapes: a circular cap and a solid circle, both with dots at the top (no text or symbols)Figura 3

Figura 4
Filtru sintetic (AH 61 / AH 62)
natural_image
Diagram showing two circular views of a human figure with shaded regions and dotted lines, labeled 'Figura 5' (no text or symbols on the figures themselves)natural_image
Illustration of a document with a grid pattern and a paperclip, no visible text or symbolsFigura 6
Filtrul care retine uleiul (AH 51 / AH 51 G)
AH 51 / AH 51 G / AH 61 AH 62

natural_image
Silhouette of a person holding a pen, facing away from behind (no text or symbols)
natural_image
Illustration of a person standing at a desk with abstract background elements (no text or symbols)Figura 8
In caz de transport
- INDEX
- SECTION 1 : The points that you need to pay attention before using your aspirator and safety precautions.
- SECTION 2 : Technical properties of your aspirator.
- SECTION 3 : Installation of your aspirator.
- Usage Method
- Usage With Stack Connection
- Usage Without Stack Connection
- (With Carbon Filter)
- Synthetic Filter (AH 61 / AH 62)
- Oil Holding (arresting) filter (AH 51 / AH 51 G)
- SECTION 4 : The use of your aspirator.
- Illumination Lamp:
- SECTION 5: The information in relation to the maintenance cleaning and transportation.
- Maintenance and Cleaning
- Changing of Illumination lamp
- In Case You Need Transportation :
- Filtru sintetic (AH 61 / AH 62)
- Filtrul care retine uleiul (AH 51 / AH 51 G)
- In caz de transport
Brand : ARCTIC COOLING
Model : AH 61
Category : Range hood