
P-Touch 9600 - Label printer BROTHER - Free user manual and instructions
Find the device manual for free P-Touch 9600 BROTHER in PDF.


| Product Type | Label Printer |
| Brand | Brother |
| Model | P-Touch 9600 |
| Print Technology | Thermal Transfer |
| Print Resolution | 360 dpi |
| Max Print Width | 24 mm (1 inch) |
| Dimensions (W x D x H) | 118 x 192 x 64 mm |
| Weight | 490 g |
| Power Source | AC Adapter or 6 AA Batteries |
| Display | LCD with 1 line x 8 characters |
| Key Functions | Mirror printing, auto-cut, label length setting, multiple fonts |
| Connectivity | Serial RS-232C |
| Supported Tape Sizes | 6, 9, 12, 18, 24 mm |
| Memory | Up to 100 labels stored |
| Maintenance | Clean print head with isopropyl alcohol; replace thermal ribbon as needed |
| Safety | Auto-off after 5 minutes to save power |
| Spare Parts | Replacement print head (PC-9800), AC adapter (PA-880), battery pack (BA-880) |
| Repairability | Easy disassembly with standard screwdriver; official service manual available |
| Operating Temperature | 10°C to 35°C |
| Certifications | CE, FCC, RoHS |
Frequently Asked Questions - P-Touch 9600 BROTHER
User questions about P-Touch 9600 BROTHER
0 question about this device. Answer the ones you know or ask your own.
Ask a new question about this device
Download the instructions for your Label printer in PDF format for free! Find your manual P-Touch 9600 - BROTHER and take your electronic device back in hand. On this page are published all the documents necessary for the use of your device. P-Touch 9600 by BROTHER.
USER MANUAL P-Touch 9600 BROTHER
natural_image
Illustration of two identical electronic typewriters with keyboard and display (no text or symbols)Thank you for purchasing this P-touch!
With your new P-touch, you can create labels for any purpose. Select from a variety of frames, fonts and character styles to design beautiful custom labels. In addition, the many pre-formatted templates available make label-making quick and easy. In addition, three types of AV label cassettes can be used to create easy-to-peel-off, pre-sized address and filing labels (AV2067: 3/4" × 2 5/8" (20 mm × 67 mm) address labels, AV1957: 3/4" × 2 1/4" (19 mm × 57 mm) return address labels and AV1789: 5/8" × 3 1/2" (17 mm × 89 mm) file folder labels).
You can print professional-looking labels in no time. The quality and performance of this P-touch make it an extremely practical machine to meet all your labelling needs.
Although this P-touch is easy to use, we suggest that you read this User's Guide carefully before starting. Keep this manual nearby for future reference.
NOTE
The P-touch will make a noise when it is turned on or while it is printing; however, this does not indicate a malfunction.
Federal Communications Commission (FCC) Declaration of Conformity (For USA Only)
Responsible Party : Brother International Corporation
100 Somerset Corporate Boulevard
Bridgewater, NJ 08807-0911 USA
declares that the product
Product Name : Brother Label Printer P-touch 9600/3600
Model Number : PT-9600/3600
complies with Part 15 of the FCC Rules. Operation is subject to the following two conditions: (1) this device may not cause harmful interference, and (2) this device must accept any interference received, including interference that may cause undesired operation.
This equipment has been tested and found to comply with the limits for a Class B digital device, pursuant to Part 15 of the FCC Rules. These limits are designed to provide reasonable protection against harmful interference in a residential installation. This equipment generates, uses, and can radiate radio frequency energy and, if not installed and used in accordance with the instructions, may cause harmful interference to radio communications. However, there is no guarantee that interference will not occur in a particular installation. If this equipment does cause harmful interference to radio or television reception, which can be determined by turning the equipment off and on, the user is encouraged to try to correct the interference by one or more of the following measures:
- Reorient or relocate the receiving antenna
- Increase the separation between the equipment and receiver.
- Connect the equipment into an outlet on a circuit different from that to which the receiver is connected.
- Consult the dealer or an experienced radio/TV technician for help.
- The enclosed interface cable should be used in order to ensure compliance with the limits for a Class B digital device.
- Changes or modi cations not expressly approved by Brother Industries, Ltd. could void the user 's authority to operate the equipment.
Patent numbers and patent publication numbers which are related to this product are as below:
USP4839742 USP4976558 USP5009530 USP5120147
USP4927278 USP4983058 USP5069557
QUICK REFERENCE
Entering text
| Adding a space Space bar | |
| Entering/Exiting Insert mode | InsertBarcode |
| Adding an uppercase letter | Shift or ShiftUserTime + Desired character |
| Adding a series of uppercase letters (entering Caps mode) | Caps → Type character |
| Adding a lowercase letter in Caps mode | Shift or ShiftUserTime + desired character |
| Adding an accented character | Alt + Type characterORCode + SymbolAccent → Type letter (OR ←→ Home) → ↑Home or ↓End to select letter → ←or → to select → ←→Block |
| Adding a symbol | SymbolAccent → ↑Home or ↓End to select category → ←→ or → to select symbol → ←→Block |
| Adding a new line | ←→Back |
| Adding a new block | Code + ←→NewBlock |
| Adding a barcode | Code + InsertBarcode → Type barcode data → ←→Block |
| Adding a special character to the barcode | Code + InsertBarcode → SymbolAccent → ↑Home or ↓End to select special character → ←→Block |
| Changing a barcode parameter | Code + InsertBarcode → ↑Home → ←→ or → to select parameter → ↑Home or ↓End to select setting → ←→Block |
Editing text
| Deleting text | Clear OR Line OutBS Delete |
| Deleting one line of text | Code + Line OutDelete |
| Clearing all of the text and formats | Code + Clear BS → ↑Harc or ↓End to select TEXT & FORMAT → ←→Back |
| Clearing only the text | Code + Clear BS → ↑Harc or ↓End to select TEXT ONLY → ←→Back |
Formatting text
| Changing formats for entire text |  |
| Changing formats for a block of text |  |
| Changing formats for a line of text |  |
| Changing the font |  |
| Changing the character size |  |
| Changing the character width |  |
| Changing the character style |  |
| Changing the line effects |  |
| Changing the frame |  |
| Changing the text alignment |  |
| Changing the label margins |  |
| Changing the label length |  |
| Changing the block margins |  |
| Changing the block length |  |
| Printing in reverse (mirror printing) | |
| Formatting text for a stamp | |
| Rotating the text |
Using an Auto Format template
| Creating a label or stamp from an Auto Format template | Code +6 AV or &7 TCE →Home or End to select template →New Black → Type in each line of text, then←→ Continue with 1, 2, 3 or 4 |
| 1Printing an Auto Format template | Home or End to select PRINT →New Text |
| 2Editing the Auto Format template text | Home or End to select EDIT MORE →New Black → Type in each line of text, then←→ |
| 3Changing the style of the Auto Format template | Home or End to select CHANGE STYLE →New Black → Home or End to select format style →New Black |
| 4 Quitting the Auto Format function | Home or End to select EXIT →New Black → New Black |
Printing text
| Previewing the label | Code + 19 (← or → to scroll) |
| Changing how the labels are cut | Code + A CutFeed & Cut → ↑ Home or ↓ End to select setting →New Text |
| Printing using the current print options | MinorPrint |
| Feeding and cutting 1" (24 mm) of tape | A CutFood & Cut |
| Printing many copies | Code + RepeatS 4 → ↑ Home or ↓ End to select number (OR type number) →New Text |
| Printing many copies while increasing selected text | Code + Number5 → ←, →, ↑ Home or ↓ End to select start of numbering field → ←→ ← or → to select end of numbering field → ←→ ←→ ↑ Home or ↓ to select (or type) number → ←→ ←→ Right |
Storing, recalling, deleting & printing text files
| Saving a file | Code +Memory8→Homeor↓Endto selectSTORE→NewBuck→Homeor↓Endto selectfile number→Type file name→NewBuck |
| Recalling a previously saved file | Code +Memory8→↑Homeor↓Endto selectRECALL→NewBuck→Homeor↓Endto selectfile number→NonBuck |
| Deleting a previously saved file | Code +Memory8→↑Homeor↓Endto selectCLEAR→NewBuck→Homeor↓Endto selectfile number→Space bar so√appears→NewBuck→NewBuck |
| Printing a previously saved text file | Code +Memory8→↑Homeor↓Endto selectPRINT→NewBuck→Homeor↓Endto selectfile number→Space bar so√appears→NewBuck |
CONTENTS
Brother® 90 Days/One Year Limited Warranty and Replacement Service
(For USA Only) ....iii
Important Information ......v
Chapter 1
Before You Start .... 1
GENERAL DESCRIPTION ......2
Top view 2
Bottom view 3
LCD display 3
Keyboard 4
Chapter 2
Getting Started 5
PRECAUTIONS 6
Connecting the AC adaptor 7
Turning on/off the P-touch 7
Installing/replacing a tape cassette 7
Connecting the P-touch to a computer 8
Installing the Software &
Printer Driver 9
Reading the User's Guide 24
Using P-touch Editor 3.2 25
Using P-touch Quick Editor 27
Uninstalling the Software & Printer Driver 30
Attaching labels 33
Assembling stamps 34
Chapter 3
Functions 37
Performing basic operations 38
Entering text 40
Editing text 45
Formatting 46
Printing 62
Storing and recalling files 65
Chapter 4
Machine Adjustments 73
Machine adjustments 74
ERROR MESSAGE LIST 77
TROUBLESHOOTING 84
MACHINE SPECIFICATIONS 88
Appendix 89
Symbols 90
Special barcode characters 93
Fonts 93
Sizes and widths 94
Type styles 96
Framing and shading patterns 98
Pre-set templates 99
Template text styles ....104
INDEX 106
ACCESSORIES (For USA Only) 110
PT-9600/3600 CONTACT INFORMATION (For USA Only) .... 112
Brother® 90 Days/One Year Limited Warranty and Replacement Service (For USA Only)
Who is covered:
- This limited warranty (“warranty”) is given only to the original end-use/retail purchaser (referred to in this warranty as “Original Purchaser”) of the accompanying product, consumables and accessories (collectively referred to in this warranty as “this Product”).
- If you purchased a product from someone other than an authorized Brother reseller in the United States or if the product was used (including but not limited to floor models or refurbished product), prior to your purchase you are not the Original Purchaser and the product that you purchased is not covered by this warranty.
What is covered:
- This Product includes a Machine and Consumable and Accessory Items. Consumable and Accessory Items include but are not limited to label cassettes, cutters, stamps, power adapters, cases and batteries.
- Except as otherwise provided herein, Brother warrants that the Machine and the accompanying Consumable and Accessory Items will be free from defects in materials and workmanship, when used under normal conditions.
- This warranty applies only to products purchased and used in the United States. For products purchased in, but used outside, the United States, this warranty covers only warranty service within the United States (and does not include shipping outside the United States).
What is the length of the Warranty Period(s):
- Machines have a two-stage warranty: 90 days from the original purchase date and an additional warranty up to one year from the original purchase date.
- Consumable and Accessories Items accompanying the Machine have a one-stage warranty: 90 Days from the original purchase date.
What is NOT covered:
This warranty does not cover:
(1) Physical damage to this Product;
(2) Damage caused by improper installation, improper or abnormal use, misuse, neglect or accident (including but not limited to transporting this Product without the proper preparation and/or packaging);
(3) Damage caused by another device or software used with this Product (including but not limited to damage resulting from use of non Brother®-brand parts and Consumable and Accessory Items);
(4) Consumable and Accessory Items that expired in accordance with a rated life; and,
(5) Problems arising from other than defects in materials or workmanship.
This limited warranty is VOID if this Product has been altered or modified in any way (including but not limited to attempted warranty repair without authorization from Brother and/or alteration/removal of the serial number).
What to do if you think your Product is eligible for warranty service:
Report your issue to either our Customer Service Hotline at 1-877-478-6824 or a Brother Authorized Service Center within the applicable warranty period. Supply Brother or the Brother Authorized Service Center with a copy of your dated bill of sale showing that this Product was purchased within the U.S. For the name of local Brother Authorized Service Center(s), call 1-800-521-2846.
What Brother will ask you to do:
After contacting Brother or a Brother Authorized Service Center, you may be required to deliver (by hand if you prefer) or send the Product properly packaged, freight prepaid, to the Authorized Service Center together with a photocopy of your bill of sale.
You are responsible for the cost of shipping, packing product, and insurance (if you desire). You are also responsible for loss or damage to this Product in shipping.
What Brother will do:
First 90 Days: If the problem reported concerning your Machine and/or accompanying Consumable and Accessory Item(s) is covered by this warranty and if you first reported the problem to Brother or an Authorized Service Center within 90 days from the date of original purchase, Brother or its Authorized Service Center will repair or replace the Machine and/or accompanying Consumable and Accessory Item(s) at no charge to you for parts or labor. The decision as to whether to repair or replace the Machine and/or accompanying Consumable and Accessory Item(s) is made by Brother in its sole discretion. Brother reserves the right to supply a refurbished or remanufactured replacement Machine and/or accompanying Consumable and Accessory Item(s) and use refurbished parts provided such replacement products conform to the manufacturer's specifications for new product/parts. The repaired or replacement Machine and/or accompanying Consumable and Accessory Item(s) will be returned to you freight prepaid or made available for you to pick up at a conveniently located Authorized Service Center.
Brother® 90 Days/One Year Limited Warranty and Replacement Service (For USA Only)
91 ^st day to 1 year:
If the problem reported concerning your Machine is covered by this warranty and if you first reported the problem after 90 days, but before 1 year from the date of original purchase, Brother will furnish, free of charge (excluding labor charges), replacement part(s) for those part(s) of the Machine determined by Brother or its Authorized Service Center to be defective. You will be responsible for all labor charges associated with repairs made after the first 90 days from original purchase. After 90 days from the original purchase date, accompanying Consumable and Accessory Items are no longer covered by this warranty. If the Machine and/or accompanying Consumable and Accessory Item(s) are not covered by this warranty (either stage), you will be charged for shipping the Machine and/or accompanying Consumable and Accessory Item(s) back to you.
The foregoing are your sole (i.e., only) and exclusive remedies under this warranty.
What happens when Brother elects to replace your Machine:
If you have delivered the Machine to an Authorized Service Center, the Authorized Service Center will provide you with a replacement Machine after receiving one from Brother. If you are dealing directly with Brother, Brother will send to you a replacement Machine with the understanding that you will, after receipt of the replacement Machine, supply the required proof of purchase information, together with the Machine that Brother agreed to replace. You are then expected to pack the Machine that Brother agreed to replace in the package from the replacement Machine and return it to Brother using the air bill supplied by Brother in accordance with the instructions provided by Brother. Since you will be in possession of two machines, Brother will require that you provide a valid major credit card number. Brother will issue a hold against the credit card account number that you provide until Brother receives your original Product and determines that your original Product is entitled to warranty coverage. Your credit card will be charged up to the cost of a new Product
only if: (i) you do not return your original Product to Brother within five (5) business days; (ii) the problems of your original Product are not covered by the limited warranty; (iii) the proper packaging instructions are not followed and has caused damage to the product; or (iv) the warranty period on your original Product has expired or has not been sufficiently validated with a copy of the proof of purchase (bill of sale). The replacement Machine you receive (even if refurbished or remanufactured) will be covered by the balance of the limited warranty period remaining on the original Product, plus an additional thirty (30) days. You will keep the replacement Machine that is sent to you and your original Machine shall become the property of Brother. Retain your original accessory items and a copy of the return air bill, signed by the courier.
Limitations:
Brother is not responsible for damage to or loss of any equipment, media, programs or data related to the use of this Product. Except for that repair or replacement as described above, Brother shall not be liable for any direct, indirect, incidental or consequential damages or specific relief. Because some states do not allow the exclusion or limitation of consequential or incidental damages, the above limitation may not apply to you.
THIS WARRANTY IS GIVEN IN LIEU OF ALL OTHER WARRANTIES, WRITTEN OR ORAL, WHETHER EXPRESSED BY AFFIRMATION, PROMISE, DESCRIPTION, DRAWING, MODEL OR SAMPLE. ANY AND ALL WARRANTIES OTHER THAN THIS ONE, WHETHER EXPRESS OR IMPLIED, INCLUDING IMPLIED WARRANTIES OF MERCHANTABILITY AND FITNESS FOR A PARTICULAR PURPOSE, ARE HEREBY DISCLAIMED.
- This Limited Warranty is the only warranty that Brother is giving for this Product. It is the final expression and the exclusive and only statement of Brother's obligations to you. It replaces all other agreements and understandings that you may have with Brother or its representatives.
- This warranty gives you certain rights and you may also have other rights that may vary from state to state.
- This Limited Warranty (and Brother's obligation to you) may not be changed in any way unless you and Brother sign the same piece of paper in which we (1) refer to this Product and your bill of sale date, (2) describe the change to this warranty and (3) agree to make that change.
Important: We recommend that you keep all original packing materials, in the event that you ship this product.
Important Information
Should you have questions, or need information about your Brother Product, we have a variety of support options for you to choose from:
USA-Customer Service:
Customer Service
877-478-6824 (voice)
Customer Service
901-379-1210 (fax)
Automated Faxback
800-521-2846
World Wide Web
www.brother.com
Supplies / Accessories
www.brothermall.com
or 888-879-3232
BROTHER INTERNATIONAL CORPORATION
100 SOMERSET CORPORATE BLVD.
BRIDGEWATER, NEW JERSEY 08807-0911
Please record your model and serial number and your date and location of Purchase below for your records. Keep this information with your proof of purchase (bill of sale) in case your Product requires service.
Model # ____
Serial # ____
Date of purchase: ____
Store where purchased: ____
Location of store: ____
Important: We recommend that you keep all original packing materials, in the event you ship this product.
Before You Start
GENERAL DESCRIPTION
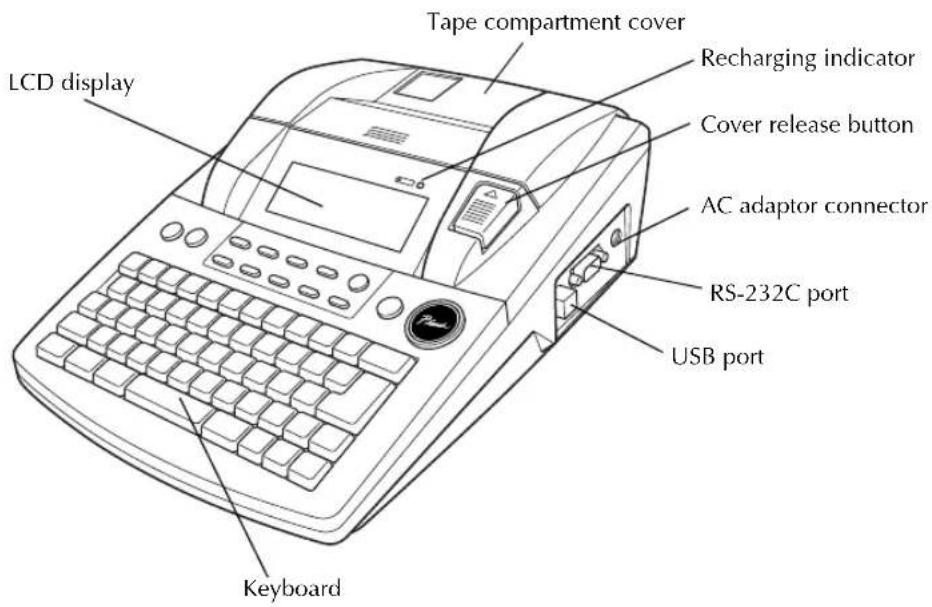
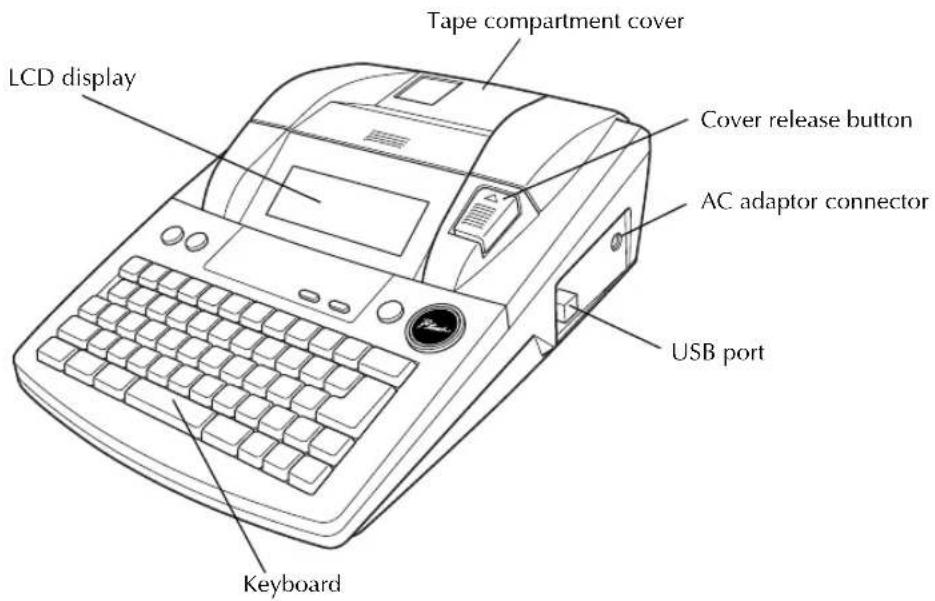
Top view
P-touch 9600:
P-touch 3600:
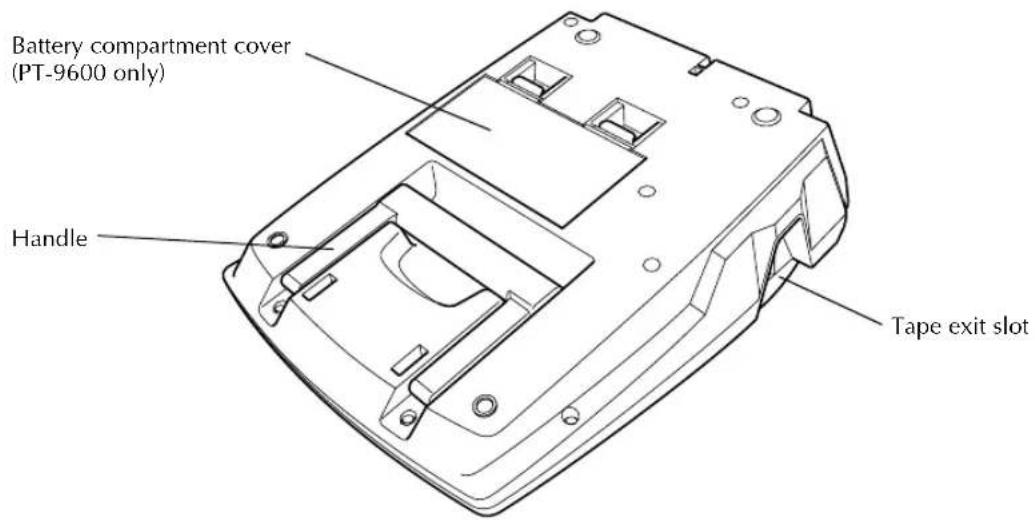
Bottom view
LCD display
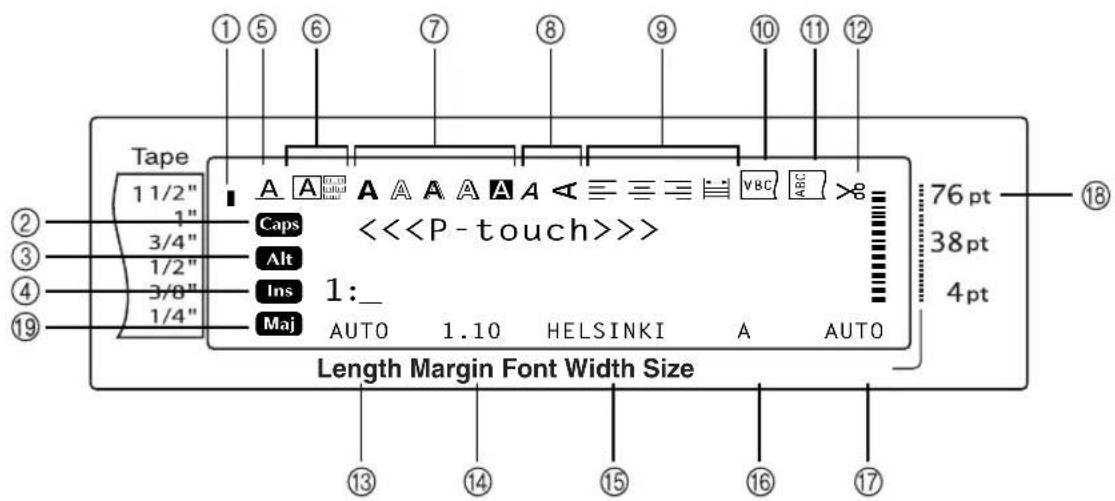
① Tape width indicator p. 8
② Caps indicator p. 40
③ Alt indicator p. 41
④ Insert mode indicator p. 40
⑤ Line Effects setting indicator p. 52
⑥ Frame setting p. 53
⑦ Style1 setting indicators => p. 50
⑧ Style2 setting indicators => p. 51
⑨ Text Alignment setting indicators ⇒ p. 53
⑩ Mirror Printing setting indicator ⇒ p. 58
⑪ Rotate setting indicator p. 54
⑫ Auto Cut setting indicator p. 62
⑬ Tape Length setting ➔ p. 56
⑭ Tape Margin setting p. 55
⑮ Font setting ⇒ p. 48
⑯ Character width setting p. 50
⑰ Character size setting ⇒ p. 48
⑱ Character size setting indicator => p. 48
⑲ French Caps indicator → p.40
Ch. 1 Before You Start
Keyboard
P-touch 9600:
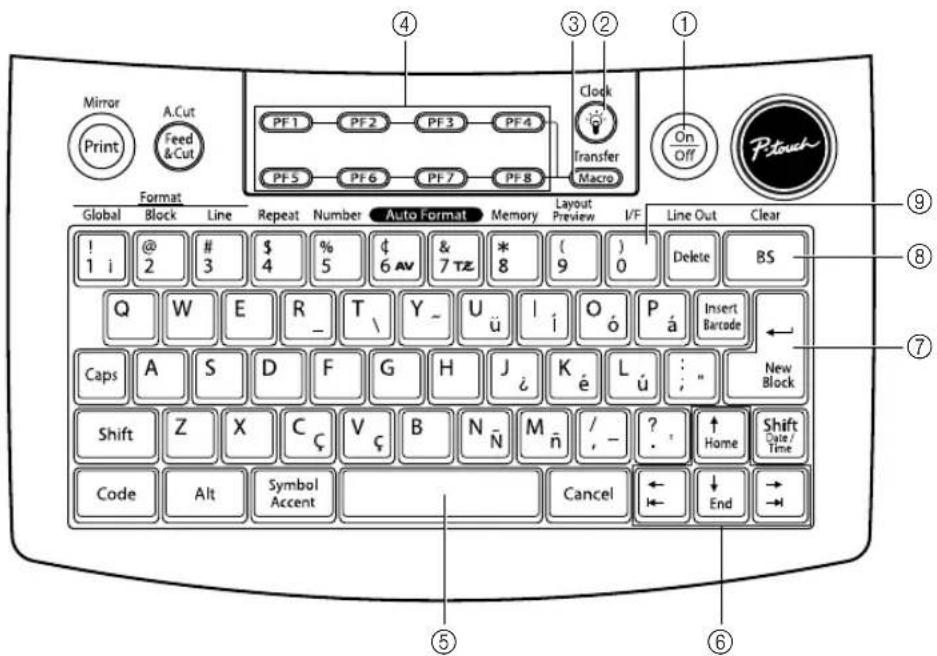
P-touch 3600:
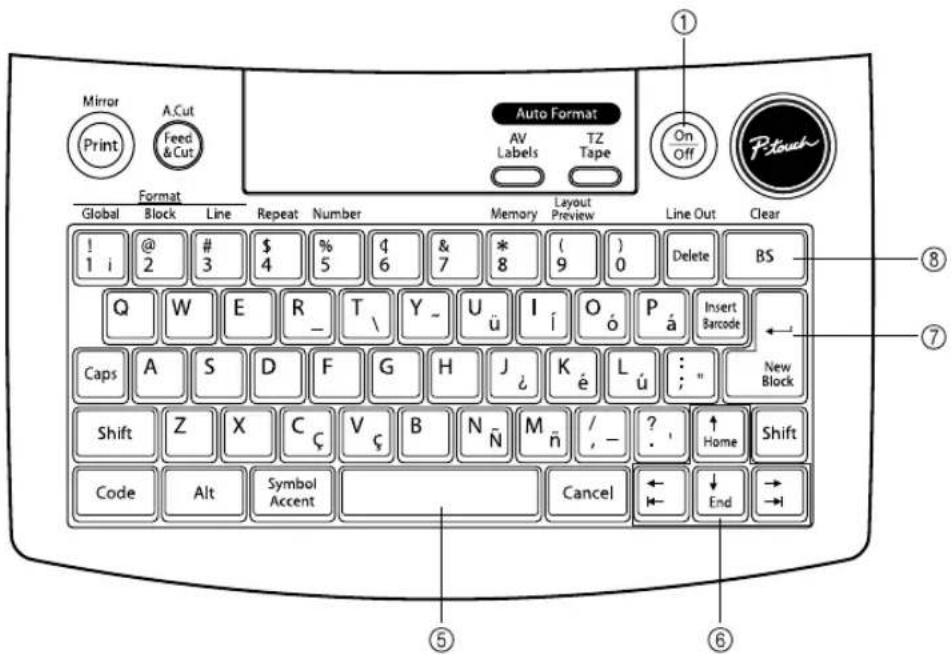
① Power key p. 7
②Screen backlight key (PT-9600 only)
⇒ Refer to the Advanced Functions booklet.
③Macro key (PT-9600 only)
⇒ Refer to the Advanced Functions booklet.
④PF keys (PT-9600 only)
⇒ Refer to the Advanced Functions booklet.
⑤Space bar p. 40
⑥ Arrow keys → p. 38
⑦Return key p. 39
⑧Backspace key ➔ p. 45
⑨Interface key (PT-9600 only) ⇒ Refer to the Advanced Functions booklet.
Getting Started
PRECAUTIONS
- Use only Brother TZ tapes or Brother/Avery AV labels with this machine. Do not use tapes that do not have the TZ mark AV
- Do not pull on the tape being fed from the P-touch, otherwise the tape cassette may be damaged.
● Avoid using the machine in extremely dusty places. Keep it out of both direct sunlight and rain. - Do not expose the machine to extremely high temperatures or high humidity. Never leave it on the dashboard or in the back of your car.
- Do not store tape cassettes where they would be exposed to direct sunlight, high humidity or dust.
- Do not leave any rubber or vinyl on the machine for an extended period of time, otherwise the machine may be stained.
- Do not clean the machine with alcohol or other organic solvents. Only use a soft, dry cloth.
- Do not put any foreign objects into or heavy objects on the machine.
- To avoid injuries, do not touch the cutter's edge.
- Use only the AC adaptor designed exclusively for this machine. Use of any other adaptor will void the warranty.
●Do not try to disassemble the AC adaptor. - When the machine is not being used for a long period of time, disconnect the AC adaptor, and (for the PT-9600 only) remove the rechargeable battery to prevent it from leaking and damaging the machine.
● Use only the Ni-MH rechargeable battery designed exclusively for this machine. (PT-9600 only)
●Never try to disassemble the P-touch.
● Use only the enclosed USB interface cable. Use of any other USB cable will void the warranty.
●Avery ^® is a registered trademark of AVERY DENNISON CORPORATION. - IBM ^ and PC-DOS ^ are trademarks of International Business Machines, Inc.
- Microsoft ^ and Windows ^ are registered trademarks of Microsoft Corp. in the US and other countries.
●Macintosh is a registered trademark of Apple Computer, Inc. - All other software and product names mentioned are trademarks of registered trademarks of their respective companies.
- Portions of graphics filter software are based in part on the work of the Independent JPEG group.
Connecting the AC adaptor
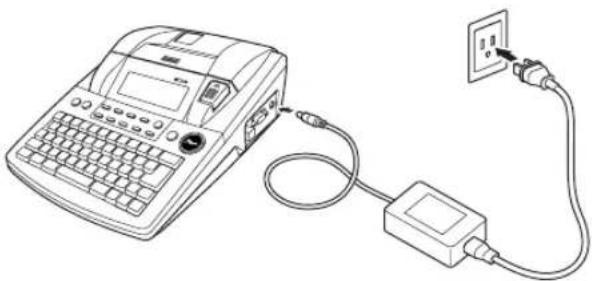
This P-touch can be used anywhere a standard electrical outlet is available.
① Insert the plug on the adaptor cord into the AC adaptor connector on the right side of the P-touch.
②Insert the pronged plug on the other end of the adaptor cord into the nearest standard electrical outlet.
NOTE
Only use the AC adaptor designed exclusively for this machine.
If you do not intend to use this machine for an extended period of time, disconnect the AC adaptor.
natural_image
Line drawing of a portable electronic device connected to a power outlet via cable (no text or symbols)Turning on/off the P-touch
The power key (On/Off) is located in the upper-right corner of the machine's keyboard. If the P-touch has remained plugged in, the previous session's text is displayed when you turn it on again. This feature allows you to stop work on a label, turn off the machine, and return to it later without having to re-enter the text.
If the PT-9600 is being operated from its rechargeable battery, the machine will automatically turn off if no key is pressed or no operation is performed for 5 minutes.
NOTE
Do not unplug the AC adaptor if the P-touch is plugged in and turned on, otherwise the data being edited will be erased. Be sure to turn off the P-touch before unplugging the AC adaptor.
If the P-touch is connected to a computer through a USB interface cable, the P-touch will automatically turn off if no key is pressed or no operation is performed for 30 minutes.
If the PT-9600 is connected to a computer through a serial (RS-232C) interface cable or is printing data from the computer, it will not automatically turn off.
If the P-touch is connected to a computer through a USB interface cable and is printing data from the computer, the P-touch will not automatically turn off.
● Press On to turn on or turn off the P-touch.
Installing/replacing a tape cassette
TZ tape cassettes are available for this machine in a wide variety of types, colors and sizes, enabling you to make distinctive color-coded and stylized labels. AV label cassettes are also available for expanded addressing and filing capabilities. This machine has been designed to allow you to change the cassettes quickly and easily.
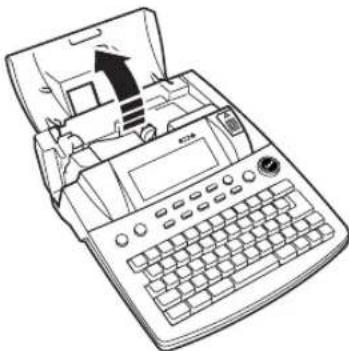
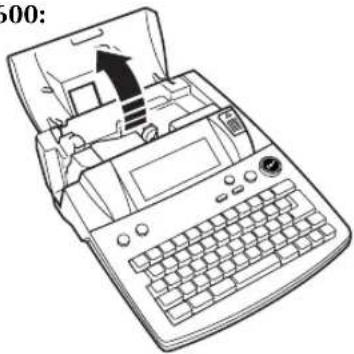
①Press the cover release button, and then lift open the tape compartment cover.
P-touch 9600:
natural_image
Line drawing of a vintage typewriter with a digital display and keyboard (no text or symbols)Ch. 2 Getting Started
P-touch 3600:
natural_image
Line drawing of a vintage typewriter with an open screen and keyboard, showing internal components (no text or symbols)②If a tape cassette is already installed and you wish to replace it, remove it by pulling it straight up.
3 If the ink ribbon is loose in the tape cassette to be installed, use your finger to wind the toothed wheel in the direction of the arrow on the cassette until there is no slack in the ribbon. Also, make sure that the end of the tape feeds under the tape guides.
NOTE
For stamp and AV label cassettes, the tightening of the ink ribbon does not apply, since they are not equipped with ink ribbons.
If you are using a new tape cassette provided with a stopper, be sure to remove the stopper.
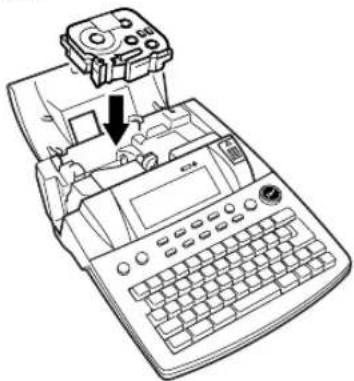
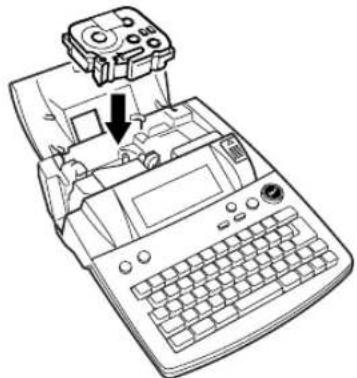
4 Insert the tape cassette firmly into the tape compartment, making sure that the entire back of the cassette touches the bottom of the compartment.
NOTE
When inserting the tape cassette, make sure that the inner ribbon does not catch on the corner of the metal guide.
P-touch 9600:
natural_image
Line drawing of a vintage typewriter with a mechanical device above it, showing no text or symbols.P-touch 3600:
natural_image
Line drawing of a vintage typewriter with a control panel and keyboard (no text or symbols)⑤Close the compartment cover, and then press to turn on the machine, if it is off. The width of the currently installed tape is shown by the tape width indicator on the left edge of the display.
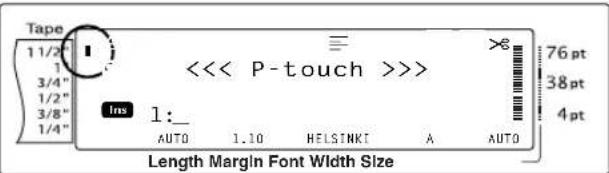
6 Press once to remove any slack in the tape and cut off the excess.
Connecting the P-touch to a computer
This machine is equipped with a USB port, allowing you to use a USB cable to connect the P-touch to a computer running Windows ^® or Mac OS, and print labels created using the P-touch Editor software.
NOTE
Do not connect the P-touch to the computer before installing the P-touch Editor software, otherwise it may not be installed correctly. Follow the installation procedure on pages 9 through 24 to install the P-touch Editor software and the printer driver, and connect the P-touch to the computer when you are instructed to do so.
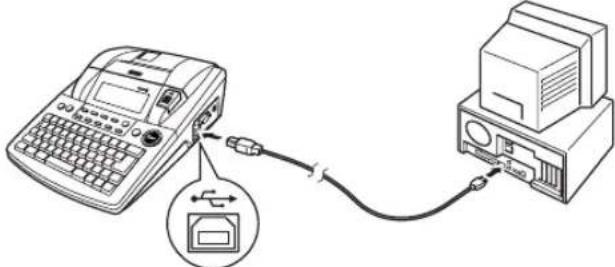
To connect a computer to the P-touch through the USB port:
①Insert the flat (A) connector on the USB cable into the USB port on the computer.
②Insert the square (B) connector on the USB cable into the USB port on the right side of the P-touch.
③Turn on the P-touch.
P-touch 9600:
natural_image
Diagram showing connection between a digital scanner and a printer (no text or symbols present)P-touch 3600:
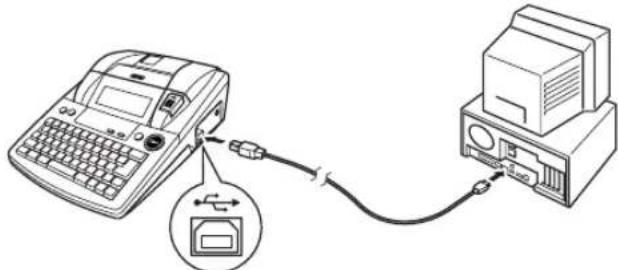
natural_image
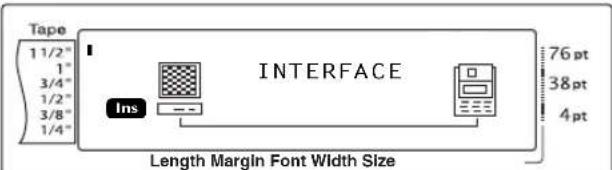
Diagram showing connection between a computer and a printer via cable, with no visible text or symbolsAfter the P-touch is connected to a computer using a USB cable, the P-touch enters Interface mode when data is sent to it from the computer.
NOTE
To exit Interface mode for a USB connection and return to the text, press any key.
The P-touch cannot enter Interface mode for a USB connection while it is printing, feeding tape or in Interface mode for an RS-232C connection (PT-9600 only) or while a macro is being assigned to a PF key (PT-9600 only).
Installing the Software & Printer Driver
In order to provide even more illustration and layout features to the label-making possibilities available with your P-touch, two applications are available on the enclosed CD-ROM: P-touch Editor 3.2 and P-touch Quick Editor. With either application, the printer driver must also be installed in order to print labels from the P-touch.
On a Computer Running Windows®
Before installation
Check that your system configuration meets the following requirements.
Computer: IBM PC or compatible.
Operating system: Pre-installed with Microsoft® Windows® 98, 98 SE, Me, 2000 Professional or XP
NOTE
For installation on Windows® 2000, administrator privileges are required. In addition, printing requires power user or administrator privileges. This software cannot be operated in Users groups. In addition, this software is not compatible with the Windows® 2000 Server operating system.
With Windows ^® XP, printing and installation is only possible from an account with administrator privileges. These operations cannot be performed from an account with limited privileges.
Hard disk free space: At least 20 MB (100 MB for a full installation)
NOTE
Up to 100 MB of hard disk free space may be needed when printing long labels or large amounts of data.
Memory: At least 64 MB
Monitor: VGA or higher graphics card
USB port
CD-ROM drive
Ch. 2 Getting Started
Installing the P-touch Editor 3.2 software
The P-touch Editor 3.2 software includes a variety of more complex functions for printing barcodes and images, enabling you to design just about any label that you can image. Install the P-touch Editor 3.2 software onto a PC as described below.
NOTE
Do not connect the P-touch to the computer before installing the software, otherwise it may not be installed correctly. Be sure to connect the P-touch only when you are instructed to do so.
To install the P-touch Editor 3.2 software
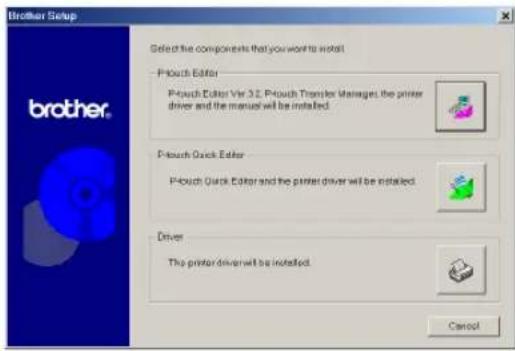
①Insert the enclosed CD-ROM into the computer's CD-ROM drive. A dialog box automatically appears, allowing you to select what to install.
NOTE
If the dialog box does not automatically appear, double-click "My Computer" on the desktop, and then double-click the CD-ROM drive containing the CD-ROM. (For Windows® XP, click "My Computer" in the Start menu, and then double-click the CD-ROM drive containing the CD-ROM.) Next, double-click "Setup.exe" to display the dialog box.
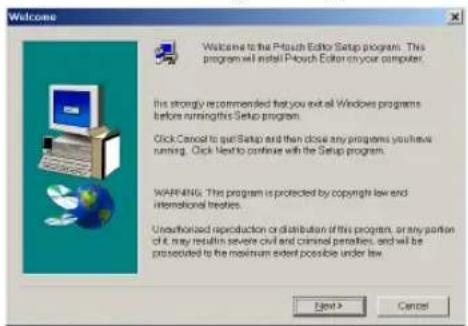
②Click the upper button (P-touch Editor). The InstallShield® Wizard for installing the P-touch Editor software starts up, and then the Welcome dialog box appears.
NOTE
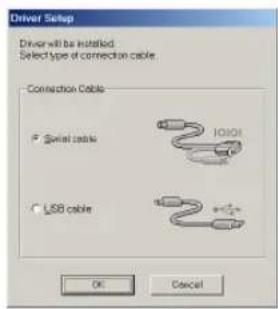
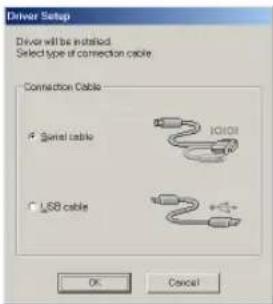
To install just the printer driver, click the lower button (Driver). The first Driver Setup dialog box appears, allowing you to select whether the P-touch will be connected through the USB port or the RS-232C port. Continue with the procedure in Installing the USB printer driver on page 14. (To install the serial printer driver, refer to the Advanced Functions booklet.)
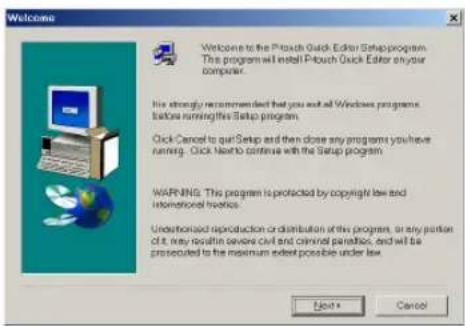
To install the P-touch Quick Editor software, click the middle button (P-touch Quick Editor). Continue with the procedure in Installing the P-touch Quick Editor software on page 12.
③ Carefully read the contents of the Welcome dialog box, and then click the Next button to continue. The User Information dialog box appears.
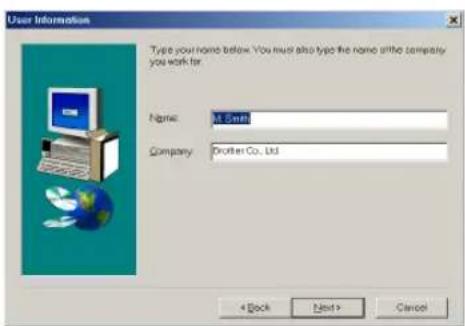
4Type the necessary information into the appropriate boxes (If the information has already been registered in Windows®, it will automatically appear.), and then click the Next button. A dialog box appears, asking for confirmation of the entered information.
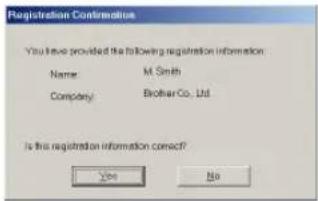
⑤ Click the Yes button to register the entered information.
NOTE
To change the registration information, click the No button, and then return to step 4.
The Setup Type dialog box appears.
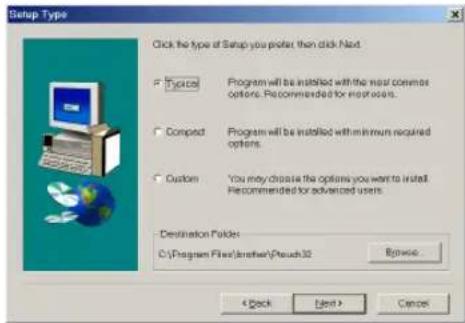
⑥Select the installation method, and then click the Next button.
●For a Typical or Compact installation
Selecting "Typical" or "Compact", then clicking the Next button immediately starts installation.
Typical: All of the basic options (P-touch Editor 3.2, Clip art, Auto Format templates, Help and fonts) are installed.
Compact: Only P-touch Editor 3.2 is installed.
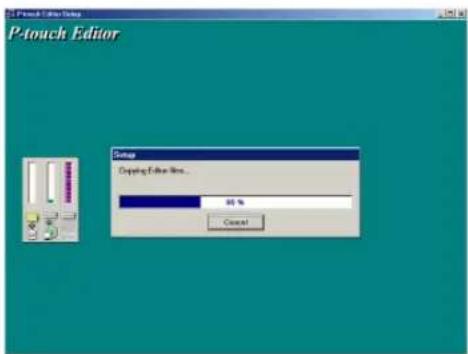
●For a Custom installation
Selecting "Custom", then clicking the Next button displays a dialog box that allows you to select which options to install. Only the options with a check mark beside them will be installed. In addition to the basic options listed for a Typical installation, the User's Guide can also be installed.
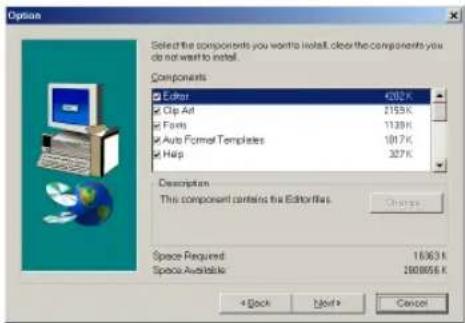
1) Select which options to install.
Editor: P-touch Editor 3.2 software
Clip Art: Illustrations for the P-touch Editor 3.2 Clip Art function
Fonts
Auto Format Templates: Templates for the Auto Format function
Help: Help files for P-touch Editor 3.2
User's Guide: HTML User's Guide for P-touch Editor 3.2 (The User's Guide can also be viewed from the CD-ROM.)
Transfer Manager: (PT-9600 only-not compatible with the software for the PT-3600) Two applications: Transfer Manager (which allows you to transfer templates, a database linked to a template or image data to the P-touch from a computer) and Backup Manager (which allows you to back up P-touch data on a PC and transfer it back to the P-touch)
If the Change button can be clicked while an option is selected, sub-components can be selected. Click the Change button to display the Select Sub-components dialog box, and then select the sub-components that you wish to install by putting a check mark beside them.
Ch. 2 Getting Started
If certain options or sub-components are not installed, some P-touch Editor functions may not be available. After selecting the desired sub-components, click the Continue button.
2) Click the Next button to begin installation.
⑦After P-touch Editor is installed, a dialog box appears, allowing you to select whether or not to install the printer driver.
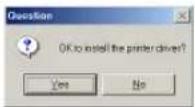
To install the printer driver, click the Yes button. The first Driver Setup dialog box appears, allowing you to select whether the P-touch will be connected through the USB port or the RS-232C port.
Continue with the procedure in Installing the USB printer driver on page 14. (To install the serial printer driver, refer to the Advanced Functions booklet.)
NOTE
If the printer driver is already installed, click the No button.
⑧When installation of P-touch Editor is finished, a dialog box appears, allowing you to upgrade P-touch Editor 3.2 so that it will be compatible with Access 2000.
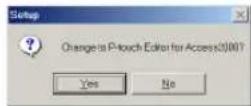
To upgrade P-touch Editor 3.2 for Access 2000, click the Yes button, and then follow the instructions that appear.
If you do not wish to upgrade P-touch Editor 3.2 for Access 2000, click the No button.
NOTE
If a dialog box appears, indicating that the installation is finished and explaining that the computer should be restarted, select the option for restarting the computer, click the Finish button to restart the computer, and then remove the CD-ROM from the CD-ROM drive.
Installing the P-touch Quick Editor software
The P-touch Quick Editor software provides quick access to the more simple label-designing features for easy text input and instant printing of labels. Install the P-touch Quick Editor software onto a PC as described below.
NOTE
Do not connect the P-touch to the computer before installing the software, otherwise it may not be installed correctly. Be sure to connect the P-touch only when you are instructed to do so.
To install the P-touch Quick Editor software
① Insert the enclosed CD-ROM into the computer's CD-ROM drive. A dialog box automatically appears, allowing you to select what to install.
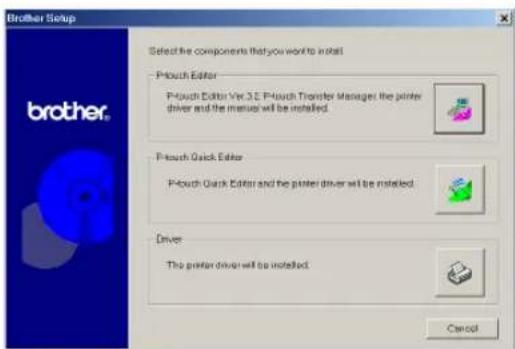
NOTE
If the dialog box does not automatically appear, double-click "My Computer" on the desktop, and then double-click the CD-ROM drive containing the CD-ROM. (For Windows® XP, click "My Computer" in the Start menu, and then double-click the CD-ROM drive containing the CD-ROM.) Next, double-click "Setup.exe" to display the dialog box.
②Click the middle button (P-touch Quick Editor). The InstallShield® Wizard for installing the P-touch Quick Editor software starts up, and then the Welcome dialog box appears.
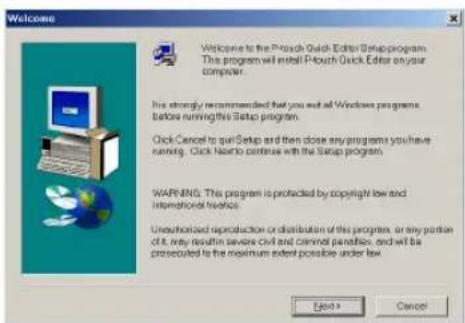
NOTE
To install just the printer driver, click the lower button (Driver). The first Driver Setup dialog box appears, allowing you to select whether the P-touch will be connected through the USB port or the RS-232C port. Continue with the procedure in Installing the USB printer driver on page 14. (To install the serial printer driver, refer to the Advanced Functions booklet.)
To install the P-touch Editor 3.2 software, click the upper button (P-touch Editor). Continue with the procedure in Installing the P-touch Editor 3.2 software on page 10.
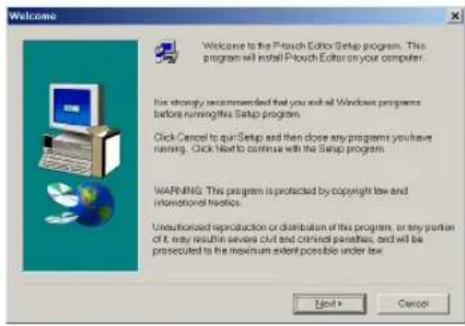
③ Carefully read the contents of the Welcome dialog box, and then click the Next button to continue. The User Information dialog box appears.
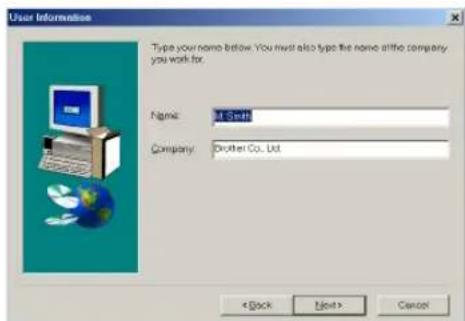
4Type the necessary information into the appropriate boxes (If the information has already been registered in Windows®, it will automatically appear.), and then click the Next button. A dialog box appears, asking for confirmation of the entered information.
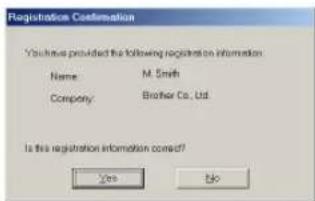
⑤Click the Yes button to register the entered information.
NOTE
To change the registration information, click the No button, and then return to step 4.
The Choose Destination Location dialog box appears.
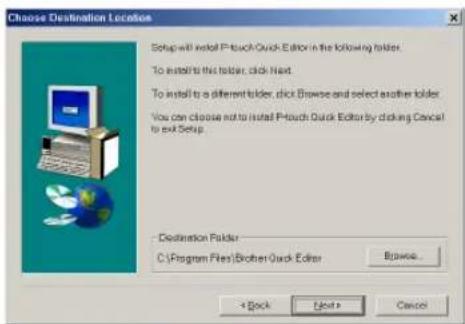
⑥ Click the Next button to begin installation.
NOTE
To change the location where P-touch Quick Editor will be installed, click the Browse button, and then select the installation folder in the Choose Folder dialog box that appears. Then, click the OK button.
After P-touch Quick Editor is installed, a dialog box appears, allowing you to select where shortcuts to P-touch Quick Editor will be added.
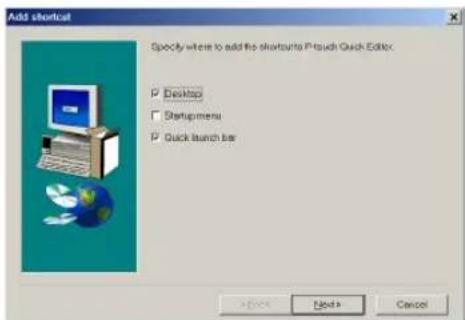
Ch. 2 Getting Started
7 Select the desired locations for the short-cuts, and then click the Next button. A dialog box appears, allowing you to select whether or not to install the printer driver. To install the printer driver, click the Yes button. The first Driver Setup dialog box appears, allowing you to select whether the P-touch will be connected through the USB port or the RS-232C port.
Continue with the procedure in Installing the USB printer driver on page 14. (To install the serial printer driver, refer to the Advanced Functions booklet.)
NOTE
If the printer driver is already installed, click the No button. A dialog box appears explaining that installation is finished. Select "Yes, I want to restart my computer now.", click the Finish button to restart the computer, and then remove the CD-ROM from the CD-ROM drive.
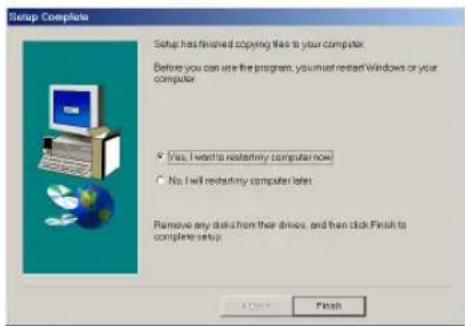
Installing the USB printer driver
With Plug-and-Play, new devices connected to the system are detected, and their drivers are automatically installed. If the P-touch 9600/3600 is to be connected through the USB port, its driver will be installed with Plug-and-Play. Be sure to read the installation instructions described below before installing the printer driver supplied on the CD-ROM.
NOTE
Do not connect the P-touch to the computer until you are instructed to do so, otherwise the printer driver may not be installed correctly.
The dialog boxes shown in the procedures below are for the installation of the software for the PT-9600. When installing the software for the PT-3600, the dialog boxes may be slightly different from those shown.
To install the USB printer driver
With Windows® 98, 98 SE, Me or 2000:
In the dialog box that appears, allowing you to select whether the P-touch will be connected with a USB cable or an RS-232C cable, select "USB cable", and then click the OK button. A dialog box appears, informing you that the PT-9600/3600 printer driver will be installed.
![Driver Setup (Brother PT-9600) The following driver will be set up: Brother PT-9600 Warning Do not connect or turn on the Brother PT-9600 until you are checked to To continue, click [Next] Setup will begin OK Next > Cancel](/content/2026/05/862099/images/c24c467c7fe563ade419f4d6f9283222d959212fdc7085f02726ce9b06cb04f2.jpg)
②Click the Next button. A dialog box appears, instructing you to connect the P-touch to the computer.
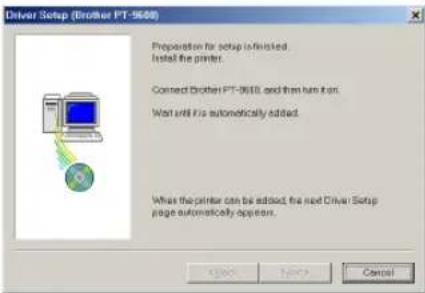
3Connect the P-touch to the computer using the enclosed USB interface cable as described on page 9, and then turn on the P-touch. A dialog box appears, indicating that the printer driver has been installed.
![Driver Setup (Brother PT-9680) Brother PT-9680 was correctly added. Click [Hint] to quit setup. Finish Cancel](/content/2026/05/862099/images/afccdc45b42084c9273546e333dde4d6cb63e17e846dd135a010bd09f03af5d4.jpg)
④ Click the Finish button.
NOTE
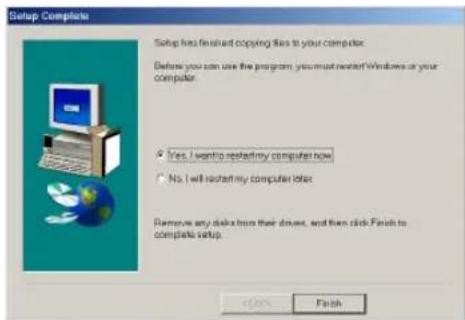
If a dialog box appears, indicating that the installation is finished and explaining that the computer should be restarted, select the option for restarting the computer, click the Finish button to restart the computer, and then remove the CD-ROM from the computer.
With Windows ^® XP:
In the dialog box that appears, allowing you to select whether the P-touch will be connected with a USB cable or an RS-232C cable, select "USB cable", and then click the OK button. A dialog box appears, informing you that the PT-9600/3600 printer driver will be installed.
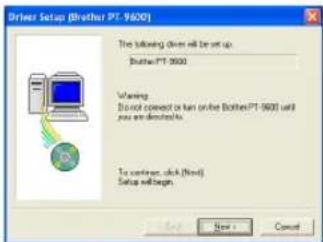
②Click the Next button. A dialog box appears, instructing you to connect the P-touch to the computer.
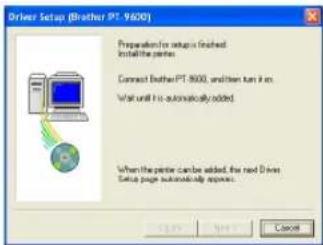
3Connect the P-touch to the computer using the enclosed USB interface cable as described on page 9, and then turn on the P-touch. The first Found New Hardware Wizard dialog box appears.
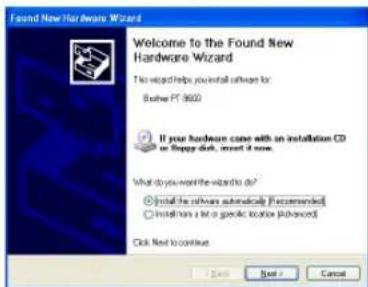
4 Select "Install the software automatically (Recommended)", and then click the Next button. A dialog box appears, warning that the software has not passed Windows® Logo testing.
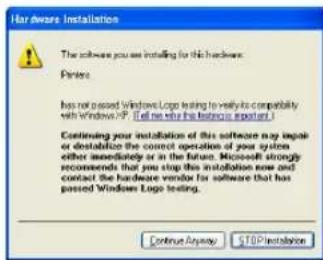
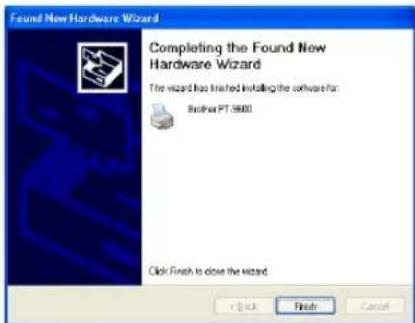
⑤Click the Continue Anyway button to continue with the installation. A Found New Hardware Wizard dialog box appears, indicating that the Found New Hardware Wizard has finished installing the software for the PT-9600/3600.
Ch. 2 Getting Started
⑥ Click the Finish button.
NOTE
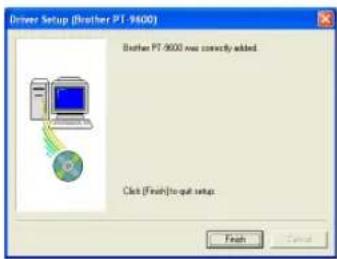
If a Driver Setup dialog box appears, indicating that the printer driver has been installed, click the Finish button.
A dialog box appears, indicating that the installation is finished.
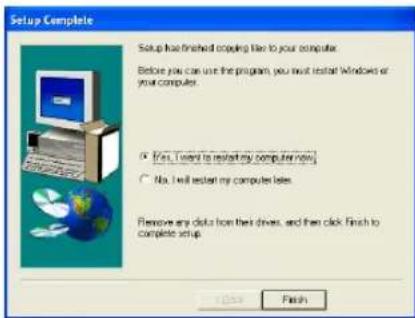
7 Select "Yes, I want to restart my computer now." (or "Yes, restart immediately" if the printer driver was installed separately), click the Finish button to restart the computer, and then remove the CD-ROM from the computer.
Replacing or adding a USB printer driver
To replace or add a USB printer driver
①Turn off the P-touch, and then disconnect it from the computer.
② Insert the enclosed CD-ROM into the computer's CD-ROM drive. A dialog box automatically appears, allowing you to select what to install.
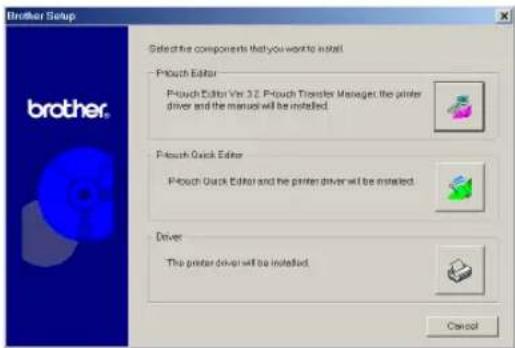
NOTE
If the dialog box does not automatically appear, double-click "My Computer" on the desktop, and then double-click the CD-ROM drive containing the CD-ROM. (For Windows® XP, click "My Computer" in the Start menu, and then double-click the CD-ROM drive containing the CD-ROM.) Next, double-click "Setup.exe" to display the dialog box.
③Click the lower button (Driver). A Driver Setup dialog box appears, allowing you to select whether to replace, add or delete the PT-9600/3600 printer driver.
![Driver Setup (Brother PT-9600) Brother PT-9600 is currently installed Replace with new Brother PT-9600? ○ Replace with new Brother PT-9600 ○ Gold Brother PT-9600 ○ Delete Brother PT-9600 Working Do not connect or turn on the Brother PT-9600 until you are directed to. Make your selection, and then click [Next] Setup will begin OK Next > Cancel](/content/2026/05/862099/images/6793675a9d1c2576b475bd90d2899cae4cd50b7e86dc24c78de9c188f08c1857.jpg)
4 Select either "Replace with new Brother PT-9600/3600." or "Add Brother PT-9600/3600.", and then click the Next button.
NOTE
If "Replace with new Brother PT-9600/3600." is selected, the previously installed printer driver is deleted, and replaced with a new one. Select this option when upgrading the printer driver, or when running Windows® 2000 or XP and changing to a P-touch 9600/3600 with a different serial number.
If "Add Brother PT-9600/3600." is selected, a new printer driver is added. With a USB connection on Windows® 98 or Me, only a port is added without adding it as a new printer. Select this option when connecting and using multiple P-touch 9600/3600s with the same computer.
To delete the printer driver, follow the procedure in Uninstalling the printer driver on page 30.
With Windows ^® 98, 98 SE, Me or 2000:
⑤A dialog box appears, instructing you to connect the P-touch to the computer.
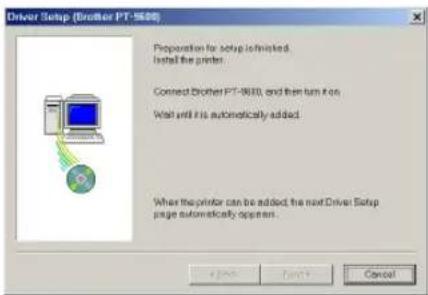
⑥Connect the P-touch to the computer using the enclosed USB interface cable as described on page 9, and then turn on the P-touch. A dialog box appears, indicating that the printer driver has been installed.
![Driver Setup (Brother PT-9608) Brother PT-9610 was correctly added. Click [first] to quit setup. Finish Cancel](/content/2026/05/862099/images/deb628ece2c388f3138f12b14df50f82f2f23bd0cb7f35c061a170d3bdd9b87f.jpg)
⑦ Click the Finish button.
NOTE
If a dialog box appears, explaining that the computer should be restarted, select the option for restarting the computer, and then click the Finish button.
With Windows ^® XP:
⑤A dialog box appears, instructing you to connect the P-touch to the computer.
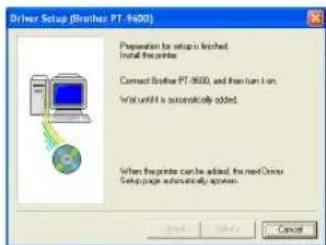
6Connect the P-touch to the computer using the enclosed USB interface cable as described on page 9, and then turn on the P-touch. A dialog box appears, indicating that the printer driver has been installed. The first Found New Hardware Wizard dialog box appears.
![Found New Hardware Wizard Welcome to the Found New Hardware Wizard helps you install software for Another PC 9000 If your hardware came with an installation CD or Happy disk, insert it now. What do you want the wizard to do? Install the software automatically [Accessories] Install from a list of specific locations [Advanced] Click Next to continue](/content/2026/05/862099/images/f858d028caeb29f8d425325a7f5a6a8003352065865ed58f0c666729eb6a4dbb.jpg)
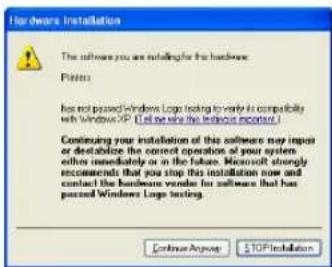
7 Select "Install the software automatically (Recommended)", and then click the Next button. A dialog box appears, warning that the software has not passed Windows® Logo testing.
Ch. 2 Getting Started
⑧Click the Continue Anyway button to continue with the installation. A Found New Hardware Wizard dialog box appears, indicating that the Found New Hardware Wizard has finished installing the software for the PT-9600/3600.
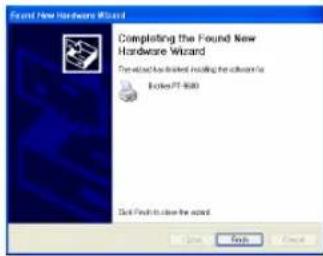
⑨ Click the Finish button. A Driver Setup dialog box appears, indicating that the printer driver has been installed.
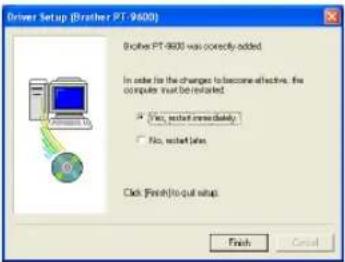
10 Select "Yes, restart immediately", click the Finish button to restart the computer, and then remove the CD-ROM from the computer.
On a Macintosh Computer
The Mac version of the software is for a Macintosh with an English operating system. If the software is installed on a Macintosh with an operating system in a different language, the software may not run properly.
Before installation
Check that your system configuration meets the following requirements.
Computer: Macintosh with Power PC processor
Operating system: Mac OS 8.6 or later, or Mac OS X v10.1 or v10.2
Hard disk free space: At least 20 MB (100 MB for a full installation)
NOTE
Up to 100 MB of hard disk free space may be needed when printing long labels or large amounts of data.
Memory: At least 32 MB
USB port (installed as standard equipment)
CD-ROM drive
Installing the P-touch Editor 3.2 software
The P-touch Editor 3.2 software includes a variety of more complex functions for printing barcodes and images, enabling you to design just about any label that you can image. Install the P-touch Editor 3.2 software onto a Macintosh as described below.
To install the P-touch Editor 3.2 software
With a Mac OS before OS X:
① With the P-touch and the Macintosh turned off, connect the P-touch to the computer using the enclosed USB interface cable as described on page 9. Be sure to leave the P-touch turned off.
②Turn on the Macintosh.
③Insert the enclosed CD-ROM into the computer's CD-ROM drive.
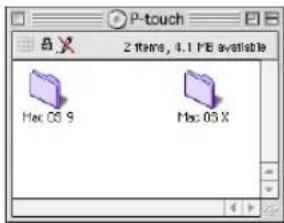
④ Double-click the Mac OS 9 folder to open it.
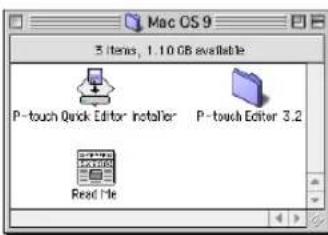
⑤ Double-click the P-touch Editor 3.2 folder to open it.
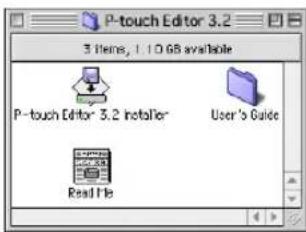
6 Double-click the P-touch Editor 3.2 Installer icon in the folder that appears. The installer starts up.
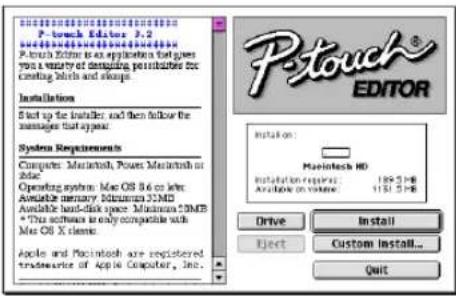
⑦Select the installation method.
●For a basic installation
Clicking the Install button immediately starts installing all options.
NOTE
About 20 MB of available hard-disk space is needed to begin installation. In order to install all options, about 100 MB of available hard-disk space is needed. If enough hard-disk space is available, click the Install button.
●For a custom installation
Clicking the Custom Install button displays a dialog box that allows you to select which options to install.
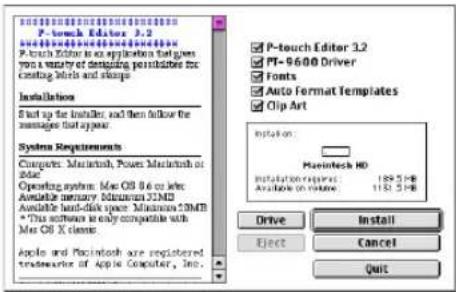
Only the options with a check mark beside them are installed. Select the options that you wish to install, and then click the Install button.
NOTE
In order to print from the P-touch 9600/3600, "PT-9600/3600 Driver" must be selected for installation.
If certain options are not installed, some P-touch Editor functions may not be available.
⑧When the dialog box appears, indicating that the installation is finished, click the Quit button.
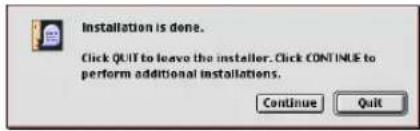
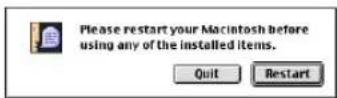
⑨When the dialog box appears, asking if you wish to restart the computer, click the Restart button to restart the computer.
With Mac OS X v10.1 or v10.2:
① With the P-touch and the Macintosh turned off, connect the P-touch to the computer using the enclosed USB interface cable as described on page 9. Be sure to leave the P-touch turned off.
②Turn on the Macintosh.
③Insert the enclosed CD-ROM into the computer's CD-ROM drive.
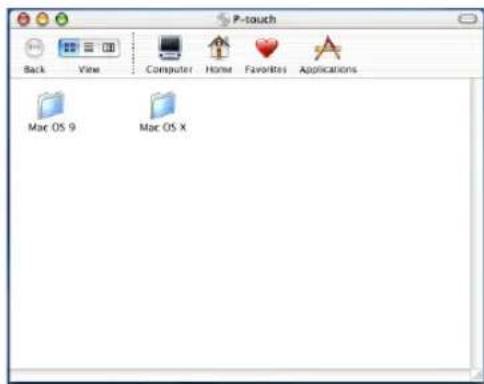
4 Double-click the Mac OS X folder to open it.
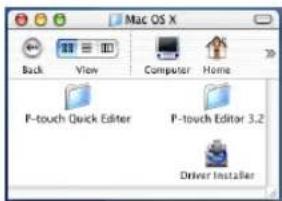
⑤ Double-click the P-touch Editor 3.2 folder to open it.
Ch. 2 Getting Started
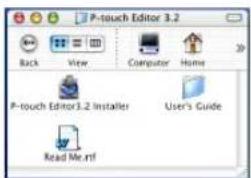
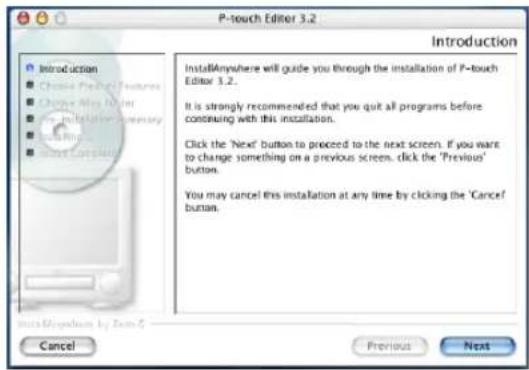
6 Double-click the P-touch Editor 3.2 Installer icon in the folder that appears. The installer starts up, and then the Introduction dialog box appears.
NOTE
When the Next button is pressed, a message may appear, warning that an older version of the software is installed. Be sure to uninstall the older version of the software before trying to install the new software. For details on uninstalling the software, refer to To uninstall the P-touch Editor 3.2 software: on page 32.
⑦ Click the Next button. The Choose Product Components dialog box appears.
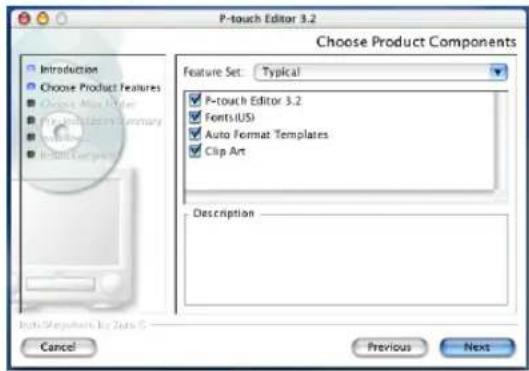
⑧Select the installation method.
●For a typical installation
Click the Next button to immediately start installing all options.
NOTE
About 20 MB of available hard-disk space is needed to begin installation. In order to install all options, about 100 MB of available hard-disk space is needed.
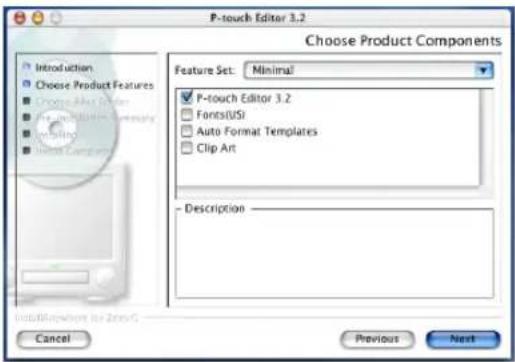
●For a minimal installation
Select "Minimal" from the Feature Set list, and then click the Next button to start installing just the P-touch Editor 3.2 application.
NOTE
If certain options (such as the Auto Format Templates and the Clip Art) are not installed, some P-touch Editor functions may not be available.
●For a custom installation
Select "Custom" from the Feature Set list to display the list of options that can be selected for installation.
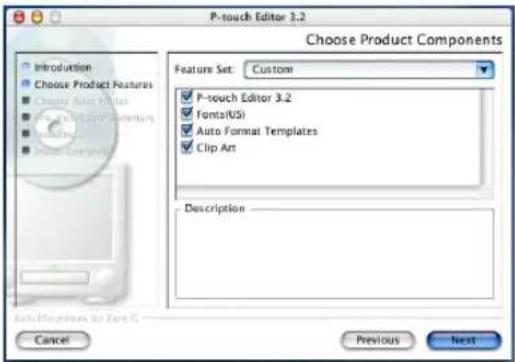
Only the options with a check mark beside them are installed. Select the options that you wish to install, and then click the Next button.
The Choose Alias Folder dialog box appears, allowing you to select where an alias to P-touch Editor 3.2 will be added.
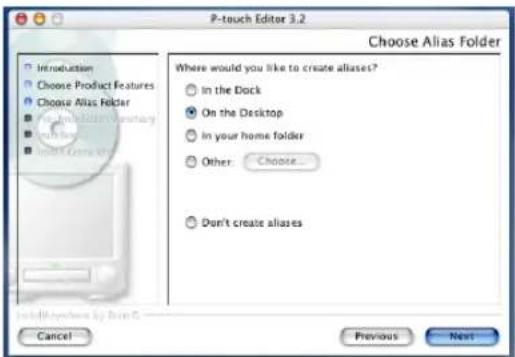
9 Select the desired location for the alias, and then click the Next button. A dialog box appears, allowing you to check the installation.
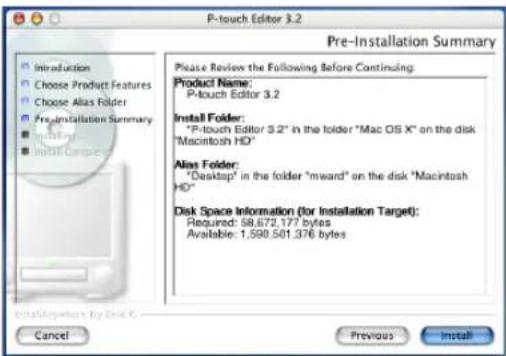
⑩Check that the installation will be performed as desired, and then click the Install button. After P-touch Editor is installed, a dialog box appears, indicating that the installation is finished.
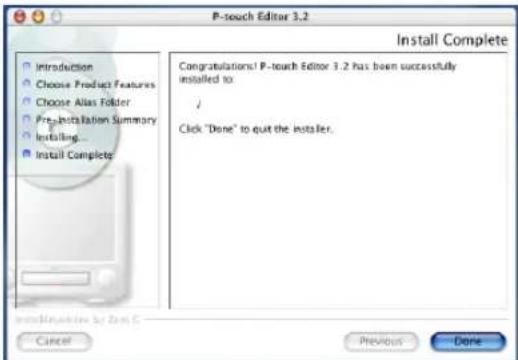
⑪ Click the Done button, and then restart the computer.
Installing the P-touch Quick Editor software
The P-touch Quick Editor software provides quick access to the more simple label-designing features for easy text input and instant printing of labels. Install the P-touch Quick Editor software onto a Macintosh as described below.
With a Mac OS before OS X:
① With the P-touch and the Macintosh turned off, connect the P-touch to the computer using the enclosed USB interface cable as described on page 9. Be sure to leave the P-touch turned off.
②Turn on the Macintosh.
③Insert the enclosed CD-ROM into the computer's CD-ROM drive.
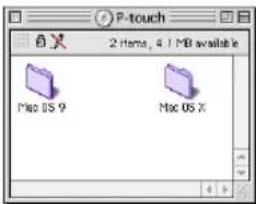
④ Double-click the Mac OS 9 folder to open it.
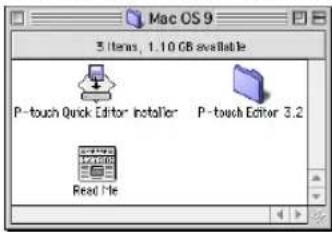
5 Double-click the P-touch Quick Editor Installer icon in the folder that appears. The installer starts up.
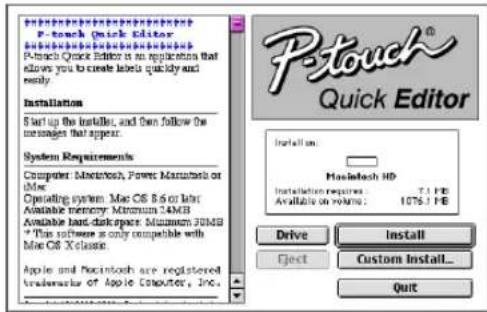
⑥Select the installation method.
●For a basic installation
Clicking the Install button immediately starts installing the most basic options.
NOTE
About 20 MB of available hard-disk space is needed to begin installation. If enough hard-disk space is available, click the Install button.
●For a custom installation
Clicking the Custom Install button displays a dialog box that allows you to select which options to install.
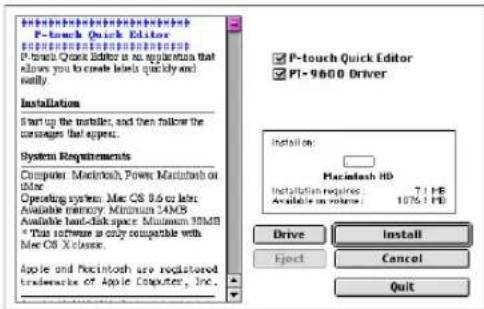
Only the options with a check mark beside them are installed. Select the options that you wish to install, and then click the Install button.
NOTE
In order to print from the P-touch 9600/3600, "PT-9600/3600 Driver" must be selected for installation.
Ch. 2 Getting Started
⑦When the dialog box appears, indicating that the installation is finished, click the Quit button.
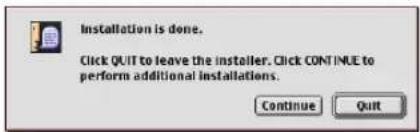
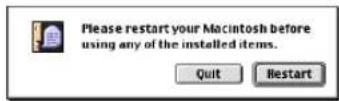
⑧ When the dialog box appears, asking if you wish to restart the computer, click the Restart button to restart the computer.
With Mac OS X v10.1 or v10.2:
①With the P-touch and the Macintosh turned off, connect the P-touch to the computer using the enclosed USB interface cable as described on page 9. Be sure to leave the P-touch turned off.
②Turn on the Macintosh.
③Insert the enclosed CD-ROM into the computer's CD-ROM drive.
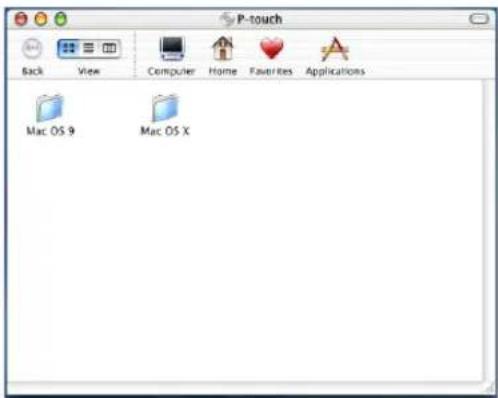
④ Double-click the Mac OS X folder to open it.
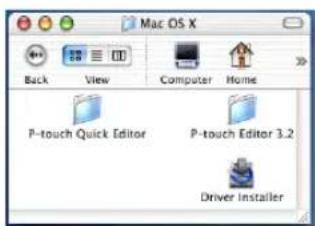
⑤Double-click the P-touch Quick Editor folder to open it.
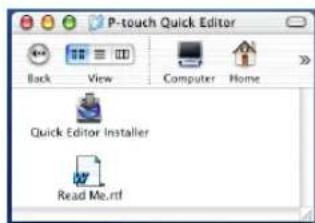
6 Double-click the P-touch Quick Editor Installer icon in the folder that appears. The installer starts up, and then the Introduction dialog box appears.
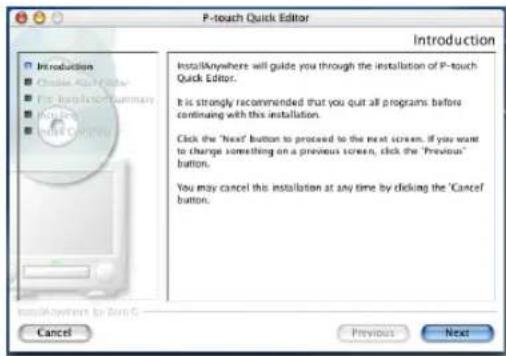
NOTE
When the Next button is pressed, a message may appear, warning that an older version of the software is installed. Be sure to uninstall the older version of the software before trying to install the new software. For details on uninstalling the software, refer to To uninstall the P-touch Quick Editor software: on page 32.
⑦Click the Next button. The Choose Alias Folder dialog box appears, allowing you to select where an alias to P-touch Quick Editor will be added.
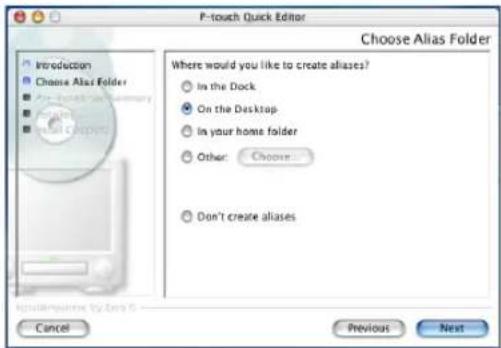
⑧ Select the desired location for the alias, and then click the Next button. A dialog box appears, allowing you to check the installation.
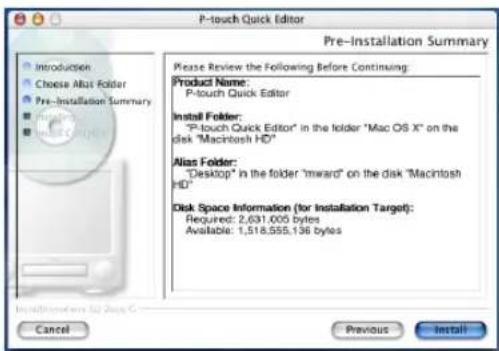
⑨Check that the installation will be performed as desired, and then click the Install button. After P-touch Quick Editor is installed, a dialog box appears, indicating that the installation is finished.
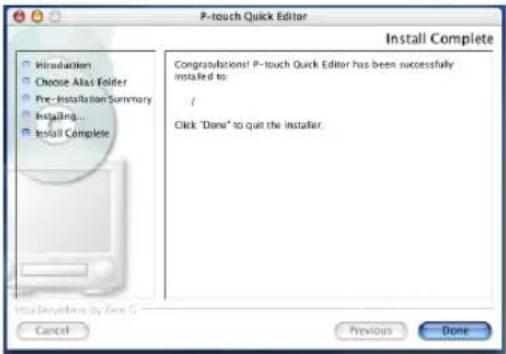
10 Click the Done button, and then restart the computer.
Installing the printer driver (Mac OS X v10.1 or v10.2)
To install the printer driver:
① With the P-touch and the Macintosh turned off, connect the P-touch to the computer using the enclosed USB interface cable as described on page 9. Be sure to leave the P-touch turned off.
②Turn on the Macintosh.
③Insert the enclosed CD-ROM into the computer's CD-ROM drive.
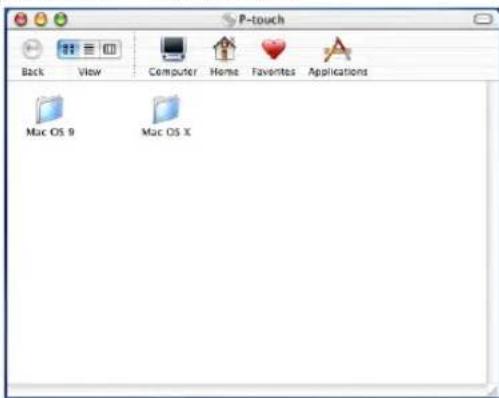
4 Double-click the Mac OS X folder to open it.
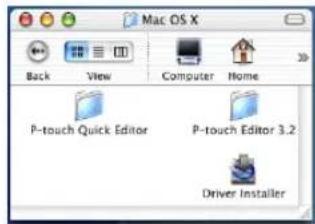
⑤Double-click the Driver Installer icon in the folder that appears. The installer starts up, and then the Introduction dialog box appears.
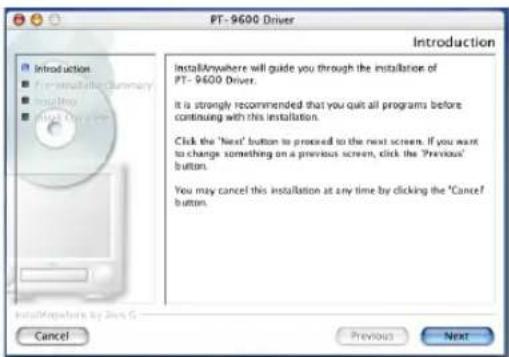
NOTE
When the Next button is pressed, a message may appear, warning that an older version of the printer driver is installed. Be sure to uninstall the older version of the printer driver before trying to install the new driver. For details on uninstalling the printer driver, refer to To uninstall the printer driver: on page 32.
⑥Click the Next button. A dialog box appears, allowing you to check the installation.
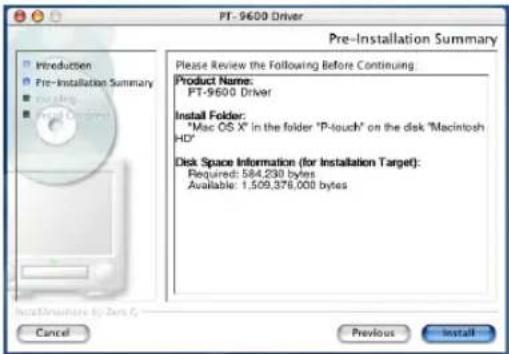
⑦Check that the installation will be performed as desired, and then click the Install button. After the printer driver is installed, a dialog box appears, indicating that the installation is finished.
Ch. 2 Getting Started
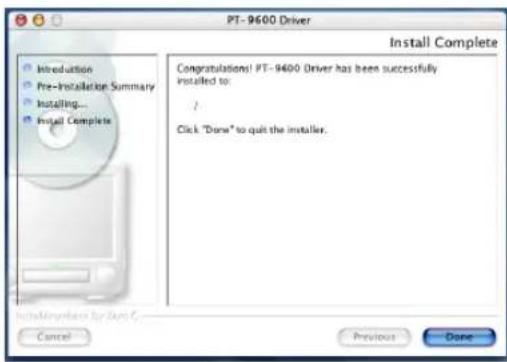
⑧Click the Done button, and then restart the computer.
Selecting the PT-9600/3600 as the printer
To select the printer:
With a Mac OS before OS X:
①Turn on the P-touch 9600/3600.
②Pull down the Apple menu and select "Chooser" to display the Chooser window.
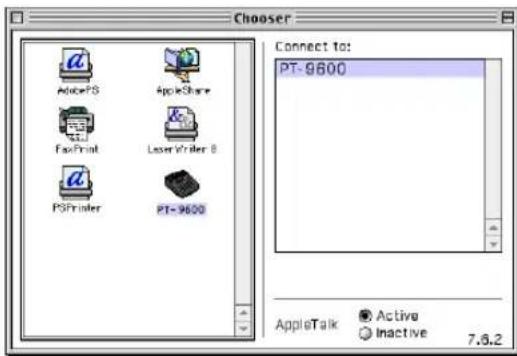
③In the list on the left, click the PT-9600/3600 icon. Then, select the appropriate printer from the list on the right.
④ Close the Chooser window to confirm your settings.
With Mac OS X v10.1 or v10.2:
①Turn on the P-touch 9600/3600.
② Double-click the Applications folder on the Macintosh HD to open it.
③Double-click the Utilities folder to open it.
4 Double-click "Print Center" to start it up.
NOTE
If no printers have been added, a message appears, allowing you to add to your list of printers. Click the Add button.
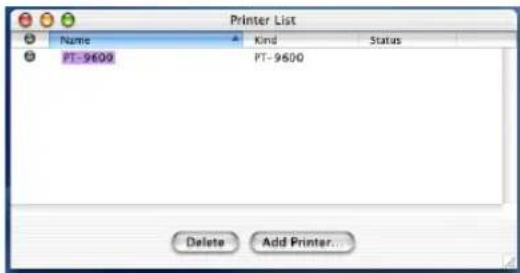
⑤Click the Add Printer button. A list of detected USB printers appears.
6 Select "PT-9600/3600" from the USB list, and then click the Add button. The PT-9600/3600 appears in the Printer List.
⑦ Quit Print Center.
Reading the User's Guide
The P-touch Editor User's Guide can be viewed either by inserting the CD-ROM into the drive each time you wish to refer to it or by installing it onto your computer so that it is quickly available at any time. Since the User's Guide is an HTML document, a browser is needed to read it.
On a Computer Running Windows®
To view the User's Guide from the CD-ROM:
① Start up Windows ^® Explorer.
②Select the CD-ROM drive.
③ Double-click the Ptouch folder
④ Double-click the Manual folder
⑤ Double-click "Main.htm".
To view the User's Guide installed on the hard disk:
① Click the Start button in the taskbar to display the Start menu.
② Point to "Programs".
③ Point to "P-touch Editor 3.2".
④ Click "The User's Guide P-touch Editor 3.2".
On a Macintosh Computer
To view the User's Guide from the CD-ROM:
- Double-click "Main.htm" in the User's Guide folder within the P-touch Editor 3.2 folder on the CD-ROM.
To view the User's Guide installed on the hard disk:
- Double-click "Main.htm" in the User's Guide folder within the P-touch Editor 3.2 folder installed on the computer.
Using P-touch Editor 3.2
P-touch Editor 3.2 makes it easy for anyone to design and print more complex labels for almost any need imaginable.
Starting up P-touch Editor 3.2
To start up P-touch Editor 3.2:
On a computer running Windows®
① Click the Start button in the taskbar to display the Start menu.
② Point to "Programs".
③ Point to "P-touch Editor 3.2".
4 Click "P-touch Editor 3.2".
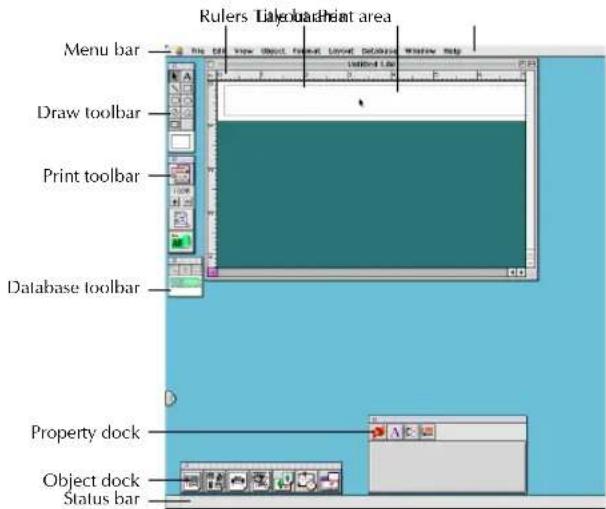
When P-touch Editor is started, the following window is displayed.
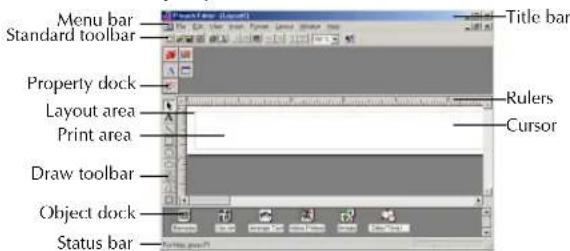
On a Macintosh computer
● Double-click the P-touch Editor 3.2 icon in the P-touch Editor 3.2 folder installed on the computer.
When P-touch Editor is started, the following window is displayed.
NOTE
To view the help for the Mac version of P-touch Editor 3.2, double-click "Main.htm" in the Help folder within the P-touch Editor 3.2 folder installed on the computer.
Displaying the Properties
NOTE
Although the screens shown in the following explanations are for Windows ^® 98, 98 SE and Me, the operations for Windows ^® 2000 and XP and Macintosh are the same unless specifically mentioned.
The desired Properties can be displayed by clicking the icon in the property dock.
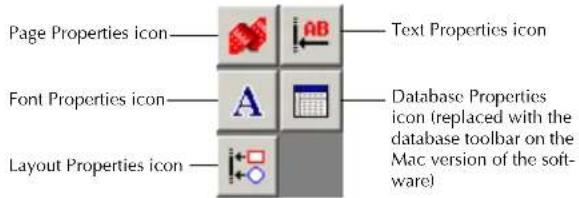
To display the Properties:
- Click the icon.
Page Properties
Click this button to hide the Properties.

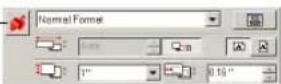
When the P-touch 9600/3600 is selected as the printer:
Ch. 2 Getting Started
Entering text
NOTE
Although the screens shown in the following explanations are for Windows ^® 98, 98 SE and Me, the operations for Windows ^® 2000 and XP and Macintosh are the same unless specifically mentioned.
①Click (Text button) on the draw toolbar. Text can be typed in, and the pointer changes from (selection pointer) to (I-beam pointer).
②Move the I-beam pointer to the position in the layout area where you wish to type in text, and then click the left mouse button. The cursor flashes in the layout area to indicate that you can now type in text.
![PostScript Editor - [Layout 3.0] File Edit View Insert Format Layout Window Help Auto Actions Properties Balance & Settings & Tools & Settings & Settings & Settings & Settings & Settings & Settings & Settings & Settings & Settings & Settings & Settings & Settings & Settings & Settings & Settings & Settings & Settings & Settings & Settings & Settings & Settings & Settings & Settings & Settings & Settings & Settings & Settings & Settings & Settings & Settings & Settings & Settings & Settings & Settings & Settings & Settings & Settings & Settings & Settings & Settings & Settings & Settings & Settings & Settings & Settings & Settings & Settings & Settings & Settings & Settings & Balance Clip Art Arrange Text Make Picture Image Date/Time/ For Help press F1](/content/2026/05/862099/images/66d535c20f94d49ac81ec1dc7af54c326608b9944d5febde07818984005f167f.jpg)
③Use the computer keyboard to type in the text.
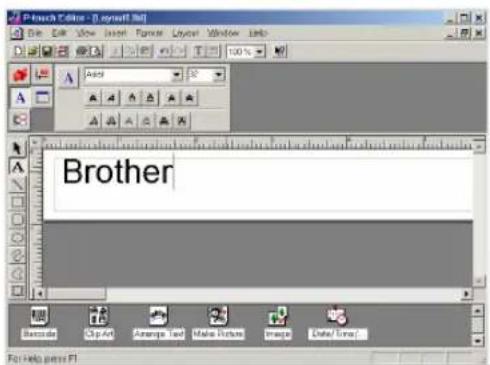
4 To create a new line of text, press the keyboard's Enter key.
NOTE
With P-touch Editor 3.2, text is always typed in using the insert mode. The overwrite mode cannot be used to type in text.
To change the font and text size, click the appropriate icon in the property dock, and then select the desired settings from the Properties that appear.
For details, refer to Reading the User's Guide on page 24.
Notes on usage
Barcodes
Keep the following points in mind when using P-touch Editor 3.2 to print barcodes.
- Barcodes should be printed on white tape. If other colors of tape are used, the barcode reader may not be able to read the barcode correctly.
- Be sure to test the barcode reader to make sure that it can read printed barcodes in the environment where you plan to use them.
●The QR Code protocol can only be used with English. If data in any other language is entered, the barcode may not be read correctly.
Databases
Keep the following points in mind when using the database functions of P-touch Editor 3.2.
NOTE
For general details, refer to the User's Guide supplied on the P-touch Editor 3.2 CDROM.
●The database function of P-touch Editor 3.2 (Windows® version) uses database files that are compatible with Microsoft Access 97. By upgrading P-touch Editor 3.2 using a program available on the CD-ROM, P-touch Editor will become compatible with Access 2000. If P-touch Editor 3.2 has not been updated to Access 2000 during installation, refer to the Readme file located at Ptouch\Editor\Ac2k on the CD-ROM, and start up the program.
- P-touch Editor 3.2 can import files other than mdb files, such as csv files. Files saved as csv files with an application such as Microsoft Excel can be used with P-touch Editor. Refer to the User's Guide supplied on the P-touch Editor 3.2 CD-ROM for more details.
- Using a function available with Microsoft Access 97, Excel files can be linked to mdb files. With this function, data changed in Excel is automatically updated with the P-touch Editor.
Using P-touch Quick Editor
P-touch Quick Editor enables you to design a simple label layout quickly and easily. In addition to the various functions available through the buttons in the toolbar, right-clicking (Windows®) or holding down the Control key and clicking (Macintosh) in the label view displays a pop-up menu containing more commands.
Starting up P-touch Quick Editor
To start up P-touch Quick Editor:
On a computer running Windows®
- If a shortcut was added to the StartUp menu:
● P-touch Quick Editor automatically starts when the computer is started up.
- If a shortcut was added to the desktop:
● Double-click the P-touch Quick Editor icon on the desktop.
- If a shortcut was added to the Quick Launch toolbar:
● Double-click the P-touch Quick Editor icon in the Quick Launch toolbar.
- If no shortcuts were added:
① Click the Start button in the taskbar to display the Start menu.
② Point to "Programs".
③ Click "P-touch Quick Editor".
When P-touch Quick Editor is started, the following window is displayed.
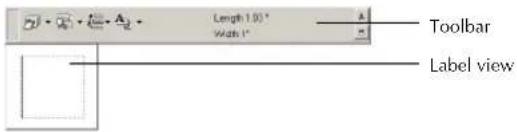
NOTE
P-touch Quick Editor can be hidden or displayed by clicking its icon in the system tray, at the right of the taskbar.
On a Macintosh computer
● Double-click the P-touch Quick Editor icon in the P-touch Quick Editor folder installed on the computer.
When P-touch Quick Editor is started, the following window is displayed.
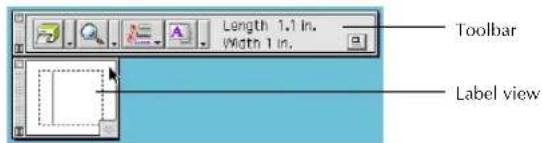
NOTE
To view the help for the Mac version of P-touch Quick Editor, double-click "Help.html" in the P-touch Quick Editor folder installed on the computer.
Specifying a label size
Before entering text, the label size must be set. A selection of preset layout sizes is available for a variety of needs.
NOTE
Although the screens shown in the following explanations are for Windows ^® 98, 98 SE and Me, the operations for Windows ^® 2000 and XP and Macintosh are the same unless specifically mentioned.
To specify the label size:
①Click the arrow beside the Properties button ( A to display a drop-down menu.
②Click [Tape Settings] to display various label format settings.
Ch. 2 Getting Started
NOTE
The Tape Settings can also be displayed by selecting [View Properties], then clicking [Tape Settings] in the pop-up menu, displayed by right-clicking (Windows®) or holding down the Control key and clicking (Macintosh) in the label view.
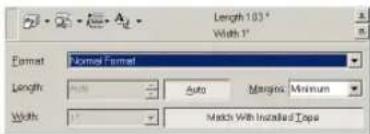
③In the Format list, click the desired label format.
NOTE
The size of the label layout can also be set by specifying the Length and Width settings or by dragging the edges of the label view until the layout is the desired size.
Three preset label formats for AV labels are available, allowing you to easily create address or file folder labels by simply selecting the format, then entering the text.
Entering text
The entire text can quickly be formatted by specifying the font, size, style and alignment. In addition, a frame can be drawn around the text.
To enter text:
①Click the arrow beside the Properties button ( ) to display a drop-down menu.
②Click [Text Settings] to display various text format settings.
NOTE
The Text Settings can also be displayed by selecting [View Properties], then clicking [Text Settings] in the pop-up menu, displayed by right-clicking (Windows®) or holding down the Control key and clicking (Macintosh) in the label view.
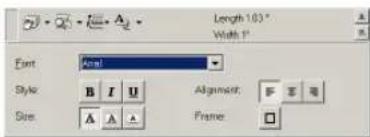
③In the Text Settings Properties, select the desired text formats.
④ Click in the label view, and then type or import the text.
NOTE
Typing in the label view shows the text as it will appear when it is printed. However, by clicking the Change View button ( ), the text is displayed in the text box, giving you a clearer view of the entered text.
Importing text
Text that has already been typed in another application can easily be imported into the label.
To import text:
①Select the desired text in the other application.
②Import the text into the label layout either by pressing the designated shortcut keys (Windows® only) or by dragging it from the other application.
NOTE
(Windows® only) To specify the shortcut keys used to import text, right-click in the label view (or text box), and then click [Options] in the menu that appears. In the Options dialog box that appears, select the desired shortcut keys for importing text.
Using the Text History list
The 10 most recently printed texts are automatically stored for future use.
To use text from the Text History list:
①Click the Text History button () to display the Text History list.
②Click the desired text.
NOTE
Text selected from the Text History list replaces all text already entered in the layout.
Adding a symbol
A symbol from the various installed symbol fonts can be added at the left side of the label text.
To add a symbol to the text:
① Windows ®: Right-click in the label view (or text box), select [Symbols] in the menu that appears, and then click [Insert/Change]. The Input Symbol dialog box appears.
Macintosh: Hold down the Control key and click in the label view (or text box), select [Symbols] in the menu that appears, and then click [Insert/Change]. A dialog box displaying symbols appears.
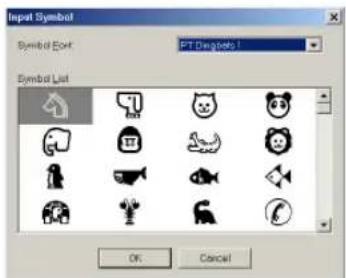
②In the Symbol Font list, select the desired symbol font.
③In the Symbol List view, select the desired symbol.
④ Click the OK button. The selected symbol is added at the left of the text.
NOTE
If a symbol has already been added to the text, it will be replaced by the newly selected symbol.
Changing the background color
The background color of the layout can be changed to suit your preference.
To change the background color:
- Windows®: Right-click in the label view (or text box), select [Background Color] in the menu that appears, and then click the desired color from the list.
Macintosh: Hold down the Control key and click in the label view (or text box), select [Background Color] in the menu that appears, and then click the desired color from the list.
NOTE
To select a color other than those listed, select [User Settings] (Windows®) or [User Settings] (Macintosh) from the Background Color sub-menu, create the desired color in the dialog box that appears, and then click the OK button.
Viewing the text
Layouts that are too long to fit in the screen can be scrolled by clicking the Arrange button ( ) to view the left, the center, then the right side of the layout with each click of the button.
NOTE
If the label view (or text box) has been moved away from the tool bar, it will be docked before scrolling.
Printing
Before printing labels, certain print options can be selected.
To print a label:
①Click the arrow beside the Print button ( ) to display a drop-down menu.
②Click [Print Options]. The Print dialog box appears.
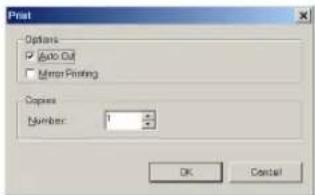
③Select the desired print settings.
Auto Cut: This option allows you to select whether or not to automatically cut off the label after it is printed.
NOTE
When printing multiple copies of AV labels with the Auto Cut check box selected, each label is cut off after it is printed. If the Auto Cut check box is cleared, the string of labels are cut off only after they have all been printed.
Mirror Printing (for TZ tape only): This option allows you to print the text in reverse so that it is perfect for attaching to the inside of windows®.
Copies: This option allows you to enter the number of copies to be printed.
④Windows®: Click the OK button to start printing.
Macintosh: Click the Print button. The layout is printed.
NOTE
If you want to start printing without changing the print options simply click the Print button (or click the arrow beside the Print button and click [Print].
Hiding/displaying P-touch Quick Editor (Windows® only)
P-touch Quick Editor can be hidden by clicking the Hide button ( ) Re-display P-touch Quick Editor by clicking its icon in the system tray, at the right of the taskbar.
Quitting P-touch Quick Editor
To quit P-touch Quick Editor:
On a computer running Windows®
Do either of the following:
● Right-click the P-touch Quick Editor icon in the system tray, and then click [Exit] in the menu that appears.
● Right-click in the label view (or text box), and then click [Exit] in the menu that appears.
On a Macintosh computer
Do either of the following:
- Click [Quit] in the [File] menu
● Hold down the Control key and click in the label view (or text box), and then click [Quit] in the menu that appears.
Uninstalling the Software & Printer Driver
On a Computer Running Windows®
Uninstalling the software
Uninstall the P-touch Editor 3.2 or the P-touch Quick Editor software from a PC as described below.
To uninstall the software:
1 Start up Windows® 98, 98 SE, Me, 2000 or XP.
②Click the Start button in the taskbar, select "Settings", and then click "Control Panel". With Windows® XP, click the Start button in the taskbar, and then click "Control Panel".
③ In the Control Panel window, double-click "Add/Remove Programs" ("Add or Remove Programs" in Windows® XP).
NOTE
The dialog box that appears may differ depending on the operating system being used.
4 In the Add/Remove Programs Properties dialog box, select "P-touch Editor 3.2" (to delete the P-touch Editor 3.2 software) or "P-touch Quick Editor" (to delete the P-touch Quick Editor software), and then click the Add/Remove button (Change/Remove button in Windows® XP).
⑤A message appears, asking if you wish to delete the selected application. Click the Yes button to delete the application.
NOTE
If you do not wish to delete the application, click the No button.
⑥ In the dialog box that appears, indicating that the application is deleted, click the OK button.
Uninstalling the printer driver
Uninstall the PT-9600/3600 printer driver from a PC as described below.
To uninstall the printer driver:
①Turn off the P-touch 9600/3600, and then disconnect it from the computer.
② Insert the enclosed CD-ROM into the computer's CD-ROM drive. A dialog box automatically appears, allowing you to select what to install.
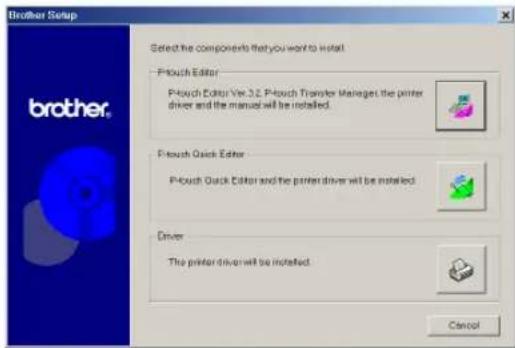
NOTE
If the dialog box does not automatically appear, double-click "My Computer" on the desktop, and then double-click the CD-ROM drive containing the CD-ROM. (For Windows® XP, click "My Computer" in the Start menu, and then double-click the CD-ROM drive containing the CD-ROM.) Next, double-click "Setup.exe" to display the dialog box.
③Click the lower button (Driver). A Driver Setup dialog box appears, allowing you to select whether to replace, add or delete the PT-9600/3600 printer driver.
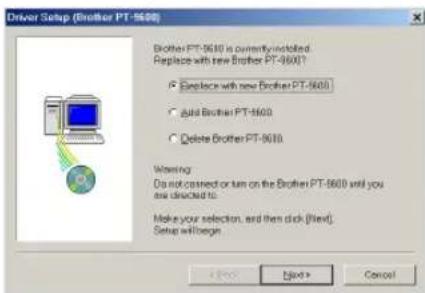
4 Select "Delete Brother PT-9600/3600.", and then click the Next button. A dialog box appears, asking for confirmation to delete all PT-9600/3600 printer drivers.
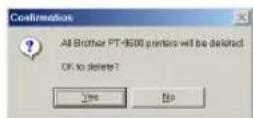
⑤Click the Yes button. A dialog box appears, indicating that the printer drivers have been deleted.
![Driver Setup (Brother PT-9630) Brother PT: 9630 was correctly deleted. Click [/*finish] to quit setup. Finish Cancel](/content/2026/05/862099/images/4d12a444edc947cafdfdba30068b69cc9cec55cf9f52661ef14788d175755550.jpg)
⑥ Click the Finish button.
NOTE
If a dialog box appears, explaining that the computer should be restarted, select the option for restarting the computer, and then click the Finish button.
On a Macintosh Computer
Uninstall the P-touch Editor 3.2 software, the P-touch Quick Editor software or the PT-9600/3600 printer driver from a Macintosh as described below.
NOTE
Before deleting the printer driver, be sure that the P-touch is turned off and disconnected from the computer.
With a Mac OS before OS X:
To uninstall the software and printer driver:
①Drag the following to the Trash icon:
- P-touch Editor 3.2 folder (to delete the P-touch Editor 3.2 software)
- P-touch Quick Editor folder (to delete the P-touch Quick Editor software)
②In the System Folder, open the Extensions folder.
③Drag the following to the Trash icon:
- PT-9600/3600 icon (to delete the printer driver)
- USB PT-9600/3600 Extension icon (to delete the printer driver)
④ In the System Folder, open the Preferences folder.
Ch. 2 Getting Started
⑤Drag the following to the Trash icon.
- P-touch Editor 3.2 Prefs icon (for the P-touch Editor 3.2 software)
- P-touch Quick Editor Prefs icon (for the P-touch Quick Editor software)
- PT-9600/3600 Prefs icon (for the printer driver)
With Mac OS X v10.1 or v10.2:
To uninstall the P-touch Editor 3.2 software:
① Double-click the Applications folder on the Macintosh HD to open it.
② Double-click the P-touch Editor 3.2 folder to open it.
③ Double-click the Uninstall P-touch folder.
4 Double-click the Uninstall P-touch icon in the folder that appears. The uninstaller starts up.
⑤ Click the Uninstall button. After P-touch Editor 3.2 is removed, a dialog box appears, indicating that the uninstallation is finished.
⑥ Click the Quit button.
To uninstall the P-touch Quick Editor software:
① Double-click the Applications folder on the Macintosh HD to open it.
②Double-click the P-touch Quick Editor folder to open it.
③ Double-click the Uninstall P-touch folder.
4 Double-click the Uninstall P-touch icon in the folder that appears. The uninstaller starts up.
⑤ Click the Uninstall button. After P-touch Quick Editor is removed, a dialog box appears, indicating that the uninstallation is finished.
⑥Click the Quit button.
To uninstall the printer driver:
① Disconnect the USB cable from the USB port on the P-touch.
②Double-click the Applications folder on the Macintosh HD to open it.
③Double-click the Utilities folder to open it.
4 Double-click the Print Center icon to start up Print Center.
⑤ Check that "PT-9600/3600" does not appear in the Printer List. If it is listed, select it, and then click the Delete button to delete it.
⑥ Quit Print Center.
⑦In the Library folder, open the Printers folder, and then open the Brother folder.
⑧ Drag the following to the Trash icon.
- PT9600/3600PDE.plugin
- PT9600/3600PM.plugin
Attaching labels
Laminated tape
The backing from labels printed on laminated tapes can easily be removed if an Auto Cut setting with a half cut (1, 3, 5 or 7) was used (refer to page 62).
Iron-on transfer tape
Iron-on transfer tape is used to transfer your text onto garments using an iron.
① Insert an iron-on transfer tape cassette, press
Print to print the text and cut off the label.

② Iron the garment to flatten it before transferring the text.
③ Place the label on the garment at the location where you wish the text to be transferred.
4 Set the iron to cotton (302 to 356 °F (150 to 180 °C)), and then press down on the label with the iron for about 15 seconds.
⑤ Allow the iron-on transfer to cool (for about 60 seconds), and then carefully remove the backing paper.
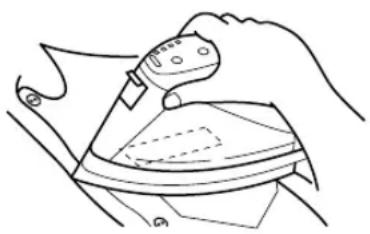
natural_image
Line drawing of a hand using a steam iron to clean or wash the material (no text or symbols)NOTE
White garments made from 100% cotton with a plain (smooth) surface are best for iron-on transfers.
You can also make transfers to garments made from 100% linen or cotton/polyester blends as long as they have a plain (smooth) surface.
The label will not adhere properly to any cloth with a rough surface, such as pile or denim, or with a waterproof surface. Heat-sensitive materials, such as nylon, acetate or other similar fibers, are also unsuitable as they may be damaged when pressing with an iron at a high temperature.
Do not move the iron while pressing, otherwise the label may move out of the desired position. Press the iron straight down onto the cloth.
After the backing tape has been removed, the transferred label may appear glossy. In addition, some white spots may have appeared on the label if it was touched while the backing tape was peeled off. These can be removed by ironing over the label with a piece of cloth placed between the label and the iron.
Since the transferred label cannot be removed once it is applied, make all transfers with care.
Washing
Garments with transfer labels can be washed over 20 times if the label has been transferred correctly. Normal biological and non-biological household detergents may be used.
The label may become discolor if the garment is placed in bleach for an extended length of time. Be careful that hard objects such as buckles or buttons do not come into contact with the label during the wash.
Do not dry clean garments that have had transfer labels applied.
Drying
Garments with transfer labels may be dried either inside or outside out.
Do not tumble dry. The transfers will come off and may stick to other items of clothing.
Ch. 2 Getting Started
Ironing
Iron garments with transfers using normal temperature settings.
Be sure to place a piece of cloth between the iron and the label when you iron over it to prevent the label from sticking to the iron.
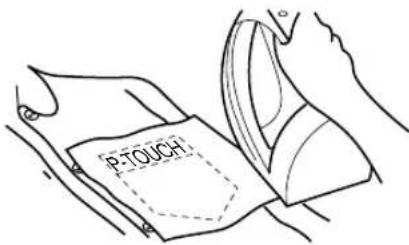
The labels are non-toxic, however, please maintain the usual precautions, such as not placing them in your mouth, etc.
Fabric tape
Fabric tape is used to attach a piece of fabric printed with your text onto garments using an iron. After printing the text onto fabric tape and cutting off the label using scissors, place the label on an ironed garment at the location where you wish to attach it in such a way that the printed text can be read correctly. Cover the label with another piece of cloth and use an iron set to a medium-high temperature (320 to 356 °F (160 to 180 °C)) to press down firmly for 15 to 30 seconds. For more details, refer to the instructions included with the fabric tape cassette.
Assembling stamps
In addition to labels, your P-touch can be used to make custom, pre-inked stamps for various uses (optional stamp kit required). Simply design your own customized stamps using one of the pre-formatted stamp templates, and then affix the printed stamp stencil to a self-inking stamp film holder.
① Install a stamp film cassette, and then format the stamp text in either of the following ways:
a) Select a pre-formatted stamp template from those available with the Auto Format function (refer to page 59).
b) Type in text, and then set the Stamp function to ON (refer to page 59).
NOTE
If an Auto Format stamp template is used, it is not necessary to set the Stamp function to ON.
③Print out the stamp stencil and remove its backing paper.
④ Remove the frame from around the stamp holder ink pad, one end at a time, and then remove the protective seal covering the ink pad.
NOTE
If the stamp holder already contains a stamp film, hold the stamp over a piece of scrap paper and remove the stamp frame by pulling it off, one end at a time. Then, slowly peel off the stamp film. Be careful that the ink does not splatter.
Keep the stamp film holder out of the reach of children.
Avoid getting ink in your eyes or mouth. If ink gets in your eyes or mouth, immediately wash it with fresh water for several minutes and consult a doctor.
Keep ink off skin, clothes and important papers. Immediately use soap to wash skin that has come in contact with ink. Even washing may not remove all ink.
⑤With the glossy side of the stamp film facing up, align one end of the stamp film with the slit in the side of the stamp holder.
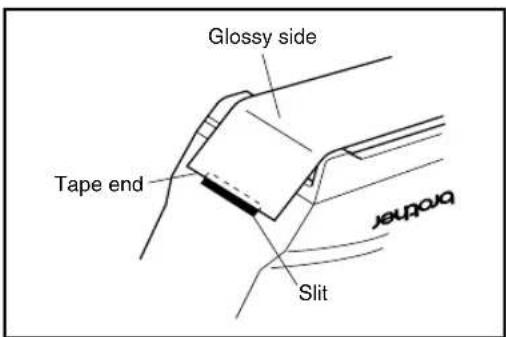
⑥Hold the end of the stamp film in place with your thumb, and then pass the stamp film through the guides while pulling it tight.
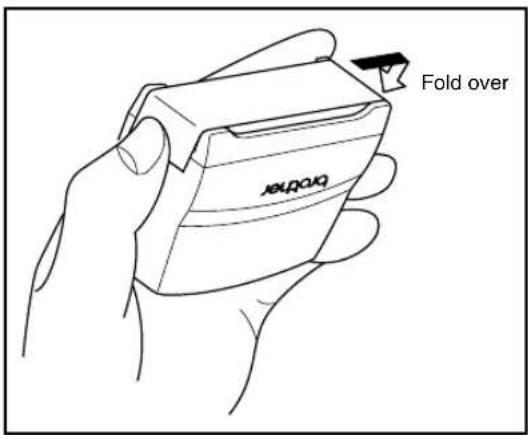
⑦Fold the other end of the stamp film over the other side of the stamp holder and hold it in place with your finger.
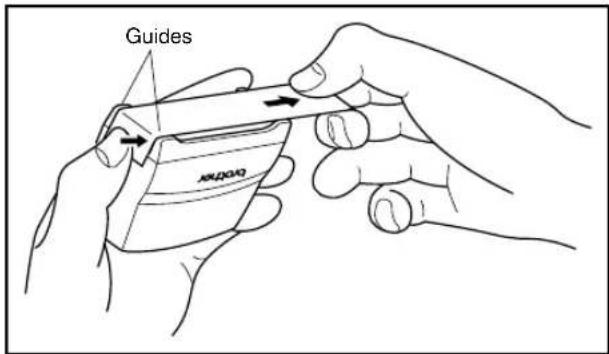
⑧ Fit the frame over the stamp film, and then push the frame down into place.
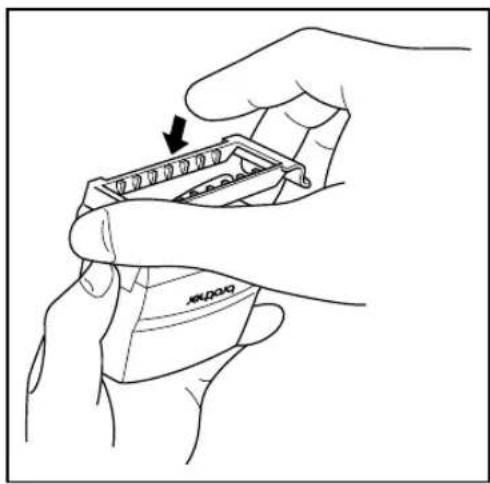
natural_image
Illustration of hands holding a small electronic component with an arrow indicating rotation (no text or symbols)⑨Insert the stamp holder straight into the cap.
NOTE
Be sure that the cap correctly covers the stamp in order to prevent ink spills.
When the stamp is not being used, firmly cover it with the cap and always store it standing up with the stamp facing downward. Do not leave the stamp laying on its side or leaning.
Store stamp film holders and stamp film cassettes in a location where they are not exposed to high temperatures, high humidity or direct sunlight.
Attaching the identification label
① Insert a TZ tape cassette into the tape compartment.
NOTE
Use 1/2" (12-mm)-wide tape to make an identification label for an M-size stamp and use 3/4" (18-mm)-wide tape to make a label for an L-size stamp.
Mirror
2 Press Print to print out the identification label.
③After the label is cut off, affix it to the end of the holder so that its bottom edge is on the same side of the stamp holder as the raised "brother" logo.
Ch. 2 Getting Started
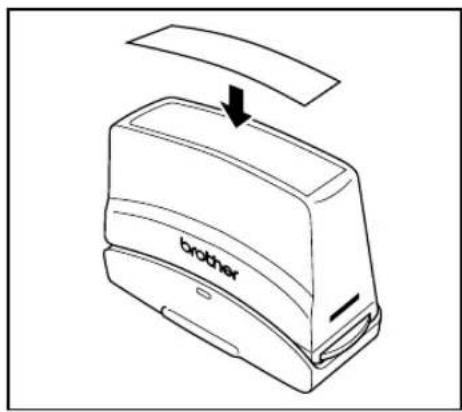
Stamping
Since the length of time and amount of pressure that the stamp holder should be held down depends on the amount of ink in the holder, first practise stamping on a piece of scrap paper.
You can expect to use a stamp film holder approximately 300 to 500 times, although some ink is lost when the stamp film is changed. The actual life of the stamp film holder will vary depending on the size and thickness of the characters, whether a shading pattern is used, etc.
NOTE
After stamping, wait until the ink has completely dried before touching it in order to prevent smearing.
If the stamp holder is not pressed straight down, the stamp may be blurred.
Do not press the stamp holder down too forcefully.
Do not stamp on wet, sticky, rough or uneven surfaces. Only stamp on paper. The ink will not dry on plastic overhead projector transparencies and other ink-impermeable objects.
If a stamp made with a new stamp film is faint or incomplete, even after forcefully pressing down the stamp holder for up to 30 seconds, replace the stamp holder with a new one. Do not try to refill the stamp holder.
Functions
Performing basic operations
The following keys are necessary for using the many functions.
Arrow keys
The machine's LCD display can show three rows of 19 characters; however, the text that you create can be up to 1000 characters long. You can review and edit your text by using the four arrow keys ( [ ], [ ], [ Home ] and [ End ] ) to move the cursor so that different parts of the text are shown in the display.
The arrow keys can also be used to select the various functions and settings.
(left arrow key)
To move the cursor one character to the left:
- Press once.
NOTE
If this key is pressed when the cursor is at the beginning of a line following another line, the cursor moves to the end of the previous line.
To move the cursor several characters to the left:
- Hold down until the cursor moves to the desired position.
To move the cursor to the beginning of the current line of text:
- Hold down Code and press
To move the cursor to the beginning of the current text block:
● Hold down Shift and press
NOTE
If the cursor is already at the beginning of a text block when these keys are pressed, the cursor moves to the beginning of the previous block.
(right arrow key)
To move the cursor one character to the right:
- Press once.
NOTE
If this key is pressed when the cursor is at the end of a line followed by another line, the cursor moves to the beginning of the next line.
To move the cursor several characters to the right:
- Hold down until the cursor moves to the desired position.
To move the cursor to the end of the current line of text:
- Hold down Code and press →.
To move the cursor to the beginning of the next text block:
● Hold down Shift and press →.
NOTE
If the cursor is already at the beginning of the last text block when these keys are pressed, the cursor moves to the end of the text.
Home (up arrow key)
To move the cursor up to the previous line:
- Press ↑ Home once.
NOTE
If this key is pressed when the cursor is in the first line of text, the cursor moves to the beginning of the line.
To move the cursor up several lines:
- Hold down [ 4 Home ] until the cursor moves to the desired position.
To move the cursor to the beginning of the entire text:
- Hold down Code and press ↑ Home.
↓ (down arrow key) End
To move the cursor down to the following line:
- Press ↓ End once.
NOTE
If this key is pressed when the cursor is in the last line of text, the cursor moves to the end of the line.
To move the cursor down several lines:
- Hold down until the cursor moves to the desired position.
To move the cursor to the end of the entire text:
- Hold down Code and press ↓ End.
Code key (Code)
To use a function printed in color above or on a key:
- Hold down [Code] and press the key for the desired function.
Return key (New Black)
The return key can be used to select an item from a list, (for example, when adding a symbol or accented character to the text) or to apply a selected setting.
Some questions asking you to confirm a command may appear on the LCD display, especially when the function that you have chosen will delete or affect files. In these cases, press is like answering "yes".
NOTE
To answer "no", press Cancel. Refer to Cancel key below.
To select an item from a list or to apply the selected setting:
- Press New Rock
Cancel key (Cancel)
The Cancel key can be used to quit most functions and return to the previous display without changing the text.
Some questions asking you to confirm a command may appear on the LCD display, especially when the function that you have chosen will delete or affect files. In these cases, pressing Cancel is like answering "no".
NOTE
To answer "yes", press 1w_n . Refer to Return key above.
To quit a function without applying any changes that you may have made:
- Press [Cancel].
Entering text
Typing in the text for your labels is almost the same as typing on a typewriter or a computer.
Insert key (Insert Barcode)
Normally, text is entered with the Insert mode, in other words, the text that you type is inserted into any existing text at the cursor's position. However, by exiting Insert mode, the text that you type replaces any existing text at the cursor's position. When the P-touch is in Insert mode, the Ins indicator on the left side of the display comes on.
To enter Insert mode:
- Press Insert Barcode. The Ins indicator comes on.
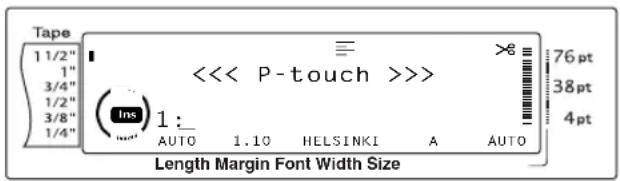
To exit Insert mode:
- Press [Insert Barcode]. The Ins indicator goes off.
Space bar
The space bar lets you add blank spaces between characters in your text. It is different from the right arrow key ( - ), which just moves the cursor without adding blank spaces.
To add a blank space to the text:
- Press the space bar.
Shift key (Shift or Shift Date/Time)
Lowercase letters can entered simply pressing their keys. However, like on a typewriter or a computer, to enter uppercase letters or the symbols in the top half of certain keys, the Shift key should be pressed.
NOTE
If the P-touch is in Caps mode, holding down or Shift while pressing a letter key will enter a lower-case letter.
To type a capital letter or a symbol printed on the top half of certain keys:
- Hold down [Shift] or [Shift Data/Imz] and press the key of the desired letter or symbol.
Caps key (Caps)
Caps mode allows you to type uppercase letters continuously without holding down Shift or Shift Date/Date. Enter or exit Caps mode by pressing Caps. When the P-touch is in Caps mode, the Caps indicator on the left side of the display comes on.
NOTE
When a number key is pressed while the P-touch is in Caps mode, the number—not the symbol above it—is typed in, unless Shift or Shift or Shift is held down. To type lowercase letters while the P-touch is in Caps mode, hold down Shift or Shift or Shift while pressing the key of the desired character.
To type in many uppercase letters:
① Press Caps. The Caps indicator comes on.
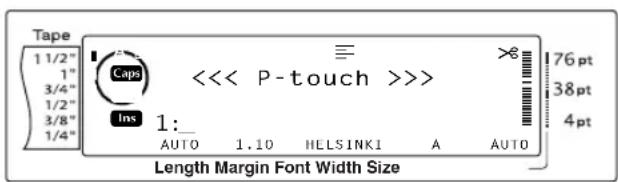
②Press the keys for the desired letters or symbols.
NOTE
To exit Caps mode at any time, press . The Caps indicator goes off.
Alt mode ( Alt )
Accented characters or special punctuation marks on the right-hand side of the keys can be added to the text using the Alt mode. Enter or exit Alt mode by pressing Alt. The Alt indicator on the left side of the display comes on while Alt is held down.
To add an accented character or a special punctuation mark written in color to the text:
① Hold down Alt. The Alt indicator comes on.
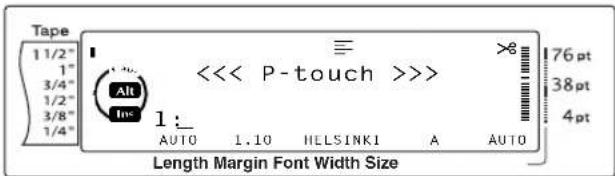
②Press the key for the desired character.
| NOTE |
| To exit Alt mode at any time, release . The Alt indicator goes off. |
Return key (New Back)
Like on a typewriter or word processor, this machine's return key ( ) is used to end a line of text and start another one. When you have finished entering one line, press the return key to make a new line and move the cursor to it.
| NOTE |
| A single block of text can only contain a maximum of 16 text lines. If the maximum number of text lines has already been entered when -12 × 0.5 is pressed, the error message “16 LINE LIMIT” will appear. |
The number of text lines that can be printed depends on the width of the tape.
For TZ tapes:
| Tape Width | Maximum Number of Lines That Can Be Printed |
| 1/4" (6 mm) 3 | |
| 3/8" (9 mm) 4 | |
| 1/2" (12 mm) 6 | |
| 3/4" (18 mm) | 10 |
| 1" (24 mm) | 13 |
| 1 1/2" (36 mm) | 16 |
| Stamp 3/4" (18 mm) | 6 |
| Stamp 1" (24 mm) | 10 |
For AV labels:
| Label Sizes | Maximum Number of Lines That Can Be Printed |
| AV2067 Address labels: 3/4" × 2 5/8" (20 mm × 67 mm) | 10 |
| AV1957 Return address labels: 3/4" × 2 1/4" (19 mm × 57 mm) | 9 |
| AV1789 File folder labels: 5/8" × 3 1/2" (17 mm × 89 mm) | 8 |
To create a new line:
- Press 12 . The return mark ( ) appears at the end of the line.
New Block function (Code + New Block)
In order for one section of the text to have a different number of lines than other sections of the text or in order to apply a different format to a section of the text (Refer to Block format functions on page 47.), a new text block must be created using the New Block function.
Ch. 3 Functions
NOTE
A single label can only contain a maximum of fifty text blocks. If the maximum number of text blocks has already been entered when Code is held down and is pressed, the error message "50 LINE LIMIT REACHED!" will appear.
To split a text block into two, position the cursor under the character that you want to start the next block, and then hold down Code and press -.
To create a new block:
- Hold down Code and press New block mark (appears at the end of the block.
Symbol key (Symbol Accent)
In addition to the letters, symbols and numerals on the key tops, there are over 440 additional symbols and pictures available with the Symbol function. After these symbols or pictures are added to the text, they can be deleted like any other character, and some can be formatted using certain text formatting functions (see pages 48 through 54).
A table of the available symbols can be found on pages 90 through 92.
To add a symbol or picture to the text:
1 Press Symbol Accent. A row of symbols appears in the display.
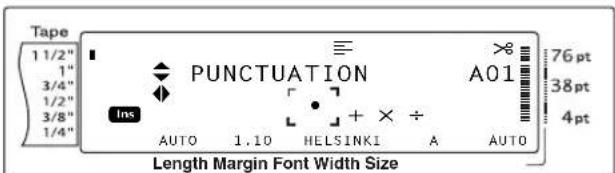
NOTE
To return to the text at any time, press Cancel (OR press Symbol Accent).
2 Press Home or End to select the desired category of symbols, and then press or until the desired symbol is displayed enlarged within the frame in the middle of the display.
3 Press — ←. The symbol is added to the text.
NOTE
To type in a series of symbols, hold down [Code] before pressing □. Then, continue adding symbols by selecting them as explained in step ②, and holding down [Code] while pressing □. Press just □ after selecting the last symbol in the series.
A symbol can also be selected by typing in the corresponding code indicated in the table of available symbols. For example, pressing displays the GARDENING category, and then pressing 3 displays the third symbol of the GARDENING category.
Accent function (Code + Symbol Accent)
The Accent function can be used to add accented characters to your text. Many of these characters can also be found on the keys and typed in using Alt (refer to page 41).
The accented characters are grouped according to the uppercase or lowercase letter that they are combined with. The following table shows the available characters.
To add an accented character to the text:
Hold down Code and press Symbol Accent. The message "ACCENT a-u/A-U? PRESS THE REQUIRED CHARACTER" appears on the display.
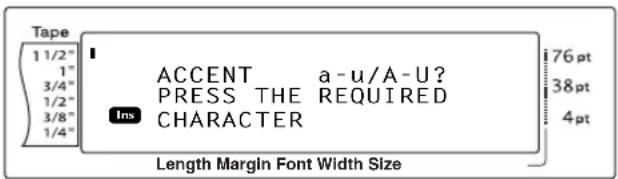
NOTE
To return to the text at any time, press Cancel (OR hold down Code and press Symbol Accent).
②Press the key of the letter in the desired accented character (OR press 12 ).
NOTE
To type an uppercase accented character, hold down Shift (OR press Caps to enter Caps mode) before pressing the letter key.
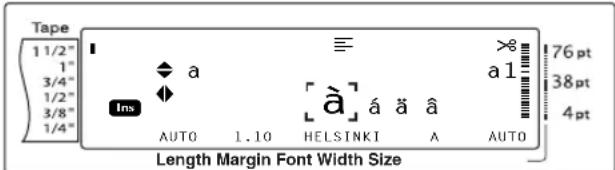
③ Press ↑ Home or ↓ End to select the desired letter in the accented character, and then press ← or ← until the desired accented character is displayed enlarged within the frame in the middle of the display.
4 Press ←. The accented character is added to the text.
NOTE
To type in a series of accented characters, hold down Code before pressing. Then, continue adding accented characters by selecting them as explained in step ②, and holding down Code while pressing. Press just after selecting the last accented character in the series.
Barcode key (Code + Insert Barcode)
The Barcode function, which enables barcodes to be printed as part of labels, is one of this machine's most advanced features.

L 30 mm D 5 mm
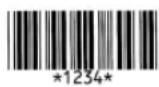
NOTE
This section will explain how to enter a barcode into your text. It is not intended as a comprehensive introduction to the concept of barcoding. For more detailed information, please consult one of the many reference books available.
Since this machine is not specifically designed for special barcode label-making, some barcode readers may not be able to read the labels.
Barcodes should be printed on white labels with black ink.
The various barcode parameters enable you to create more customized barcodes.
| Parameter | Settings |
| PROTOCOL | CODE 39, I-2/5, EAN13, EAN8, UPC-A, UPC-E, CODABAR, EAN128, CODE128 |
| WIDTH(bar width) | LARGE, MEDIUM, SMALL, EXTRA SMALL |
| UNDER# (numbers printed below barcode) | ON, OFF |
| CHECK DIGIT | OFF, ON |
The default settings are CODE 39 PROTOCOL, MEDIUM WIDTH, UNDER# set to ON, and CHECK DIGIT set to OFF.
NOTE
It is recommended that barcodes be printed with the barcode WIDTH parameter set to at least SMALL, otherwise barcodes may be difficult to read.
The CHECK DIGIT parameter is only available with the CODE 39 and I-2/5 types.
Ch. 3 Functions
To enter the barcode data:
1 Hold down Code and press Insert Brocks.
NOTE
To change the data or parameters of a barcode that has already been added to the text, position the cursor below the right half of the barcode mark ( ) before holding down [Code] and pressing Insert Barcode.
To quit the Barcode function without adding a barcode, OR press [Cancel] at any time (hold down [Code] and press [non Barcss]).
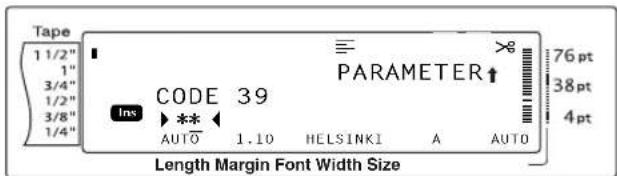
②Type in the new barcode data or edit the old data.
To change the barcode parameter settings:
③Press ↑ Home.
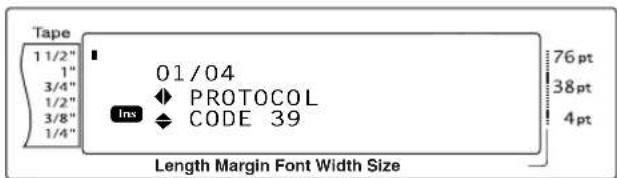
4 Press or until the parameter that you want to change is displayed.
NOTE
To select the default setting, press the space bar.
To return to the barcode data without changing any parameters, press Cancel (OR hold down Code and press Incr Barc).
5 Press ↑ home or ↓ End until the desired setting is displayed.
⑥ Repeat steps ④ and ⑤ until all parameters are set as you wish.
7Press
To add special characters to barcodes (only with protocols CODE39 or CODE128):
8 Press ← or → until the cursor is below the character immediately to the right of where you want to add the special character.
9Press Symbol Accent
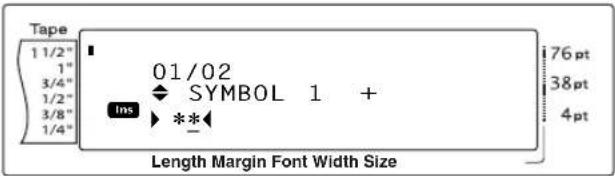
10 Press Home or End until the special character that you want to add is displayed.
NOTE
Refer to page 93 for tables of the special characters that are available.
11 Press ←. The selected special character is added to the barcode data.
NOTE
To quit the Barcode function without adding a barcode, OR press [Cancel] at any time (hold down [Code] and press [RSRT]
To add the barcode to the text:
12Press
NOTE
To delete a barcode, move the cursor either immediately after the barcode mark (||||) or below the right half of the mark and press (OR move the cursor below either half of the barcode mark (|||| and press Out ). When the message "OK TO CLEAR? ||" appears, press Out . To return to the text without deleting the barcode, press .
Editing text
Backspace key ( BS)
The backspace key ( [ Class BS ] ) allows you to remove characters to the left of the cursor's current position. It differs from the left cursor key ( [ ] ), which only moves the cursor without deleting any characters.
NOTE
If the cursor is at the beginning of a line or a block when is pressed, the current text line or block is joined with the previous one.
To remove one character:
1 Press ←, →, Home or End to position the cursor below the character immediately to the right of the character that you wish to delete.
②Press once.
NOTE
Each time is pressed, one character is deleted.
To delete a sequence of characters:
1 Press ←, →, ↑Hunc or ↓End to position the cursor below the character immediately to the right of the character that you wish to delete.
② Hold down Clear BS until all of the characters that you wish to delete are removed.
Delete key ( )
The Delete key (Delete) allows you to remove the character above the cursor. After the character is deleted, the remaining text to the right moves one place to the left. Each time Delete is pressed, one character is deleted.
To remove one character:
① Press , , or to position the cursor below the character that you wish to delete.
②Press Line Out Delete once.
To delete a sequence of characters:
1 Press , , Home or End to position the cursor below the character that you wish to delete.
② Hold down Delete until all of the characters that you wish to delete are removed.
Line out function (Code + Line Out Delete)
With the Line Out function, you can easily remove an entire line of text.
To delete a line of text:
① Press ←, →, ↑ Home or ↓ End to position the cursor within the line of text that you wish to delete.
② Hold down Code and press Line Out Delete once.
NOTE
Each time [Delete] is pressed while [Code] is held down, one line of text is deleted.
Clear function (Code + BS)
When clearing the display before entering new text, the Clear function can be used to choose whether all of the text is erased and all formatting functions (Font, Size, Width, Style1, Style2, Line Effects, Frame, Alignment, Text Rotation, Tape Margin, Tape Length, Block Margin, Block Length and Mirror Printing) are returned to their default settings, or whether just the text is erased.
To erase all of the text and formats:
① Hold down Code and press Clear BS.
NOTE
To return to the text without erasing anything, press
Cancel (OR hold down Code and press BS).
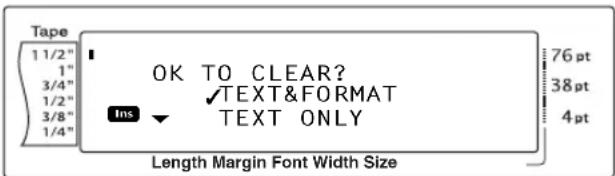
Ch. 3 Functions
②Since √√ is already beside TEXT&FORMAT, press ←. All of the text is erased and all of the formatting functions are reset to their default settings.
To erase only the text:
① Hold down Code and press Clear 85.
② Press Home or End to move √ beside TEXT ONLY.
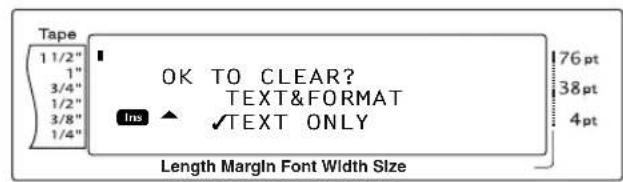
③ Press . The text is erased, but the formatting functions remain unchanged.
Formatting
A variety of formatting functions are available for making more decorative and customized labels.
The appearance of characters can be changed using the text formatting functions Font, Size, Width, Style1, Style2, Line Effects, Frame, Alignment and Text Rotation. Most text formats can be applied to a single text line, a single text block or all of the text. However, the Text Rotation function can only be applied to single text blocks or the entire text. When the text format for a line is changed and text is added to the line, the format remains applied until it is changed again.
The label formatting functions (Tape Margin, Tape Length, Block Margin, Block Length and Mirror Printing) specify the general appearance of the label. The label formatting functions will be applied to the entire text. In addition, the Block Length function can be applied to single blocks.
Global format functions
With the Global Format functions, you change the appearance of the entire text by printing it with various settings applied: Font, Size, Width, Style1, Style2, Line Effects (underline/strikeout), Frame, Text Alignment or Text Rotation. In addition, the appearance of the whole label can be adjusted by changing the Tape Margin, Tape Length, Block Margin and Block Length settings.
To change the Global Format functions:
① Hold down Code and press Global 1 i.
② Select FONT, SIZE, WIDTH, STYLE1, STYLE2, LINE EFFECTS, FRAME, ALIGNMENT, T. MARGIN, T. LENGTH, B. MARGIN, B. LENGTH or ROTATE and the desired setting as described on pages 48 to 57. The selected setting will be applied to the entire text.
Block format functions
$$ (\boxed {\text {Code}} + \boxed {\frac {@}{2}}) ^ {\text {Block}} $$
Formatting with the Block Format functions enables you to change the appearance of each of the label's text blocks, created using the New Block function. The following label shows how these functions can be used together.
Jazz Concert
10-12-02
The multiple blocks in this label were created using the New Block function with the first block of this text containing a single line, the second containing two lines, and the third, one line. Then, different settings were applied to each block separately, using the Block Format functions (Font, Size, Width, Style1, Style2, Line Effects (underline/strikeout), Frame, Text Alignment, Block length or Text Rotation).
NOTE
Only the square frame (1) and rounded frame (2) settings can be selected for the Frame function in block formatting. (For samples of the frames, refer to page 98.)
To change the Block Format functions:
1 Press [] , [] , [] or [] to position the cursor in the block that will be given a different format.
② Hold down Code and press @ 2.
3 Select FONT, SIZE, WIDTH, STYLE1, STYLE2, LINE EFFECTS, FRAME, ALIGNMENT, B.LENGTH or ROTATE and the desired setting as described on pages 48 to 57. The selected setting will only be applied to the text block that the cursor is positioned in.
NOTE
To return to the text without changing the formatting, press [Cancel] (OR hold down Code) and press [@2].
Line format functions
$$ (\boxed {\text {Code}} + \boxed {# 3} ^ {\text {Line}}) $$
The Line Format functions allow you to emphasize a single line of the text by printing it with a Font, Size, Width, Style1, Style2, Line Effects (underline/strikeout), Frame or Text Alignment setting that is different from the rest of the text.
NOTE
Only the square frame setting (1) can be selected for the Frame function in line formatting. (For a sample of the frame, refer to page 98.)
Robert Becker
ABCImport/Export Division II
To change the Line Format functions:
1 Press , , Home or End to position the cursor in the line that will be given a different format.
② Hold down Code and press #3.
3 Select FONT, SIZE, WIDTH, STYLE1, STYLE2, LINE EFFECTS, FRAME or ALIGNMENT and the desired setting as described on pages 48 to 53. The selected setting will only be applied to the text line that the cursor is positioned in.
NOTE
To return to the text without changing the formatting, press Cancel (OR hold down Code and press Line #3).
Ch. 3 Functions
Font function (FONT)
With the Font function, you can change the font of the text to one of the many that are available. For samples of the available Font settings, refer to page 93. The font of the text at the cursor's current position is shown at the bottom of the display.
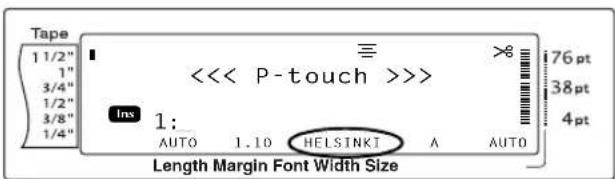
NOTE
Letter Gothic (L. GOTHIC) is a fixed pitch font (all characters use a fixed amount of space), as opposed to all of the other fonts, which are proportional (characters use different amounts of space).
To change the setting for the Font function:
① Hold down Code and press ! i, @ 2 or # 3.
NOTE
This step may be skipped if settings for several format functions are being applied at the same time.
2 Press [:] or [:] until FONT is displayed. The setting for the text at the cursor's current position is shown on the left side of the display and a sample can be seen on the right side.
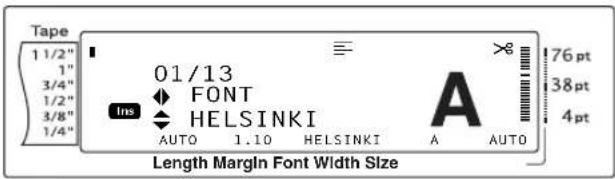
3 Press Home or End until the desired setting is displayed.
NOTE
If "*****" appears as a setting, the Font function has already been applied to part of the current text (either a line in the current block if the Block Format or the Global Format function is being set or a block in the text if the Global Format function is being set). Changing the setting will cancel the setting that was previously applied.
To return the function to its default setting (HEL-SINKI), press the space bar.
To return to the text without changing the formatting, press Cancel (OR hold down Code) and press Global Block Line 1, @ 2 or # 3).
④Press → to apply the setting.
NOTE
To apply several format settings at the same time, continue pressing or to select the function, then pressing or to select the desired setting. Press only after the necessary functions have been set.
Size function (SIZE)
The character size can be adjusted using the Size function. With the AUTO setting, the machine compares your text with the width of the installed tape and automatically adjusts the characters to the largest possible size. For samples of the available Size settings, refer to page 94. The size of the text at the cursor's current position is shown in the lower-right corner of the display and with the indicator on the right side of the display.
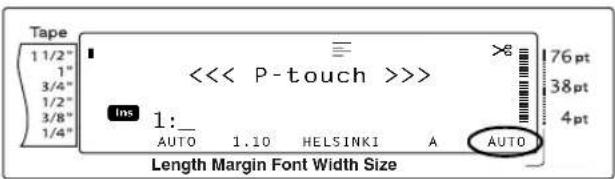
NOTE
Since the text sizes that can be printed depends on the width of the tape, the following table shows the maximum text size that can be used with each tape width.
The following text sizes do not apply to text with a Text Rotation setting applied.
For TZ tapes:
| Tape Width | Maximum Text Size (in points) |
| 1/4" (6 mm) 12 | |
| 3/8" (9 mm) 20 | |
| 1/2" (12 mm) 28 | |
| 3/4" (18 mm) 40 | |
| 1" (24 mm) 64 | |
| 1 1/2" (36 mm) 76 |
For AV labels:
| Label Sizes | Maximum Text Size (in points) |
| AV2067 Address labels: 3/4" × 2 5/8" (20 mm × 67 mm) | 48 |
| AV1957 Return address labels: 3/4" × 2 1/4" (19 mm × 57 mm) | 36 |
| AV1789 File folder labels: 5/8" × 3 1/2" (17 mm × 89 mm) | 36 |
With the AUTO setting selected and the text in a block consisting of just one line of only uppercase letters (and no accented letters) and written horizontally/vertically without the BERMUDA font, the text is printed slightly larger than the maximum possible for the tape width.
If the 4 point or 5 point text size setting is selected, the text will be printed with the BRUS-SELS font setting, regardless of the font setting that is selected.
To change the setting for the Size function:
① Hold down Code and press Global, Block or #3.
NOTE
This step may be skipped if settings for several format functions are being applied at the same time.
2 Press ☐ or ☐ until SIZE is displayed. The setting for the text at the cursor's current position is shown on the left side of the display and a sample can be seen on the right side.
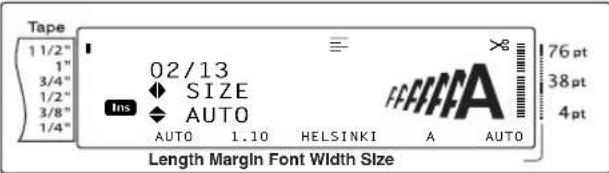
③ Press ↑ Home or ↓ End until the desired setting is displayed.
NOTE
If "*****" appears as a setting, the Size function has already been applied to either a line in the current text block (if the Block Format or the Global Format function is being set) or a block in the current text (if the Global Format function is being set). Changing the setting will cancel the setting that was previously applied.
To return the function to its default setting (AUTO), press the space bar.
To return to the text without changing the formatting, press Cancel (OR hold down Code and press Global Block Line [1 1, @ 2] or # 3).
④ Press to apply the setting.
NOTE
To apply several format settings at the same time, continue pressing or to select the function, then pressing home or free to select the desired setting. Press _box only after the necessary functions have been set.
Ch. 3 Functions
Width function (WIDTH)
The Width function can be used with any of the text sizes to make the size of the characters wider or more narrow. For samples of the available Width settings, refer to page 94. The width of the text at the cursor's current position is shown at the bottom of the display.
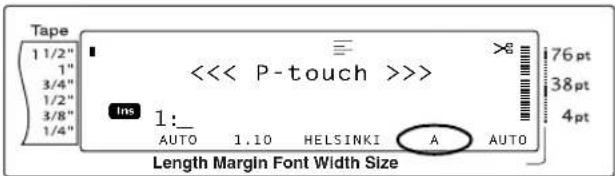
To change the setting for the Width function:
① Hold down Code and press Global Block or Line
NOTE
This step may be skipped if settings for several format functions are being applied at the same time.
2 Press [←] or [→] until WIDTH is displayed. The setting for the text at the cursor's current position is shown on the left side of the display and a sample can be seen on the right side.
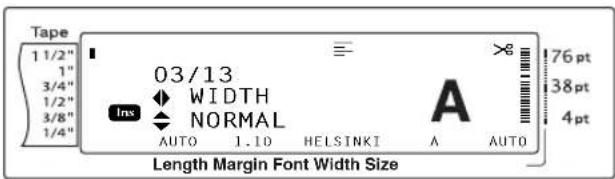
③ Press Home or End until the desired setting is displayed.
NOTE
If "*****" appears as a setting, the Width function has already been applied to either a line in the current text block (if the Block Format or the Global Format function is being set) or a block in the current text (if the Global Format function is being set). Changing the setting will cancel the setting that was previously applied.
To return the function to its default setting (NORMAL), press the space bar.
To return to the text without changing the formatting, press Cancel (OR hold down Code and press Global Block Line [1 1], @ 2 or # 3).
4 Press 12 to apply the setting.
NOTE
To apply several format settings at the same time, continue pressing or to select the function, then pressing or to select the desired setting. Press only after the necessary functions have been set.
Style1 function (STYLE1)
With the Style1 function, 5 other text styles are available, allowing you to create more personalized labels. For samples of the available style settings, refer to page 96. The style indicators at the top of the display show the style of the text at the cursor's current position when any setting other than NORMAL is selected.
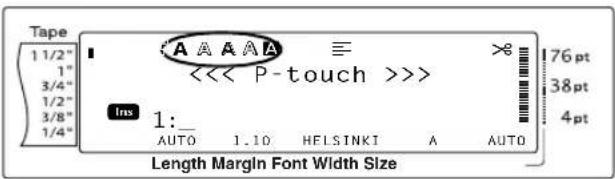
Each of the text styles available with the Style1 function can be combined with each of the text styles available with the Style2 function. (See Style2 function (STYLE2) on page 51.)
To change the setting for the Style1 function:
① Hold down Code and press ! i, @ 2 or # 3.
NOTE
This step may be skipped if settings for several format functions are being applied at the same time.
2 Press ☐ or ☐ until STYLE1 is displayed. The setting for the text at the cursor's current position is shown on the left side of the display and a sample can be seen on the right side.
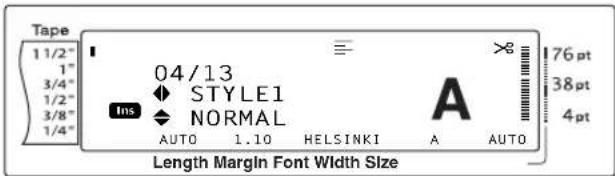
③ Press Home or End until the desired setting is displayed.
NOTE
If "*****" appears as a setting, the Style1 function has already been applied to either a line in the current text block (if the Block Format or the Global Format function is being set) or a block in the current text (if the Global Format function is being set). Changing the setting will cancel the setting that was previously applied.
To return the function to its default setting (NORMAL), press the space bar.
To return to the text without changing the formatting, press Cancel (OR hold down Code) and press Global Block Line 1, @ 2 or # 3).
④Press ← to apply the setting.
NOTE
To apply several format settings at the same time, continue pressing or to select the function, then pressing or to select the desired setting. Press only after the necessary functions have been set.
Style2 function (STYLE2)
Two more text styles are available with the Style2 function: ITALIC and VERTICAL. Either of these styles can be combined with each of the text styles available with the Style1 function. (See Style1 function (STYLE1) on page 50.) For samples of the available style settings, refer to page 96. The style indicators at the top of the display show the style of the text at the cursor's current position when any setting other than NORMAL is selected.
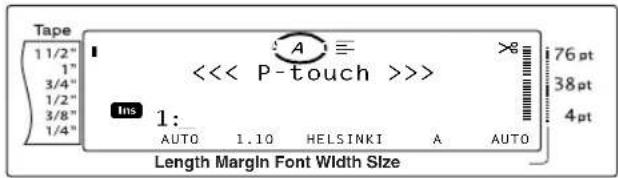
The VERTICAL style setting, which rotates each character 90° counterclockwise and prints the text vertically along the length of the label, is different from the Text Rotation function (page 54), which rotates each text block 90° counterclockwise and prints the text horizontally along the length of the label.
To change the setting for the Style2 function:
① Hold down Code and press Global Block or Line 1 i, 2 or #3.
NOTE
This step may be skipped if settings for several format functions are being applied at the same time.
2 Press ← or → until STYLE2 is displayed. The setting for the text at the cursor's current position is shown on the left side of the display and a sample can be seen on the right side.
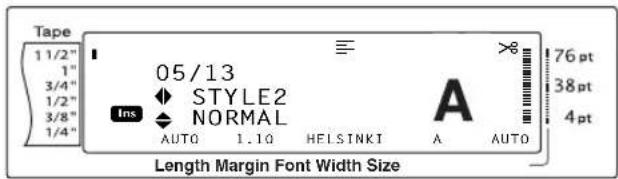
3 Press [ Home. or [ End] until the desired setting is displayed.
NOTE
If "*****" appears as a setting, the Style2 function has already been applied to either a line in the current text block (if the Block Format or the Global Format function is being set) or a block in the current text (if the Global Format function is being set). Changing the setting will cancel the setting that was previously applied.
To return the function to its default setting (NORMAL), press the space bar.
To return to the text without changing the formatting, press [Cancel] (OR hold down [Code] and press [1 i], @ 2 or # 3).
④Press ← to apply the setting.
NOTE
To apply several format settings at the same time, continue pressing - or + to select the function, then pressing + or + to select the desired setting. Press - only after the necessary functions have been set.
Line Effects function (LINE EFFECTS)
The Line Effects function enables you to underline or strike out certain parts of your text.
12 34 56
OFF STRIKEQUNDERLINE
When any setting other than OFF is selected for the text at the cursor's current position, the Line Effects indicator at the top of the display comes on.
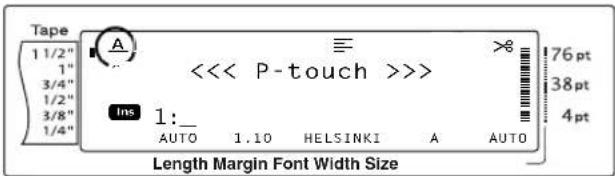
To change the setting for the Line Effects function:
① Hold down Code and press ! 1 i, @ 2 or # 3.
NOTE
This step may be skipped if settings for several format functions are being applied at the same time.
2 Press ☑ or ☑ until LINE EFFECTS is displayed. The setting for the text at the cursor's current position is shown on the left side of the display and a sample can be seen on the right side.
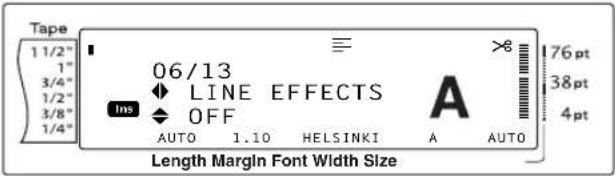
③ Press Home or End until the desired setting is displayed.
NOTE
If "*****" appears as a setting, the Line Effects function has already been applied to either a line in the current text block (if the Block Format or the Global Format function is being set) or a block in the current text (if the Global Format function is being set). Changing the setting will cancel the setting that was previously applied.
To return the function to its default setting (OFF), press the space bar.
To return to the text without changing the formatting, press Cancel (OR hold down Code and press Global Rock Line [1 i], @ 2 or # 3).
④Press to apply the setting.
NOTE
To apply several format settings at the same time, continue pressing or to select the function, then pressing or to select the desired setting. Press only after the necessary functions have been set.
Frame function (FRAME)
With the Frame function, you can choose from a variety of frames and highlights for emphasizing certain parts or all of the text in your label. For samples of the available frame settings, refer to page 98. When any setting other than OFF is selected for the text at the cursor's current position, the Frame indicator at the top of the display comes on. The lines on the right side of the indicator, starting from the top, show if the Frame setting is applied to the entire text, the block or the line.
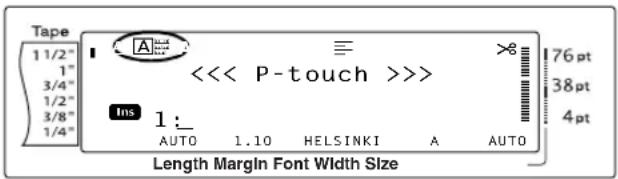
To change the setting for the Frame function:
① Hold down Code and press ! \1 i , @ \2 or # \3 .
NOTE
This step may be skipped if settings for several format functions are being applied at the same time.
2 Press [←] or [→] until FRAME is displayed. The setting for the text at the cursor's current position is shown on the left side of the display and a sample can be seen on the right side.
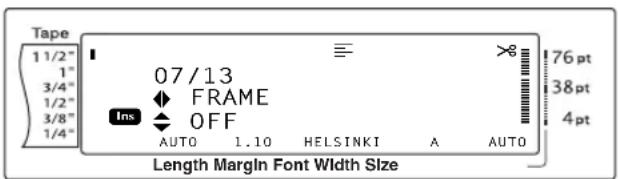
③ Press ↑ Home or ↓ End until the desired setting is displayed.
NOTE
Even if a frame setting has already been applied to either a line in the current text block (if the Block Format or the Global Format Frame function is being set) or a block in the current text (if the Global Format Frame function is being set), all frames will be applied and printed.
To return the function to its default setting (the square frame OFF), press the space bar.
To return to the text without changing the formatting, press [Cancel] (OR hold down [Code] and press 1 & Block 1 & 2 , or #3 ).
④Press to apply the setting.
NOTE
To apply several format settings at the same time, continue pressing or to select the function, then pressing _Home or _End to select the desired setting. Press -12 only after the necessary functions have been set.
Text Alignment function (ALIGNMENT)
You can choose to align the text in one of four ways:
| ABCDEFGHIJKLM | LEFT |
| ABCDEFGHIJKLM | CENTER |
| ABCDEFGHIJKLM | RIGHT |
| A B CDEFGHIJKLM | JUSTIFY |
Ch. 3 Functions
In addition, if the Text Rotation function is set to OFF, the text will align within the length set with the Block Length function. If the Text Rotation function is set to any setting other than OFF, the text will align within the width of the tape. The alignment of the text at the cursor's current position is shown at the top of the display.
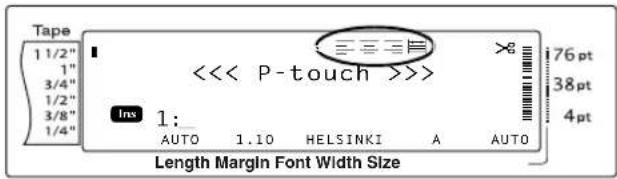
To change the setting for the Text Alignment function:
① Hold down Code and press Global Block or Line 1 i, 2 or #3.
NOTE
This step may be skipped if settings for several format functions are being applied at the same time.
2 Press [←] or [→] until ALIGNMENT is displayed. The setting for the text at the cursor's current position is shown on the left side of the display and a sample can be seen on the right side.
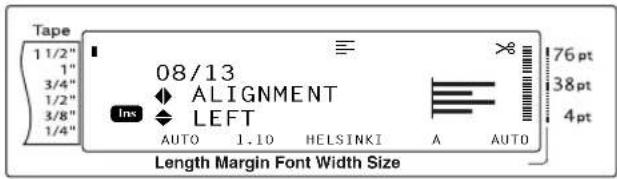
③ Press or until the desired setting is displayed.
NOTE
If "*****" appears as a setting, the Text Alignment function has already been applied to either a line in the current text block (if the Block Format or the Global Format function is being set) or a block in the current text (if the Global Format function is being set). Changing the setting will cancel the setting that was previously applied.
To return the function to its default setting (LEFT), press the space bar.
To return to the text without changing the formatting, press [Cancel] (OR hold down [Code] and press [1 1 i], @2 or #3).
4 Press ← to apply the setting.
NOTE
To apply several format settings at the same time, continue pressing or to select the function, then pressing _Home or _End to select the desired setting. Press only after the necessary functions have been set.
Text Rotation function (ROTATE)
Any text block with the Text Rotation function applied is rotated 90^ counterclockwise. By selecting the &REPEAT setting, the text is repeatedly printed for the length of the text block.
ABCD EFG HIJK
OFF
ABCD EFG HIJK
ON
ABC ABC ABC ABC ABC
&REPEAT
When any setting other than OFF is selected for the text at the cursor's current position, the Text Rotation indicator at the top of the display comes on.
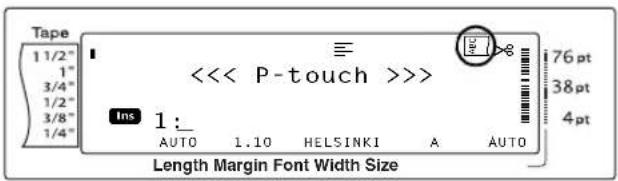
To change the setting for the Text Rotation function:
① Hold down Code and press Global or Black
NOTE
This step may be skipped if settings for several format functions are being applied at the same time.
2 Press ← or → until ROTATE is displayed. The setting for the text at the cursor's current position is shown on the left side of the display and a sample can be seen on the right side.
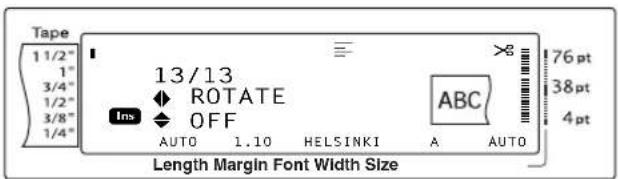
③ Press Home or end until the desired setting is displayed.
NOTE
If "*****" appears as a setting, the Text Rotation function has already been applied to a block in the current text (when the Global Format function is being set). Changing the setting will cancel the setting that was previously applied.
To return the function to its default setting (OFF), press the space bar.
To return to the text without changing the formatting, press Cancel (OR hold down Code and press [1 i] or @ 2).
④Press to apply the setting.
NOTE
To apply several format settings at the same time, continue pressing or to select the function, then pressing _home or _End to select the desired setting. Press -12 only after the necessary functions have been set.
Tape Margin function (T. MARGIN)
The Tape Margin function allows you to adjust the size of the margins on the left and right sides of your text. The label margins can be set to a width between 0.08" and 4.00" (0.2 cm and 9.9 cm).
The current Tape Margin setting is shown at the bottom of the display.
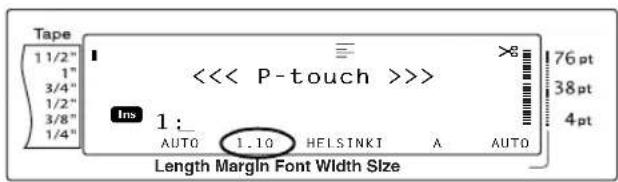
NOTE
The Tape Margin setting is only applied to labels printed on TZ tape. The tape margins of AV labels are fixed at 0.20" (0.5 cm) and cannot be adjusted even if this setting is changed.
To change the setting for the Tape Margin function:
① Hold down Code and press Global i.
NOTE
This step may be skipped if settings for several Global Format functions are being applied at the same time.
② Press ☐ or ☑ until T. MARGIN is displayed. The current setting is shown on the left side of the display.
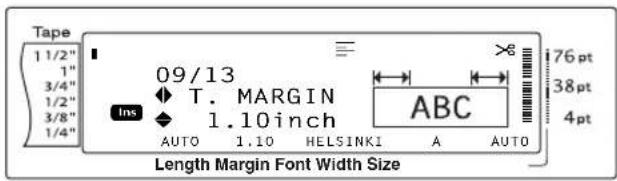
3 Press [ none] or [ end] until the desired setting is displayed, or use the number keys to type in the desired margin width.
NOTE
To return the function to its default setting (0.16 inch (0.4 cm)), press the space bar.
To change the setting in 0.1" (1.0 cm) steps, hold down either ↑ Home or ↓ End, and then release the key when the desired setting is displayed.
The tape margins are displayed in the currently selected unit of measurement (inches or centimeters). The unit of measurement can be changed with the Setup functions. (Refer to refer to page 74.)
To return to the text without changing the formatting, press Cancel (OR hold down Code and press Global i).
④Press □ to apply the setting.
NOTE
To apply several format settings at the same time, continue pressing or to select the function, then pressing or to select the desired setting. Press only after the necessary functions have been set.
Tape Length function (T. LENGTH)
Although the length of the printed label automatically adjusts to fit the length of the entered text, there may be times when you will want to make a label with a specific length. The Tape Length function allows you to set the label length between 0.25" and 38.84" (0.6 cm and 99.5 cm).
The current Tape Length setting is shown in the lower-left corner of the display.
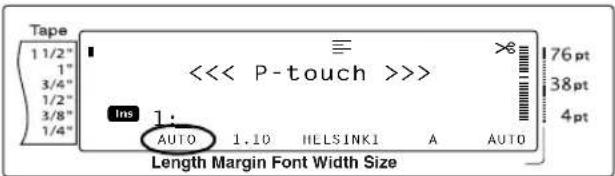
NOTE
The Tape Length setting is only applied to labels printed on TZ tape. The label length of AV labels cannot be adjusted.
To change the setting for the Tape Length function:
① Hold down [Code] and press [Global i i].
NOTE
This step may be skipped if settings for several Global Format functions are being applied at the same time.
② Press ☐ or ☐ until T. LENGTH is displayed. The current setting is shown on the left side of the display.
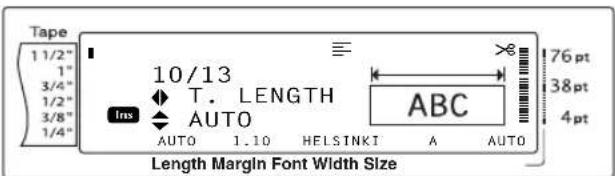
3 Press [ none] or [ End] until the desired setting is displayed, or use the number keys to type in the desired tape length.
NOTE
To return the function to its default setting (AUTO), press the space bar.
To change the setting in 0.1" (1.0 cm) steps, hold down either or , and then release the key when the desired setting is displayed.
The tape length is displayed in the currently selected unit of measurement (inches or centimeters). The unit of measurement can be changed with the Setup functions. (Refer to refer to page 74.)
To return to the text without changing the formatting, press Cancel (OR hold down Code and press Global 1 i).
④Press ← to apply the setting.
NOTE
To apply several format settings at the same time, continue pressing or to select the function, then pressing Hom or Ind to select the desired setting. Press | | only after the necessary functions have been set.
Block Margin function (B. MARGIN)
The width of the margins between text blocks can be set between 0.00" and 12.00" (0.0 cm and 30.0 cm). The left and right margins for each text block will have a width that is the specified setting. If the AUTO setting is selected, the block margins will be 0.00" (0.0 cm) if only one text block has been created and 0.13" (0.3 cm) if multiple text blocks have been created.
To change the setting for the Block Margin function:
① Hold down Code and press Global 1 i.
NOTE
This step may be skipped if settings for several format functions are being applied at the same time.
② Press or until B. MARGIN is displayed. The current setting is shown on the left side of the display.
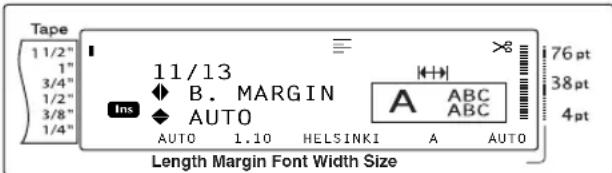
3 Press ↑ Home or ↓ End until the desired setting is displayed, or use the number keys to type in the desired block margin width.
NOTE
To return the function to its default setting (AUTO), press the space bar.
To change the setting in 0.1" (1.0 cm) steps, hold down either or , and then release the key when the desired setting is displayed.
The block margins are displayed in the currently selected unit of measurement (inches or centimeters). The unit of measurement can be changed with the Setup functions. (Refer to refer to page 74.)
To return to the text without changing the formatting, press [Cancel] (OR hold down [Code] and press [Global]).
4 Press ← New Back to apply the setting.
NOTE
To apply several format settings at the same time, continue pressing or to select the function, then pressing or to select the desired setting. Press · only after the necessary functions have been set.
Block Length function (B. LENGTH)
Normally, the length of each text block automatically adjusts to fit the length of the entered text. However, with the Block Length function, you can set each text block to a length between 0.25" and 38.84" (0.6 cm and 99.5 cm).
Ch. 3 Functions
To change the setting for the Block Length function:
① Hold down Code and press Global or Block
NOTE
This step may be skipped if settings for several format functions are being applied at the same time.
② Press ☑ or ☒ until B. LENGTH is displayed. The current setting is shown on the left side of the display.
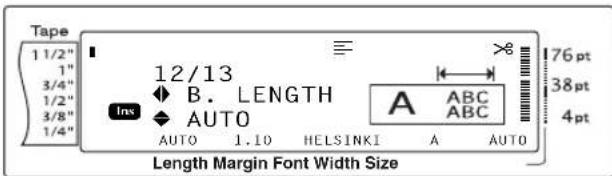
3 Press ↑-one or ↓-End until the desired setting is displayed, or use the number keys to type in the desired block length.
NOTE
To return the function to its default setting (AUTO), press the space bar.
To change the setting in 0.1" (1.0 cm) steps, hold down either 1have or 1and , and then release the key when the desired setting is displayed.
The block length is displayed in the currently selected unit of measurement (inches or centimeters). The unit of measurement can be changed with the Setup functions. (Refer to refer to page 74.)
To return to the text without changing the formatting, press Cancel (OR hold down Code and press Global or @2).
④Press | ·s K_m B_k,l | to apply the setting.
NOTE
To apply several format settings at the same time, continue pressing or to select the function, then pressing or to select the desired setting. Press only after the necessary functions have been set.
Mirror Printing function
$$ (\boxed {\text {Code}} + \boxed {\text {Mirror}}) $$
This function prints your label so that the text can be read from the adhesive side of the tape. If mirror-printed labels are attached to glass or some other transparent material, they can be read correctly from the opposite side.
NOTE
When using the Mirror Printing function, the text should be printed on clear tape.
ABC
OFF
BC
ON
When ON is selected, the Mirror Printing indicator at the top of the display comes on.
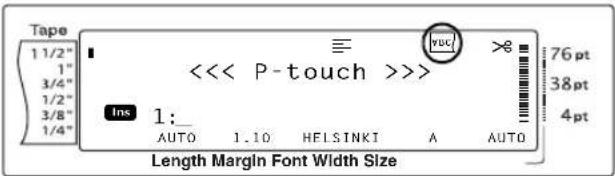
To print a mirror image of the text:
① Hold down Code and press Mirror Print.
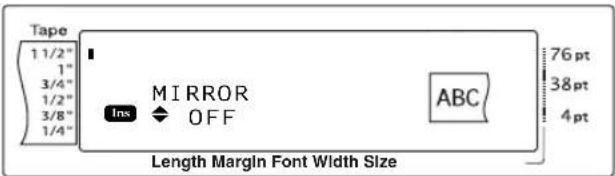
② Press Home or End until the desired setting is displayed.
NOTE
To return the function to its default setting (OFF), press the space bar.
To return to the text without changing the formatting press Cancel (OR hold down Code and press Print).
③Press 12 to apply the setting.
Stamp Stencil function
$$ (\boxed {\text { Code }} + \boxed {S}) $$
The Stamp Stencil function allows you to quickly and easily create your own stamp stencil films for chemical etching. After inserting a stamp film cassette, select this function to adjust the text to a perfect thickness for the pre-inked stamp film holders. Since the stamp holder is reusable, just make a new stamp stencil film and replace the one in the holder.
To make a stamp:
①Type in the text, and then insert a medium (3/4" (18-mm)-wide) or large (1" (24 mm)-wide) stamp film cassette.
② Hold down Code and press S.
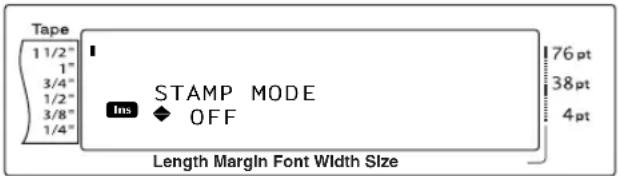
NOTE
If a stamp is created using this function, be sure to use the Tape Length function to select left and right label margins of 1" (25 mm).
3 Press [ Home] or [ End] until the desired setting is displayed.
NOTE
To return the function to its default setting (OFF), press the space bar.
To return to the text without changing the setting for the Stamp function, press (OR hold down and press ).
4 Press ☐. If ON was selected, the text is automatically adjusted for stamps.
5 Press Print to cut print resolution out of the stamp stencil film.
⑥ After the stamp stencil film is cut off, remove the backing paper from the stamp stencil film and affix it to the ink pad of a stamp film holder. Refer to Assembling stamps on page 34.
Auto Format function
$$ \begin{array}{l}\left( \right.\boxed {\text {Code}} + \boxed {\frac {\mathrm{t}}{6 \mathrm{AV}}} / \boxed {\&} _ {7 \mathrm{TZ}} \left. \right. [ \boxed {\text {A V}} / \boxed {\text {T Z}} \text {on}\\text {the PT - 3600]}\left. \right)\end{array} $$
The Auto Format function keys ( 6 AV and 7 TZ ) make creating labels and stamps quick and easy. After simply selecting one of the various pre-formatted templates and typing text into each of its fields, the overall style of the label can easily be changed by selecting one of the six available style formats, and then the label is ready to be printed.
The two sets of templates available allow you to create labels and stamps for a variety of needs—from addressing envelopes to identifying floppy disks or audio and video cassettes. The 15 templates available by pressing 66 AV (Labels on the PT-3600) are designed specifically for the pre-sized AV labels, which allow you to quickly and easily create multiple copies of address and filing labels. By pressing 87 TE (tape on the PT-3600), a wider variety of templates (39 with the PT-9600, 31 with the PT-3600) are available for use with TZ tape. The width and length of each label or stamp printed from a template is preset. For samples of the available templates, refer to pages 99 through 103.
After the text is entered, a different style for the text can easily be selected. For samples of the available style formats, refer to pages 104.
To select a pre-formatted template:
1 Hold down Code and press 6 AV or 7 TE. (For the PT-3600, press Labels or Tape.)
NOTE
The template that was last used appears first. Selecting this template displays the text that was entered in it at that time.
The label sizes are displayed in the currently selected unit of measurement (inches or centimeters). The unit of measurement can be changed with the Setup functions. (Refer to refer to page 74.)
An Auto Format template that has been stored in the memory can be recalled and used again. For details on recalling stored Auto Format templates, refer to page 67.
Ch. 3 Functions
TZ Tape
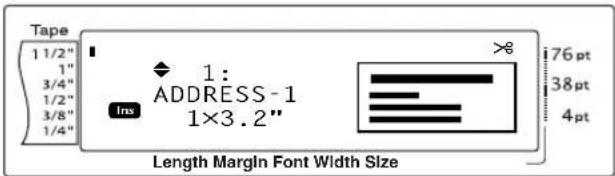
AV Labels
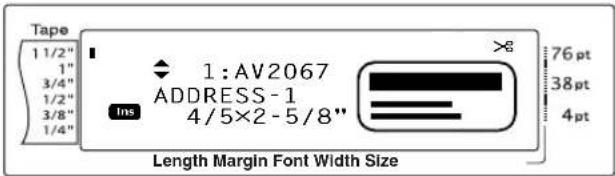
② Press ↑ Home or ↓ End until the name of the desired template is displayed.
NOTE
To select the default setting (ADDRESS-1, press the space bar.
③ Press . The first field for the selected template is displayed.
NOTE
To select a different field, press or until the desired field is displayed.
To select a different template, press Cancel, press Home or and until √ moves CANCEL EDITING?, and then press the bus.
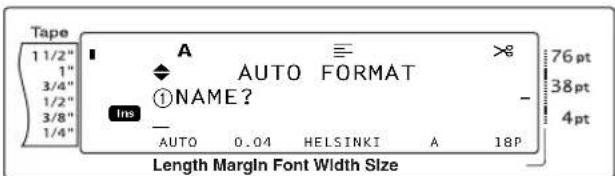
To enter text in the template:
4 For each field, type in the text, and then press 📄. When 📄 is pressed after typing in the text for the last field, the MENU screen appears in the display.
NOTE
If is pressed while the last field is displayed, the first field appears. If is pressed while the last field is displayed, the MENU screen appears.
To return to the first field while the MENU screen is displayed, press Cancel.
Accented characters (page 42), symbols (page 42), barcodes (page 43), time stamps (Refer to the Advanced Functions booklet.) and user-defined character images (Refer to the Advanced Functions booklet.) can be entered in the fields.
An Auto Format template can be stored in the memory to be recalled and used at a later time. For details on storing Auto Format templates, refer to page 65.
To immediately print the label for the selected template, press Minor Print.
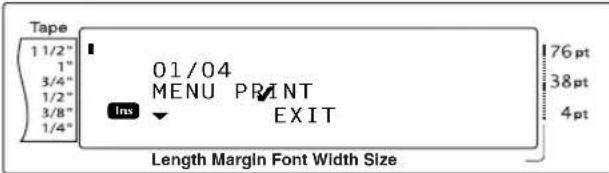
To change the style of the text:
5 Press ↑ Home or ↓ End until √ moves beside CHANGE STYLE.
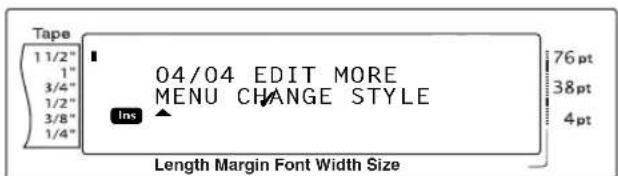
6Press New Focs.
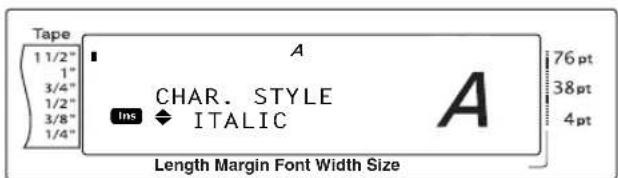
7 Press Home or End until the name of the desired format style is displayed. A sample can be seen on the right side of the display.
NOTE
The default setting (ORIGINAL) can be selected by pressing the space bar.
⑧ Press ←. The MENU screen appears in the display again.
To print a label using the selected template:
9 Press ↑ Home or ↓ End until √ moves beside PRINT.
NOTE
Before printing a template selected by pressing 46 AV , an AV label cassette of the appropriate type must be installed. Before printing a template selected by pressing 87 TZ , a TZ tape cassette with the specified tape width must be installed.
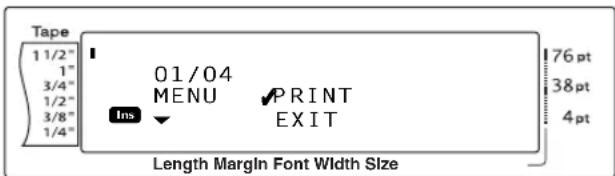
10 Press 12 to print the label. The message "COPIES 1/1" appears in the display while the label is being printed. The MENU screen appears in the display again.
To change the text entered in the template:
11 Press ↑ Home or ↓ End until √ moves beside EDIT MORE.
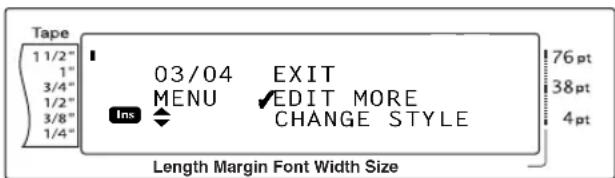
12 Press ☐. The first field for the selected template appears in the display.
13 Repeat step 4 until the text is edited as you wish. The MENU screen appears again when _HR_K,3 is pressed after editing the last field in the template.
To finish using the Auto Format function:
14 Press ↑ Home or ↓ End until √ moves beside EXIT.
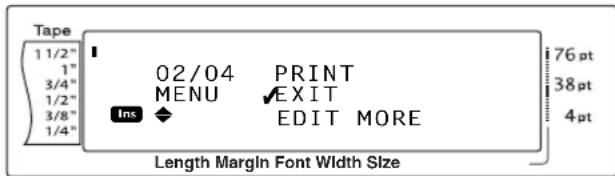
15 Press ← T he message "OK TO EXIT AUTO FORMAT?" appears in the display.
16 Press . Any text displayed before the Auto Format function was used reappears in the display.
NOTE
The template that was last used appears first. Selecting this template displays the text that was entered in it at that time.
The label sizes are displayed in the currently selected unit of measurement (inches or centimeters). The unit of measurement can be changed with the Setup functions. (Refer to page 74.)
An Auto Format template that has been stored in the memory can be recalled and used again. For details on recalling stored Auto format templates, refer to page 67.
To quit the Auto Format function without using a template, hold down and press 6é at any time.
The half cut can only be used to cut laminated tape.
Printing
Layout Preview function
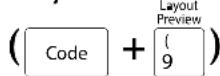
The Layout Preview function allows you to get a general overview of the text within the width of the currently installed tape. The length of the current label is indicated in the lower-left corner of the display.
To preview the label:
● Hold down Code and press Layout Preview 9.
NOTE
To scroll the label preview back and forth, press or.
To return to the text at any time, press [Cancel] (OR hold down Code and press [9]).
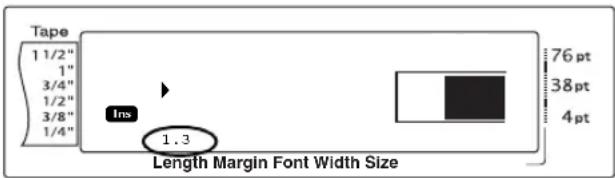
Auto Cut function (Code + Feed & Cut)
Each setting of the Auto Cut function consists of settings for three different cut methods: full cut (which is used to completely cut off the label), half cut (which is used to cut laminated tape without cutting the label backing, making it easier to remove the backing paper from labels), and chain printing (where the last copy is not cut off, reducing the amount of tape that is wasted).
Chain printing is an economical function designed to help eliminate “wasted tape” at the beginning of labels. Without chain printing, the usual leftover tape from the previous printing session is wasted before the first label in the current session is printed. However, if an Auto Cut setting using chain printing is selected, the last label in the previous session remains in the machine (is not fed out), so that the next label can be printed without wasting tape.
When the last label is printed, press 📄 to feed the chain of labels and cut it.
When setting 1, 2, 3 or 4 is selected, the Auto Cut indicator in the upper-right corner of the display comes on, indicating that the labels will be cut off after the last label in the chain is printed.
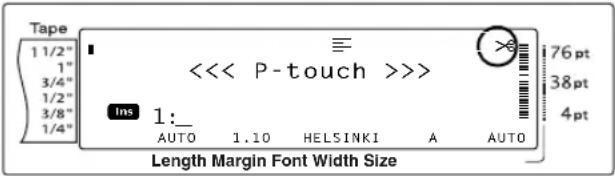
NOTE
AV labels are always cut after they are printed regardless of the current Auto Cut setting.
When setting 5, 6, 7 or 8 is selected, the Auto Cut indicator does not come on.
The following Auto Cut settings are available:
1
(both full and half cuts—no chain printing)
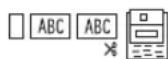
2
(full cuts only—no half cuts and no chain printing)
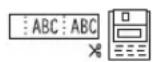
3
(half cuts only—no full cuts and no chain printing)
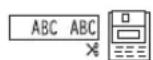
4
(no full, half cuts or chain printing)
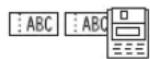
5
(full, half cuts and chain printing)
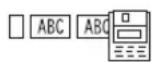
6
(full cuts and chain printing—no half cuts)
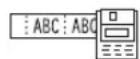
7
(half cuts and chain print- ing—no full cuts)
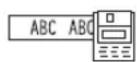
8
(chain printing—neither full nor half cuts)
NOTE
After printing a label on TZ tape with the Auto Cut function set to 5, 6, 7 or 8, press (A.Cut) to feed the tape, then cut it.
This function can also be specified with the P-touch Editor 3.2 software.
To change the setting for the Auto Cut function:
① Hold down Code and press A.Cut (Feed & Cut).
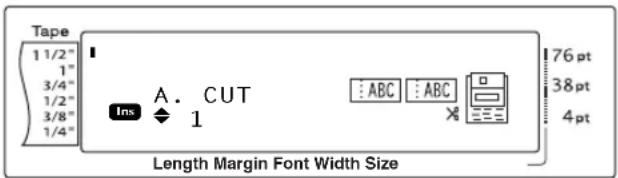
2 Press Home or End until the desired setting is displayed. The current setting is shown on the left side of the display and a sample can be seen on the right side.
NOTE
To return the function to its default setting (1), press the space bar.
To return to the text without changing the setting for the Auto Cut function, press [Cancel] (OR hold down Code and press Feed &Cut).
③Press ← to apply the setting.
Print key (Mirror Print)
After you have typed in your text and chosen all of the desired format settings, you are ready to print it.
NOTE
Depending on the setting selected for the Auto Cut function, TZ labels will automatically be cut after they are printed. AV labels are always cut after they are printed.
To print a label:
- Press Print. The message "COPIES" followed by the number of the label being printed appears.
NOTE
To quit printing at any time, press Cancel.
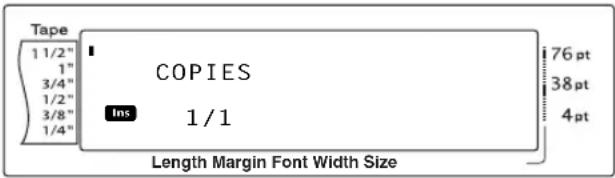
Feed & Cut key (A.Cut Feed & Cut)
Press this key to feed out any leftover printed tape after pressing Cancel to quit printing.
NOTE
Only TZ tape can be fed out and cut using this function. If an AV label cassette is installed when [Code] is held down and [Feed] is pressed, the error message "CAN'T FEED AV LABELS" appears.
After printing with the Auto Cut function set to 5, 6, 7 or 8, press to feed the tape, then cut it.
To feed out 1" (26 mm) of tape and automatically cut it:
- Press Feed & Cut. The message "FEED" appears.
Repeat Printing function
$$ (\boxed {\text {Code}} + \boxed {\frac {}{4} ^ {\text {Repeat}}}) $$
This function allows you to print up to 999 copies of the same text.
To print multiple copies of a label:
① Hold down Code and press Repeat \$ 4.
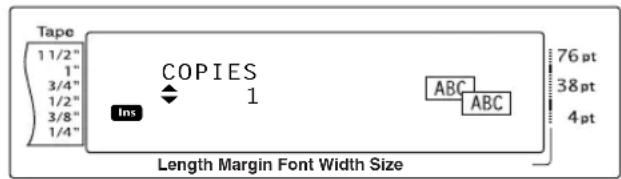
2 Press ↑ Home or ↓ End until the desired setting is displayed, or use the number keys to type in the desired number of copies.
NOTE
To select the default setting (1), press the space bar.
To change the setting in steps of 5, hold down either or , and then release the key when the desired setting is displayed.
To quit the Repeat Printing function, press Cancel (OR hold down Code and press \$4).
③ Press to begin printing the set number of copies. The number of each copy is displayed while it is being printed.
NOTE
After printing with the Auto Cut function set to 5, 6, 7 or 8, press _testg_test to feed the tape, then cut it.
Numbering function (Code + Number % 5)
The Numbering function can be used to print many copies of the same text while increasing certain characters (letters, numbers or barcode data) after each label is printed. This type of automatic incrementation is very useful when printing serial number labels, production control labels or other labels requiring ascending codes.
Letters and numbers increase as shown below:
| 0 | → | 1 | → | ...9 | → | 0 | → | ... |
| A | → | B | → | ...Z | → | A | → | ... |
| a | → | b | → | ...z | → | a | → | ... |
| A0 | → | A1 | → | ...A9 | → | B0 | → | ... |
Spaces (shown as underlines “_” in the examples below) can be used to adjust the space between characters or to control the number of digits that are printed:
| _Z → | AA → | ...ZZ → | _A → | ... |
| _9 → | 10 → | ...99 → | _0 → | ... |
| 1_9→ | 2_0 → | ...9_9 → | _0 → | ... |
NOTE
Only one numbering field can be selected from any text.
If you include a non-alphanumeric character such as a symbol in the numbering field, only the letters and numbers in the numbering field will be increased when the labels are printed, or just one label will be printed if the field only contains a non-alphanumeric character.
When a barcode is selected as the numbering field, only the numbers in the barcode data are increased.
To print labels using the Numbering function:
① Hold down Code and press 5% . The message "SELECT START POINT" appears.
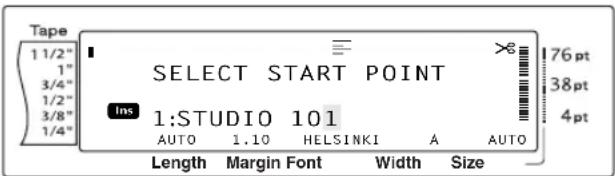
2 Press Home, End, or until the first character that you wish to include in the numbering field is flashing.
NOTE
To quit the Numbering function, press Cancel (OR hold down Code and press 5).
③ Press . The message “SELECT END POINT” appears.
NOTE
If a barcode was selected in step ②, this step is skipped.
A numbering field must be located entirely within one line of text of a single block.
A maximum of five characters can be selected for the numbering field.
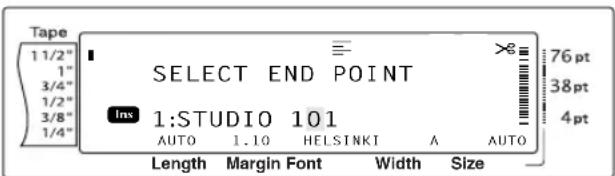
4 Press ← The NUMBER screen appears.
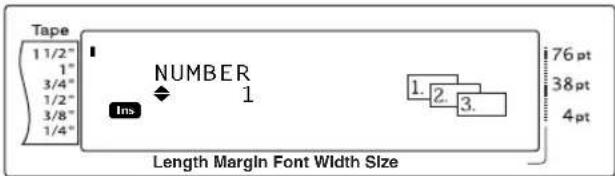
5 Press [] or [] until the desired setting is displayed, or use the number keys to type in the desired number of copies.
NOTE
To select the default setting (1), press the space bar.
To change the setting in steps of 5, hold down either Home or End, and then release the key when the desired setting is displayed.
6 Press to begin printing the set number of labels. The number of each copy is displayed while it is being printed.
NOTE
After printing with the Auto Cut function set to 5, 6, 7 or 8, press to feed the tape, then cut it.
Storing and recalling files
Memory functions (Code + Memory 8)
You can store frequently used text and Auto Format template text in the memory. These text files, TZ tape template files and AV label template files remain in the memory, even after all characters are erased from the display using the Clear function (holding down Code and pressing Base).
When each file is stored, it is given a number and can also be given a file name to make recalling it easier. Up to 100 files or approximately 10,000 characters can be stored in the memory. All Global Format, Block Format and Line Format functions (Font, Size, Width, Style, Line Effects, Frame, Alignment and Text Rotation, Tape Margin, Tape Length, Block Margin, Block Length) specified are also saved with the text.
Since a copy of the stored text file is recalled when the Recall function is used, the text can be edited or printed without changing the originally stored file. However, the Store function can be used to replace the previously saved file with the new edited one. When a file is no longer needed or more space is necessary, the Memory Clear function can be used to delete it. With the Memory Print function, either a single file or multiple files stored in the memory can be quickly selected for printing.
NOTE
TZ tape and AV label templates from the Auto Format function can also be stored while the template is being selected, while text is being entered or while the MENU screen is displayed. To store the template with text and a specific character style, type in the text for each field, and then select the style of the text before storing the template.
Storing text and Auto Format templates
To save a text file:
① Hold down Code and press Memory *8. The MEMORY screen appears.
Ch. 3 Functions
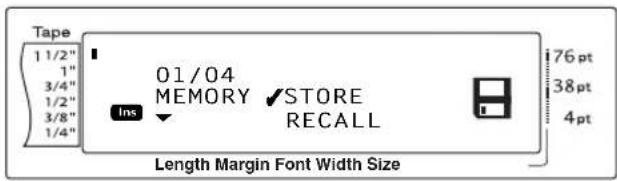
② Press Home or End until √ moves beside STORE.
③Press . The STORE screen appears in the display with the currently selected file number. The type of file is also indicated: FILE (for normal text files), TZ (for TZ tape templates) or AV (for AV label templates).
NOTE
If the maximum number of characters has already been stored, the error message "MEMORY FULL!" appears in the display. If this occurs, an existing text file must be deleted before the new one can be stored.
To quit the Store function without storing the text, press Cancel (OR hold down Code and press Memory * 8).
For a text file:
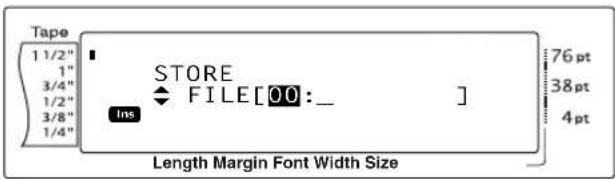
For a TZ tape template file:
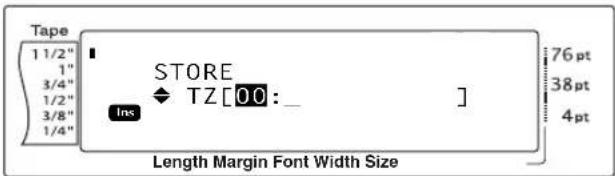
For an AV label template file:
![Tape 1 1/2" 1" 3/4" 1/2" 3/8" 1/4" STORE AV[00:] Ins 76 pt 38 pt 4 pt Length Margin Font Width Size](/content/2026/05/862099/images/ebdbce5ba70a2e4b67b0dccbe73d9a287be35bbf4c85b678f30b16fe83c3b367.jpg)
4 Press ↑ Home or ↓ End until the file number where you wish to store the text is displayed.
NOTE
File numbers that are not flashing already contain a file.
⑤Type in the desired file name.
For a text file:
![Tape 1 1/2" 1" 3/4" 1/2" 3/8" 1/4" STORE FILE[01 : NAMETAG_] Ins 76 pt 38 pt 4 pt Length Margin Font Width Size](/content/2026/05/862099/images/4e083a46abede5b2f23eead6bcf40163e771303d5088b27973dca6e581fb35fd.jpg)
For a TZ tape template file:
![Tape 1 1/2" 1" 3/4" 1/2" 3/8" 1/4" STORE TZ[01:ADDRESS_ ] Ins 76 pt 38 pt 4 pt Length Margin Font Width Size](/content/2026/05/862099/images/c46dba3d6b3cc6ba30d5c73ea5143c76b0888ed79cf7d582e6ab248946eced59.jpg)
For an AV label template file:
![Tape 1 1/2" 1" 3/4" 1/2" 3/8" 1/4" STORE AV [01 : ADDRESS_ ] Ins 76 pt 38 pt 4 pt Length Margin Font Width Size](/content/2026/05/862099/images/22f6c5ddf632349444c86b0ad7eed1c8898b6c6c86941f61b1211934d589bd20.jpg)
NOTE
The file name can be up to 8 characters long and can contain letters, numbers, symbols, spaces and accented characters.
6 Press. The text is stored under the selected file number and the text previously shown in the display reappears.
NOTE
If a file is already stored under the selected file number, the message "OVERWRITE?" appears in the display and you must decide whether or not to overwrite it (delete it from the memory and store the new one).
To overwrite the stored file with the new one:
- Press ← to delete the previously stored file and store the new one under the selected number.
NOTE
To go back and choose another file number without overwriting the text file, press [Cancel], and then select a different file number.
Recalling text and Auto Format templates
To recall a file that has been saved:
① Hold down Code and press Memory * 8. The MEMORY screen appears.
NOTE
An Auto Format template that has been stored in the memory can be recalled when you are asked to select a template in the Auto Format function.
② Press ↑ Home or ↓ end until √ moves beside RECALL.
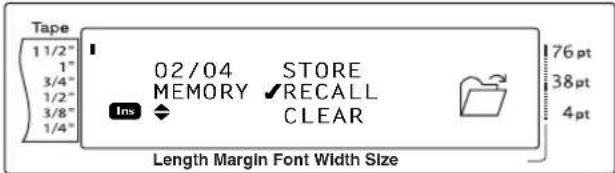
③Press . The RECALL screen appears in the display with the currently selected file number.
NOTE
To quit the Recall function without recalling any text, press Cancel (OR hold down Code and press Memory 8).
For a text file:
![Tape 1 1/2" 1" 3/4" 1/2" 3/8" 1/4" RECALL ◆ FILE[00:NAMETAG ] Ins ► R. Becker←ABC Tran 76 pt 38 pt 4 pt Length Margin Font Width Size](/content/2026/05/862099/images/a5e462bbe7f028b4ee146c4ceb4ae80f70998b2975398fd00938dbe5b0a50e2c.jpg)
For a TZ tape template file:
![Tape 1 1/2" 1" 3/4" 1/2" 3/8" 1/4" RECALL 3/4" TZ[00:VIDEO] FAVORITE SONGS Ins 76 pt 38 pt 4 pt Length Margin Font Width Size](/content/2026/05/862099/images/2e87c8d5e6923c4e7aa3c3b2af61746cec24b2d95489b7521c67ef8e83fcdb8a.jpg)
For an AV label template file:
![Tape 1 1/2" 1" 3/4" 1/2" 3/8" 1/4" RECALL AV2067 AV[00:ADDRESS1] R. Becker ABC Impo Ins 76 pt 38 pt 4 pt Length Margin Font Width Size](/content/2026/05/862099/images/36a040b496ff00d9f817cb3bdf42aa55b5fcf4c7d69e21fc63af4baace1cc86d.jpg)
4 Press Home or End until the file number containing the text that you wish to recall is displayed. The file name is shown beside the file number and the text stored in the selected file number is shown at the bottom of the display.
NOTE
To see other parts of the selected text file, press or .
Auto Format template files of the same tape width are displayed grouped together.
5 Press . Any text previously entered in the display is erased and the text stored under the selected file number is recalled into the display.
Ch. 3 Functions
Deleting a file
To delete a file that has been saved:
① Hold down [Code] and press [Memory * 8]. The MEMORY screen appears.
NOTE
An Auto Format template that has been stored in the memory can be deleted by holding down [Code] and pressing [ Memory * 8 ] from the Auto Format function.
② Press ↑ Home or ↓ End until √ moves beside CLEAR.
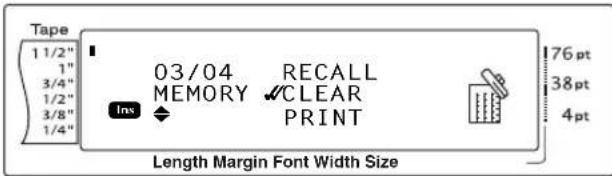
③Press . The CLEAR screen appears in the display with the currently selected file number.
NOTE
To quit the Memory Clear function without erasing any text, press [Cancel] (OR hold down [Code] and press [Memory * 8]).
For a text file:
![Tape 1 1/2" 1" 3/4" 1/2" 3/8" 1/4" CLEAR FILE[00:NAMETAG ] Ins R. Becker\ABC Tran 76 pt 38 pt 4 pt Length Margin Font Width Size](/content/2026/05/862099/images/8460ecc58b4d19888a366d1972ebddf1b3b2e642d3d268af028eab7c860f9313.jpg)
For a TZ tape template file:
![Tape 1 1/2" 1" 3/4" 1/2" 3/8" 1/4" Clear 3/4" TZ[00:VIDEO] Ins FAVORITE SONGS 76 pt 38 pt 4 pt Length Margin Font Width Size](/content/2026/05/862099/images/e5e013f860e05467f597b59ac6402a31b3954053de8e22d27ef7a64c20cde56f.jpg)
For an AV label template file:
![Tape 1 1/2" 1" 3/4" 1/2" 3/8" 1/4" CLEAR AV2067 AV[00:ADDRESS1] R. Becker ABC Impo Ins 76 pt 38 pt 4 pt Length Margin Font Width Size](/content/2026/05/862099/images/e6c40f647110f4c4189cb90d200923e5675a35163e8214ff2caab0eb9566964d.jpg)
4 Press Home or End until the file number containing the text that you wish to delete is displayed. The file name is shown beside the file number and the text stored under the selected file number is shown in the bottom line.
NOTE
To see other parts of the selected text file, press or. Auto Format template files of the same tape width are displayed grouped together.
5 Press the space bar so that √ appears to the right of the file name.
For a text file:
![Tape 1 1/2" 1" 3/4" 1/2" 3/8" 1/4" Clear FILE[00:NAMETAG]✓ R. Becker↓ABC Tran Ins 76 pt 38 pt 4 pt Length Margin Font Width Size](/content/2026/05/862099/images/586b16bc85ff2423d114ba91b07a05be6256eef67f20d42ef2aa909a7c68bcad.jpg)
For a TZ tape template file:
![Tape 1 1/2" 1" 3/4" 1/2" 3/8" 1/4" CLEAR 3/4" TZ[00:VIDEO] FAVORITE SONGS Ins 76 pt 38 pt 4 pt Length Margin Font Width Size](/content/2026/05/862099/images/1e3e923deb5064491e8440d242de835b2417c455e19e4a64b2dc2ed1b70110d1.jpg)
For an AV label template file:
![Tape 1 1/2" 1" 3/4" 1/2" 3/8" 1/4" Clear AV2067 AV[00:ADDRESS1] R. Becker↓ABC Impo Ins 76 pt 38 pt 4 pt Length Margin Font Width Size](/content/2026/05/862099/images/838860c2bb9f6e74c881a2488827cf31605803c4b5395cee5f2222ceac6768a7.jpg)
⑥ Repeat steps ④ and ⑤ until √ appears to the right of all files to be deleted. Files marked with √ will be deleted.
NOTE
If multiple files are to be deleted, follow steps ⑤ and ⑥ to mark them with √. If only one file is to be deleted, steps ⑤ and ⑥ can be skipped.
To select all files in the memory, hold down code and press the space bar.
To remove a file from those that are to be deleted, select the file, and then press the space bar to remove the √ from the right side of the file name.
⑦ Press ←. The message "OK TO CLEAR?" appears.
NOTE
If all of the stored files were selected, the message "CLEAR ALL?" appears.
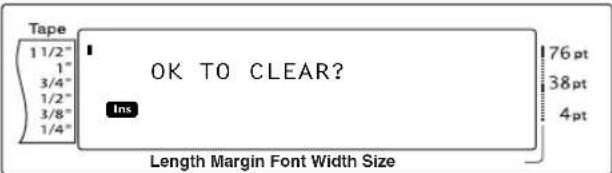
8 Press : ←. The text stored in the selected file numbers is deleted.
NOTE
To go back and select different files to be deleted, press Cancel.
Printing stored text and Auto Format templates
Multiple stored text or Auto Format templates can be printed immediately without first being recalled.
To print stored text files:
① Hold down Code and press Memory *8. The MEMORY screen appears.
② Press Home or end until √ moves beside PRINT.
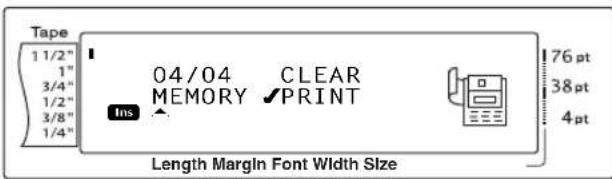
③ Press □. The PRINT screen appears in the display with the currently selected file number.
NOTE
To quit the Memory Print function without printing any text, press Cancel (OR hold down Code and press Memory * 8).
![Tape 1 1/2" 1" 3/4" 1/2" 3/8" 1/4" PRINT FILE[00:NAMETAG] R. Becker↓ABC Tran Ins 76 pt 38 pt 4 pt Length Margin Font Width Size](/content/2026/05/862099/images/8dfcd73342aea0a310257b234091667d2849c9f013d456347e0b222f4d85dde6.jpg)
4 Press Home or End until the file number containing the text that you wish to print is displayed. The file name is shown beside the file number, and the text stored under the selected file number is shown in the bottom line.
NOTE
To see other parts of the selected text file, press or .
Ch. 3 Functions
5 Press the space bar so that √ appears to the right of the file name.
![Tape 1 1/2" 1" 3/4" 1/2" 3/8" 1/4" PRINT FILE[00:NAMETAG] Ins R. Becker↓ABC Tran 76 pt 38 pt 4 pt Length Margin Font Width Size](/content/2026/05/862099/images/8c1e663959713ce178cf401e62e3363be0a26090064d78b9bd141687e450384f.jpg)
⑥ Repeat steps ④ and ⑤ until √ appears to the right of all files to be printed. Files marked with √ will be printed.
NOTE
If multiple files are to be printed, follow steps ⑤ and ⑥ to mark them with √. If only one file is to be printed, steps ⑤ and ⑥ can be skipped.
To remove a file from those that are to be printed, select the file, and then press the space bar to remove the √ from the right side of the file name.
⑦ Press . The text stored under the selected file numbers is printed.
To print stored Auto Format template files:
① Hold down Code and press 6 AV or 7 TZ.
② Hold down [Code] and press [* \8] . The MEMORY screen appears.
③ Press ↑ Home or ↓ End until √ moves beside PRINT.
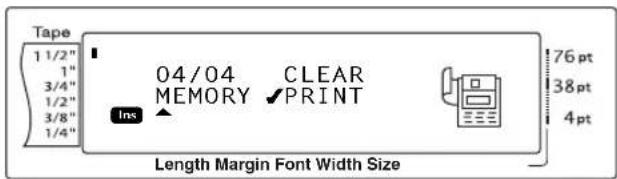
4 Press ☐. The PRINT screen appears in the display with the currently selected file number.
NOTE
To quit the Memory Print function without printing any text, press Cancel (OR hold down Code and press Memory 8).
For a TZ tape template file:
![Tape 1 1/2" 1" 3/4" 1/2" 3/8" 1/4" PRINT TZ[00:VIDEO] FAVORITE SONGS 76 pt 38 pt 4 pt Ins Length Margin Font Width Size](/content/2026/05/862099/images/5d38cfcf48df50640baa57063d774a61bfa92d2c874dc95de2b2246602ea721d.jpg)
For an AV label template file:
![Tape 1 1/2" 1" 3/4" 1/2" 3/8" 1/4" PRINT AV2067 AV[00:ADDRESS1] R. Becker↓ABC Impo Ins 76pt 38pt 4pt Length Margin Font Width Size](/content/2026/05/862099/images/5f684b5bafea9dde1a3bd027c35d90b6d1cf6ba0ff154e8a98c327997f583783.jpg)
5 Press Home or End until the file number containing the text that you wish to print is displayed. The file name is shown beside the file number, and the text stored under the selected file number is shown in the bottom line.
NOTE
To see other parts of the selected text file, press or .
Auto Format template files of the same tape width are displayed grouped together.
⑥Press the space bar so that √ appears to the right of the file name.
For a TZ tape template file:
![Tape 1 1/2" 1" 3/4" 1/2" 3/8" 1/4" PRINT TZ[00:VIDEO] FAVORITE SONGS 76 pt 38 pt 4 pt Ins Length Margin Font Width Size](/content/2026/05/862099/images/5201f492414e650eba9c12e0396d9f7974152cd9457c9ed48272635fbb5db7c3.jpg)
For an AV label template file:
![Tape 1 1/2" 1" 3/4" 1/2" 3/8" 1/4" PRINT AV2067 AV[00:ADDRESS1]✓ R. Becker↓ABC Impo Ins 76pt 38pt 4pt Length Margin Font Width Size](/content/2026/05/862099/images/76f5e32a57466ad838537196ab79517bcc208ea18fa27018965b15cbe2b83702.jpg)
⑦ Repeat steps ⑤ and ⑥ until √ appears to the right of all files to be printed. Files marked with √ will be printed.
NOTE
If multiple files are to be printed, follow steps ⑤ and ⑥ to mark them with √. If only one file is to be printed, steps ⑤ and ⑥ can be skipped.
To select all files in the memory, hold down
Code and press the space bar.
To remove a file from those that are to be printed, select the file, and then press the space bar to remove the √ from the right side of the file name.
⑧ Press □. The MENU screen appears in the display.
⑨Make sure that √√ is beside PRINT, and then press □. The text stored under the selected file numbers is printed.
To change the style of the stored Auto Format template:
10 Press ↑ Home or ↓ End until √ moves beside CHANGE STYLE.
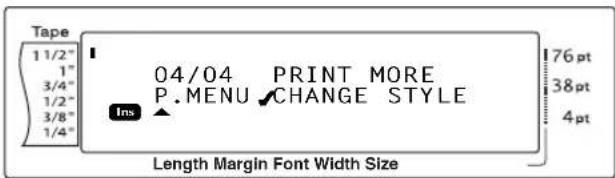
11 Press
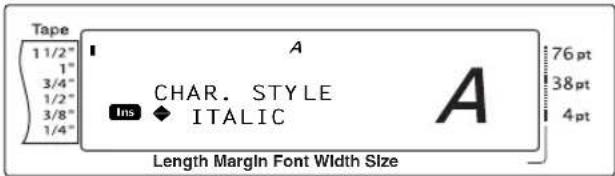
12 Press ↑ Home or ↓ End until the name of the desired format style is displayed. A sample can be seen on the right side of the display.
NOTE
The default setting (NO CHANGE) can be selected by pressing the space bar.
13 Press □. The MENU screen appears in the display again.
To print more stored Auto Format template files:
14 Press ↑ Home or ↓ End until √ moves beside PRINT MORE.
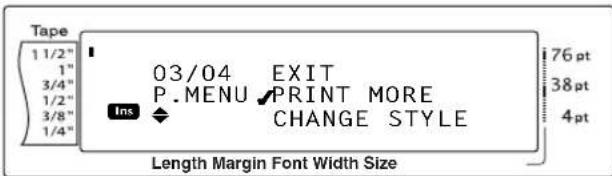
15 Press □. The PRINT screen appears in the display with the currently selected file number.
For a TZ tape template file:
![Tape 1 1/2" 1" 3/4" 1/2" 3/8" 1/4" PRINT 3/4" TZ[00:VIDEO] FAVORITE SONGS Ins 76 pt 38 pt 4 pt Length Margin Font Width Size](/content/2026/05/862099/images/2688cf0a4249075ca6b4b912eba89f215a12ee2bb69926e5fd8c6dc4898297f0.jpg)
For an AV label template file:
![Tape 1 1/2" 1" 3/4" 1/2" 3/8" 1/4" PRINT AV2067 AV[00:ADDRESS1] ✓ Ins R. BeckerJABC Impo 76 pt 38 pt 4 pt Length Margin Font Width Size](/content/2026/05/862099/images/15d9eea1e1bac15c46ffa4603b14b4e34019ab5506561501d7f2b6e1f58aafa8.jpg)
16 Press [Home] or [end] until the file number containing the text that you wish to print is displayed. The file name is shown beside the file number, and the text stored under the selected file number is shown in the bottom line.
NOTE
To see other parts of the selected text file, press | or |.
Auto Format template files of the same tape width are displayed grouped together.
17 Press the space bar so that √ appears to the right of the file name.
Ch. 3 Functions
For a TZ tape template file:
![Tape 1 1/2" 1" 3/4" 1/2" 3/8" 1/4" PRINT TZ[00:VIDEO] FAVORITE SONGS 76 pt 38 pt 4 pt Ins Length Margin Font Width Size](/content/2026/05/862099/images/f8886e166dc89a238c06aeabe6a46e3bcaacd00b626115684d0be887faff9f0c.jpg)
For an AV label template file:
![Tape 1 1/2" 1" 3/4" 1/2" 3/8" 1/4" PRINT AV2067 AV[00:ADDRESS1] ✓ R. Becker↓ABC Impo Ins 76 pt 38 pt 4 pt Length Margin Font Width Size](/content/2026/05/862099/images/492910ed9474062c70f0ba6ff1e8a4b7e1dd780e9793c81f7cb484d54a781b44.jpg)
18 Repeat steps 16 and 17 until √ appears to the right of all files to be printed. Files marked with √ will be printed.
NOTE
If multiple files are to be printed, follow steps 17 and 18 to mark them with √. If only one file is to be printed, steps 17 and 18 can be skipped.
19 Press □. The MENU screen appears in the display.
20Make sure that √√ is beside PRINT, and then press √. The text stored under the selected file numbers is printed.
To finish using the Auto Format function:
21 Press or until √ moves beside EXIT.
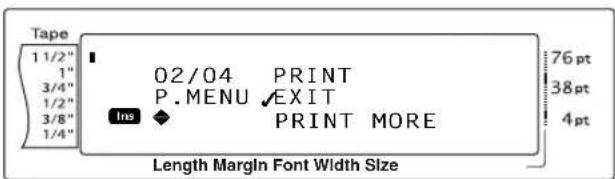
22 Press . The screen from the Auto Format function displayed before the Memory Print function was used reappears in the display.
Machine Adjustments
Ch. 4 Machine Adjustments
Machine adjustments
Setup functions (Code + A)
Various functions are available for changing the general appearance how text is shown on the display and for adjusting the operation of the P-touch.
To change the UNITS setting:
This function lets you choose the units used for displaying measurements.
① Hold down Code and press A.
NOTE
This step may be skipped if settings for several Setup functions are being applied at the same time.
② Press ☐ or ☑ until UNITS is already displayed.
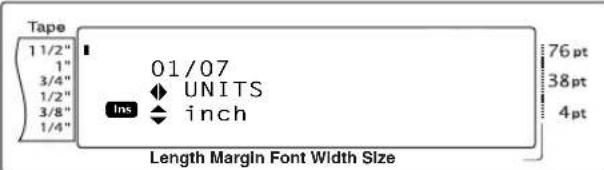
3 Press [ none] or [ End] until the desired setting is displayed.
NOTE
To return the function to its default setting (inch), press the space bar.
4 Press 18.05 to apply the setting.
NOTE
To apply several Setup settings at the same time, continue pressing || or || to select the function, then pressing || or || to select the desired setting. Press || only after the necessary functions have been set.
To change the LANGUAGE setting:
The LANGUAGE function allows you to select whether the menus, settings and messages will appear in English or French.
① Hold down Code and press A.
NOTE
This step may be skipped if settings for several Setup functions are being applied at the same time.
② Press [] or [] until LANGUAGE is displayed.
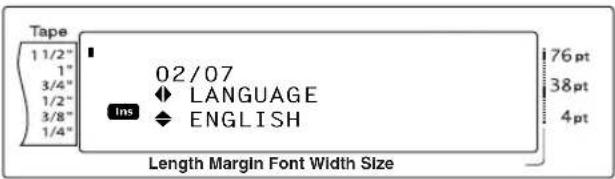
③ Press or until the desired setting is displayed.
NOTE
To return the function to its default setting (ENGLISH), press the space bar.
4 Press 12x_0 to apply the setting.
NOTE
To apply several Setup settings at the same time, continue pressing or to select the function, then pressing or to select the desired setting. Press only after the necessary functions have been set.
To change the CONTRAST setting:
The CONTRAST function enables you to make the LCD display lighter or darker.
① Hold down Code and press A.
NOTE
This step may be skipped if settings for several Setup functions are being applied at the same time.
② Press ☐ or ☐ until CONTRAST is displayed.
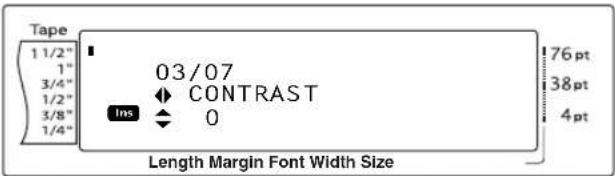
③ Press ↑ Home or ↓ End until the desired setting is displayed.
NOTE
To return the function to its default setting (0), press the space bar.
④Press ← New Black to apply the setting.
NOTE
To apply several Setup settings at the same time, continue pressing or to select the function, then pressing Home or Ed to select the desired setting. Press · only after the necessary functions have been set.
To change the TAPE LENGTH ADJUST setting:
When printing a label with a specified length (Tape Length function), the length of the printed label may be slightly different. This function allows you to adjust the length of the printed label.
NOTE
If the tape length cannot be adjusted satisfactorily using this function, small adjustments can be made to the tape length using the Tape Length function.
① Hold down [Code] and press [A].
NOTE
This step may be skipped if settings for several Setup functions are being applied at the same time.
2 Press or until TAPE LENGTH ADJUST is displayed.
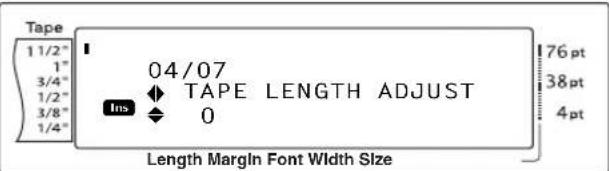
3 Press or until the desired setting is displayed.
NOTE
To return the function to its default setting (0), press the space bar.
To decrease the label length, select a lower value. To increase the label length, select a higher value.
4 Press to apply the setting.
NOTE
To apply several Setup settings at the same time, continue pressing ☐ or ☐ to select the function, then pressing ↑ Home or ↓ Inc to select the desired setting. Press ☐ only after the necessary functions have been set.
To change the HEAD ADJUSTMENT setting:
This function allows you to shift the printing up or down within the tape.
NOTE
This function does not adjust printing on 1 1/2" (36-mm)-wide tape.
① Hold down Code and press A.
NOTE
This step may be skipped if settings for several Setup functions are being applied at the same time.
② Press ← or → until HEAD ADJUSTMENT is displayed.
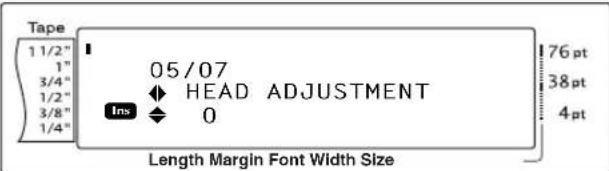
③ Press Home or End until the desired setting is displayed.
NOTE
To return the function to its default setting (0), press the space bar.
To shift the printing down, select a lower value. To shift the printing up, select a higher value.
4Press ← to apply the setting.
NOTE
To apply several Setup settings at the same time, continue pressing ± or ± to select the function, then pressing ± or ± to select the desired setting. Press ± only after the necessary functions have been set.
Ch. 4 Machine Adjustments
To change the HALF CUTTER setting:
This function allows you to adjust how deep a half cut is cut with laminated tape, for example, if the tape is cut too much or not enough. Normally, it is only necessary to change the setting by one. If the half cut is still either too deep or not deep enough, change the setting by one again.
NOTE
If the tape is still not cut correctly even after this setting has been continuously adjusted, the cutter may be dull. Contact your service representative.
① Hold down Code and press A.
NOTE
This step may be skipped if settings for several Setup functions are being applied at the same time.
② Press ☐ or ☑ until HALF CUTTER is displayed.
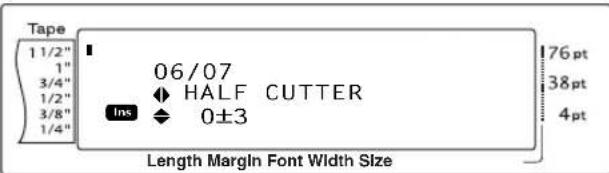
3 Press [ Home] or [ End] until the desired setting is displayed.
NOTE
To cut less deep, select a lower value. To cut deeper, select a higher value.
Adjust the setting in small steps.
To return the function to its default setting (0), press the space bar.
④Press to apply the setting.
NOTE
To apply several Setup settings at the same time, continue pressing or to select the function, then pressing or to select the desired setting. Press only after the necessary functions have been set.
To change the USB ID SELECTION setting:
This function allows you to specify a unique identification number for each P-touch connected to a computer in order to print through the USB connection. Normally, for easy setup of multiple P-touch machines connected to a computer, all PT-9600/3600s will be set to 000000001, indicating that the data will be printed on all connected P-touch machines at the same time.
① Hold down Code and press A.
NOTE
This step may be skipped if settings for several Setup functions are being applied at the same time.
② Press ☐ or ☐ until USB ID SELECTION is displayed.
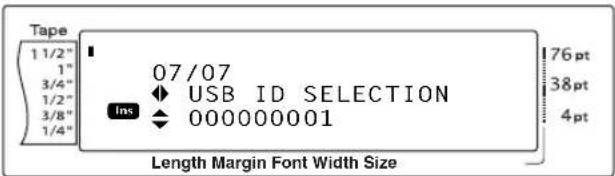
③ Press ↑ Home or ↓ End until the desired setting is displayed.
NOTE
To return the function to its default setting (000000001), press the space bar.
4 Press to apply the setting.
NOTE
To apply several Setup settings at the same time, continue pressing or to select the function, then pressing Home or Final to select the desired setting. Press only after the necessary functions have been set.
ERROR MESSAGE LIST
| ERROR MESSAGE CAU | SE SOLUTION | |
| 16 LINE LIMIT! | This message appears if 16 lines have already been entered in a text block of text when you press. | Limit the number of lines in a text block to 16. |
| This message appears if you delete text, causing the number of lines in a block to exceed the 16-line limit. | Adjust the number of lines so that the block will not have more than 16 lines. | |
| 50 LINE LIMIT REACHED! | This message appears if 50 text blocks have already been entered when you hold down and press. | Limit the number of text blocks to 50. |
| BATTERIES WEAK!(PT-9600 only) | This message appears when the installed Ni-MH battery has become weak. | Recharge the battery or use the AC adaptor. |
| BUFFER EMPTY! | This message appears if no text has been typed in when you try to print or use the Numbering function, Repeat Printing function or Layout Preview function. | Type in some text before trying to perform any of these operations. |
| BUFFER FULL! | This message appears if you try to add a character, a space, a new line, a new block, a symbol, an accented character or a barcode after the maximum number of characters has already been entered. | Delete some existing text before trying to add any more. |
| CAN'T FEED AV LABELS! | This message appears if an AV label cassette is installed when you try press  | Install a tape cassette other than an AV label cassette before pressing  |
| CASSETTE CHANGED! | This message appears if the tape cassette was changed while the computer was sending data to the P-touch. | Change the tape cassette before sending the data to the P-touch. |
| CHANGE ADAPTOR! | This message appears if an extremely high-voltage or extremely low-voltage adaptor is being used. | Disconnect the adaptor, and connect the adaptor designed exclusively for this machine. |
| CHARGE BATTERIES!(PT-9600 only) | ● This message appears when the rechargeable Ni-MH battery has reached a low voltage. | ● Recharge the battery or use the AC adaptor. |
| CLOSE CASSETTE COVER! | ● This message appears if the tape compartment cover is open. | ● Close the compartment cover. |
| CUTTER ERROR! | ● This message appears if the cutter did not operate correctly. | ● Turn off the P-touch, and then turn the P-touch on again.● If the problem cannot be corrected, contact your service representative. |
| EEPROM ERROR! | ● This message appears if a checksum error occurred when the P-touch was turned on or if the keyword was damaged and failed to initialize. | ● Contact your service representative. |
| FEED ERROR! | ● This message appears if the AV label sensor cannot detect the labels. | ● Replace the AV label cassette with one that is not empty.● If this error message appears even after a new AV label cassette is installed, the sensor may be damaged. Contact your service representative. |
| INPUT WHOLE CODE! | ● This message appears if the set number of digits is not entered in the barcode data. | ● Input the correct number of digits or change the number of digits set in the barcode parameters. |
| ERROR MESSAGE CAUSE SOLUTION | ||
| INTERFACE ERROR! | ● This message appears if the wrong port is selected for a USB connection. | WindowsUnder “Print to the following port” in the printer Properties dialog box, select “PTUSB:” for the USB connection.For Windows 98 and Me:If two or more of the same P-touch model are connected through their USB ports, instead of “PTUSB:”, select “PTUSB (PT-3600/9600-XXXXXXXXX):”(where XXXXXXXXX is the serial number). The serial number is written above the barcode on the silver label attached to the bottom of the P-touch.For Windows 2000 and XP:The P-touch can be added as a second printer.MacintoshIn the Chooser, select the PT-3600/9600 as the printer. |
| ● This message appears if the wrong port is selected for a serial (RS-232C) connection. | ● Specify correct settings for the BAUDRATE, BIT LENGTH, PARITY and BUSY interface parameters.● Check that the interface cable is correctly connected. | |
| INVALID CHARACTERS! | ● This message appears if a time stamp or user-defined character image is selected when you try to use the Numbering function. | ● Select text or a barcode before trying to use the Numbering function. |
| LENGTH LIMIT! | ● This message appears if you try to print or use the Layout Preview function when the length of the text is greater than the 3'1/3" (1 m) limit. | ● Delete some of the text. |
| ERROR MESSAGE CAU | SE SOLUTION | |
| LINE LIMIT!XX LINES MAXIMUM | This message appears if you try to print or use the Layout Preview function when the number of lines in the text is greater than the maximum possible for the installed tape.This message appears if you try to print or use the Layout Preview function when the number of lines in the text is greater than the maximum possible for the installed tape. (Since the number of lines possible depends on the width of the tape, the message that appears depends on the tape width.) | Reduce the number of lines or install a wider tape. |
| 16 LINES MAXIMUM (on 36 mm tape) | ||
| 13 LINES MAXIMUM (on 24 mm tape) | ||
| 10 LINES MAXIMUM (on 18 mm tape) | ||
| 6 LINES MAXIMUM (on 12 mm tape) | ||
| 4 LINES MAXIMUM (on 9 mm tape) | ||
| 3 LINES MAXIMUM (on 6 mm tape) | ||
| MEMORY FULL! | This message appears if you try to store a text file after the maximum number of characters has already been stored in the memory. | Delete an unwanted file to make space for the new one. |
| MIN 4 DIGITS! | This message appears if less than the minimum four digits are entered as the barcode data. | Enter a minimum of four digits before pressing [ ] . |
| NO FILES! | This message appears if no files are stored in the memory when you try to recall, delete or print one. | Store a text file before trying to recall, delete or print one. |
| NO TAPE! | This message appears if no tape cassette is installed when you try to feed the tape, print or use the Layout Preview function. | Install a tape cassette and try again. |
| REPLACE BATTERIES!(PT-9600 only) | This message appears when the installed Ni-MH battery is about to run out, or when the battery has reached a high voltage. | Replace the battery or use the AC adaptor. |
| ERROR MESSAGE CAUSE SOLUTION | ||
| SET 1/4" TAPE!SET 6mm TAPE! | ● This message appears if a 1/4"(6-mm)-wide tape cassette is not installed when printing an Auto Format template created for 1/4"(6-mm)-wide tape. | ● Install a 1/4"(6-mm)-wide tape cassette. |
| SET 3/8" TAPE!SET 9mm TAPE! | ● This message appears if a 3/8"(9-mm)-wide tape cassette is not installed when printing an Auto Format template created for 3/8"(9-mm)-wide tape. | ● Install a 3/8"(9-mm)-wide tape cassette. |
| SET 1/2" TAPE!SET 12mm TAPE! | ● This message appears if a 1/2"(12-mm)-wide tape cassette is not installed when printing an Auto Format template created for 1/2"(12-mm)-wide tape. | ● Install a 1/2"(12-mm)-wide tape cassette. |
| SET 3/4" TAPE!SET 18mm TAPE! | ● This message appears if a 3/4"(18-mm)-wide tape cassette is not installed when printing an Auto Format template created for 3/4"(18-mm)-wide tape. | ● Install a 3/4"(18-mm)-wide tape cassette. |
| SET 1" TAPE!SET 24mm TAPE! | ● This message appears if a 1"(24-mm)-wide tape cassette is not installed when printing an Auto Format template created for 1"(24-mm)-wide tape. | ● Install a 1"(24-mm)-wide tape cassette. |
| SET 1-1/2" TAPE!SET 36mm TAPE! | ● This message appears if a 1 1/2"(36-mm)-wide tape cassette is not installed when printing an Auto Format template created for 1 1/2"(36-mm)-wide tape. | ● Install a 1 1/2"(36-mm)-wide tape cassette. |
| SET AV1789 TAPE! | ● This message appears if an AV1789 File folder label cassette is not installed when printing an AV1789 File folder template of the Auto Format function. | ● Install an AV1789 File folder label cassette. |
| SET AV1957 TAPE! | ● This message appears if an AV1957 Return address label cassette is not installed when printing an AV1957 Return address template of the Auto Format function. | ● Install an AV1957 Return address label cassette. |
| SET AV2067 TAPE! | ● This message appears if an AV2067 Address label cassette is not installed when printing an AV2067 Address template of the Auto Format function. | ● Install an AV2067 Address label cassette. |
| ERROR MESSAGE CAU | SE SOLUTION | |
| SET STAMP-L! | This message appears if a 1"(24-mm)-wide stamp tape cassette is not installed when printing an Auto format template created for a STAMP L stamp. | Install an 1"(24-mm)-wide stamp tape cassette. |
| SET STAMP-M! | This message appears if a 3/4"(18-mm)-wide stamp tape cassette is not installed when printing an Auto format template created for a STAMP M stamp. | Install an 3/4"(18-mm)-wide stamp tape cassette. |
| TAPE END! | This message appears if the end of the tape in the cassette has been reached. | Replace tape cassette. |
| TEXT TOO HIGH! | This message appears if the size of the text is larger than the width of the installed tape.(PT-9600 only) This message appears if the Lines of Text setting for the ESC/P interface mode exceeds the maximum possible for the installed tape. | Reduce the size of the characters, install a tape with a greater width or select the AUTO text size setting.Specify the correct setting for the installed tape. |
| TEXT TOO LONG! | This message appears if the length of the text is longer than the label length that has been set with the Tape Length function.This message appears if you try to print a label that is longer than the maximum label length.This message appears if you try to print a label that is longer than the maximum label length or is longer than the specified block length.This message appears if the length of the text is longer than the width of the tape when the Text Rotation function is used. | Delete some of the text, reduce the character width, or increase the set label length.Delete some of the text or reduce the character size. |
| ERROR MESSAGE CAUSE SOLUTION | ||
| VALUE OUT OF RANGE!CHECK VALUE AND RE-ENTER. | This message appears if the value entered while setting the Tape Margin, Tape Length, Block Margin and Block Length function is not within the allowable range.This message appears if the specified characters cannot be found in the database.This message appears if the values for the records to be printed is not within the allowable range. | Type in a value that is within the allowable range. |
TROUBLESHOOTING
| Problem Solution | |
| (1) The display stays blank after you have turned on the machine, or abnormal characters are displayed. | Check that the AC adaptor is connected.Check that the rechargeable Ni-MH battery is properly charged. (PT-9600 only)Reset the machine by:- (PT-3600) unplugging the AC adaptor, and leaving it unplugged for about one minute, then and plugging it in again-(PT-9600 only) pressing the reset button in the battery compartment at the bottom of the machineThe text and formats in the display will be erased.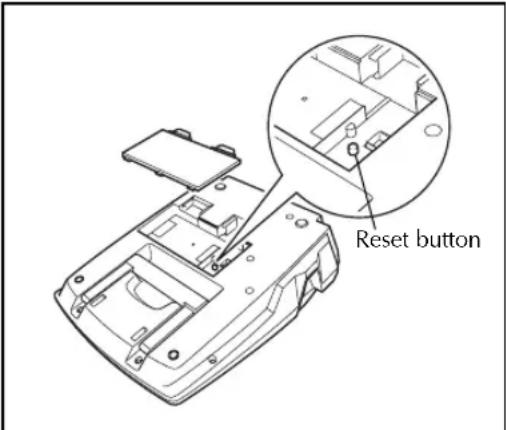 |
| (2) The machine does not print or the printed characters are blurred. | Check that the tape cassette has been inserted properly.If the tape cassette is empty, replace it with a new one.Make sure that the tape compartment cover has been closed.Check that the interface cable is correctly connected. |
| (3) The text is printed on striped tape. | You have reached the end of the tape in the cassette. Replace it with a new one. |
| (4) The P-touch is not working correctly. | Reset the P-touch by turning it off, then while holding down Code and R, turning the machine back on.All settings will be reset to their defaults and the entire contents of the memory will be cleared. If it necessary to keep the current settings and stored files, back them up to the computer using the P-touch Backup Manager.Before installing or removing the tape cassette, be sure that the P-touch has been reset. |
| (5) The machine has “locked up” (i.e., nothing happens when a key is pressed). | Reset the machine by:-(PT-3600) unplugging the AC adaptor, and leaving it unplugged for about one minute, then and plugging it in again-(PT-9600 only) pressing the reset button in the battery compartment at the bottom of the machine.The text and formats in the display and all text files stored in the memory will be erased.Before installing or removing the tape cassette, be sure that the P-touch has been reset. |
| (6) The half cut is either too deep or not deep enough. | Follow the procedure on pages 76 to adjust how deep laminated tape is cut. |
| (7) A blank horizontal line appears through the text in the printed label. | 1Turn off the machine, and then disconnect the AC adaptor and (for the PT-9600 only) remove the rechargeable battery.2Open the tape compartment cover, then remove the tape cassette if one is installed. The print head and rollers are located in the tape compartment.3Print head: Use a dry cotton swab to gently wipe up and down along the print head.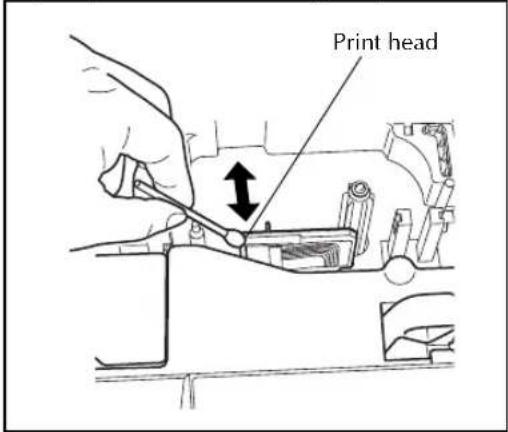 Rollers: Use a dry cotton swab to wipe up and down along each roller while rotating them with your finger. Rollers: Use a dry cotton swab to wipe up and down along each roller while rotating them with your finger.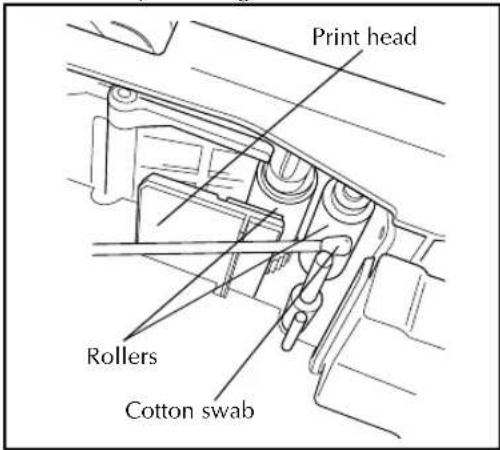 4Install a tape cassette, close the tape compartment cover, and then try printing again.5If a blank streak still appears in the printed label, repeat steps 2 through 4 using a cotton swab dipped in isopropyl (rubbing) alcohol.If none of the above works, contact your service representative.6The print head can be cleaned more easily if the optional print head cleaning cassette (TZ-CL6) is used. 4Install a tape cassette, close the tape compartment cover, and then try printing again.5If a blank streak still appears in the printed label, repeat steps 2 through 4 using a cotton swab dipped in isopropyl (rubbing) alcohol.If none of the above works, contact your service representative.6The print head can be cleaned more easily if the optional print head cleaning cassette (TZ-CL6) is used. |
| (8) The tape is not ejected correctly after being automatically cut. | Turn off the machine, open the tape compartment cover, and remove the tape cassette if one is installed.Using a cotton swab, clean off the metal piece in the exit slot to the left of cutter. |
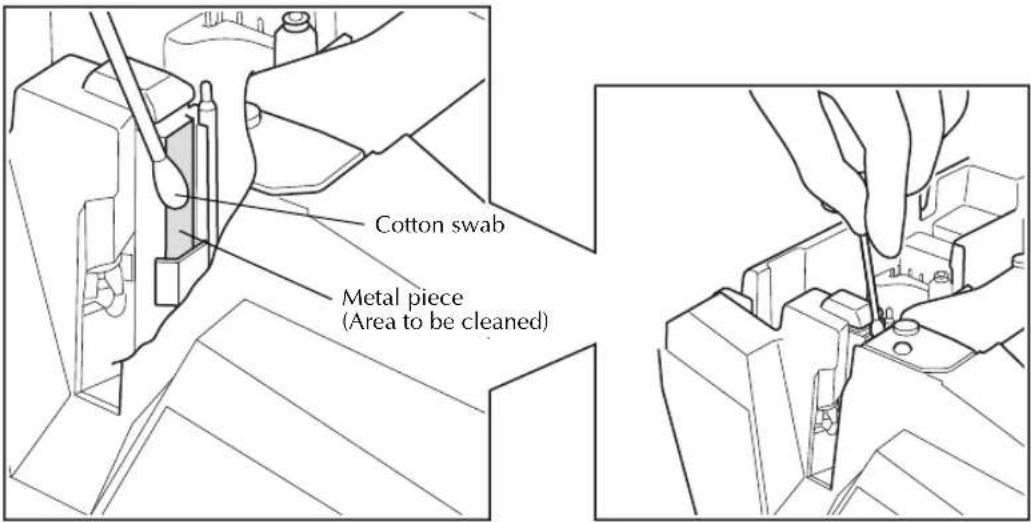 | |
| (9) The cutter does not cut correctly. | Change the HALF CUTTER setting. (Refer to page 76.)The cutter may be dull. Contact your service representative. |
MACHINE SPECIFICATIONS
HARDWARE
Power supply: AC adaptor 24 V, 2.5 A
(PT-9600 only: Rechargeable Ni-MH battery)
Input device: Keyboard (PT-9600: 68 keys; PT-3600: 58 keys)
LCD: 24 × 119 dots
+ Caps, Alt and other indicators
(with screen backlight—PT-9600 only)
Print tape: TZ tape is available in the following six widths:
1/4" (6 mm)
3/8" (9 mm)
1/2" (12 mm)
3/4" (18 mm)
1" (24 mm)
1 1/2" (36 mm)
AV labels are available in the following three types:
AV2067 Address labels: 3/4" × 2 5/8" (20 mm × 67 mm)
AV1957 Return address labels: 3/4" × 2 1/4" (19 mm × 57 mm)
AV1789 File folder labels: 5/8" × 3 1/2" (17 mm × 89 mm)
Print head: 384 dots (height)/360 dpi (resolution)
Tape cutter: Automatic full cut
Automatic half cut
Dimensions: 9 1/3" (W) × 11 15/16" (D) × 4" (H) (237 (W) × 302 (D) × 101 (H) mm)
Weight: 4.41 lbs. (2 kg)
SOFTWARE
Character fonts: 10 built-in fonts (Helsinki, Brussels, US, San Diego, Florida, Brunei Bold, Los Angeles, Bermuda Script, Istanbul and Letter Gothic)
Character sizes: AUTO plus 24 point sizes (4, 5, 6, 7, 8, 9, 10, 11, 12, 14, 16, 18, 20, 22, 24, 28, 32, 36, 40, 48, 56, 64, 72 and 76 points)
Character styles: Normal, Bold, Outline, Solid, Shadow, Invert, Italic, and Vertical
Buffer size: Maximum 4' (1.0-meter) line of text
Maximum 16 lines
Maximum 50 blocks
Memory size: Approximately 10,000 characters
Appendix
Appendix
Symbols p. 42
The following symbols are available.
| Category | Symbols | |||||||||||||
| PUNCTUATION(A01-A18) | ●+ | × | ÷ | ± | = | \ | § | ¶ | ® | © | TM | ¿ | i | |
| 1 | 2 | 3 | 4 | 5 | 6 | 7 | 8 | 9 | 10 | 11 | 12 | 13 | 14 | |
| @ | # | & | - | |||||||||||
| 15 16 | 17 18 | |||||||||||||
| BRACKET(B01-B08) | [ | ] | { | } | < | > | « | » | ||||||
| 12 3 | 4 | 5 | 6 | 7 | 8 | |||||||||
| ARROW(C01-C14) | → | ← | ↑ | ↓ | ← | ↑ | ↓ | ↔ | ⇌ | ∅ | ∅ | ∅ | ∅ | |
| 1 | 2 | 3 | 4 | 5 | 6 | 7 | 8 | 9 | 10 | 11 | 12 | 13 | 14 | |
| UNIT(D01-D26) | ° | $ ¥ | ∅ | f | DM | Pts | Kr | in. | mm | cm | km | kg | ||
| 1 | 2 | 3 | 4 | 5 | 6 | 7 | 8 | 9 | 10 | 11 | 12 | 13 | 14 | |
| gm | cc | ∅ | °F | °C | oz. | lb. | ft. | zt | Pf | € | ∅ | |||
| 15 16 | 17 18 19 | 20 21 22 | 23 24 25 | 26 | ||||||||||
| LETTER(E01-E14) | a | o | β | SS | α | β | γ | δ | μ | Ω | ∅ | ∅ | p | p |
| 1 | 2 | 3 | 4 | 5 | 6 | 7 | 8 | 9 | 10 | 11 | 12 | 13 | 14 | |
| NUMBER(F01-F40) | 1/2 | 1/3 1 | /4 1 | 2 | 3 | 4 | 5 | 6 | 7 | 8 | 9 | 10 | 13 | ~ |
| 1 | 2 | 3 | 4 | 5 | 6 | 7 | 8 | 9 | 10 | 11 | 12 | 13 | 14 | |
| ± | - | + | 0 | 1 | 2 | 3 | 4 | 5 | 6 | 7 | 8 | 9 | ± | |
| 15 16 | 17 18 19 | 20 21 22 | 23 24 25 | 26 27 28 | ||||||||||
| - | + | 0 | 1 | 2 | 3 | 4 | 5 | 6 | 7 | 8 | 9 | |||
| 29 30 | 31 32 33 | 34 35 36 | 37 38 39 | 40 | ||||||||||
| PICTOGRAPH(G01-G14) | ★ | ○ | ● | □ | △ | ♠ | ♥ | ♦ | ♣ | × | + | ! | ♪ | ∅ |
| 1 | 2 | 3 | 4 | 5 | 6 | 7 | 8 | 9 | 10 | 11 | 12 | 13 | 14 | |
| ELECTRICAL(H01-H18) | /. | ~ | --- | -| - | ⊥ | ☐ | = | ∅ | ⊥ | ∅ | ∅ | I | ∅ | ∅ |
| 1 | 2 | 3 | 4 | 5 | 6 | 7 | 8 | 9 | 10 | 11 | 12 | 13 | 14 | |
| ∅ | ∅ | ∅ | ∅ | |||||||||||
| 1516 | 1718 | |||||||||||||
| PROHIBITIVE(I01-I29) |  |  |  |  |  |  |  |  |  |  |  |  | [72GS] |  |
| 1 | 2 | 3 | 4 | 5 | 6 | 7 | 8 | 9 | 10 | 11 | 12 | 13 | 14 | |
 |  |  |  |  |  |  |  |  |  |  |  |  |  | |
| 15 | 16 | 17 | 18 | 19 | 20 | 21 | 22 | 23 | 24 | 25 | 26 | 27 | 28 | |
 |  |  | | | |  | [ZSZ7] |  | | | |  | [5ZS2] | |
| 29 | ||||||||||||||
| CAUTION(J01-J42) |  |  |  |  |  |  |  |  |  |  |  |  |  |  |
| 1 | 2 | 3 | 4 | 5 | 6 | 7 | 8 | 9 | 10 | 11 | 12 | 13 | 14 | |
 |  |  |  |  |  |  |  |  |  |  |  |  |  | |
| 15 | 16 | 17 | 18 | 19 | 20 | 21 | 22 | 23 | 24 | 25 | 26 | 27 | 28 | |
 |  |  |  |  |  |  |  |  |  |  |  |  |  | |
| 29 | 30 | 31 | 32 | 33 | 34 | 35 | 36 | 37 | 38 | 39 | 40 | 41 | 42 | |
| SAFETY1(K01-K19) |  |  |  |  |  |  |  |  |  |  |  |  |  |  |
| 1 | 2 | 3 | 4 | 5 | 6 | 7 | 8 | 9 | 10 | 11 | 12 | 13 | 14 | |
 |  |  |  |  | ||||||||||
| 1516 | 171819 | |||||||||||||
| FIRE(L01-L08) |  |  |  |  |  |  |  |  | ||||||
| 12.3 | 4 | 5 | 6 | 7 | 8 | |||||||||
| TRANSPORT(M01-M13) |  |  |  |  |  |  |  |  |  |  |  |  |  | |
| 1 | 2 | 3 | 4 | 5 | 6 | 7 | 8 | 9 | 10 | 11 | 12 | 13 | ||
| EMERGENCY(N01-N06) |  |  |  |  |  |  | ||||||||
| 12.3 | 4 | 5 | 6 | |||||||||||
| SAFETY2(O01-O43) |  |  |  |  |  |  |  |  |  | [YS82] |  |  |  |  |
| 1 | 2 | 3 | 4 | 5 | 6 | 7 | 8 | 9 | 10 | 11 | 12 | 13 | 14 | |
 |  |  |  |  |  |  |  |  |  |  |  |  |  | |
| 15 | 16 | 17 | 18 | 19 | 20 | 21 | 22 | 23 | 24 | 25 | 26 | 27 | 28 | |
 |  | [BYDD] |  |  |  |  |  |  |  |  |  |  |  | |
| 29 | 30 | 31 | 32 | 33 | 34 | 35 | 36 | 37 | 38 | 39 | 40 | 41 | 42 | |
 |  |  | | | | | |  |  | |  |  |  | |
| 43 | ||||||||||||||
Appendix
| Category | Symbols | |||||||||||||
| OTHER SIGNS(P01-P11) |  |  |  |  | [KSY5] |  |  |  |  |  |  | |||
| 1 | 2 | 3 | 4 | 5 | 6 | 7 | 8 | 9 | 10 | 11 | ||||
| VIDEO(Q01-Q09) |  |  |  |  |  |  |  |  |  | |||||
| 12 3 | 4 | 5 | 6 | 7 | 8 | 9 | ||||||||
| OFFICE(R01-R44) |  |  |  |  |  |  | [BC3C] |  |  |  |  |  |  | [WDS2] |
| 1 | 2 | 3 | 4 | 5 | 6 | 7 | 8 | 9 | 10 | 11 | 12 | 13 | 14 | |
 |  |  |  |  |  |  |  |  |  | [SW8C] |  |  | [T4XS] | |
| 15 | 16 | 17 | 18 | 19 | 20 | 21 | 22 | 23 | 24 | 25 | 26 | 27 | 28 | |
 |  |  |  |  |  |  |  |  |  |  |  |  |  | |
| 29 | 30 | 31 | 32 | 33 | 34 | 35 | 36 | 37 | 38 | 39 | 40 | 41 | 42 | |
 |  |  | |  | | | | |  | | | |  | |
| 4344 | ||||||||||||||
| GENERAL(S01-S27) | [DSYD] |  | [SXXS] |  |  |  |  |  |  |  |  |  |  |  |
| 1 | 2 | 3 | 4 | 5 | 6 | 7 | 8 | 9 | 10 | 11 | 12 | 13 | 14 | |
 |  |  |  |  |  |  |  |  |  |  |  |  | ||
| 1516 | 171819 20 | 21 22 23 | 24252627 | |||||||||||
| GARDENING(T01-T14) |  |  | [Z7Z2] |  |  |  |  |  |  |  |  |  |  |  |
| 1 | 2 | 3 | 4 | 5 | 6 | 7 | 8 | 9 | 10 | 11 | 12 | 13 | 14 | |
| VEHICLES(U01-U13) |  |  |  |  |  |  |  |  |  |  |  |  |  | |
| 1 | 2 | 3 | 4 | 5 | 6 | 7 | 8 | 9 | 10 | 11 | 12 | 13 | ||
| OCCASIONS(V01-V18) |  |  |  |  |  |  |  |  |  |  |  |  |  |  |
| 1 | 2 | 3 | 4 | 5 | 6 | 7 | 8 | 9 | 10 | 11 | 12 | 13 | 14 | |
 |  |  | [7BWY] | |||||||||||
| 1516 | 718 | |||||||||||||
Special barcode characters ➔ p. 43
The following special characters can only be added to barcodes created using protocols CODE39 or CODABAR.
| Value Character | |
| 1 | + |
| 2 | $ |
The following special characters can only be added to barcodes created using protocols EAN128 and CODE128.
| Value | Character | Value | Character | Value | Character |
| 3 # 69 ENQ 87 ETB | |||||
| 4 $ 70 ACK 88 CAN | |||||
| 11 + 71 BEL 89 EM | |||||
| 28 < 72 BS 90 SUB | |||||
| 29 = 73 HT 91 ESC | |||||
| 30 > 74 LF 91 { | |||||
| 32 | @ | 75 | VT | 92 | FS |
| 59 [ | 76 FF 92 | ||||
| 60 | \ | 77 | CR | 93 | GS |
| 61 | ] 78 SO 93 } | ||||
| 62 ^ 79 | SI | 94 RS | |||
| 63 _ | 80 | DLE | 94 | ~ | |
| 64 NUL 81 | DC1 95 US | ||||
| 64 | ` | 82 DC2 95 | DEL | ||
| 65 SOH 83 | DC3 96 | FNC3 | |||
| 66 STX 84 | DC4 97 | FNC2 | |||
| 67 ETX | 85 NAK | 100 | FNC4 | ||
| 68 EOT 86 | SYN | 102 | FNC1 |
Fonts → p. 48
The following fonts are available.
| HELSINKI | BRUNEI BOLD |
| BRUSSELS | LOS ANGELES |
| US | BERMUDA SCRIPT |
| SAN DIEGO | ISTANBUL |
| FLORIDA | LETTER GOTHIC |
Letter Gothic (L. GOTHIC) is a fixed pitch font (all characters use a fixed amount of space), as opposed to all of the other fonts, which are proportional (characters use different amounts of space).
Appendix
Sizes and widths p. 48 & 50
Samples of some available text sizes and widths are shown below.
| Width Size | WIDE NORMAL NARROW | NARROWEST | ||
| 76 points | ABC | ABC | ABC | ABC |
| 72 points | ABC | ABC | ABC | ABC |
| 64 points | ABC | ABC | ABC | ABC |
| 56 points | ABC | ABC | ABC | ABC |
| 48 points | ABC | ABC | ABC | ABC |
| 40 points | ABC | ABC | ABC | ABC |
| 36 points | ABC | ABC | ABC | ABC |
| 32 points | ABC | ABC | ABC | ABC |
| 28 points | ABC | ABC | ABC | ABC |
| 24 points | ABC | ABC | ABC | ABC |
| 22 points | ABC | ABC | ABC | ABC |
| 20 points | ABC | ABC | ABC | ABC |
| 18 points | ABC | ABC | ABC | ABC |
| 16 points | ABC | ABC | ABC | ABC |
| 14 points | ABC | ABC | ABC | ABC |
| 12 points | ABC | ABC | ABC | ABC |
| 11 points | ABC | ABC | ABC | ABC |
| 10 points | ABC | ABC | ABC | ABC |
| 9 points | ABC | ABC | ABC | ABC |
| 8 points | ABC | ABC | ABC | ABC |
| Size\Width | WIDE NORMAL NARROW | NARROWEST | ||
| 7 points | ABC | ABC | ABC | ABC |
| 6 points | ABC | ABC | ABC | ABC |
| 5 points | ABC | ABC | ABC | ABC |
| 4 points | ABC | ABC | ABC | ABC |
If the 4 point or 5 point text size setting is selected, the text will be printed with the BRUSSELS font setting, regardless of the font setting that is selected.
Characters printed using the smaller sizes may be difficult to read if certain style settings are selected.
Small characters may appear faint when they are printed.
Appendix
Type styles p. 50 & 51
| Style1 Setting | NORMAL | BOLD | OUTLINE | SOLID | SHADOW | INVERT |
| Style2 Setting | NORMAL | NORMAL | NORMAL | NORMAL | NORMAL | |
| Helsinki | ABC | ABC | ABC | ABC | ABC | ABC |
| Brussels | ABC | ABC | ABC | ABC | ABC | ABC |
| US | ABC | ABC | ABC | ABC | ABC | ABC |
| San Diego | ABC | ABC | ABC | ABC | ABC | ABC |
| Florida | ABC | ABC | ABC | ABC | ABC | ABC |
| Brunei Bold | ABC | ABC | ABC | ABC | ABC | ABC |
| Los Angeles | ABC | ABC | ABC | ABC | ABC | ABC |
| Bermuda Script | ABC | ABC | ABC | ABC | ABC | ABC |
| Istanbul | ABC | ABC | ABC | ABC | ABC | ABC |
| Letter Gothic | ABC | ABC | ABC | ABC | ABC | ABC |
| Style1 Setting | NORMAL | BOLD | OUTLINE | SOLID | SHADOW | INVERT |
| Style2 Setting | ITALIC ITALIC ITALIC ITALIC ITALIC ITALIC | |||||
| Helsinki | ABC | ABC | ABC | ABC | ABC | ABC |
| Brussels | ABC | ABC | ABC | ABC | ABC | ABC |
| US | ABC | ABC | ABC | ABC | ABC | ABC |
| San Diego | ABC | ABC | ABC | ABC | ABC | ABC |
| Florida | ABC | ABC | ABC | ABC | ABC | ABC |
| Brunei Bold | ABC | ABC | ABC | ABC | ABC | ABC |
| Los Angeles | ABC | ABC | ABC | ABC | ABC | ABC |
| Bermuda Script | ABC | ABC | ABC | ABC | ABC | ABC |
| Istanbul | ABC | ABC | ABC | ABC | ABC | ABC |
| Letter Gothic | ABC | ABC | ABC | ABC | ABC | ABC |
The VERTICAL style setting can be combined with all Style1 text styles (NORMAL, BOLD, OUTLINE, SOLID, SHADOW and INVERT).
The VERTICAL style setting cannot be combined with the ITALIC style setting.
Appendix
Framing and shading patterns p. 53
The following frame and shading patterns are available.
| Setting | Sample | Setting | Sample | Setting | Sample |
| 1 |  | 1 |  | 1 |  |
| 2 |  | 1 |  | 2 | 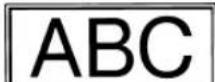 |
| 3 | 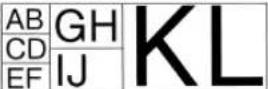 | 1 |  | 3 | 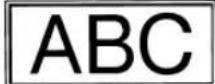 |
| 4 | 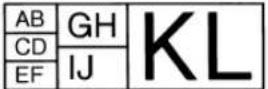 | 1 |  | 4 |  |
| 5 | 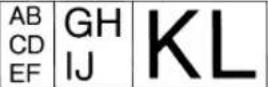 | 1 |  | 5 |  |
| 6 | 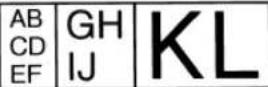 | 1 |  | 6 |  |
| 7 |  | 1 |  | 7 |  |
| 8 |  | 1 |  | 8 |  |
| 9 |  | 1 |  | 9 |  |
| 10 20 3 |  |  |  |
Pre-set templates p. 59
Samples of the available TZ tape templates are shown below.
| No. | Template Name | Tape Width | Label Length | Sample |
| 1 ADDRESS-1 | 1"(24 mm) | 3.2"(80 mm) | ABC Import/Export29 Main StreetMonterey, CA 12345Tel.: 012.345.6789 | |
| 2 ADDRESS-2 | 1"(24 mm) | 3.1"(78 mm) | 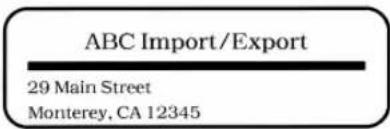 | |
| 3 ADDRESS-3 | 1"(24 mm) | 4.1"(104 mm) | 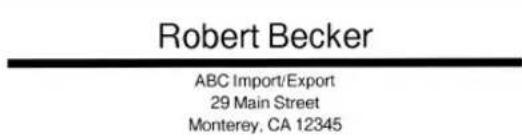 | |
| 4 ADDRESS-4 | 1 1/2"(36 mm) | 3.4"(86 mm) | 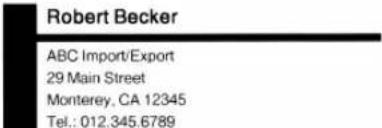 | |
| 5 ASSET | 1"(24 mm) | 3.3"(84 mm) | ABC Import/ExportDivision II012502054009 | |
| 6 WALLPLATE | 1 1/2"(36 mm) | 7.3"(186 mm) |  | |
| 7 NAMEBADGE-1 | 1"(18 mm) | 4.0"(102 mm) | Robert BeckerABC Import/Export | |
| 8 NAMEBADGE-2 | 1 1/2"(36 mm) | 3.9"(98 mm) | 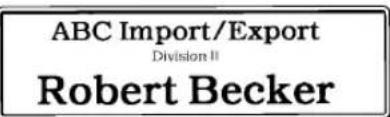 | |
| 9 NAMEBADGE-3 | 3/4"(18 mm) | 4.0"(102 mm) | Robert BeckerABC Import/Export | |
| 10 SALE | 1 1/2"(36 mm) | AUTO |  | |
Appendix
| No. | Template Name | Tape Width | Label Length | Sample |
| 11 PRICE-1 | 1"(24 mm) | 2.2"(57 mm) | CAMERA | |
| 12 PRICE-2 | 1"(24 mm) | 4.3"(110 mm) | CAMERA SALE$149   | |
| 13 SIGN | 1 1/2"(36 mm) | 4.5"(114 mm) |   | |
| 14 FLOPPY-1 | 1"(24 mm) | 2.8"(70 mm) |    | |
| 15 FLOPPY-2 | 1"(24 mm) | 2.8"(70 mm) |    | |
| 16 FLOPPY-3 | 1 1/2"(36 mm) | 2.8"(70 mm) |    | |
| 17 VCR VHS-1 | 3/4"(18 mm) | 5.5"(140 mm) |       | |
| 18 VCR VHS-2 | 3/4"(18 mm) | 5.5"(140 mm) |   [CX6S][H4AX][TYX] [CX6S][H4AX][TYX] | |
| 19 VCR 8mm-1 | 3/8"(9 mm) | 2.9"(73 mm) | [46KH]  [STOZ][XCGCK] [STOZ][XCGCK] | |
| 20 VCR 8mm-2 | 1/2"(12 mm) | 3.6"(92 mm) |   Concert Concert | |
| 21 VCR VHSC | 3/4"(18 mm) | 3.2"(81 mm) |   [C25S] [SHAW][43XX][2DYX] [C25S] [SHAW][43XX][2DYX] | |
| 22 AUDIO-1 | 3/8"(9 mm) | 3.5"(89 mm) |   | |
| 23 AUDIO-2 | 3/8"(9 mm) | 3.5"(89 mm) |    | |
| 24 AUDIO-3 | 3/8"(9 mm) | 3.5"(89 mm) |   | |
| 25 SLIDE | 1/2"(12 mm) | 1.7"(42 mm) |  | |
| 26 FILE-1 | 1 1/2"(36 mm) | 7.9"(200 mm) |  | |
| 27 FILE-2 | 1"(24 mm) | 7.5"(190 mm) |  | |
| 28 STAMP NORMAL-L | STAMP L1"(24 mm) | 4 1/2"(115 mm) |  | |
| 29 STAMP NORMAL-M | STAMP M3/4"(18 mm) | 4 1/8"(105 mm) |  | |
| 30 STAMP 2LINE-L | STAMP L1"(24 mm) | 4 1/2"(115 mm) |  | |
| 31 STAMP VERTICAL-M | STAMP M3/4"(18 mm) | 4 1/8"(105 mm) |  | |
Appendix
Samples of the available AV label templates are shown below.
| No. | Template Name | Label Type Sample | |
| 1 2067 | ADDRESS-1 | AV20673/4" × 2 5/8"(20 mm × 67 mm) | Mr. R. Becker29 South Main St.Los Angeles, CA 88888 |
| 2 2067 | ADDRESS-2 | AV20673/4" × 2 5/8"(20 mm × 67 mm) | Mr. R. Becker29 South Main St.Los Angeles, CA 88888 |
| 3 2067 | ADDRESS-3 | AV20673/4" × 2 5/8"(20 mm × 67 mm) | Mr. R. Becker29 South Main St.Los Angeles, CA 88888 |
| 4 2067 | ADDRESS-4 | AV20673/4" × 2 5/8"(20 mm × 67 mm) | Mr. R. Becker29 South Main St.Los Angeles, CA 88888 |
| 5 2067 | ADDRESS-5 | AV20673/4" × 2 5/8"(20 mm × 67 mm) | Mr. R. BeckerABC Import/Export29 Main St.Los Angeles, CA 88888 |
| 6 2067 | ADDRESS-6 | AV20673/4" × 2 5/8"(20 mm × 67 mm) | Mr. R. BeckerABC Import/Export29 Main St.Los Angeles, CA 88888 |
| 7 2067 | ADDRESS-7 | AV20673/4" × 2 5/8"(20 mm × 67 mm) | Mr. R. BeckerOverseas Sales Div.ABC Import/Export29 Main St.Los Angeles, CA 88888 |
| 8 1957 | RETURN-1 | AV19573/4" × 2 1/4"(19 mm × 57 mm) | R. Becker29 South Main St.Los Angeles, CA 88888 |
| 9 1957 | RETURN-2 | AV19573/4" × 2 1/4"(19 mm × 57 mm) | R. Becker29 South Main St.Los Angeles, CA 88888 |
| 10 1957 RETURN-3 | AV1957 3/4" × 2 1/4"(19 mm × 57 mm) | R. BeckerABC Import/Export29 Main St.Los Angeles, CA 88888 | |
| 11 1957 RETURN-4 | AV1957 3/4" × 2 1/4"(19 mm × 57 mm) | R. BeckerABC Import/Export29 Main St.Los Angeles, CA 88888 | |
| 12 1789 FILING-1 | AV1789 5/8" × 3 1/2"(17 mm × 89 mm) | Sales Report | |
| 13 1789 FILING-2 | AV1789 5/8" × 3 1/2"(17 mm × 89 mm) | August Sales Report | |
| 14 1789 FILING-3 | AV1789 5/8" × 3 1/2"(17 mm × 89 mm) | August Sales ReportOverseas Sales Div. | |
| 15 1789 FILING-4 | AV1789 5/8" × 3 1/2"(17 mm × 89 mm) | August Sales ReportOverseas Sales Div. | |
Appendix
Template text styles → p. 59
Samples of the available template text styles are shown below.
| CHAR. style | Sample Font Style | ||
| ORIGINAL | Bill ReynoldsABC INTERNATIONAL INC. | Template default | |
| ITALIC | Bill ReynoldsABC INTERNATIONAL INC. | Template default | ITALIC |
| DYNAMIC | Bill ReynoldsABC INTERNATIONAL INC. | ISTANBUL SOLID | |
| CUTE | Bill ReynoldsABC INTERNATIONAL INC. | FLORIDA OUTLINE | |
| FORMAL | Bill ReynoldsABC INTERNATIONAL INC. | BRUSSELS ITALIC | |
| ELEGANT | Bill ReynoldsABC INTERNATIONAL INC. | US NORMAL | |
| NATURAL | Bill ReynoldsABC INTERNATIONAL INC. | SAN DIEGO NORMAL | |
INDEX
A
AC adaptor 7
AC adaptor connector 2
Accent function 42
Accented characters 42
Accessories 110
Adaptor 7
Aligning text 53
Alt indicator 41
Alt key 41
Alt mode 41
Appendix 89
Arrow keys 38
Attaching labels 33
Auto Cut function 62
Auto Format function 59
B
Backing removal 33
Backspace key 45
Barcode function 43
Barcode key 43
Barcode parameters 43
Barcode special characters 93
Basic functions 37
Battery compartment (PT-9600) 2
Blank space 40
Block Format functions 47
Block Length function 57
Block Margin function 57
Blocks 41
C
Cancel key 39
Capital letters 40
Caps indicator 40
Caps key 40
Caps mode 40
Center alignment 53
Changing
Block format 47
Block length 57
Block margins 57
Character size 48, 49
Character style 51
Character width 50
Font 48
Framing 53
Global format 46
Label length 56
Line effect 52
Line format 47
Margins 55
Text alignment 54
Text in template 61
Text rotation 55
Character size 48
Character styles 50, 51
CHECK DIGIT parameter 43
Cleaning
Print head 86
Rollers 86
Clear function 45
Clear key 45
Clearing display 45
CODABAR special characters 93
Code key 39
CODE128 special characters 93
CODE39 special characters 93
Computer, connecting to 8
Connecting
AC adaptor 7
To computer 8
Copies 63
Cover release button 2
Creating
New block 41
New line 41
Stamps 59
Cursor 38
Custom stamps 34
Customized stamps 59
Cutting tape 62, 63
D
Default settings
Auto Cut 63
Auto Format 60
Block Length 58
Block Margin 57
Font 48
Frame 53
Line Effects 52
Mirror Printing 58
Numbering 65
Repeat Printing 64
Size 49
Stamp 59
Style 2 52
Style1 51
Tape Length 57
Tape Margin 56
Text Alignment 54
Text Rotation 55
Width 50
Delete key 45
Deleting
File from memory 68
Text 45
Text and formats 45
Text lines 45
Description of machine 2
Display clearing 45
Displaying text 38
Drying garments with labels 33
E
EAN128 special characters 93
Editing
Text 45
Emphasizing 53
Ending line of text 41
Entering
Accented characters 41, 42
Barcodes 43
Blank space 40
Capital letters 40
Special characters 41
Symbols or pictures 42
Text 40
Uppercase letters 40
Erasing
File from memory 68
Text 45
Text and formats 45
Text lines 45
Error messages 77
F
Fabric tape 34
Feed&Cut key 63
Font function 48
Format functions
Block 47
Global 46
Format templates 59
Formatting
Entire text 46
Text 46
Text automatically 59
Text blocks 47
Frame function 53
Framing 53
Functions
Accent 42
Auto Cut 62
Auto Format 59
Barcode 43
Block Format 47
Block Length 57
Block Margin 57
Clear 45
Font 48
Frame 53
Global Format 46
Layout Preview 62
Line Effects 52
Line Out 45
Mirror Printing 58
New Block 41
Numbering 64
Repeat Printing 63
Size 48
Stamp 59
Style 1 50
Style 2 51
Symbol 42
Tape Length 56
Tape Margin 55
Text Alignment 53
Text Rotation 54
Width 50
G
Global Format functions 46
Grip 2
H
Handle 2
Hardware specifications 88
Highlighting 53
1
Incremental printing 64
Indicators
Alt 41
Auto Cut 62
Caps 40
Font 48
Frame 53
Ins 40
Line Effects 52
Size 48
Style 50, 51
Tape Length 56
Tape Margin 55
Text Alignment 54
Text Rotation 55
Width 50
Ink stamps 34
Ins indicator 40
Insert key 40
Insert mode 40
Inserting text 40
Installing
P-touch Editor 10
Tape cassette 7
Ironing garments with labels 34
Iron-on transfer tape 33
Italic text style 51
j
Justify text 53
K
Keyboard 2, 4
L
Label, attaching 33
Laminated tape 33
Layout Preview function 62
LCD display 2, 3
Left alignment 53
Line Effects function 52
Line Out function 45
Lines of text 41
Lowercase letters 40
M
Macintosh operating systems 18
Maximum
Memory 65
Number of blocks 42
Number of characters in memory 65
Number of lines 41
Text size 49
Memory functions 65
Mirror Printing function 58
Modes
Alt 41
Caps 40
Insert 40
Multiple copies 63
N
New Block function 41
New line 41
Numbering function 64
O
Operating systems 9
Overwriting stored files 67
P
PARAMETER menu 44
PC operating systems 9
PC, connecting to 8
Picture, add to text 42
Pictures 90
Power key 7
Precautions 6
Previewing 62
Print head cleaning 86
Print key 63
Printing 63
Auto format template file from memory 70
Multiple copies 63
Text file from memory 69
Problems & solutions 84
PROTOCOL parameter 43
P-touch Editor 10
Starting 25
P-touch Quick Editor 12
Starting 27
Punctuation marks 41, 90
Q
Quitting functions 39
R
Recalling text file 67
Release button 2
Removing
Text 45
Text and formats 45
Text lines 45
Repeat Printing function 63
Replacing tape cassette 7
Return key 39, 41
Right alignment 53
Roller cleaning 86
Rotating text 54
RS-232C port (PT-9600) 2
s
Saving text file 65
Shift key 40
Signs 42, 90
Size function 48
Software
Starting 25, 27
Software (PT-9600)
Specifications 88
Space bar 40
Special characters
Barcode 93
Entering 41
Specifications 88
Stamp function 59
Stamp kits 110
Stamp, assembling 34
Striking out 52
Style1 function 50
Style2 function 51
Supplies 110
Symbol function 42
Symbol key 42
Symbols 42, 90
System configuration 9, 18
T
Tape
Fabric 34
Iron-on transfer 33
Laminated 33
Tape cassette
Installing 7
Replacing 7
Tape compartment cover 2
Tape exit slot 2
Tape Length function 56
Tape Margin function 55
Tapes 110
Template text
Editing 61
Entering 60
Printing 61, 71
Style 60, 71
Text Alignment function 53
Text formats 46
Text Rotation function 54
Transferring
Text to fabric 33
Troubleshooting 84
Turning power on/off 7
Typing text 40
U
UNDER# parameter 43
Underlining 52
Uppercase letters 40
USB port 2, 9
v
Vertical text style 51
W
Washing garments with labels 33
Width function 50
WIDTH parameter 43
ACCESSORIES (For USA Only)
The following supplies and accessories are available for your P-Touch machine and can be ordered directly from Brother should your retailer not stock them.
StockNo. Description Price
Avery Labels for P-Touch:
Ideal for printing Avery paper labels one at a time (black printing on white labels)
| AV1789 File | Folder Labels (5/8" x 3-1/2") - 50 labels/cassette 12.99 | |
| AV1957 Return Address Labels ( 3/4" x 2-1/4") - 70 labels/cassette12.99 | ||
| AV2067 Address Labels (3/4" x 2-5/8") - 65 labels/cassette $12.99 | ||
Industrial Tapes:
Super Adhesive Strength: laminated tapes with twice the adhesive strength ideal for textured surfaces and harsh environments
| TZ-S111 Black on Clear 1/4" (6mm) 15.99 | |
| TZ-S121 Black on Clear 3/8" (9mm)17.99 | |
| TZ-S131 Black on Clear 1/2" (12mm) 18.99 | |
| TZ-S141 Black on Clear 3/4" (18mm)21.99 | |
| TZ-S151 Black on Clear 1" (24mm) 25.99 | |
| TZ-S211 Black on White 1/4" (6mm)15.99 | |
| TZ-S221 Black on White 3/8" (9mm) 17.99 | |
| TZ-S231 Black on White 1/2" (12mm)18.99 | |
| TZ-S241 Black on White 3/4" (18mm) 21.99 | |
| TZ-S251 Black on White 1" (24mm)25.99 |
Laminated Tapes:
| 11/2" (36mm)-wide laminated tapes | |
| TZ-161 Black on Clear 27.99 | |
| TZ-261 Black on White | 27.99 |
| TZ-661 Black on Yellow | $27.99 |
1" (24mm)-wide laminated tapes
| TZ-151 Black on Clear | 22.99 |
| TZ-251 Black on White | 23.99 |
| TZ-252 Red on White | 23.99 |
| TZ-354 Gold on Black | 26.99 |
| TZ-355 White on Black | 26.99 |
| TZ-451 Black on Red | 23.99 |
| TZ-651 Black on Yellow | 23.99 |
| TZ-B51 Black on Fluorescent Orange - 16.4ft. tape length | 28.99 |
3/4" (18mm)-wide laminated tapes
| TZ-141 Black on Clear | 18.99 | |
| TZ-145 White on Clear | 20.99 | |
| TZ-241 Black on White | 20.99 | |
| TZ-242 Red on White | 20.99 | |
| TZ-243 Blue on White | 20.99 | |
| TZ-344 Gold on Black | 23.99 | |
| TZ-345 White on Black | 23.99 | |
| TZ-441 Black on Red | 20.99 | |
| TZ-541 Black on Blue | 20.99 | |
| TZ-545 White on Blue | 23.99 | |
| TZ-641 Black on Yellow | 20.99 | |
| TZ-741 Black on Green | 20.99 | |
| TZ-B41 | Black on Fluorescent Orange - 16.4ft. tape length | 24.99 |
| TZ-M41 | Black on Clear Matte Finish | 20.99 |
| TZ-WB41 | Black on Bugs Bunny Pattern | 23.99 |
| TZ-WS41 | Black on Sylvester & Tweety Pattern | 23.99 |
| TZ-WT41 | Black on Tazmanian Devil Pattern | 23.99 |
| Laminated Tapes (cont.) | ||
| StockNo. Description Price | ||
| 1/2" (12mm)-wide laminated tapes | ||
| TZ-131 Black on Clear16.99 | ||
| TZ-231 Black on White 17.99 | ||
| TZ-232 Red on White17.99 | ||
| TZ-334 Gold on Black 20.99 | ||
| TZ-335 White on Black20.99 | ||
| TZ-631 Black on Yellow 17.99 | ||
| 3/8" (9mm)-wide laminated tapes | ||
| TZ-121 Black on Clear14.99 | ||
| TZ-221 Black on White 16.99 | ||
| TZ-325 White on Black18.99 | ||
| TZ-421 Black on Red 16.99 | ||
| 1/4" (6mm)-wide laminated tapes | ||
| TZ-111 Black on Clear12.99 | ||
| TZ-211 Black on White 14.99 | ||
| TZ-315 White on Black17.99 | ||
| Specialty Tapes | ||
| TZ-FA3 1/2" (12mm) Navy Blue on White Fabric Iron-on Tape-9.8ft. tape length 24.99 | ||
| TZ-SE4 3/4" (18mm) Black on White Security (tamper-evident)Tape - leaves a checkerboard pattern when removed | 29.99 | |
*all tapes are 26.2' long unless otherwise noted
| StockNo. | Description Price | |
| Options | ||
| BA9000 Rechargeable Battery (PT-9600 only) * | ||
| CC9000 | Carrying Case | * |
| TZ-CL6 Print head cleaning cassette- approx. 100 uses | $27.99 | |
*call for pricing
There are 4 easy ways to order directly from Brother.
- Call us Toll Free at 1-888-879-3232 and use a major credit card.
- Visit us on line at www.brothermall.com and use a major credit card.
- Complete the order form (on the reverse side) and fax it to us at 1-800-947-1445
- Complete the order form (on the reverse side) and mail it to us as directed.
If you haven't already returned your machine warranty card, take a few minutes to register at www.registermybrother.com
Service Center Locations
If you need a local service center, please call 1-800-284-HELP (4357)
to locate the authorized service center closest to you.
Note: Be sure to call the Service Center before your visit.
Service centers do not provide operational assistance. See "Operational Assistance".
Operational Assistance
For technical and operational assistance you may call Brother Customer Service at:
Voice 1-877-4-PTouch, or Fax 1-901-379-1210
Assistance on the Internet
For product information and downloading the latest drivers: http://www.brother.com
For purchasing accessories and certain Brother products: http://www.brothermall.com
Accessories and Supplies
To order Brother accessories or supplies by Visa, MasterCard, Discover or American Express, you may call toll tree 1-888-879-3232, or complete the order form in your user's guide and fax both sides of the form to 1-800-947-1445.
For purchasing accessories on the Internet: http://www.brothermall.com
To order by mail or pay by check, please complete the accessory order form and mail it along with payment to:
Brother International Corporation
Attn: Consumer Accessory Division
P.O. Box 341332
Bartlett, TN 38133-1332
Fax-Back System
Brother Customer Service has installed an easy-to-use Fax-Back System so you can get instant answers to common technical questions and product information for all Brother products.
This system is available 24 hours a day, 7 days a week. You can use the system to send the information to any fax machine, not just the one you are calling from.
Please call 1-800-521-2846 and follow the voice prompts to receive faxed instructions on how to use the system and an index of Fax-Back subjects.
P-TOUCH ACCESSORY ORDER FORM (For USA Only)
Dear Customer:
This order form is provided for your convenience should your retailer not stock the item(s) needed. To order by mail, send this completed form along with proper payment to the address below OR credit card holders: call toll-free 1-888-879-3232, fax completed order form to 1-800-947-1445, or visit our web site at http://www.brothermall.com. Please refer to the Accessories listing in your User's Guide for stock no. and price.
| Stock # Description Quantity Price | |||
To complete the Order Form:
- Review the reverse side of this form and select the desired items.
- Complete the form above, indicating the quantity of each item.
- Total the columns and enter the total on the "Supply/Accessory Subtotal" line.
- Add the appropriate Sales Tax and Shipping/Handling Charge.
- Clearly print your name and address in the space below.
- Place your order
a. Call toll free anytime 1-888-879-3232
b. Order on line at www.brothermall.com
c. Fax completed form to 1-800-947-1445
d. Mail completed form along with proper payment to
BROTHER INTERNATIONAL CORP.
Attn: Consumer Accessory Div.
P.O.Box 341332
Bartlett, TN 38184-1332
Supply / Accessory Subtotal: \$
AZ, CA, CO, CT, FL, GA, IL, LA,
MA, MD, MI, MN, MO, NC, NJ,
NV, NY, OH, PA, TN, TX, VA, WA
residents add applicable sales tax: \$ ____
Shipping and Handling Options \$
Please choose one:
- Standard Freight:
•Continental U.S. (\$5.75)
Alaska and Hawaii (\$8.75)
GU, PR, VI (\$15.75)
• 2nd Day Air Freight
(Continental U.S. only): \$8.75
• Overnight Delivery
(Continental U.S. only): \$14.75
TOTAL DUE \$
No C.O.D. orders
Method of Payment (check one)
( ) Visa ( ) Master Card ( ) Discover
( ) Check/Money Order ( ) American Express
Account Number
Expiration Date
Signature
Billing Address (if different from shipping address at left)
Name:
Address:
City:
State:
Zip:
Daytime Phone #:
Daytime Fax #:
Email:
Your Model Number:
Prices subject to change without notice. All prices quoted in US Dollars.
Service Center Locations
If you need a local service center, please call 1-800-284-HELP (4357)
to locate the authorized service center closest to you.
Note: Be sure to call the Service Center before your visit.
Service centers do not provide operational assistance. See "Operational Assistance".
Operational Assistance
For technical and operational assistance you may call Brother Customer Service at: Voice 1-877-4-PTouch, or Fax 1-901-379-1210
Assistance on the Internet
For product information and downloading the latest drivers: http://www.brother.com For purchasing accessories and certain Brother products: http://www.brothermall.com
Accessories and Supplies
To order Brother accessories or supplies by Visa, MasterCard, Discover or American Express, you may call toll tree 1-888-879-3232, or complete the order form in your user's guide and fax both sides of the form to 1-800-947-1445.
For purchasing accessories on the Internet: http://www.brothermall.com
To order by mail or pay by check, please complete the accessory order form and mail it along with payment to:
Brother International Corporation
Attn: Consumer Accessory Division
P.O. Box 341332
Bartlett, TN 38133-1332
Fax-Back System
Brother Customer Service has installed an easy-to-use Fax-Back System so you can get instant answers to common technical questions and product information for all Brother products.
This system is available 24 hours a day, 7 days a week. You can use the system to send the information to any fax machine, not just the one you are calling from.
Please call 1-800-521-2846 and follow the voice prompts to receive faxed instructions on how to use the system and an index of Fax-Back subjects.
P-TOUCH ACCESSORY ORDER FORM (For USA Only)
Dear Customer:
This order form is provided for your convenience should your retailer not stock the item(s) needed. To order by mail, send this completed form along with proper payment to the address below OR credit card holders: call toll-free 1-888-879-3232, fax completed order form to 1-800-947-1445, or visit our web site at http://www.brothermall.com. Please refer to the Accessories listing in your User's Guide for stock no. and price.
| Stock # Description Quantity Price | |||
To complete the Order Form:
- Review the reverse side of this form and select the desired items.
- Complete the form above, indicating the quantity of each item.
- Total the columns and enter the total on the "Supply/Accessory Subtotal" line.
- Add the appropriate Sales Tax and Shipping/Handling Charge.
- Clearly print your name and address in the space below.
- Place your order
a. Call toll free anytime 1-888-879-3232
b. Order on line at www.brothermall.com
c. Fax completed form to 1-800-947-1445
d. Mail completed form along with proper payment to
BROTHER INTERNATIONAL CORP.
Attn: Consumer Accessory Div.
P.O.Box 341332
Bartlett, TN 38184-1332
Supply / Accessory Subtotal: \$
AZ, CA, CO, CT, FL, GA, IL, LA, MA, MD, MI, MN, MO, NC, NJ, NV, NY, OH, PA, TN, TX, VA, WA
residents add applicable sales tax: \$
Shipping and Handling Options \$
Please choose one:
- Standard Freight:
•Continental U.S. (\$5.75)
Alaska and Hawaii (\$8.75)
GU, PR, VI (\$15.75)
• 2nd Day Air Freight
(Continental U.S. only): \$8.75
•Overnight Delivery
(Continental U.S. only): \$14.75
TOTAL DUE \$
No C.O.D. orders
Method of Payment (check one)
( ) Visa ( ) Master Card ( ) Discover
( ) Check/Money Order ( ) American Express
Account Number
Expiration Date
Signature
Billing Address (if different from shipping address at left)
Name:
Address:
City:
State:
Zip: ____
Daytime Phone #: ____
Daytime Fax #: ____
Email:
Your Model Number: ____
Prices subject to change without notice. All prices quoted in US Dollars.
GUÍA DE USUARIO
PRÓLOGO
100 Somerset Corporate Boulevard
Bridgewater, NJ 08807-0911 USA
TEL: (908) 704-1700
NOTA
NOTA
Editor: Software P-touch Editor 3.2
NOTA
NOTA
NOTA
4 Seleccione "Replace with new Brother PT-9600/3600." (Sustituir por la nueva Brother PT-9600/3600.) o "Add Brother PT-9600/3600." (Añadir Brother PT-9600/3600.) y haga clic en el botón Next.
NOTA
NOTA
NOTA
NOTA
NOTA
Para iniciar P-touch Quick Editor:
NOTA
Symbol Tecla (Symbol Accent)
Tecla Delete (Line Out Delete)
Función Line out (Code + Delete)
$$ (\boxed {\text {Code}} + \boxed {\text {@ 2}}) $$
$$ (\boxed {\text {Code}} + \boxed {\frac {}{4}}) $$
| _Z → | AA → | ...ZZ → | _A → | ... |
| _9 → | 10 → | ...99 → | _0 → | ... |
| 1_9→ | 2_0 → | ...9_9 → | _0 → | ... |
NOTA
Peso: 4,41 lbs. (2 kg)
SOFTWARE
Fuentes de 10 fuentes integradas (Helsinki, Brussels, US, San Diego, Florida, Brunei Bold, Los Angeles, Bermuda Script, Istanbul y Letter Gothic)
- NOTE
- Federal Communications Commission (FCC) Declaration of Conformity (For USA Only)
- QUICK REFERENCE
- Formatting text
- Using an Auto Format template
- Printing text
- CONTENTS
- Chapter 1
- Before You Start .... 1
- GENERAL DESCRIPTION ......2
- Chapter 2
- Getting Started 5
- PRECAUTIONS 6
- Chapter 3
- Functions 37
- Chapter 4
- Machine Adjustments 73
- ERROR MESSAGE LIST 77
- TROUBLESHOOTING 84
- MACHINE SPECIFICATIONS 88
- Appendix 89
- INDEX 106
- ACCESSORIES (For USA Only) 110
- PT-9600/3600 CONTACT INFORMATION (For USA Only) .... 112
- Brother® 90 Days/One Year Limited Warranty and Replacement Service (For USA Only)
- Who is covered:
- What is covered:
- What is the length of the Warranty Period(s):
- What is NOT covered:
- What Brother will ask you to do:
- What Brother will do:
- What happens when Brother elects to replace your Machine:
- Important Information
- BROTHER INTERNATIONAL CORPORATION
- SOMERSET CORPORATE BLVD.
- BRIDGEWATER, NEW JERSEY 08807-0911
- Before You Start
- GENERAL DESCRIPTION
- Top view
- Bottom view
- LCD display
- Ch. 1 Before You Start
- Keyboard
- Getting Started
- PRECAUTIONS
- Connecting the AC adaptor
- Turning on/off the P-touch
- Installing/replacing a tape cassette
- Ch. 2 Getting Started
- Connecting the P-touch to a computer
- To connect a computer to the P-touch through the USB port:
- Installing the Software & Printer Driver
- On a Computer Running Windows®
- Before installation
- Installing the P-touch Editor 3.2 software
- To install the P-touch Editor 3.2 software
- ●For a Typical or Compact installation
- ●For a Custom installation
- Fonts
- Installing the P-touch Quick Editor software
- To install the P-touch Quick Editor software
- Installing the USB printer driver
- To install the USB printer driver
- With Windows® 98, 98 SE, Me or 2000:
- With Windows ® XP:
- Replacing or adding a USB printer driver
- To replace or add a USB printer driver
- With Windows ® 98, 98 SE, Me or 2000:
- On a Macintosh Computer
- With a Mac OS before OS X:
- ●For a basic installation
- With Mac OS X v10.1 or v10.2:
- ●For a typical installation
- ●For a minimal installation
- Installing the printer driver (Mac OS X v10.1 or v10.2)
- To install the printer driver:
- Selecting the PT-9600/3600 as the printer
- To select the printer:
- Reading the User's Guide
- To view the User's Guide from the CD-ROM:
- To view the User's Guide installed on the hard disk:
- Using P-touch Editor 3.2
- Starting up P-touch Editor 3.2
- To start up P-touch Editor 3.2:
- Displaying the Properties
- To display the Properties:
- Entering text
- Notes on usage
- Barcodes
- Databases
- Using P-touch Quick Editor
- Starting up P-touch Quick Editor
- To start up P-touch Quick Editor:
- Specifying a label size
- To specify the label size:
- To enter text:
- Importing text
- To import text:
- Using the Text History list
- To use text from the Text History list:
- Adding a symbol
- To add a symbol to the text:
- Changing the background color
- To change the background color:
- Viewing the text
- Printing
- To print a label:
- Hiding/displaying P-touch Quick Editor (Windows® only)
- Quitting P-touch Quick Editor
- To quit P-touch Quick Editor:
- Uninstalling the Software & Printer Driver
- Uninstalling the software
- To uninstall the software:
- Uninstalling the printer driver
- To uninstall the printer driver:
- To uninstall the software and printer driver:
- To uninstall the P-touch Editor 3.2 software:
- To uninstall the P-touch Quick Editor software:
- Attaching labels
- Laminated tape
- Iron-on transfer tape
- Washing
- Drying
- Ironing
- Fabric tape
- Assembling stamps
- Attaching the identification label
- Stamping
- Functions
- Performing basic operations
- Arrow keys
- (left arrow key)
- To move the cursor one character to the left:
- To move the cursor several characters to the left:
- To move the cursor to the beginning of the current line of text:
- To move the cursor to the beginning of the current text block:
- (right arrow key)
- To move the cursor one character to the right:
- To move the cursor several characters to the right:
- To move the cursor to the end of the current line of text:
- To move the cursor to the beginning of the next text block:
- Home (up arrow key)
- To move the cursor up to the previous line:
- To move the cursor up several lines:
- To move the cursor to the beginning of the entire text:
- To move the cursor down to the following line:
- To move the cursor down several lines:
- To move the cursor to the end of the entire text:
- Code key (Code)
- To use a function printed in color above or on a key:
- Return key (New Black)
- To select an item from a list or to apply the selected setting:
- Cancel key (Cancel)
- To quit a function without applying any changes that you may have made:
- Insert key (Insert Barcode)
- To enter Insert mode:
- To exit Insert mode:
- Space bar
- To add a blank space to the text:
- Shift key (Shift or Shift Date/Time)
- To type a capital letter or a symbol printed on the top half of certain keys:
- Caps key (Caps)
- To type in many uppercase letters:
- Alt mode ( Alt )
- To add an accented character or a special punctuation mark written in color to the text:
- Return key (New Back)
- To create a new line:
- New Block function (Code + New Block)
- Ch. 3 Functions
- To create a new block:
- Symbol key (Symbol Accent)
- To add a symbol or picture to the text:
- Accent function (Code + Symbol Accent)
- To add an accented character to the text:
- Barcode key (Code + Insert Barcode)
- To enter the barcode data:
- To change the barcode parameter settings:
- To add special characters to barcodes (only with protocols CODE39 or CODE128):
- To add the barcode to the text:
- Editing text
- Backspace key ( Clear BS)
- To remove one character:
- To delete a sequence of characters:
- Delete key ( )
- Line out function (Code + Line Out Delete)
- To delete a line of text:
- Clear function (Code + BS)
- To erase all of the text and formats:
- To erase only the text:
- Formatting
- Global format functions
- To change the Global Format functions:
- Block format functions
- Jazz Concert
- To change the Block Format functions:
- Line format functions
- Robert Becker
- To change the Line Format functions:
- Font function (FONT)
- To change the setting for the Font function:
- Size function (SIZE)
- To change the setting for the Size function:
- Width function (WIDTH)
- To change the setting for the Width function:
- Style1 function (STYLE1)
- To change the setting for the Style1 function:
- Style2 function (STYLE2)
- To change the setting for the Style2 function:
- Line Effects function (LINE EFFECTS)
- Frame function (FRAME)
- To change the setting for the Frame function:
- Text Alignment function (ALIGNMENT)
- To change the setting for the Text Alignment function:
- Text Rotation function (ROTATE)
- To change the setting for the Text Rotation function:
- Tape Margin function (T. MARGIN)
- To change the setting for the Tape Margin function:
- Tape Length function (T. LENGTH)
- To change the setting for the Tape Length function:
- Block Margin function (B. MARGIN)
- To change the setting for the Block Margin function:
- Block Length function (B. LENGTH)
- To change the setting for the Block Length function:
- Mirror Printing function
- To print a mirror image of the text:
- Stamp Stencil function
- To make a stamp:
- Auto Format function
- To select a pre-formatted template:
- TZ Tape
- AV Labels
- To enter text in the template:
- To change the style of the text:
- To print a label using the selected template:
- To change the text entered in the template:
- To finish using the Auto Format function:
- Layout Preview function
- To preview the label:
- Auto Cut function (Code + Feed & Cut)
- To change the setting for the Auto Cut function:
- Print key (Mirror Print)
- Feed & Cut key (A.Cut Feed & Cut)
- To feed out 1" (26 mm) of tape and automatically cut it:
- Repeat Printing function
- To print multiple copies of a label:
- Numbering function (Code + Number % 5)
- To print labels using the Numbering function:
- Storing and recalling files
- Memory functions (Code + Memory 8)
- Storing text and Auto Format templates
- To save a text file:
- For a text file:
- For a TZ tape template file:
- For an AV label template file:
- To overwrite the stored file with the new one:
- Recalling text and Auto Format templates
- To recall a file that has been saved:
- Deleting a file
- To delete a file that has been saved:
- Printing stored text and Auto Format templates
- To print stored text files:
- To print stored Auto Format template files:
- To change the style of the stored Auto Format template:
- To print more stored Auto Format template files:
- Machine Adjustments
- Ch. 4 Machine Adjustments
- Setup functions (Code + A)
- To change the UNITS setting:
- To change the LANGUAGE setting:
- To change the CONTRAST setting:
- To change the TAPE LENGTH ADJUST setting:
- To change the HEAD ADJUSTMENT setting:
- To change the HALF CUTTER setting:
- To change the USB ID SELECTION setting:
- ERROR MESSAGE LIST
- TROUBLESHOOTING
- MACHINE SPECIFICATIONS
- HARDWARE
- SOFTWARE
- Appendix
- Symbols p. 42
- Special barcode characters ➔ p. 43
- Fonts → p. 48
- Sizes and widths p. 48 & 50
- Framing and shading patterns p. 53
- Pre-set templates p. 59
- Template text styles → p. 59
- INDEX
- A
- B
- C
- D
- E
- F
- G
- H
- 1
- j
- K
- L
- M
- N
- O
- P
- Q
- R
- s
- T
- U
- v
- W
- ACCESSORIES (For USA Only)
- There are 4 easy ways to order directly from Brother.
- Service Center Locations
- Operational Assistance
- Assistance on the Internet
- Accessories and Supplies
- Fax-Back System
- P-TOUCH ACCESSORY ORDER FORM (For USA Only)
- Dear Customer:
- To complete the Order Form:
- Supply / Accessory Subtotal: \$
- Shipping and Handling Options \$
- TOTAL DUE \$
- Method of Payment (check one)
- GUÍA DE USUARIO
- PRÓLOGO
- NOTA
- Para iniciar P-touch Quick Editor:
- Symbol Tecla (Symbol Accent)
- Tecla Delete (Line Out Delete)
- Función Line out (Code + Delete)
Brand : BROTHER
Model : P-Touch 9600
Category : Label printer