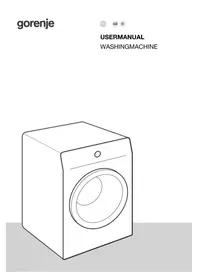
USER MANUAL WA1141 GORENJE
Thank you for your trust and for buying this appliance. We hope it will successfully serve its purpose for many years.
This washing machine was designed for home use.
It meets all the requirements of modern washing: it is economical, it uses less water, less energy and washing agent.
Before Use 19
Tips for Energy Savings
Important.... 20
Removing the Transport Brackets 21
Placing and Installation.... 21
Connection to the Water Supply
Water Outlet
Connection to Power Supply
The Door 23
Direction of Opening the Door
Preparing the Laundry.... 24
Type of Fabrics
Colour Fastness
Degree of Soil
Loading
Washing Agents and How Much to Use..... 25
Dispenser
Fabric Conditioner and Starching Agent
Liquid Washing Agents
Washing 27
Control Light
Programme Selection Knob
Temperature Selection Knob
Spinning Speed Selection Knob
Timer
Spinning-OFF Knob
Pump Stop Pushbutton
Extra Rinsing Switch
Higher Water Level Switch
Lower RPM
Half Programme Switch
Cold Wash Switch
ON/OFF Switch
Prepare Your Machine for Washing
After Washing
Table of Washing Programmes.... 31
Cleaning and Maintenance.... 31
Housing
Drum Interior
Dispenser
Wire Net in the Inlet Hose
Door Gasket
Filter
Trouble-Shooting Guide 33

Before Use
This instruction manual was prepared for the user of the washing machine. Read the manual carefully and get to know your washing machine so that you will know how to use it safely and correctly.
This instruction manual was prepared for various models of washing machine, and they vary in function and design. Make sure to consider only those switches and knobs your machine is equipped with.
- When you find your appliance is out of use and no longer needed, try not to burden the environment with it. Call your nearest authorized "collecting service for used appliances".
Tips for Energy Savings
Through correct use and considering our recommendations, you can make substantial energy savings.
- For economical washing, always refer to the table of programmes with recommended wash loads.
- Skip the pre-wash whenever possible (if laundry is lightly soiled).
- Laundry which was usually washed at 95°C may be washed at 60°C when using either the TAED washing agent (bleaching agent activator) or concentrated washing agents (any of the ...SUPER or ...ULTRA).
- Use an adequate washing agent, and always consider the recommended amount, and pay attention to water hardness and degree of soiling.
- In the course of time (depending on water hardness) lime deposits on the heater and inside the appliance. This increases the consumption of energy for heating water. Occasionally remove the lime deposit with a special agent.

Important
Before putting the machine into use, don't forget to remove the transport brackets. Switching on a blocked machine may damage the machine. Our guarantee does not cover such damage.
- Before switching the machine on, check that the transport brackets have been removed.
- Don't place the appliance in a room where the temperature may fall below 0°C, causing individual parts of the machine to freeze and become damaged (hose may crack).
- The appliance should stand firmly and horizontally on a solid base (a machine standing on an uneven floor is very likely to vibrate during the spinning cycle).
- Always consider the instructions for correct placing and installation of the machine to the mains and water supply. This will help you avoid accidents and protect your machine against damage.
- The appliance is to be connected to the water mains using new hose-sets and that old hose-sets should not be reused.
- The appliance may not be built-in under the kitchen worktop in a row of cabinets, because the use of the appliance without the top cover is not allowed for safety reasons. Likewise, the removal of the rear panel and the bottom of the appliance are also not allowed.
- The appliance should be positioned in such a way to provide normal ventilation.
- The end of the outlet hose should not be immersed in the discharge water (the machine may pump the discharge water back).
- During the washing cycle, the door of the machine cannot be opened. It can only be opened 2 minutes after washing is finished.
- The glass door gets very hot during washing, so take care of children.
- Use only washing powder and other agents specially designed for machine washing.
- We do not take any responsibility for damage caused by the improper use of bleaching or colouring agents (coloured gasket and other plastic parts).
- Lime dissolving agents contain acid, so only use those containing rust-protection agents. Always consider the manufacturer's instructions. When you have finished removing lime deposit, run a few rinse cycles to make sure that the acid is thoroughly rinsed. Even traces of acid can cause substantial damage to component parts.
- Never use washing agents containing solvents - individual component parts may be damaged or
toxic gases may be produced. There is also a risk of ignition or explosion.
- When washing is finished, remember to close the tap.
- Your washing machine can only be transported with transport brackets. It is usually enough to use only one of the rods, that is the upper one. It is much easier to insert the rod if you remove the top cover. Before doing anything, however, don't forget to disconnect the machine from the power supply.
- The data plate with essential information on the appliance is fitted above the opening for laundry insertion under the door frame.
Noise level
The noise level of your new washing machine when spinning can differ very much from the previous one. This is due to the drive of up-to-date motor with electronic controlled universal motor, which enables the following:
- gentle tumbling of laundry with soft drive
- better distribution of laundry in the drum during the spinning cycle
- stability of the machine during the spinning cycle
(UKS) - Unbalance Control System
This washing machine is equipped with the UKS - unbalanced control system. This means that the spinning starts smoothly, even in case of smaller wash loads or inadequate loads.
In case of unfavorable distribution of laundry in the drum, this is sensed by the UKS system and the automatic re-distribution of the laundry follows immediately, then only spinning starts.
In case the re-distribution of the laundry is not successful (only one large piece in the drum), the UKS system reduces the spinning speed (r.p.m.), to prevent damages to the washing machine.

The symbol on the product or on its packaging indicates that this product may not be treated as household waste. Instead it shall be handed over
to the applicable collection point for the recycling of electrical and electronic equipment. By ensuring this product is disposed of correctly, you will help prevent potential negative consequences for the environment and human health, which could otherwise be caused by inappropriate waste handling of this product. For more detailed information about recycling of this product, please contact your local city office, your household waste disposal service or the shop where you purchased the product.
Removing the Transport Brackets
The washing assembly is blocked with two metal rods which protect the machine during transport (fig.1).
- Undo the screws on the rear wall (fig. 2).
- Remove the squares, rotate them 180 degrees and use them to pull out the rods (fig. 3).
- Disengaged parts may remain at the bottom since they do not obstruct the operation of the machine (4 rubber hoses and 4 paper spools).
- Use the enclosed plastic caps to plug the holes (fig. 4).


Save the brackets: you may need them later.
Placing and Installation
If the floor is uneven, use the adjustable feet to level the machine.
- Undo the nuts. Rotate the feet to level the machine (fig. 5). Fix the nuts (fig. 5.1).


Maximum height of the washing machine is 850 mm.
IMPORTANT
The floor on which the machine stands should be dry, otherwise the machine may slide during the spinning cycle.
Connection to the Water Supply
The elbow connection of the inlet hose is fixed to the coupling on the rear wall of the appliance.
Insert a rubber washer with a net (filter) into a nut on the other end of the hose, and fix the hose to a tap. To ensure efficient operation, the water pressure of the water supply should be between 0.5 and 8.0 bars.
If the pressure exceeds the maximum allowed limit, fit a pressure regulator. (Open the tap fully - in 15 seconds, 3 litres of water should pour out; and this is the minimum pressure of the water supply).
Connection to cold water
Insert the enclosed washer with filter into the loose end of the hose and connect the hose to water tap (fig. 6).
Connection to hot/cold water
Washing machines designed for the connection to hot/cold water are equipped with two inlet hoses. The attachment and the inlet hose for hot water are marked with red colour.


Insert the enclosed washers with filter into the loose ends of the hoses and connect the red marked hose to hot water tap and the other hose to cold water tap (fig. 6.1).
IMPORTANT
The highest allowed temperature of hot water is 60°C.
Water Outlet
Hook the outlet hose securely over the edge of the washbasin or bath tub. The outlet hose can also be connected directly to the plumbing outlet, the diameter of which should be not less than 4 cm (fig. 7).
Wall siphon drain must be correctly fitted in such manner to enable cleaning.
If water is drained through a washbasin, always check it is drained quickly enough, otherwise an overflow may occur or the machine may pump the water back. Pull a string through the hole on the plastic knee, and secure the outlet hose to prevent it from falling off (fig. 8).


The end of the outlet hose should be raised from the floor by not more than 100 cm and not less than 60 cm. If the hose is positioned higher than recommended, the machine will not pump out the water.
Connection to Power Supply
Connect the appliance to the power supply with a cable cord. The wall socket should be equipped with an earth contact (safety socket).
Fixed connection should be carried out by an expert.
Rated voltage, frequency and other data are listed on the rating plate of the machine.
Your washing machine should be grounded and connected to the power supply according to local electricity board regulations and standards.
WARNING!
If the supply cord is damaged, it must be replaced by the manufacturer or its service agent or a qualified person in order to avoid hazard.
- The appliance should be placed in a position where the plug is within reach.
The Door
The door can only be opened two minutes after the washing programme has finished.
Open the door by pulling the door handle (fig. 9).
When closing the door, push it towards the machine until it locks (fig. 10).
If the door is not correctly closed, the machine will not operate.

IMPORTANT
- When closing the door, be careful not to trap fabric between the door glass and the rubber gasket.
- If you need to open the door after the machine has been switched on, first switch it off and wait for about two minutes.
When opening the door, be careful, as the water level may be high and water may pour out when you open the door.
- Don't even try to open the door while the machine is operating.
- If the machine won't start after switching on, push the door once again towards the machine (at handle).
- An inadequately closed door is the most common cause of malfunctions.
Direction of Opening the Door
Certain models of appliances allow the possibility of changing the direction of door opening. This is an option that has to be ordered separately and paid for by the customer.
Preparing the Laundry
Sort the laundry before washing according to the type, quality, colour and soil degree of the laundry.
Type of Fabrics
Most clothes nowadays have labels describing the type of fabric they are made of, the kind of recommended wash, and the recommended washing temperature.
These labels will help you choose the most suitable washing programme for your clothes.
Put delicate laundry (stockings, fine underwear...) into a sack or into a pillow case if washed together with other laundry.
| °C | WASHING |
| 95° | White laundry - resistant. |
| 60° 40° 30° | Coloured laundry - resistant. |
| 60° 40° 30° | Fine and delicate laundry . |
| Hand wash. |
| No washing. |
| DRY CLEANING |
| A P F | Dry cleaning. |
| Dry cleaning not allowed. |
| DRYING |
| Drying in tumble drier allowed. |
| higher temperature (resistant laundry) |
| lower temperature (delicate laundry) |
| Drying in tumble drier not allowed. |
| IRONING |
| Ironing: up to 200°C - up to 150°C - up to 110°C |
| No ironing |
Colour Fastness
Pay special attention to colour fastness, and always choose the correct washing temperature. When washing new clothes, always check colour fastness first - wash separately the first time.
Degree of Soil
Stained and heavily soiled laundry should be washed in small loads or with a larger amount of washing powder.
Heavily stained or soiled areas on the fabric can be treated before washing using special agents.
Use the energy-saving programme for lightly soiled laundry (no pre-wash, economic programme, lower washing temperature).
Loading
The maximum load of dry laundry is stated in the table.
Excessive loads cause creases and decrease the washing effect.
Always check the pockets before loading the laundry. Remove keys, coins, hair-pins and similar objects that may clog the water outlet hose.
Zip the zippers and remove metal pins that may damage the laundry or even the drum (fig. 11).

Folded clothes should be loosened before loading.
The best washing effect is obtained by mixing larger and smaller items of laundry in one load.
Washing Agents and How Much to Use
Use only washing powder for machine washing.
Use special washing agents for delicate and woollen fabrics.
This washing machine was designed for washing powder as well as for liquid detergent. As to the quantity of the washing agent, refer to the manufacturer's recommendation. The quantity of washing agent recommended on the packaging is usually sufficient for 4.5 to 5 kg of normally soiled laundry, depending on the hardness degree.
| Hardness degrees (Water hardness) °C | Degrees of hardness |
| H(°N) m mol/l °fH(°F) | p.p.m. | |
| 1. (soft) | 0-7 | 0-1,3 | 0-12 | 0-120 |
| 2. (medium) | 7-14 | 1,3-2,5 | 12-25 | 120-26 |
| 3. (hard) | 14-21 | 2,5-3,8 | 25-37 | 250-370 |
| 4. (wery hard) | >21 | >3,8 | >37 | >370 |
If your water is hard, we recommend using water softener. This means that you can then use the same quantity of washing powder as if the water was soft (hardness degree 1). Follow manufacturer's instruction.
Dispenser
The detergent dispenser is divided into three sections (fig. 12). The programme table indicates which section to use.
| | These sections are used for washing powder |
| This section is used for liquid softener and starching agent. |
Always add washing agents before switching on the appliance, and keep the dispenser clean and dry so that the washing agent can be efficiently rinsed from it.
For programmes without a pre-wash cycle, the washing powder can be placed directly in the drum. This is especially convenient if:
- you use larger amounts of washing powder (very hard water),
- you use washing powder that is difficult to rinse from the dispenser, or if water pressure is low,
- you use a concentrated washing powder with a special dosing sack that should be inserted directly into the drum.
Not enough washing powder causes
– the laundry to turn grey, – greasy clots, – lime deposits in the machine and on the laundry.
Too much washing powder causes
- bubbling, – reduced agitation and washing effect,
- inadequate rinsing.
We recommend that you gradually decrease or increase the quantity of washing agent while paying attention to the condition of the linen.
Fabric Conditioner and Starching Agent
When using fabric conditioner or starching agent, always follow the manufacturer's instructions, but never fill above the level marked on the dispenser. The excess is immediately poured out before washing and is therefore pure waste.
When using a high-density liquid agent, we recommend mixing it with water before filling, as otherwise the dispenser outlet may clog.
In case the dispenser is clogged and the liquid is not flushed, the dispenser should be washed. Remove level indicator and wash with brush and lukewarm water or rinse under the tap (fig. 13).


Never use both fabric conditioner and starching agent together, as clots may clog the dispenser opening.
Liquid Washing Agents
(for some models only)
If the washing machine is equipped with partition plate, the middle section may also be used for liquid washing agents.
Lift the partition plate when using washing powders and push it in when using liquid detergent.
We recommend using liquid detergent with washing programme without prewash.

- Washing powder
- Liquid detergent
Table of consumption values
Consumption values presented in this table were measured with a recommended quantity of test laundry per EN 60456 standard. These values serve only as reference values when selecting programmes in the housekeeping.
Washing machines with the temperature selection button
| Programme (without additional functins) | Load kg | Washing time min | EI. energy kWh |
| B – white 90°C 5,0 123 1,9 | | | |
| B – coloured 60°C 5,0 123 1,03 | | | |
| C – coloured 60°C 5,0 87 0,92 | | | |
| D – coloured 40°C 5,0 67 0,52 | | | |
| H – easy care laundry 60°C 2,5 62 0,58 | | | |
| H – easy care laundry 40°C 2,5 62 0,42 | | | |
| J – delicates 40°C 1,5 48 0,35 | | | |
| J – delicates 30°C 1,5 48 0,25 | | | |
| M – woolens 40°C 1,0 50 0,31 | | | |
| M – woolens 30°C 1,0 50 0,21 | | | |
Washing machines without temperature selection button
| Programme (without additional functions) | Load kg | Washing time min | El. energy kWh |
| B – white 90°C 5,0 123 2,1 | | | |
| C – coloured 60°C 5,0 87 1,37 | | | |
| D – coloured 40°C 5,0 67 0,62 | | | |
| H – easy care laundry 60°C 2,5 62 0,58 | | | |
| J – delicates 40°C 1,5 48 0,35 | | | |
| M – woolens 40°C 1,0 50 0,31 | | | |
Washing
Before washing, select the washing programme and prepare the machine for washing.
The control panel incorporates various switches and pushbuttons for selecting washing programmes, a control light, and a dispenser.
This instruction manual was prepared for various models of washing machine. You may therefore find in it descriptions of some functions that your appliance doesn't have.
Control Light
Control light is lit when the machine is switched on.
Programme Selection Knob
When the machine is switched off, turn the knob clockwise.
Washing programmes are divided into three groups and are marked with letters (A knob).

Programmes for non-delicates (A-F)
Programmes are very intensive and are concluded with a prolonged spin cycle of highest number of revolutions.
Programmes for delicates (G-L)
Programmes with gentle tumbling are concluded with short spin stage spinning.
Programme for Woolens (M)
Programme woollens may as well be used for washing of delicate and specials. Laundry is made at high water level and gentle tumbling. It is concluded with a short stage spinning.
Spinning with interruptions
(only for models with 800 rpm or more)
On programmes for resistant laundry, the first two spinning cycles are interrupted three times at the beginning. This prevents excessive foaming of the washing powder and improves spinning results.
Temperature Selection Knob
Turn the knob clockwise (B knob).
Washing temperature may be optionally selected up to 95°.
Programmes from A to B may be used as economic programmes if the selected temperature is lower than 95°C. This feature will help you save energy up to 40%.


On the position marked with a snowflake, the heaters are switched off and you can select cold wash on all programmes. The duration of the programme is the same as if the heaters are on.
Spinning Speed Selection Knob
Spinning speed is selected by turning the knob clockwise up to the highest position and backwards (C knob).


The knob is marked with some positions; you can also choose the medium settings. Lower number of revolutions is recommended for washing delicate laundry. For woolens, cotton and linen we recommend higher number of revolutions. The number of revolutions depends on the model of the washing machine.
Timer
(some models only)
Timer is used to preset the time when you want the machine to start washing. This is especially convenient for the period when electricity is cheaper or you want your laundry to be washed when you arrive home.
You can set the beginning of washing for 12 hours ahead. Numbers on the knob are hours. Rotate the knob clockwise to the end position and then back to the selected setting (D knob).


After the preset time elapses, the knob stops on the position "I" and the machine starts washing. If you want the machine to start washing immediately after you've selected the adequate programme, the timer has to be on position "I".
Spinning-OFF Knob

Using this switch the intermediary and final spinning of all programmes are switched-OFF.

This switch can be used for all programmes whenever wishing the laundry to remain in the last rinsing water. When this switch is off the washing programme ends with a spin cycle.

All washing programmes are designed for the optimum use of water, during the washing as well as during the rinsing cycle.
Use the extra rinsing cycle if you are allergic to washing agents. This switch is operating only with the programs for resistant laundry (A-F) and can be switched on at the beginning of washing or prior to rinsing.
Higher water level Switch

Washing under programmes for resistant laundry (programmes A and B) is carried out with a low water level, the quantity of
water is automatically adjusted to the amount of laundry. This guarantees successful and economic washing, regardless of the amount of laundry.
When washing heavily soiled laundry the water level can be increased by pressing this switch.
It is impossible to change the water level in programmes for delicate linens and woolens.
Lower RPM
500 With this switch you reduce the number of revolutions, which is especially recommended for washing delicates.
If the switch is off, the number of revolutions during the spin cycle is higher.
The number of revolutions varies according to model.
Half Programme Switch
1/2 If the amount of laundry you intend to wash is smaller, use the half programme (up to 2.5 kg).
This will help you save energy and water. Don't forget to use less washing powder as well.
Washing machine without temperature selection knob
Half programme switch may be used only with programmes for non-delicates (95°C).
If you use the half programme switch for other programmes, the washing temperature will be higher than marked for individual programme.
Washing machine with temperature selection knob
Half programme switch may be used with all programmes for non-delicates. On programmes for delicates and woolens, this switch won't work.
Cold Wash - Switch

If you switch the cold wash switch, the heaters are off and all programmes are washing with cold water. The duration of the programme is the same as if the heaters were on.
ON/OFF switch
Select suitable washing programme, prepare the laundry for washing and press the ON/OFF switch to switch the machine on.
Prepare your machine for washing
- Select laundry and load a suitable amount.
- Close the door (push it towards the machine).
- Fill the dispenser (in the correct sections). – Check water inlet and outlet.
- Choose the right programme.
- If your machine is equipped with switches, use them, as appropriate.
- Select the washing temperature and spinning speed, if your washing machine is equipped with this option.
- Switch the machine on.
After Washing
- Switch off the machine (the control lamp turns off).
- Check that the washing is finished and that water is pumped out of the machine to avoid unnecessary flooding. If there is still water in the machine, select one of the programmes for pumping or spinning.
- Some two minutes after the washing is finished you can open the door.
- Take the laundry out of the machine and turn the drum once or twice with hand to make sure it is really empty.
- Check the rubber gasket on the door and remove objects that might have deposited (buttons, pins..) (fig. 14).
- Leave the door open and allow the interior to dry.
- Disengage any pushbuttons you used.
- Close the water tap.
- Check the dispenser and clean it if necessary and dry it well.
- Every now and then, check and clean the lint filter.

Table of Washing Programmes - Cold Water Table of Washing Programmes - Hot/cold Water
| Programme | Washing temperature washing (°C) | Dispenser- shing laundry agents | Dry dry (kg) |
| Type of fabric, laundry |
| ☐☐☐ | ☐☐ | ☐ |
| NON-DELICATES (cotton, linen) |
| A | Whites/Coloureds | 60 - 95 | | | | 5,0 |
| B | 60 - 95 | | | |
| C | Coloureds | 40 - 60 | | | |
| D | ※ - 40 | | | |
| E | Rinse | | | | |
| F | Conditioner, spin dry | | | | |
| DELICATES (surface finished cotton, mixture of cotton with synthetics) |
| G | Delicates (surface fine | 40 - 60 | | | | 2,5 |
| H | 40 - 60 | | | |
| J | ※ - 40 | | | | 1,5 |
| K | Rinse | | | | | 2,5 |
| L | Conditioner, short spin | | | | |
| WOOLEN (non-shrinkable, mixtures of wool with synthetics, silk) |
| M | Woolen | ※ - 40 | | | | 1,0 |
| Programme Washing | Dispenser- Dry temperature (°C) agents (kg) | washing | laundry |
| Type of fabric, laundry | 1 | 2 | |
| 000 | 00 | 0 |
| NON-DELICATES (cotton, linen) |
| A | Whites/Coloureds | 95 | 40 - 95 | | | | 5,0 |
| B | 95 | *40 - 95 | | | |
| C | Coloureds | *60 | 40 - 60 | | | |
| D | 40 | * - 40 | | | |
| E | Rinse | | | |
| F | Conditioner, spin dry | | | |
| DELICATES (surface finished cotton, mixture of cotton with synthetics) |
| G | Delicates (surface Fine) | 60 | * - 60 | | | | 2,5 |
| H | 60 finished, 60 delicates | | | |
| J | *40 | * - 40 | | | | 1,5 |
| K | Rinse | | | | 2,5 |
| L | Conditioner, short spin | | | |
| WOOLEN (non-shrinkable, mixtures of wool with synthetics, silk) |
| M | Woolen | 40 | * - 40 | | | | 1,0 |
| Legend: |
| 1 No temperature selection knob (washing temperature is determined with programme selection). |
| 2 Models with temperature selection knob (recommended washing temperature). |
Cleaning and Maintenance
Warning:
- Before cleaning disconnect the machine from mains supply.
- There is a danger of burning when hot water is in the machine. Wait until it cools.
Housing
Clean the housing of your washing machine with a soft cloth and mild detergent. Do not use coarse cleaning agents which could damage the surface.
Drum Interior
Lumps of grease can occur in the inside of the drum, on the door seal as well as on clothes washed, which is due to incorrect washing procedure. Prior to next washing, clean the machine by setting the appliance to the programme whites/coloureds 60°C and do the washing without laundry using only half quantity of detergent or better a liquid washing agent.
Dispenser
Check the dispenser after each washing. If there is a residue of washing powder, clean it. Pull it out of the machine, clean it with a brush and warm water, and dry it (fig. 15).
If necessary, clean the interior of the detergent dispenser casing if you detect any remaining washing powder inside.

Wire Net in the Inlet Hose
The wire net in the inlet hose should be cleaned frequently.
Shut off the water supply and remove the inlet hose. Clean the net under a tap, replace it, and fix the inlet hose (fig. 16).

Door Gasket
Wipe the gasket after each washing; the gasket will last longer.
Filter
The filter is located under the cap at the bottom of the machine.
If you use the machine correctly, there is no need to clean the filter.
You have to open and clean the filter when solid objects trap in it and obstruct the outlet. (The laundry is not rinsed enough, still wet, water is not pumped out of the machine).
Before cleaning the filter, mind to pump the water out of the machine. The best method to do that is to place the outlet hose as low as possible (near the floor).


- Remove the cover (with a coin inserted into the notch) (fig. 17).
- Insert the funnel attached to the machine into the bottom cut-outs between the filter cover and cabinet and fix it by turning clockwise.
- Place a shallow pan underneath to allow the excess water to pour out. Remove the filter by turning it counter-clockwise (35-40°) (fig. 18).
- Replace the filter in the reverse order and screw it down firmly. Check it for sealing prior to washing.

Trouble-Shooting Guide
The user can come across troubles appearing during the operation of the appliance. We are listing some of troubles, which in most cases
result from improper handling of the appliance and can be eliminated by yourself.
| Problem: Check the following: |
| The machine doesn't operate (the control lamp is off). | - Check the power supply and fuses.- Is the plug correctly plugged in the socket? |
| Water is not pumped into the machine. | - Is the machine switched on?- Is the water tap open?- Is the wire-net filter on the inlet hose clean?- Is the door well closed? |
| The machine jumps during operation. | - Are the transport brackets removed?- Is the machine correctly levelled? (if not, use the adjustable legs)- Check the load (perhaps you are washing only one large item). |
| The machine is leaking. | - Is the lint filter properly fixed?- Is the inlet hose properly secured to the tap and to the machine? |
| The laundry is too wet. | - Is the lint filter clean (free of solid particles)?- whether the wall siphon drain is clogged (clean it). |
| Too much bubbling during washing. | - Check the water hardness and/reduc the quantity of washing powder you are using. |
| Washing was not efficient (stains, greasy clots). | - Have you chosen the correct waste programme? Use larger quantities of washing powder for heavily soiled laundry, or wash smaller loads. |
| Laundry is not well rinsed (wash powder residues). | - Is the lint filter clean (free of solid particles)?- Perhaps you overloaded the machine (especially delicate fabrics) and used too much washing powder.- whether the wall siphon drain is clogged (clean it). |
| The appliance fails to reach washing temperature at short programs (D,J,M) | - if the voltage is correct- if the inlet water is too cold- if the "high water level" button is on |
After you have considered all the above stated instructions and the malfunction still cannot be eliminated, call the nearest authorised service. Any claim or malfunction caused by improper installation or misuse is not covered by the guarantee. All repair costs shall be covered by the user.
WE RESERVE THE RIGHT TO ALTER THE SPECIFICATIONS WITH NO INFLUENCE ON THE OPERATION OF THE APPLIANCE. THIS INSTRUCTION MANUAL CAN NOT BE A REASON FOR CLAIM.