BASE 26 - Television Odys - Free user manual and instructions
Find the device manual for free BASE 26 Odys in PDF.


| Product Type | LED TV |
| Screen Size | 26 inches (diagonal) |
| Resolution | 1366 x 768 (HD Ready) |
| Aspect Ratio | 16:9 |
| Power Supply | AC 100-240V ~ 50/60Hz |
| Power Consumption | 70W (typical) |
| Tuner | DVB-T (digital) and Analog (ATV) |
| Connections | HDMI (2), VGA, SCART, USB, YPbPr, AV (Composite), PC Audio, Antenna |
| Media Playback | USB support for photo, music, video (FAT/FAT32, up to 500GB) |
| Remote Control | Includes batteries (2x AAA) |
| Teletext | Yes, with index, subpage, hold, reveal functions |
| EPG | Electronic Program Guide for DTV channels |
| Parental Lock | Yes, with password (default 6666) |
| Sleep Timer | Yes, programmable |
| Wall Mount | VESA compatible (screws provided) |
| Dimensions (with stand) | Approx. 63 x 40 x 20 cm |
| Weight | Approx. 5 kg |
| Warranty | 24 months |
| Safety | Built-in surge protection, auto sleep after 15 min no signal |
Frequently Asked Questions - BASE 26 Odys
User questions about BASE 26 Odys
0 question about this device. Answer the ones you know or ask your own.
Ask a new question about this device
Download the instructions for your Television in PDF format for free! Find your manual BASE 26 - Odys and take your electronic device back in hand. On this page are published all the documents necessary for the use of your device. BASE 26 by Odys.
USER MANUAL BASE 26 Odys
1 Important Safety Instructions.... 2
2 Front and Rear Panel Illustration 6
2.1 Front panel and Keyborad 6
2.2 Remote Key Function: 7
3 Teletext Function Keys 9
4 System Connections.... 10
4.1 Connecting to External AV Signal Source.... 10
4.2 Connecting to External AV Signal Source (Y/PB/PR) 11
4.3 Connecting to External AV Signal Source (SCART)....11
4.4 Connecting to External AV Signal Source (HDMI) 12
4.5 Connecting a USB Devices 12
4.6 Connecting to PC.... 14
4.7 Connecting to TV-Signal Input.... 15
5 Input Source Selection.... 16
6 TV operation and System Setup.... 17
6.1 Installation Guide (DVB-T, ATV).... 17
6.2 OSD Settings (Main Operations) 17
6.2.1 Channel Menu....17
6.2.2 Picture Menu....20
6.2.3 Sound Menu....20
6.2.4 Time Menu....20
6.2.5 Option Menu....21
6.2.6 Lock Menu 21
6.2.7 EPG Menu (Electronic Program Guide). 22
7 Trouble Shooting 23
7 Trouble Shooting 23
8 Specifications.... 24
9 Warranty condition.... 25

1 Important Safety Instructions
三
Warning: To reduce the risk of electric shock, do not remove the cover or back. There are no user-serviceable parts inside. Refer servicing to qualified personnel.
Warning: To prevent fire or electric shock hazard, do not expose the unit to rain or moisture.
Do not expose the Adaptor and Digital Photo Frame to water (dripping or splashing) and no objects filled with liquids, such as vases, should be placed on the unit.
Keep the product away from direct sunlight and heat source such as radiators or stoves.
Do not block the ventilation openings. Slots and openings on the unit are provided for ventilation. The openings should never be blocked by placing your product on a cushion, sofa or other similar surface.
Do not place the product on unstable cart, stand, tripod, bracket or table. The unit may fall, resulting in possible damage or injury.
Never place heavy or sharp objects on the panel or frame.
Only use the AC adapter included with product. Using any other adapter will void our warranty.
Unplug the power from the outlet when the unit is not in use.
Attention should be drawn to the environmental aspects of battery disposal.
WARNING: The battery (battery or batteries or battery pack) shall not be exposed to excessive heat such as sunshine, fire or the like.
WARNING: Excessive sound pressure from earphones or headphones can cause hearing loss.
WARNING: Only use attachments/accessories specified provided by the manufacturer, the product is supplied by AC adapter, the AC adapter is used as disconnect device, the disconnect device shall remain readily operable.

This marking indicates that this product should not be disposed with other household wastes throughout the EU. To prevent possible harm to the environment or human health from uncontrolled waste disposal, recycle it responsibly to promote the sustainable reuse of material resources. To return your used device, please use the return and collection systems or contact the retailer where the product was purchased. They can take this product for environmental safe recycling.
ODYS BASE
Warning

High voltages are used in the operation of this television receiver. Do not remove the cabinet back from your set. Refer servicing to qualified service personnel.

To prevent fire or electrical shock hazard, do not expose the television receiver to rain or moisture
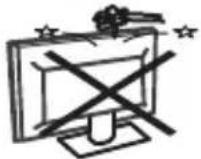
Do not drop or push objects into the television cabinet slots or openings. Never spill any kind of liquid on the television receiver.

Do not block the ventilation holes in the back cover. Adequate ventilation is essential to prevent failure of electrical components.
Caution

Do not trap the power supply cord under the television receiver.

Never stand on, lean on, or suddenly push the television or its stand. You should pay special attention to children. Serious injury may result if it should fall.
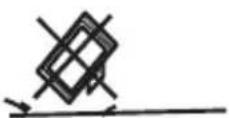
Do not place your television on an unstable cart, stand, shelf or table. Serious injury to an individual, and damage to the television, may result if it should fall.

When the television receiver is not used for an extended period of time, it is advisable to disconnect the AC power c ord from the AC outlet.
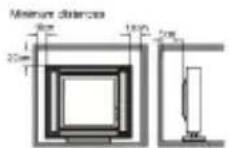
If the television is to be built into a compartment or similar enclosure, the minimum distances must be maintained. Heat build-up can reduce the service life of your television, and can also be dangerous.

Tips regarding environmental protection
At the end of its operating life, this product may not be disposed of by way of your normal household waste. Instead it must be delivered to a collection point for recycling electrical and electronic equipment. The icon on the product, in the operating instructions or on the packaging, indicates this.
The materials used in manufacturing this product are recyclable, depending on their identifying markings. By recycling this equipment, by recycling its components, or through other procedures of re-using outdated equipment, you are making an important contribution to protection our environment. Please ask you local municipal administration for the location of the corresponding recycling point.

Battery Recycling
In order to ensure the environmentally friendly disposal of batteries, please do NOT dispose of used batteries through normal household waste. Please take the batteries to your local retail or community collection point for recycling.
The following may be an indication of a discharged battery: The device cannot be switched on. The device switches off automatically and "Battery Empty" is shown in the display. The device and or battery do not function properly.
Support
URL: http://www.odys.de
See our website for the latest information on this engine, on other products by our company and on our company itself. If you have questions or problems, please read the FAQs on our website or contact our customer support service support@odys.de.
Appropriate use
The receiver is designed for receiving and watching unencrypted DVB-T and analogue Cable TV channels (free-to-air) for private use. It is exclusively meant for this purpose and must only be used for the same. This also includes paying attention to all information contained in this operating manual, especially in the safety instructions. Any other usage is considered to be improper and may lead to material damages and even personal injuries. Moreover, it will result in the immediate loss of guarantee. The manufacturer does not bear any liability for damages caused due to improper use.
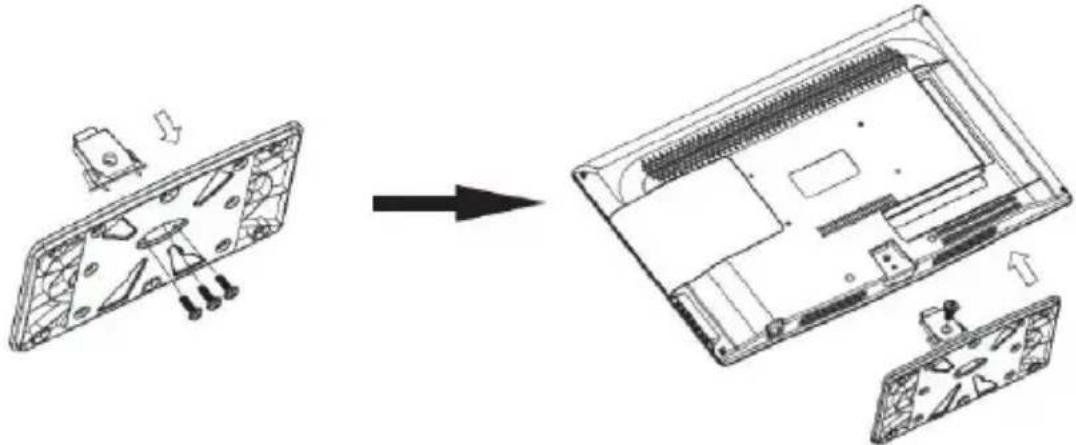
Base Stand Assembly Instruction
- Insert the stand support pillar into the stand as the arrow indicated direction, and then fastened with three screws.
- Insert the stand Ass'y into back cover as the arrow indicated direction, and then fastened with one screw.
Wall Mounting Installation Guidelines
This television can be wall mounted as follows:
- Remove the screw which fixes the stand and back cover (screw as shown in the circle).
- Remove the stand Ass'y as the arrow indicated direction.
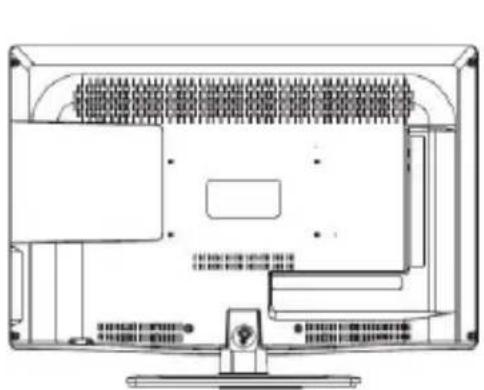
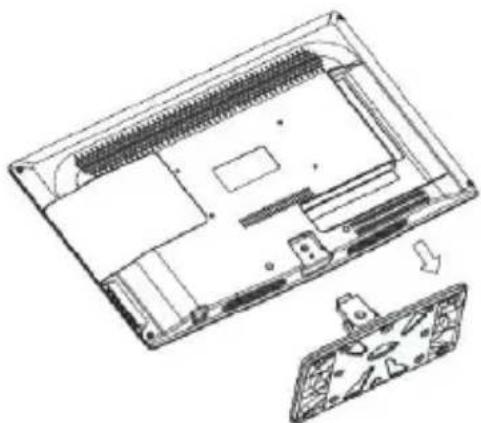
- Use the four screws provided to fix the TV onto a wall mounting bracket (not included) via the four standard holes on the back of the television.

2 Front and Rear Panel Illustration
2.1 Front panel and Keyborad

1: Remote control sensor.
2: Indicator LED:
BLUE
RED
POWER ON.
STAND BY.
3: Side buttons

- SOURCE:
Display the input source menu. In MENU mode, press "SOURCE" to confirm the selected item.
- MENU:
Display main MENU.
- CH+/CH-
In TV mode, press "CH+" or "CH-" to change the channel up and down. In MENU mode, press "CH+" or "CH-" to select items.
- VOL+/VOL-
Adjust sound level.
In MENU mode, press "VOL+" or "
VOL-"to adjust the item that you selected.
- STANDBY
Press this button to turn the unit ON from STANDBY mode.
Press it again to turn the set back to STANDBY.


All the terminals are(from left to right):
- AV
- YPbPr / AV AUDIO
- YPbPr
- HDMI2
- POWER SOCKET
- AV
- YPbPr / AV AUDIO
- YPbPr
- HDMI2
- POWER SOCKET


- HDMI1
- USB
- PC AUDIO
- SOCKET for SCART adaptor
- VGA
- ANALOG TV / DVB-T ANTENNENANSCHLUSS

-
AV and YPbPr share one audio channel.
-
When HDMI2 port get DVI signal ,the audio signal receives from the YPbPr/AV Audio channel
-
When HDMI1 port get DVI signal ,the audio signal receives from the PC Audio channel
2.2 Remote Key Function:

1: POWER: To set the TV to standby or power on.
2: NUMERIC KEY: For direct access to channels.
3:TV MENU:To display TV menu.
4: CURSOR: To move within the menu.
5: CH. LIST: To display channels list.
6:VOL+/- :To adjust sound level.
7: PIC: To switch picture mode.
8:SLEEP:Set timer to turn off the TV.
9: FREEZE; to freeze the picture
10: EPG: To display information about the program being viewed and what's on next in DTV mode.
11:FAV : Used to access your favourite channels.
13: MUTE: To disable or enable the sound output.
14: AUDIO: To select the available audio language of TV programs
15: RECALL: Used to switch between the last two viewed channels.
16: SOURCE: To select input source.
17: OK: Used to confirm a selection within a menu.
18: EXIT: Used to return to the previous screen or menu.
19: SOUND: To switch sound mode.
20: CH+/-: Used to changing the channels in normal play.
21: ASPECT: To change picture aspect ratio
22: TV/RADIO: In DTV mode, it is used to switch between digital TV channels and radio stations.
In USB mode, it's used to switch repeat mode.
23: TEXT: Used to open teletext OSD display if teletext available in the broadcasted stream.
24: INFO: Used to display information about the channel being viewed or further information about the program when in DTV mode.
25: SUBTITLE: Used to switch among different subtitles that are broadcasted in DTV mode.
26-27: ◀/▶: to skip to the previous/next file in USB mode
28: Rep: repeat functions.
29: STOP: Stop the media player in USB mode.
30: ←: Fast rewind for USB file playback
31: ▶: Fast forward for USB file playback
32: Play the media player in USB mode.
33: Pause the media player in USB mode.
Index/Subpage/Size/Reveal: Teletext functions
Insert Batteries Into the Remote Control
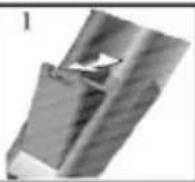

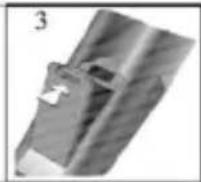
- Remove the battery cover.
- Inserting the 2 AAA 1.5V batteries making sure the polarity (+ or -) of the batteries matches the polarity marks inside the unit.
- Mount the battery cover. Replace with new batteries when the TV set begins to show the following symptoms: Operation is unsteady or erratic. Sometimes the TV set does not function with Remote Control Unit.
Remark:
1) Alkaline Battery Recommended.
2) Remove batteries when they are exhausted or if the remote control is not to be used for Long time.
3 Teletext Function Keys
Teletext i s a n inf or mati on s ystem broa dcast b y cer tai n cha nnels w hich c a n be consulte d li ke a ne wspaper . I t als o offer s a ccess t o sub titles for v viewers with hea ring proble ms or who are no t fa mil iar wit h the trans missi on lan gua ge (cable networks, satellite cha nnels, etc .)
| Press: | You will obtain: |
| TTX | This is used to call or exit tele text mode s T hesum mar y ap pe a r swi th a lis tof ite m sthat can be ac c e s sed .Each it e m has a cor re s p o n ding 3 dig it pa g enu m ber. If the chan n e l se le c te ddo e snot b r o a d ca st tele te xt , t hei n di ca ti on100 will be disp la ye dand the s creen will re m a in b l a n (in t hi sc as e, e x i t t e l e t e x t and sele c t an o t h e r chan n e l). |
| SELECTING A | Enter then u m ber ofthe page required sing the0 to 9 u p / d o wn .Ex a mp le : page 1 2 0en ter 12 0 . T h enu m ber ris di sp la ye dtop le ft ,the coun ter turn s and then thepage eis dis pl ay e d Repe a tthis oper a tio ro vie w an o t h e r page .If the coun ter r conti n u e stos ear ch ,this me ans that the p a g e is not trans m i tt ed .Se le c t an o t h e n u m ber. |
| DIRECT ACCESS TO THE ITEMS | Coloured are as are dis pl ay e dt the botto m of the s creen .The 4 colou re dk e ys are u sed to a cc essthe i tem sorcor r e s p o n d in p a g e s . The colou re dare a s flash whenthe i temor thep age is not yet avai la b l e . |
| INDEX | This return sto the c ont en t s page (u su a ll yp a g e10 0 ). |
| SUB PAGE | Cert ai npa g e s c ontain s ub- p a g e whi ch are au to mati ca ll y di spl ya e ds u c c e s si ve l y This key is u se d tos to por re su me sub- page acquis ition . The ind d ic ation ap pe a r stop l e ft . |
| HOLD | To freeze the page. |
| REVEAL | To display or hide the concealed information (gam es solutions). |
| LIST | The user can set four favor i tepage stobe dire ctly lin ke d to the four color keys. While l is tmo de isa ctiv a te d it is not po ss b il it y o useTOP or FLO F navig ation with the color keys. The favor i tepagenu m ber s should be stored and restored o/fo m non v olatil ene mor yforea ch chan n e lby the sys te msoft w are. |
4 System Connections

Do not connect the power cord until all other connections have been made.
Ensure that you observe the color cord when connecting audio and video cables.
4.1 Connecting to External AV Signal Source
Use the audio and video cable to connect the input jacks on the right panel of the unit to the external AV signal source.
Ensure that you observe the color cord when connecting audio and video cables.
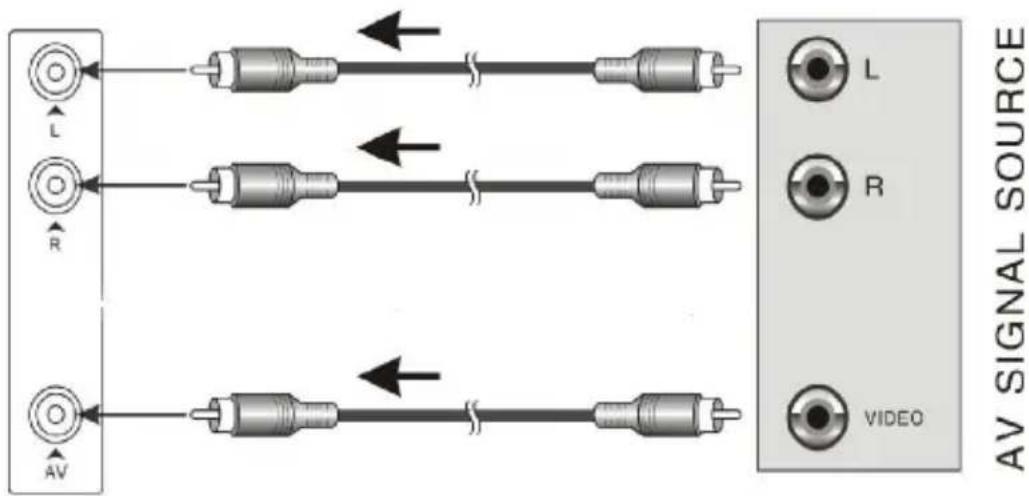
After connection, turn on the power of the unit and the external AV signal source. Press SOURCE then direction buttons to select Composite, and then press the OK button to confirm.
The L/R audio input jacks can be used in the both Composite and YPbPr modes.
4.2 Connecting to External AV Signal Source (Y/PB/PR)
Use the audio and video cables to connect the Y/PB/PR input jacks on the rear panel of the unit to the external AV signal source.
![graph TD A["AC-INPUT 100-240V~ 50/60Hz"] --> B["Sensor Inputs"] B --> C["AV"] B --> D["L"] B --> E["R"] B --> F["Y"] B --> G["Pb"] B --> H["PrY"] B --> I["HDMI2"] C --> J["Resistors"] D --> J E --> J F --> K["Resistors"] G --> K H --> K I --> K J --> L["Output"] K --> M["Output"] style A fill:#f9f,s…](/content/2026/05/862020/images/4dbae91fb97358c422db002e587aef91307a392811de07c100dbba598f2d25cb.jpg)
After connection, turn on the power of the unit and the external AV signal source. Press SOURCE then direction buttons to select Component mode, and then press the OK button to confirm.
4.3 Connecting to External AV Signal Source (SCART)
Use the SCART cables to connect the SCART input Jacks on the rear panel of the unit to the external AV signal source.
After connection, turn on the power of the unit and the external AV signal source. Press SOURCE then direction buttons to select SCART mode, and then press the OK button to confirm.

Please only use the provided SCART Adaptor.
Hold the adapter in the hand while insuring that the arrow on the connector side is visible. While using the thumb and forefinger to press together the grey clips of the adapter, connect the plug to the appropriate jack found on the rear side of the device.
To remove the adapter, press together the grey clips and pull the plug out of the jack.
ODYS BASE
4.4 Connecting to External AV Signal Source (HDMI)
Follow the figure below to connect an HDMI signal source to the HDMI jack on the rear panel of the unit.



After connection, turn on the power of the unit and the external AV signal source and use the SOURCE and the direction buttons to select HDMI mode, and then press the OK button to confirm.
HDMI provides both audio and video signals and typically provides superior image quality to component, S-Video or composite.
4.5 Connecting a USB Devices
This unit is designed with a USB port, can be connected to the USB device, see the figure below:

Please only connect compatible devices with playable content.
The device supports USB devices with FAT or FAT32 disk system up to 500GB.
Please only use harddisks with separate power supply.


If possible, please connect USB devices directly to the Devices USB interface. If this is not possible, use only USB extension cables not exceeding 25 cm.
ODYS BASE
Press SOURCE then direction buttons to select MediaPlayer mode, then press the OK button to confirm.


Please make sure that the USB device have plugged in the slot. There are three type media item can be selected, such as photo, music and Movie. Select the type media item by pressing ◀▶, press OK button to enter the disk selection menu.
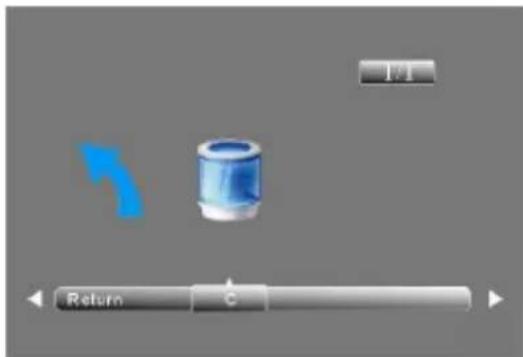
Press the ◀▶ to select the right disk and press OK to display media files and folder list or choose Return to back to the media type selection menu.

Select the media file by pressing ◀▶ or ▲▼, then the preview frame will pop up. Press the button ▶(pl ay) to play the media file in full screen. When the media file (photo, music, Movie) is playing, press the OK or Info button can display the control bar.

Press ◀▶ to select the function icon, press OK button to confirm the function. Press ▼ or EXIT button to exit the control bar.

You can adjust the audio track, or program in the Info menu while Playing the video file. Choose the Info icon and press OK can display the Info MENU.
ODYS BASE

4.6 Connecting to PC
The unit can be connected to PC (personal computer) via the VGA cable.
Follow the figure below to connect:
- Connect one end of the VGA cable to the VGA input jack on the rear panel of the unit and connect the other end to the PC.
- Connect one end of the audio cable to the PC audio input jack on the rear panel of the unit and connect the other end to the PC audio output jack.
- Connect the power cord.
- Power on the TV set and switch to PC mode (VGA) using the SOURCE key.
- Power on the PC.
- Set the PC video resolution to match that of the television.

NOTE: It is very important to follow this steps exactly!

4.7 Connecting to TV-Signal Input
Connect the TV signal cable (the antenna cable, for example) to the Antenna Input Jack on the back of the unit so that you can receive television programmes.

After connection, turn on the power of the unit. Then press the SOURCE button to select TV or DTV mode and conduct program selection.
5 Input Source Selection

The unit i incorporates multiple video modes which can b e sel ected via the Input button on the television or rem ote.
Press the SOURCE button to enter Input menu. The screen will display as shown below:
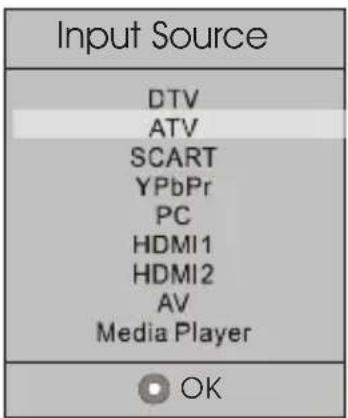
Use the ▲▼ direction buttons and OK button
On the input menu, press the ▲▼ direction button to select the desired video mode, and press the OK button to enter the selected mode.
Use the SOURCE button and OK button
On the input menu, press the SOURCE button to select the desired video mode, and press the OK button to enter the selected mode.
6 TV operation and System Setup
6.1 Installation Guide (DVB-T, ATV)
This screen only appear when the TV first time turn on or reset to factory et. energy-saving mode and country, auto tuning programs. And after tuning ,the screen will skip to the first DTV program.

Select the country for DTV and ATV reception.
- Switch Home/Shop Mode freely by yourself.

- Select the country for DTV and ATV reception and press OK to confirm.
The channel search starts now with ATV channel search.
- Press "Exit" to exit the channel search. Press ◀ -key to exit or ▶ -key to proceed searching.
- Press "TV menu" to skip the analogue TV (ATV) channel search.
Press ◀ -key to skip or ▶ -key to proceed searching.
If you skip ATV search the engine will proceed with DTV channel search.
6.2 OSD Settings (Main Operations)
Press "TV menu" to open the settings.
Press ◀ / ▶ to select the page. Press ▲ / ▼ to select the setting.
6.2.1 Channel Menu
The first item of the MENU is channel menu( for TV or DTV source only).

ODYS BASE

![Auto Tuning DTV Manual Tuning ATV Manual Tuning Programme Edit Signal Information Software Update[USB]](/content/2026/05/862020/images/62992fda3fc374f9ec2f4cf1d0cf0b5d8a6db13acafd67703a26ff2bdf18aa03.jpg)
You can search channels and edit programs here.
1). Auto tuning:
Search all the channels automatically(you can select ATV and DTV)
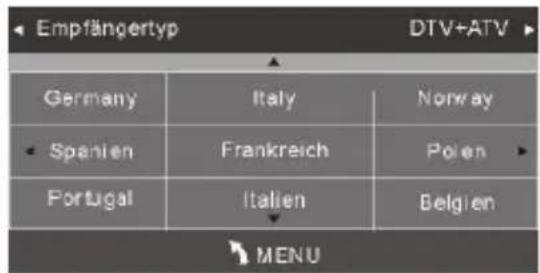
Pls press ◀▶ ▲▼ to select country at first, then press OK button to start auto tuning. Press "TV MENU" to cancel ATV channel search and Press ◀ to confirm . P ress ▶to continue with ATV channel search. The engine will proceed with the DTV channel search.
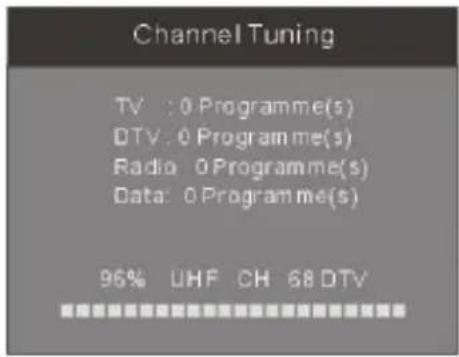
NOTE:
All the channels including ATV, DTV and DTV Radio can be tuning by one time, if the Tune Type is DTV+ATV.
All the stored channels will be deleted and overwritten after auto tuning.
After auto tuning, the channel will skip to the first DTV channel.
2).DTV Manual tuning:
You can select a DTV channel then find the programs in this channel.
PIs press ◀▶ to select the channel, then press OK to search the programs.

Bad - Normal - Good means signal intensity.
ODYS BASE

3). ATV Manual tuning :
You can change the sound system to search the analog TV channels and fine tune the channels, then store the channels you selected to a desired Number.


Press teletext red button to storage to channels after manual tuning.
4). Program edit:
You can Delete ,Rename ,Move, Skip , FAV any programs.
| Red Key Delete | Press teletext red button, the program in cursor will delete. |
| Green Key Rename: | Only can rename ATV programs .Move the cursor to the program, press teletext green button to rename the program.Press ▲▼ to choose the character. Press ◀▶ to move the cursor .Press MENU button to exit edit , Press EXIT to exit the menu.Note: ATV programs name only can be 5 character. |
| Yellow Key Move | Move the cursor to the program,press yellow button ,then you can use ▲▼ to move the program. |
| Blue Key Skip | Press ▲▼ to choose the program, press teletext blue button to skip this program,The will show on the right side of the program.Choose the skipped program, press blue button again, you can cancel the skip,The will disappear. |
| FAV Key Favourite | Press ▲▼to choose the program, press FAV button, it will show on the right side of the program.Choose the FAV program, press FAV button again, you can cancel the FAV ♥, the will disappear. |

ODYS BASE
6.2.2 Picture Menu
The second item of the MENU is PICTURE MENU. You can adjust picture effect here, such as contrast, brightness, etc.
Press ▲▼ to select the setting, press OK to adjust, press ◀▶ to change the setting.
Press TV ME NU to step back to the pre vious menu.


1).Tint is available in NTSC system only.
2). There are four colors temperature modes can be selected medium, warm, cool, user
3). Screen is available in PC mode only which, can adjust Horizontal position, vertical position, size and phase.
6.2.3 Sound Menu
The third item of the MENU is the SOUND MENU.
You can adjust the sound effect here such as treble, bass, balance etc.
Press ▲▼ to select the setting, press OK to adjust, press ◀▶ to change the setting.
Press TV ME NU to step back to the previous menu.

6.2.4 Time Menu
The forth item of the menu is the TIME MENU You can adjust the clock, power on/off time, sleep time etc. Press ▲▼ to select the setting, press OK to adjust, press ▲▼ to select the value to change, press ◀▶ to change the setting. Press TV MENU to step back to the previous menu.

i Within 15 minutes there is no signal, the TV will auto sleep, The clock time can get from the DTV system auto.
6.2.5 Option Menu
The fifth item of the MENU is the OPTION MENU. You can adjust the Menu language, Audio language, Subtitle language etc.
Press ▲▼ to select the setting, press OK to adjust, press ▲▼ to select the value to change, press ◀▶ to change the setting.
Press TV MENU to step back to the previous menu.
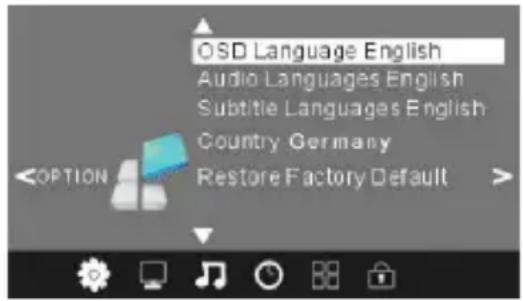

NOTE: Restore factory default will clear all the programs and password.
6.2.6 Lock Menu
The sixth item of the menu is the LOCK MENU You can lock system, set password, block program and set parental guidance Once you set the lock system on you can not search the channels or change any programs.
Press ▲▼ to select the setting, press OK to adjust, press ▲▼ to select the value to change, press ◀▶ to change the setting.
Press TV MENU to step back to the previous menu.


NOTE: The default pass word is 6666.Block program: Press ▲▼ to choose the program ,press teletext green button to block the program. If you want unblock the program, pls enter the main menu , input the password, then press green button again. Parental guidance: Press ◀▶ to choose level.
This Option is available in DVB-T and ATV Mode only!

ODYS BASE
6.2.7 EPG Menu (Electronic Program Guide).
The EPG menu is used to look at what is being broadcasted on DTV or Radio channel in the day. To access the EPG menu, press the EPG button, the following menu will be displayed:

| Green Key / INFO Key | Use to choose the programs, Press INFO key, you can display the highlight program's information. |
| Yellow Key Schedule | Press the teletext yellow key, It can list all the reminder schedule, press ▲▼ to choose the list, press red key to delete the schedule list, Press EPG to return to EPG menu.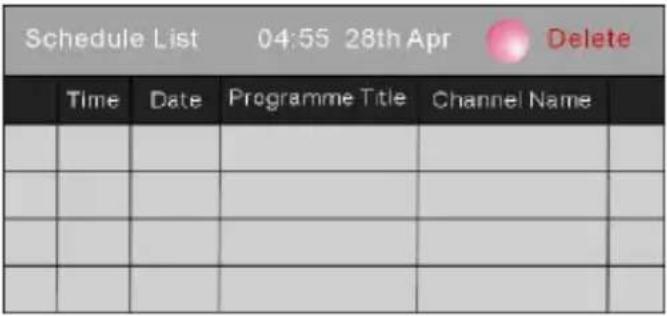 |
| Blue Key Remind | Press the blue key to choose one program and set up one reminder time, the TV screen will skip to the chosen program in the reminder time automatically. |
7 Trouble Shooting
| Trouble phenomenon Symptom | Inspection Check | |||
| Picture Audio | ||||
 | Snow |  | Noise | antenna position, direction or connection |
 | Ghost |  | Normal audio | antenna position, direction or connection |
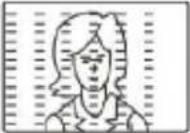 | Interference | 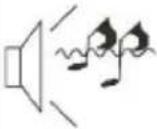 | Noise | electronic equipment, car/ motorcycle, fluorescent light |
 | Normal Picture | 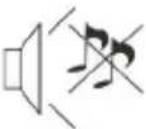 | Mute | Volume(check if mute is activated or if the audio system connections are not correct) |
 | No picture |  | Mute | Power cord is not inserted Power switch is not opened Contrast and brightness/volume |
 | No colour |  | Normal audio | Colour control |
8 Specifications
| Item | Specific ation | |
| ATV/DTV Tune Frequency Range | VHF: 174MHz to 230 MHz | UHF: 470MHz to 862 MHz |
| DVB-T Demodulation | Demodulator COFDM | |
| OFDM Modulation | 2K, 8K FFT, SFN and MFN | |
| Packet Carries | 2K/8K | |
| Guard Interval | 1/4, 1/8, 1/16, 1/32 | |
| Connections | RF IN | IEC 169-2 female connector |
| RF Loothough | IEC 165-2 male connector | |
| TV SCART | Composite Video, Audio L/R | |
| Power | Consumption | 100-240V ~ 50/60Hz |
| Display | Decoder Module | PAL, NT SC |
| Aspect Rate | 4:3 (Letterbox, Pan & Scan),16:9 | |
| Decoding | Vide o | MPEG2 Transport MP@ML |
| Audio | MPEG2 Audio Layer | |
| Others | Compliance | ETSIEN 300 744 DVB-T Compliance |
| Sound Mode | Right, Left, Stereo |
* Specifications are subject to change without further notice.

This symbol on the product or in the instructions means that your electrical and electronic equipment should be disposed at the end of life separately from your household waste. There are separate collection systems for recycling in the EU. For more information, please contact the local authority or your retailer where you purchased the product.
9 Warranty condition
The following conditions comprise the requirements and scope of our warranty conditions and do not affect our legal and contractual warranty obligations.
We offer a warranty on our products in accordance with the following conditions:
- ODYS products are covered by a 24 month warranty. We will resolve damages or defects on ODYS products free of charge within 12 months of the purchase date under the following warranty conditions. For any damage or defect determined later than 12 months after the purchase date, proof of a manufacturing fault must be submitted for repair under warranty.
The warranty does not cover batteries and other parts, which are considered consumables, parts that break easily such as glass or plastic or defects based on normal wear and tear. There is no warranty obligation in the event of marginal differences compared to the target appearance and workmanship provided these have a negligible effect on the product's fitness for use, in the event of damage caused by chemical or electrochemical effects, by water or generally from abnormal conditions. - The warranty will be performed in such a way that we shall decide whether to repair the defective parts or to replace them with working parts free of charge. AXDIA reserves the right to exchange the product for a replacement product of equal value if the product that is sent in cannot be repaired within a reasonable time or at reasonable cost. The product can also be exchanged for a different model of the same value. Requests cannot be made for repairs to be carried out on site. Parts that have been replaced or exchanged become our property.
- The warranty claim does not apply if repairs or other work is carried out by unauthorized persons or if our products are equipped with additional parts or accessories that are not approved for our products.
- Warranties that have been activated do not cause the warranty period to be extended, nor do they trigger a new warranty period. The warranty period for any replacement parts installed ends with the warranty period for the entire product.
- Any other or further claims are excluded, especially those for replacement due to damage caused outside of the product, provided there is no obligatory legal liability. We therefore accept no liability for accidental, indirect or other consequential damage of any kind, which leads to usage restrictions, data loss, loss of earnings or interruption to business.
Asserting a warranty claim
- To make use of the warranty service, you must contact the AXDIA Service Center by e-mail, fax or phone (see below for contact details). You can also use the service form on our website or on the back of the warranty conditions.
- AXDIA Service Center will try to diagnose and solve your problem. If it is determined that a warranty claim exists, you will be given an RMA number (Return Material Authorization) and you will be asked to send the product to AXDIA.
IMPORTANT: AXDIA will only accept parcels that have an RMA number.

Please observe the following when sending the product:
- Send the product suitably packaged with carriage and insurance paid. Do not enclose any accessories with the products (no cables, CD's, memory cards, manuals, etc.), unless the AXDIA Service Centre specifies otherwise.
- Mark the RMA number on the outside of the package in such a way that it is visible and clearly legible.
- You must enclose a copy of the sales slip as proof of purchase.
- Once AXDIA has received the product, it will meet its warranty obligations in accordance with the warranty conditions and will return the product to the sender with carriage and insurance paid.
Service outside of warranty
AXDIA can refuse any service claim made that is not covered by the warranty. If AXDIA agrees to provide a service outside the warranty, the customer will be invoiced for all repair and transport costs.
AXDIA will not accept any packages that have not first been approved by AXDIA by means of an RMA (Return Material Authorization).


- 1 IMPORTANT SAFETY INSTRUCTIONS
- 三
- ODYS BASE
- WARNING
- CAUTION
- TIPS REGARDING ENVIRONMENTAL PROTECTION
- BATTERY RECYCLING
- SUPPORT
- APPROPRIATE USE
- BASE STAND ASSEMBLY INSTRUCTION
- WALL MOUNTING INSTALLATION GUIDELINES
- 2 FRONT AND REAR PANEL ILLUSTRATION
- 2.2 REMOTE KEY FUNCTION
- INSERT BATTERIES INTO THE REMOTE CONTROL
- REMARK
- 3 TELETEXT FUNCTION KEYS
- 4 SYSTEM CONNECTIONS
- 4.1 CONNECTING TO EXTERNAL AV SIGNAL SOURCE
- 4.2 CONNECTING TO EXTERNAL AV SIGNAL SOURCE (Y/PB/PR)
- 4.3 CONNECTING TO EXTERNAL AV SIGNAL SOURCE (SCART)
- 4.4 CONNECTING TO EXTERNAL AV SIGNAL SOURCE (HDMI)
- 4.5 CONNECTING A USB DEVICES
- 4.6 CONNECTING TO PC
- 4.7 CONNECTING TO TV-SIGNAL INPUT
- 5 INPUT SOURCE SELECTION
- 6 TV OPERATION AND SYSTEM SETUP
- 6.1 INSTALLATION GUIDE (DVB-T, ATV)
- 6.2 OSD SETTINGS (MAIN OPERATIONS)
- 6.2.1 CHANNEL MENU
- 1). AUTO TUNING
- NOTE
- 2).DTV MANUAL TUNING
- 3). ATV MANUAL TUNING
- 4). PROGRAM EDIT
- 6.2.2 PICTURE MENU
- 6.2.3 SOUND MENU
- 6.2.4 TIME MENU
- 6.2.5 OPTION MENU
- 6.2.6 LOCK MENU
- 6.2.7 EPG MENU (ELECTRONIC PROGRAM GUIDE)
- 7 TROUBLE SHOOTING
- 8 SPECIFICATIONS
- 9 WARRANTY CONDITION
- WE OFFER A WARRANTY ON OUR PRODUCTS IN ACCORDANCE WITH THE FOLLOWING CONDITIONS
- ASSERTING A WARRANTY CLAIM
- PLEASE OBSERVE THE FOLLOWING WHEN SENDING THE PRODUCT
- SERVICE OUTSIDE OF WARRANTY
Brand : Odys
Model : BASE 26
Category : Television